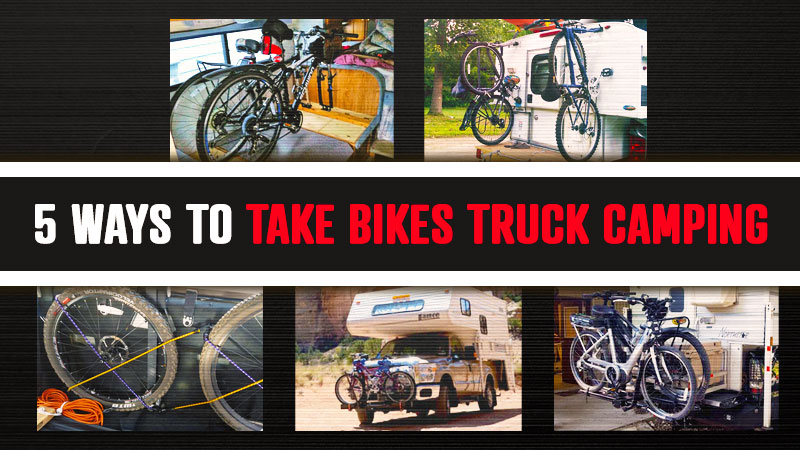
Bicycles can be a big part of enjoying the outdoors and exploring a new area. Here we have five different solutions to taking bikes when you go truck camping. Pick one and get in gear.
Submitted by: Tim Ray-Tahtinen, 2007 Chevy Silverado 2500 HD, 2003 Northstar TC650

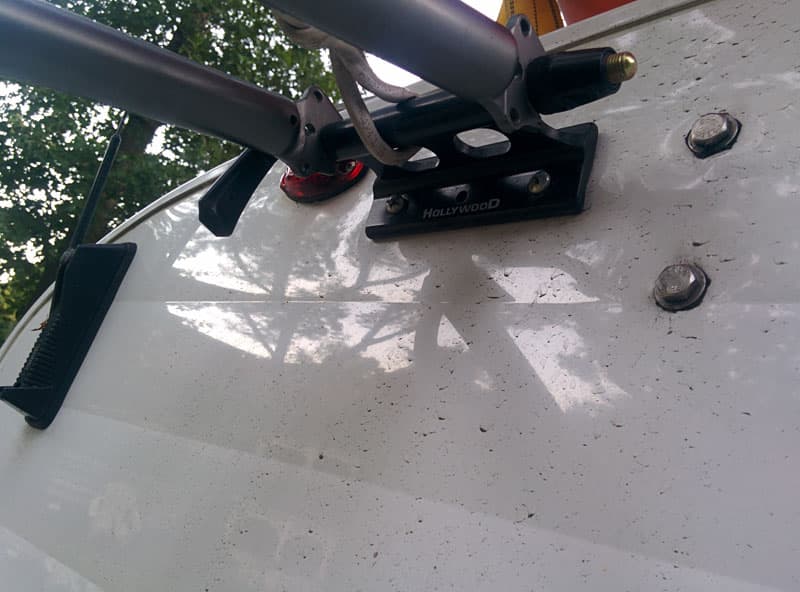
I needed a rear carrier for gear and two bikes. It also needed to maintain my entry and departure angles because the lion’s share of camping we do is off-road. I also needed to be able to access our camper with ease while on the road. A swing-out system was needed. I wanted my cake so we could eat it too.
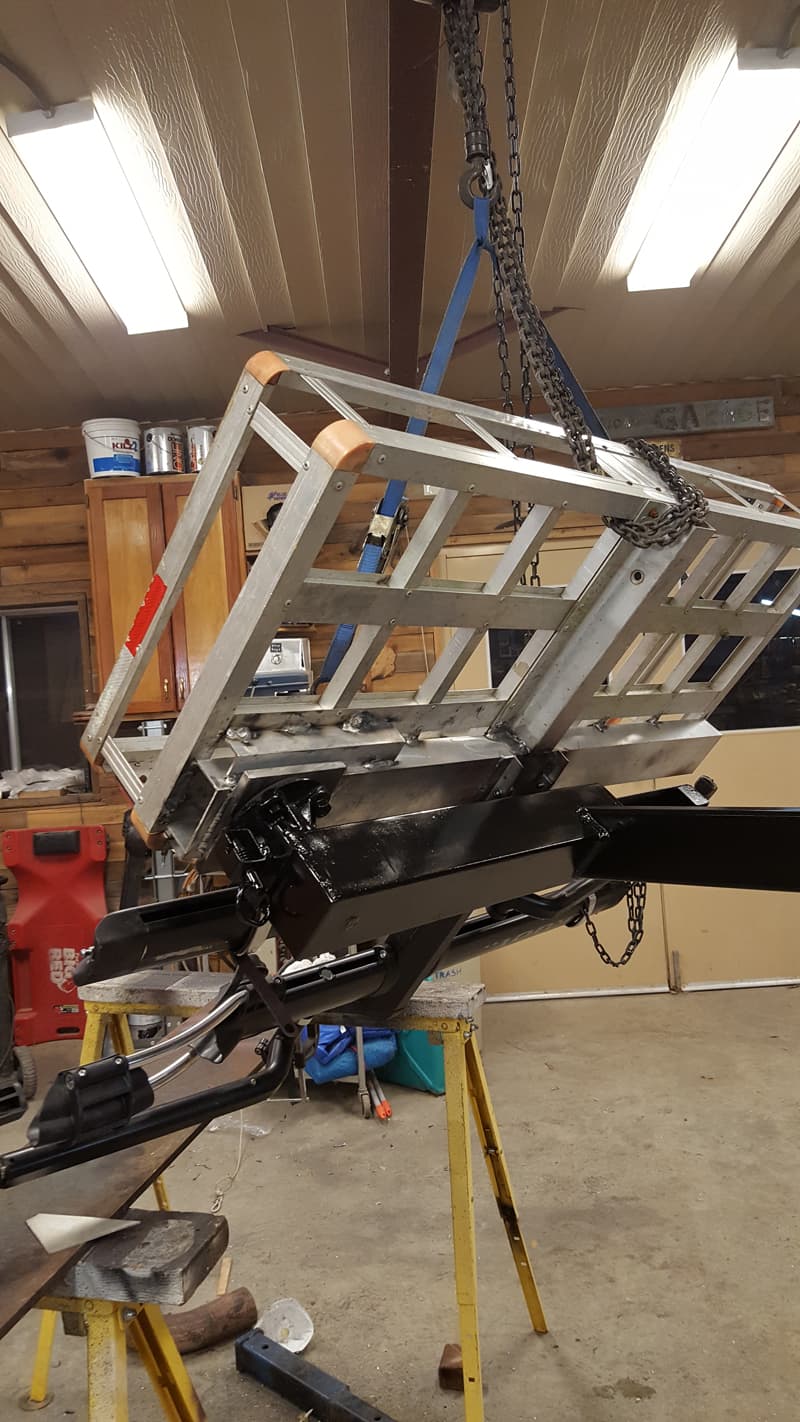
Very few suppliers had what I was looking for. Those that did were not affordable. So I took an aluminum Northern Tool rear receiver carrier, a trailer axle hub, some scrap steel tubing, aluminum tubing, and a rear section of a dual bike carrier and put them together.

I started by butchering the aluminum carrier and adding a strong back 2×4 aluminum rectangle tube. Then I fabricated a steel receiver unit that lifted the whole assembly over the top of my rear tailgate. We use our tailgate as a rear deck when our TC650 Northstar is installed.
 |
 |
I welded a bike carrier rear add-on section in place on the back of the aluminum carrier.
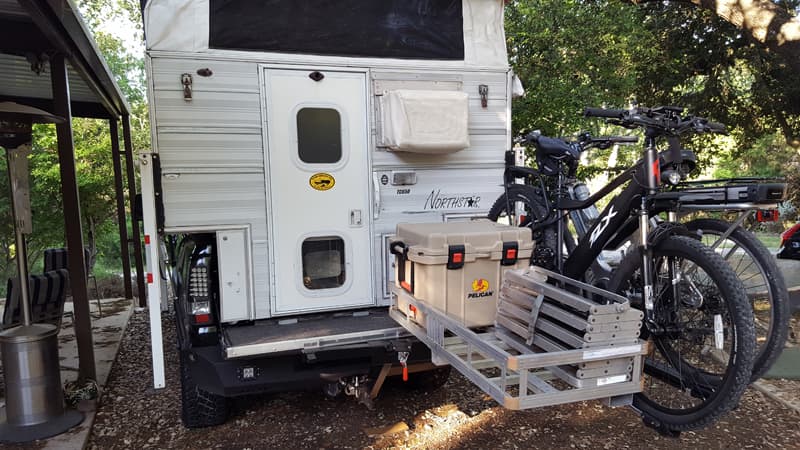
And presto, I have a finished swing-out cargo/bike rack. I will be taking it into the backcountry of the North Rim this year.
It took me about 30-hours to complete this modification and cost me $100 for the carrier, $175 for the bike section, $85 in materials, and $40 for the spindle. About $300 in total. In my opinion, the skill level of this modification is extremely hard. You need to know aluminum and MIG welding.
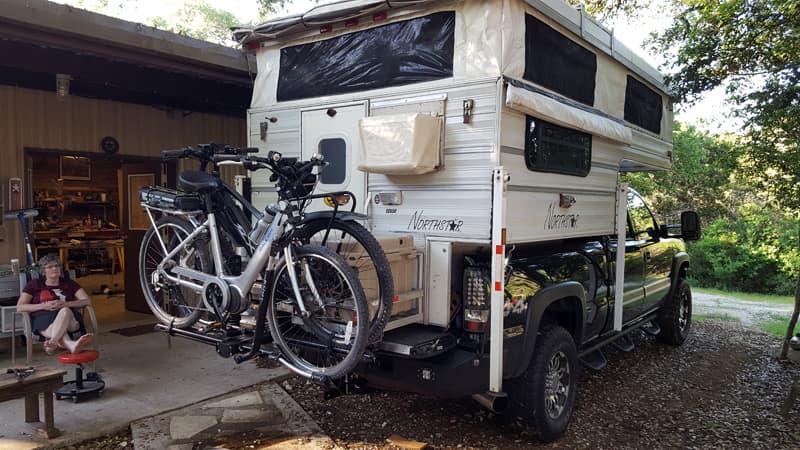
Submitted by: Mike Borrego, 2005 Dodge 3500, 2008 Host Yellowstone
This mod was a result of needing a better way to carry our two bikes. Since the camper extends about 3.5-feet beyond the rear hitch, it wasn’t practical to use a rear hitch-mounted bike rack.
I have been using a front hitch-mounted rack for several years, but the bikes were getting wear marks and always full of bugs. In 2008, the bikes traveled on the front-mounted rack all the way from Colorado to Alaska and back.
The first rack was a side fold-over. It actually folded over at 65-miles per hour and caused a lot of damage to the bikes.
I replaced the rack with a swing-out type rack after that, but it was hard to keep the bikes from rubbing against each other. It was also very difficult to drive at night with the bikes on the front since they blocked part of the headlight beam. I needed a safer and more secure way to carry the bikes.
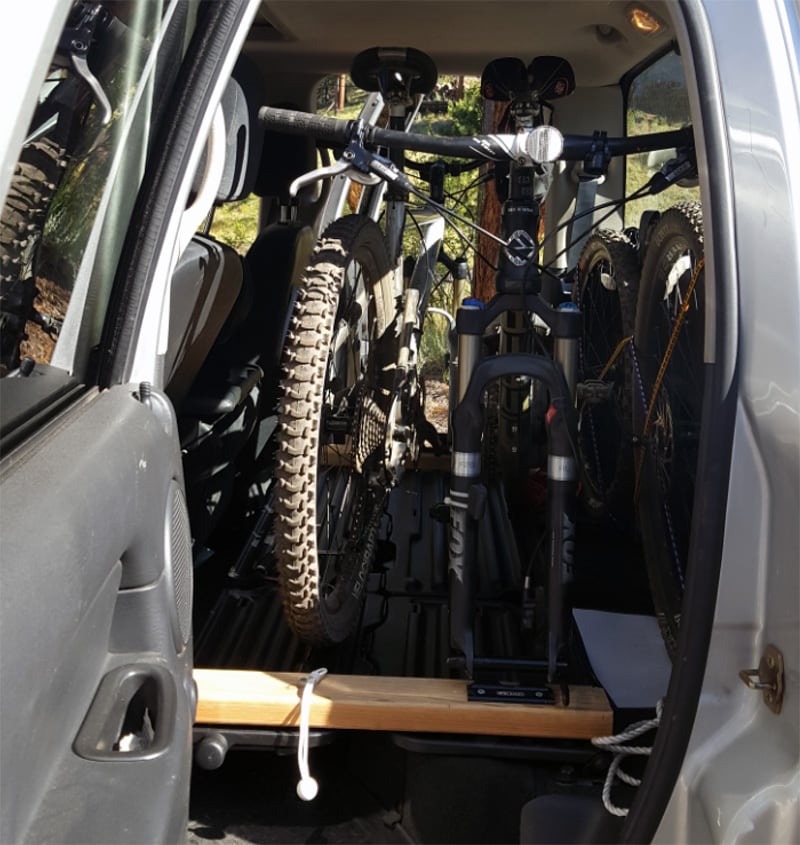
After some trial and error, I figured out a way to put the bikes in the rear seat of my 2005 Dodge Ram 3500 quad cab. The rear seat is a 60/40 folding seat with a fold-out cargo tray. Both bikes wouldn’t fit with the rear seat folded up, so I completely removed the rear seat. That gave me about 5-inches of additional space.
The mod is fairly simple. It took about two-hours to figure out the location and spacing. It takes about 30-minutes to install with most of the time spent on removing the rear seat.
There are eight bolts holding the seats in place that need to be removed plus one bolt that holds the center seat belt. To remove the seats they need to folded up and then lifted up about 2-inches to unhook the seat back from the rear cab wall.
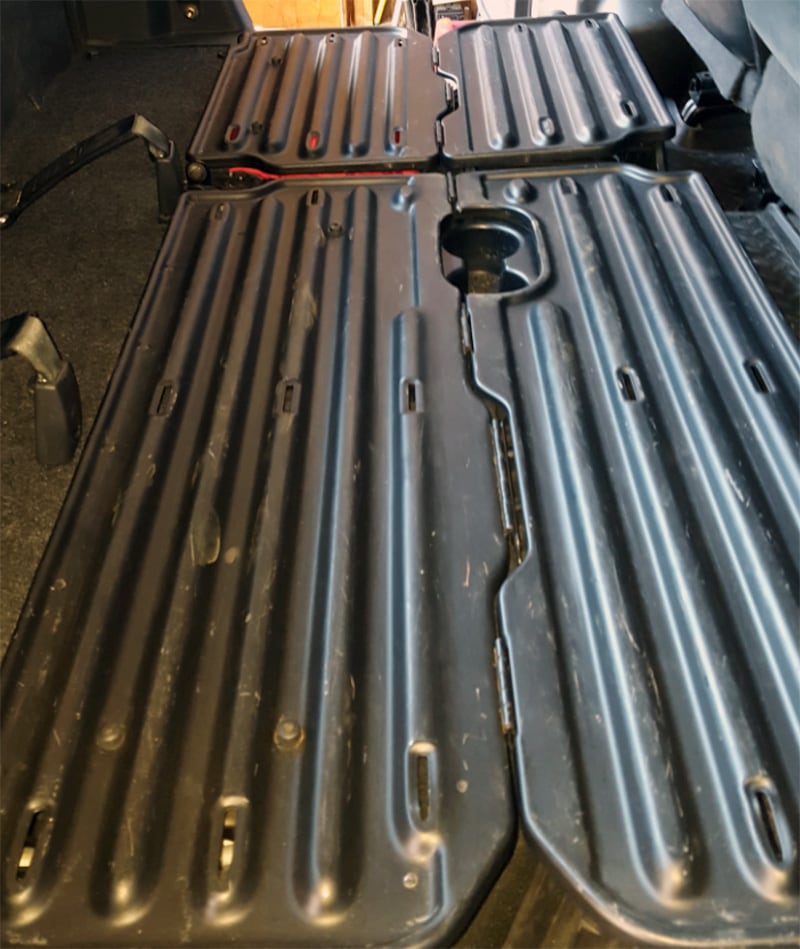
The fold-out cargo tray is attached to the seats with two nuts on each seat. I detached the cargo trays from each seat and reinstalled them using a spacer washer underneath the mounting hole to take the place of the seat bracket.
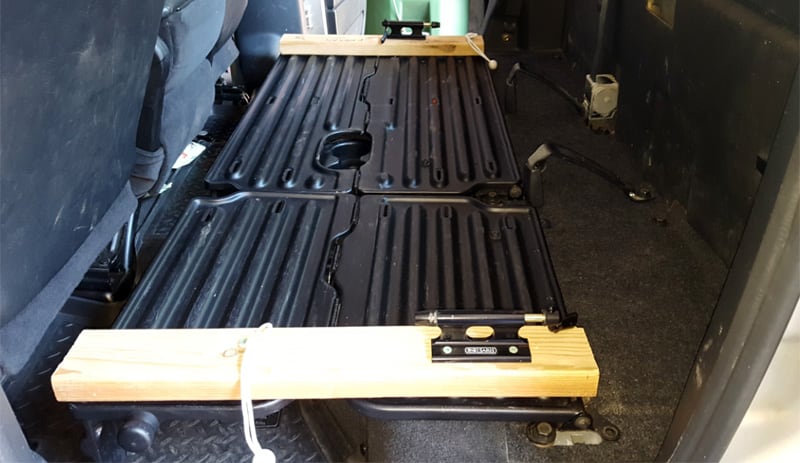
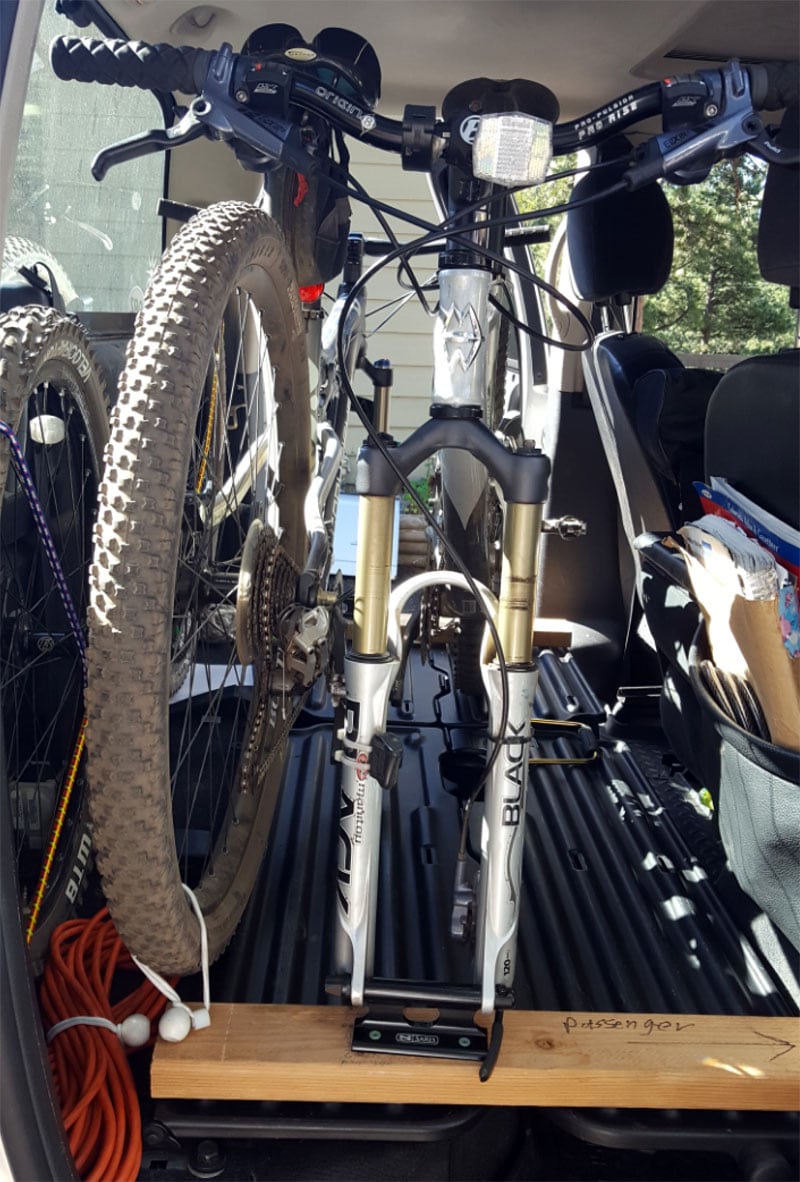
I then cut a piece of 2×4 the length of the cargo tray for each side. Using the existing slots in the outside edge of the cargo tray, I mounted the 2×4 pieces using 2-inch wood screws in four places.
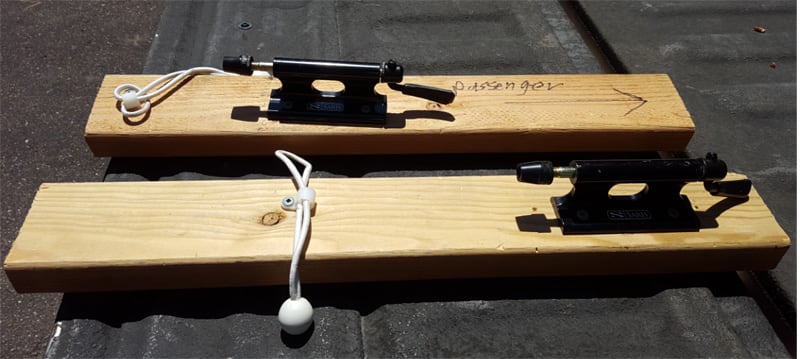
I purchased two inexpensive bike fork mounts with a flat base to hold the bikes in place. I tried some different spacing and locations for the fork mounts to determine the best location. Then, I secured them to the 2×4 with 1.5-inch wood screws.

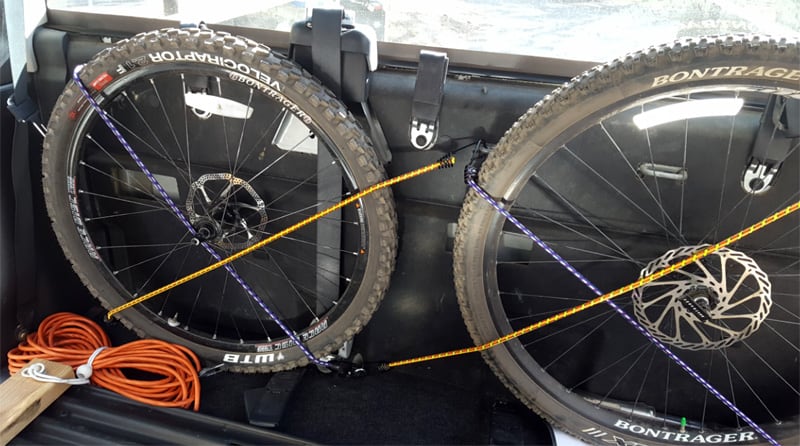
I added a nylon cable clamp where the rear tire sits and use a bungee with a ball end to secure the rear tire. I also purchased four large S-hooks and bent them at about a 60-degree angle and placed them on the rear seat bolts before I reinstalled the bolts.
It’s necessary to reinstall the seat bolts to keep the road noise down and prevent dirt or moisture from entering into the cab from the open hole. This gave me an anchor point on the base of the rear wall to help secure the front tires to the rear wall with bungee cords.
It is very easy to load the bikes by moving both front seats all the way forward. Once the bikes are in place, the front seat can still slide back to the most rearward position.
There is also room in between the bikes for our biking gear, pump, and other items. I am a ham radio operator and usually take my radio gear with me on our trips. There is still enough room left to load three cases with my radios, a small bag with an antenna, and a 6-foot folding tripod.
To unload the bikes with all this extra gear, I slide both front seats all the way forward, move the radio cases to the front seat, undo the bungee on the rear tire and loosen the fork mount and roll each bike out. It takes less than five-minutes to load or unload both bikes.
I have done three long trips since doing this mod and it has worked out just fine with no hassles or changes needed. It took me three-hours to complete this modification and cost me $65. In my opinion, the skill level of this modification is medium.
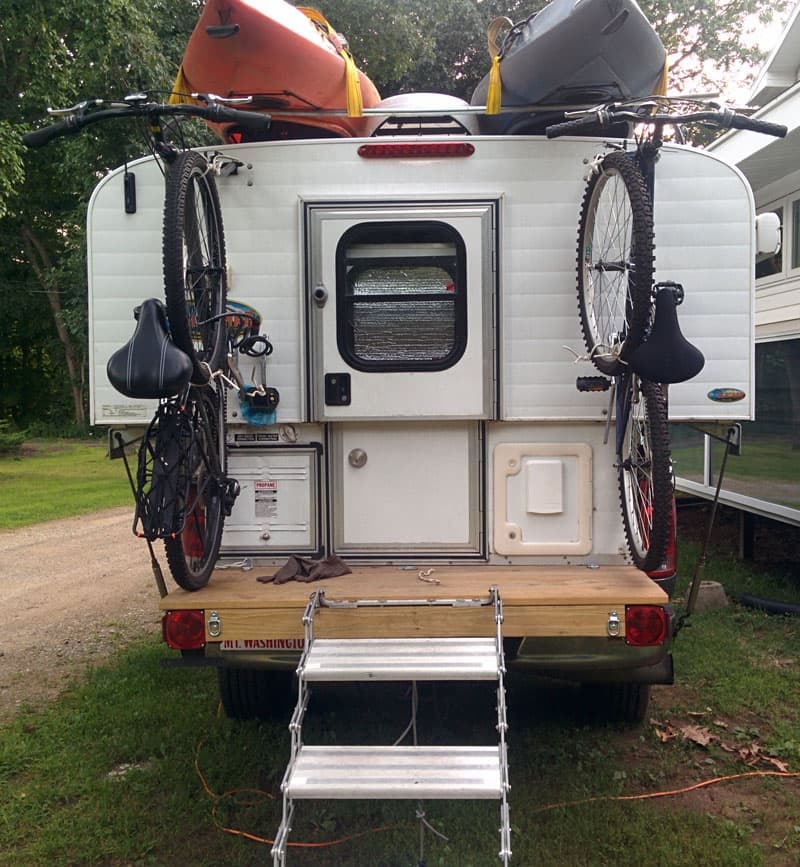
Submitted by: Tom Strock, 2003 Chevy 2500HD, 2000 Bigfoot 9.6
We love to take our toys with us when we travel. Our kayaks, strapped upside down to the roof racks, are out of the way and can handle any type of weather. However, our bikes posed a different set of challenges.
We used to carry the bikes hanging from a rack-mounted to the back ladder. They would need to be removed to get access to the kayaks on the roof. They were also subject to dust and rain which makes a muddy mess.
We tried a rear hitch-mounted bike rack. That hindered back door access while still having to deal with wet muddy bikes. Then I had an aha moment, “What about putting the bikes inside the camper?”
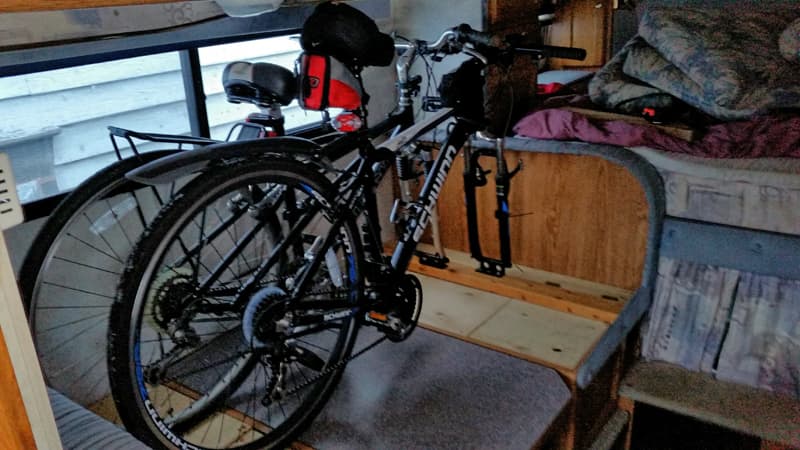
Our Bigfoot camper has a face-to-face dinette that easily makes into a bed. This area should be large enough to carry two bikes. But, how could we hold them in place securely enough for travel?
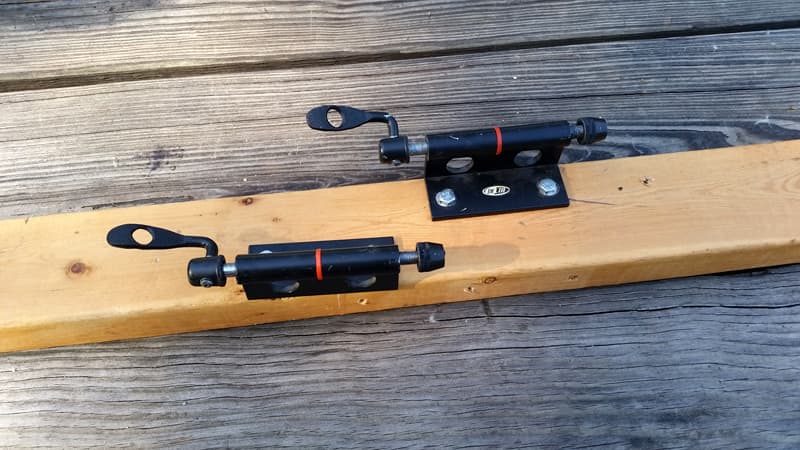
Then I remembered that several years ago I had bought a couple of quick release clamps that bolt on the wall. You store your bikes by clamping the front forks into them.
I cut a piece of 2×4 long enough to snugly fit between the wall and the lip of the bench seat that holds the cushion in place. Removing the bike’s front wheel (with the same type of quick release) allows the handlebars to be turned 90 degrees. This provides clearance up to the steps and through the door with the back wheel rolling up the steps and into the camper.
Then I clamped the mounting bracket into the front fork and lifted the bike onto the bed. After making sure that the handlebars were clear of the window blinds, I lag bolted the bracket into the 2×4. I repeated the same process for the second bike. The 2×4 simply sits on top of the dinette seat and is not fastened in any way.
The mounting brackets hold the bikes in place very securely. The front wheels store vertically between the back wheels which can be swung over close to the wall providing additional room for storage or to sit on the edge of the seat. There is enough room for the back cushions to remain in place while the seat cushions either fit under the table or on the bed.
While the bikes are usually the first thing unloaded upon reaching our destination, they can be left in place for an overnight Walmart stay giving us access to everything in the camper except the table.
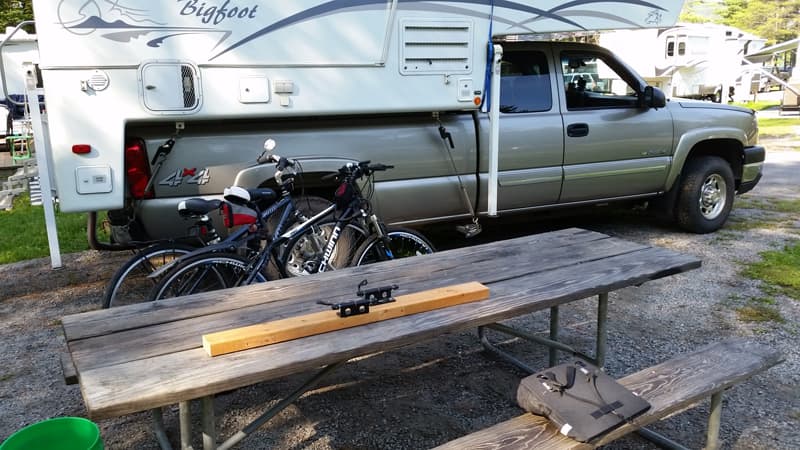
Once the bikes are unloaded, the 2×4 is lifted out and stored under the camper or picnic table. No tools, no straps, no mud, and no more wet bike seats.
It took me about 15-minutes to make one cut on the 2×4 and to drive the four 1/4-inch by 1-inch lag bolts. The mod cost me nothing because I had everything on hand. You should be able to buy everything for less than $30. In my opinion, the skill level of this modification is easy.
Submitted by: David Carvalho, 2006 Ram 3500, 2013 Alaskan camper
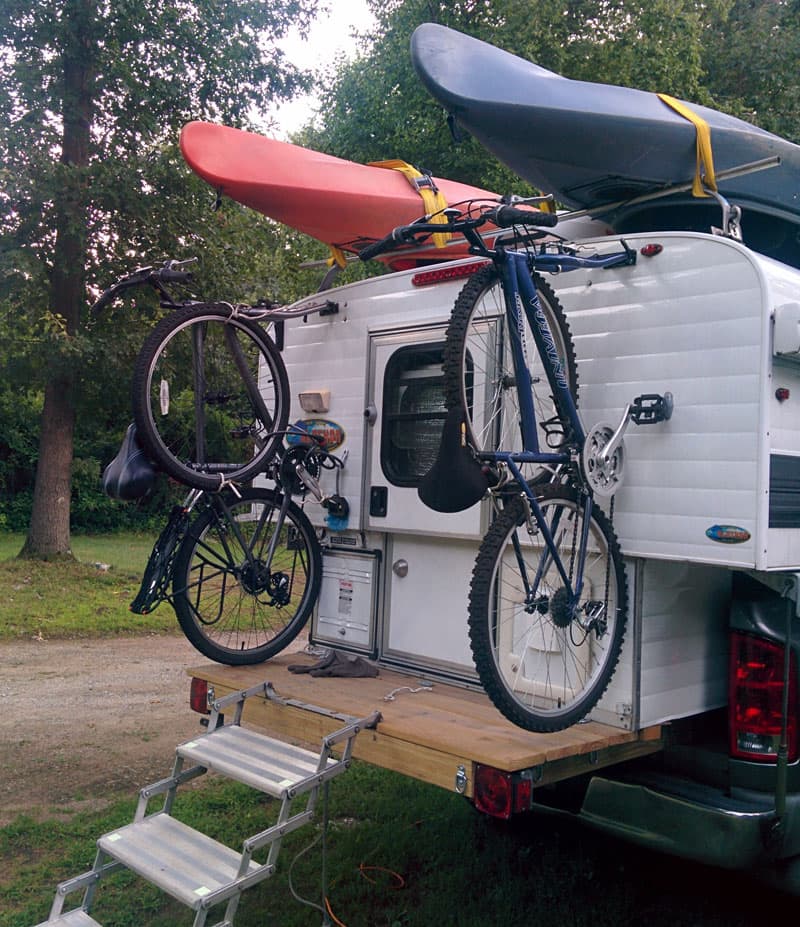
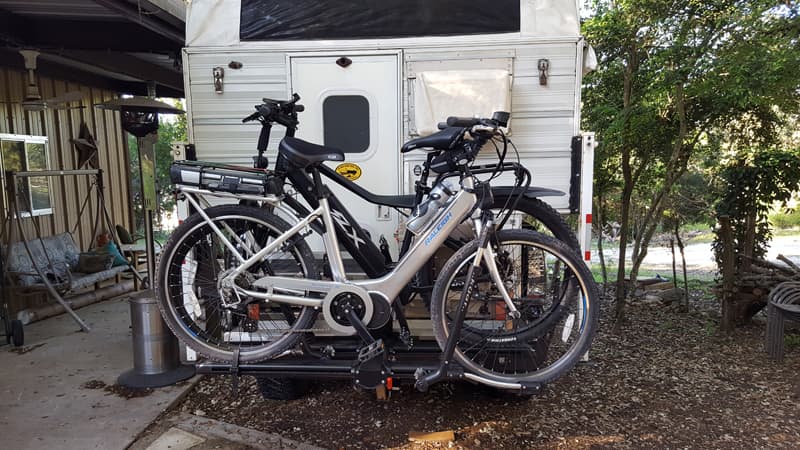
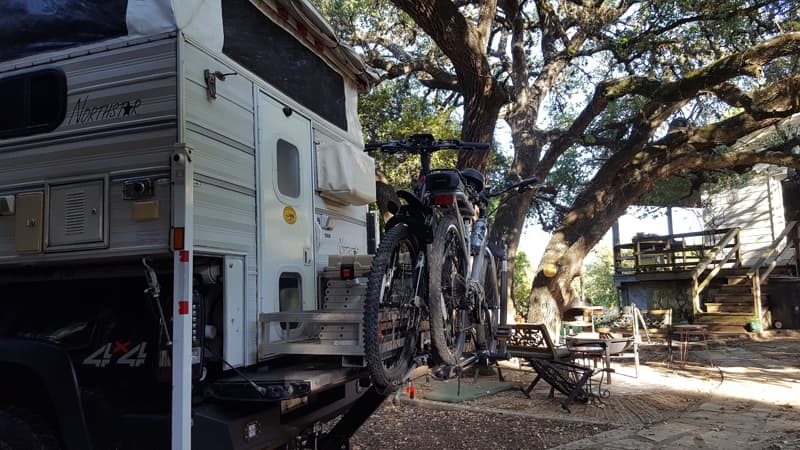
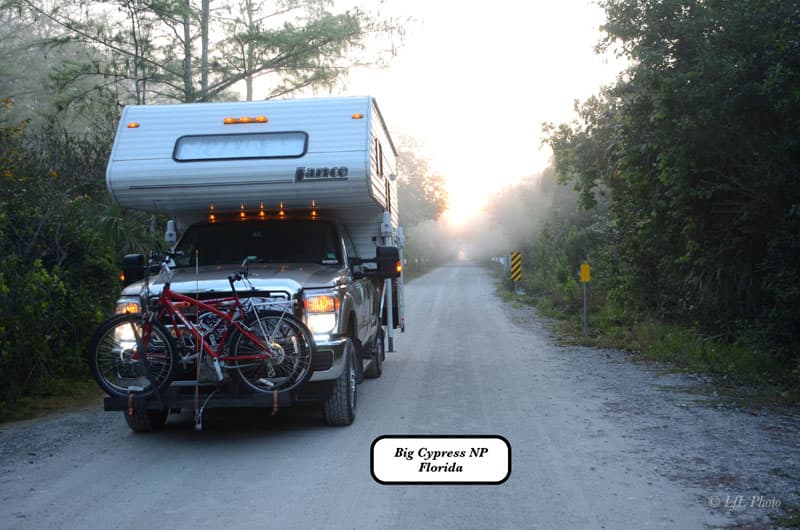
I carry two full-size bikes without having to have a hitch-mounted carrier or put my bikes inside. I installed bike fork mounts to the rear of the camper. I can safely carry two bikes on the back of the camper without the use of a hitch-mounted bike carrier.
The bikes ride up high on the camper, one on each side. I can still enter the camper with the bikes mounted. I can also raise and lower the camper without removing bikes.
Mounted this way, the bikes don’t get all the bugs or road grime. An expensive swing-away carrier is not required. The bikes are easy to load from the stairs or platform.
It took me one hour to complete and cost $50. In my opinion, the skill level of this mod is easy to medium.
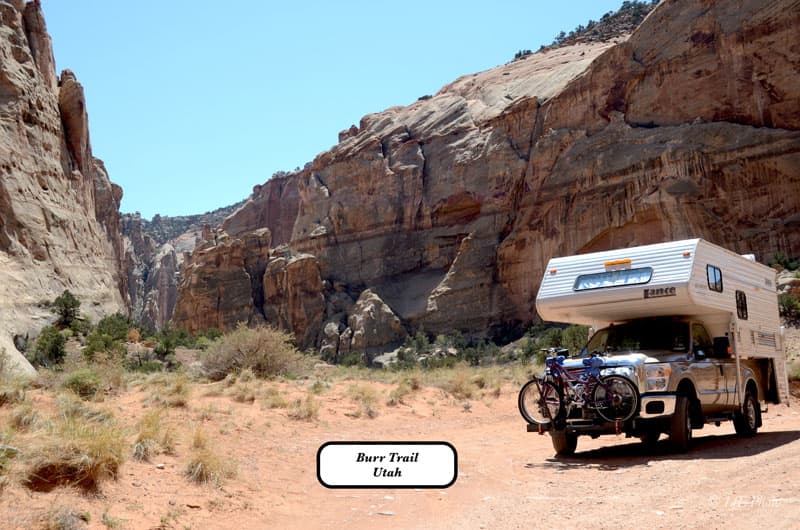
Submitted by: Lucien F. Langlois, 2012 Ford F250, 2004 Lance 1025
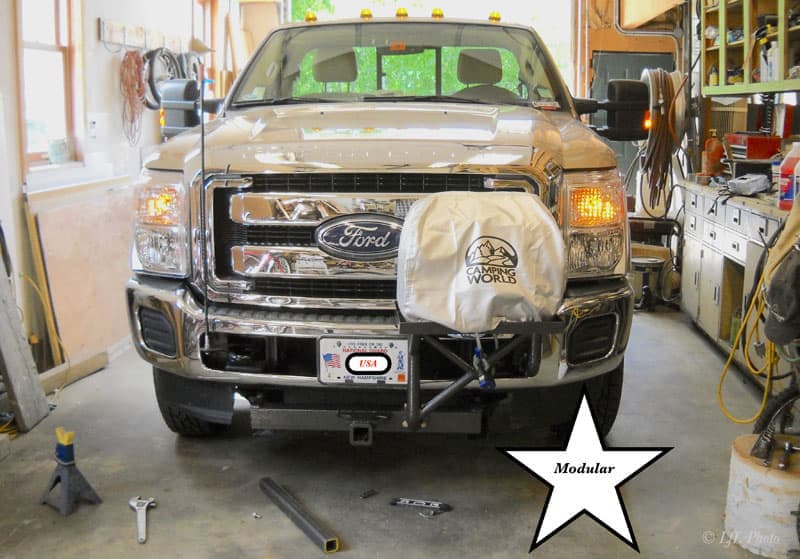
This modification was created because of a need to have shore power available both on the road and for extended stays in boondocking areas and campgrounds that don’t offer shore power. Let me back up for a second and say that this truck camper modification is the third generation modification. It’s sort of a transformer-type mod that grew as new demands and ideas came into being.
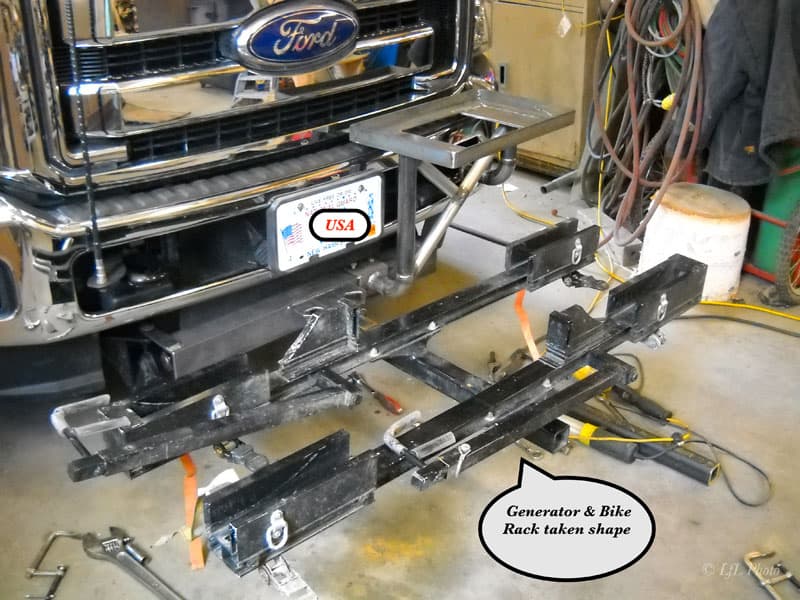
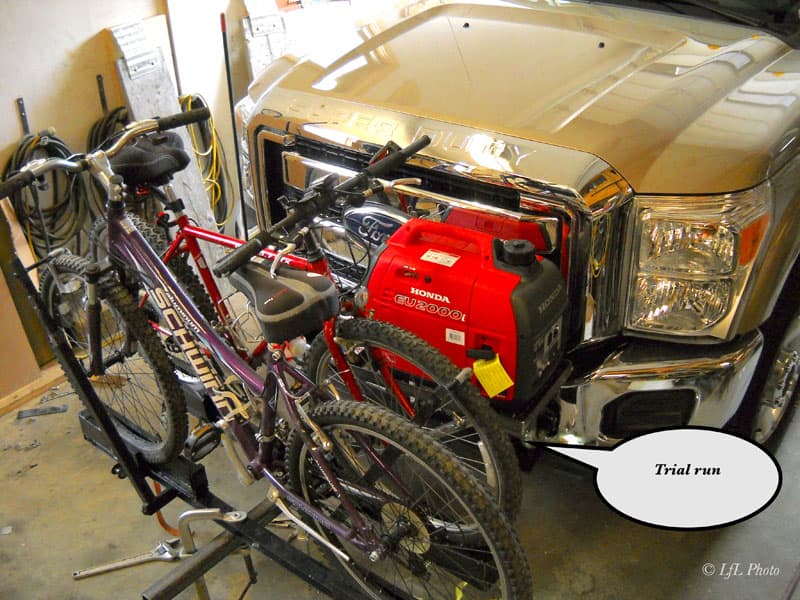
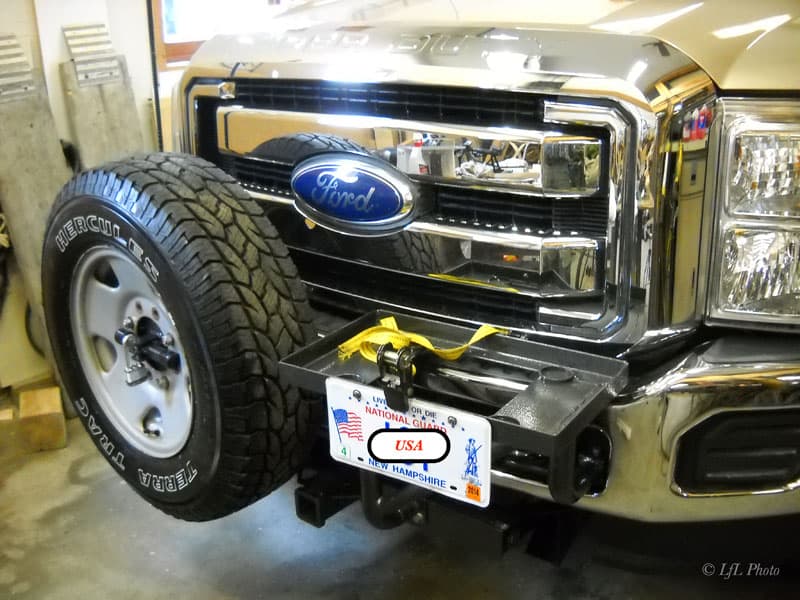
My truck is a Ford F250 Super Duty 4×4 and it has a snowplow. The first need was to adapt the snowplow mount to a front receiver hitch which I fabricated. The receiver hitch had to be bolt-able. The idea here was to install a bike rack.
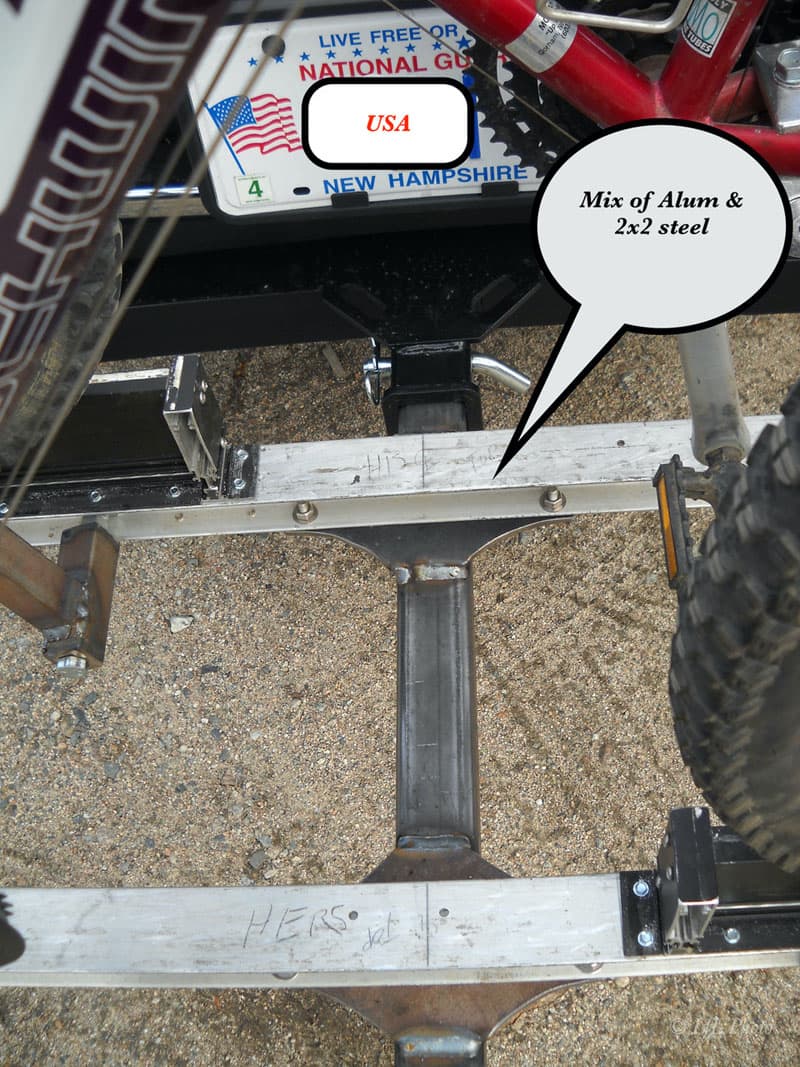
I fabricated the bike rack out of two-by-two inch steel tubing, and various aluminum storefront window extrusions. This setup worked great.
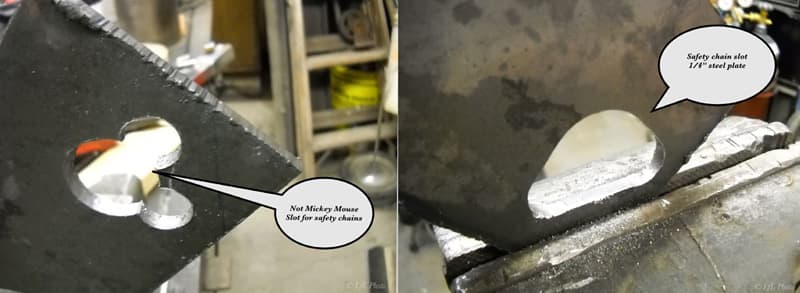
Left: Not for Mickey Mouse, slot for safety chains. Right: Safety chain slot 1/4″ steel plate
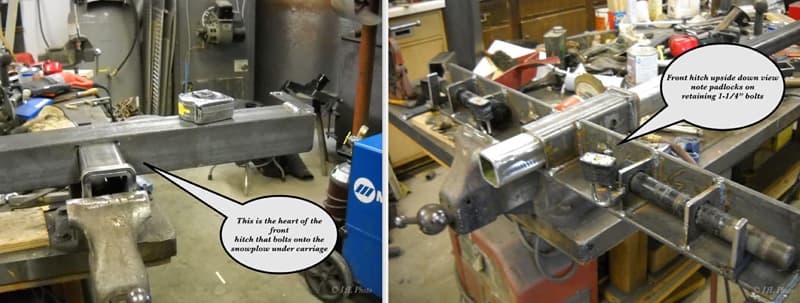
Left: The heart of the front hitch that bolts onto the snowplow undercarriage. Right: Front hitch upside down view, note padlocks on retaining 1.25″ bolts
The bikes are mounted low to the ground and do not interfere with my view while driving.
The next idea occurred after an extended winter stay in Key West, Florida without a generator. It was apparent that a generator would be my next truck camper modification. The logical place to store a Honda ie2000 generator was upfront.
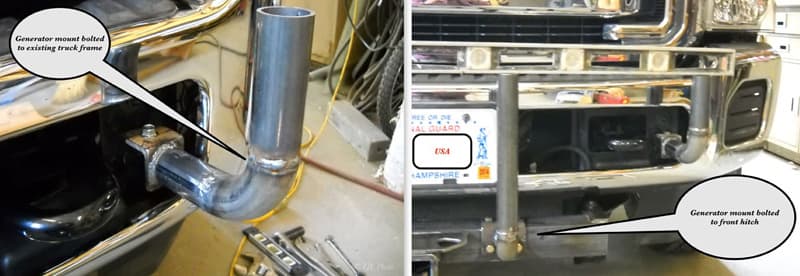
I quickly came up with a design and plan. It sort of helps that I am a retired general contractor with a shop full of tools capable of fabricating almost anything.
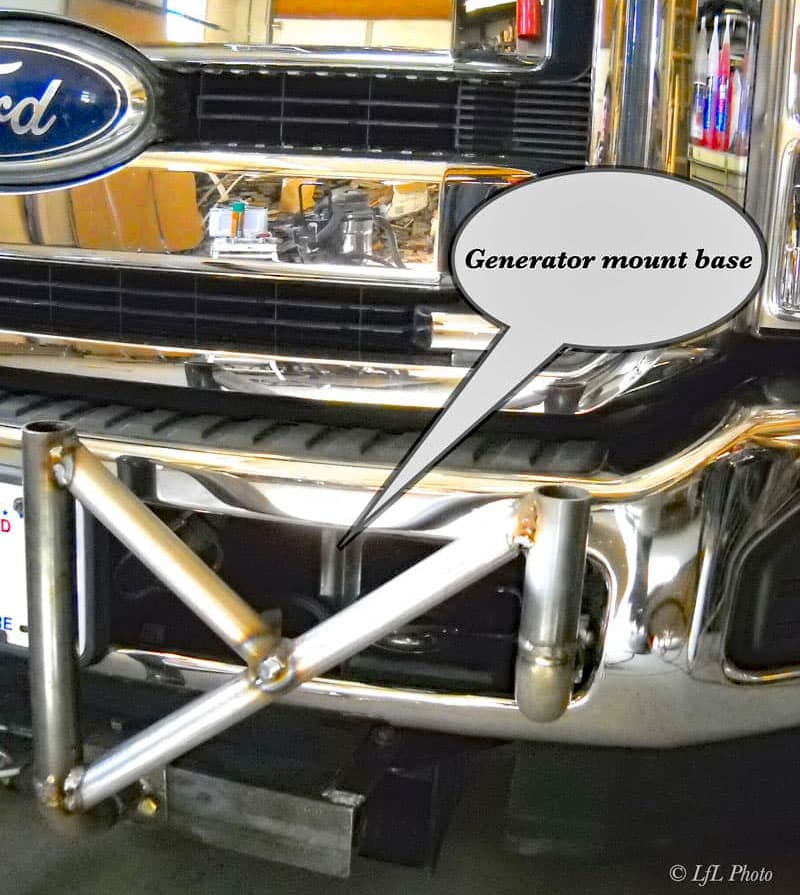

The generator mount is modular in that it can be bolted onto the fabricated receiver hitch.
All mounting bolts and hardware are grade eight qualities for extra strength.
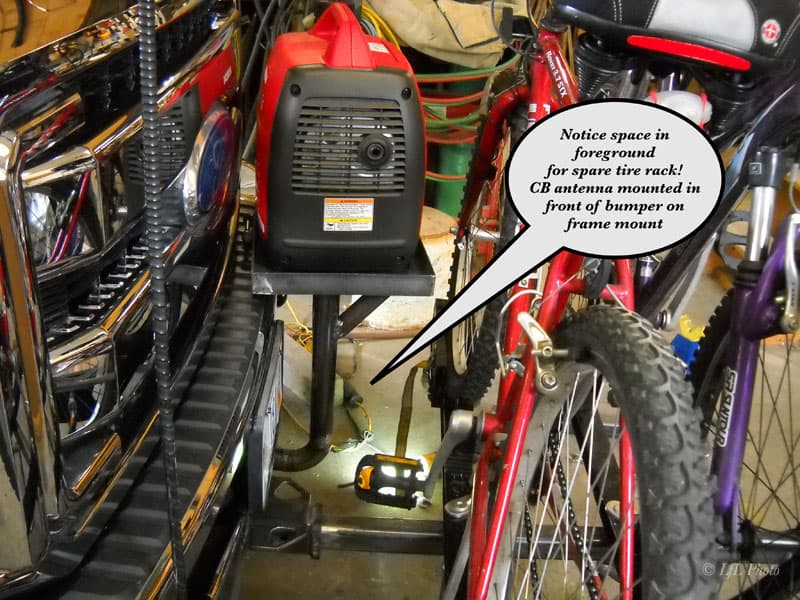
We took an adventure ride up into the wilds of Labrador. Although the adventure trip was cut short because of a forest fire, I had prepared myself with another front hitch modification. The trip into Labrador was close to a thousand miles of gravel roads. This was definitely a two spare tire trip.
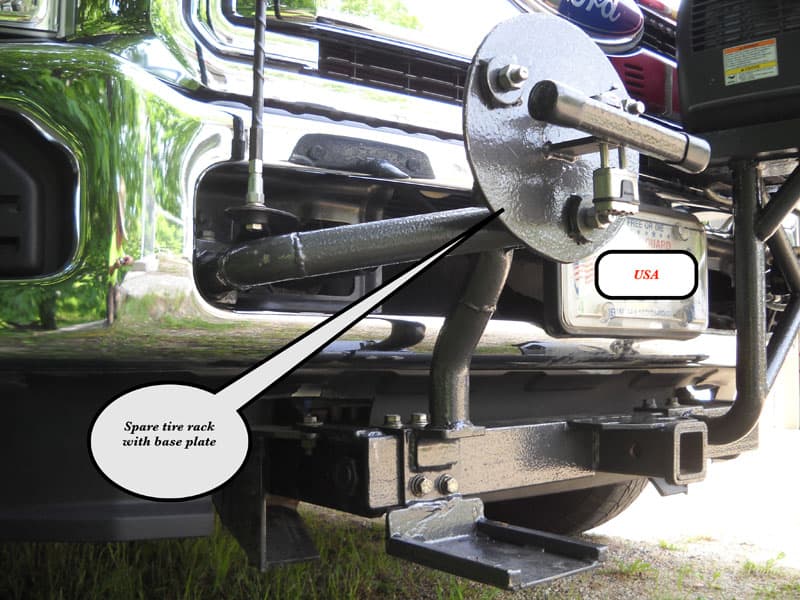
I fabricated a mount for that additional spare tire on the front hitch opposite of the generator mount. I can just hear Truck Camper Magazine readers saying, “Is he crazy? All that weight up front!” Well, with the spare tire, generator, and bikes, it still didn’t add up to the weight of a Fisher Snow Plow.
For even more bringing along your bike ideas, The Best Bike Racks and Packs and Bike Solutions for Truck Campers.
Disclaimer: The modifications above are submitted by Truck Camper Magazine readers. It is your responsibility to make sure that any do-it-yourself modification project you undertake is safe, effective, and legal for your situation.


