Welcome to the fourth entry in June’s Mega Mod Contest. One Mega Mod will be published in every Email Alert in June. At the end of the month, we’ll hold a reader vote to determine June’s winner. Click here for information about the 2021 Mod Contest, including how to enter.
David Romero, Shreveport, Louisiana
Upgrading Microwave to Convection Microwave, Oven, and Grill Combo and 12-volt Range Hood
2017 Ram 2500
2017 Cirrus 820
My mod was removing the microwave that came with the camper. We didn’t like it and wanted a convection microwave, oven, and grill combination unit instead. While I was at it, I also put in a new 12-volt Furrion range hood.
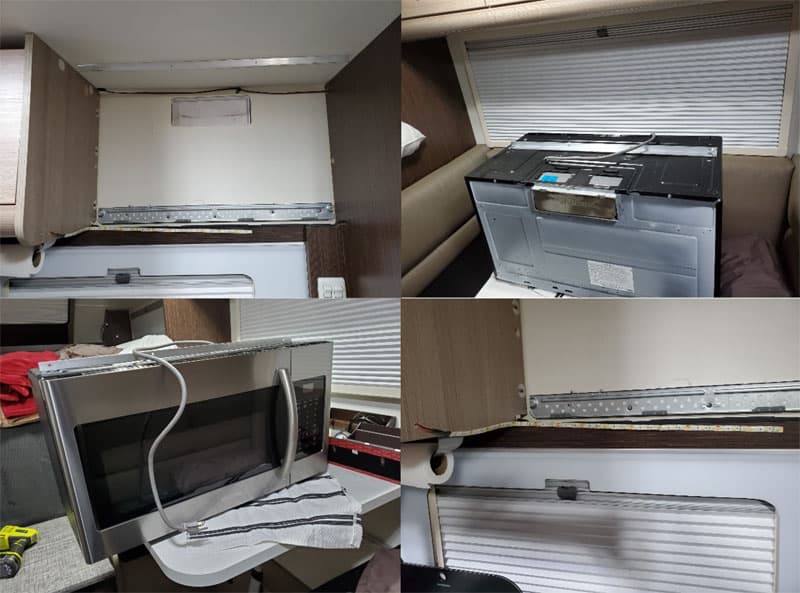
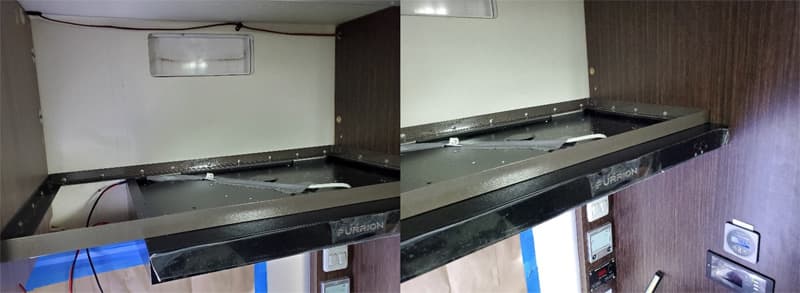
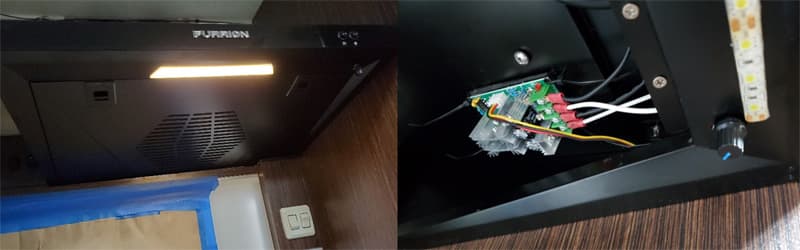
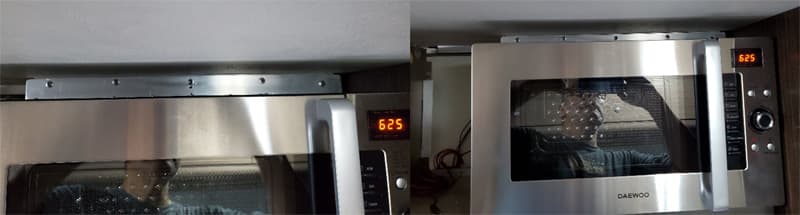
First, I removed the microwave. In the picture above, the vent and mounting brackets are visible. You can also see the LED light strip I mounted underneath the microwave to add much-needed light.
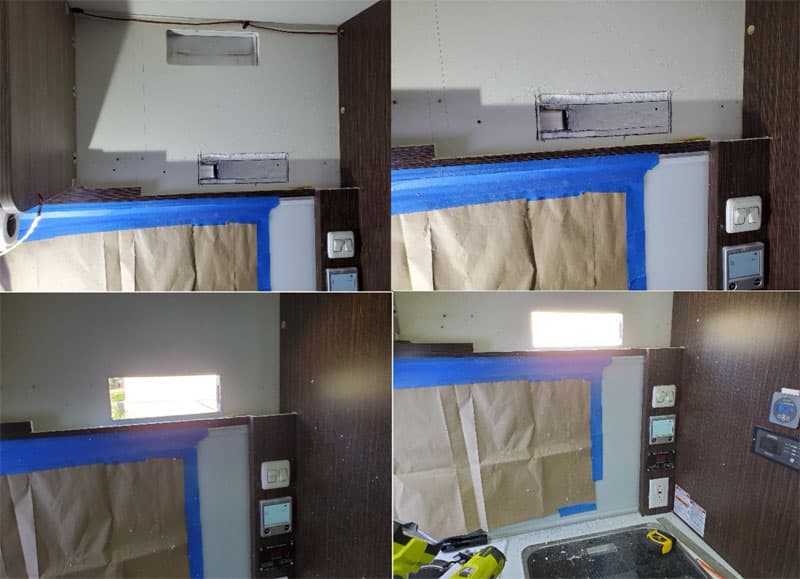
I notched out the wood ledge to hold the new 12-volt Furrion range hood. Then, I located a vent hole and cut into the 1-inch by 2-inch aluminum tubing that was inside the wall to make sure nothing was running through it.
This tube was installed to hold the original mounting bracket for the Samsung microwave. After that, I opened a new vent hole for the new range hood. I covered the window to keep the sawdust and metal shavings out.

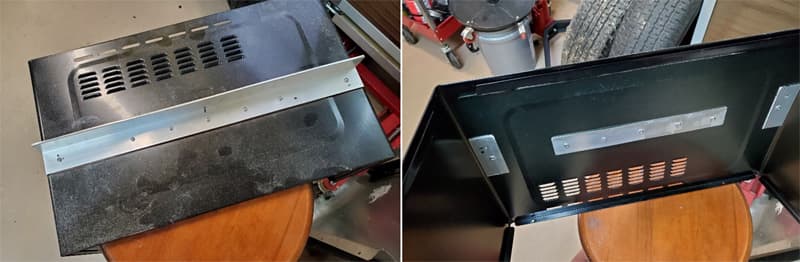
After fitting the range hood, I constructed an aluminum frame to hold a shelf.
I installed the range hood and set the painted aluminum frame on top of the range hood. I wanted the frame to be mounted to the back wall and the two side walls. The back wall really has little support, the two side cabinet walls, or the main support. The aluminum 1-inch by 2-inch tubing was used to hold the microwave as well. I used the range hood as support.
In the picture above you can see the wiring I pulled up the refrigerator’s wall and across the back. This powers the range hood and switch panel I installed. The switch panel controls four items which are our cellular modem, an LED strip, the cabin fans behind the microwave, and activation of a WIFI repeater for use at RV parks.
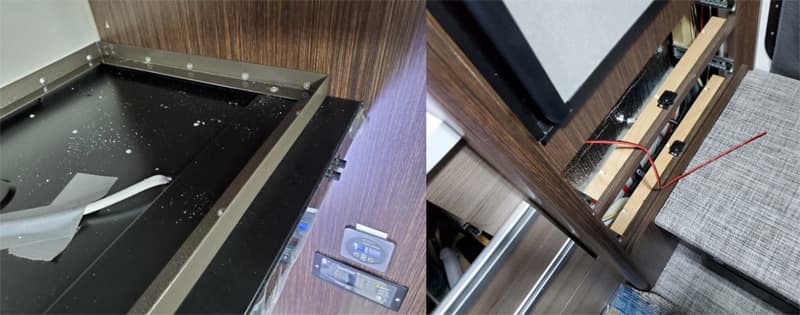
The aluminum frame was screwed down to the top of the range hood as well as the walls. The wire down to the distribution block to power the switch panel and the range hood is 10-AWG.

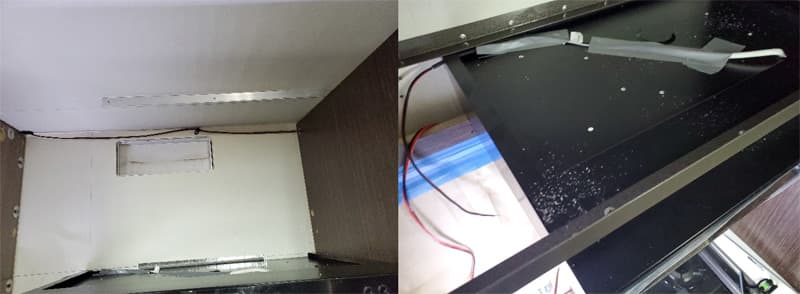
Above you can see that I placed 1/8-inch plates inside the range hood on each side of the fan and indexed them to the back and top of the range hood. I mounted them to the 1-inch by 2-inch aluminum tubing that is inside the back wall.
By placing these plates inside the back of the range hood it gave direct support to the back wall and aluminum frame. I was able to mount those directly to the 1-inch by 2-inch aluminum tubing to help bolster and secure the shelf. I wanted to make sure that the shelf could support another microwave.
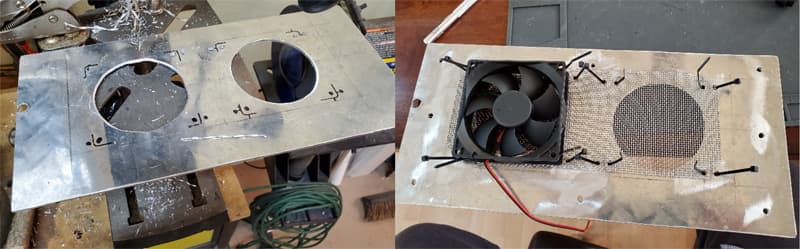
Since I am installing another microwave that is also a convection oven and a grill, I thought it would be a great idea to use the top vent opening as an oven vent. I used 1/8-inch plate material, cut two holes, and mounted fans.
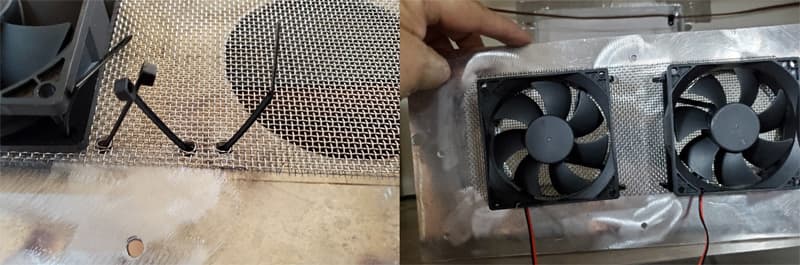
I mounted a stainless steel screen to the fan’s opening to make sure that I would have no wasp entry. I used two computer fans that only draw .15-amps each and move 50 cubic feet a minute of air volume each. So, .30-amps draw at 100 cubic feet of air volume.
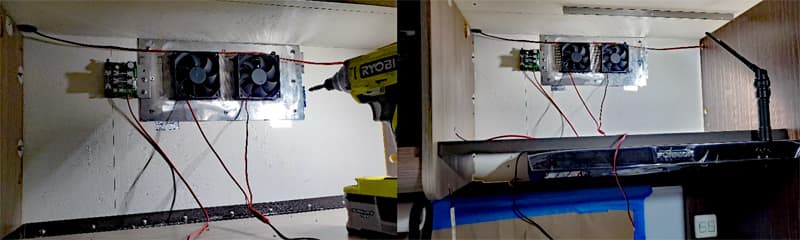
Above you can see the speed controller that I installed so that I can control the speed of these two fans. These fans will move air from the back of the convection oven/microwave and can be used to move air out of the camper’s cabin. I now have full fan speed control for 0 to 100-percent. These controllers are easy and inexpensive to use.

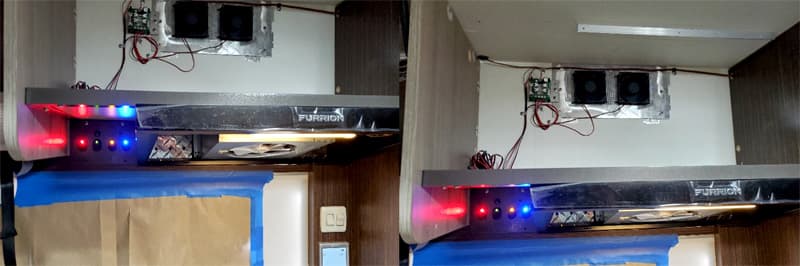
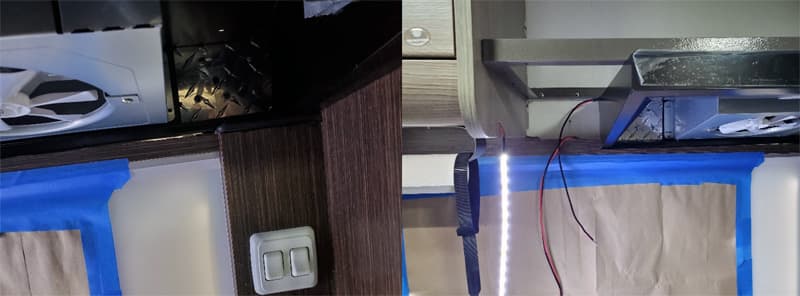
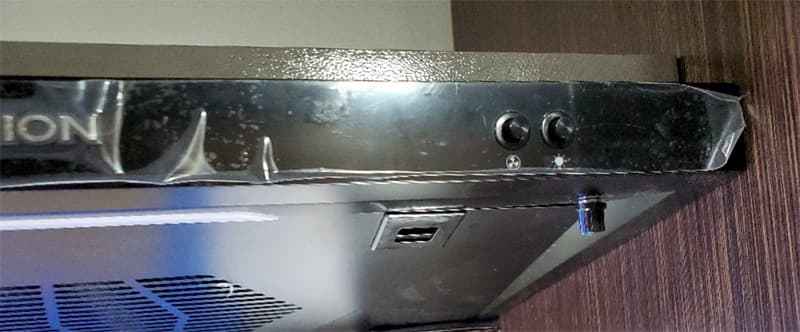
You can see the switch panel now all lit up in the above photos. The blue switch will turn on/off the cellular modem. The yellow lighted switch will activate the LED strip that will be installed to the bottom front of the range hood.
The factory-installed LED light on the range hood, in my opinion, is just not enough light. The green switch and variable speed knob activate the cabin fans behind the microwave and the red switch will activate the WIFI repeater for the RV parks.
I installed the variable speed switch controller to the switch panel. It is directly above the green-lit switch or, as I call it, the oven/cabin fans.
In the above picture, you can see that I have cut and reattached the aluminum angle to the roof of the camper. I plan to mount the new convection microwave to this bracket for more support. I added several more screws to firm up the ceiling mount. You may also notice three pieces of ¾-inch aluminum angle mounted on the back left side of the shelf. This is to give support for a false wall to hide the wiring. I will use this wall to mount the cellular modem.
The range hood had only a single speed fan so I installed a variable speed controller on the range hood. I now have a complete controller from a full stop to fully open and any speed in between. It works great. I installed the variable speed control knob on the lower part of the range hood shown in the picture above.
Next, I mounted a piece of 1/8-inch aluminum 1 1/2-inch angle to the top of the convection microwave. I removed the cover and drilled the holes in the top of the microwave cover and used 1/8-inch by 1 1/2-inch strap. I riveted the aluminum angle and the microwave and backing plates together. To measure the location for the aluminum mounting bracket I set the microwave in place.
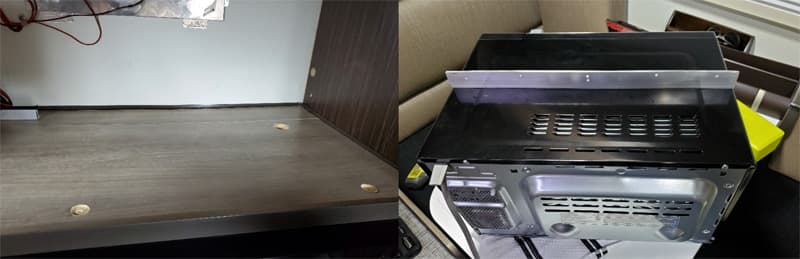
Above you can see the shelf and the three recessed holes I put into the shelf to index with the legs on the microwave. This ensures the microwave stays in place and does not move on the shelf. Then, I mounted the top of the microwave to the aluminum bracket that is mounted to the roof, which is much the same way the Samsung was mounted.
In the picture above, you can see the top mounting of the microwave. The microwave is very firmly mounted and has no movement.

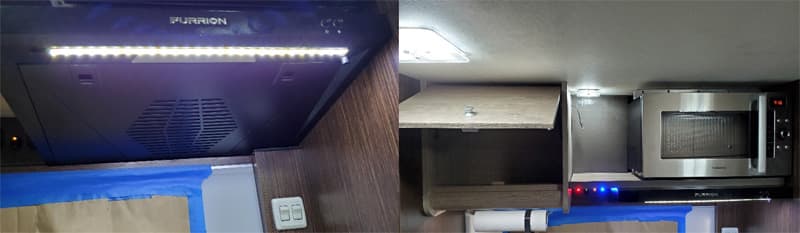
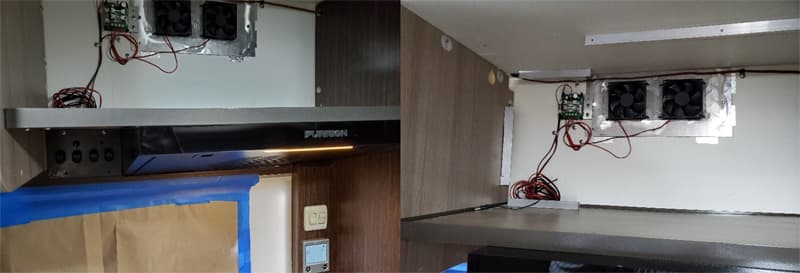
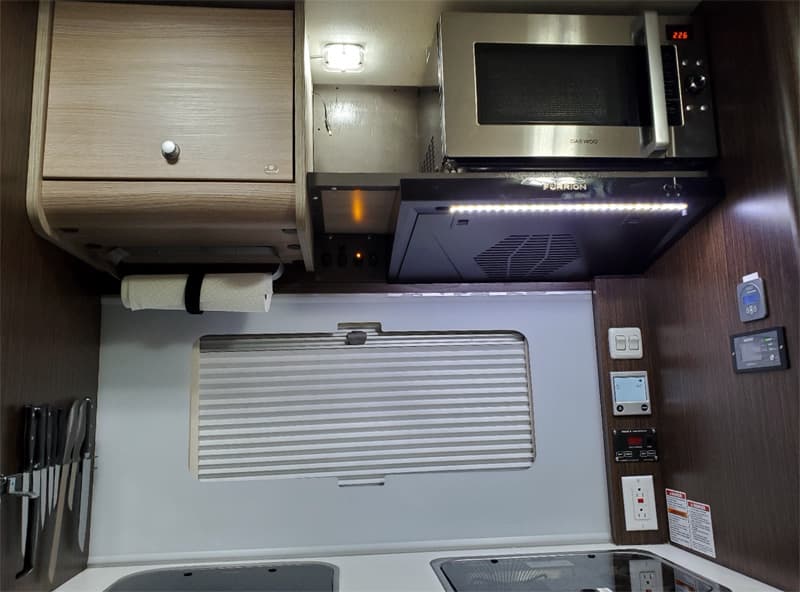
I completed the range hood with an LED light strip and the filter cover in place. You can see in the picture the false back cabinet panel in place that covers the wiring. This includes the convection microwave’s plug that runs into the cabinet and plugs into the 120-volt plug that was used for the Samsung microwave.
I moved the 120-volt plug closer to the back of the cabinet so the plug would reach. Another hole was cut in the back of the cabinet behind the false panel allowing access for the plug. You can also see the small 12-volt plug hanging in the small shelf opening. This is the power cord for the cellular modem.
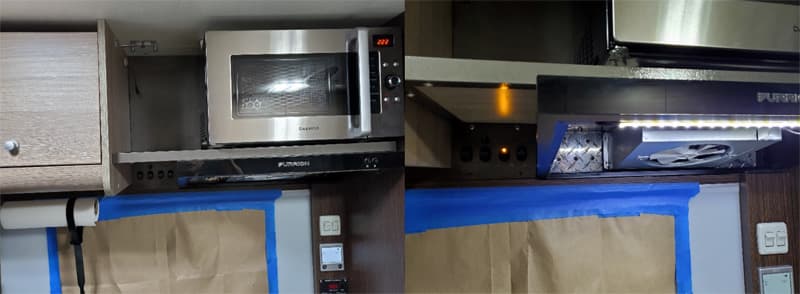
The yellow switch is on and the LED light strip is illuminated.
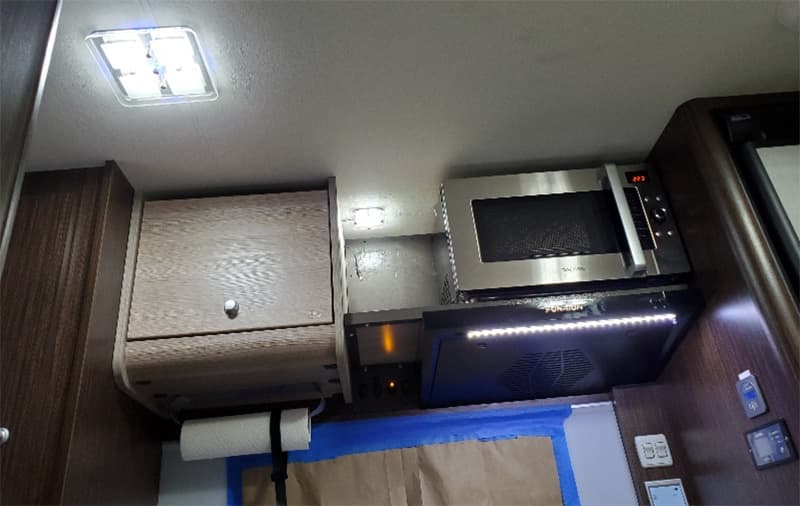
Above is my finished project with a 1 cubic foot convection microwave. The false panel wall is only as wide as the cabinet’s opening, which is 10-inches. The back of the microwave does not touch the panel.
It actually sits about 1 ½-inch away from the panel and leaves an opening behind the microwave. The back half of the top of the microwave is open as well. This leaves plenty of air access and drafting for the twin fans I mounted behind the microwave. It can also remove heat from the cabinet if the cellular modem gets warm. So, there is a multi-function use of the installed cabin fans I have installed.
For the fact it was the only convection oven/grilling microwave that had small enough measurements to fit the space, I chose the Daewoo KOC-9Q4DS. The unit is 12-inches high, 19.75-inches wide, and 16-inches deep. It was a great fit.
I found several microwaves to fit, but there are not very many convection oven/grilling microwaves, so Daewoo was almost the only choice. I was able to find a couple of other convection oven microwaves, but they were several hundred dollars more than this unit. I paid $160 on Amazon. The unit is easy to use and works well.
The range hood install was complicated. I believe if you have DIY skills this is a doable project. This modification requires patience and planning.
Disclaimer: The modifications above are submitted by Truck Camper Magazine readers. It is your responsibility to make sure that any do-it-yourself modification project you undertake is safe, effective, and legal for your situation.
Enter Your Mods Now!
If you’d like to enter a modification you’ve done on your truck camper, click here. You can enter as many mods as you want, at any time. Good luck mod makers!


