Welcome to the first entry in January’s Medium Mod Contest. One Medium Mod will be published in every Email Alert in January. At the end of the month, we’ll hold a reader vote to determine January’s winner. Click here for information about the 2023 Mod Contest, including how to enter.
Ray Fair, Hopkinton, Massachusetts
Roof Mounted Solar Panel Tilting Solution
2022 Silverado 3500
2017 Eagle Cap 850
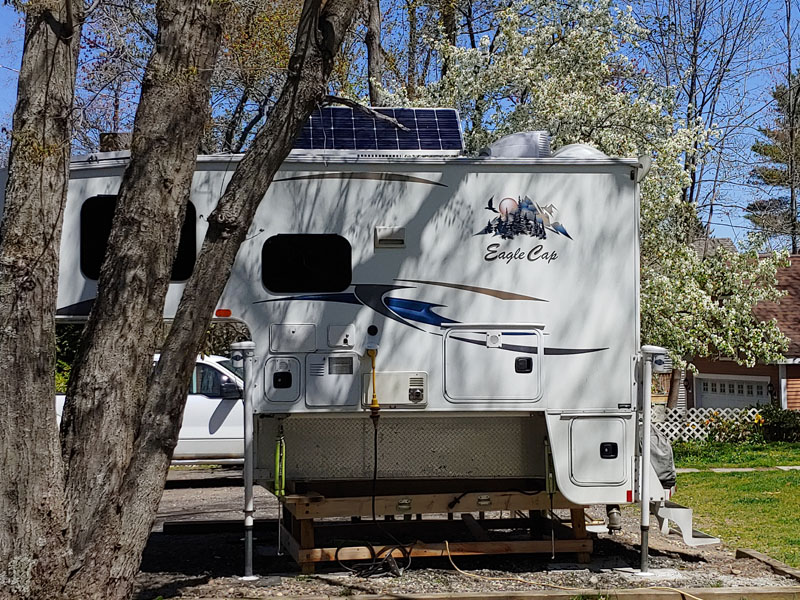
We have been truck camping for over eight years with many memorable moments. Whether at a national or state forest, BLM lands in the western states, or just some out-of-the-way quiet sites, one of our goals was to boondock without a generator running. We also did not want to give up on our essential luxury items such as lights, furnace, radio, and power for our Kindles. Thus, we rely on our batteries and solar panel for electric power.
Upon arriving at a chosen boondocking site, our primary concern is finding the best level location for the camper and viewing the scenery. Little thought goes into aligning our camper to the sun to obtain maximum exposure for our solar panel.
The solar alignment necessity came to light (no pun intended) during a three-week-long trip to BLM land in the desert southwest where the sun’s height is low in the sky during the winter months. Thus, we had two options: reorientate the camper to catch the sun, or raise the solar panel to overcome this oversight. We chose to reorientate the solar panel to increase the panel output during the winter months. At the time, our solar panel was secured with four brackets and T-knobs from AM Solar.
When we returned home, I ordered four additional brackets with T-knobs to accomplish my mod from AM Solar.
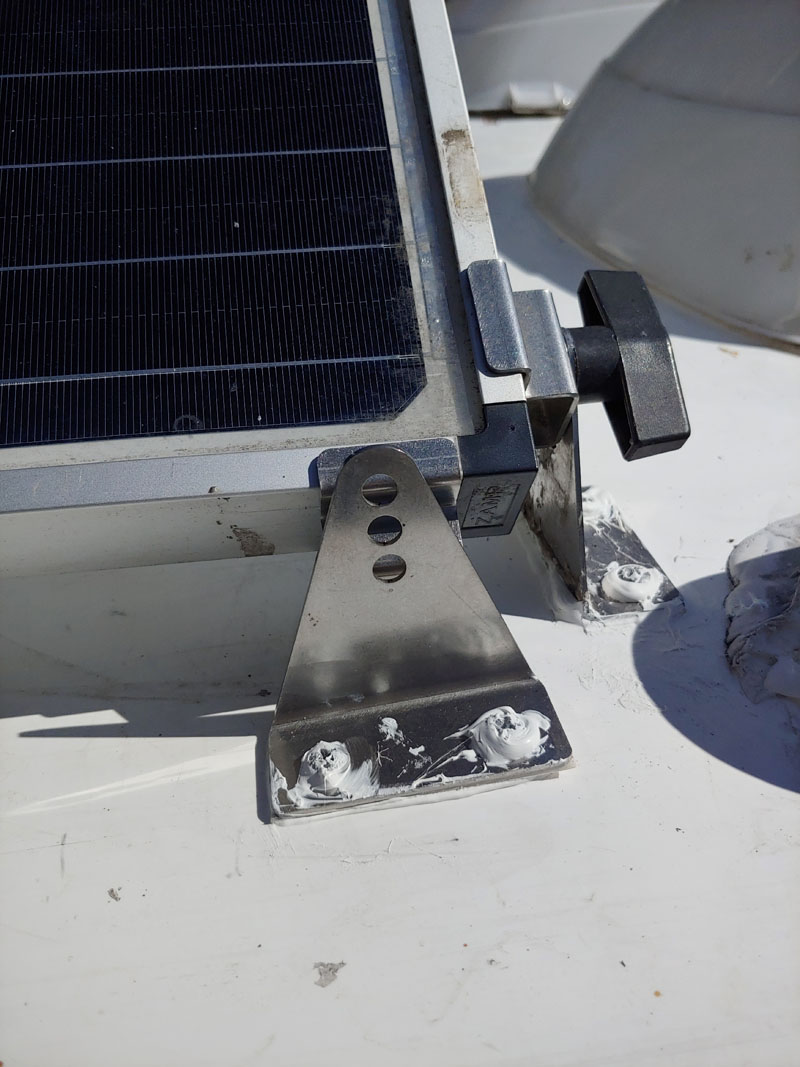
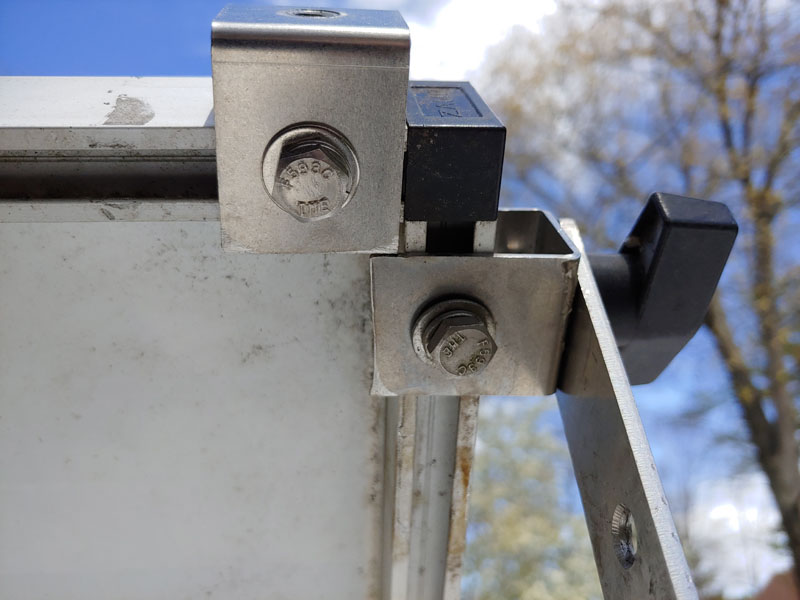
Above: Two mounts at each corner
First, I relocated the current brackets as close to the corner of the panel as possible. As luck would have it, the relocated brackets would cover one of the unused bracket holes. Next, I filled each exposed hole (4) with Dicor Sealant, a 3/4-inch #10 stainless screw, then covered the screw again with Dicor. Finally, I mounted the new brackets as close as possible to each panel’s remaining corners and applied Dicor.
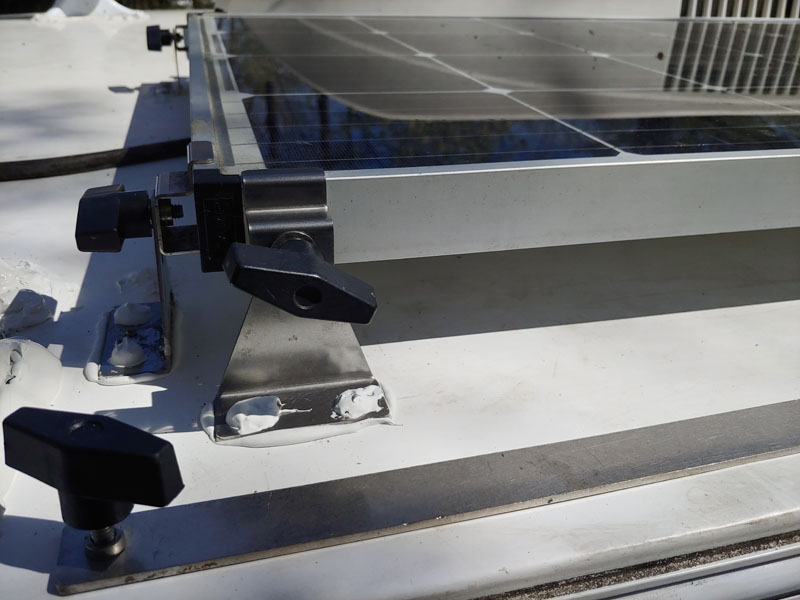
Above: Solar panel laying flat for travel
So now, the panel is secured by eight T-knobs and eight brackets. Overkill? Yes.
Above: Solar Panel at 45-degrees
Tilting the panel is accomplished by loosening the two T-knobs along two of the panel’s two lengths and tilting the panel up approximately 45-degrees. Next, I secure the panel with two stainless steel tilting bars (from AM Solar) to the mounting brackets. Tilting and securing the panel achieves the desired results of increasing the output from the panel.
Materials Used:
Four AM Solar brackets and T-knobs (L-foot three holes standard) $48
One Tilt Bar Set – 11-inch / 45-degree – $40
Dicor – Already had a tube in the camper
It took me one hour to complete this modification and cost me $88. In my opinion, the skill level of this modification is medium.
Disclaimer: The modifications above are submitted by Truck Camper Magazine readers. It is your responsibility to make sure that any do-it-yourself modification project you undertake is safe, effective, and legal for your situation.
Enter Your Mods Now!
If you’d like to enter a modification you’ve done on your truck camper, click here. You can enter as many mods as you want, at any time. Good luck mod makers!


