Follow Eric Williams as he gets a Roadmaster InvisiBrake installed and tests it with his Alaskan Camper and rock crawling Jeep rig. It’s time to take a brake.
Boy do we have an action-packed story for you. First, Bob Vondra, Publications Manager for Roadmaster, gives us the low down on what the Roadmaster InvisiBrake is, what makes it unique in the marketplace, and why a supplemental towing system is important for truck campers that tow vehicles.
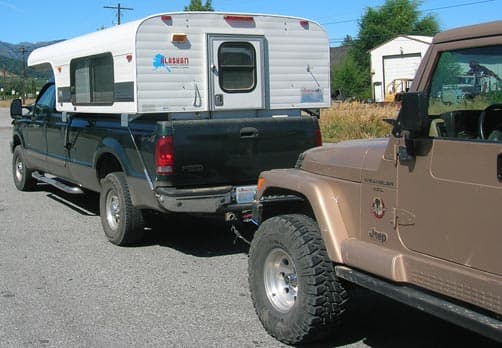
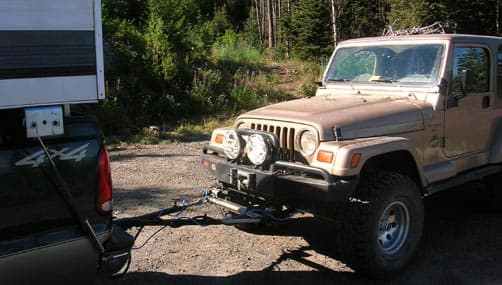
Then we watch a Roadmaster InvisiBrake get installed on Eric Williams’ Alaskan Camper and Jeep rig at Roadmaster’s headquarters. And finally, we ask Eric what’s it like to go from no supplemental braking system to using the InvisiBrake. Jeepers, that’s a lot of content. Let’s get to it.
The following is an interview with Bob Vondra, publications manager for Roadmaster, on the Roadmaster InvisiBrake supplemental braking system.
What is the InvisiBrake?
The Roadmaster InvisiBrake is a fully-automatic supplemental braking system that stops your towed vehicle in tandem with your truck camper. Best of all, it’s completely out of sight. Once installed, the InvisiBrake doesn’t need to be connected or disconnected for use. It’s totally idiot proof. You set it and forget it.
What are the benefits of the InvisiBrake versus Roadmaster’s other braking systems — the Even Brake, BrakeMaster, and 9700?
Our other supplemental braking systems are extremely reliable and work just as well as the InvisiBrake, but they’re not invisible and need to be set up and removed for use. The InvisiBrake is our new supplemental braking system and its key advantages are that it’s out of sight and that it doesn’t have to be set up or removed.
Why does someone need a supplemental braking system?
Safety is the most important reason. You can’t wish momentum away and towing a car behind a truck and camper without brakes will dramatically increase your stopping distance in an emergency situation. The difference between a close call and an accident is usually a matter of a few feet. At freeway speeds the Roadmaster Invisibrake will allow your combination to do a panic stop around seventy-five feet sooner.
If you talk to somebody and tell them to put 3,000 pounds of bricks behind their truck, people understand why there’s a law that says you need to have a braking system. But, a car doesn’t seem to weigh 3,000 pounds in people’s minds. Another consideration is that taking some of the burden away from your truck’s brakes will make them last longer.
And for legal reasons. In virtually all the states and many Canadian provinces, if your trailer/tow vehicle weighs more than 3,000 pounds, it is required that you have an independent supplemental braking system. As you’re driving, people can’t see if you have a supplemental braking system or not, but insurance adjustors will check and, if you don’t have it, you may not get the insurance benefit.
Does your towed vehicle drive differently after the InvisiBrake is installed?
No, not at all. The InvisiBrake is only activated when it’s connected to the towing vehicle. When it’s disconnected, there’s no difference in the way the vehicle drives.
Would the InvisiBrake work differently with a truck camper than a motorhome or would it work differently with a car than a Jeep?
A Ford F-350 is not going to weigh as much as Class A diesel pusher. There would be more towing and braking burden on a Ford F-350. If you are towing something that’s 3,000 to 4,000 pounds, an independent braking system is even more important on a truck camper.
Can a regular person install an InvisiBrake?
For myself, I’d prefer a professional installer install the InvisiBrake, but there are some customers who work on cars all the time and can handle the installation. They change their own oil, and they feel comfortable with do-it-yourself projects. For those kind of people, the install should be easy. If you want, you can get the installation instructions online on our website to preview ahead of time.
How did Roadmaster test this product prior to releasing it to the public?
We went through a lot of testing of the InvisiBrake system to see how it would perform. It’s been four years in development. We’ve been testing it for the last four to six months on a range of heavier vehicles. We have tested it with the more popular vehicles like a Saturn or a Jeep.
What kind of maintenance needs to be done on the InvisiBrake?
None. It’s a zero maintenance product.
What is the warranty and MSRP on the InvisiBrake?
The InvisiBrake has our standard one year limited warranty and the MSRP is $1,081.
Would there be any instances in which someone would not want an InvisiBrake or where an InvisiBrake would not be a good fit?
We designed it so that it could be used with any vehicle. We made it as simple as possible. It’s designed to be universal.
Is there anything else about the InvisiBrake that you would like to add to the interview?
Another important design feature of the InvisiBrake is that it trickle charges your towed vehicle’s battery. Many supplemental systems just pull power off your towed vehicle’s battery. If you’re towing for days in a row, it’s possible to drain the battery. With our system, you never have to worry about that happening.
Basic information about the InvisiBrake is on our website. We also invite you to request a free Roadmaster brochure.
Thanks Bob. I’m sure there are lots of folks who will benefit from your advice on safely towing a vehicle. I appreciate your focus on safety.
You’re welcome.
The following is an overview on the InvisiBrake installation for Eric’s truck camper and Jeep rig. For complete and detailed Roadmaster InvisiBrake installation instructions, visit our website for InvisiBrake Installation Instructions.
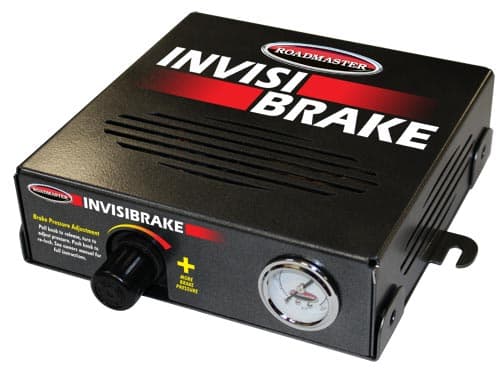
Above: The InvisiBrake supplemental braking system ready for install
The Roadmaster installation team began by planning where the InvisiBrake controller, pulley and air cylinder would be installed. The components are interdependent with each component affecting the possible locations for the others, so careful planning is required before the installation can begin. See page 4 of the Roadmaster InvisiBrake Installation Instructions for more detail on this critical step.
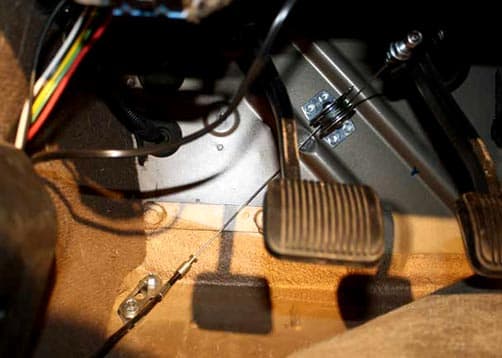
Above: In Eric’s Jeep, the brake pedal clamp, pulley and cable anchor bracket installed
To start the installation, the Roadmaster installation team attached the brake pedal clamp with two 10-12 x 1 1/2” Allen head bolts and 10-24 Nylock nuts. Then they attached the pulley making sure that the cable was in a straight line from the brake pedal for proper function.
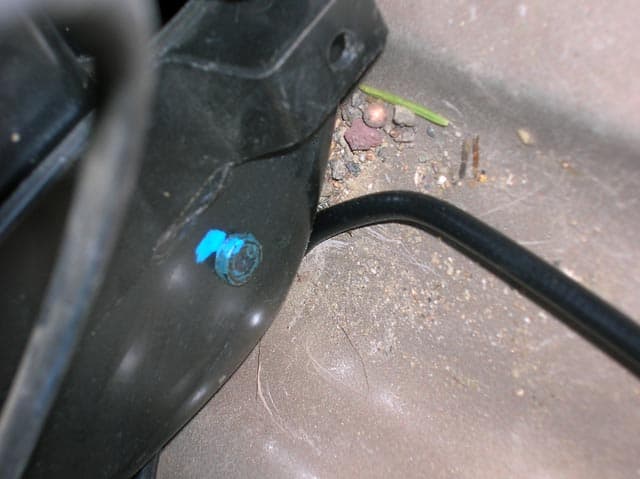
Above: Brake pedal clamp and pulley attached. Notice, that the pulley is attached on a nice, flat surface.
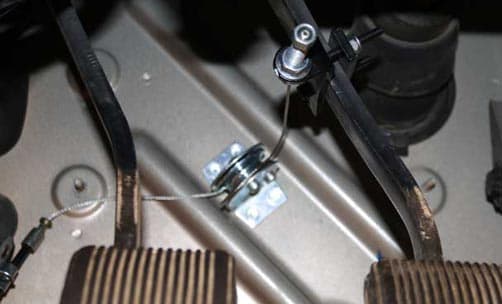
The cable requires 1/4” of free play (see silver hose like piece in the picture; the circular inside piece should be out about 1/4″) to prevent the towed vehicle’s brakes from being inadvertently applied.
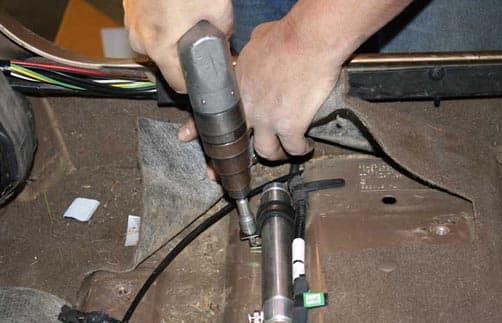
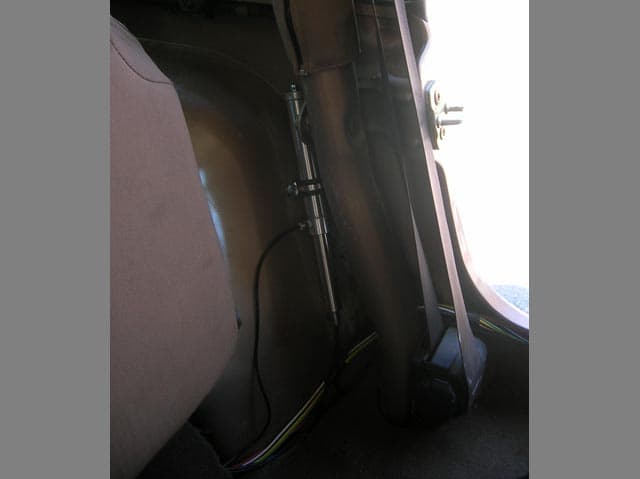
Above: The air cylinder being attached with band clamps
As planned before the installation, the Roadmaster installation team routed the cable and attached the air cylinder with a band clamp. They then attached the 1/8” air line to the cylinder making sure to trim the air line to length to make it a smooth and straight cut. With that completed, the other end of the line was pushed into the port on the InvisiBrake controller until the air line bottomed out.
 |
 |
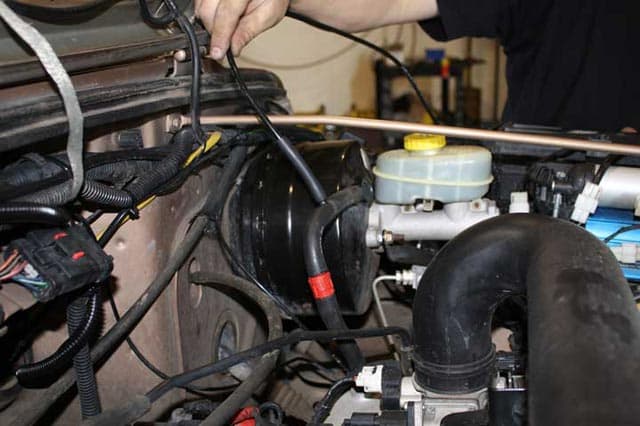 |
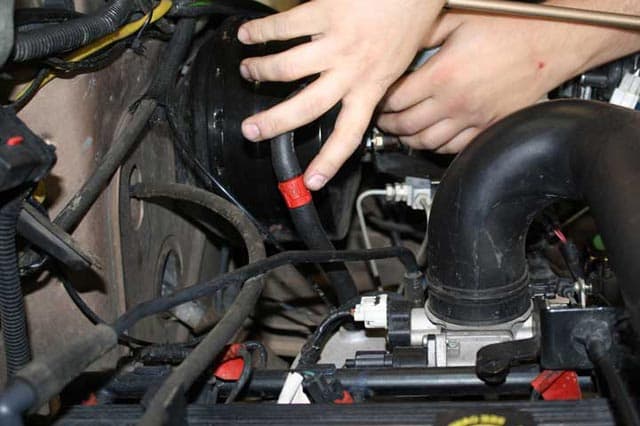
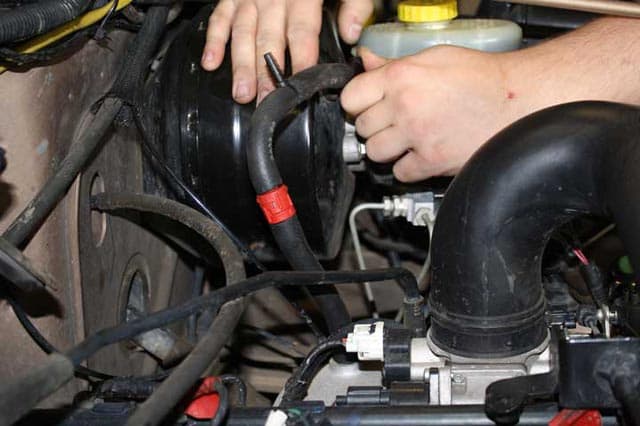
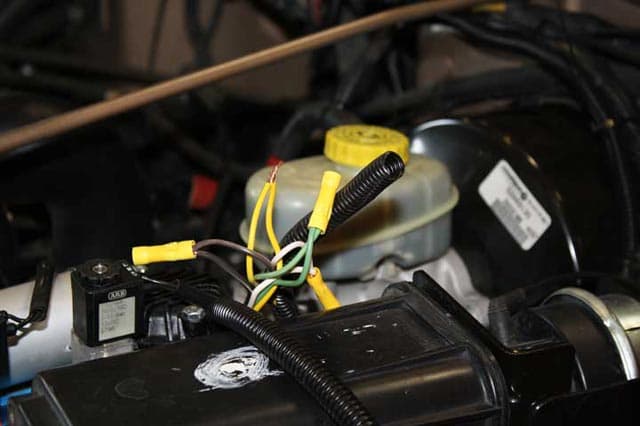
For vehicles with vacuum assisted power brakes, the Roadmaster InvisiBrake features a vacuum line. Eric’s Jeep had vacuum power brakes and required the vacuum line to be installed. According to Roadmaster, this is normal and what will occur in the majority of InvisiBrake installations. For vehicles that feature full-time power braking systems, the InvisiBrake vacuum line is not installed.
 |
 |
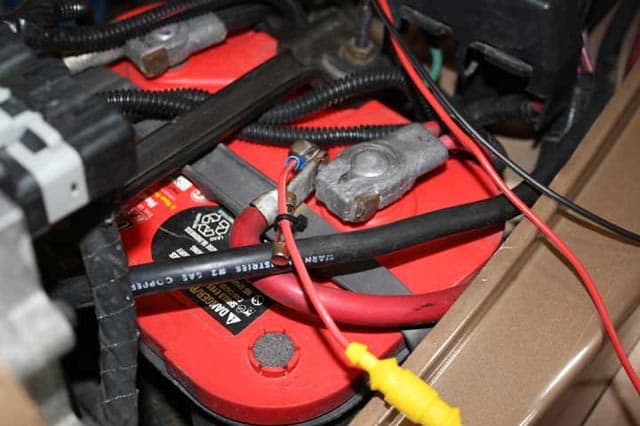 |
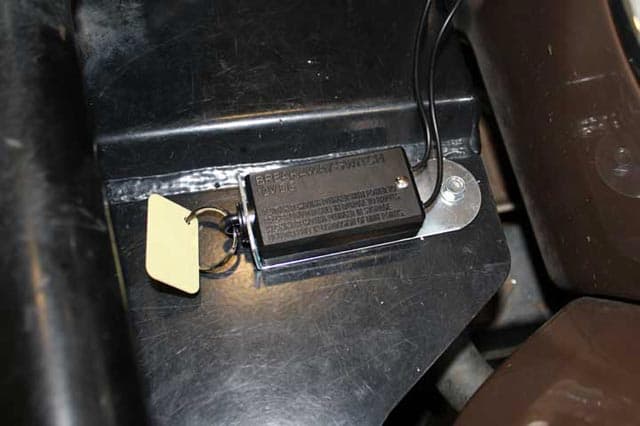
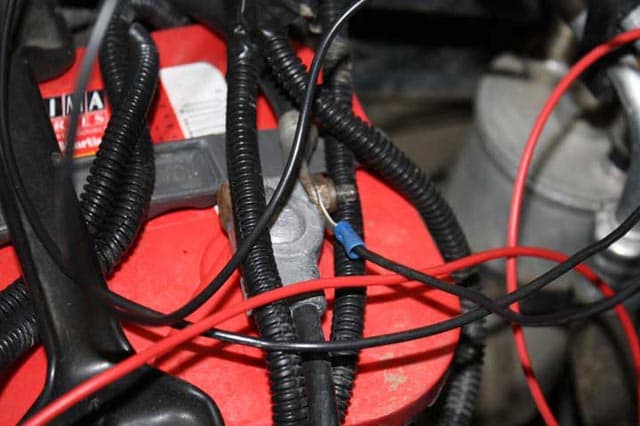
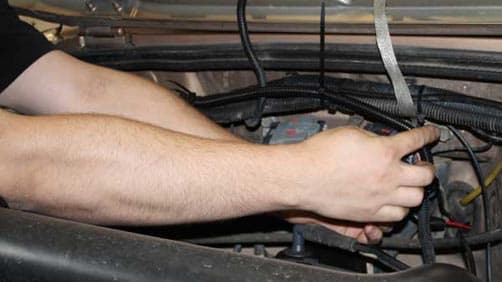
The next step was to attach the four-wire harness to the InvisiBrake controller. Then the brake away switch was mounted horizontally to the front of Eric’s Jeep. The bonded pair of black (ground) and red (power) wires were then connected to the Jeep’s battery.
Roadmaster checked the lighting systems on both Eric’s truck and Jeep to make sure they were functioning properly. This included checking the brake lights, turn signal lights and the running lights on his truck and Jeep. They also tested the light systems with the truck and Jeep connected for towing.
 |
 |
 |
Next the four-wire flat harness was installed upstream of the wiring diodes. InvisiBrake must be upstream from the wiring diodes to properly function and to avoid potentially severe damage to the towed vehicle.
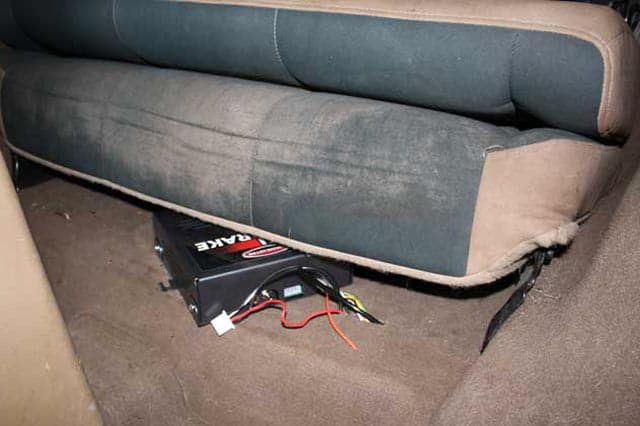
First the Roadmaster install team attached the wire harness to the controller and routed the harness to the vehicle’s aftermarket tow light harness. They used a test light to identify the ground, turn signals and taillight wires. They then attached the controller to the pre-determined mounting location. For this installation, that was under Eric’s driver’s side front seat in the Jeep.
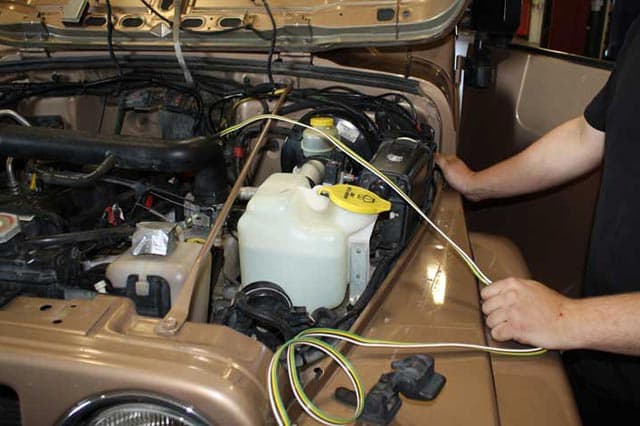
Above: Pointing to the factory drilled holes in the firewall
Step 9 had the Roadmaster installation team installing the wiring harness for the InvisiBrake monitor in Eric’s truck. Not every InvisiBrake installation requires a hole to be drilled into the towed vehicle’s firewall, but some do. Eric’s installation did not. If drilling a hole is necessary, Roadmaster supplies a grommet. Use silicone sealant to re-seal the firewall.
With this step completed, the Roadmaster team reattached the door trim and carpeting over the vacuum line, cable housing and electrical controller wiring to make these aspects of the system “invisible.”
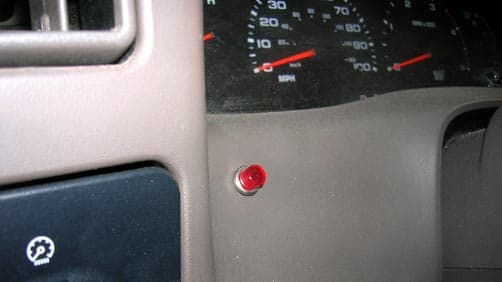
ABOVE: The red light is an indicator light in the truck for the InvisiBrake
With the InvisiBrake installation completed, Roadmaster tested the system to evaluate the brake pressure setting. The InvisiBrake allows you to “dial in” a brake pressure setting to your liking.
Once Eric’s new InvisiBrake had passed Roadmaster’s test, the keys were handed over to Eric for his evaluation. What did Eric think of his new invisible supplemental braking system? Let’s find out.
We followed up with Eric to get his feedback on the new InvisiBrake. Here are his impressions:
 |
 |
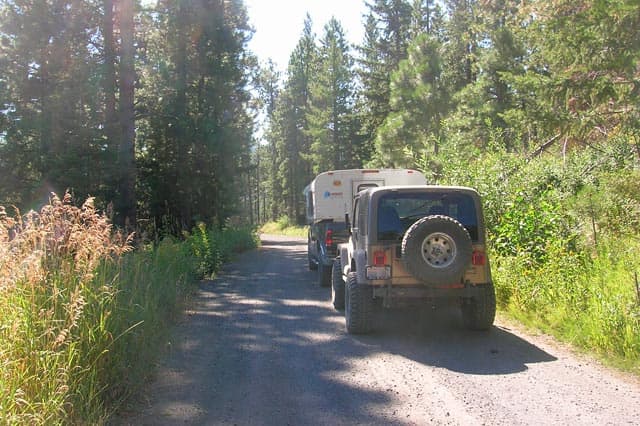 |
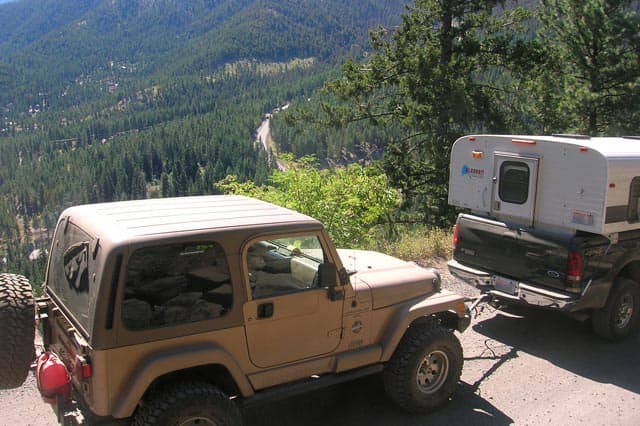
I have been towing a Jeep with my Alaskan truck camper for a long time. I’m used to giving lots of space in front of me to compensate for the poor braking. After the InvisiBrake was installed, I spent the weekend on some nasty trails and driving through what I call, “Whoop-dee-doos”.
Before the InvisiBrake installation, the rig would stop, but it wasn’t well controlled. With the InvisiBrake, I put my foot on the brake and the rig would go through the, “Whoop-dee-doos” like I wasn’t towing at all. I didn’t feel the weight of the Jeep pushing on the truck.
 |
 |
 |
One problem I did encounter was probably a direct result of me taking the rig onto some very extreme off-road conditions. The Roadmaster team installed the InvisiBrake under the Jeep’s front seats. When I was off-roading, a line got crushed by the rocking seat causing the system to stop working.
I contacted Roadmaster and we went through some diagnostics. That’s when I discovered the crushed line. Roadmaster immediately sent me a new line and hydraulic brake actuator which I could position in an area that would be much better suited for my extreme off-roading. Roadmaster invited me back to the factory for the installation, but I installed the new line and hydraulic brake actuator myself.
This time, I mounted the new hydraulic brake actuator behind the driver’s seat, tucked behind the roll bar and mounted to the wheel well and the roll bar. If you off-road with your truck camper, make sure you mount the system in a way that nothing will interfere with the system under off-road conditions.
Since that change, the Roadmaster InvisiBrake system has worked great. I can hardly tell we have the Jeep behind us when I put on the brakes.
Having brakes versus not having a brakes is a safety issue. Using the Roadmaster InvisiBrake is so much easier and better than having that extra weight pushing the truck and camper when we are coming to a stop.
Since I was already at Roadmaster, I also had them add front and rear Roadmaster sway bars to my truck. Now, every time I go around the corner, the truck handles significantly better. The sway bars have made all the difference in the world. I am very happy with both the InvisiBrake and the sway bars.
For more information on the InvisiBrake and other Roadmaster products, visit their website at roadmasterinc.com. Click here for a Roadmaster towing brochure.


