Truck Camper Magazine upgrades from a single 150-watt solar panel to a three-panel 490-watt Zamp solar panel system. Here’s why we made this 226-percent increase in solar panel power, and the difference it makes to our off-grid capabilities and lifestyle. Does 490-watts of solar power make sense?

Starting around 2010, the combination of all-LED interior lighting and solar panels was nothing less than transformative for the off-grid abilities of truck campers.
With LED lighting consuming approximately one-tenth the power and solar panels approaching 100-watts a piece, off-grid power was just no longer a primary concern – especially in comfortable camping weather.
We started to wrap our heads around the LED-solar sea change during our time with a fully-equipped Northstar 9.5 Igloo we borrowed in 2008. With the Northstar, as long as we were careful with the furnace and device charging, we could practically camp off-grid indefinitely with LED lighting and solar power. That was a very big deal 12 years ago.
This situation improved considerably as LED lighting and solar panel quality, efficiency, and cost improved. Most camper brands were all-LED by 2012 and offered at least one 100-watt panel as optional around the same time. Many consumers took things even further by adding more solar panels, experimenting with different LED light types, light colors, and intensities and improving the capacity of their battery banks.
By the time we got our project camper in 2014, changing out the old incandescent bulbs and adding a solar panel system and controller was a no-brainer. Our good friends at Hallmark RV helped us with a supply of their then-recommended bayonet-style LED lights. We installed one in every light fixture in our camper and they have been flawless ever since. What a huge difference quality LED lighting makes.
For solar power, we turned to the company nearly every truck camper manufacturer was using, Zamp Power. Zamp recommended a single 150-watt solar panel and controller. We immediately placed our order and called a friend.
By far the best part of running Truck Camper Magazine are all the amazing people we have met, and the wonderful experiences they have brought to our lives. Early in our truck camping years, we were lucky to meet fellow truck campers, Tom and Pat Emerick.
Tom and I hit it off immediately over a shared passion; electronic keyboards and synthesizers. Not only was Tom the Plant Facility Manager for Allen Organ, but he is something of a legend in the electronic music industry for his work with Rocky Mount Instruments (RMI).
Now you probably have never heard of RMI, but you have heard their electric pianos and keyboards if you have listened to Deep Purple, Yes, Genesis, Funkadelic, Traffic, Elton John, and just about any other major keyboard player in the 60s and 70s. And yes, Tom met and worked with a lot of these legends back in the day.
With the help of Tom Emerick and his sons, Donny and Michael, we installed our existing solar panel and controller in 2015. Having worked on some of the most important products in keyboard history, Tom had no trouble with our solar installation.
The full report of our original Zamp solar panel and controller installation was featured in a two-part series, “Installing a Solar Panel System” and, “Installing a Solar Controller”. Those articles go into detail about the installation and are must-reads for anyone considering installing a solar panel system themselves.
If you’re considering solar, we also recommend Bryan Appleby’s excellent, “RV Solar Systems Charged and Challenged” and, “Solar Panel Roof Rack Install”. As you will see, Bryan was way ahead of the solar curve.
Our single 150-watt Zamp solar panel literally powered Truck Camper Magazine’s off-grid adventures for years. Together with two Group 31 AGM batteries, we were able to charge our computers, phones, and cameras and keep this publication’s electrons flowing.
“What about that time in Everglades National Park when you had to plug into my camper for some generator power? And that time at a dry camping spot when your batteries were sucking wind and you needed Mikeee to save your butt?”
Why is it that I can often hear the voice of Mikeee Tassinari – aka the Grand Poo-Bah of the Northeast Truck Camping Jamboree – in my head? Like those old guys in the balcony of the Muppet Show, he’s always commenting – mid-cranium – even as I write this article! Does anyone else have this problem?
Yes, it’s true. On a few occasions, we ran into difficulties with our single 150-watt solar panel set-up. About once or twice a year, shading trees, clouds, and our increasing power needs conspired to put our batteries dangerously low. On two such occasions, Mikeee Tassinari rescued our rumps with his built-in generator – not that he reminds us of these events. No sir.
After these incidents, we talk about getting a 2,000-watt portable generator. Too big. Too much weight. Too expensive. We won’t use it. A year later we get into another off-grid low-power situation and this discussion fires up again.
You don’t need to tell us we’re nuts. We know.
A short history lesson is in order for anyone who hasn’t been reading Truck Camper Magazine for the past three years. We sold our house and went full-time in our truck camper in mid-2017. A year later a Toyota Camry made quite the impact on our driver’s side. We were okay, but our truck was totaled and the camper was significantly damaged.
We bought a new 2018 Ram 3500 and, over the course of about 10-months, got our camper fixed up. The last part of the camper repair process was a spray-on FlexArmor roof. I detailed the meticulous installation process and reviewed our FlexArmor roof in February. So far, it’s been everything we hoped for. Expensive, but highly recommended.
There is an important catch to getting a FlexArmor roof. You really should have everything you will ever want on your roof prior to the installation. Once the spray-on roof material is applied, it’s a big deal to add solar panels, air conditioners, and other roof-top features.
For this reason, we decided to upgrade our solar panel system. The single 150-watt Zamp solar panel was just enough most of the time, but our power requirements seemed to be creeping up – especially since we went full-time.
After five years of reliable service and rock-solid customer support, there was no question that we wanted another Zamp solar panel. Even better, Zamp Solar is located in Oregon. When you call their phone number, an English speaking human in Bend picks up the phone and actually knows what he/she is talking about. What a concept.
Lucky for us, Zamp was displaying at the annual Elkhart Open House. We talked to the Zamp team about what we wanted to do. Right on cue, a Zamp team member walked out of the building with us, climbed our camper’s ladder, and suggested a solution. Zamp products are not the least expensive, but their products are top-notch and they offer some of the best service we’ve experienced in the RV industry. Truly outstanding.
The original plan was to remove the front driver’s side Zamp 150-watt solar panel from mid-2015 and replace it with two Zamp 170-watt solar panels; one on the front driver’s side and one on the front passenger’s side. That would take us from 150 to 340-watts of solar.
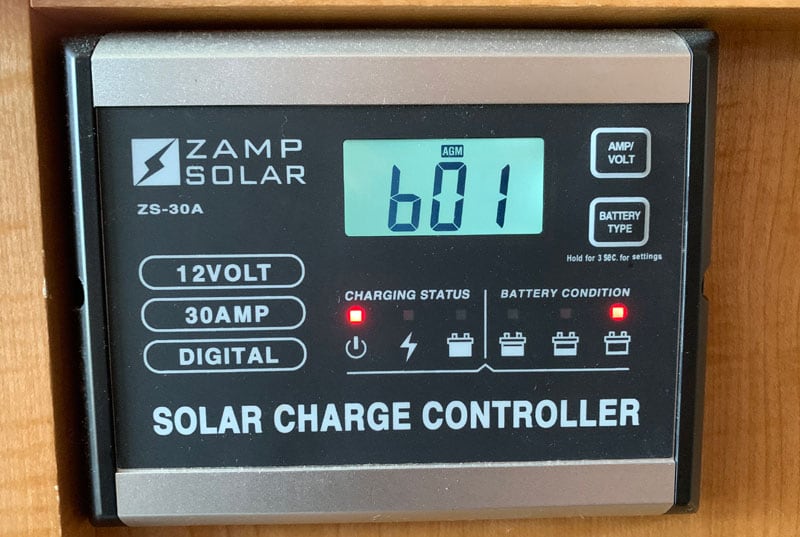
Even better, our existing solar controller from 2015, a Zamp ZS-30A, is rated for up to 510-watts. Leaving the ZS-30A in place, we could change to the two 170-watt Zamp panels with solar controller capacity to spare. With that plan, I ordered the two 170-watt panels and started dreaming about the difference 190 additional watts – a full 126-percent increase – would provide.
Unbeknownst to yours truly, Angela was also dreaming of power. Only Angela wanted even more. “If the Zamp solar controller can handle up to 510-watts, why don’t we keep the original 150-watt panel? We have the real estate on the roof and, with the two new 170-watt panels, we would have 490-watts!”
Under her seemingly coy proposition, I could hear something else. Something far more compelling, and irresistible. With that kind of wattage, we could rule the galaxy as husband and wife! Nobody would dare challenge Truck Camper Magazine with 490-watts of solar power. Muh-ha-ha-ha!
When my eyebrows uncurled and hands stopped wringing, we had our typical, “Does that really make any darn sense?” conversation. You know, the same debate that talks us out of a portable generator once or twice a year. After all, we were getting by with one 150-watt panel. Why would we possibly need 490-watts?
“With the upcoming FlexArmor roof installation, we have one shot at this. Besides, who knows what we might want in the future? You’ll be happy we have 490-watts.” Angela can be extremely convincing when she wants to be.
Zamp shipped the two 170-watt solar panels, a triple-port roof cap, and required wiring to D&H RV in Apex, North Carolina. Prior to our arrival, we were in the Northeast visiting family.
On our way south to Florida for the winter, we would stop at D&H RV Center for the solar panel installation. Then we would head for FlexArmor in Green Cove Springs, Florida for the roof coating. In the process, we would capture pictures and video for future Truck Camper Magazine content.
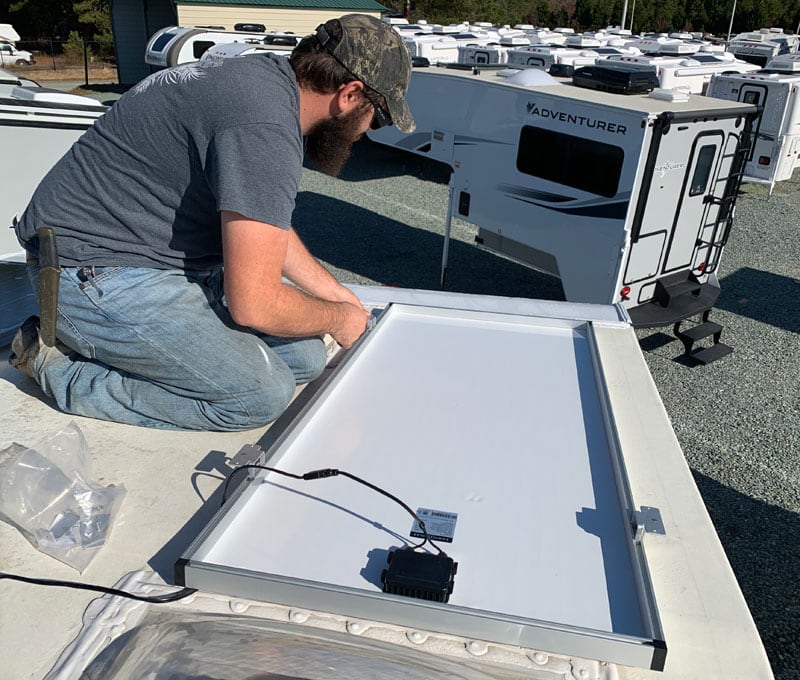
Above: Josh Michels installing the second 170-watt Zamp solar panel at D&H RV Center
At D&H RV Center we worked with Josh Michels. He left the original 150-watt panel right where it was, put one of the new 170-watt panels on the front passenger’s side, and the second 170-watt panel on the rear passenger’s side. With minimal adjustments, we worked out a location for the second panel that would be out of the way.
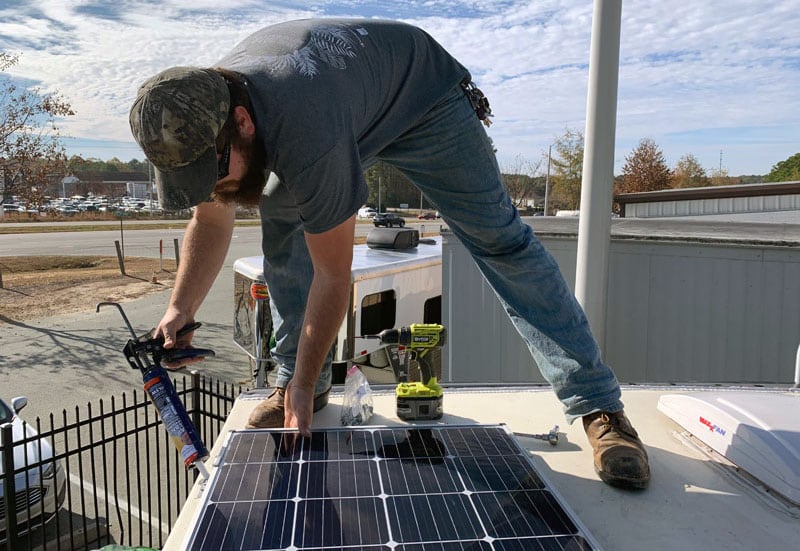
This was not Josh’s first rodeo installing solar panels and he made quick work of it. Since we were getting the FlexArmor roof installed about a week later, he just “tacked” the wiring with Dicor self-leveling sealant. For the same reason, a minimum amount of sealant was placed on the solar panel brackets.
Above: All three Zamp panels installed with tack caulking – the roof is now ready for FlexArmor
This entire installation would be removed – including the solar panels, wiring, and hardware – by the FlexArmor team. In fact, nearly everything on the roof would be removed and subsequently reinstalled during the FlexArmor installation process. To understand how and why that happened, check out the FlexArmor install and review.
The solar panel installation at D&H RV Center, removal by FlexArmor, and reinstallation by FlexArmor went off without a hitch. For the re-installation, FlexArmor used their own proprietary solar panel mounts designed exclusively for their heavy-duty roof coating system. The FlexArmor solar mounts are easily the most robust I’ve ever seen.

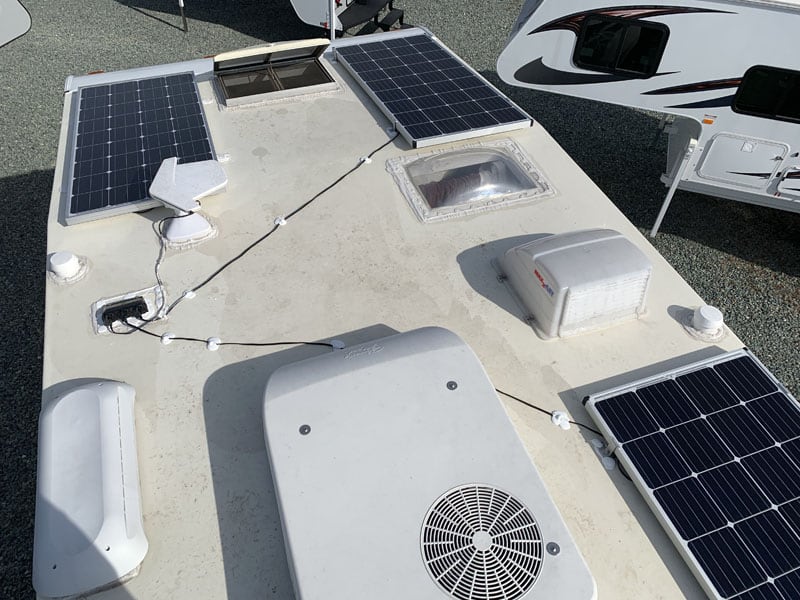
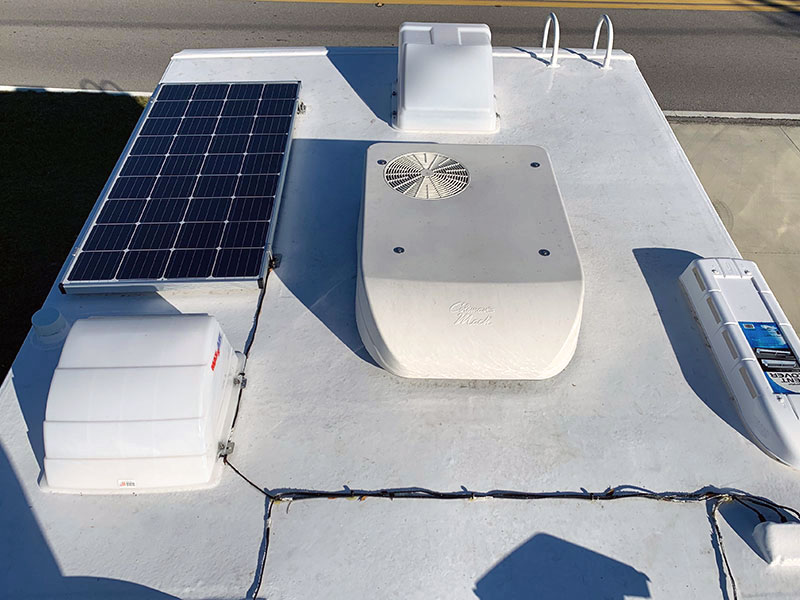
Above and below: The complete solar system (front and back of our camper) with the new FlexArmor Roof
So the big question is, what’s it like to go from one 150-watts of solar to 490? In a word, incredible!
When camping off-grid, we routinely check our solar controller to monitor the status of our batteries and see how much power we’re pulling from our panels. With our single 150-watt panel, it wasn’t unusual to see our batteries approaching 12.1 or even 11.9 at the end of a day.
During a typical workday, we tend to run the Fantastic Fan, intermittently operate the water pump, and charge our laptops and phones. We both have 12-volt chargers for our MacBook Pros, and are careful to only charge one laptop at a time. With that approach, we muddled through for years on one panel. It worked, but the battery levels could get uncomfortably low.
All of that changed with the 490-watt three-panel set-up. Now, if the sun is shining, it’s not unusual to see our solar controller read 14 or higher. We normally would only see a reading that high when we’re plugged into shore power. We certainly never saw 14.4 off-grid with one panel. Now we do.
The best part of this level of solar power is that we can both be charging our laptops with seemingly minimal effect on the battery’s charge or level. Angela’s older computer charges better on our 600-watt Zamp inverter. That does impact the charge somewhat, but not enough to cause concern.
The weak point in the chain is now our Group 31 AGM batteries. The temptation is to look into lithium, but we are waiting to hear from Zamp about the lithium batteries they recommend with their systems. We also want to make sure the rest of our electrical system is lithium compatible, and up to the task.
A few months after the initial Zamp solar panel installation, we did have a problem. One mid-morning in mid-February, we suddenly got a burning plastic smell in our camper. At first, we thought it might have been from a truck passing on the road about 50-yards away, but the smell quickly intensified.
After searching around the unit for signs of trouble, we quickly sniffed out the issue. A 20-amp fuse had blown in our fuse box. The plastic housing was actually slightly burnt, which explained the smell. A quick whiff of the fuse eliminated any doubt of the odoriferous origin.
At the same time, we were no longer getting any solar panel charges to our batteries. With the help of Joseph Orcelletto, Technical Services at Zamp Solar, we were able to diagnose the situation almost immediately.
Above: This error code on the Zamp controller means the charge controller can’t see the battery bank
When we had just one 150-watt solar panel, 12-gauge wiring and a 20-amp fuse between the controller to the batteries were fine. When we upgraded to 490-watts of solar, we needed 8-gauge wiring and a 30 or 40-amp fuse.
With Joe’s direction, we purchased 8-gauge wiring and a 40-amp fuse from a nearby Napa Auto Parts. The next morning, Mikeee Tassinari and Ray Fair helped us remove the old wiring and install the new 8-gauge wiring and 40-amp fuse. Yes, Mikeee saved our butts again, with help from Ray.
The lesson from this incident is simple. If you upgrade your solar panels, make sure you take into account the gauge of the wiring and related fuse(s). We overlooked this now obvious weak link, and it caught up with us.
If we were not running a magazine from our truck camper, I am 100-percent positive that our single 150-watt Zamp solar panel would be plenty. For running LED lights, running the water pump, heating the camper in the mornings, and charging phones, tablets and the occasional camera battery, one 150-watt panel and two Group 31 AGM batteries is enough.
That stated, not everyone is comfortable with just enough. Some folks understandably want more than they need – just in case. Like us, others may use power-hungry appliances on the road like laptops and inverters to power hair dryers and coffee makers. For those folks, more solar panels and bigger battery banks make sense.
We are thrilled with our new 490-watt Zamp solar panel system and the FlexArmor roof installation that prompted it. I can’t see us ever needing more solar panels. I can see us wanting a higher capacity battery bank, but not yet. If I had to guess, our next power system upgrade will be lithium batteries. Hey Zamp, what Group 31 lithium batteries do you recommend?


