
Finished Bathroom Skylight
FlexArmor is the most robust sprayed-on RV roof system on the planet. Billed as, “…the last RV roof you’ll ever need”, it comes with a lifetime warranty. For this review, Truck Camper Magazine gets a FlexArmor roof from RVRoof.com and asks the big question; is FlexArmor worth the cost?
Editor’s Note: After this article was published, TCM readers wrote in with questions about our roof’s coating. Here are the answers: Your FlexArmor Roof Questions Answered.
Nearly every RV roof manufactured today is made with a layer of EPDM or TPO membrane and Dicor self-leveling lap sealant to seal the roof’s edges, vents, pipes and screw heads. Applied properly, this is a highly-effective combination resulting in a waterproof roof or truck campers, travel trailers, fifth wheels and motorhomes – at least for a while.
Once an EPDM or TPO roof sealed with Dicor sealant leaves the factory, it is immediately exposed to the sun and elements. Over time, sun light, wind, rain, heat and cold dry out Dicor sealant allowing water to penetrate. This can take years but, without routine maintenance, leaks are inevitable.
When water gets into an RV roof, trouble follows. The first concern is wood rot. The great majority of RVs – even those framed in aluminum – have plywood in their roofs and floors. As a rule of thumb, anywhere you can walk on an RV (roofs and floors) is plywood.
The other concern from water intrusion is mold. Even if your roof is fiberglass, or otherwise contains no wood, a water leak can lead to mold. We once discovered a roof leak in our camper only after experiencing the sore throat and watery eyes mold exposure can trigger.
Every RV tech worth their weight in turnbuckles will tell you that a leaky roof can destroy an RV. Worse, it’s often a surprise to the RV owners. They have no idea there’s a water leak until a large section of the roof (and usually a side wall or two) have started to rot and mold. It happens.
This is not to say that all EPDM and TPO roofs sealed with Dicor are doomed. Far from it. With proper routine inspections and maintenance, EPDM and TPO roofs sealed with Dicor can last indefinitely. The problem is that too many RV owners fail to inspect their roofs, much less replace aging Dicor and repair possible seal breaks. Routine seal maintenance is the key.
Our 2004 Alpenlite project camper was in dire need of roof inspection and seal maintenance when we took ownership in mid-2014. Knowing how critical roof seals are, we planned a thorough inspection and seal replacement in the first weeks of having the unit.
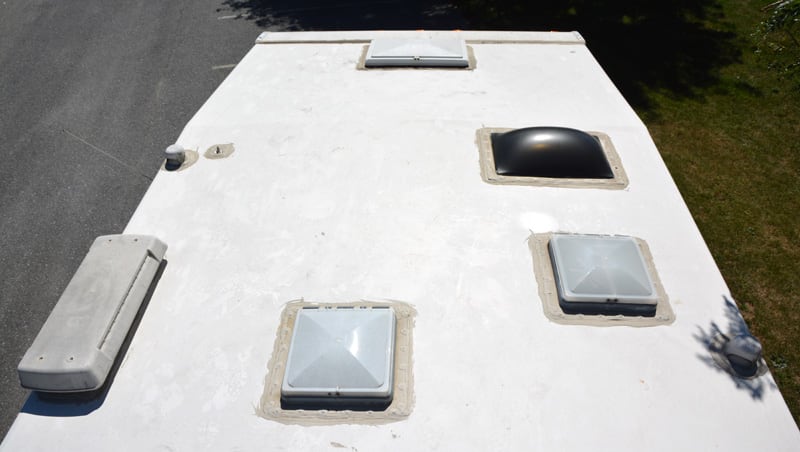
Above: Our camper’s original roof when we first got it in 2014
We detailed the process of inspecting and repairing our camper seals with the cleverly titled article, “How To Inspect and Repair Camper Seals”. That write-up and photography remains recommended reading for anyone approaching a significant seal inspection and repair project.
Suffice it to say our whole-camper seal project was a time and labor intensive process. Over the course of a week we gained a deep respect for just how involved RV seal maintenance can be. It also showed us just how easily older roof seals can dry out, become damaged and allow water to penetrate.
In an attempt to create a better and longer lasting roof seal, we used Sikaflex 715 self-leveling sealant. A wide variety of Sikaflex sealants and adhesives are in use throughout the RV industry and are generally celebrated for their superior qualities.
In the four years that followed, the Sikaflex 715 performed flawlessly. Was it better than Dicor? It’s hard to say now that our long-term test was cut short by a Camry, but we were impressed with the Sikaflex 715 and never found an issue in our monthly roof inspections.
In addition to the Sikaflex 715, we also experimented with Eternabond, especially for areas where the Sikaflex wasn’t appropriate. A perfect example of this was the metal roof rack on our camper. At one point we discovered that the seams connecting roof rack tubes channeled water into our unit. We used Eternabond to wrap those seams and stopped the leak.
We also kept a roll of Eternabond on hand for any possible roof punctures. While this never happened, it’s not unusual for a truck camper’s roof to encounter a tree limb that penetrates the EPDM or TPO membrane. If you have a roll of Eternabond, you can tape that puncture or tear in the field. Best of all, you probably won’t have to worry about that puncture or tear again. Eternabond it, and it’s done.
Up to our car accident in July of 2018, we were very confident about our Sikaflex 715 and Eternabond roof seals. We had removed the original factory Dicor sealant and applied SikaFlex 715 self-leveling sealant. Having done the work ourselves, we knew that the job had been done carefully and checked the roof seals at least once a month, if not more.
The accident totaled our truck and damaged the structure of our camper. Unfortunately, the structural damage to our camper extended to our roof. This meant our roof needed to be replaced as part of the structural repair to our camper. So long, Sikaflex 715. Bye-bye, Eternabond.
When we got our camper back from the repair facility, we were not impressed with the new roof. The repair company had applied an inappropriate roll-on sealant that almost immediately peeled off leaving exposed roof screws and roof seams. Upon closer inspection, the whole roof job appeared rushed and inadequate.
To address our immediate concerns, we bought a few tubes of Dicor and sealed the roof’s seams and screws properly. We would have used Sikaflex 715 again but we were already thinking about a more permanent plan. We would get a FlexArmor Roof from RVRoof.com and be done with it. No more seams. No more screws. No more sealant.
The first time we ever heard of FlexArmor roofs was at the 2014 Mid-Atlantic Truck Camper Rally. Fellow truck campers, Dave and Cindy Gilbert, had the roof coating on their Northern Lite 10-2. They were very satisfied with the work and results, and were looking forward to years of stress-free ownership.
The next truck camper owner that we encountered with a FlexArmor roof was Duncan Crawford. He had bought a brand new 2015 Northstar 12STC and taken it directly to RVRoof.com for a FlexArmor coating. He, too, was 100-percent satisfied with the results and excited to have his brand new roof and camper protected.
Before we booked our appointment with RVRoof.com, we contacted Dave, Cindy and Duncan and asked about their experience with their FlexArmor roofs. They all raved about their FlexArmor roofs, now six and five years old respectively. No leaks. No required maintenance. We were sold.
At $170 per linear foot, being sold on a FlexSeal roof is no small consideration. Our camper’s roof is 18-feet long (11-foot floor plus 7-foot cabover) making the cost of our roof application $3,060, plus tax.
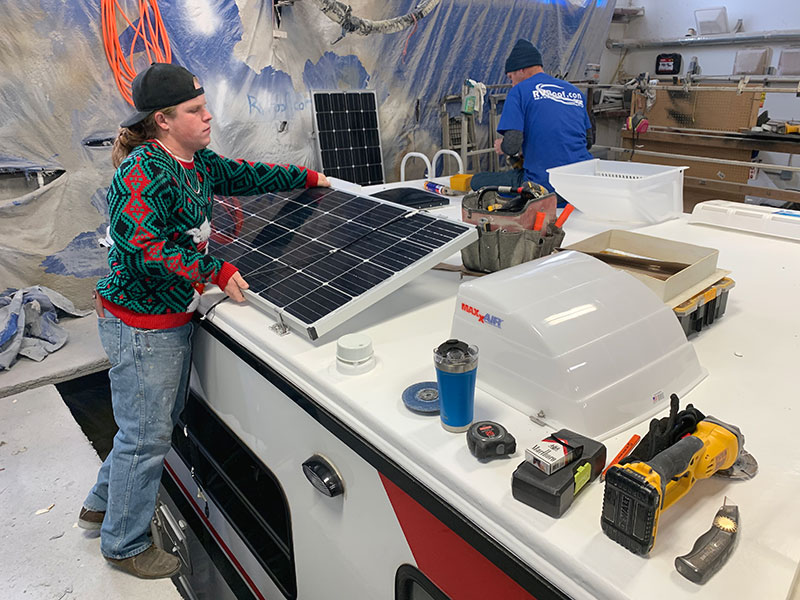
That price does not include any roof repairs that need to be made should the installation team discover rotted wood or other roof issues, nor does it include the special brackets required if you have solar panels. For example, we had three solar panels on our roof adding an additional $200 for their proprietary brackets.
Thankfully, our roof structure was in good condition and did not require any repairs. Still, the total cost of our FlexSeal roof, solar panel brackets and tax came to $3,488.20. Even with a media discount, our final cost wasn’t something any of us would take casually.
The RVRoof.com team hears price objections all the time, and has some good answers.
First, many of their roof customers are insurance jobs. An RV roof has been damaged and the owner and insurance company has determined that it’s cheaper to get a FlexArmor roof than a completely new RV roof installed. It’s not unusual for a new EPDM or TPO roof to cost $5,000 or more. The labor hours alone are in the thousands. The FlexArmor roof is not only considerably less, but it’s arguably better. Plus, a FlexArmor roof comes with a lifetime warranty.
Second, if you invest tens of thousands (or more) in an RV, investing a few thousand to ensure that the roof never leaks is a no-brainer. This is especially convincing for anyone who’s owned a RV with a roof leak. Even better, you never have to risk your neck getting on the roof to inspect and repair the seals. For older RVers, or folks who just don’t want to constantly worry about their roof seals, getting a FlexArmor roof can be a very easy decision.
I’ll add our own reasons to this list. We live full-time in our truck camper. It’s our home. While I was confident in our Sikaflex 715 and Eternabond sealed roof, we simply didn’t have the time to go through that extensive down-to-nothing and seal-it-properly process again.
We wanted that sealed roof confidence back. It’s a horrible feeling to be in a pouring rain storm worrying that your roof might be leaking. The considerable cost was hard to swallow, but well worth it in the long term. I wouldn’t call it a no brainer, but we made the decision to proceed and haven’t regretted it for one second since. Let it rain.
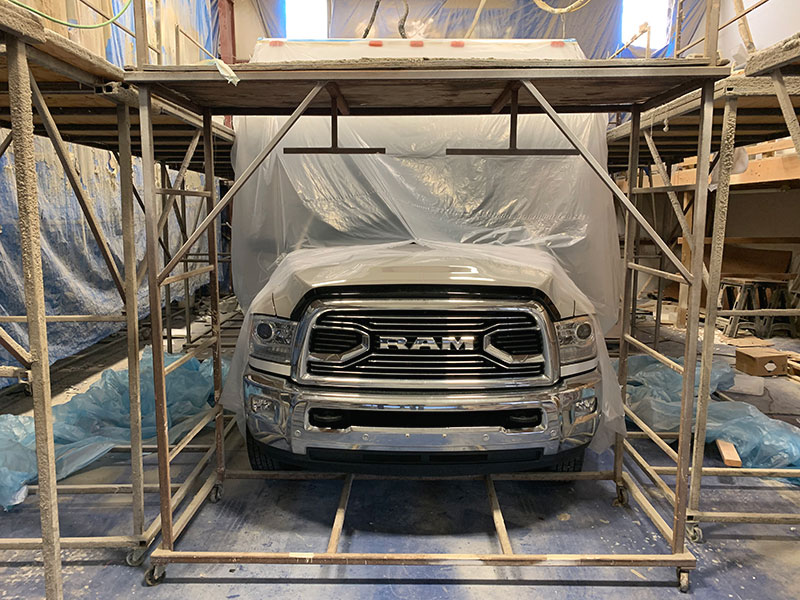
Before we arrived at RVRoof.com’s headquarters in Green Cove Springs, Florida, I thought they just removed the existing sealant, removed the roof components, sprayed the FlexArmor material on, reinstalled everything and were done. That’s it, right?
As it turns out, not by a mile. The process of preparing our roof, applying the two coatings (FlexArmor and white UV coating), and the final finishing process was an amazingly detailed and extremely labor intensive two-day event.
We observed the application from start to finish and would love to reveal exactly what they did at each stage of the process, but we can’t. The RVRoof.com ownership team was very clear with us about not revealing specific details about their process or their materials. What we can do it outline the basics of the process. Let’s begin.
The first step was to remove all the roof components. Knowing how tenacious Dicor and other self-leveling sealants are to remove, we envisioned this part of the process taking many hours.
What I hadn’t anticipated was the RV Roof team simply cutting the roof membrane with a utility knife and taking off the sealant with a cut portion of the membrane. It was a solution Alexander the Great would have approved.
Since the applied FlexArmor is 3/16-inch thick and completely seals the roof, the RVRoof.com team doesn’t need to worry about damaging the EPDM or TPO.
In fact, they cut the EPDM or TPO membrane away from the edges of the entire camper roof’s perimeter and around every component. Not only did this greatly speed the roof’s preparation process, but it also improved the final FlexArmor application.

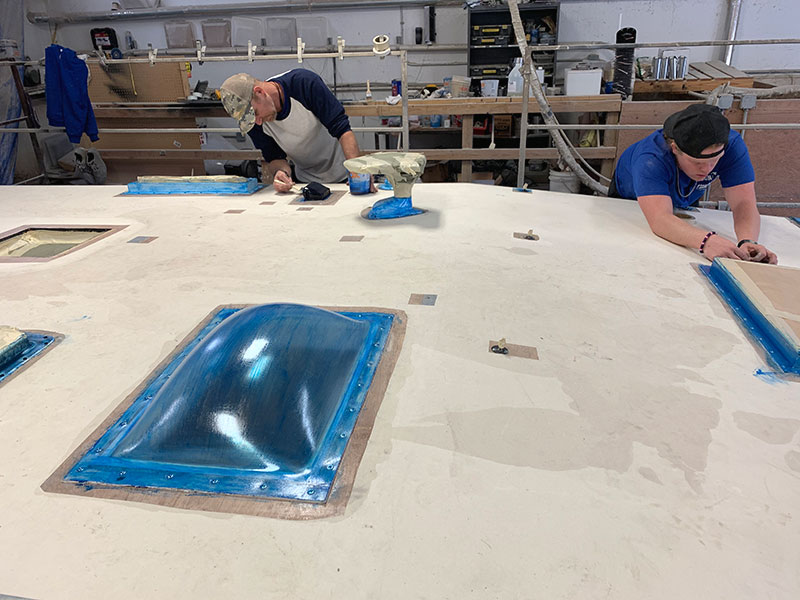
Section by section, component by component, the team made quick work of the Dicor. Once the sealant was cut out, they used various methods to sand and scuff the remaining surfaces.
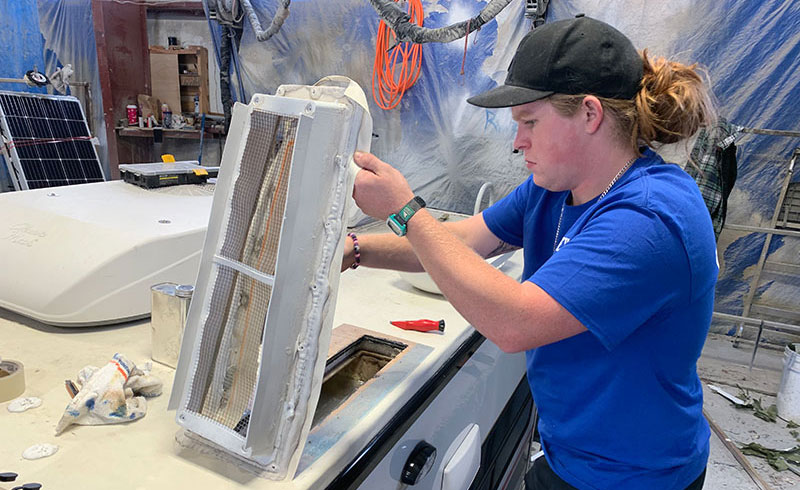
Then they literally removed every screw holding down the bathroom skylight, front hatch, and various vents and replaced them with flat head stainless screws.
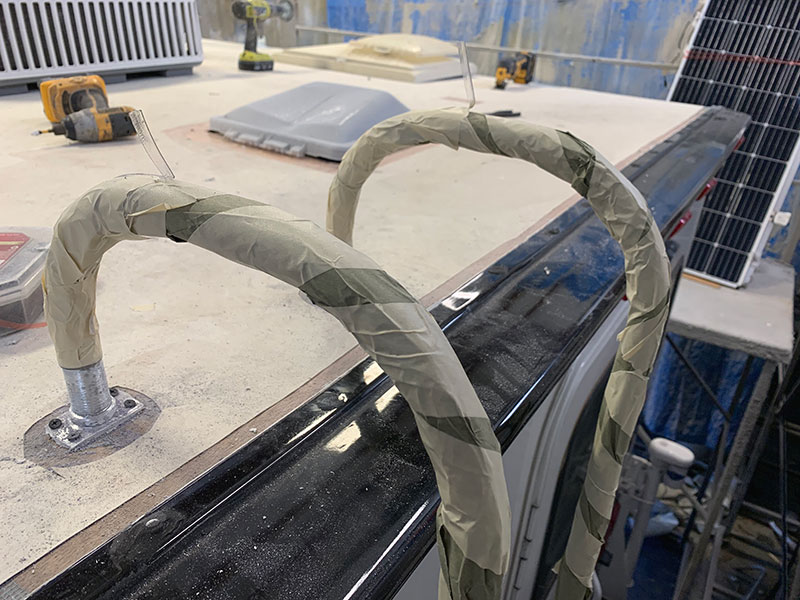
Above: The rear ladder with the wire embedded masking tape
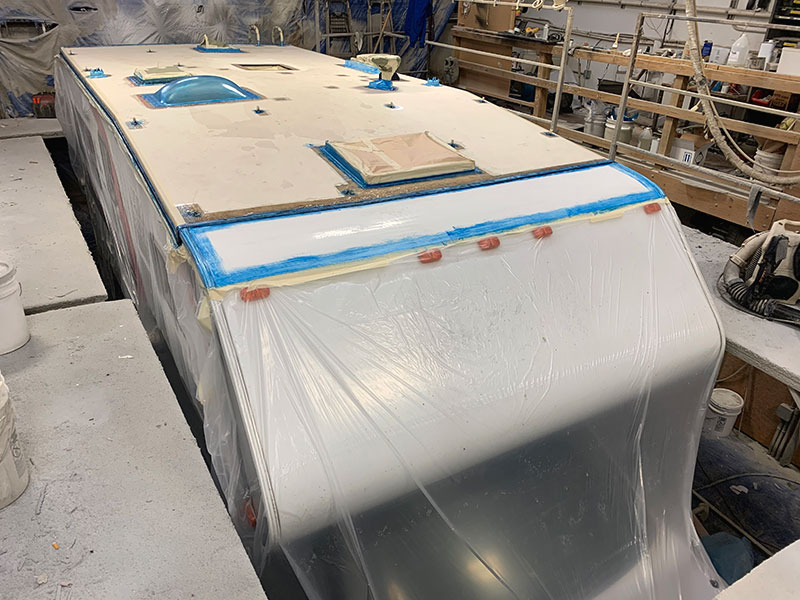
Other surfaces and items, including the rear ladder, were taped off with a wire-embedded masking tape. This allows the team to apply the FlexArmor and then pull the wire-embedded masking tape for a clean line. This same wire-embedded masking tape was applied around the perimeter of the camper to create a clean line when the FlexArmor had cured.
During this time RVRoof.com’s proprietary solar brackets were installed. These brackets are specifically designed by RVRoof.com to work with the FlexArmor coating and keep the solar panels the right distance from the final coating. I wasn’t permitted to photograph the solar brackets, but they are more robust than the brackets they replaced and appear very well made.
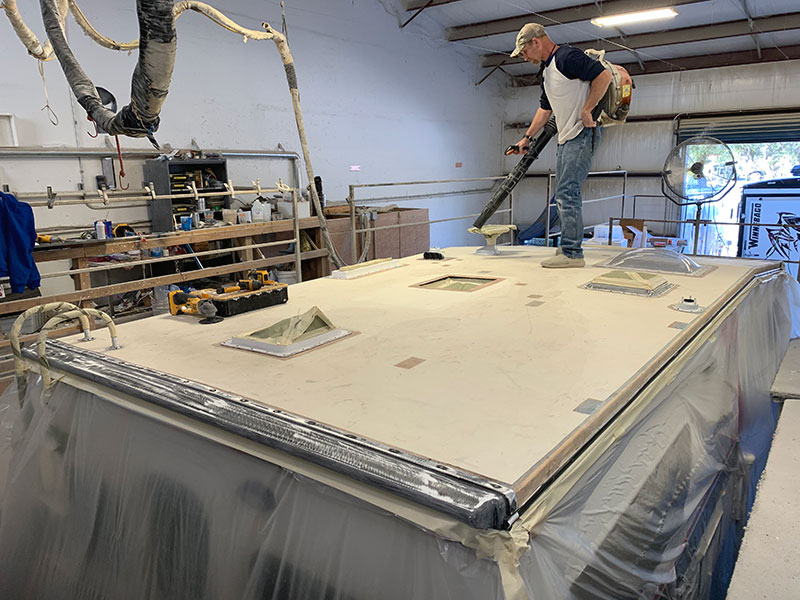
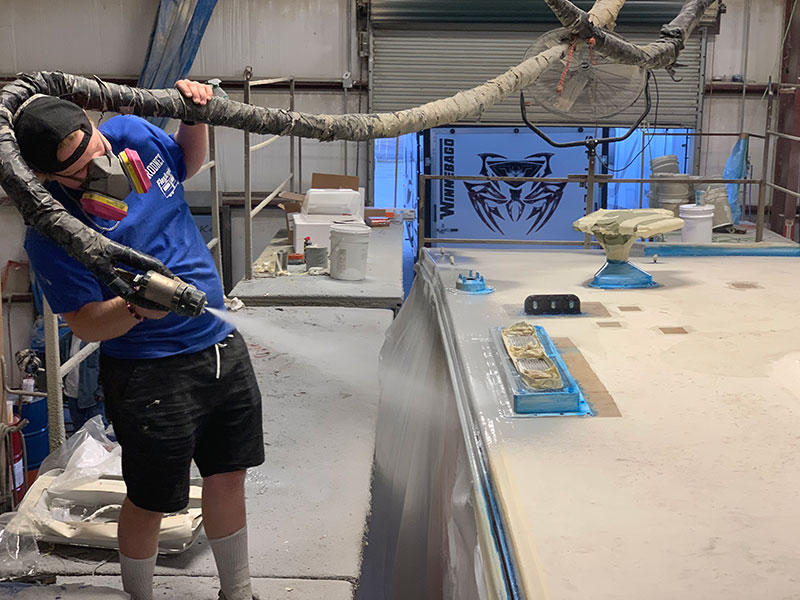
With every removable roof component removed, every surface prepared and the wire-embedded masking tape installed, the team used a leaf blower to remove the sanding shavings and other debris. Now they can spray on the FlexArmor right? Not yet.
All of the metal and plastic components were then brushed and treated with a chemical the team did not want me to disclose. All I can say is that the chemical brushes on blue in color (so they can see where it was applied), and improves adhesion with the final FlexArmor coating.
The above processes took two people about four hours. The roof was now cleared and fully prepped for the FlexArmor material application. As it was explained to us, each step of the roof prep process was the result of something they learned about the process along the way. They don’t add a step unless it’s needed.
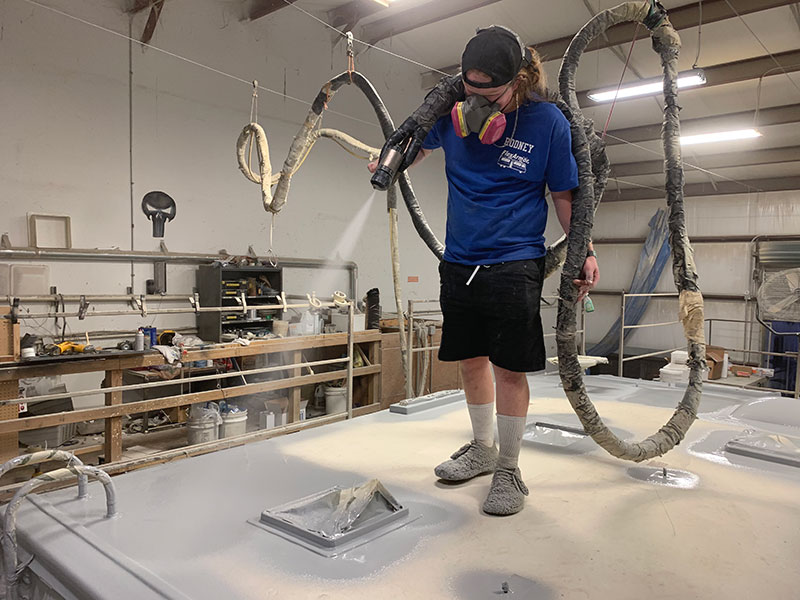
The FlexArmor application itself took about a half hour. The lead team member put on an automotive painting respirator, some fantastically FlexArmored shoes, and went to work. Seriously, the FlexArmored shoes would be a huge hit if RVRoof.com ever needed a side business.
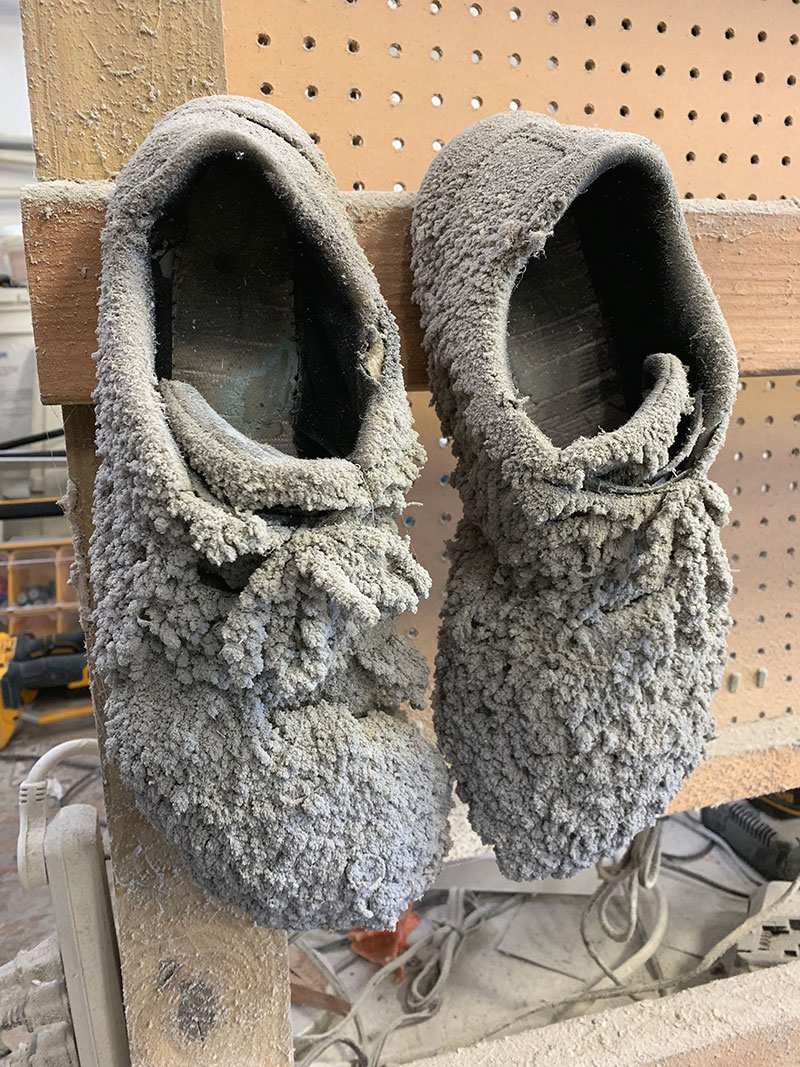
Above: The FlexArmored shoes
The FlexArmor application started with the perimeter of the camper’s roof and then moved onto the areas surrounding each roof component.
He was very calculated with the amount of coating applied, the angle of the spray, and how the swigs were feathered. There’s definitely an art to the FlexArmor application technique.
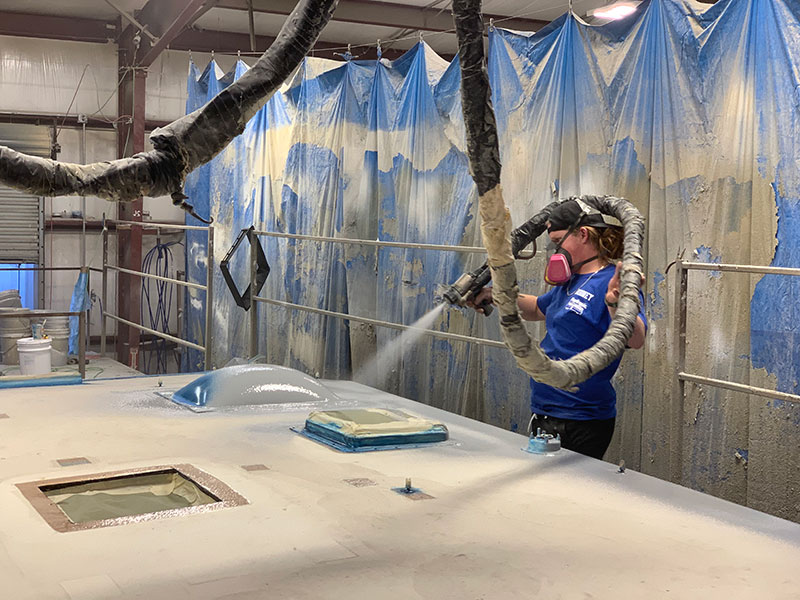
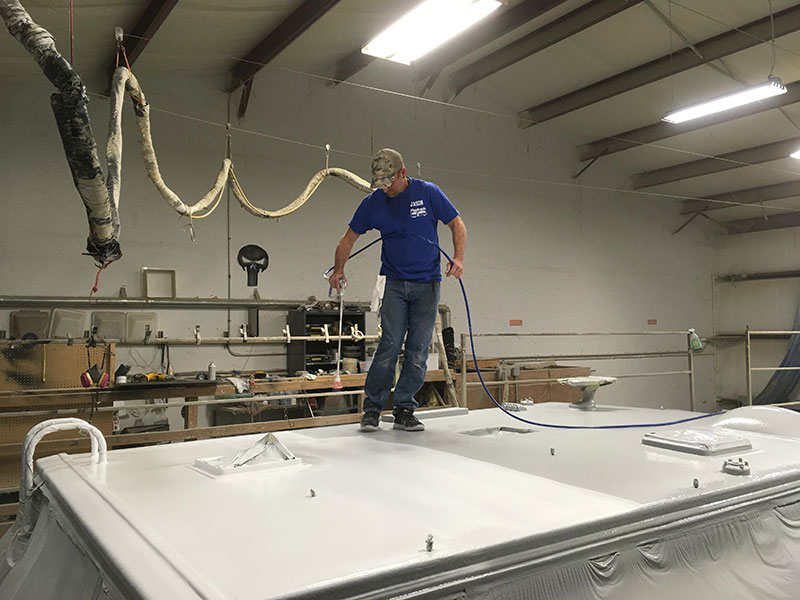
With the perimeter and components coated, he covered the larger areas of the roof.
When that was completed, he made another pass over the entire roof. We later learned this was a beauty pass to make it look uniform and build the final material thickness.
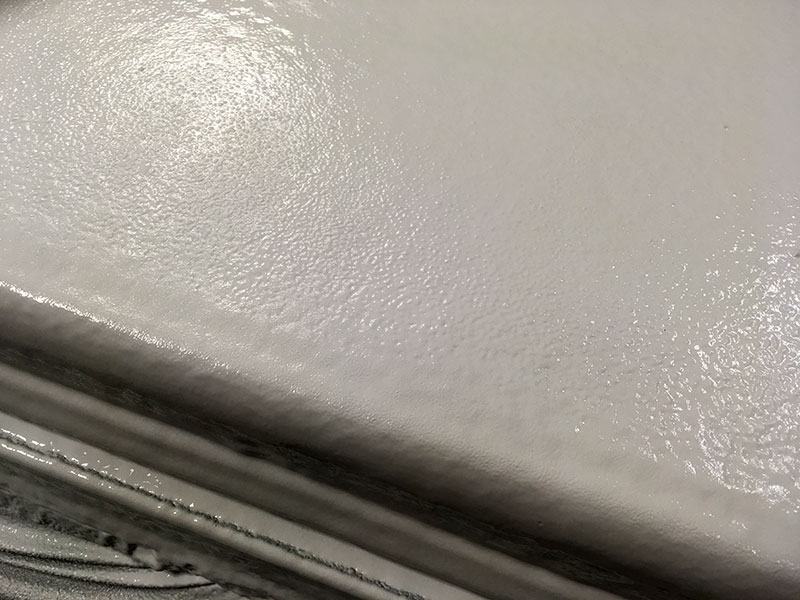
Next it was time for the UV coating. Without the UV coating, the FlexArmor will turn from grey to green with exposure to the sun. The UV coating makes the roof bright white – like freshly fallen snow.
One of the more popular selling points of the FlexArmor system is that you can jump up and down on a FlexArmor treated skylight and it won’t break.
And before we could say, “We believe you, but please don’t do that to our camper”, there he was jumping up and down on our window skylight. He had absolutely no hesitation or fear that the skylight would break.
It was equally painful and amazing to watch this full down adult jumping up and down repeatedly on our skylight. I kept expecting him to crash into our shower below, but he just continued to bounce. Just a few minutes after the FlexArmor had been applied, it was holding up to this guy jumping on the skylight. Holy cow!
Thankfully, he stopped. He then proceeded to complete the UV coating and jump off the roof. At this point in the day it was getting dark outside. The team cleaned and put away their tools and headed home. Good night.
The next morning we walked in first thing and found the team already at work reassembling everything onto the roof. We also discovered the lead sporting an outrageous Christmas sweater. Now it was early December so this wasn’t exactly out of place, but it was quite shocking this early in the morning. Merry Christmas!
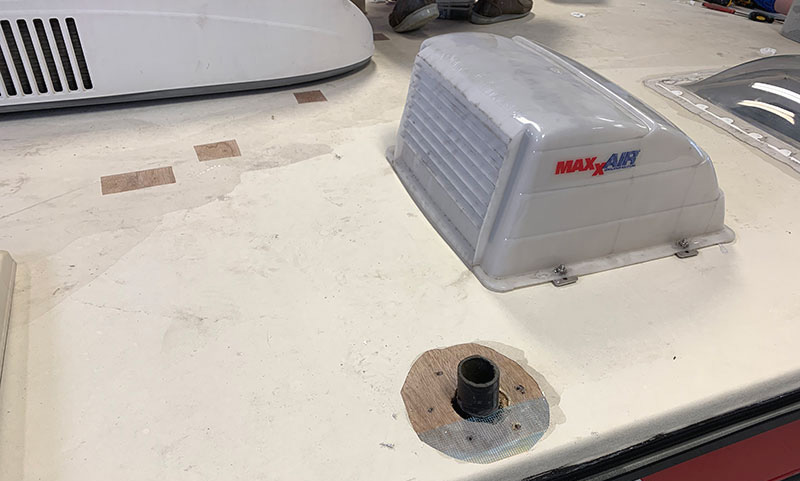
The vent cover, refrigerator vent cover, vent pipe covers were all replaced with brand new covers. This is a nice bonus for anyone getting a FlexArmor roof – all new covers front to back.
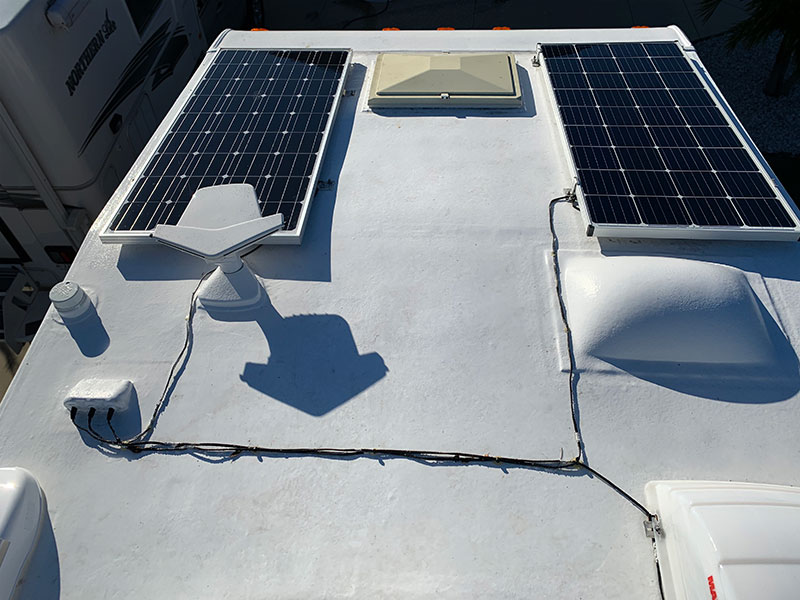
Then the solar panels were attached to their solar brackets. Then the solar wires were run to the solar junction box, arranged for efficiency, and attached with a two-part epoxy they have found to be particularly effective.
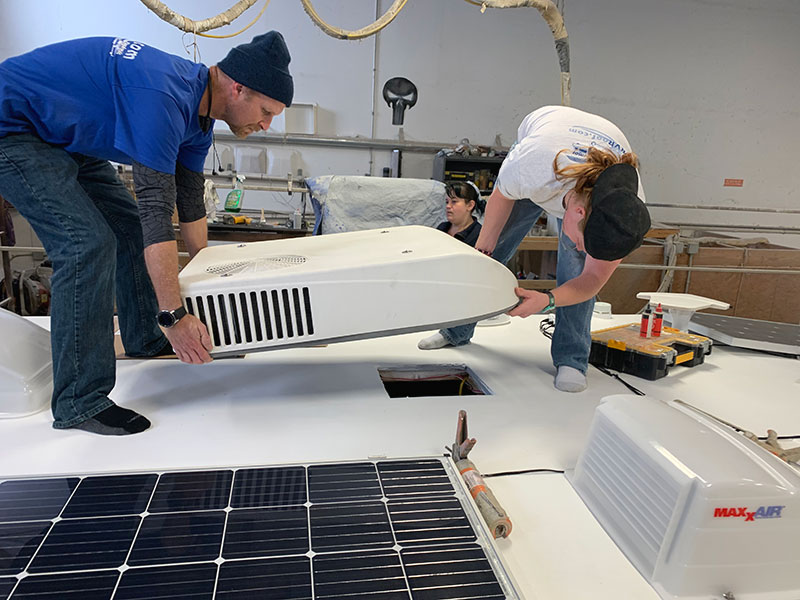
Next, the air conditioner seal was also replaced and improved with a proprietary sealant RVRoof.com asked us not to disclose.
Of everything involved in the FlexArmor installation process, nothing surprised us more than the last detail.
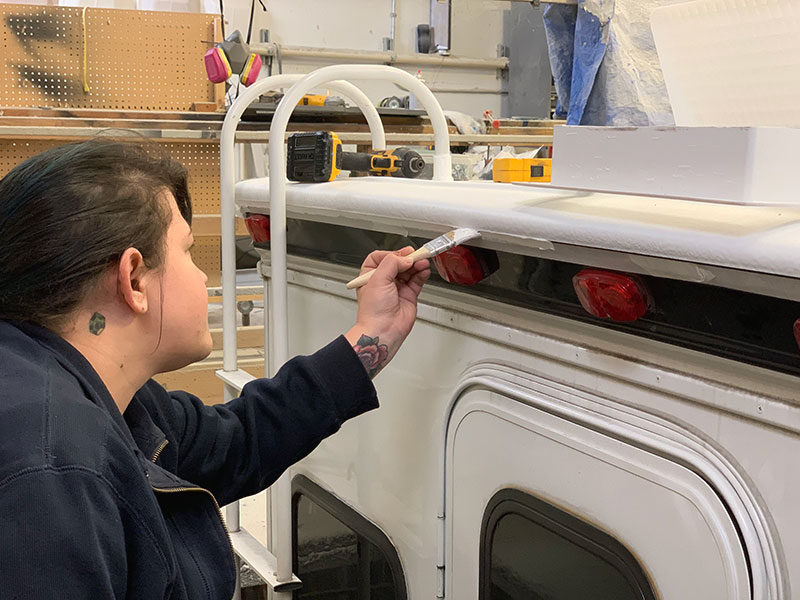
A third team member literally hand painted the downward-facing edge of the FlexArmor coating with the white UV coating. This was detailed work that took her the better part of two hours to complete. Along the way she looked for any place the UV coating had missed and touched it up.
After watching the RVRoof.com installation team for the better part of two days, we had absolutely no doubt about the quality of their work, materials, and process.

Above: A trailer that was just sprayed in the spot next to ours
We also saw them working on another RV in the next bay and can confirm what they did for our camper wasn’t just for us. They do this level of work everyday. It was truly wonderful to see a team care so much about the quality of their work.
Finished Bathroom Skylight
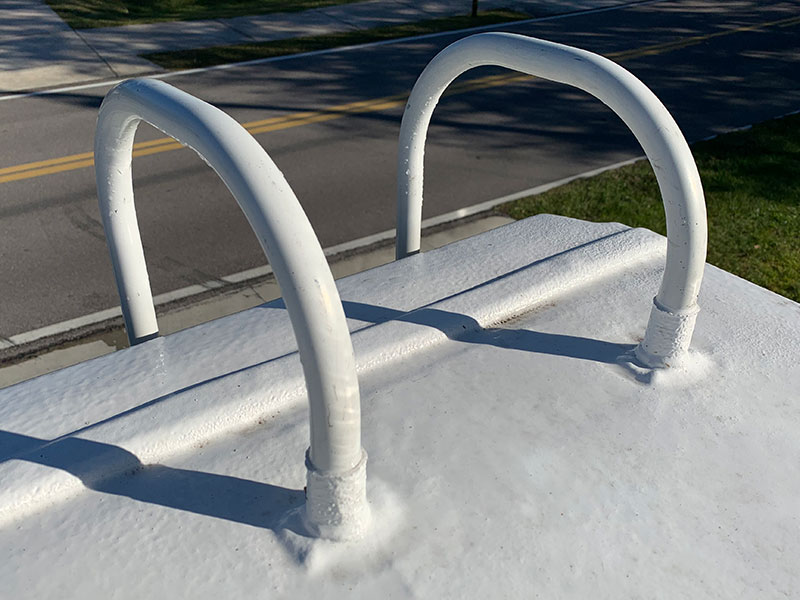
Finished Ladder
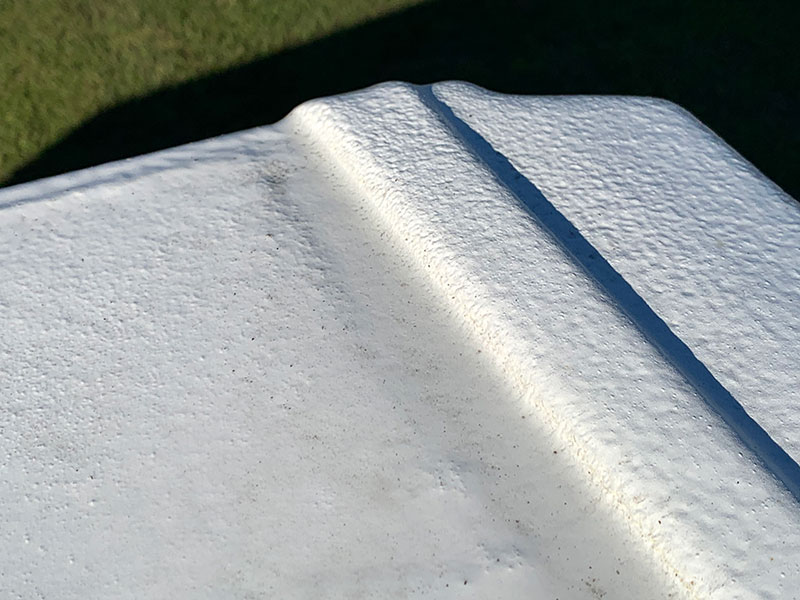
Finished Rear Edge
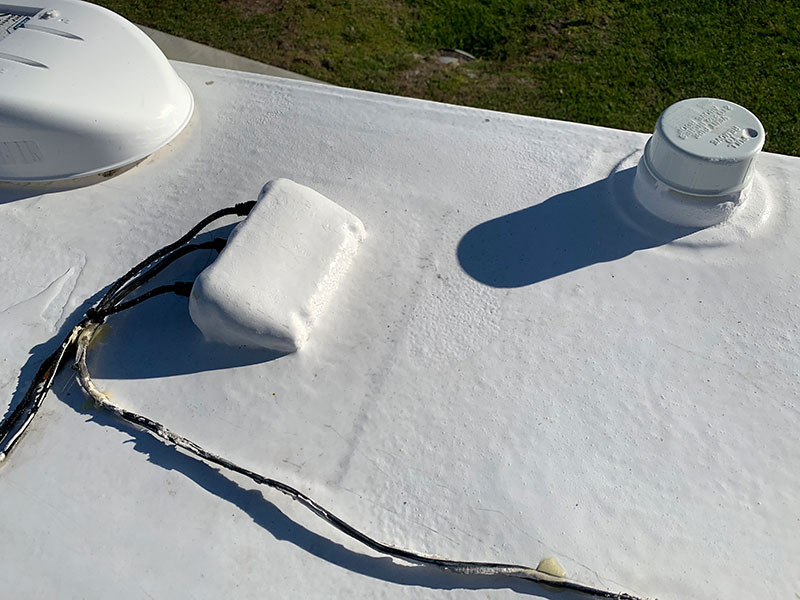
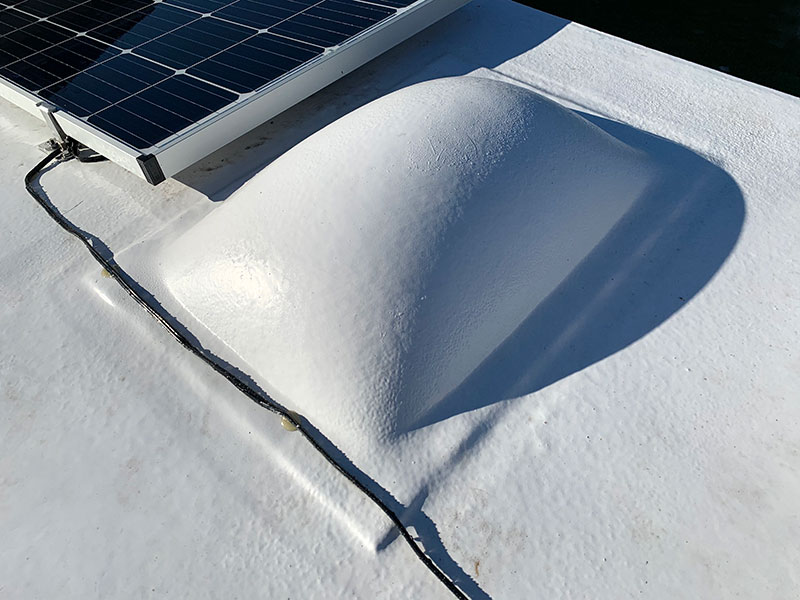
Finished Solar Port and Vent
Finished Wide Rear
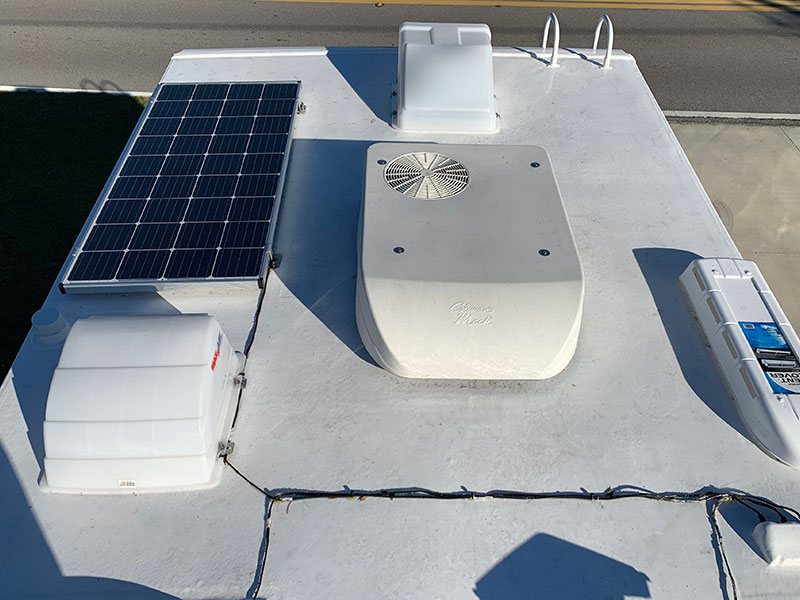
Above: Our FlexArmor roof after two months
As of this writing, it’s been almost two months since our FlexArmor installation. Our FlexArmor roof still looks like the day it was completed – bright white and beautifully sealed to perfection. The new FlexArmor roof also wraps around the sides, rear and front nose further improving our roof’s seal. It’s a great feeling to know your RV roof is sealed no matter what falls from the sky. Short of an alien ship landing on our camper, our new FlexArmor roof is going to hold.
At $170 per linear foot, FlexArmor will likely be a tough sell for many RV owners. If your roof includes a few solar panels or needs a little wood repair, that number can increase considerably. FlexArmor is no bargain, but I think it’s fair to say you get what you pay for. Of course the same thing can be said of many products and services. Just because something might be priced fairly doesn’t always mean it’s a sensible purchase for everyone.
So who should consider a FlexArmor roof? Anyone who wants to keep their camper or RV in tip-top condition for the longest time possible. Anyone who needs a major camper or RV roof repair already, and needs the best (and possibly most economical) solution. And anyone who simply wants the best camper or RV roof seal, or just doesn’t want to worry about their roof sealants ever again.
Being full-time truck campers, we are very happy to have the FlexArmor roof installed. We now have full confidence that our roof is sealed from the elements. I have been up on our roof at least once a week since the seal was applied and can’t believe how good it looks. We love it.
Just before completing this review, I head a voice in my head asking, “Hey, self-appointed Chief of the Weight Police dude – what does your FlexArmor roof weigh?” Well, applied FlexArmor weighs about a half-pound per square foot. All totaled, our camper roof coating is about 150 square feet. That’s 18-feet long (floor and cabover), 8-feet wide, plus the side, rear and front nose wraps. At a half-pound per square foot, our 150-square foot roof added 75-pounds to our camper. Worth every ounce.
My only regret is that there isn’t a similar process for the sidewalls, front nose, and rear of the camper. We have already coated the underbody with industrial “rubber in a can”. I’m not convinced Line-X or Rhino Liner wouldn’t be better for permanently sealing the camper’s underbody, but rubber in a can has held up well so far. The real point is that we are getting closer to my dream of a perfectly sealed truck camper. If it’s possible, we’ll make it happen.
Pros
FlexArmor is a 3/16-inch thick coating that covers entire RV roof
FlexArmor coating wraps around roof edges, rear and front nose
FlexArmor has a lifetime warranty – for the life of the RV
Once applied, roof seals are eliminated with no required maintenance
Often cheaper than a completely new EPDM or TPO roof
FlexArmor eliminates EPDM or TPO windshield streaks
Cons
FlexArmor is very expensive – $170 per linear foot
Solar panels and/or roof repairs add more cost
FlexArmor can only be applied on location at a RVRoof.com installer
FlexArmor repairs can only be done by a RVRoof.com installer
Adding roof components after application is not advised
FlexArmor adds approximately half-a-pound per square foot
RV Roof
Phone: 904-814-2104
Find A FlexArmor Location
Web: rvroof.com
Quality, Customer Service, and Long-Term Reliability
Truck Camper Magazine inspects all reviewed truck campers (and related products) for design, material, and quality issues and reports what we find. However, since Truck Camper Magazine reviews only brand new truck campers and products, our reviews do not address long-term quality, customer service, or reliability.
To learn about a brand’s long-term quality, customer service, and reliability, Truck Camper Magazine recommends talking directly with truck camper owners at truck camper rallies and online via truck camper forums and truck camper owners groups.
Please be sure to balance your gathered feedback across multiple sources including direct correspondence with the truck camper manufacturers and your closest truck camper dealers.
If you are new to truck campers, please start in the Newbie Corner.


