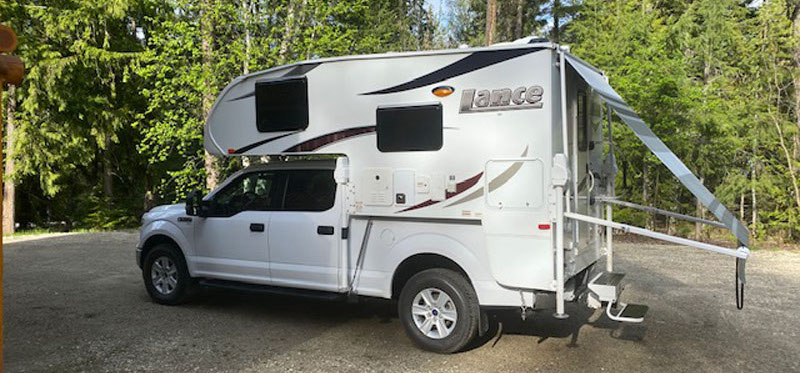
Looking for a faster and more reliable way to load your truck camper? Here are six relatively easy tricks that help make truck camper loading a snap. No lasers necessary!
Loading a truck and camper can be intimidating, especially if you don’t have enough experience with a particular truck and camper combination. The good news is that with patience, practice, and perhaps a few tricks, loading and unloading gets easier and less stressful over time. Just don’t let anyone ever tell you it’s a cinch. That’s going too far, but camper loading can become routine.
Of course anything that helps us load and unload easier or faster or with less stress is always welcome. For most of us, that means getting comfortable with our specific truck and camper set-up, learning where to look, what to line up, and loading and unloading enough times that the above becomes second nature. For others, things like lasers and carefully placed tennis balls or dog leashes come into play. The real trick is to find what techniques and/or loading hacks works for you.
The following are six truck camping loading solutions our readers have submitted over the years. One of these may be exactly what you need, or give you a loading trick idea of your own.
Submitted by: Steve Paushter, 2016 Ram 3500, 2016 Northstar Arrow 8.5 U
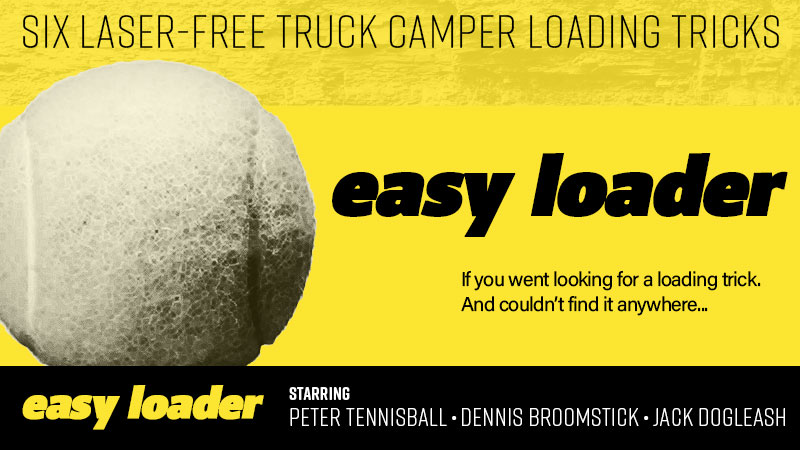
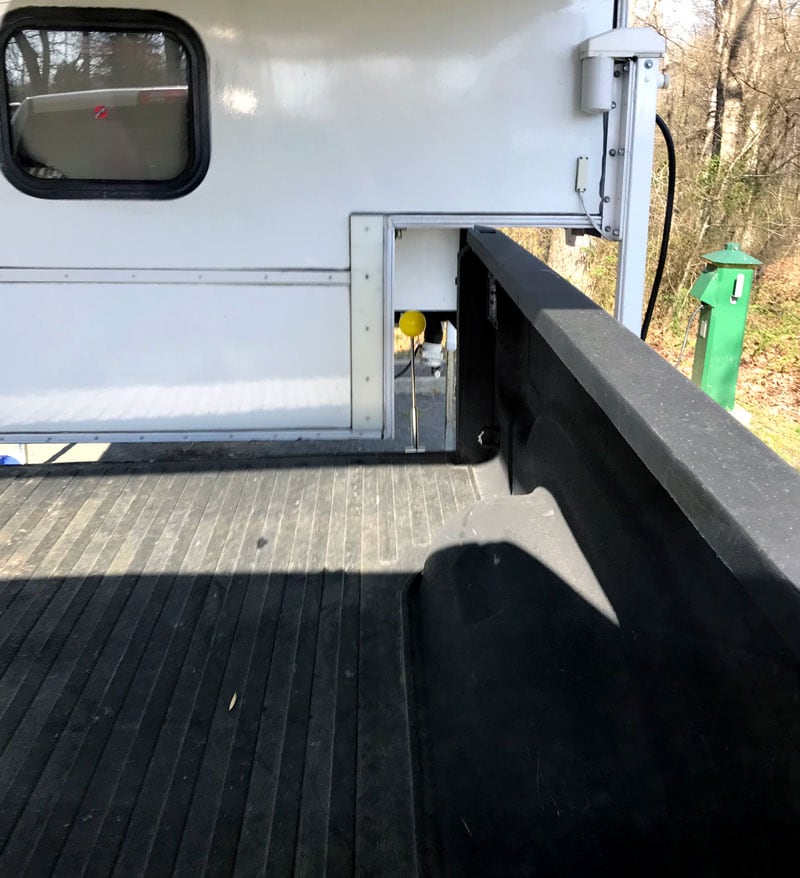
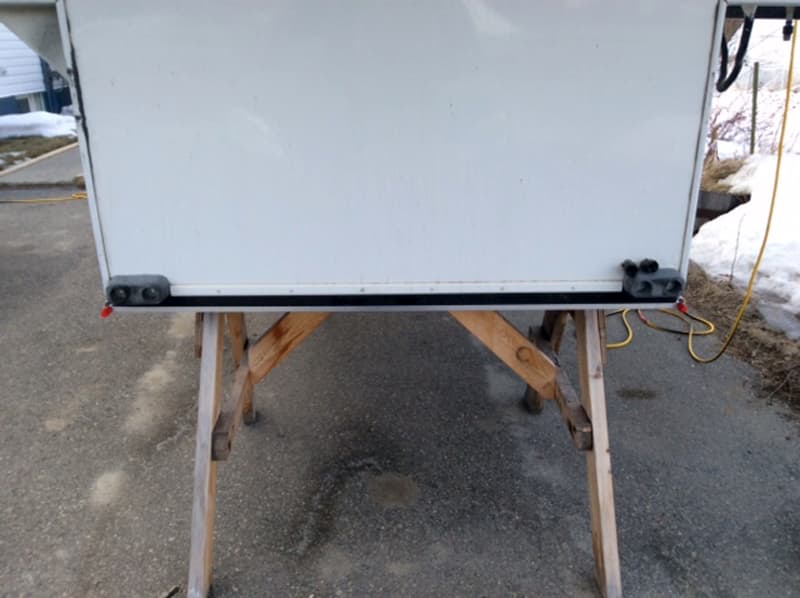
When we first got our camper, we found that loading the camper onto our truck was an intimidating task. We have a short bed truck and cannot see the end of the bed from the driver’s seat when loading. This makes lining the camper up with the wheel wells challenging.
I bought a trailer alignment kit from Harbor Freight for under 10-dollars. This consists of a foam ball mounted on an adjustable wand with a magnetic base. It is usually used to help line a trailer up with a hitch. I only use one of the two balls the kit comes with.
I marked the end of the truck bed on the driver’s side with a paint line. This line is drawn about an inch or so inside the wheel well, minus the radius of the foam ball.
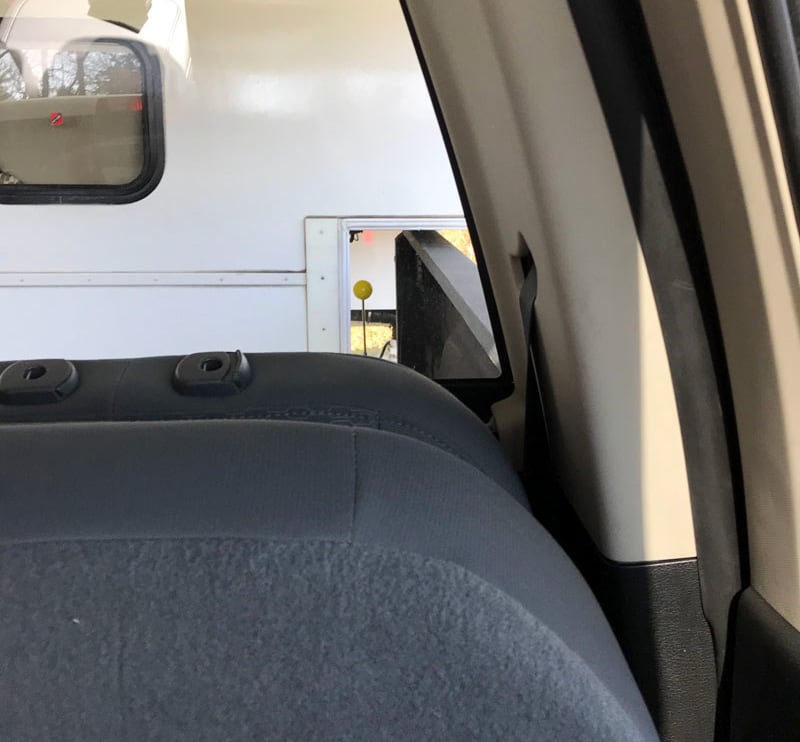
When loading the camper, I put the front seat back, look over my right shoulder, and line the ball up with the inside edge of the camper leaving about a half-inch to one-inch of space. I then back up keeping the ball lined up with the camper. It works like a charm every time.
We take our camper off the truck almost everywhere we stay. I have used this mod every time I load the camper for the past 2.5 years and it makes the job much easier.
It took me 5 minutes to complete this modification and cost me under $10. In my opinion, the skill level of this modification is easy.
Submitted by: Phil and Mary Bogardus, 2014 Ford F350, 2018 Northern Lite 8-11 EX CDSE
Loading your slide-in camper onto your truck is probably the most stressful part of owning a truck camper. For my wife, this is the one part that causes her more anxiety, stress and creates more arguments between us than anything involved with our camper.
Like everyone new to loading a camper I went online and watched a ton of videos on how to do it. Most of the videos involved trying to line up something in your mirror with something on the camper and backing in. It sure looked easy on the video but in real life, it never, ever, ever worked out that way. I had to find a simple, consistent easy way to load the camper to make loading easier and less stressful.
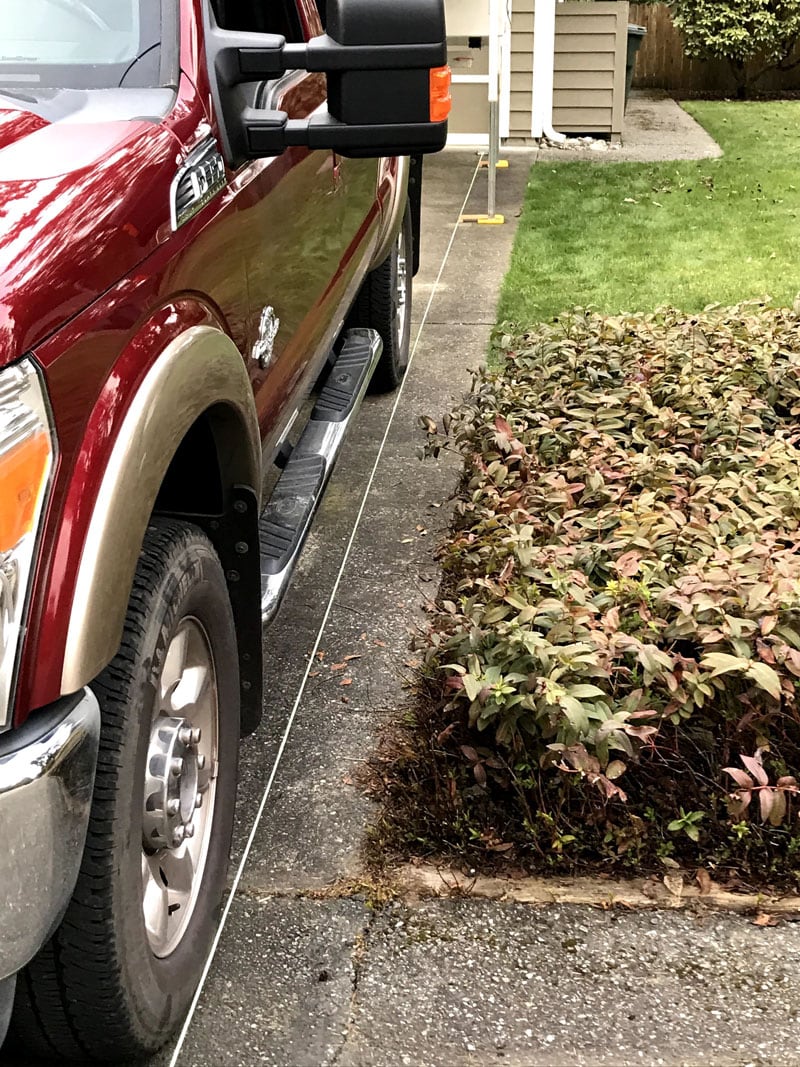
The big problem with loading a camper is that you must squeeze it between the wheel wells of the truck with only inches to spare on each side. Plus the truck must start parallel to the camper as you approach it and stay parallel as the camper moves through the truck bed.
I found my inspiration from Charlie Coushaine’s laser loading mod. Charlie’s mod was designed to square the truck bed to the camper.
I kept thinking, “How can I easily make sure I am square to the camper without the complication of a laser?” I remembered what my Dad always told me growing up – “KISS” or, “Keep It Simple, Stupid” (or some variation of that as I got older). Taking his advice to heart I developed a simple, inexpensive, and stress-reducing solution to our problem.
Since your camper jacks are in a fixed location on the camper’s body, the edge of the truck’s tires will always be the same distance away from the edge of the jacks. By creating a visible line that is a set distance from the jacks to the edge of the tires it would allow the truck to be backed square and parallel to the camper every time.
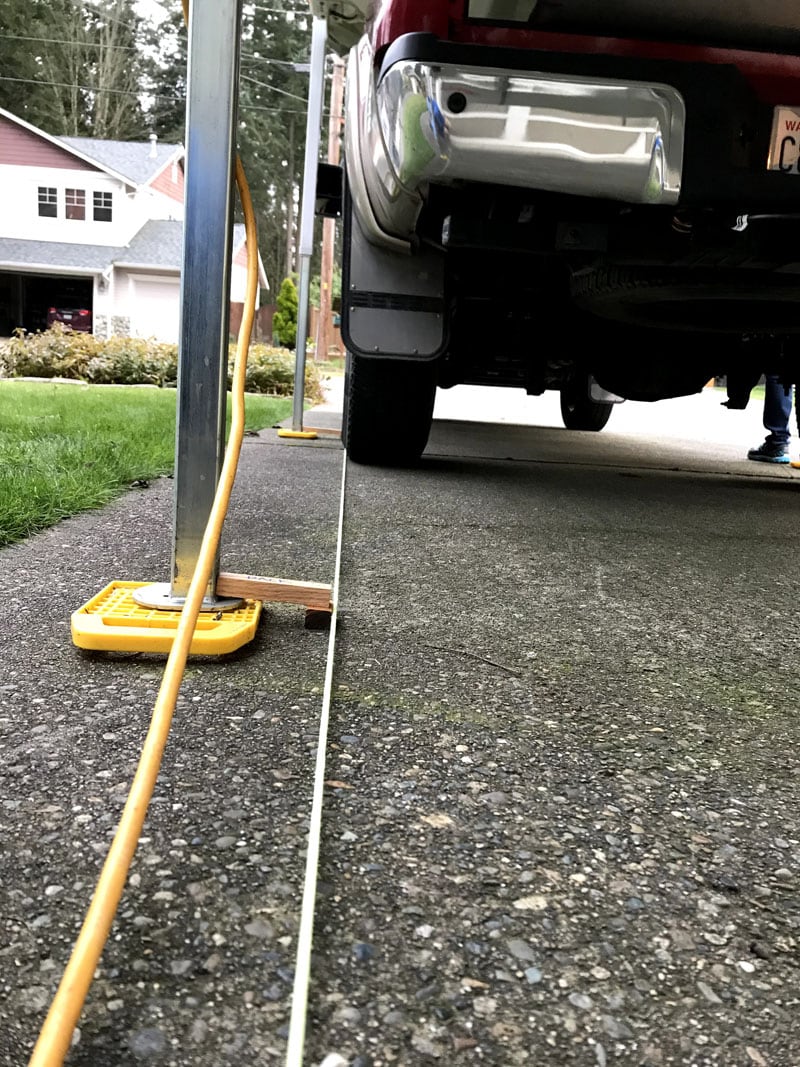
We started with the camper loaded on the truck and the driver’s side camper jacks down, so they just touched the ground. We took a 3/16-inch by 50-foot polypropylene rope (Harbor Freight SKU 65569) and tied each end to a couple of 6-pound scuba diving weights lying around in the shop.
Any five-pound or so weight will work. You can get used barbell weights at Play It Again Sports pretty darn cheap. You will see in my picture that I got a little fancy with this attachment, but you can just tie it on with a knot.
I stretched the rope from just behind the camper to be in front of the truck so that it was just touching the edge of the front and back driver’s side tires.
We then measured from the inside edge of the front and back jack legs to the rope. With these measurements, “alignment guides” were built by cutting some scrap pieces of wood to match each measurement, and a short stub was nailed on to create a tee.
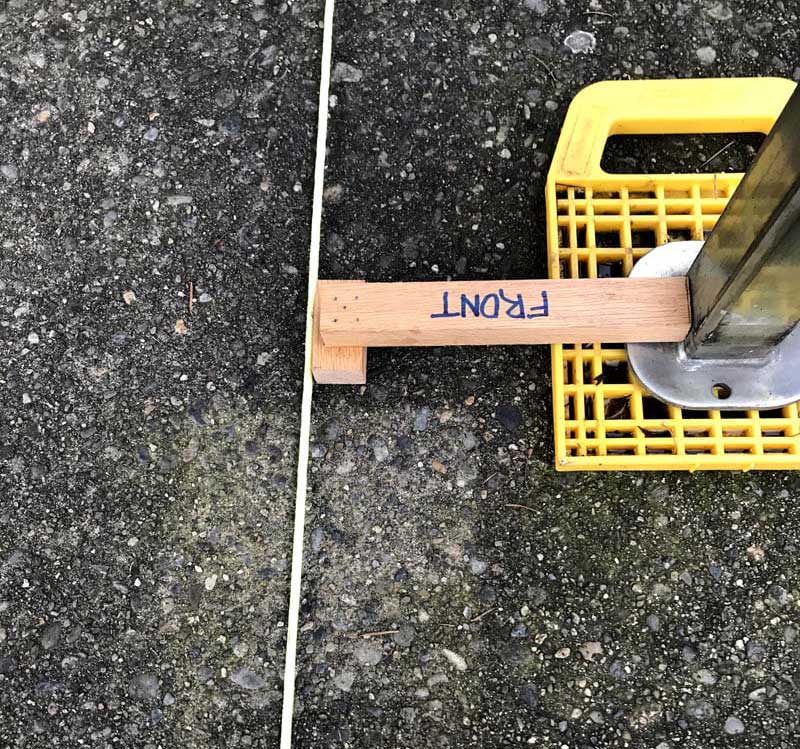
Then we marked each one with “Front” and “Back” so I knew their location.

Next, I jacked up the camper and pulled the truck out. This next step may not be necessary but we find it really helps us with consistent loading. When you load the camper you want each jack’s height to be the same as when you unloaded it. It helps to align everything a little better when you reload.
We stick blue tape (it removes easily) on the camper’s body at each jack’s location and write the jack’s heights on the tape with a permanent marker.
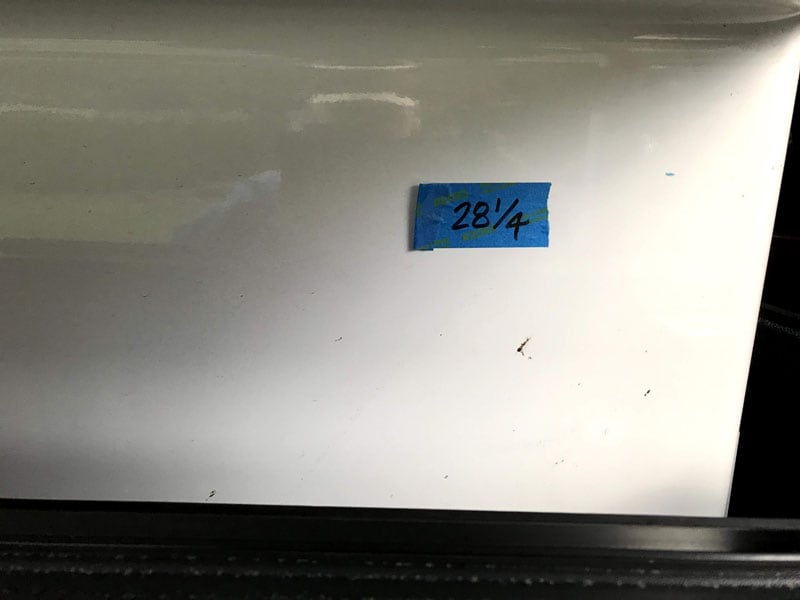
Now comes the magic. When you want to load the camper, raise your camper so that each jack matches the measurements recorded on the blue tape. Then set the appropriate “alignment guides” up against the jack’s edges.
Next, stretch the rope with weights attached on each end (this keeps the rope taught) from the back of the camper out to in front. We usually put all of the 50 feet of rope out and adjust the rope so that it just touches the edge of both the front and back “alignment guides”. One person can do this, but it is much easier with two. You will now have a line that will be parallel to the camper.
Before you start backing in the truck, adjust the driver’s side mirror so it is pointing straight down at the ground. This makes it easy to see where the back tire is in relation to the rope’s line.
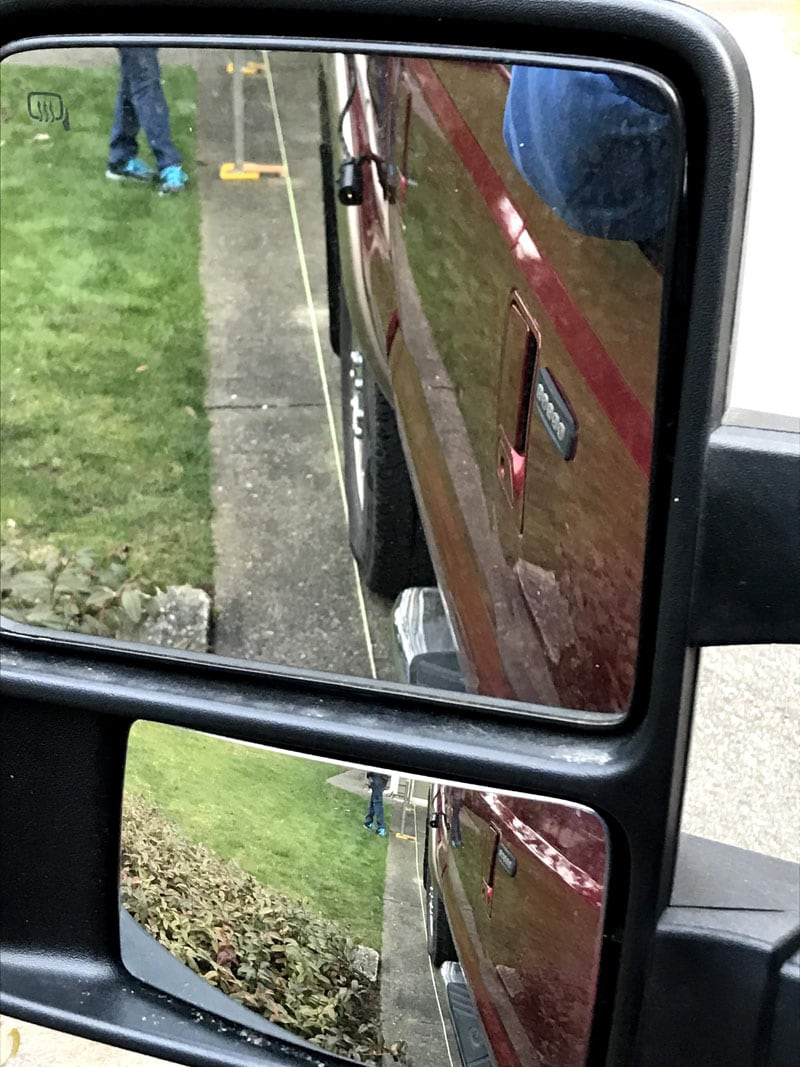
Start backing up your truck and maneuvering it until the edge of each tire is just touching the rope. This may take a little bit of jockeying forward and backward.
Now all you need to do is back up while maintaining each tire’s edge on the rope line.

You can check the back tire in the mirror and lean out the open window to check the front tire.
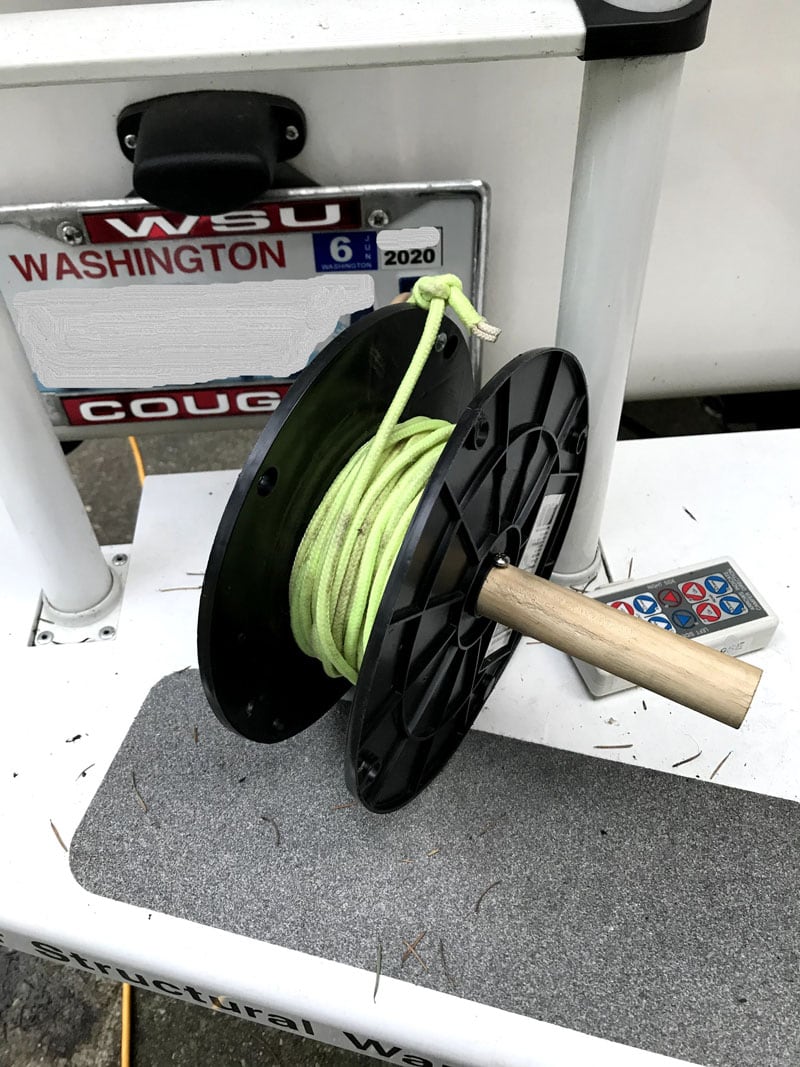
To store the rope, I made a reel to wind it up. I went to Home Depot and they gave me an empty wire rope spool for free. I put a wood dowel through the rope’s spool for a handle. Screw a washer on one end and put another screw on the other side of the spool to keep the dowel from slipping out.
And now an important word on safety – always, always make sure you have proper clearances as you back up. As my wife always instructs me over and over and over, “Stop! Let me check!” And then I wait patiently to hear, “You’re good! Back up a little bit more.”
What she is telling me in her own sweet way is to make sure everything is aligned so that we don’t have an accident.
The KISS Camper Loading System has been fantastic. It was an inexpensive mod to build, is very simple to set up and use, and best of all, we are less stressed when loading the camper at home or at the campground.
It took me three hours to complete this modification and cost me $4 since I had the weights and wood scraps. In my opinion, the skill level of this modification is easy.
Submitted by: Ed Evans, 2020 Ford F-150, 2019 Lance 650
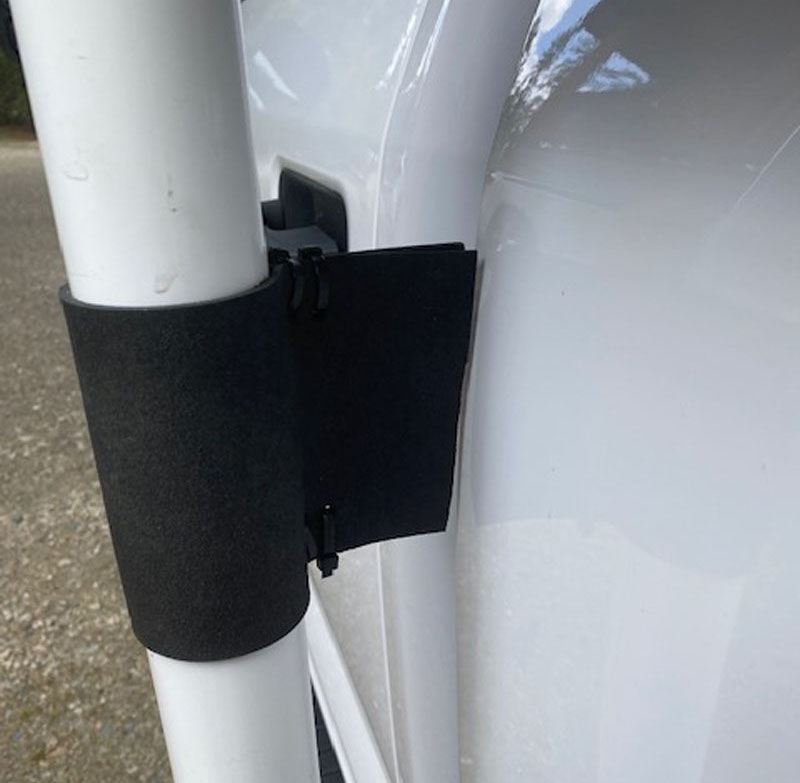
Loading the camper to the exact right distance on each side of the truck box was difficult to get right. I needed an idea to use the camper jack for measuring that wouldn’t scratch or damage the truck box.
After looking in my garage, I found some leftover neoprene. I cut out a piece that was 6 inches by 12 inches and folded it around the jack.

Then I drilled holes into it and attached zip ties. After loading the camper to the exact spot, I measured and cut the neoprene to just touch the box.
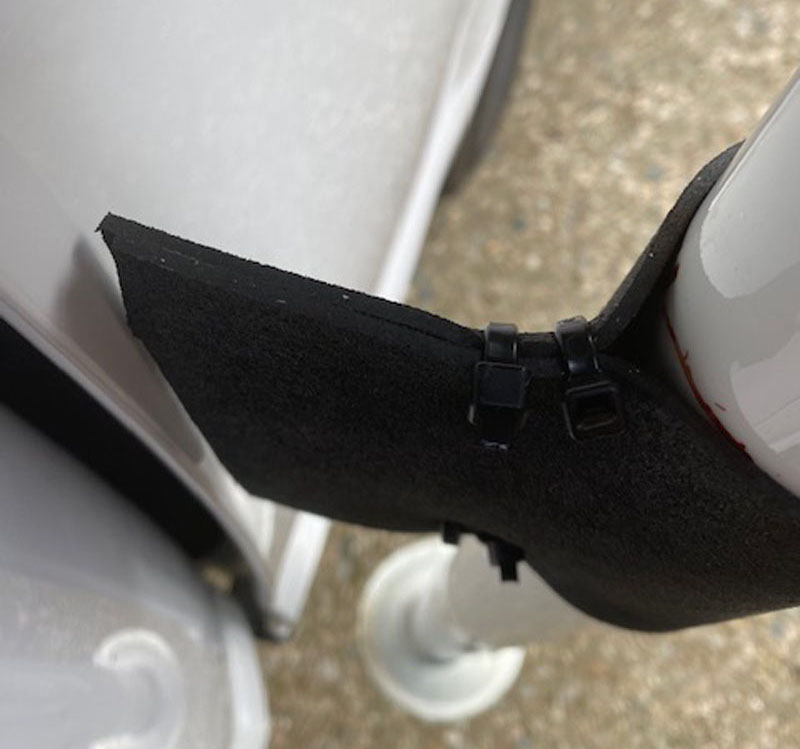
After a number of times loading the camper, I am now able to get the distance exactly right. The neoprene folds and returns to shape if the truck touches it. No problem. I have marked the jack at the point where the flag sits on the jack so it can adjust and return to the exact measurement.
It took me 15 minutes to complete this modification and cost me $10. In my opinion, the skill level of this modification is easy.
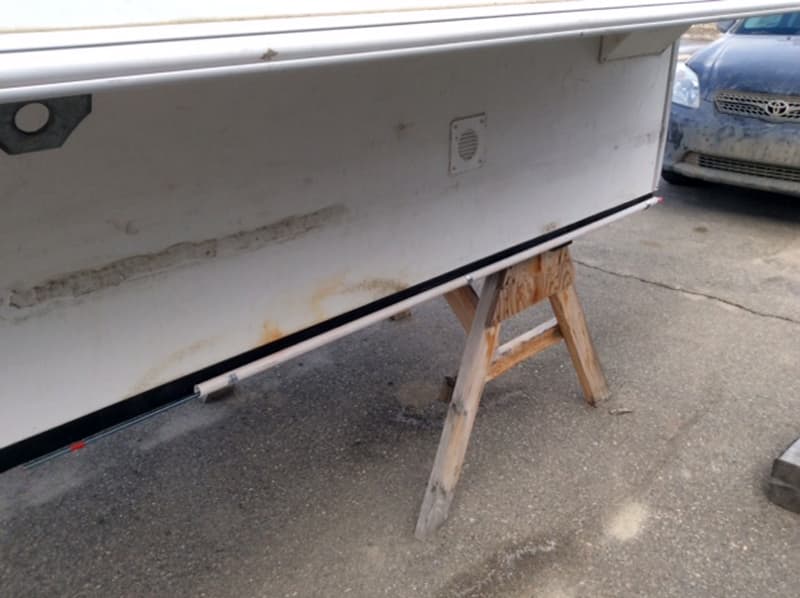
Submitted by: Terry Fleming, 1999 Ford F-250, 2019 Adventurer 80RB
I was unable to easily load our truck camper.
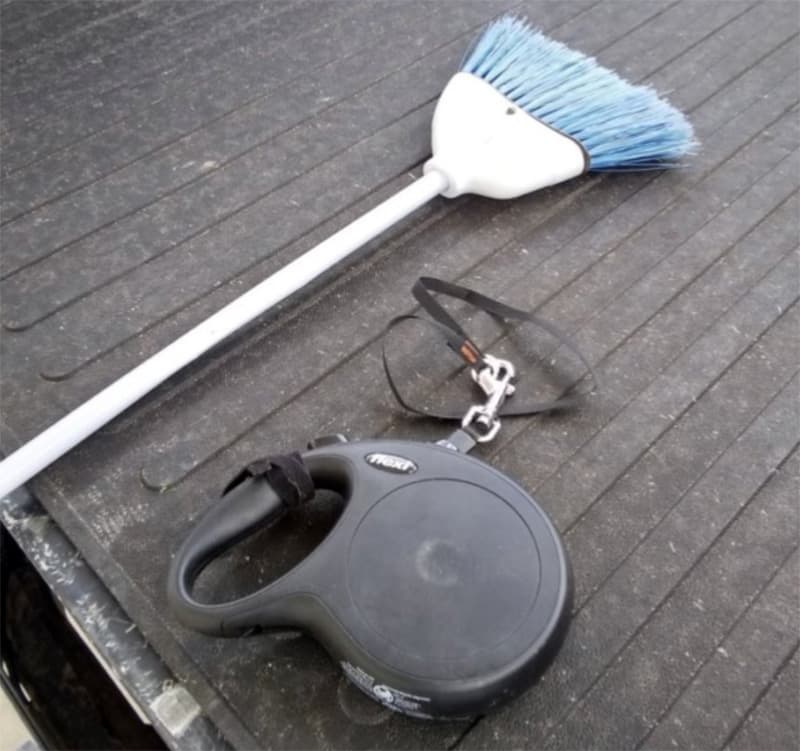
We load our 2019 Adventurer 80RB truck camper onto our 1999 F-250 long bed truck using two items; a Dollar Store kitchen broom, and a retracting dog leash.
The broom helps to center the camper while the dog leash ensures that the camper is correctly aligned, even on an uneven grade. Plus, I can align the truck without getting out of the cab.
Here’s how it works:
After the tailgate is removed, a broom is placed in the center of the bed, extending a foot or so beyond the rear bumper. On the camper there is a piece of blue painter’s tape which marks the center of the camper.
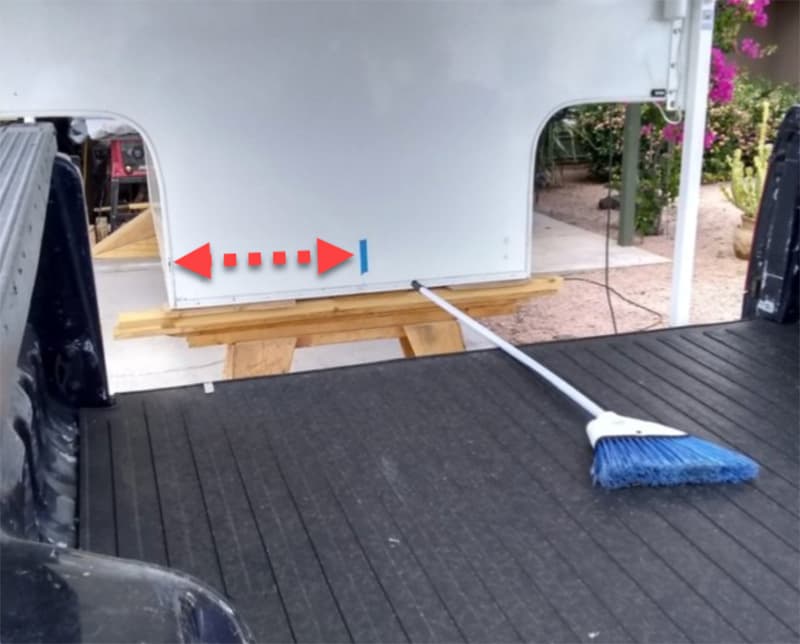
I measure the distance from the painter’s tape to the edge of the camper (see photo). The purpose for the measurement will become obvious shortly.
Using the broom handle as a guide, I center the truck with the tape. The truck is now centered, but probably not aligned. I am sure to raise the camper high enough that the truck bed will clear the camper.
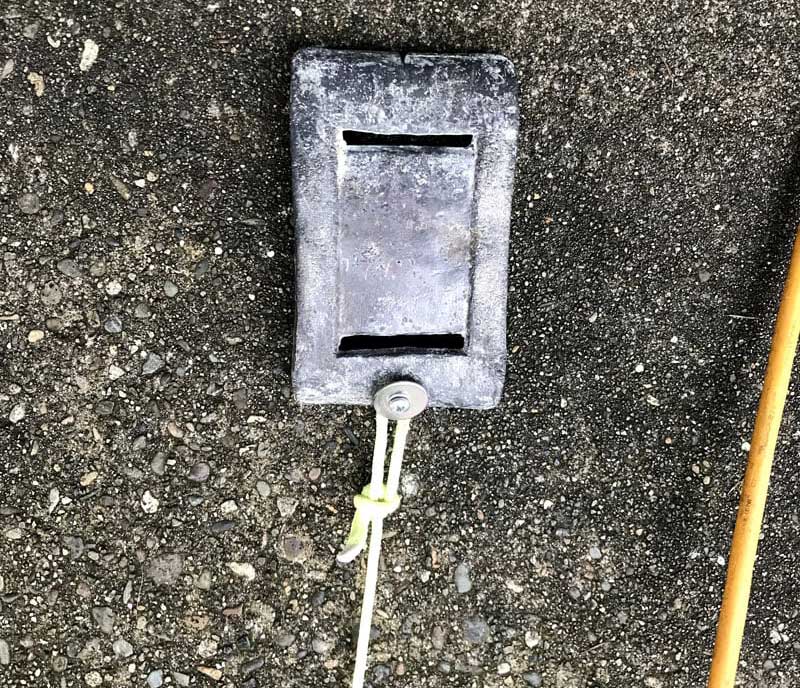
Time for the dog leash! On the front wall of the truck bed, next to the cab, on the passenger’s side, I have placed a magnet with a hook. The magnet is incredibly strong and has not moved in two years.
On our truck, the magnet is 24-inches from the center of the front wall. Use the measurement that you recorded earlier to position the magnet on your truck. The height is not critical. Place it somewhere midway.
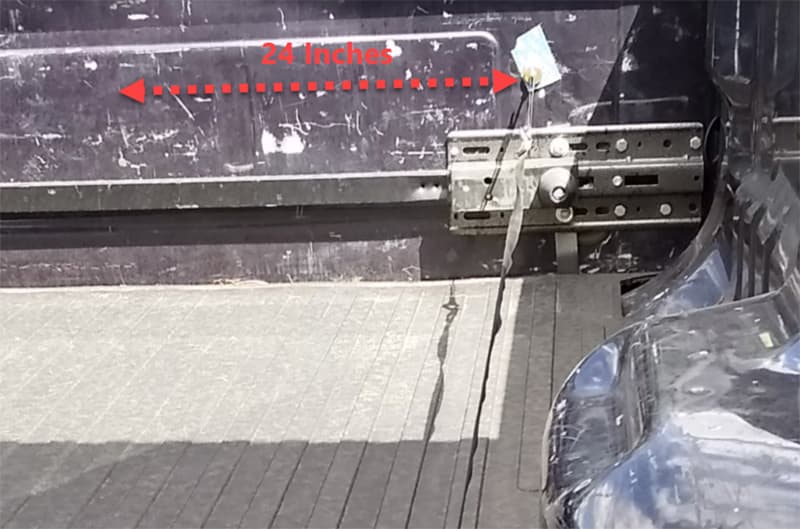
Loop the end of the dog leash on the magnetic hook and the other end to the far end of the camper. I just loop mine over the handrail (see photo below).
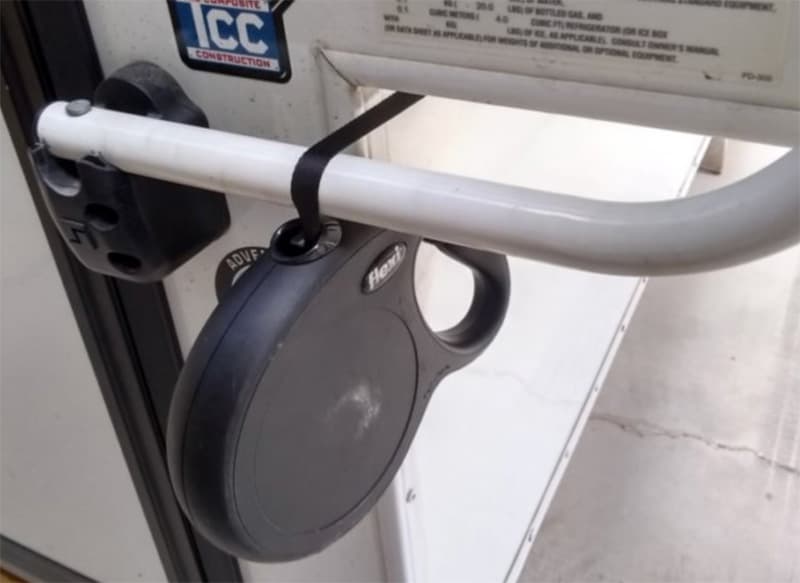
The leash is a 26-feet in length for dogs up to 110-pounds and has plenty of spring. The 26-foot length works fine with our camper and has never been an issue.
At this point, check that the broom handle is still pointed toward the painter’s tape.
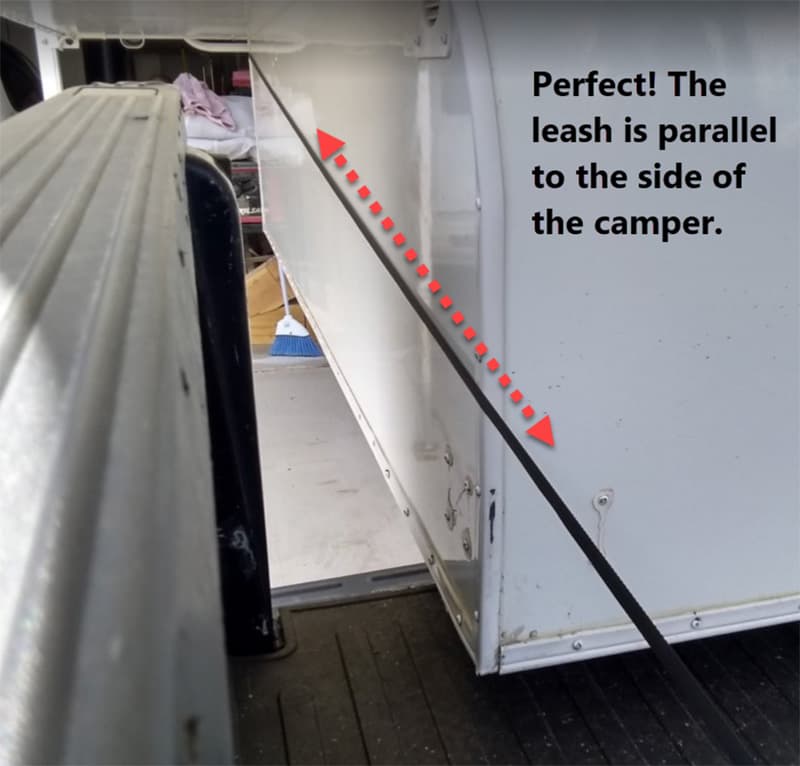
If the line from the dog leash is parallel to the side of the camper, the truck is aligned, and you may slowly back up after checking that the height of the camper is correct.
If not, adjust the front of the truck so that the dog leash is parallel to the side of the camper and the broom is still pointing toward the painter’s tape.
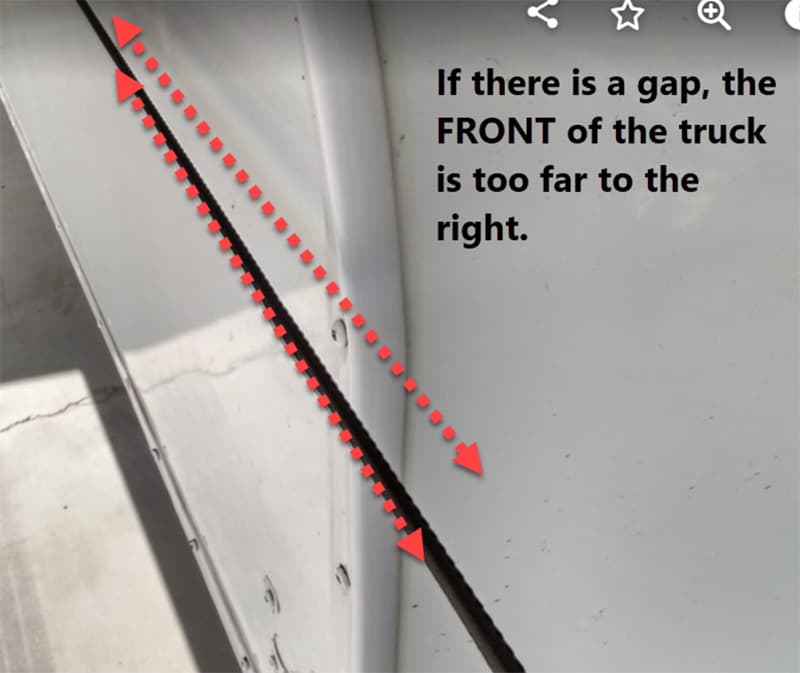
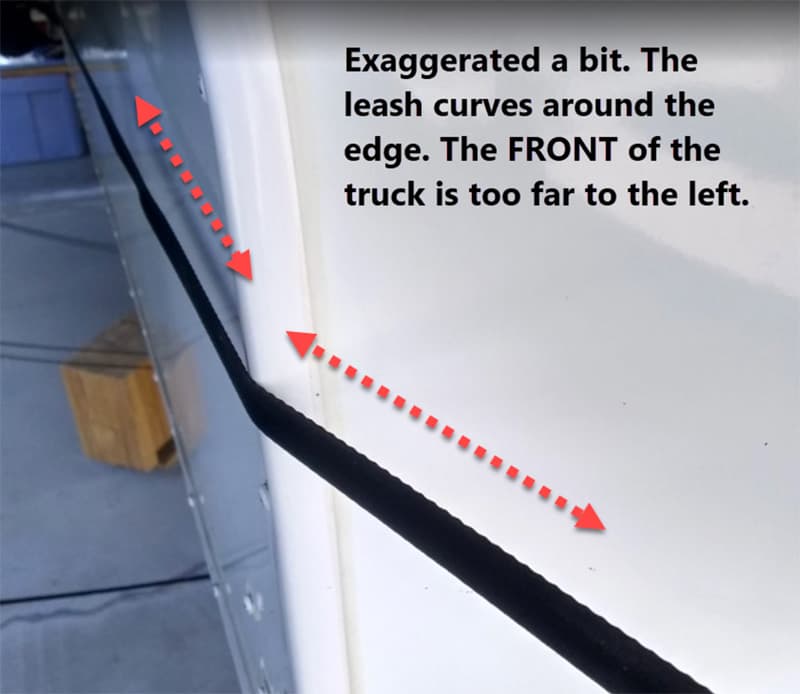
Watch the corner where the dog leash contacts the camper. If there is a gap, the front of the camper is too far to the right. If the leash is bending around the edge, the front of the camper is too far to the left.
Once the truck is aligned and the broom is still pointing to the center of the camper (the painter’s tape), remove the broom and back up cautiously while maintaining the alignment with the dog leash which will automatically retract and remain taut as you back up.
The camper will be perfectly aligned and centered and doesn’t require anything more than a broom and a dog leash. Perfect. Happy camping!
The magnetic hooks were purchased on Amazon. Search for 40-pound magnetic hooks. The dog leash was $29.99 and the broom was $1 at the Dollar Store.
It took me less than an hour to complete this modification and cost me about $40. In my opinion, the skill level of this modification is easy.
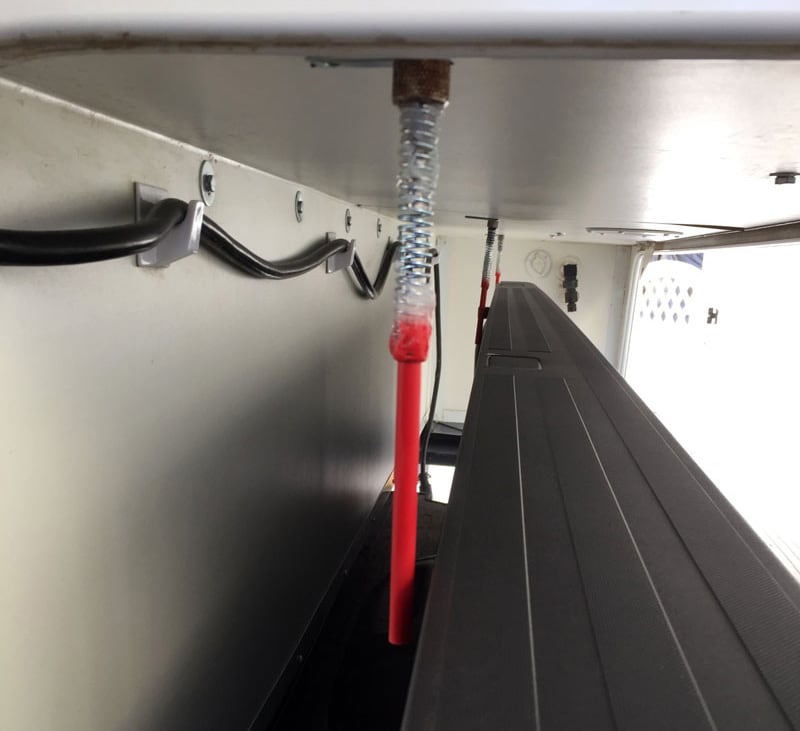
Submitted by: Dennis Chemnitz, 2019 Ford F-350, 2019 Host Cascade
This modification is to aid with loading my camper and to make it a faster task.
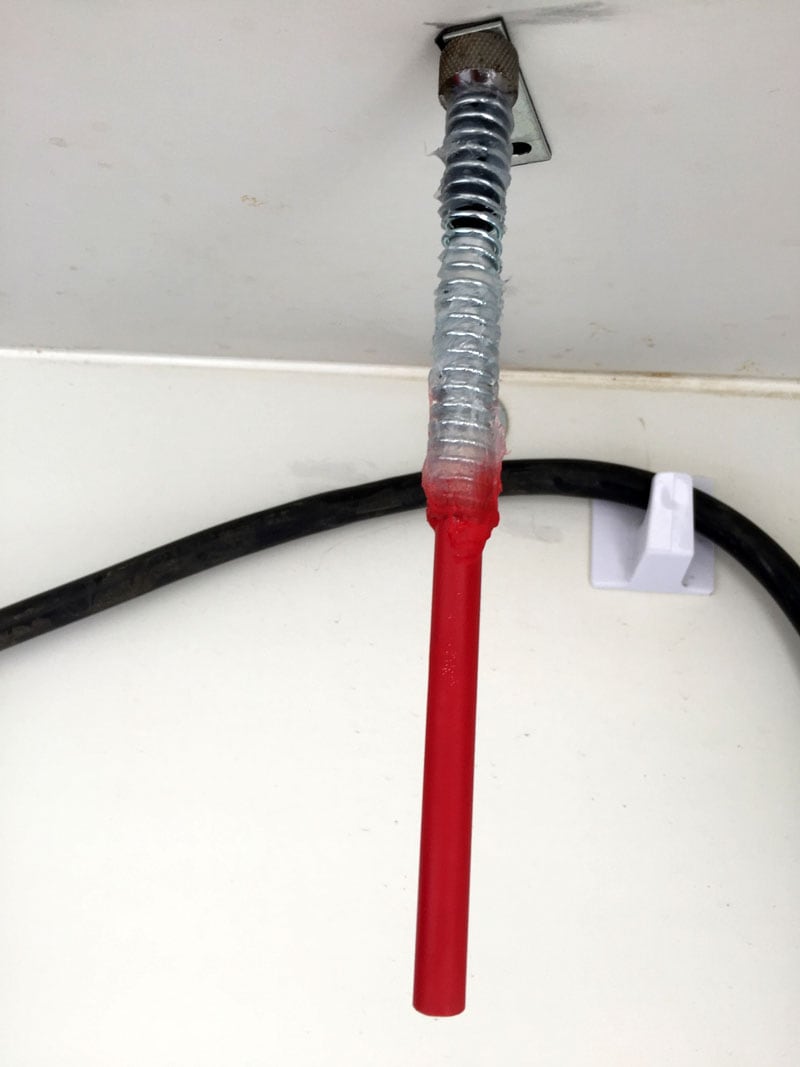
I took three magnetic wands and cut them to 2-inches. Then I glued a 4-inch long spring to the wand. I inserted and glued a tube in the spring.
I used double-sided tape on a 2-inch mending plate. The plates are attached on the underside of the camper 8-inches out from the front, middle and rear of the camper.
The location of the red wands centers the camper on the truck. I took the width of bed rails minus the width of the base of the camper. Then, I divided that by two. That number gave me the location to mount wands.
Finally, I stuck the wand to the mending plate. Then I was ready to load camper. It took 15-minutes to load the camper with no stress.
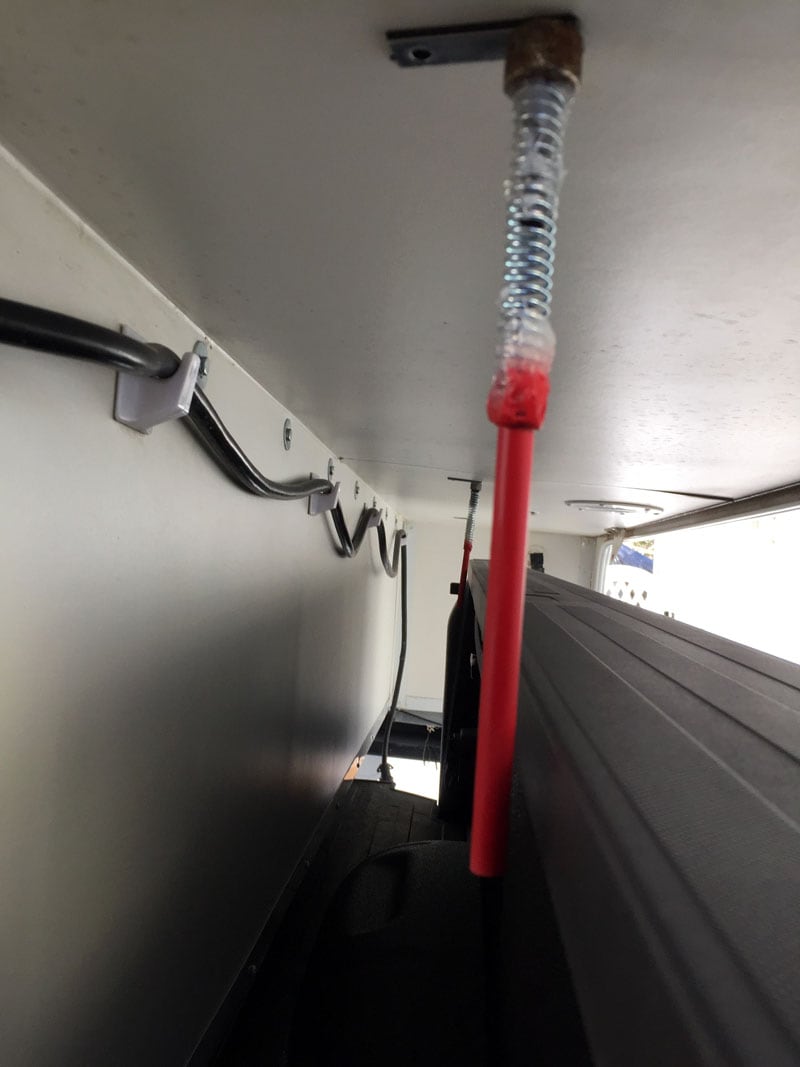
I can see the first wand in the side view mirror. The spring is flexible, so it’s no big deal if I hit it on the bed rail of the truck. As I backup, my goal is to align all springs with the bed’s rail.
I can do it myself, but I do have to get out of the truck a few times. Normally I have my wife back the truck under the camper. I instruct her which way to turn. If we align all the wands to just touching the bed rail, the camper is straight and centered.
It took me 30 minutes to complete this modification and cost me $15 because I had some of the parts already. In my opinion, the skill level of this modification is easy.
Submitted by: Roch Nadon, 2007 Toyota Tundra, 2007 Okanagan 89WS
I have owned a camper for three years now and it has been a blast so far! The main challenge has been to load the camper in our truck bed. I have to do it many times per year since I use my truck for other tasks as a handyman.
I don’t have much space in the truck bed. There’s only one-inch between the wheels and the camper sides. Sometimes it goes well on the first try and sometimes it takes forever! So, this year I decided to install a guide. I made something simple to use, simple to build, and simple to install.
One part of the guide is made of half-inch PVC pipe. There are two sections 5-feet long. Each section is screwed on both sides of the camper at the floor level in the wood frame.
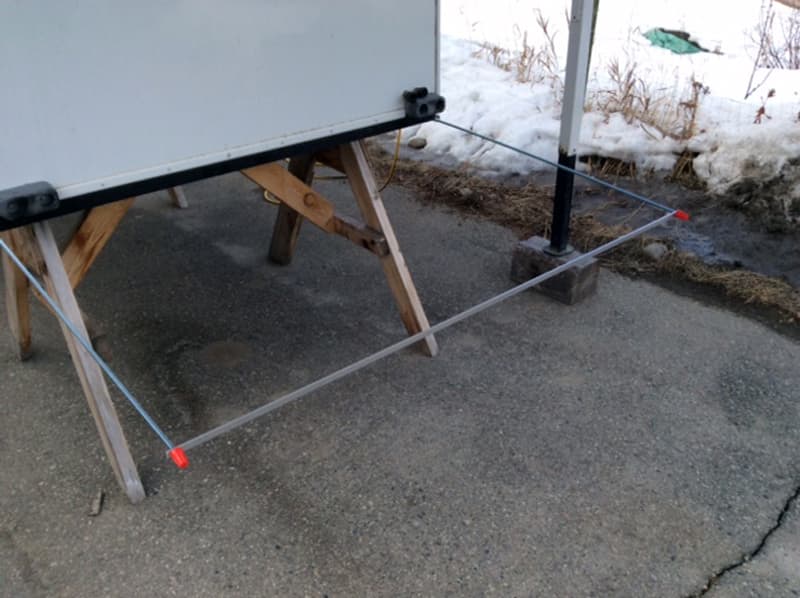
The guide itself is made of two rods that are 6-feet long by 5/16-inch in diameter, and a 4-foot long half-inch flat aluminum bar. These three parts are assembled together to make a square U-shape. I had to cut the flat bar to make two holes for the rods.
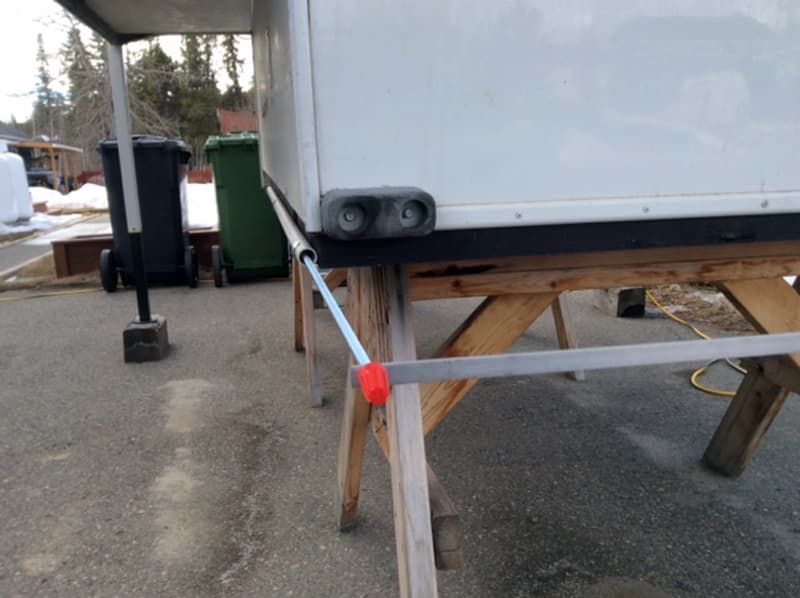
The guide (rod) is inserted in the PVC pipe. This way, the guide can slide in the pipe freely. So, when I pull the guide about 5-feet out of the PVC pipe, the guide goes between the wheels. More importantly, when the camper goes into the truck’s bed, the guide slides back into the PVC pipe. It’s working great and I’m a happy camper!
It took me one hour to complete this modification and will cost you around $20 Canadian if you build with new material. I used leftovers from previous projects when I made it. In my opinion, the skill level of this modification is medium.
The loading mods above do not include laser solutions. If you want to see laser loading ideas, we have an entire article from readers who have gone that route called Laser Loaders for Truck Campers.
Disclaimer: The modifications above are submitted by Truck Camper Magazine readers. It is your responsibility to make sure that any do-it-yourself modification project you undertake is safe, effective, and legal for your situation.


