How do you install recliner-style seating in a face-to-face dinette? Truck Camper Magazine readers came up with five creative solutions for putting recliner or office chairs in a camper’s dinette. Sit back, relax and enjoy!
Submitted by: Roger and Kathy Sather, 2008 Dodge 3500, 2012 Arctic Fox 811
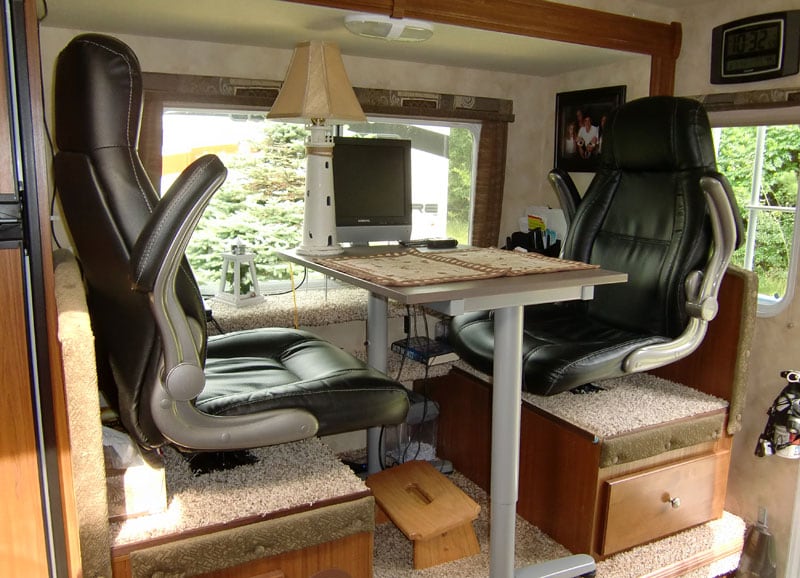
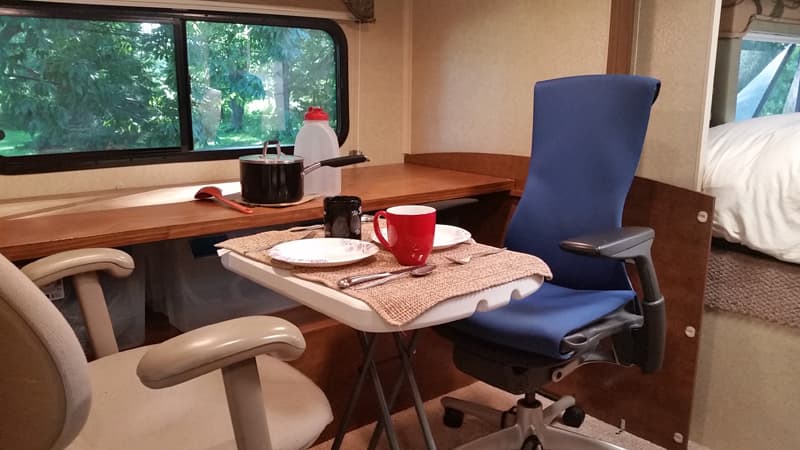
We did this modification to make the seating more comfortable after giving up the original foam seats in the first four months. In a truck camper your seating is limited. Our real concern was did we have enough room between the booths to do this. We spent a good deal of time finding suitable chairs.
We added a shelf under the window and another shelf across the two booths. The booth plywood deck was a half inch, we changed it to 29/32 inch for more chair stability. The table is from IKEA, with adjustable leg height.

The chairs are from Staples, and were chosen due to the arms that go up for ease of chair entry and exit. The fabric trim around the booth was cut down to about two inches to provide more room for the chairs.
The rug is the second attempt because the first we had was too much contrast. This one almost matches the factory carpet. The wires are still a work in process. We want them neater, but still have to move them with computers to go to WiFi locations.
Submitted by: Charles Coushaine, 2001 Ford F350, 2012 Chalet DS116RB
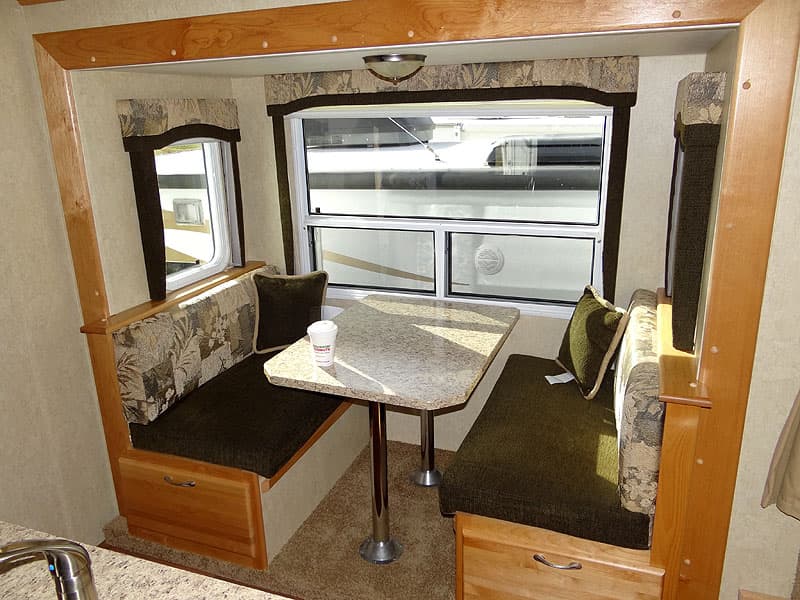
Before the recliners, as a standard camper dinette:
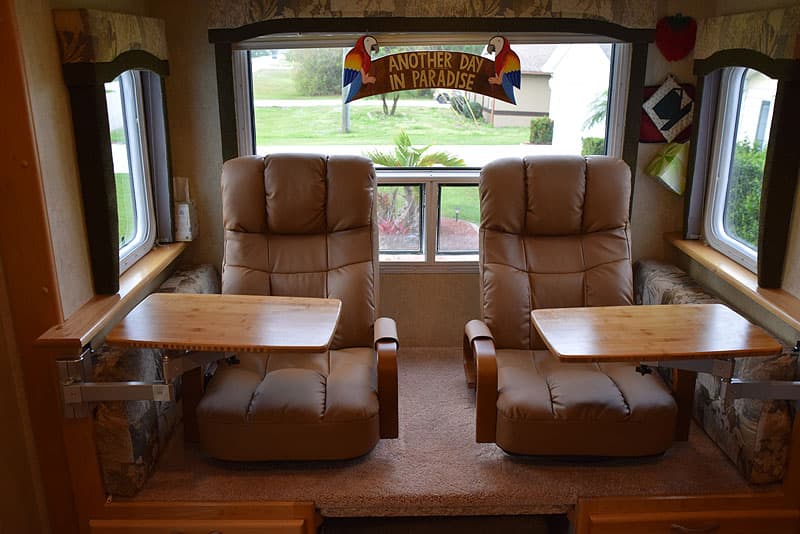
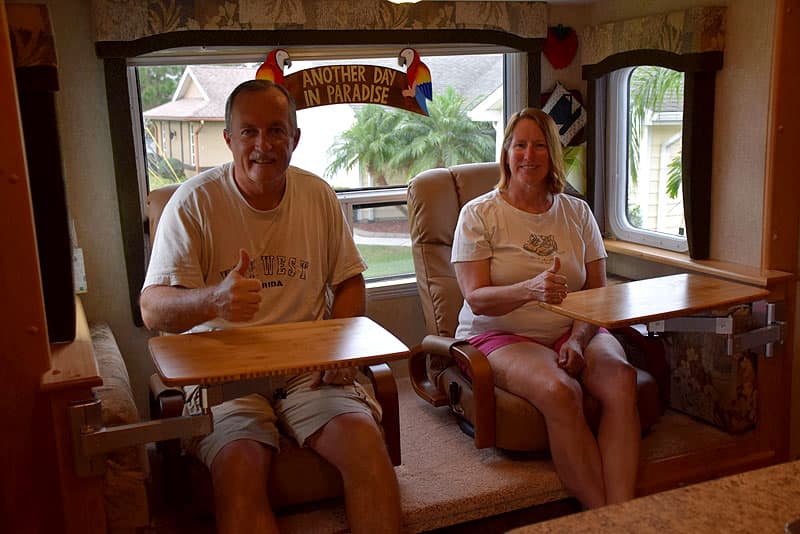
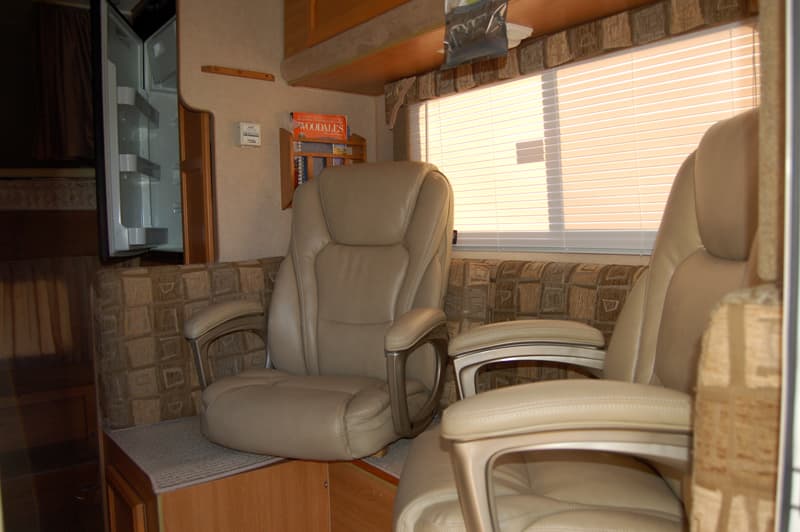
With the recliners, and it can still be converted back to a dinette at any time:
We changed our dinette to Lazyboy-style recliners. This changeover can be accomplished without any tools, and can easily be changed back if we wish.
The essence of this change was to give us more comfortable seating during our multi-month truck camping travels.
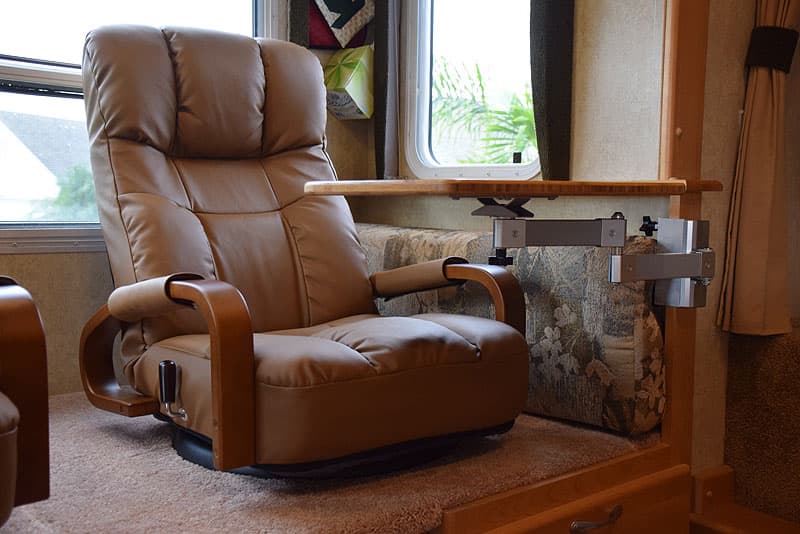
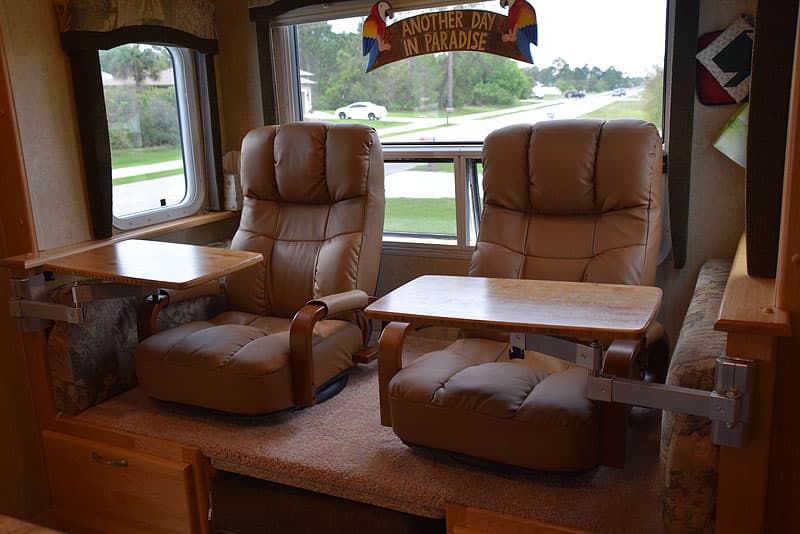
In addition to the new seats, this modification includes custom articulating tables to allow eating and use laptops. The articulating tables pivot out of the way for sitting down and travel. The seating and table change should be a perfect upgrade for our lifestyle.
Watch the video to see the changeover happen:
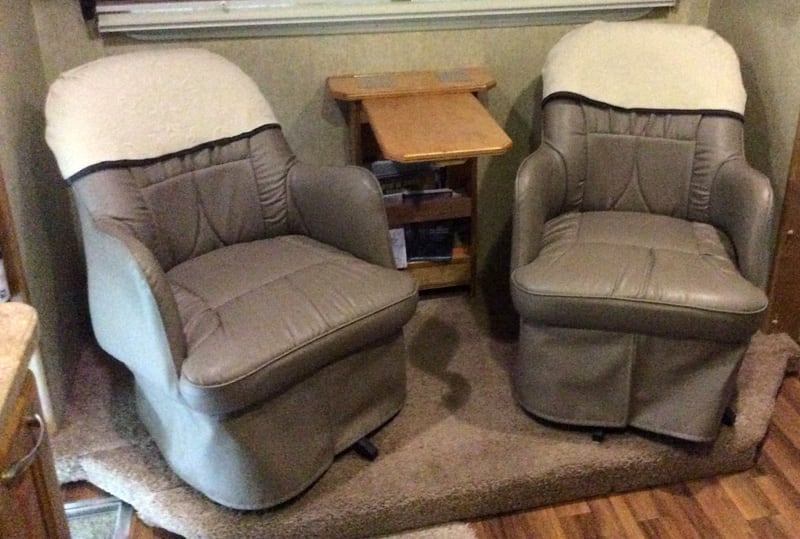
Before finding the right chairs, we tried several chairs that didn’t work out. One was a video gaming chair that was too stiff and not cushiony enough (sent back). Another was an IKEA chair that I had to cut 6-inches off its height (broke, not robust enough).
The chairs we settled on are perfect. They are leather, with arms, swivel, and the back tilts. The chairs are called “floor chairs” and, after exhausting internet searches, could only be found in China. Although moderately expensive, we spent the money and are thrilled with the quality. Here is a link to the chairs.
The articulating arm was found easily on Amazon. As expected, it had to be customized to fit our camper.
It took me 10 hours to complete this modification and cost me roughly $550. In my opinion, the skill level of this modification is medium.
Submitted by: Rick and Cathy Johnson, 2001 Ford F350, 2007 Lance 915 Lite
We took our first truck camping trip last August and September. We traveled from south Texas to the inside passage of Alaska, which was 8,500 miles in eight and a half weeks. The dinette got increasingly uncomfortable by the day. When we got back, we decided to take action.
I removed the seat cushions, table, table support bracket, and all the aluminum guides for expanding the seat to make a bed. That way the remaining base was somewhat smooth and level. Then we purchased two Serta memory foam office chairs from Walmart and I assembled them without their bases.
I cut a two-inch by two-inch board the width of the chairs and put a slight angle on the board so that it sits flat. Using the screws included with the chair, I attached the board to the bottom of the chair where the base would have attached. The chairs sit on the dinette base without any attachment so they can swivel slightly.
We tied the chairs down for travel with a bungee across the back and a small turnbuckle on the front. There have been no problems with this installation.
Above: They use bungee cords to keep them in place during travel
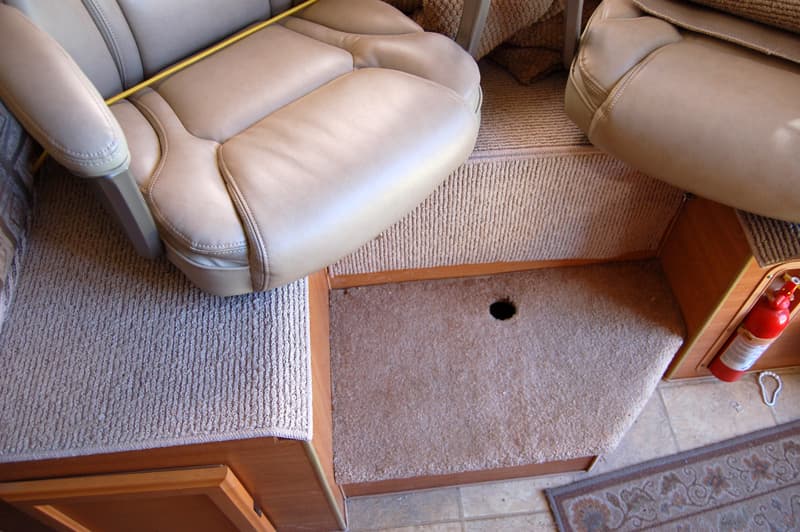
On our second truck camping trip we spent four weeks in the Texas Hill Country and Big Bend and drove 800 miles. The chairs were much more comfortable than the dinette but my wife decided that the foot well would be more comfortable if it was a bit higher.
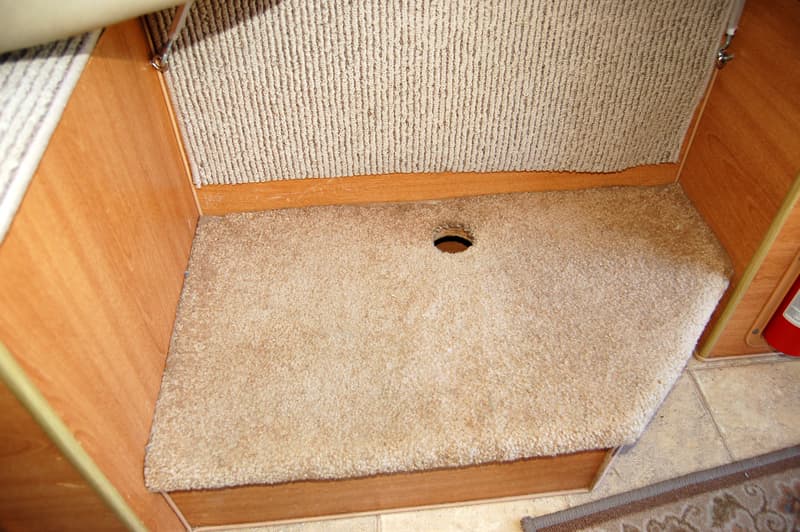
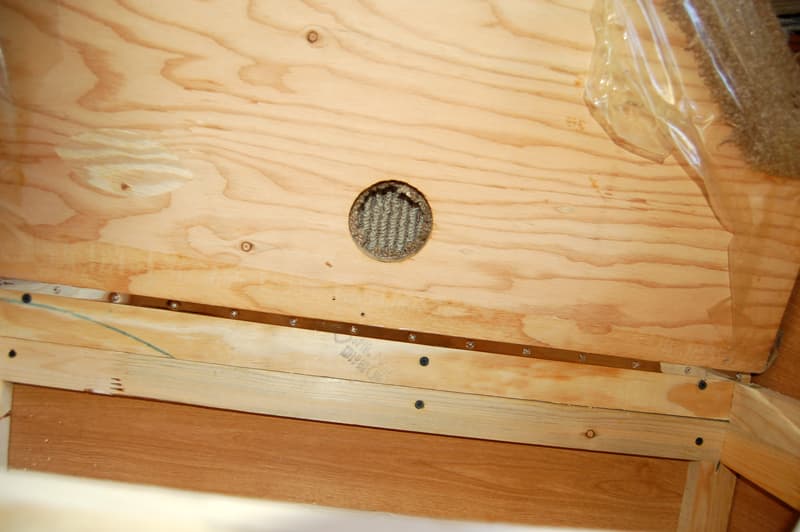
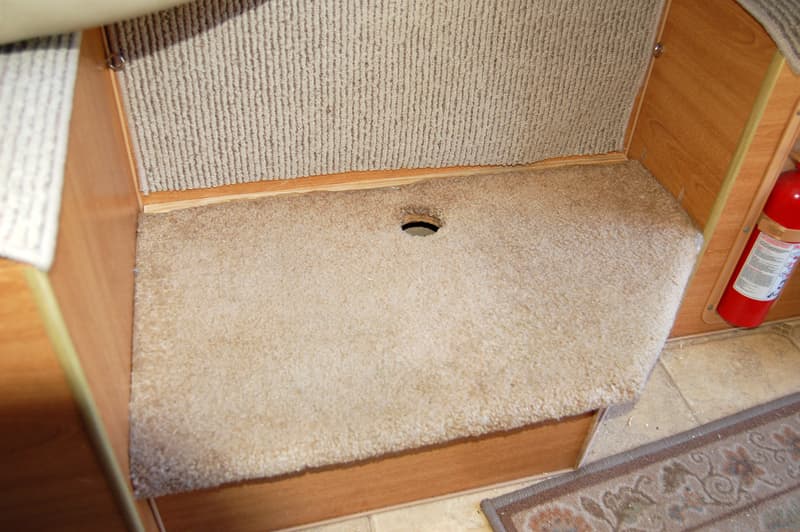
Above: Unmodified foot rest closeup
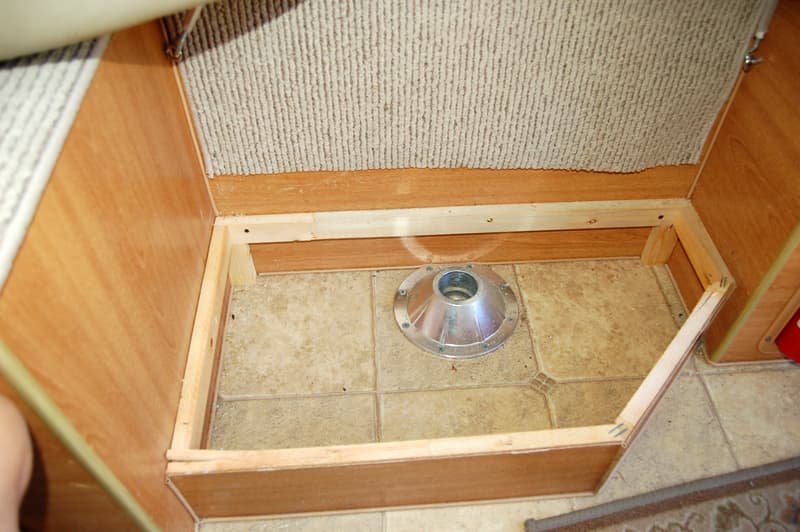
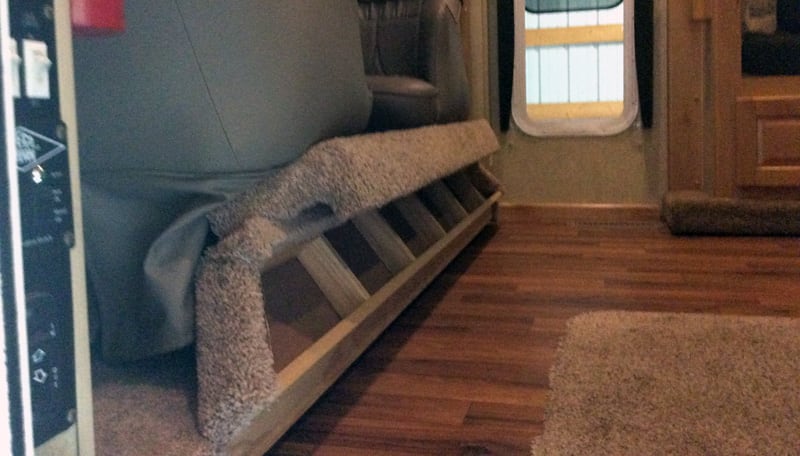
Above: This is what was under the foot rest
I removed the top of the foot rest and discovered what I suspected – a nice storage compartment. With storage being in short supply in a Lance 915, I decided this mod was worth pursuing.
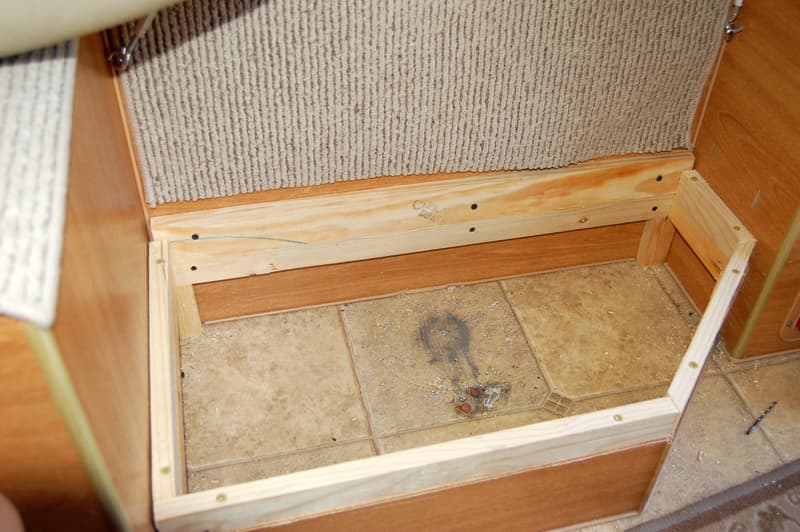
Above: Dinette foot rest on new extension
I extended the height of the box by screwing a one-inch by two-inch board to the top of the existing frame with 3-inch screws. I ripped a one-inch by four-inch board for the rear part of the frame to make it a half-inch taller.
Above: Piano hinge on the rest top
I screwed a piano hinge to the foot rest top. Voilà, I now have a wine and beer cellar and my wife has her feet up where she wants them. Until truck camping trip number three to Nova Scotia, I won’t be sure that the height is perfect.
Above: The new foot rest is higher
The chairs are much more comfortable than the dinette. Raising the foot rest improved the comfort and the extra storage is an added bonus. Eating on a lap tray is no problem and a laptop in the lap works out just fine for me. My wife puts a cushion under her iPad to raise it a little.
It took me 3.5-hours to complete this modification and cost me $280. In my opinion, the skill level of this modification is medium.
Submitted by: Jim and Joan Thompson, 2011 GMC 3500, 2013 Lance 1191
We are fortunate to be able to work from the road for four or five weeks at a time using our laptops and cellular internet connection. We had room to work comfortably in our fifth wheel. However, when we bought a truck camper, we found the dinette seating unbearably uncomfortable for using a laptop, or for any kind of extended sitting.
Our 2013 Lance 1191 has a deep slide-out featuring a U-shape dinette. We needed to convert that area into a more comfortable place to sit and work. When we’re not working, we wanted a more comfortable place to sit and read (or in my case, knit).
We decided that whatever we did should be reversible in case we decide to sell the camper down the road. We knew we would want be able put it all back into a stock U-shape dinette without any extra holes in the walls. We also didn’t want to add a lot of weight to our rig, and we wanted to accomplish our changes without losing storage space.
We’ve accomplished our goals! Here’s what we did:
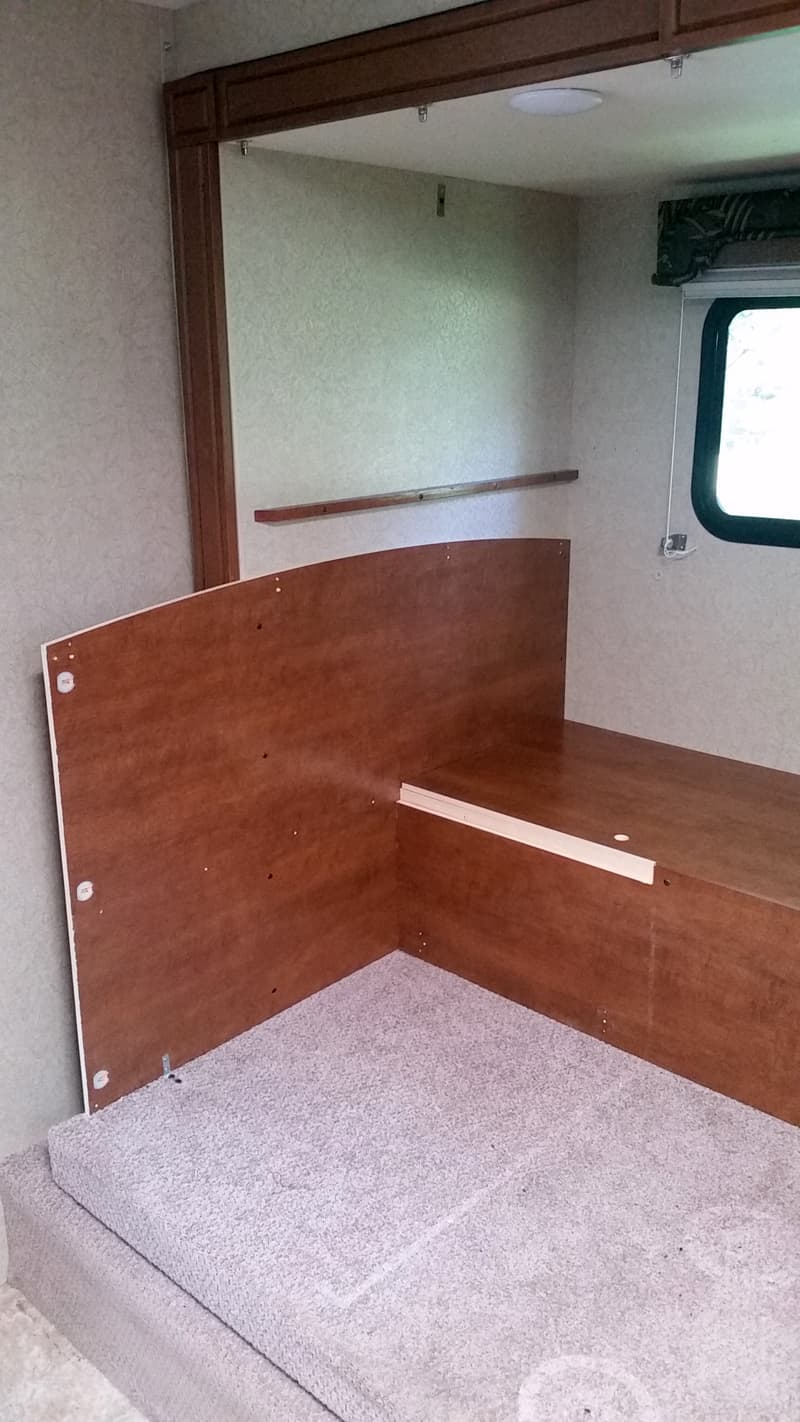
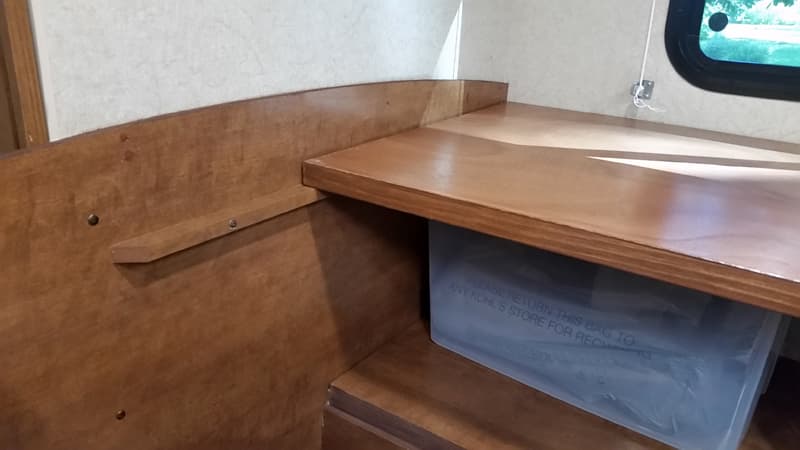
1. We removed most of the dinette except for the boards that form the back of the seats and the large storage area that’s accessible from the outside. Everything came out easily with a screwdriver. No glue joints had to be broken. We put hardware into plastic bags and labeled them, taking photos as we worked.
The photo above shows what we left in place. We also removed the bunk bed. The bunk bed was heavy, cuts down on headspace in the slide, and is something we do not need.
2. In the above photo, you can see the supports for the bunk bed on the wall. You can also see that we moved the window valance and shade up almost to the ceiling. When the shade is up, it no longer covers one-third of the glass. What a difference!
3. We moved the bunk bed supports down and mounted them on the dinette seat-back boards – as shown above. We bought an unfinished 24-inch by 80-inch hollow-core slab door from Home Depot, cut it to length, then stained and finished it.
The door sits on the bunk bed supports and slides forward for use as a desk. If it ever sags, it can be flipped over.
We found some 54-quart plastic storage boxes that are just the right height to sit on top of the outside storage compartment. We can fit three of these boxes length-wise in this area. They sit back against the wall and allow the knee-space we need when we are facing the window using the desk.
The boxes seem to give us a little more storage than what we lost by removing the drawers under the dinette. A stretch cord across the three boxes (not yet in place when the photo was taken) holds them in while traveling.
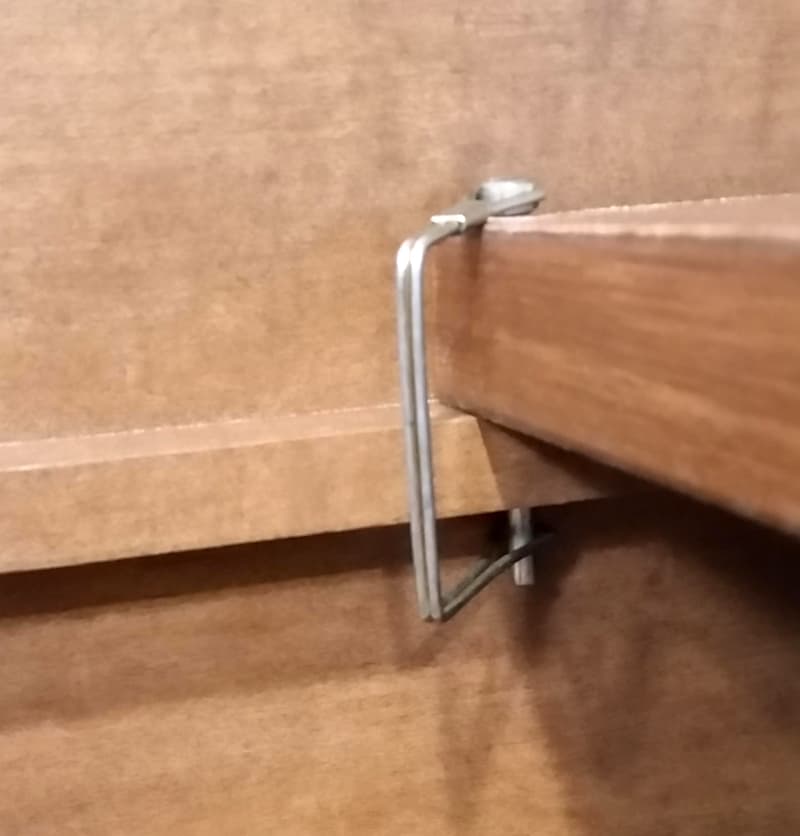
4. When we are on the road, the desk is held in place with a couple of clips that go through the supports, as shown above.
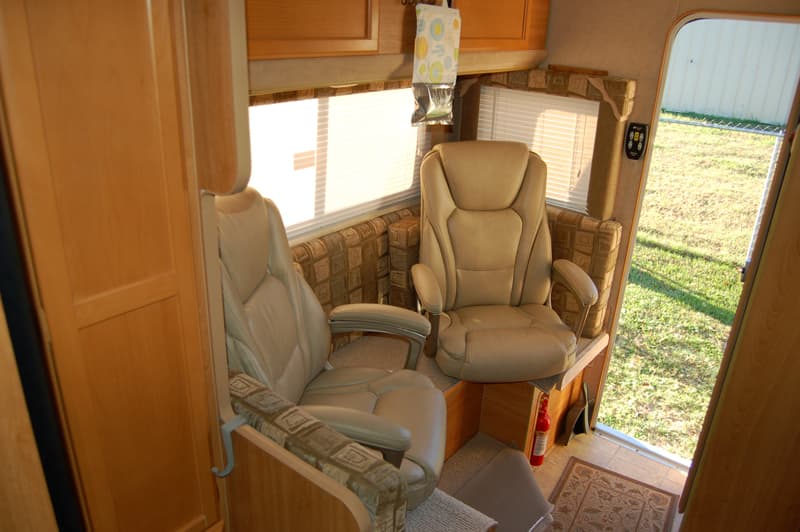
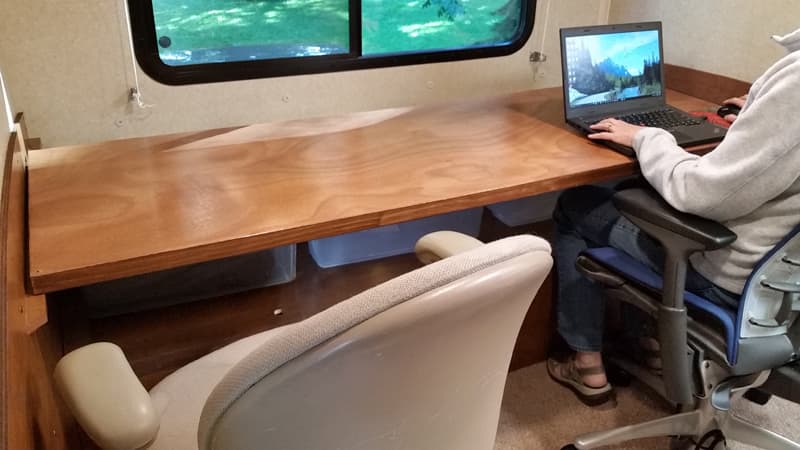
5. Next, we brought our comfortable office chairs into the camper. We are both tall people with long legs, so the placement of the chairs was all planned out beforehand to make sure we had leg room.
The spacing is just right to be able to sit facing the window to work, with the desk pulled forward about eight inches as shown in the photo above. We can also push the desk back against the wall and swivel the chairs to face the camper’s interior for relaxing or reading. With the desk against the wall and the back of the seat in the corner, I am able to recline as much as I would want to.
6. As you can see from the photo above, we have just enough room on the slide for the chairs. It would not have been possible to leave our outside storage intact without having the extra slide depth from the deep U-shape dinette slide.
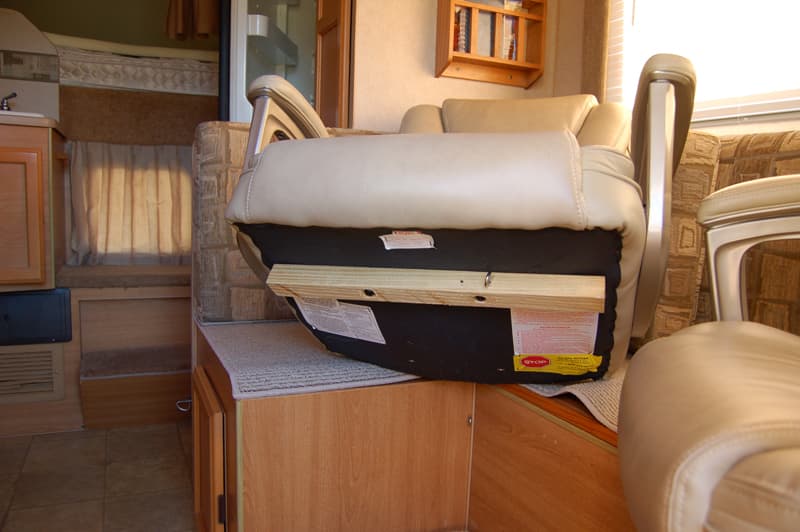
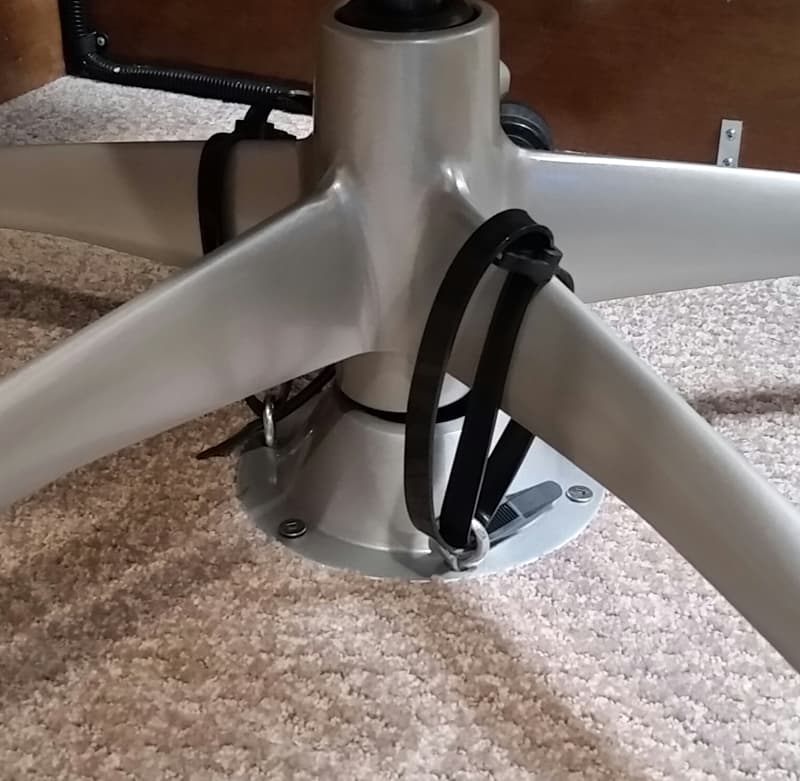
Next, we needed a way to keep the chairs from moving around and possibly falling off the slide floor while traveling or sitting in them. We took the two table supports from the center of the slide floor and mounted one under each chair using the original hardware.
Like most office chairs, our office chairs have a center shaft that extends down from the bottom. We positioned the table mounts directly beneath the center shafts.
To keep the chairs from jumping out of their holders, we replaced two of the screws on each table mount with I-bolts that go through the floor of the slide with a fender washer and locknut. The I-bolts allow the chairs to be solidly strapped down.
We do not move the chairs, and they’re in exactly the right position for either working or lounging. When we travel, the chairs are turned back-to-back with a stretch cord between them. The photo above also shows the wiring for the slide, in the background. We repositioned this wiring simply by moving the clips that held it in place.
If we want to eat facing each other, it is a little tight, but it works. We normally bring a folding table with us. Usually, we’re in a campground that has an outdoor table and we prefer that anyway, but this is a good option to have.
Before embarking on this mod, we spent a lot of time thinking about our priorities, and we had decided that comfort for working and relaxing was more important than being able to have an indoor table where we could sit facing each other.
7. We painted the exposed edges of the wood seat-back panels brown and filled in the screw-holes with wood filler.
Obviously, this mod would be nicer without the dinette seat’s back panels, and we realized that removing them would make getting in and out of the bed with the slide in very easy when stealth camping. But, because the storage box is built to fit between those two seat-back panels, removing them would have meant making spacers to put between the ends of the storage box and walls. We decided to start here and try it out.
We can remove these panels down the road, or we can put it back to a dinette very easily. All we would be out is some time and the $35 we spent on the door and stain. None of the new screw-holes we made will be visible when the camper is returned to its original U-shape dinette.
The door weighs about 15-pounds and the chairs average about 40-pounds each. With the removal of the bunk bed and dinette, we think the slide is no heavier now than originally configured.
We just completed a four week trip throughout Montana and Idaho. We found it best to take turns getting in and out of our chairs.
We also discovered that accessing the storage boxes requires that you be smarter than the box (and by the way, the box lids are an unnecessary complication). Those were our only learning curves. Overall, we were amazed at how well it worked, and how nice it was to have a comfortable place to sit for working, lounging, or eating.
It took me 100 hours of thinking and about five hours of doing to complete this modification. It cost me $29 for the door and $6 for some stain. We already had the polyurethane, office chairs, and fasteners. In my opinion, the skill level of this modification is easy.
Submitted by: David Donovan, 2007 Chevrolet K3500, 2012 Chalet TS 116
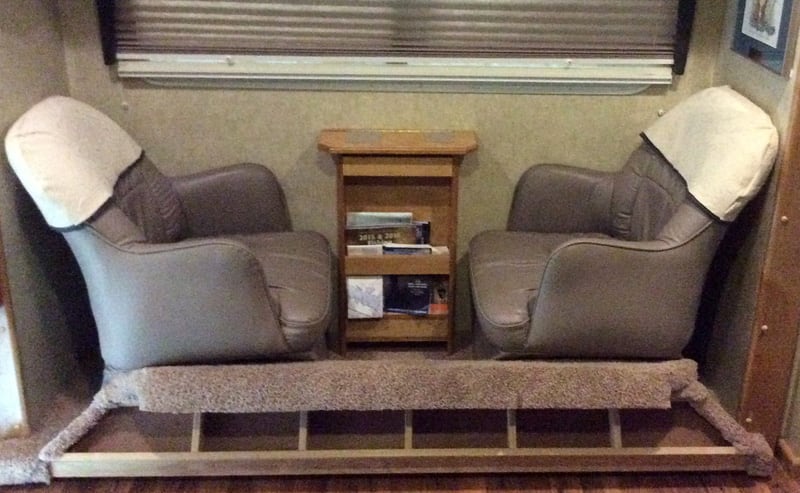
I own a Chalet TS116 camper. The rear slide contained a couch/sleeper in it. The couch was very uncomfortable to sit on and, since there is just my wife and I, we didn’t need to use the sleeper. I decided to look into if I could modify the couch/sleeper into a two chair installation. This would improve our comfort.
Above: The added floor has a hinge so that the slide can close
I took the existing couch out. Since the rear slide in the Chalet camper is not very deep, some depth had to be added to the floor in order to make the chairs fit. This could not be a permanent floor. Otherwise the slide wouldn’t close. The added floor had to be made to hinge up and the chairs moved back when the slide was retracted.
Above: The chairs turn to the side and the table is folded up in travel mode
I also built a table between the chairs that could be folded up when traveling. The pictures explain what was done. All materials were purchased at Home Depot except for the chairs.
This modification has worked out great. We did lose the storage under the couch, but the convenience and comfort of the two chairs far out way the lost storage.
It took me four to six hours to complete and cost $850. In my opinion, the skill level of this mod is medium.


