Get ready for part one of a four part, two-week, all-out truck camper mod-a-thon of epic proportions.

Welcome to the first of four contest entry articles from the 2012 Top Mod Showdown Contest. The first three installments include a runner-up $25 fuel card prize announcement. For the fourth installment, we will announce the winner of the $100 Fuel Card Prize.
The next two weeks will truly be a dream come true for all those truck camper modification craving readers who relentlessly pester us every year for more mods. We’re going to give you mods, mods, and more mods until you ask us for mercy. You’ll be practically begging for a simple truck camping lifestyle story when we’re done. I can hear it now, “Please Gordon and Angela, not another amazing mod. We can’t take it anymore!”
Runner-Up Winner #1: Kerry Stark, Pennsylvania
2009 Chevy Silverado 3500 dually
2010 Arctic Fox 1140
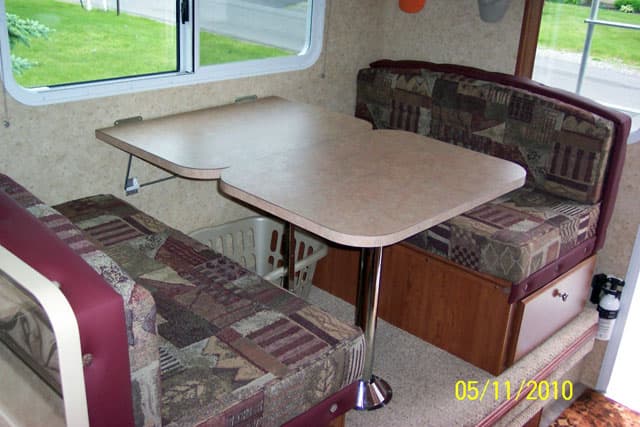 |  | 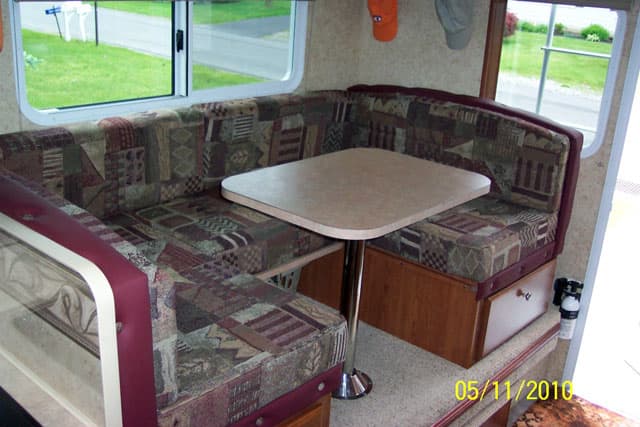 |
“This is a modification that I made to my Arctic Fox conventional dinette set-up. I didn’t want to lose the full table function, but I wanted the dinette arrangement to be more universal and comfortable. I removed the main big table and made two smaller tables that would match together. One piece uses the factory wall mount bracket and the other piece uses a floor pedestal mount that I added. By using both together, I don’t give up anything that was stock original.
I also have the capability of using just a small wall table for two, and that gives us some unobstructed seating at the aisle areas of the truck camper. If I drop down the small table, I can make a U-shaped couch set up with no table(s) to interfere. If I have the U-shaped couch set up, I can then use the optional second piece of table on a pedestal mount to still have use of a table while leaving the U-shaped couch in place.
I did have to contact the company that makes Northwood’s cushions and had them assist me in locating new material and make the extra cushions that I needed. I was able to closely match the factory table formica and the new tables were laminated over new plywood. I purchased the pedestal mount online from an RV supplier.
After posting pictures of this modification on some other RV sites, several others have used the idea to convert their dinettes also.” – Kerry Stark
2012 Top Mod Contest Entries Part 1
Tom and Joyce Wilson, North Carolina
2011 Ford F250
2003 Lance 815

“We have a Lance 815 and we needed extra outside storage space for drinks, fishing rods, wet shoes, etc. I made a storage box that attaches to the bottom of the camper. It is light weight at less than forty pounds empty. The storage space provides a 13” x 13” x 82” compartment that I use all the time.” – Tom and Joyce Wilson
Sally Stomberg and George Brown, Washington
2006 Ford F-550 DRW
2006 Lance 1191
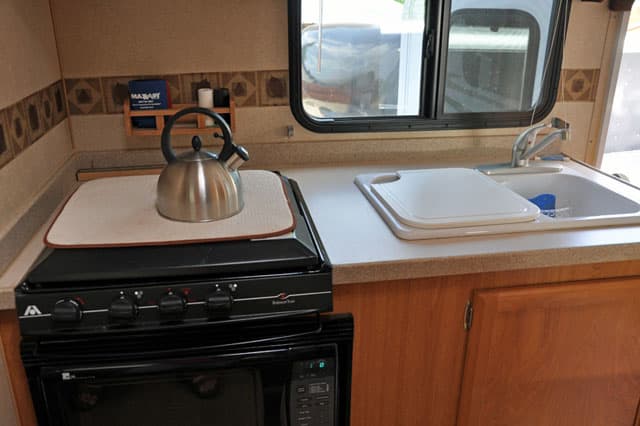 | 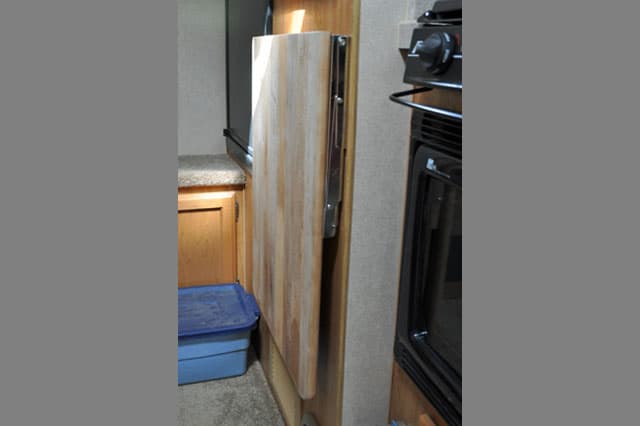 | 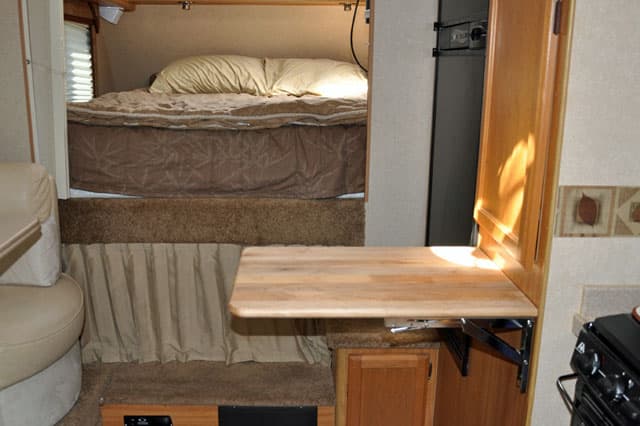 |
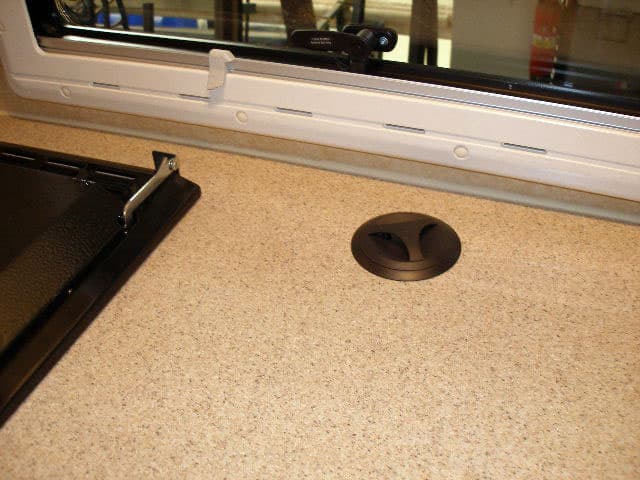
“I have come to the conclusion that someone who doesn’t cook in a truck camper designed the galley in our Lance 1191. There is practically no usable counter space unless the stove cover is down or the sink lid is on. But you can’t use the stove if the cover is on!
I did some research to see what other campers were doing to solve this issue because I know we aren’t the only ones looking for more counter space. We considered the flip-up countertop extension from Camping World but that was not usable nor large enough for what we wanted. I wasn’t able to find any other ready-to-go extensions either, so we decided to design our own.
After reviewing our options, we decided on locating the new countertop just below the closet that is between the refrigerator and galley. We had about 19″ of width to use. What to use for a countertop was our next decision. Do we build our own out of laminate and plywood or purchase a ready made cutting board close to the size we wanted? A cutting board would do the trick. I found a nice 18″ x 24″ cutting board at Bed Bath & Beyond. George trimmed the back edge off to remove where the corners were rounded and then gave the board a coat of cutting board oil.
I researched many types of brackets and settled on a Sugatsune polished stainless bracket from Woodworkers Hardware. Note to self: re-read the unit of measure before ordering. Much to my chagrin, when my package arrived it only had one bracket in the box. It was a nice looking shiny sturdy bracket, but there was just one of them. We needed two. I had looked at so many brackets and most came in pairs. When I placed my order, I assumed it was for a pair, especially at almost $40 plus shipping. So back to the computer I went to order another bracket. And of course I had to pay for more shipping costs that would have been covered on my first order. Drats!
The flip-up extension cost us $130 for the brackets and cutting board, definitely more than we wanted to spend. It could have been done for much less money by using non-stainless brackets. However, not only do we have nice form, we also have great function. The flip-up extension is definitely what this galley needed.
Extension in the down position sticks out 1 and 7/8″ from the wall and the bracket is friction held in place during travel so it doesn’t bounce around. Now this is usable food prep space! We still have plenty of room to move around the extension and get to the refrigerator. Having the extra space to work with has been much more pleasurable.” – Sally Stomberg and George Brown
Art and Mabel Davidson, New York
2007 Chevrolet 3500 Dually
2003 Bigfoot 30c10.11SL
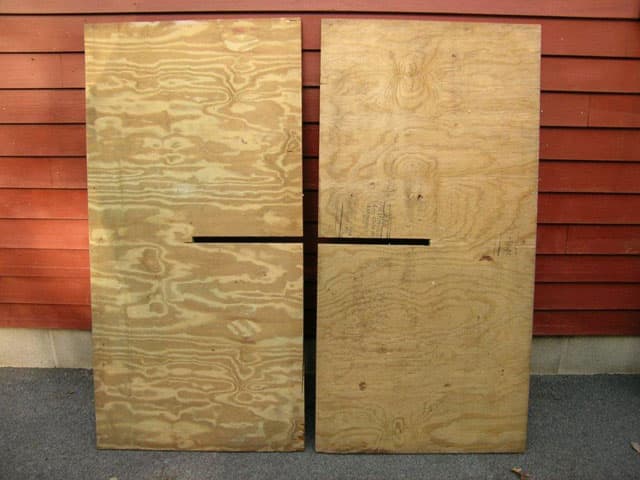 |  |  |
“I made storage supports made from one 4X8 sheet of ¾” pressure treated plywood cut into a four 2X4 piece and notched out. The pieces can be laid flat in truck bed under camper for use when traveling.” – Art and Mabel Davidson
John Wells, Pennsylvania
2002 Ford F350 Powerstroke Dually
2005 Lance 1025

“We do a lot of boondocking. We already had a solar panel and digital charge controller. We also had a Honda EU2000i suitcase generator. How could we get more battery storage capacity in a camper only designed for one Group 31 battery?
We converted the unused generator cabinet to hold another Group 31 AGM battery. Generator pre-wiring in the Lance allowed the unused cabinet to hold another Group 31 AGM battery. Unused generator wires, very heavy gauge, are already carried to the cabinet in the bathroom that holds the solar charge controller and is adjacent to the battery compartment.
I converted the generator leads with battery terminals and connected them to the existing battery after drilling an access hole in the battery compartment. The hole was sealed with Duxseal after passing cables through. Back in the new battery (old generator) compartment, I installed a heavy duty cut-off switch in the hot lead, added battery terminals to the cables, and connected in parallel to the original battery.
I reinforced the floor pan in the compartment with several extra hold-down bolts to better support the battery weight. Due to the common recommendation to not hook old and new batteries together, I purchased two new Group 31 AGM batteries when performing this conversion. AGM batteries are needed for this conversion due to minimal off-gassing during charging.
The red key is the cut-off/isolator switch for this battery. Even after the conversion, there’s still plenty of storage space left for a tool bag, jack pads, etc.” – John Wells
Joe Brocki, New York
1991 Chevy 2500
Late 1960’s Leisure Time

“I built a hitch extender to get the hitch out past the back of the camper. Then I took a standard hitch mount luggage carrier and built a scooter attachment for it. When I get the camper leveled out at my campsite, I can leave it that way. I just hop on the scooter and ride to the store.” – Joe Brocki
Pete Horneck, Colorado
2006 Dodge Ram 2500
2010 Hallmark Milner LX
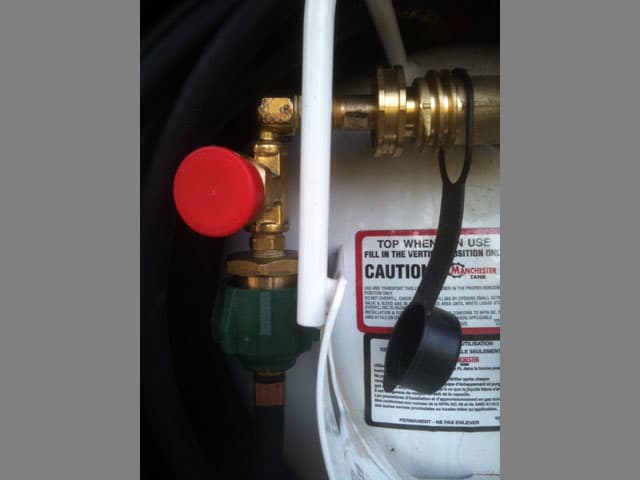 |  | |
“I prefer to cook outside rather than inside. I recently retired my pristine 1984 Coleman liquid fuel stove and tailgating charcoal grill for propane versions. The one pound LP bottles were kind of a pain so I had this fitting made to fit my thirty pound main tank. With a fifteen foot hose that stores in the compartment and plugs in where the red cap is, I can reach any side of the truck to get out of the wind or under the awning. It works great and I only have one LP tank to fill.” – Pete Horneck
Brad Caroline, California
2001 Ford F350 7.3 4×4 diesel, 212,000 miles
2012 Outfitter Apex 9.5
 |  | |
“I am always short on plugs for charging all of our electronics. This modification pops up adding three outlets and is nearly flush when closed. Other models have 110v outlets plus USB. I added two of these units to my camper (only came with a single duplex). I love them.” – Brad Caroline
David Miller Wostok, Alberta
2010 Ford F150
Adventurer 80GS

“My modification has to do with the tailgate. With my old F150, we just used to open the tailgate and put the camper on. This led to lots of stone chips on the tailgate. When I bought my new 2010 Ford F150, the salesman said the tailgate with the backup camera was worth about $3000. So I decided to build my own tailgate out of 2×2″ square tubing with three-quarters of a foot of plywood. The aluminum checker plate on the top helps support the overhang on the camper and gives my wife a little deck on the back. It works great.” – David Miller Wostok
Tom and Laurel Strock, Wisconsin
2003 Chevy Silverado 2500 HD
1996 Coachmen Ranger 100 SD
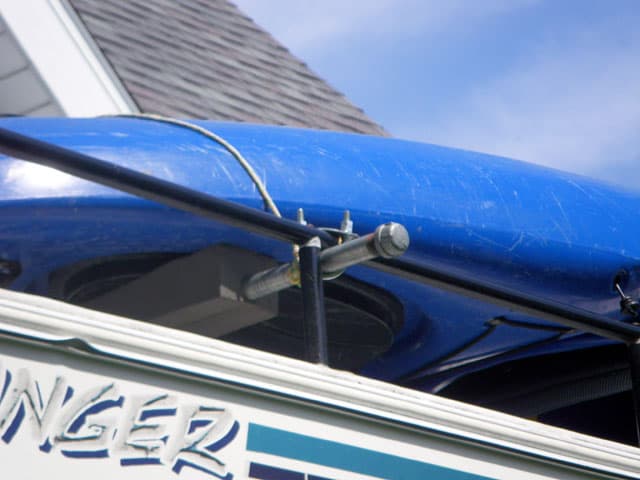 |  |  |
“My wife and I both enjoy combining truck camping with kayaking and canoeing. In a recent sixteen day trip we managed to paddle eleven days on six different rivers in four different states. Having your own truck camper waiting for you at the take out of a twenty-five mile river trip gives you a great degree of comfort. We know that everything we could possibly want or need will be safely waiting for us at the end. The least of which includes a cold drink, a hot shower, and dry clothes.
When we purchased our used camper, it came equipped with a luggage rack and roof ladder, but we had no way to carry any boats, let alone a way to get them up onto the roof. So I made a pair of roof racks from eight foot lengths of galvanized three-quarter inch iron water pipe purchased from a local home improvement store for about ten dollars each. Not wanting to drill any holes in the rubber roof to invite potential leaks, I fastened the rear bar to the existing luggage rack with a U-bolt on each end.
For the front rack, I built towers by laminating pieces of scrap 2x4s to achieve the proper height and then drilled the towers to accept the pipe. To hold the front rack in place, I attached a pair of ratchet nylon tie-down straps hooked between the end of the pipe and the jack brackets. Putting several twists in the straps will prevent them from sounding like a giant base fiddle at high speeds.
To solve the loading and unloading problem, I installed a set of Hully Rollers on the back of the luggage rack. By standing the boat on end and placing the bow in the notch of the two rollers, the boat is stable enough for me to then climb the ladder to the roof, grab on to the bow, and simply walk forward allowing the boat to climb up on to the rollers with very little effort. I then flip the boats over and tie them to the front and rear pipes. Unloading is simply the reverse.

We have been using this system for over five years and invariably we will arrive at a place only to have someone ask us how in the world we got those boats off of the camper. At that point I say that if they will take a minute, I’ll show them and wager that I can do it before they are able to get theirs off the roof of their car. For some reason they always just sit there and watch me, rather than tend to their own business of removing their own boat. Easy money.” – Tom and Laurel Strock
Jerry and Judy Funk, Full Timers
2006 Chevy Silverado 3500
2012 Lance 1181
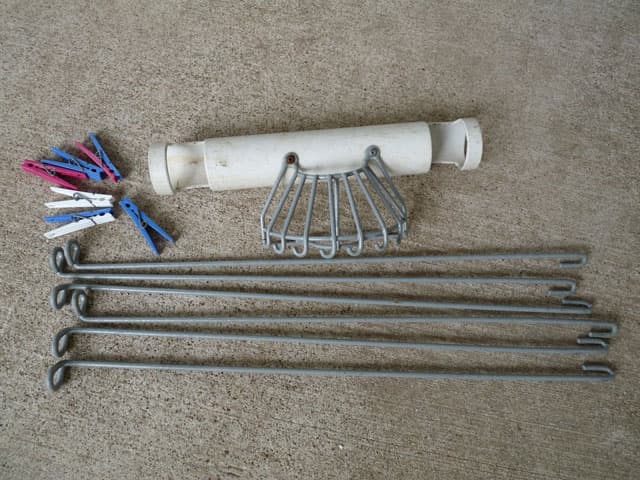 | 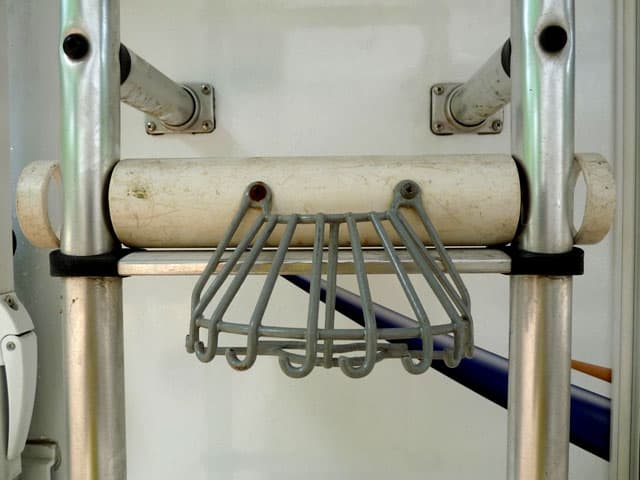 | 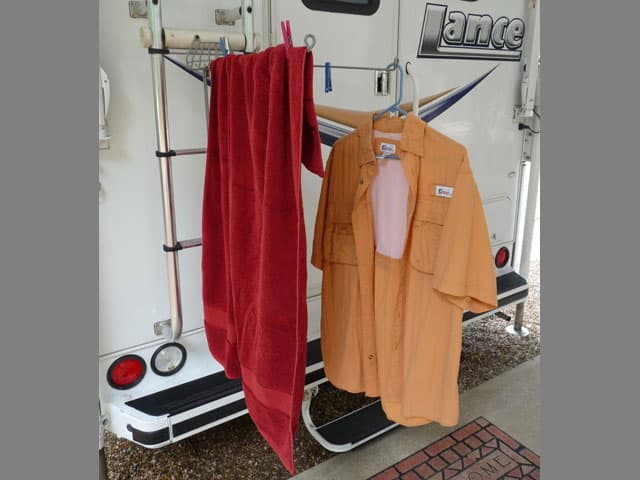 |
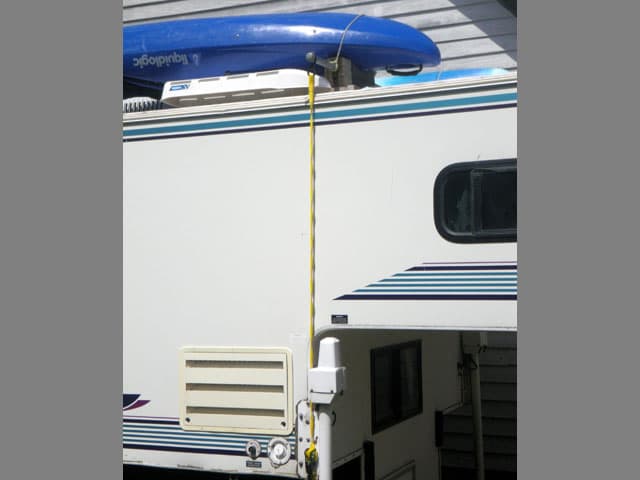
“Here’s our clothes rack. This is so easy to store and you can use it anywhere. We bought it at an Ikea store. We then modified a piece of PVC pipe and adapted it to our ladder. It takes a lot of moisture out of our rig and keeps wet stuff from hanging in the shower or inside the camper. We don’t need to run a line to anything.” – Jerry and Judy Funk
Jim Haldeman, Pennsylvania
2000 Ford F-350
1998 Lance 820

“I installed a receiver on the front of my Ford. Then I cut a eighteen inch tow bar into three pieces and welded it to get the manufactured bike rack low enough for good vision. It works absolutely great.” – Jim Haldeman
Paul and Marceil Gathany, Ohio
2009 Chevy Silverado 1500
2008 Sun Lite 865SE
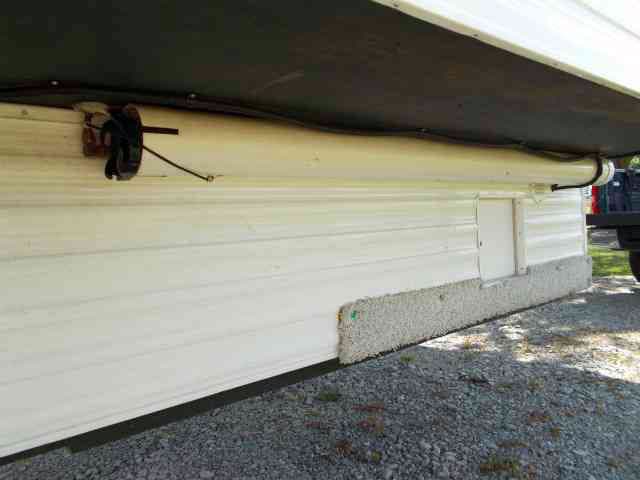 |  | 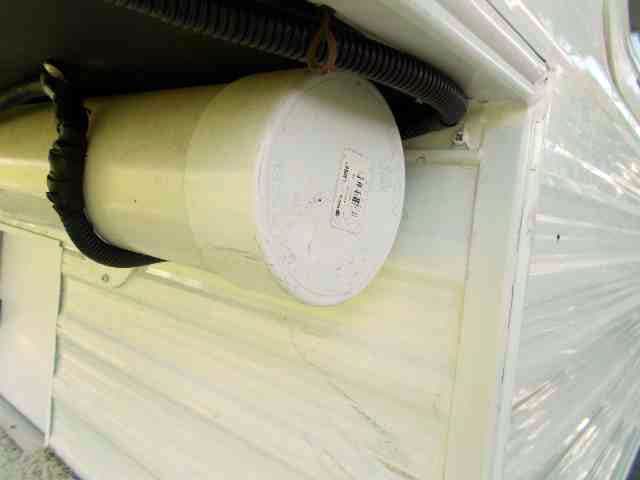 |
“When we purchased our camper, one of the deficits in the design was the lack of a good place to store the sewer hose. There was no compartment for it. The only two options were to keep it in the bed of the truck, accessed via the inside pocket door, or in the compartment under the front bed step, where the fresh water tank is located. Neither seemed like something we wanted to deal with on our camping exploits.
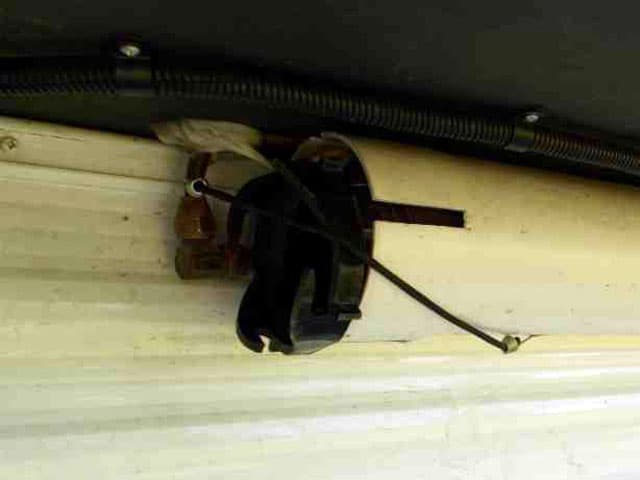
The solution was quite simple. There is sufficient room on the passenger’s side, under the camper’s over the wheel well area. A six foot piece of four inch PVC drain pipe and an end cap fit the bill. Three half inch holes were drilled and spaced along the pipe. On the opposite side of the pipe, directly across from the half inch holes, quarter inch holes were drilled.
The cap is placed on the end of the pipe toward the front of the camper. The quarter inch holes are used for fastening the pipe with one inch pan head screws. The half inch holes give screwdriver access to the screws and provide drainage for any moisture that remains on the inserted sewer hose after cleaning.
There is plenty of room to insert the hose in the rear end of the pipe. A couple half inch holes are drilled near the rear of the pipe allowing for a mini-bungy cord to be fastened across the opening. This acts as a retainer to keep the hose from sliding out.
This modification gets the sewer hose storage outside of the camper and where it’s not really noticeable. Access is quite easy to reach and use. It doesn’t hamper loading and unloading the camper.” – Paul and Marceil Gathany
M. E. Sellers, California
2005 Dodge 2500 Power Wagon
2007 Sun-Lite 690
 | 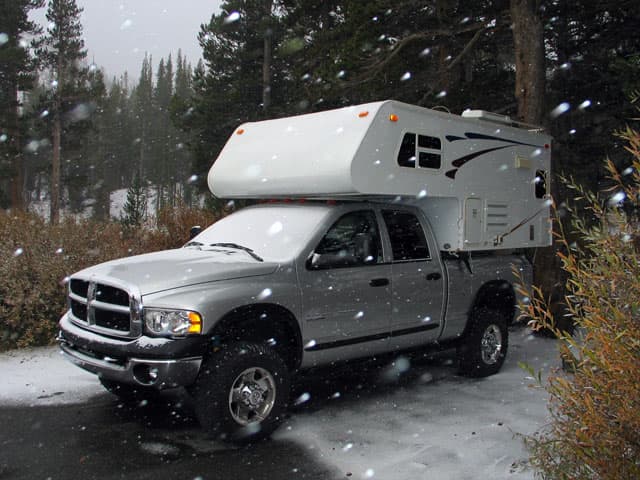 | |
“I remove the jacks once I load the camper and I leave them at home. The first reason that I remove the jacks is that they weigh about forty-five pounds each. The second reason is that they are susceptible to damage when off-road. Third, there is better vision when using mirrors without the jacks. The rig also just looks better. Removing the jacks really helps for traveling on and off-road, reduces sway, and it only takes about twenty minutes to do.” – M.E. Sellers
Disclaimer: It is your responsibility to make sure that any do-it-yourself modification project you undertake is safe, effective, and legal for your situation.