Here are some must-see solutions to keep your cats from taking over your camper, sneaking under the slide-out, or filing a complaint about lack of outdoor access. And yes, there are a few extremely clever litter box spots.

It’s no secret that we are quite fond of cats. Our beloved Harley truck camped with us for fourteen years. Let there be no doubt that he probably loved truck camping even more than we did. Harley was never more happy than when he was sleeping, resting, napping or otherwise endlessly licking himself in the back seat of a pickup truck at highway speeds.
We attempted many modifications for Harley but he didn’t take well to new ideas or change. The most famous attempt was something called a Litter Kwitter. The concept was to train your cat to use a human toilet instead of a litter box, but he ended up teaching us a lesson instead. Oh we have stories.
Thank you to everyone who sent in these fine feline feats. They are all extremely impressive, and we’re not lion.
by Kevin Mooney, 2014 Ford F350, 2006 Okanagan 106UDB
Lori and I travel with Tia, our indoor cat, and needed a place for a litter box.
When we stopped for the night in our previous camper, I would inflate a motorcycle inner tube between the truck window and the camper window, and then use that as a bug-free way of giving Tia access to his litter box in the back seat of the truck.
With our newer camper and flatbed truck, using the truck and camper pass-through windows is no longer an option. Nothing lines up. With one litter box in the truck, I had to find a place in the camper for a second litter box.
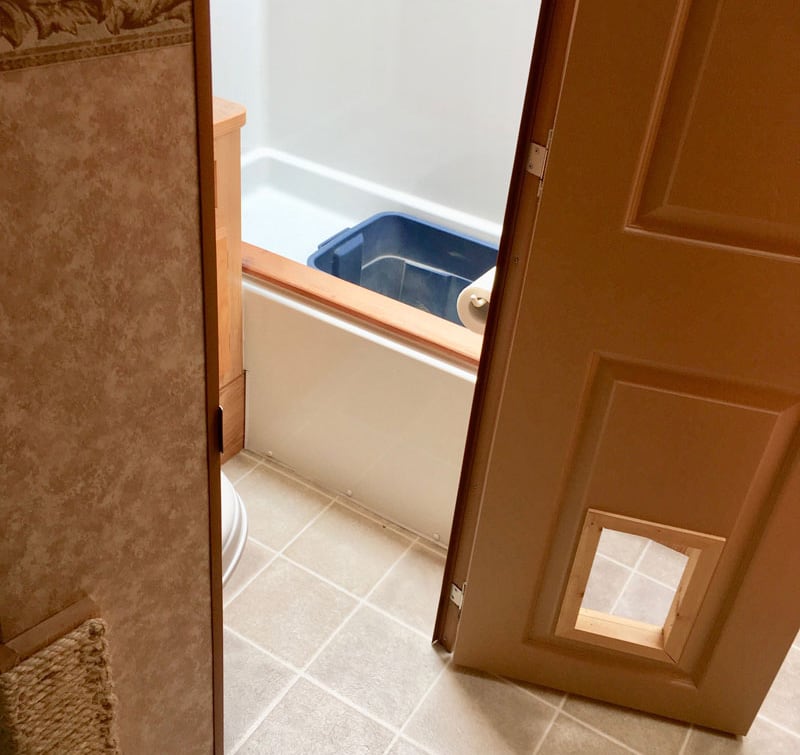
After much thought, I realized that we don’t use our shower very often, and putting his litter box in there would be ideal. It is the bathroom after all.
It turns out that by cutting the handle off of one side of a Rubbermaid tub, it fits perfectly in the shower. I taped some of that non-skid shelf paper onto the bottom of the tub so as not to scratch the finish in the shower stall.
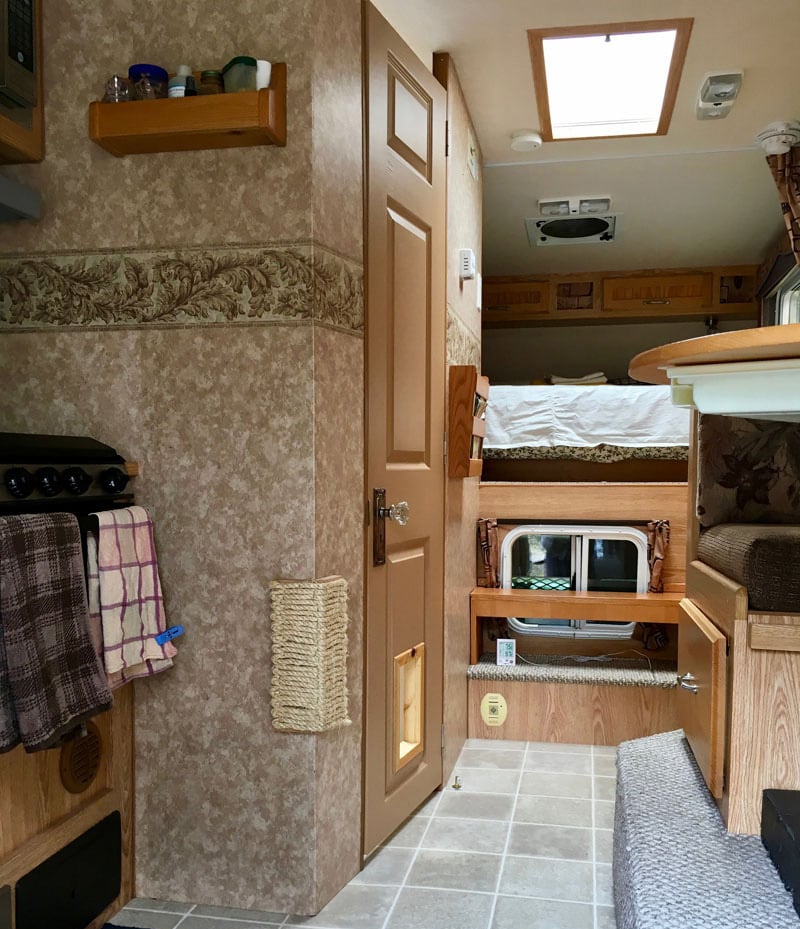
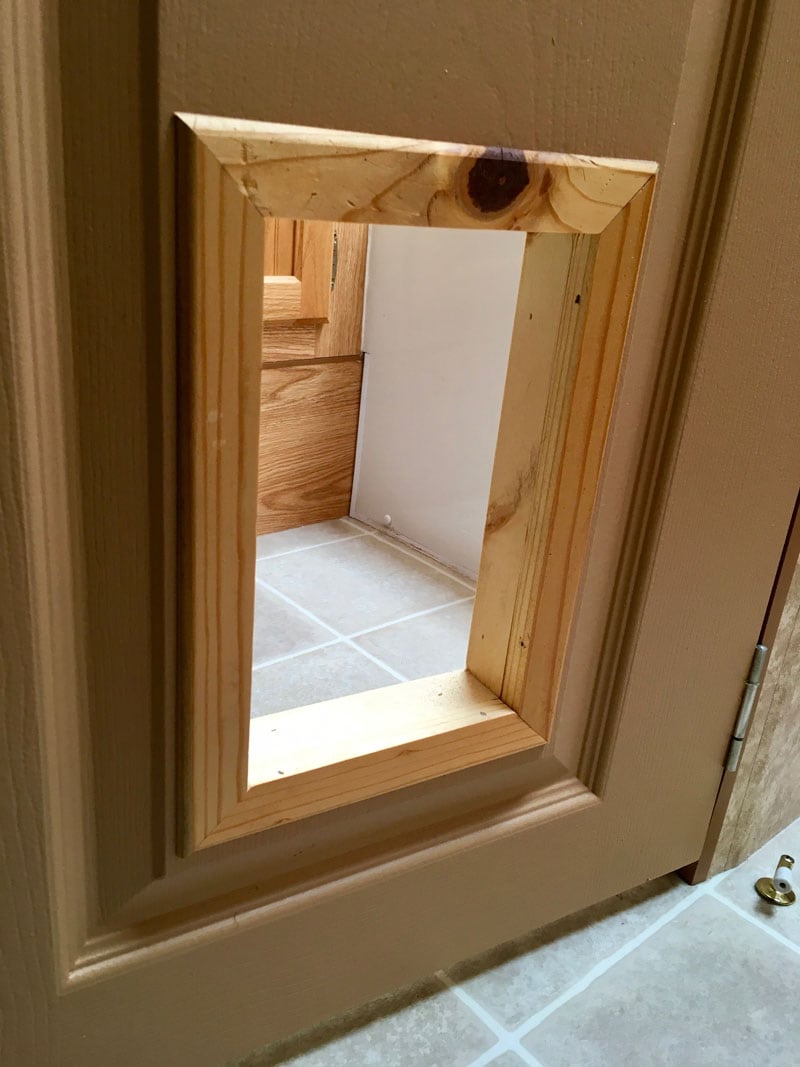
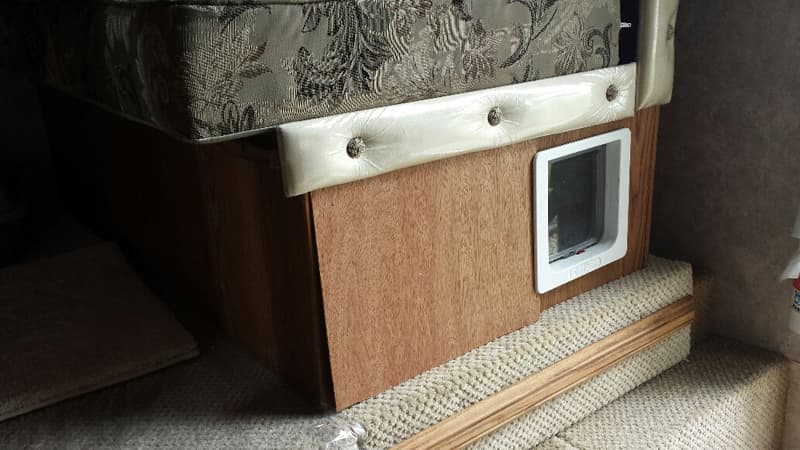
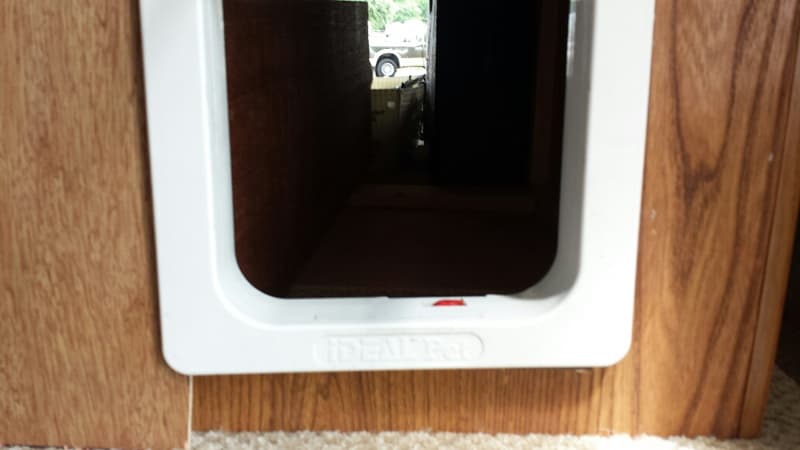
Next, I took the huge and heavy mirror off the door and sanded, painted, and cut a hole for cat access. The door is hollow, so I infilled around the perimeter of the cut with some scrap wood to give it some rigidity.
After that, I made up some moldings to size. Basically, I made a picture frame on either side of the door. It didn’t take Tia too long to figure that one out.
I didn’t put a swinging style door on it as I figured it might be obstructed by the toilet on the one side. If nothing else, it provides an extra bit of ventilation when the fan is on.
It is a bit odd using the toilet yourself, and suddenly feeling this furry thing brushing against your leg. Tia seems to think it is a group activity!
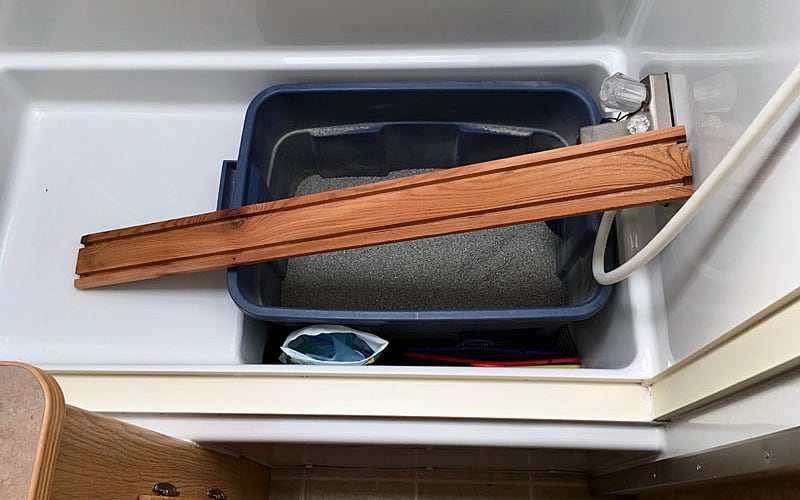
After some time, I found that litter was accumulating in the sill of the shower curtain trough. Getting that soaking wet was not going to be a good idea, so I cut some slots in the back of a chunk of cedar and notched it at one end to fit in the other groves. This has eliminated litter getting into the sill.
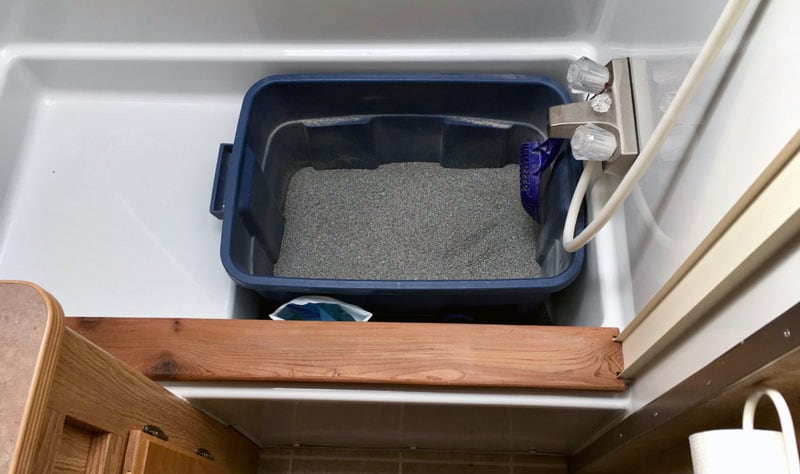
Lastly was a fancy old door knob set for Lori to finish it off. While I was cutting wood, I slapped together a wall-mounted, rope style scratching post for just outside the door. Tia took to that pretty quickly as well, and it saves the furniture.
This mod was one of my better ideas. We no longer have to get out of bed to open a window in the middle of the night so our little man can go have a pee. If either of us wants to have a shower, we just lift the box out and place it in the other room temporarily, which is no big deal.
Any odors are contained where they should be. Leaving the vent open on a nice day never hurts either. I couldn’t have hoped for anything more. I don’t think Tia could care less but, then again, he’s a cat!
It took me a couple of hours to complete this modification and cost me one Rubbermaid tub and some molding. In my opinion, the skill level of this modification is medium.
by David Cox, 2014 Ford F350, 2014 Arctic Fox 990
A vexing problem we faced with our Arctic Fox 990 is that we wanted to travel with our two cats. While driving, keeping the cats in the back of our Ford F350 super cab was not a workable solution. They needed to get to their litter box as well as to water and food. There is not enough room in the truck for these items.
We have a pass-through donut between the cab and the camper so the cats are free to go between truck and camper to use the litter box, access food, and sleep.
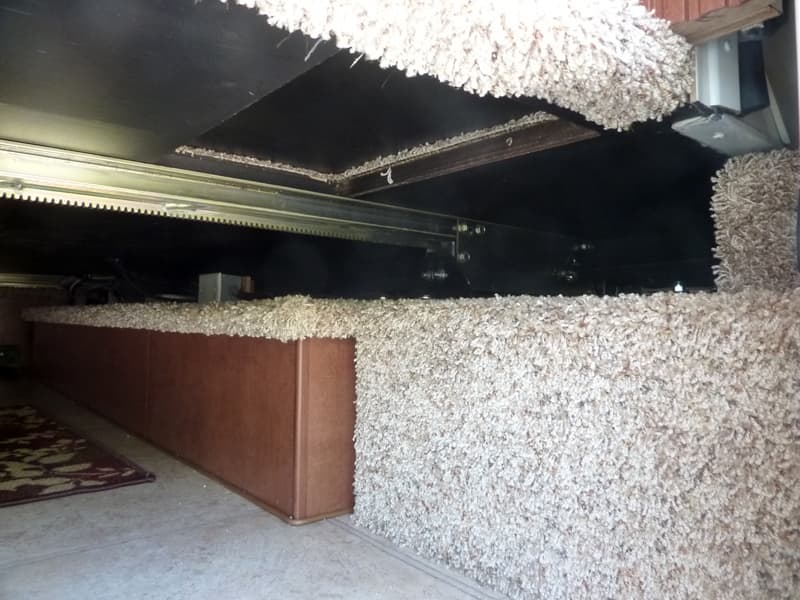
Above: The original slide-out before the cat blocker was installed, see the open gap where the slide mechanism is located
The problem we were having occurred when our slide-out was pulled in. Cats like to hide in small, dark spaces – like the ones created under the slide-out when it’s in.
We often pull over for lunch and open the slide-out. But, if the cats are underneath, that could be a problem. Unlike dogs, when you call cats, they just ignore you. So we were faced with the likelihood of not being able to open the dining area when we needed it. Or worse, sliding the room out and crushing the cats! That would not be good.
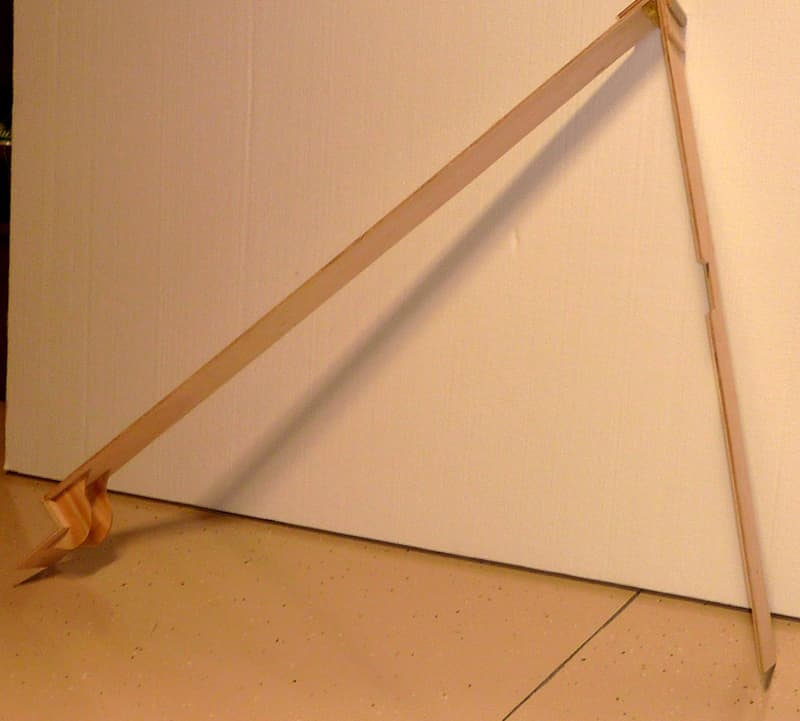
To solve this problem, I created a way to block the underside of the slide-out room when the slide-out was in.

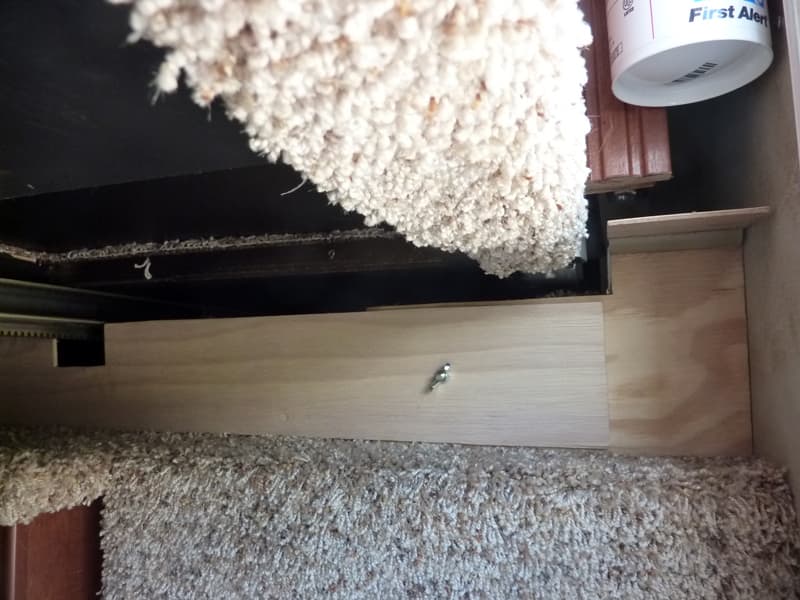
Above: The cat blocker assembled before it is installed in the camper’s slide
My design goals were (a) to prevent the cats from getting under the slide, (b) easy installation that takes under two minutes, (c) the ability to open the slide-out room partially without removing the blocker, and (d) the blocker is able to be stored in the truck when not installed.
The blocker is in three parts; the left side, right side, and the center span between the two. The sides are custom-fit since the openings are different.

Above: Cat blocker, left side
Above: Cat blocker, right side
Above: Cat blocker, center
Above: Showing the hinge of the center span
The center span is hinged to facilitate storage. Two wing nuts are all that is needed to assemble the blocker.
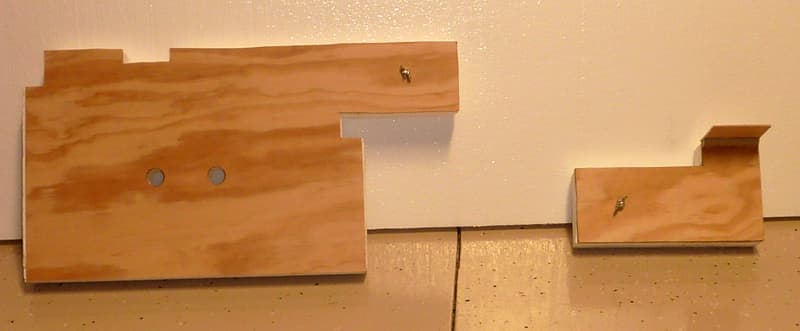
Above: Left and right pieces on their own
The left and right sides are ¼-inch plywood with 2-inch thick insulating Styrofoam backing for stability. The center span is ¼-inch plywood, hinged at the center.
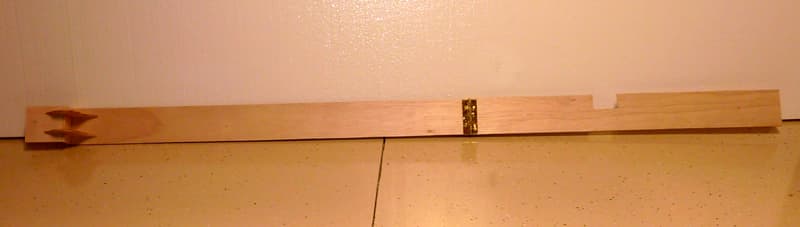
Above: Center span on its own
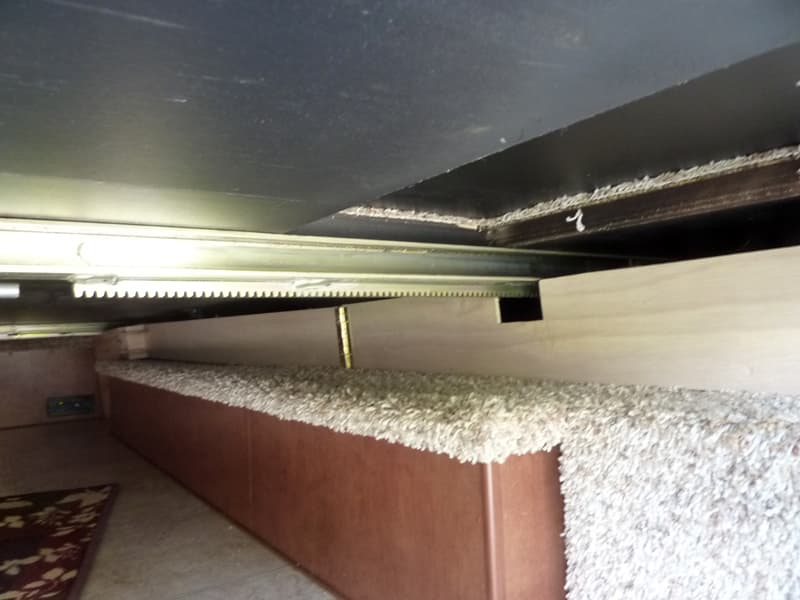
The blocker works as planned. The blocker can be quickly installed by one person, but two make it easier.
The cats cannot get into the Netherlands under the slide-out and we can move the room out a foot or so to hop in for a quick lunch while the blocker is still in there.
The blocker took me eight hours to design, fabricate, tweak, redesign, etc. The materials cost me $20. In my opinion, the skill level of this modification is medium.
by Michael Smith, 2015 Ford F350, 2008 Arctic Fox 990
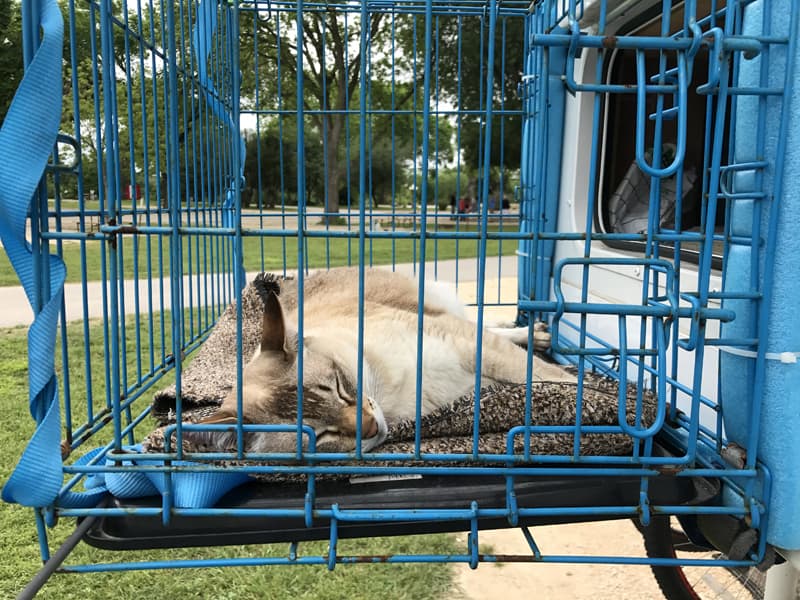
When we decided to do some traveling in a truck camper, we knew that our younger cat, Sandy, would need more room to roam, so we adapted our small cage and a passage into the truck for her.
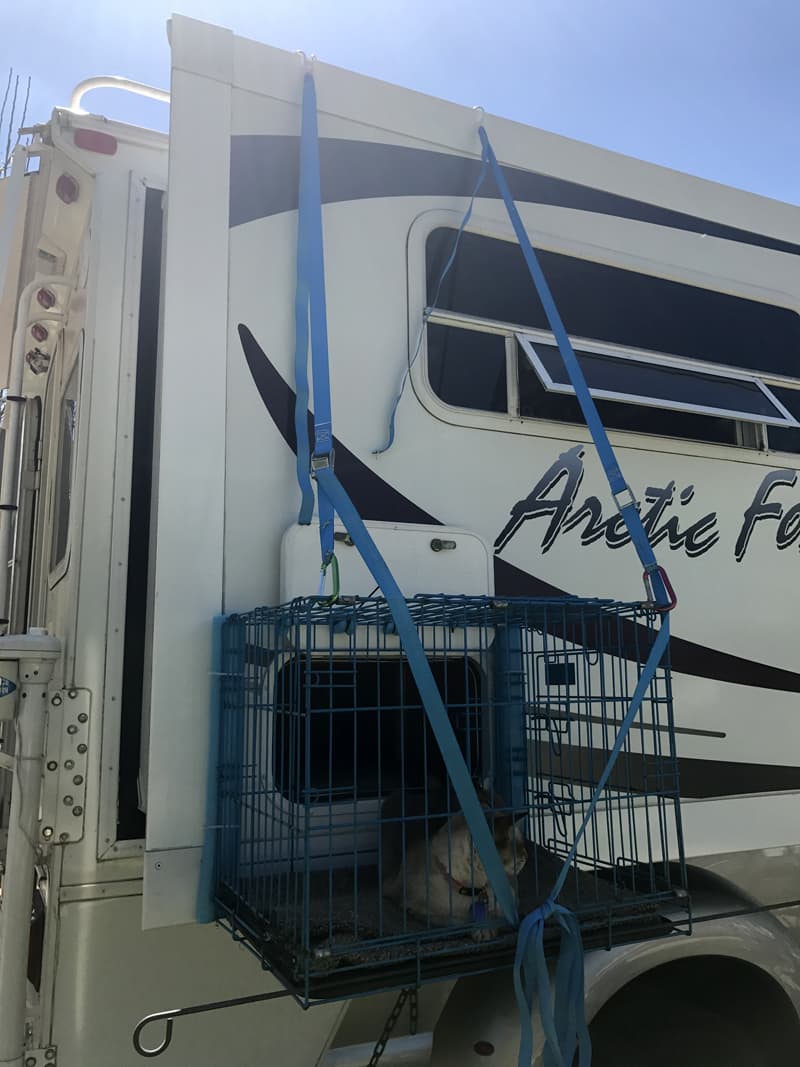
Using our existing cage, I suspended it from the top of the slide with adjustable length straps and secured the bottom of the cage with two C-clamps. Foam padding was added so that we do not to mar the camper finish. This method has no permanent changes or drilled holes in the camper.
I removed a drawer inside the Arctic Fox and installed our cat door to allow the cats to pass through to the side hatch opening.
It takes five minutes to install or remove. When I take it off, the camper is returned to its original form.
This has worked well so far. Sandy loves to run from the truck, through the camper and into her “cat-io”. She will often sleep outside, even on chilly nights.
The needed improvements to this mod are (1) a better way to suspend the cage, and (2) a better tunnel from the camper into the cage. Also, rain-proofing the opening.
It took me several hours of thinking, and 45 minutes of actual work. This modification cost me $20 since I used an existing cage and cat door. In my opinion, the skill level of this modification is easy.
by Robert Morrissey, 2011 Ford F350, 2012 Lance 850
Above: Windy in the overcab, covered tank switches under the sink
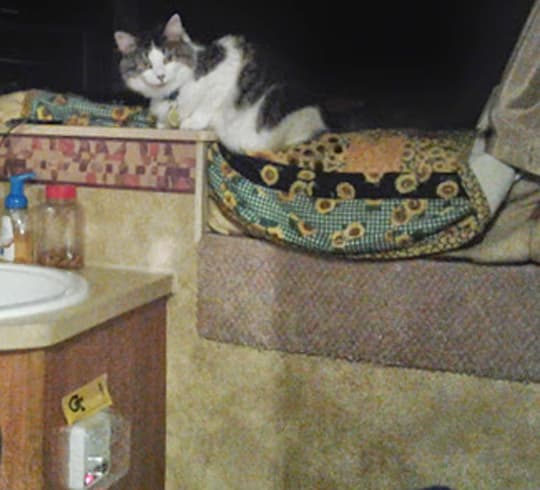
Our two cats, Windy and Stormy, have complete freedom while underway and roam about our camper at will. This mod is to prevent Windy and Stormy from accidentally turning on the water pump and flooding our truck camper while traveling down the road.
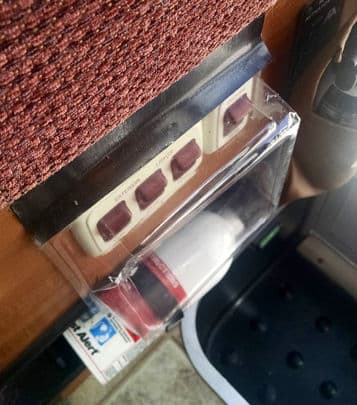
Above: A clear plastic vegetable container was used to cover the light switches
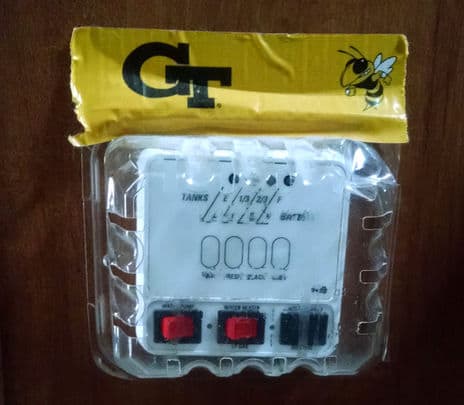
Above: A clear plastic vegetable container was used to cover the tank and water pump switches
I simply took a clear plastic vegetable container, removed the lid, and taped it over the switches. It works well and gives us peace of mind. I have also added a cover near the back door to prevent them from turning on the lights.
Above: Stormy enjoying their Lance 850
There have been no accidents so far. By using clear plastic we can see if the pump or lights are on or off.
This mod took me fifteen minutes to complete and it cost nothing extra. In my opinion, the skill level of this mod is easy.
by Don and Sue Graf, 2008 Ford F350, Arctic Fox 865
For our cat, Ollie, we have converted a drawer under our camper’s dinette seat into a litter box area.
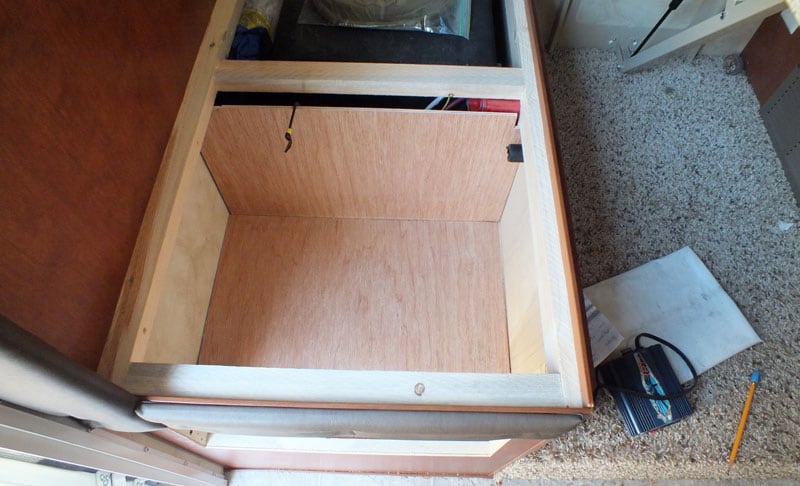
First, we removed the drawer and its hardware from under the dinette seat.
Since this area was exposed to the storage space below, we enclosed the area by putting a thin plywood base in the hole.
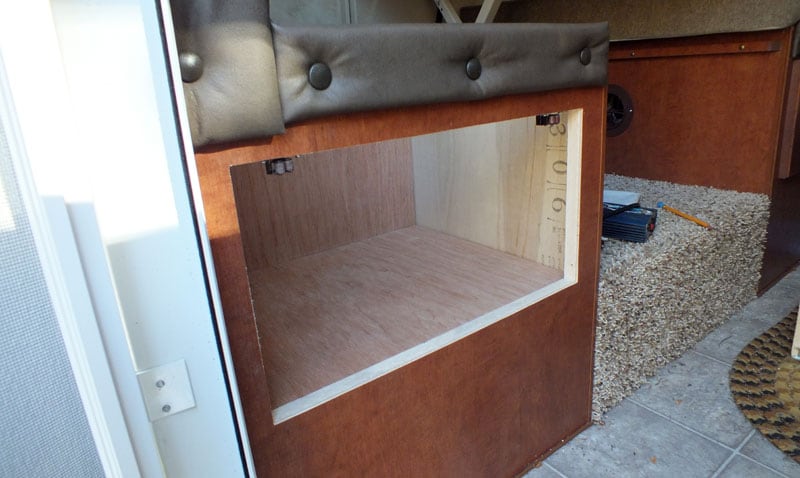
To make the kitty-litter pan, I used half-inch plywood to make a box that fits in that hole. It is about three inches high and has a recessed front so that our cat can get in easier.
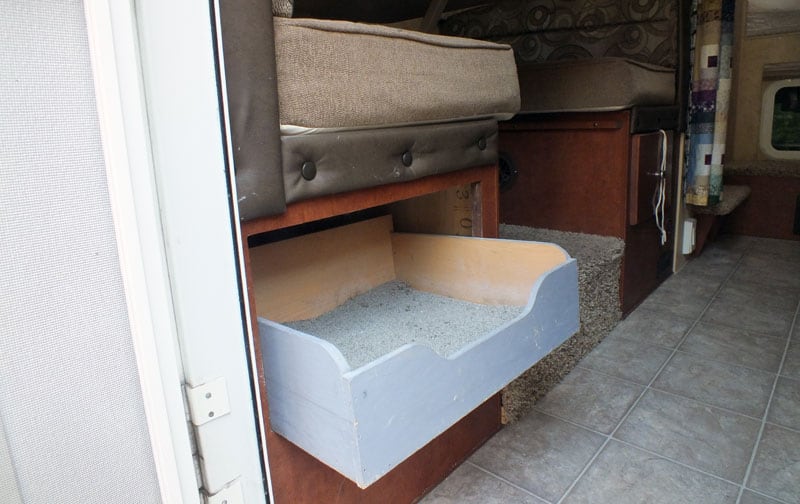 Then, I painted it and applied many coats of polyurethane.
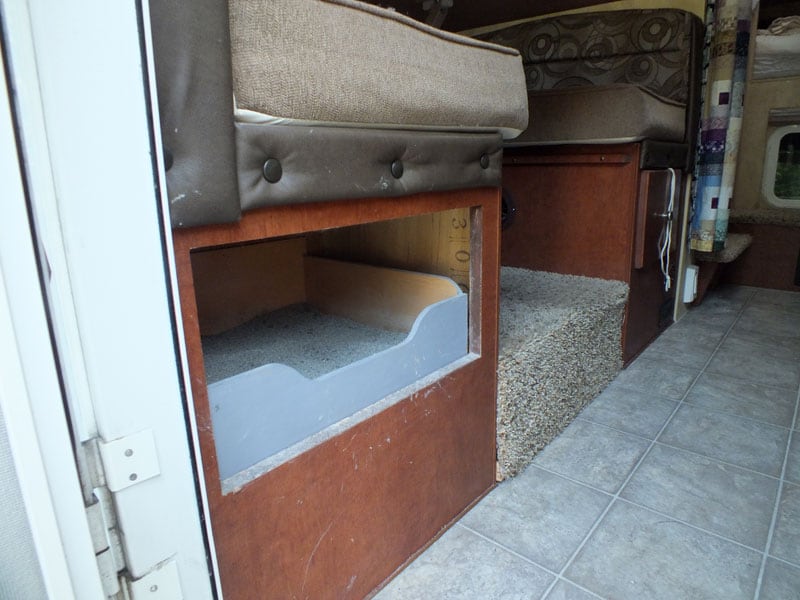
We fill that box with kitty litter. I only pull the box out to clean it. With the recessed front, there is plenty of room for Ollie to come and go. There is no need for a latch because it stays put as we travel.
by Buzz and Sherri Merchlewitz, 1998 Dodge Ram 2500, 2015 Hallmark Ute
We keep the litter box for our camper cat, Spridgy, in the back seat space of our quad cab truck. I didn’t like any of the various pass-through window boots available commercially, so I made something myself.
I had some two-inch thick, medium density foam laying around and I cut four properly sized pieces to put into the pass-through window to cover the two sides, top, and bottom. When we stop to camp, I open both the camper and the truck slider windows and install the foam pieces. The pieces of foam fit tightly enough that they hold themselves in place.
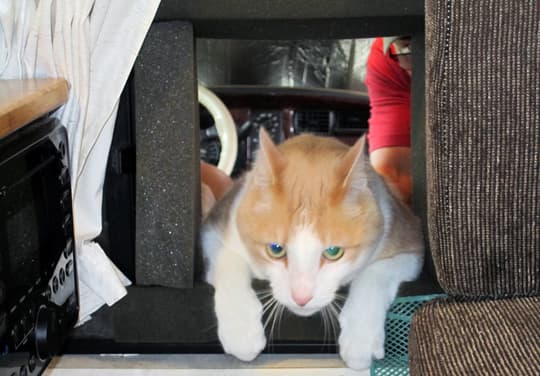
Now our traveling cat can use his kitty commode in almost total privacy and his litter box is not in our way.
For even more ideas for camping with cats and fun stories, visit Two People, Two Cats, One Four Wheel Camper and the Adventurer 90FWS Cats video.
Disclaimer: The modifications above are submitted by Truck Camper Magazine readers. It is your responsibility to make sure that any do-it-yourself modification project you undertake is safe, effective, and legal for your situation.


