Welcome to the second entry in June’s Mega Mod Contest. One Mega Mod will be published in every Email Alert in June. At the end of the month, we’ll hold a reader vote to determine June’s winner. Click here for information about the 2021 Mod Contest, including how to enter.

John Johnson, Thomasville, North Carolina
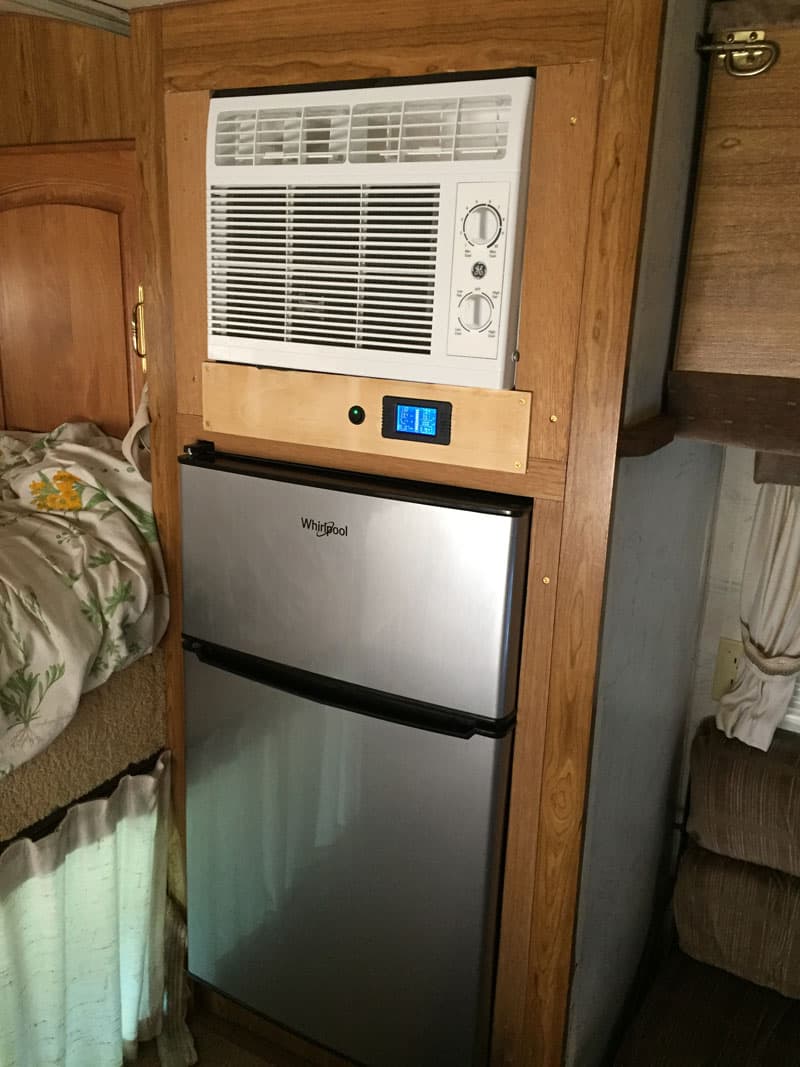
Wall Mounted Air Conditioner And Refrigerator
2000 Ford F250
1992 Fleetwood Caribou
When I purchased my 1992 Caribou, it had been sitting virtually unused in a barn or under a shed for its entire 28-years. Therefore, the Dometic refrigerator had long since stopped working. It was also way too large for my needs.
After trying to burp the refrigerator for several days, I reluctantly gave up and decided to install a dorm fridge. Because it was larger than the door of the camper, removing the refrigerator was the hardest part of the whole mod.
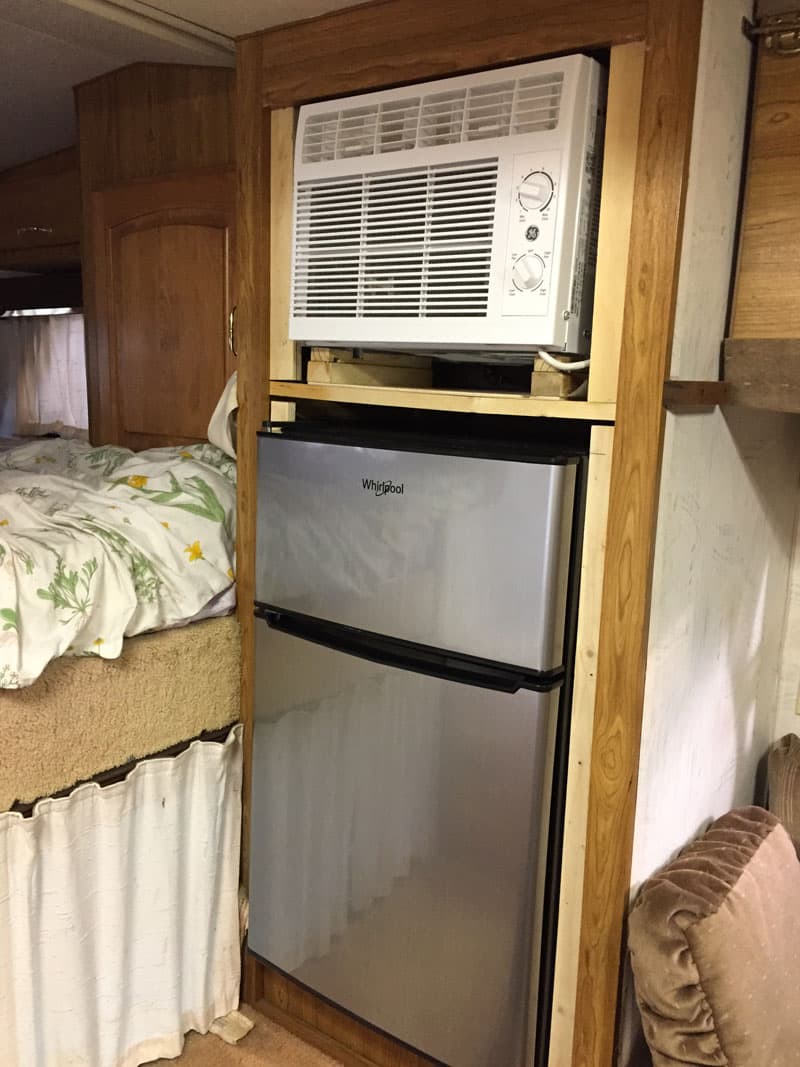
My ultimate goal for my rig is boondocking, so the horribly inefficient roof air conditioner wasn’t an option. It sucked down 1,800-watts and didn’t cool any better than a cheap window shaker, which only consumes about 500-watts. I looked at several window mount ideas and didn’t like any of them. They all seemed like too much of a hassle, and a bit too hillbilly.
The dorm fridge I picked was considerably shorter than the original, and I was wondering what to do with the space above it. Shelf? Cabinet? We all know it had to be used, right? This is, after all, a truck camper.
I looked outside and saw the window shaker that I had just bought for my daughter, and thought, “Hey, wait a minute…”
But what do I do with the tremendous amount of water window shakers produce? And where would I vent the hot air?
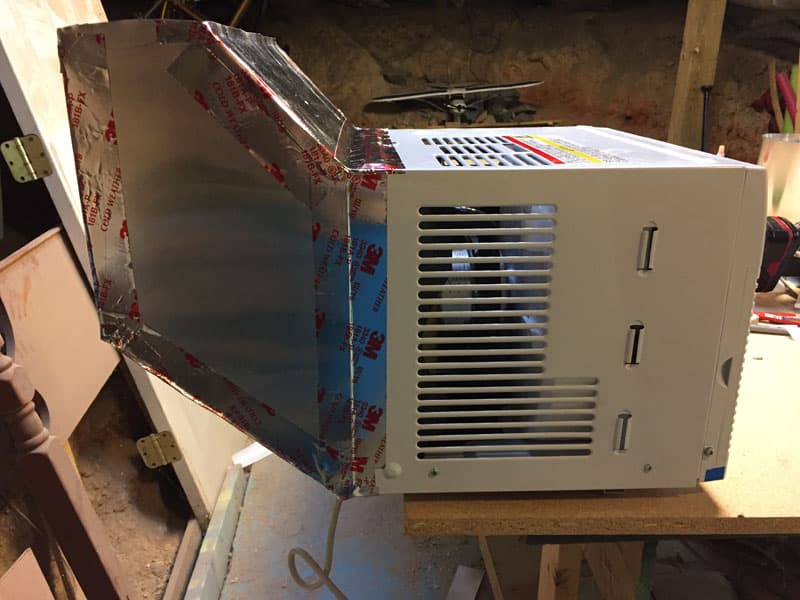
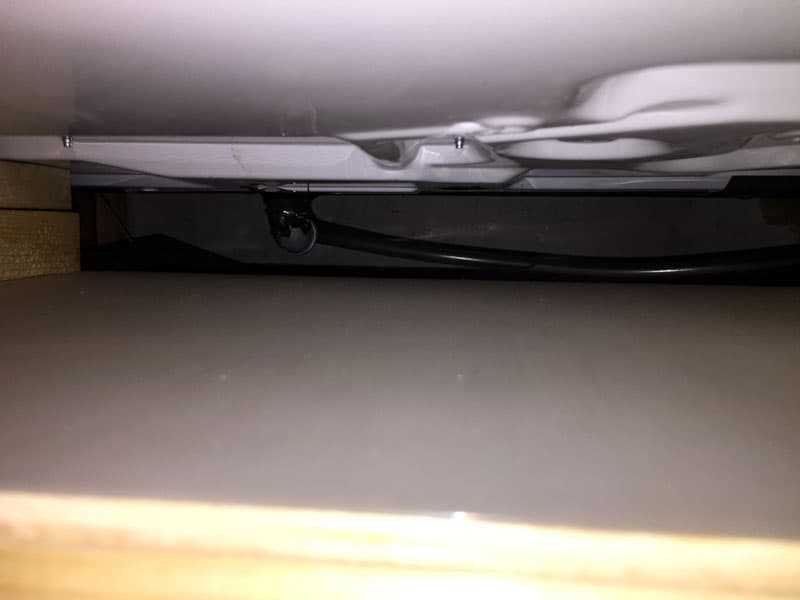
For the water, I attached a drain to the bottom using JB Weld, some pipe fittings, and plastic tubing, which I ran out of the lower vent. For the hot air, I built a duct out of aluminum flashing – and yes, duct tape – that fit up into the original refrigerator’s roof vent. The widths were just about the same.
I ran the unit outside for several days to make sure the drain and duct system worked. When I installed it, I tilted the unit back a bit like they were in windows in order to have any water move towards the drain.
I was very nervous about damaging my pristine barn find. To be extra safe, I put a plastic sheet under the air conditioner unit and put a slight dip in it to channel any water to the outside of the cabinet. My intent was to place another sheet at the bottom to then channel any water outside. However, the drain worked so well that this turned out to be unnecessary, so laziness won out over precaution.
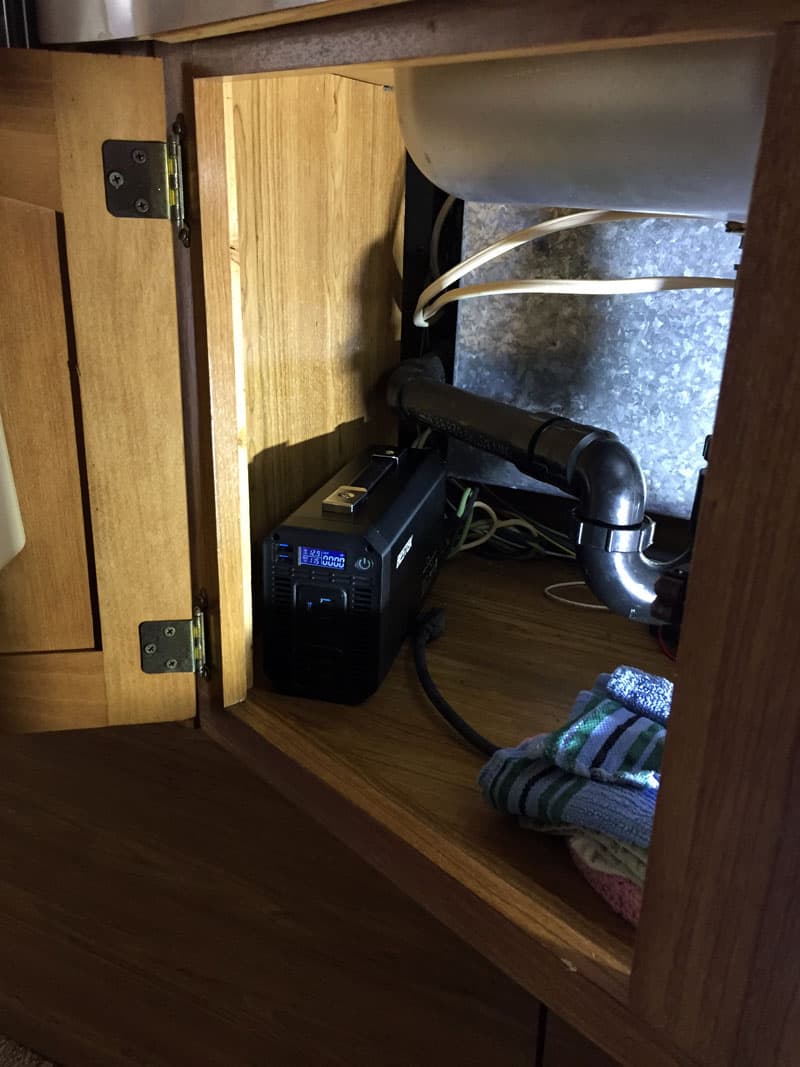
My first inverter was an old 2,000-watt modified sine wave unit that – while it worked – was noisy and made both the air conditioner unit and the refrigerator get warmer than I liked. I purchased a 1,000-watt pure sine wave unit that is smaller, quieter, and much more efficient. I get about 20-percent longer run time from a single charge which equates to over 30 extra minutes.
I built a framework in the cabinet to firmly mount things as well as provide a backing plate for the oak trim. For the trim, I used an old oak headboard that I had in the basement. The finish matched nicely. I used brass screws to match the faux brass cabinet handles.
Above the refrigerator and below the air conditioner unit, I put a plywood plate to hold a battery monitor, some switches, and a future solar controller display. When I find a thin piece of oak plywood, I’ll replace this one. That’s if I get ambitious.
One of the unseen problems in a dorm fridge conversion is how to keep the doors from flying open while driving. I’ll never forget the full (but not for long) gallon of milk that spent 40-miles splashing around a carpeted (but not for long) motor home we had.
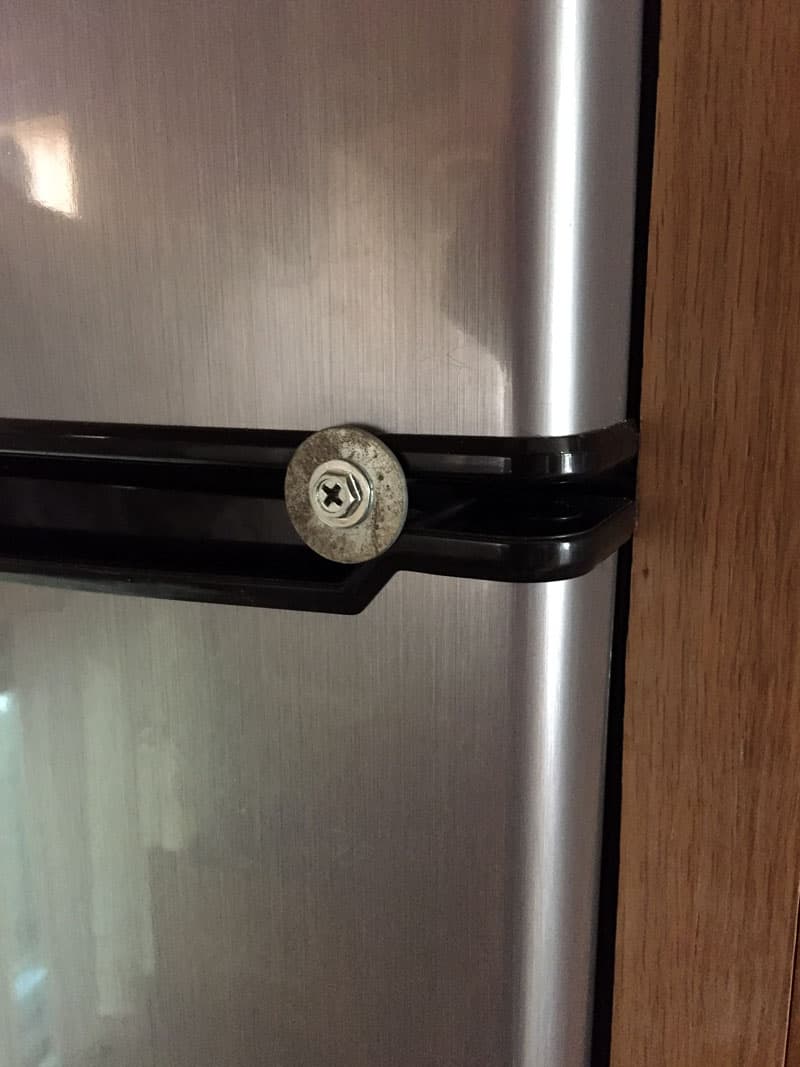
RV units have locks built in, but for residential units, you often have to resort to child locks, bungee cords, ratchet straps, the dog’s leash, etc. This refrigerator had reversible doors, so I could use a small bolt and washer to hold both doors closed.
Honestly, it has worked far better than I expected. When I started, the addition of the air conditioner unit was a total spitball idea. I didn’t really expect it to work. But the tiny 5,000-BTU unit cools the camper as well or better than the original monster, and I get almost two hours of run time for both the refrigerator and air conditioner. Together, they consume between 500 and 580-watts. That’s just not much.
Where it’s placed allows me to direct the cool air either up to the bed area or down in the main part of the camper. The threat of water or humidity damage I was terrified of simply never materialized. It drains perfectly to the outside (or into the custom fabricated, very unique reclamation tank), and the air exhausts out the original refrigerator vent without any restrictions. The new refrigerator is more than adequate for my needs.
I was worried that the efficiency of the air conditioner would be lowered by not having water splash through the exhaust coils, which is what they do in a window. But I haven’t noticed it.
The inverter sits under the sink next to the converter. This is handy since the battery box is right there on the outside. I simply unplug one and plug in the other to switch over. The first time I tried things out with my old inverter, it was pulling a ton of current, and I couldn’t understand why. Then I noticed that I had left the converter plugged in, so I was trying to charge the same battery I was using to power the inverter. Take it from me, perpetual energy does not work.
I also connected the camper’s battery to the dual diesel batteries in the truck via a solenoid, but that’s another story…
The air conditioner I used is the least expensive GE unit that I could find. I highly recommend it. It has a nice drain hole that works perfectly for this mod and, unlike other inexpensive units, it has a much higher rating. I specifically wanted manual controls and no remote. I also wanted the smallest one I could get in terms of energy usage. I think it was $109.
The Whirlpool refrigerator was simply what I could get via curbside pickup, that had reversible doors, and was $149. In retrospect, I would have been better off with an integrated freezer compartment. I have more freezer and less refrigerator space than optimum.
The Bestek inverter was purchased from Amazon and was also $149. I can’t say enough about this unit. It can even run the old combination microwave/broiler unit that came with the camper even though it pulls almost 1,500-watts. It’s small, quiet, light, has USB ports and a great display.
The rest of the supplies were just stuff I had laying around, but purchasing them wouldn’t have cost more than $20.
It took me 20-hours or so to complete this modification and cost me $430. In my opinion, the skill level of this modification is extremely hard and that is only because of the ductwork and removing the old refrigerator. Yikes!
Disclaimer: The modifications above are submitted by Truck Camper Magazine readers. It is your responsibility to make sure that any do-it-yourself modification project you undertake is safe, effective, and legal for your situation.
Enter Your Mods Now!
If you’d like to enter a modification you’ve done on your truck camper, click here. You can enter as many mods as you want, at any time. Good luck mod makers!


