Welcome to the second entry in March’s Medium Mod Contest. One Medium Mod will be published in every Email Alert in March. At the end of the month, we’ll hold a reader vote to determine March’s winner. Click here for information about the 2023 Mod Contest, including how to enter.
Kevin Mooney, Nimpo Lake, British Columbia
Return of the Exhaust Fan 2
2016 Eagle Cap 1200
2022 Ford F-550
A few years back, I submitted a fan mod to Truck Camper Magazine using a 7-inch computer fan in a standard above-the-range hood. That mod was done because the factory fan was so noisy that my wife would not use it.
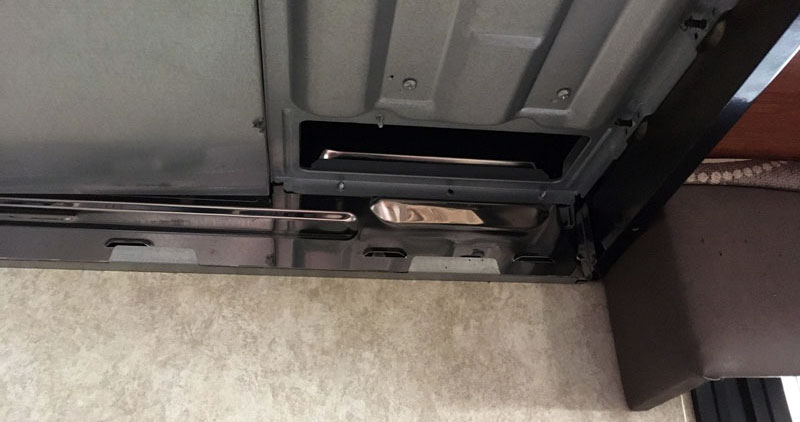
Since then we bought a used Eagle Cap 1200 and have started the whole mod process over again. The factory range hood fan in the Eagle Cap was even more useless and noisy. For starters, the fan was part of a convection microwave oven. I’m sure these are handy for some folks, but we camp off-grid all the time so the microwave (and thus the range hood fan) never got used. The only way to have any venting when cooking was to open a window and a ceiling vent or use the Fantastic Fan, none of which was really handy when you just want a localized fan directly over the cooktop.
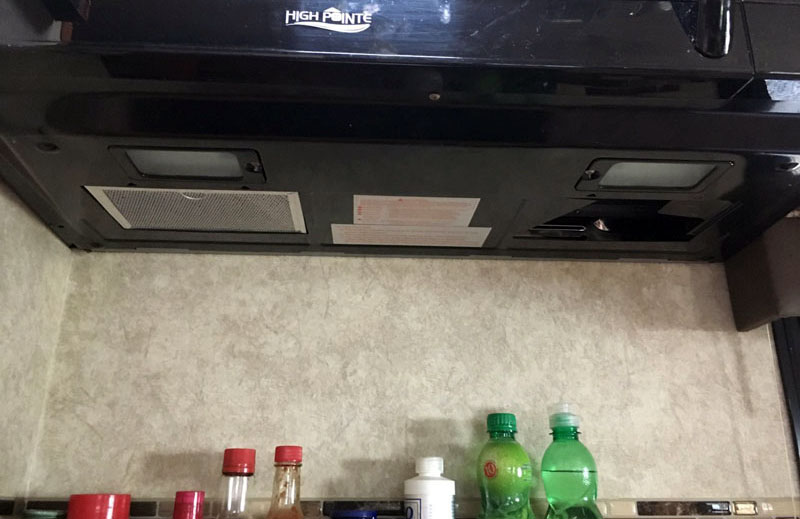
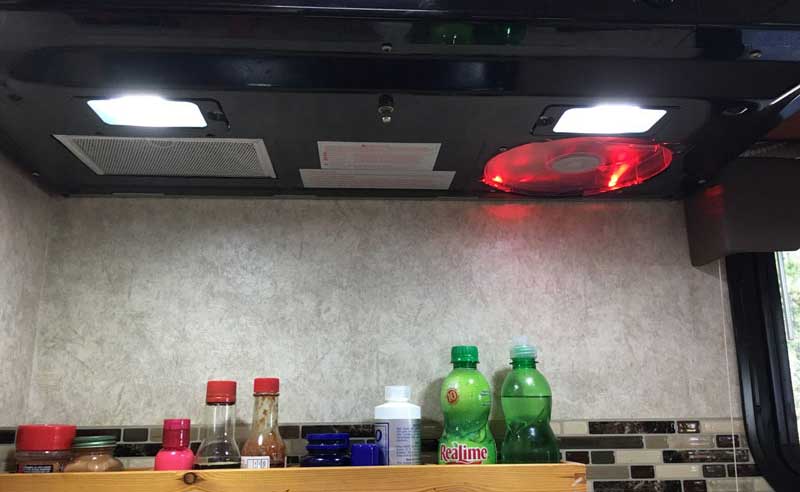
So I got to looking at the bottom of the microwave. As you will see in the photo, there are two small silver fan vent grates for capturing grease. There are six or eight screws on the bottom of the unit. After unscrewing those I found it did not drop down on the stove. There are four tabs holding it at the back, as you can see in the next picture.
The red, black, and white wires in the middle are for the rotating of the glass tray inside. Leave those attached, but remove the two wiring clips to both lights. Note that these lights and bulbs are both 120-volt units; not really handy when you are parked out in the boondocks.
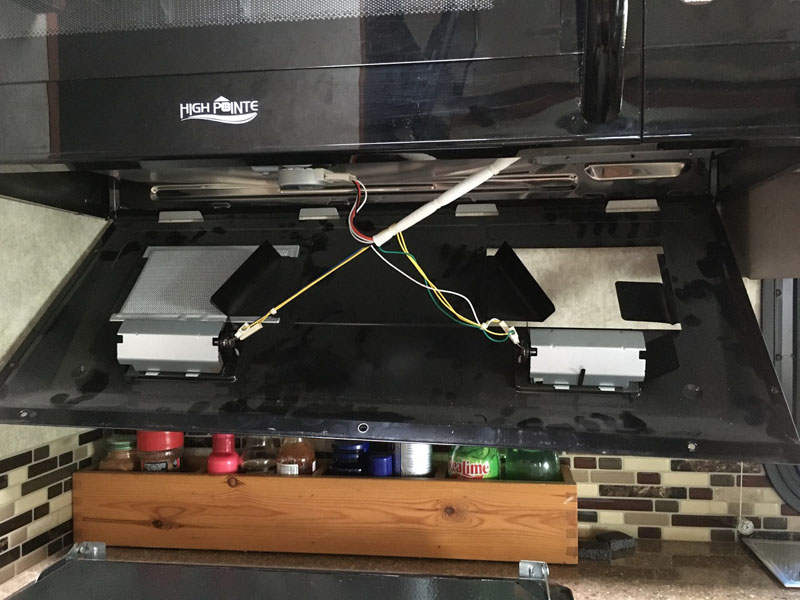
Once you have undone the light connectors, all you have to do is wiggle the rear of that piece up and off the four tabs at the back. I also taped up the two light wire harnesses to the main white one to keep them out of the way.
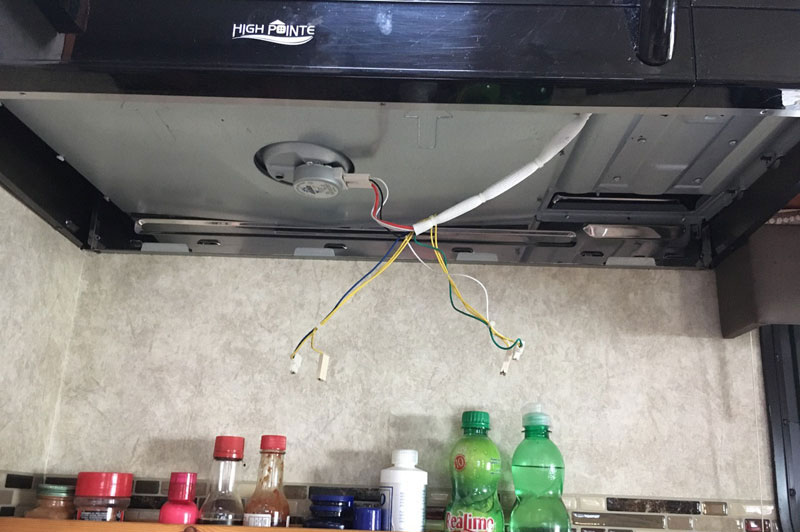
The main venting for this microwave is at the right rear of the unit. There is a smaller opening on the left rear, but this is the bigger of the two. The microwave uses a type of fan referred to as a squirrel cage. I figured my only option was to put some sort of fan under this vent hole and hope for the best.
I could have used one 4-inch computer fan, but they only push about 20 cfm (cubic feet per minute). Even two of them would only be 80 cfm. I decided to go with another 7-inch fan as they move about 110 cfm.
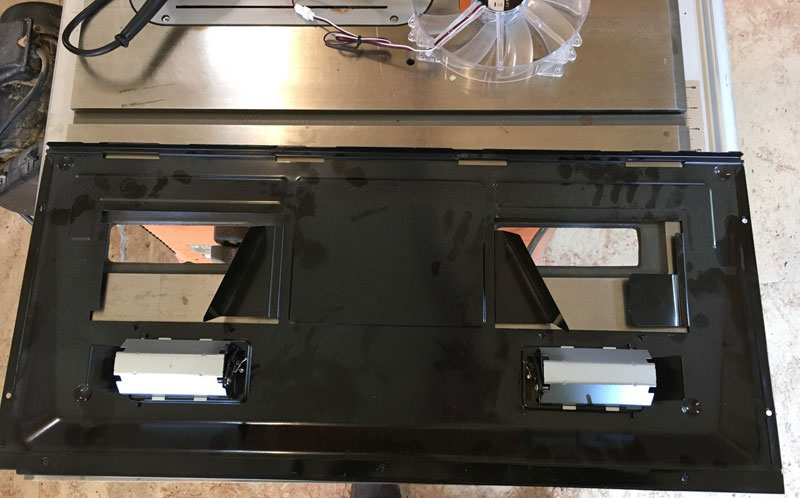
I took the bottom plate into the shop and started thinking; always a little dangerous for me because I easily get carried away. I grabbed my fan and did a rough approximation of where I wanted it, and then started flattening the metal tabs that were sticking up, making sure that it still cleared the light at the bottom.
Once I had the four holes of the fan marked, it was time to start cutting. I used a disk grinder with a cutting wheel and some tin snips. Use whatever you have, it doesn’t have to look really pretty as you can hardly see it even when sitting down across from it.
Once the fan was in, I started searching for LED bulbs to replace these and then came to the realization that that wouldn’t do me much good because I would still need 120 volts to turn them on. I had a couple of older smaller 12-volt LED lights from another project. They were round in shape but made of cheap plastic. Time to start cutting again.
I removed the 120-volt socket and bulb because I planned on tapping into a 12-volt line to power the fan. Why not use it for a couple of lights as well? The bonus is that it can be used strictly on 12-volt or when you are plugged in and using the microwave on 120-volt. They are not connected to each other.
Unfortunately, I did not take pictures of the lights after I cut them up. If you don’t have any on hand, you can pick something up really cheap on Amazon.
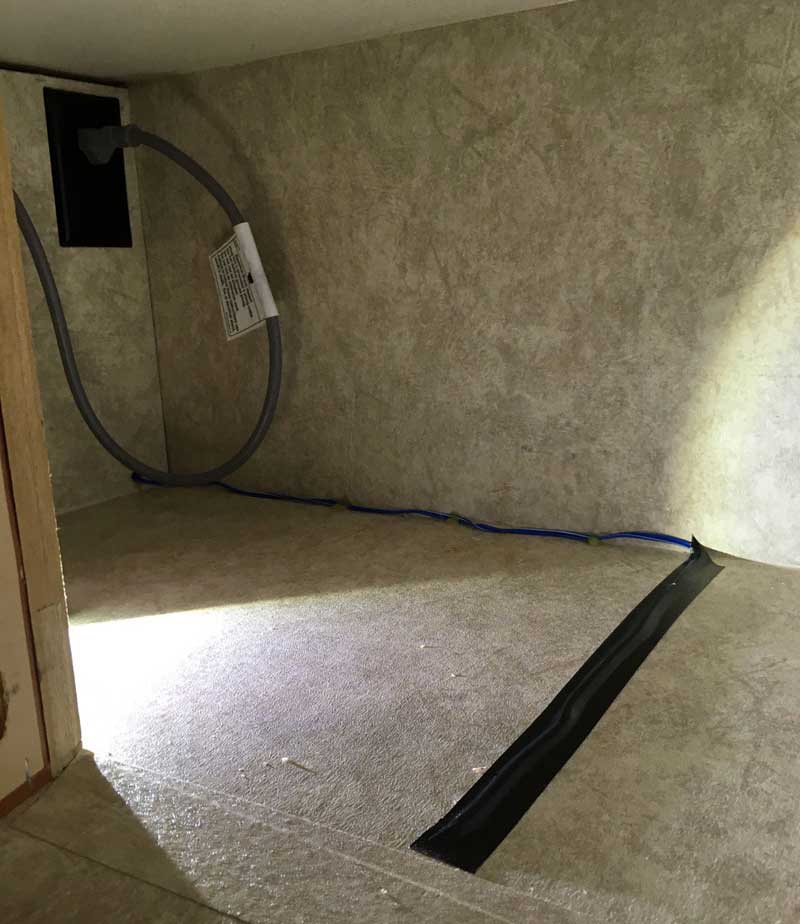
In this camper, there was a 12-volt light about two feet to the right of the microwave. I unscrewed that and then drilled a hole up into the cabinet above. I ran some flat two wire under some tape and used hot glue in a few spots at the back of the cabinet to hold the wire in place. Once my sweetie put all her goodies back in the cupboard, we can’t even see the wire. And because it’s so thin, it really doesn’t affect how anything sits.
I also needed to drill a hole at the back of the cabinet going into the microwave itself. Double-check your measurements before you start drilling. And if you haven’t figured it out by now, make sure there is no power going to the microwave. It just so happens that that was a large vent hole there and that’s exactly where this hole came out. Very convenient. I also did my best to file the rough edges and used a rubber grommet so the wire wouldn’t wear through over time.
Once I had that 12-volt wire run to roughly where the old wire harness was, I wired it to a rotary-style switch (round shiny thing sticking down between the lights), and that controls both lights and the fan. I could run separate switches, but I prefer having them together because the fan is so quiet. The lights are a reminder that everything is still on. The last fan mod I did previously had separate switches and we were forever leaving the fan on for literally hours at a time.
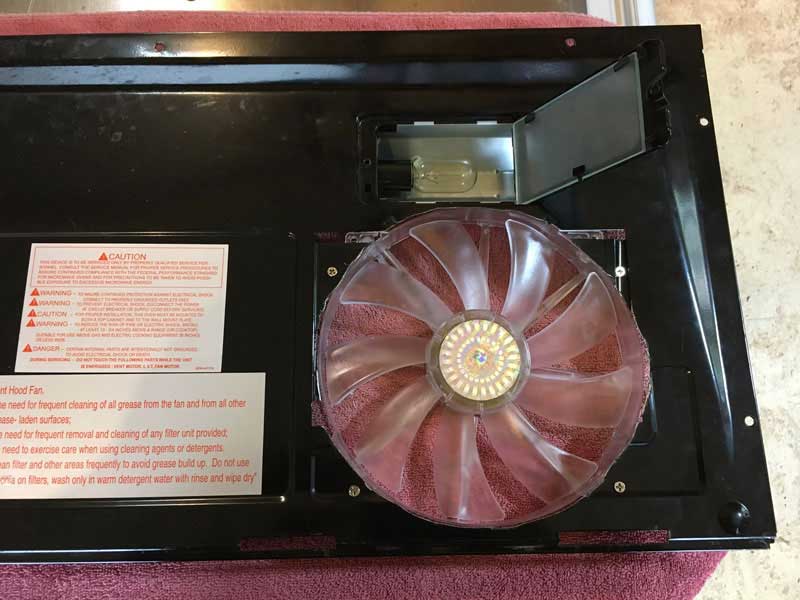
And yes it is a very groovy, sexy red fan light – Yeah, baby, yeah! One uses what one has on hand! These were very inexpensive on Amazon. I had ordered them for a different project and wound up with a spare. If you are prepared to spend a little extra coin, they have fully sealed ball-bearing style fans, which is what I used last time. After five years it was still running great.
I couldn’t be bothered with trying to make a mount for the silver grease grill, it’s not like we’re deep frying in the camper. If I have to replace the fan every five years, then so be it. We’ll see. The fan works quite well. Some of the venting is blocked by the squirrel cage fan that is still in the microwave and usable, but it is more than adequate for our purposes. At least we have a fan and a couple of lights now.
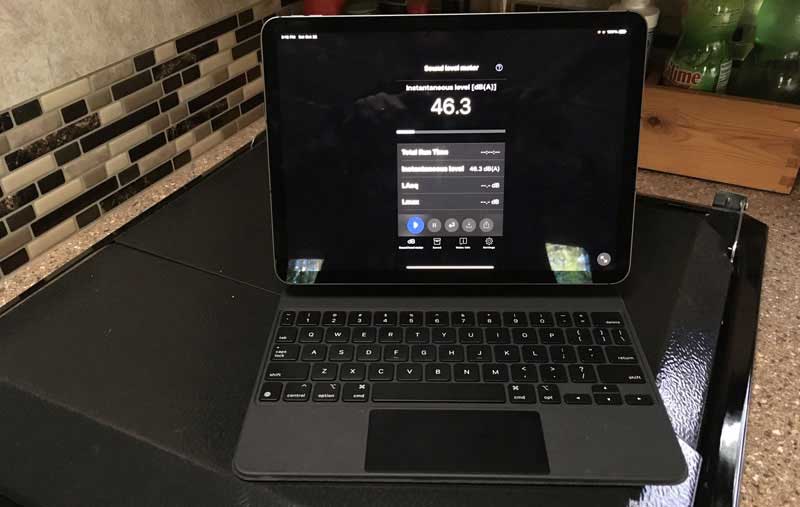
Now for the nerdy geeky portion of my mod. I had downloaded the NIOSH app for my phone and iPad for some other things and figured it would be pretty cool just to see what the difference in fan noise is. First I took the reading below, which for all intents and purposes is dead quiet in my camper. Yes, I even held my breath.
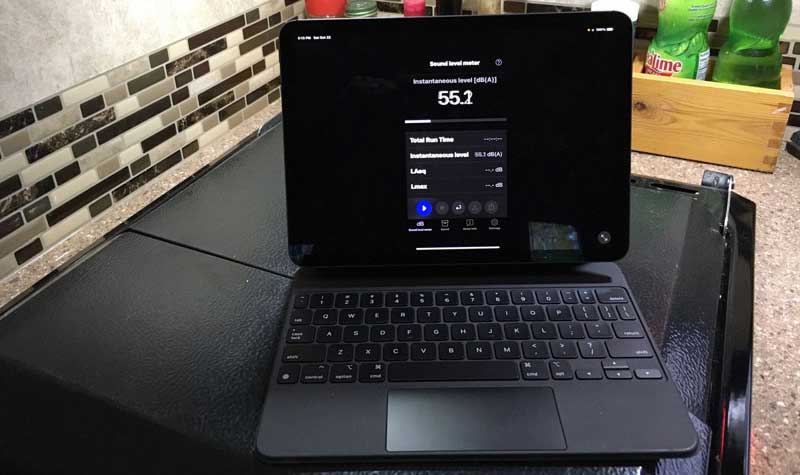
With the new 7-inch fan on it, was only roughly 9-decibels louder, which I can assure you is really, really quiet.
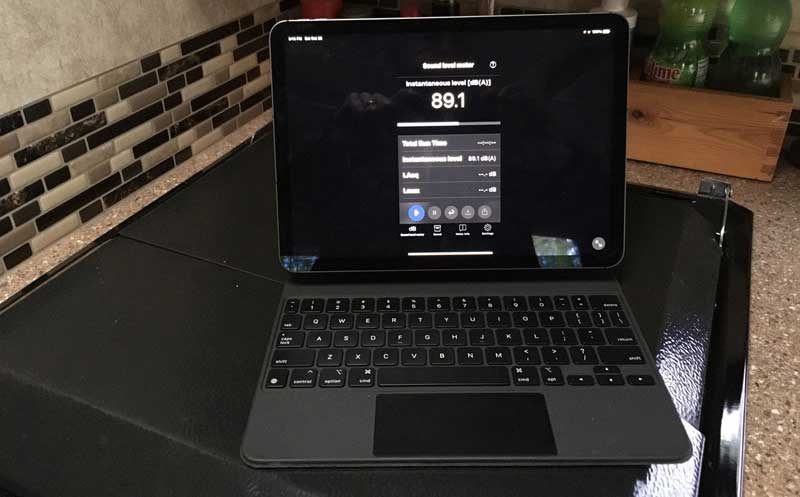
Then I shut off the 7-inch fan and fired up the factory-installed fan, and was blown away by the fact that it was 34 decibels louder. According to NIOSH, exposure to 85 decibels of noise for an eight-hour period could cause hearing loss. Yes I know, nobody is going to have their microwave on for eight hours at a time, unless you happen to pass out after a few wobbly pops around the campfire, but even then, not very likely!
Still, I am always blown away by just how noisy some of the products that wind up in our RVs are. I would gladly pay extra for a really nice quality item that was quiet. That’s part of the reason we go out camping in the wilderness in the first place.
That’s all she wrote. It only took three to four hours to complete. I would say it was a medium skill level; nothing too challenging. The fan was about $15 online. I had the lights, the switch, and the wiring. It is so much nicer now to cook or boil a kettle and have everything vented out of the camper with very little noise and use a couple of extra lights that were all unusable before.
Disclaimer: The modifications above are submitted by Truck Camper Magazine readers. It is your responsibility to make sure that any do-it-yourself modification project you undertake is safe, effective, and legal for your situation.
Enter Your Mods Now!
If you’d like to enter a modification you’ve done on your truck camper, click here. You can enter as many mods as you want, at any time. Good luck mod makers!


