Welcome to the second entry in October’s Mega Mod Contest. One Mega Mod will be published in every Email Alert in October. At the end of the month, we’ll hold a reader vote to determine October’s winner. Click here for information about the 2022 Mod Contest, including how to enter.
Al Worrell, Milford, Michigan
From Rot to Complete Camper Refurb
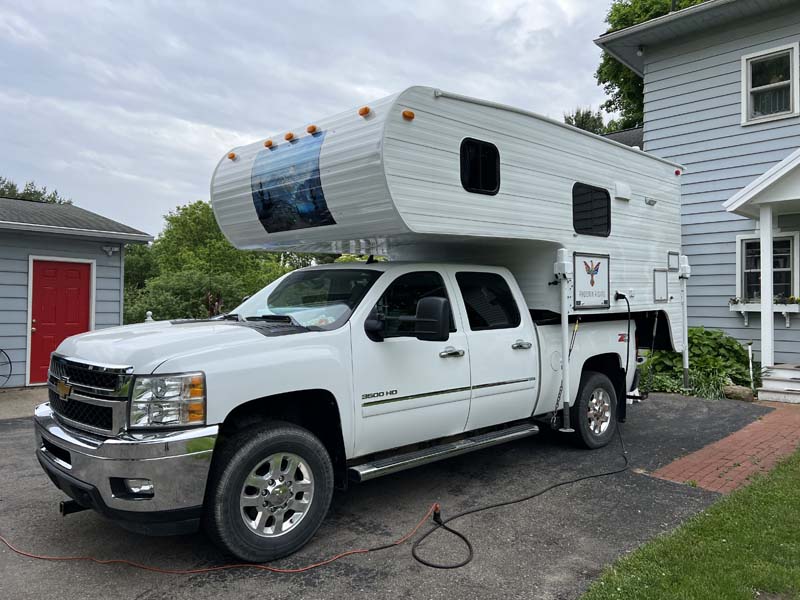
2012 Chevrolet 3500
2002 S&S Ponderosa 8.5SC
Editor’s Note: Whether your camper is wood framed, aluminum framed or a fiberglass shell, keeping water out should be a priority. To learn more about how to maintain camper seals, check out, “How To Inspect and Repair Camper Seals”.
On April 25, 2021, my wife and I opened our 2002 S&S Ponderosa 8.5SC that we purchased in 2012 for $4,000 to find mold and extensive water damage on the mattress.
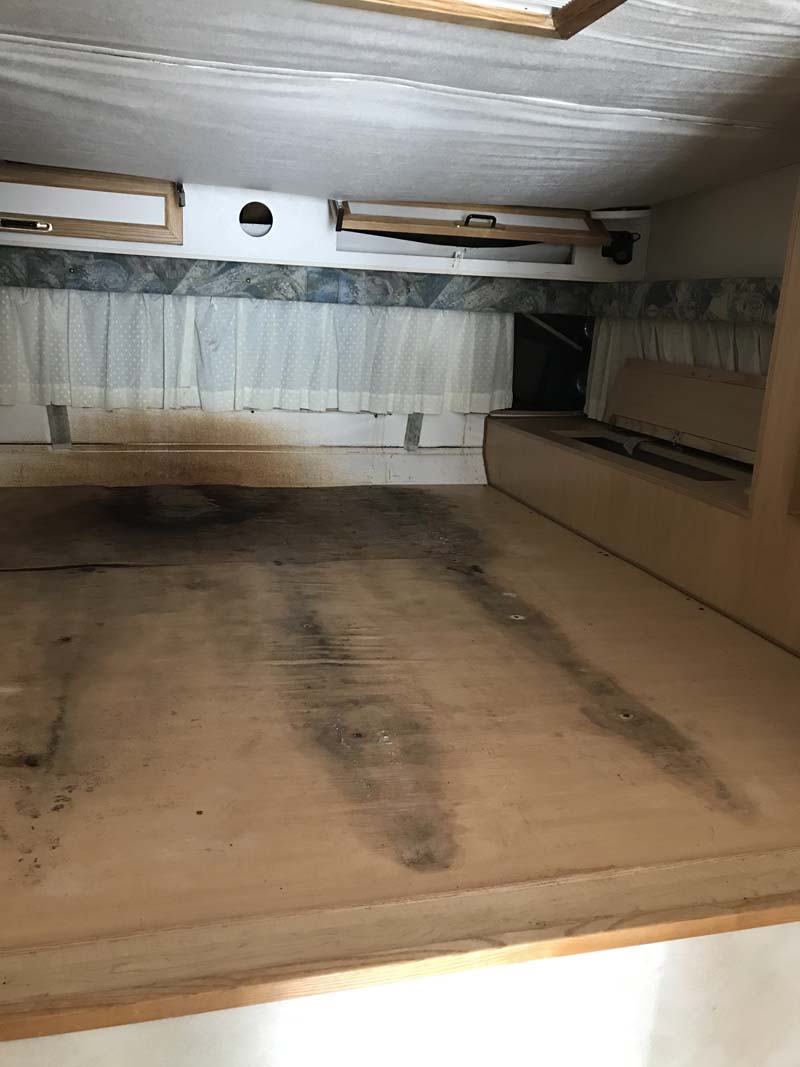
That is not what we expected. I would say that is a gross understatement. We immediately tossed the mattress. Underneath, there was mold on the luan bed support which we cut out.
Then we noticed the sagging ceiling that was actually retaining a potential rain shower as I cut into it. We soon discovered the entire front of the camper was compromised with mold and a dry rotted frame.
My wife and I discussed what to do with her “baby” that took us 12,118-miles to Alaska and back in 2012. We went on a wonderful trip to the Pacific Northwest a couple of years later, and we have also seen numerous state parks here in Michigan. We decided to correct whatever caused the water problem.
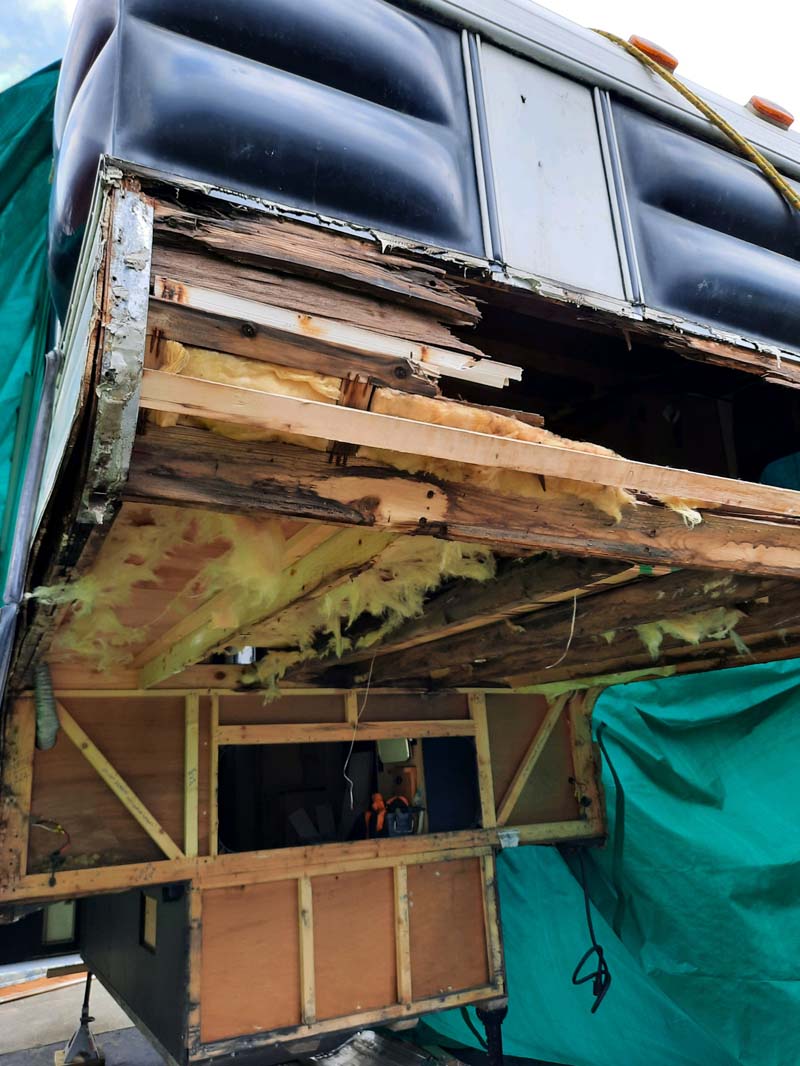
Upon more inspection, I discovered the solid aluminum roof had major corrosion problems around the edges. It was bad! The water was transferred towards the acrylic nose windows compromising the entire front structure. On April 25, 2021, we decided to resurrect the camper we loved so much, thus the new name of our camper, “Phoenix Rising”.

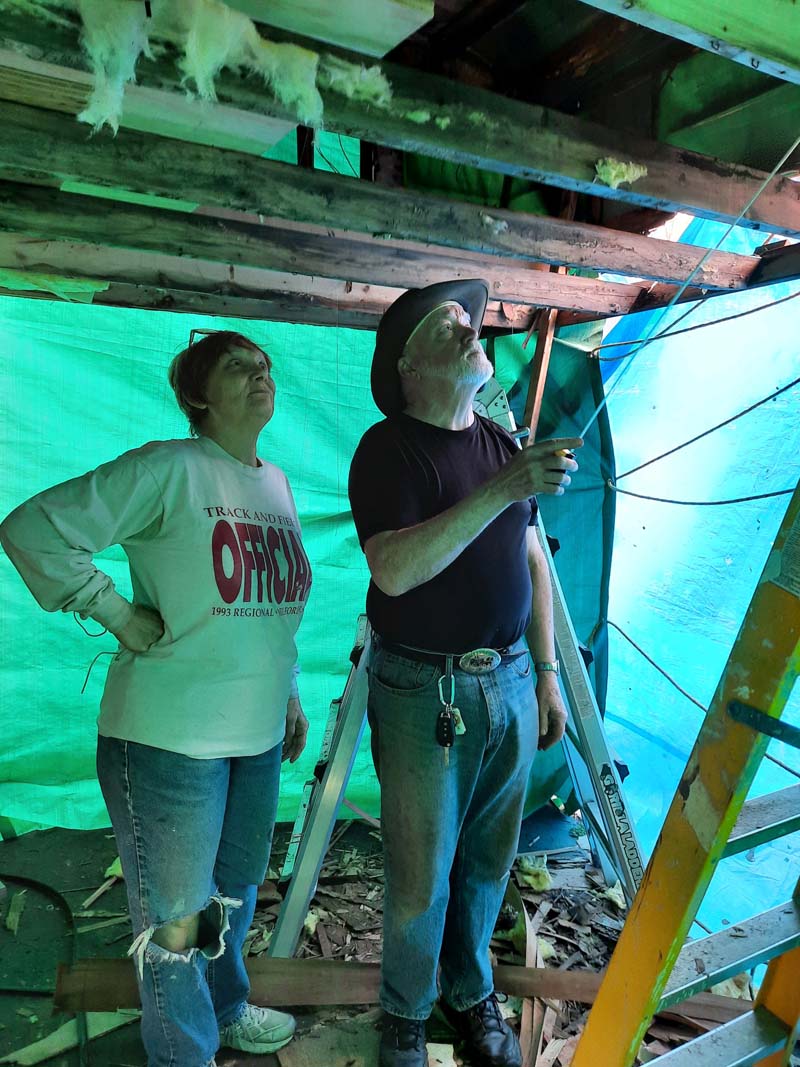
I called a couple of my best buds who graciously offered to help. It was fun as they called it. As I redesigned the nose, the frame and the skin to prevent the front window and roof-to-sides problems, they the engaged removal of the skin, down to the frame. Or should I say, we removed the front frame completely and rebuilt it in mid-air.
We pulled the existing marker and security lights that were replaced with LEDs, removed the jackscrews, pulled the useless insulation, and made the roof framing and ceiling panels back to solid wood.

The rebuild utilized Titebond Quick & Thick glue throughout in conjunction with three sizes of staples; 1-inch crown, T-50 size, and 1/4-inch crown. As we rebuilt the nose and side frame members, we insulated the side panels with styrofoam between the framing. I decided to form all the corners and overlap the other side with butyl tape to further reduce the chance of water entering the 90-degree joints.
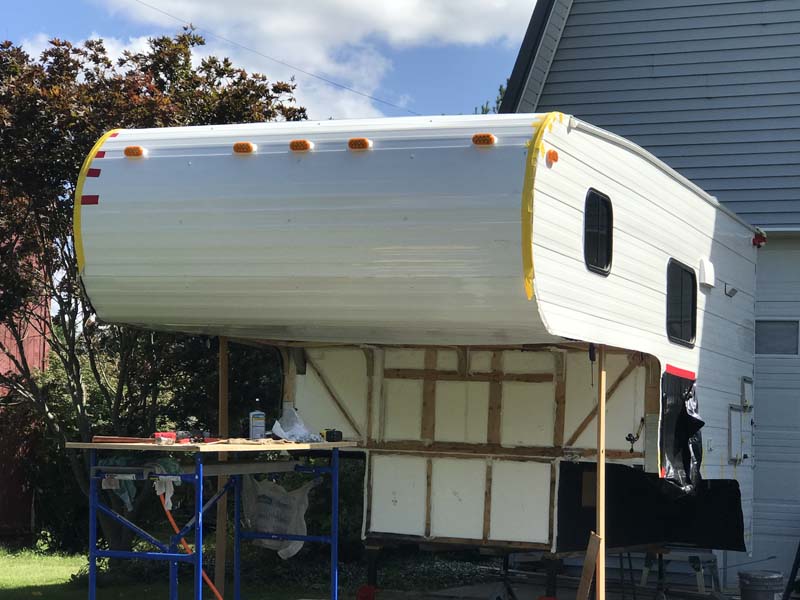
All electrical wiring and connections were also checked and replaced as necessary. Palco Campers in Roseville, Michigan worked from two samples and my dimensions, 17-feet long sides and 4-feet by 8-feet under the nose, to fully match the skin. I was able to order a full 16-foot closure rail from Camper Parts and Repair in Fowlerville, Michigan.
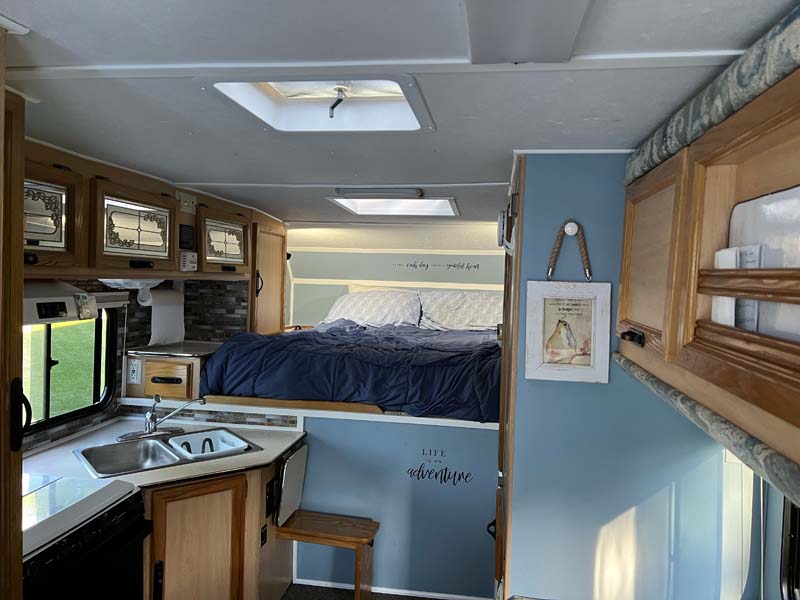
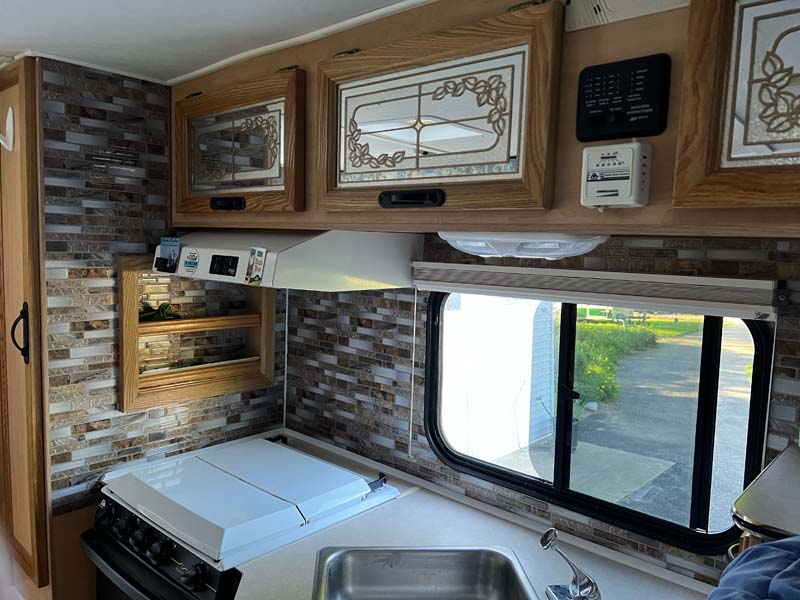
After full ceiling replacement, my wife repainted the interior walls, trim, and tiled the kitchen backsplash.
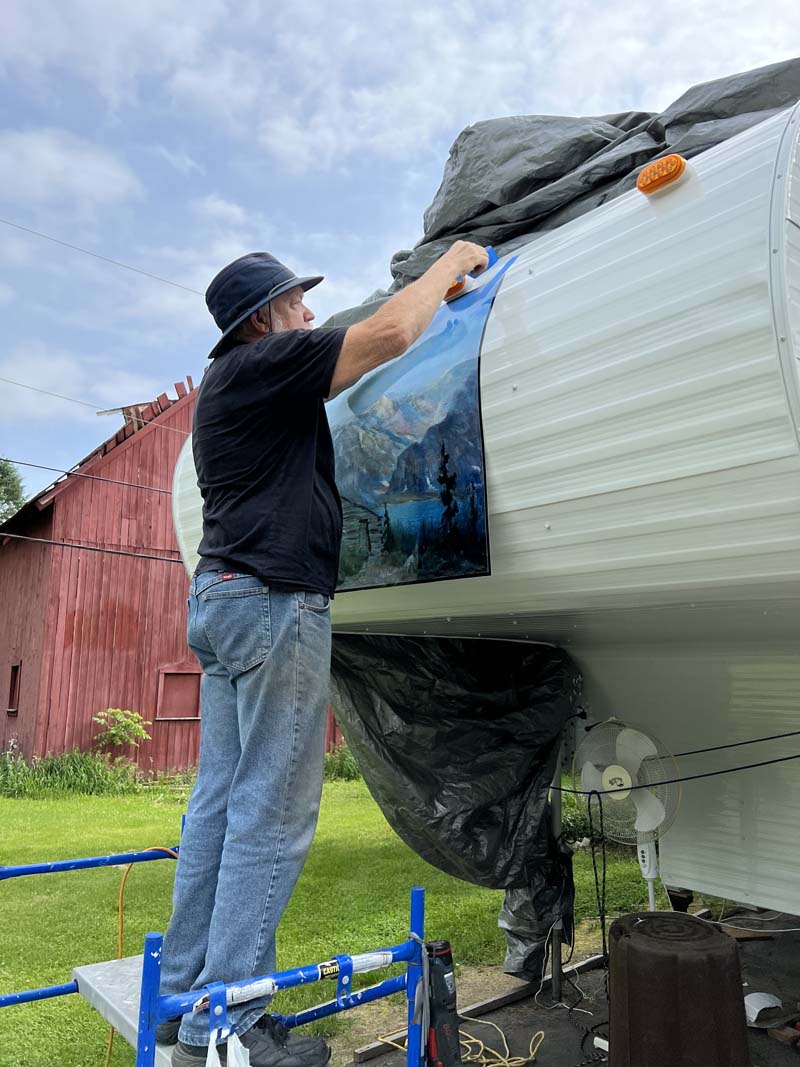
She also worked with two local vinyl sign companies on the nose art and other signage. She also located a trucker’s Sleep Dog mattress. So much more detail went on in this mod than you can see in the pictures.
The best I can say is that my wife is extremely happy with the mod! Happy wife, happy life. She was first to take the camper out on a weekend test run to the thumb of Michigan. At age 77, I told my buddies I want to get at least another ten years out of our “Phoenix Rising”. With the improvements, I believe we will.
Other than lumber and insulation from Home Depot, Lowes, and Menards, we used the following materials:
Custom siding, closure rails – $2,100 – Palco Campers, Roseville Michigan
Sleep Dog Queen Size Mattress that we bought online for $492.11
1/4-inch Crown Pneumatic Stapler, Chicago Electric Sheetmetal shears, Pneumatic Air Nibbler, Hercules 12-inch Dual-Bevel Compound Saw from Harbor Freight
Ryobi Cordless One+ 16ga finish nailer, Orbital JigSaw, 4-1/2″ angle grinder, Multi-Tool from Home Depot. A Ryobi (or any cordless system) is essential to a project of this size and complexity, or so I told my wife.
Arrow T50 Pneumatic Stapler from Lowes
Freeman Pneumatic PWC50 1-inch Crown Stapler, a structural beast, from Amazon
It took us more than 1,432 hours to complete this modification and cost me $7,523 (less daily labor meals for five friends). In my opinion, the skill level of this modification is extremely hard.
Disclaimer: The modifications above are submitted by Truck Camper Magazine readers. It is your responsibility to make sure that any do-it-yourself modification project you undertake is safe, effective, and legal for your situation.
Enter Your Mods Now!
If you’d like to enter a modification you’ve done on your truck camper, click here. You can enter as many mods as you want, at any time. Good luck mod makers!


