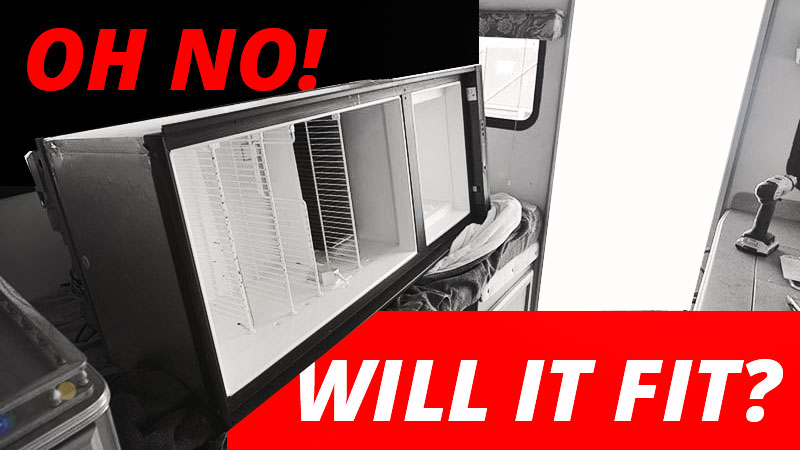
Have you ever wondered what would happen if your truck camper’s refrigerator quit? Most entry doors are too narrow to remove the old one, much less fit a new one. And that’s not half the story. Get your knives out.
For the first 7-years we ran Truck Camper Magazine we borrowed brand new truck campers from the industry as demos. This allowed us to experience many different makes and models and helped tremendously in our understanding of the product and marketplace. It was also fun.
Until it wasn’t. Eventually we found ourselves wanting our own truck camper. One that we could modify and personalize – and didn’t need to worry if we scratched it on a tree limb (happened), carved a hole in the roof removing snow (happened), or Harley chewed up the toilet flusher (also happened – big time).
I also sensed a growing resentment from readers who looked at our new camper every few months and said, “Must be nice”. We truly understand that now.
In 2014, we bought a used 2004 Alpenlite 1100. It was a little rough around the edges and needed some serious seal maintenance. Otherwise it was in good condition. That year we cleaned up the camper, fixed the seals, and started to add features and modifications to suit our on-the-road lifestyle.
In went new LP and CO detectors (they were out of date), new air conditioner (it didn’t have one), new water heater and new water pump (both needed to be replaced), and so on. During these projects we learned a ton from the product manufacturers, industry veterans and readers.
Learning to maintain an older camper has been a real eye opener that has put our feet in the shoes of our readership. Above all I have learned there is always something that needs work on an older truck camper. It’s the nature of the beast.
If you had asked me two years ago what was the most reliable component in our truck camper I would probably said our refrigerator. Ironically, the propane heater has been more trouble-free, but I just don’t think about it. Now that I’ve mentioned it, the propane heater will fail. Why is that?
Anyway, with routine maintenance, and a replacement Dinosaur board installed by Mr. RV Refrigerator himself a couple years back (aka Mikeee Tassinari) our 15-year old Dometic RM2663 has been a champ. Beer cold. Ice cream frozen. No complaints. Then July of 2018 happened.
After our car accident, our trusty Dometic would freeze my beer and melt our ice cream. The unit would work for a while and then revert to one extreme or the other.
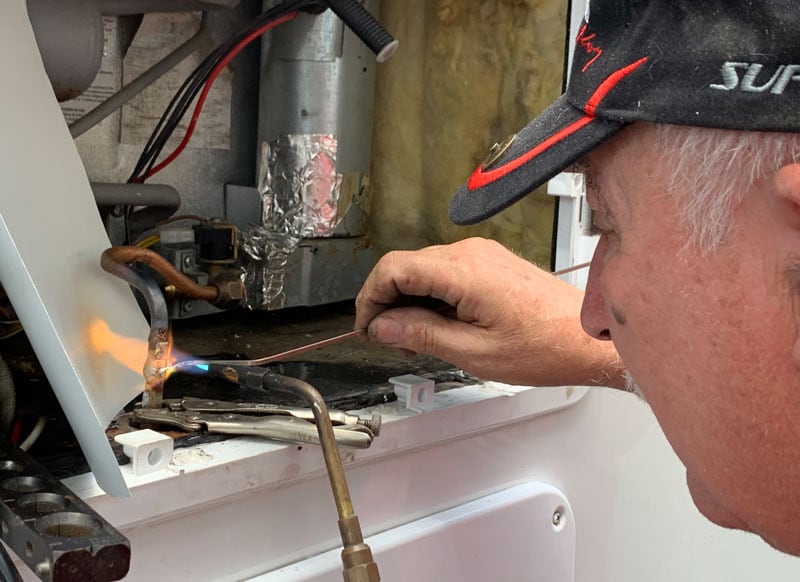
Above: Post-accident, Mike Tassinari helped us fix the propane line for better propane flow
We had a number of experts look it over, and consulted with the usual suspects over the phone, but the refrigerator just wouldn’t settle down. It would keep it cool for a few days, and then go haywire again.
Fortunately, we were headed for Elkhart, Indiana for the annual industry open house and would have direct access to Dometic’s factory trouble shootin’ team.
On the day before the official open house, Dometic held an open house across the street from their headquarters with games and prizes for industry folks and accredited media types. At one station they literally had us tossing toilet paper at toilet bowl lids. Angela got two. I got none. I’m not sure what that means.
Anyway, when we asked for suggestions about our refrigerator we were immediately brought to Rory Leitch, Director of Product Management for Dometic Americas. Rory listened to our issue, asked a couple of pointed questions, and said, “Given the age and issues of your unit, it needs to be replaced. Stop by and we’ll install a new one.”
While we were excited at the prospect of getting a new refrigerator, we would have much preferred learning what the problem was with the one we had, fixing it, and learning from the repair. That’s the whole purpose of our camper – to learn from the experts, solve the issues, and then share that learning and experience with you.
When I pressed Rory on this, he explained, “RV refrigerators don’t typically last longer than 15-years. We might be able to repair the problem you’re having, but you’re going to have more troubles moving forward. It’s just the lifespan of the product. It’s time for a new refrigerator.”
Considering that our issue had (so far) stumped the experts we knew, I couldn’t argue with his statement. We also really couldn’t afford to have our refrigerator down after we left Elkhart. After we set up an appointment, I had one more question.
“How are you going to remove our old refrigerator and install the new one? The entry door is too narrow.”
“Don’t worry,” he said with a smile, and walked back to the toilet paper toss. Oh boy, what have we gotten ourselves into?
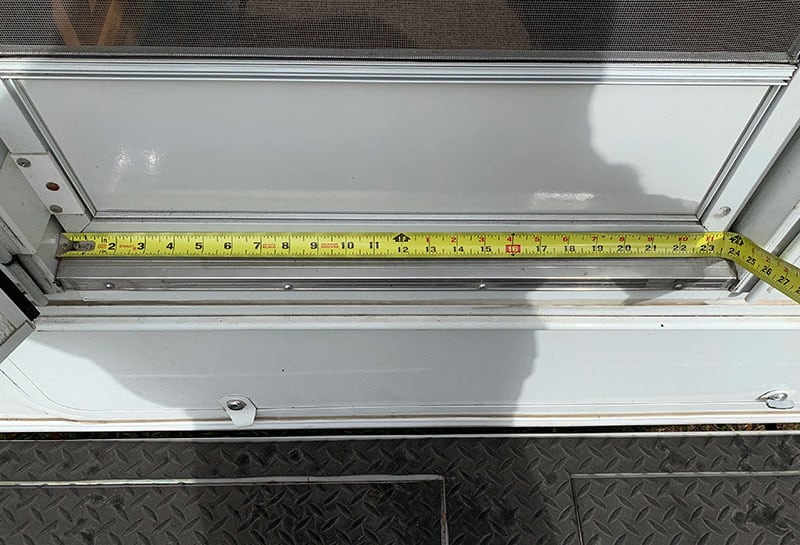
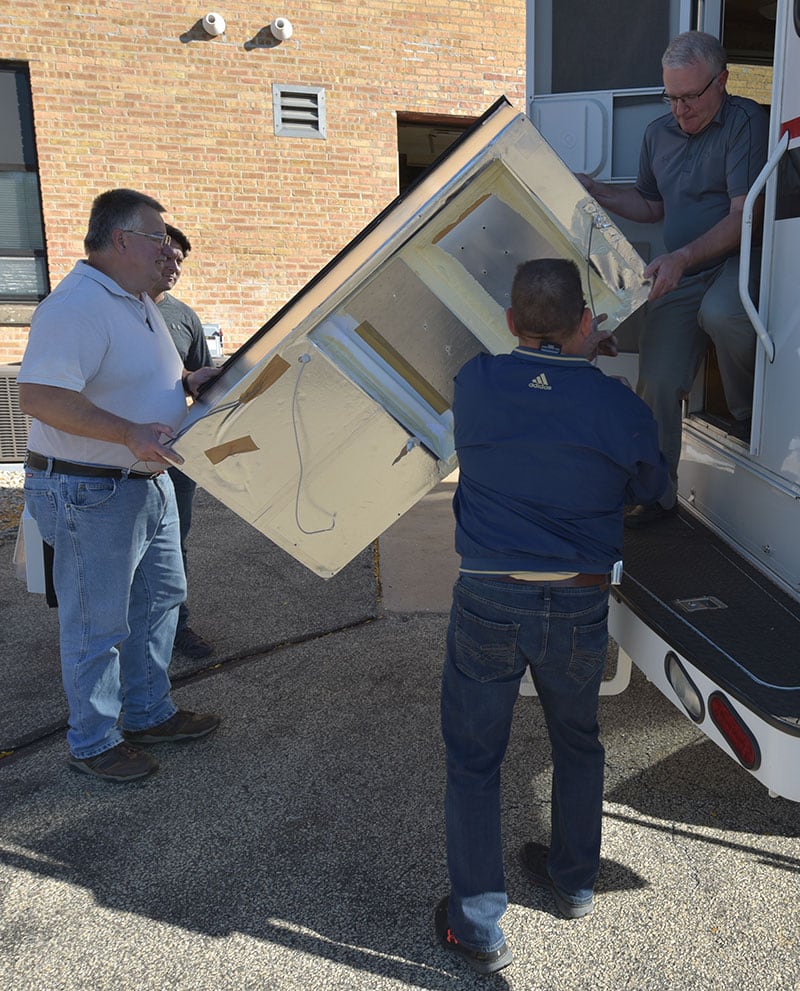
Above: We needed at least 26″ to get the refrigerator through the door
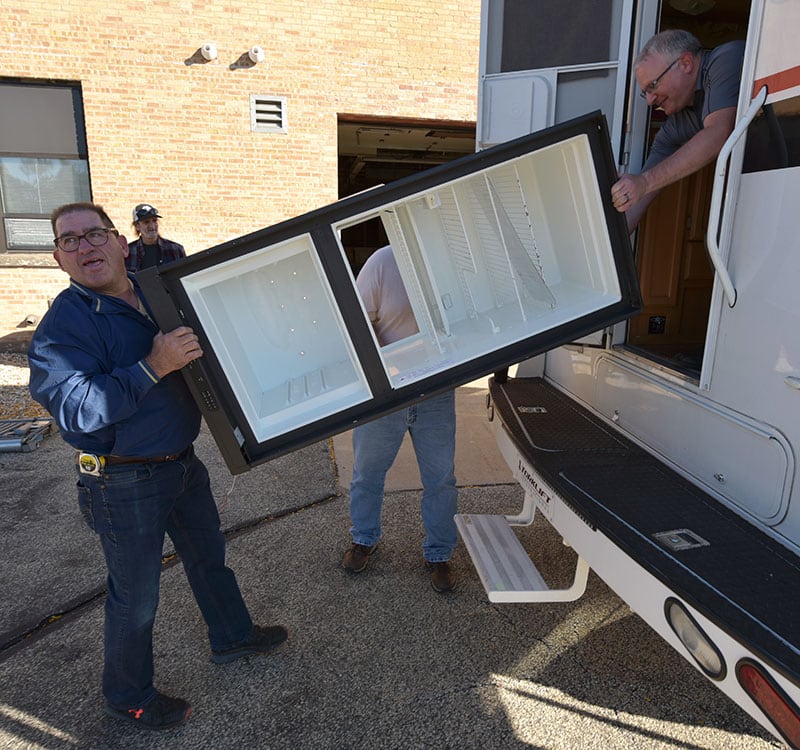
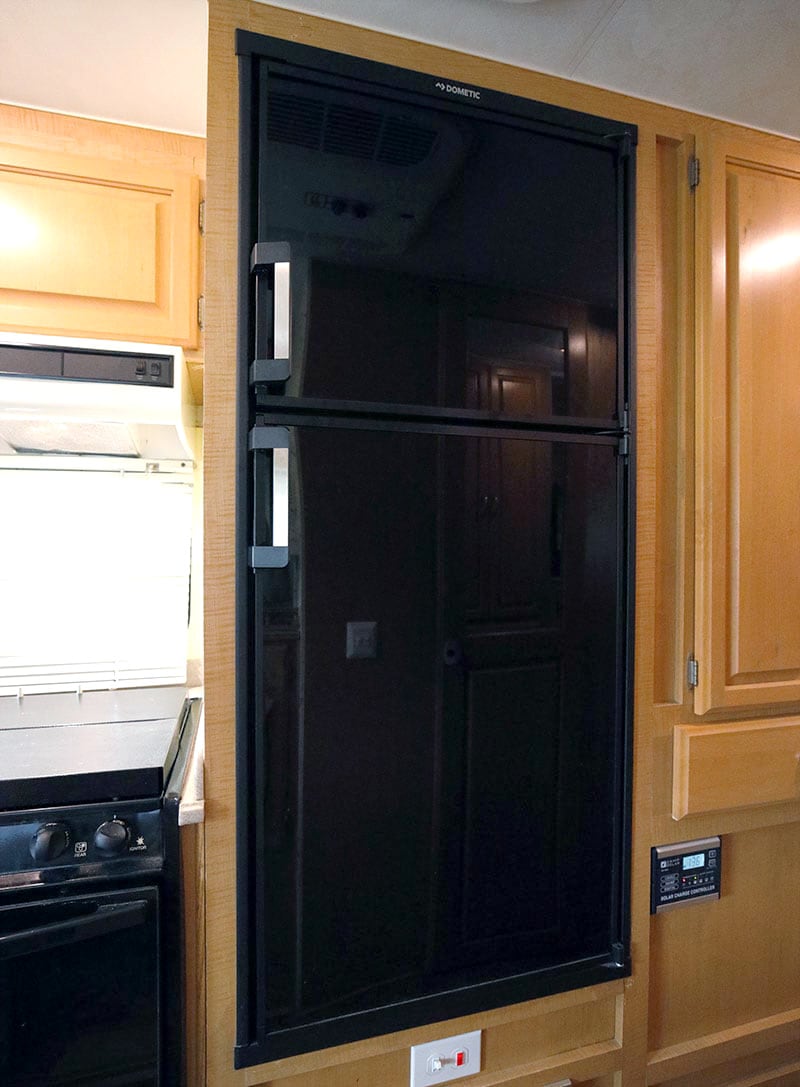
Taking a measuring tape to our entry doorway told us what we already knew. Neither the outgoing old Dometic DM 2663 refrigerator nor the incoming new Dometic DM 2682 refrigerator were going to fit through the camper’s entry doorway in one piece.
The plan was to pull the old refrigerator out, lay it facedown in our dinette (converted into a bed), remove the rear components, and then take the refrigerator out of our entry door in two pieces.
Then the new refrigerator would be disassembled outside the camper, brought into the unit, laid facedown on the dinette for re-assembly, and then installed.
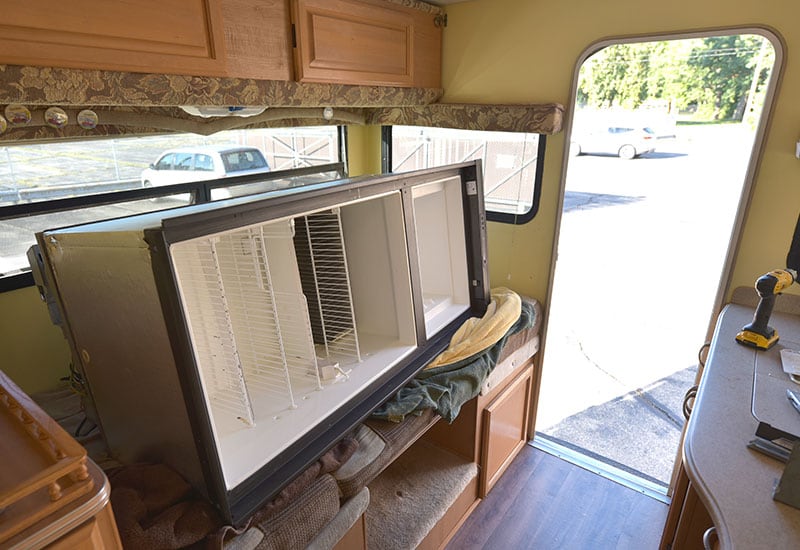
Above: Refrigerator sitting in dinette on top of towels
Before the old refrigerator was removed, we converted the dinette into a bed and put down towels to protect the dinette’s cushions. Two minutes later, the old refrigerator’s doors were removed, the unit was unscrewed from the cabinetry, pushed out from its cavity, and carefully moved to the dinette facedown.
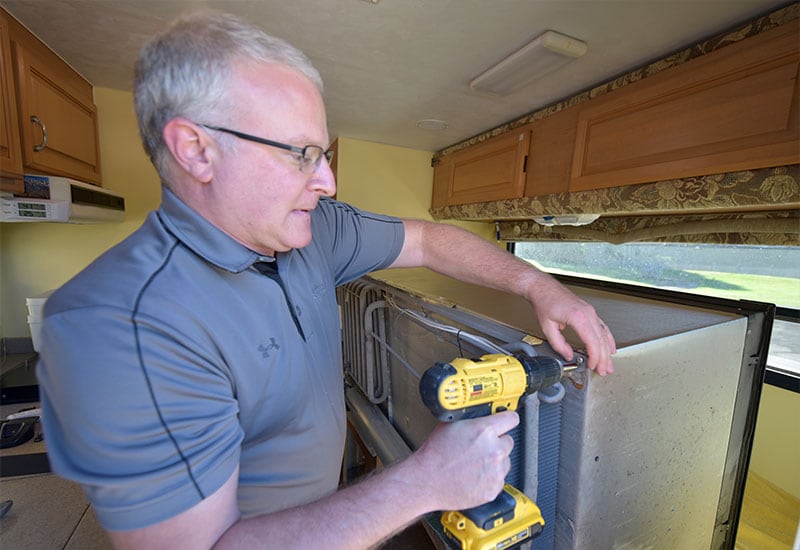
Above: Removing the back with a drill
Above: Using a crowbar to removing the back of the refrigerator
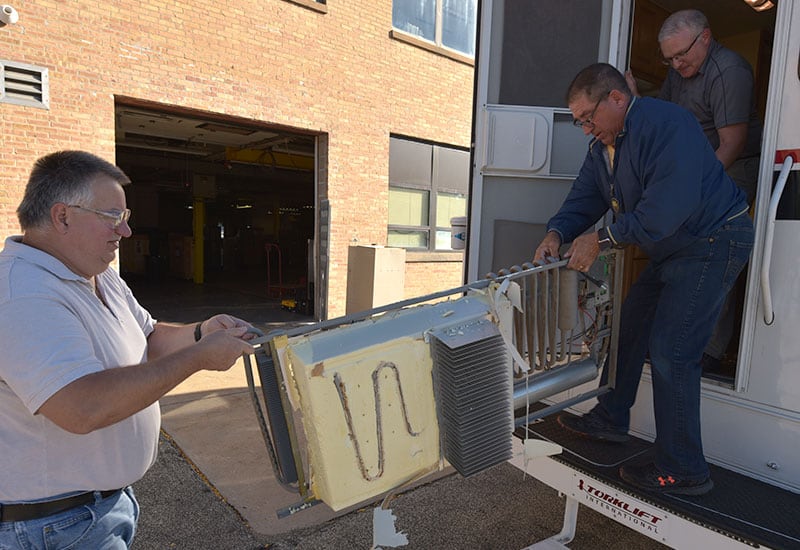
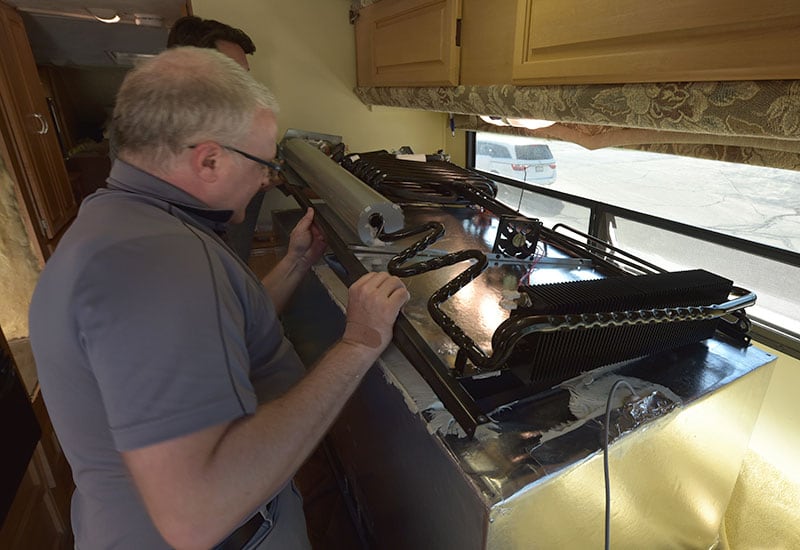
It was a little disturbing to watch the Dometic team crowbar the rear coils and frame and knife the guts out of our poor old refrigerator. They literally used a long serrated knife to cut through the insulation and remove the attached components.
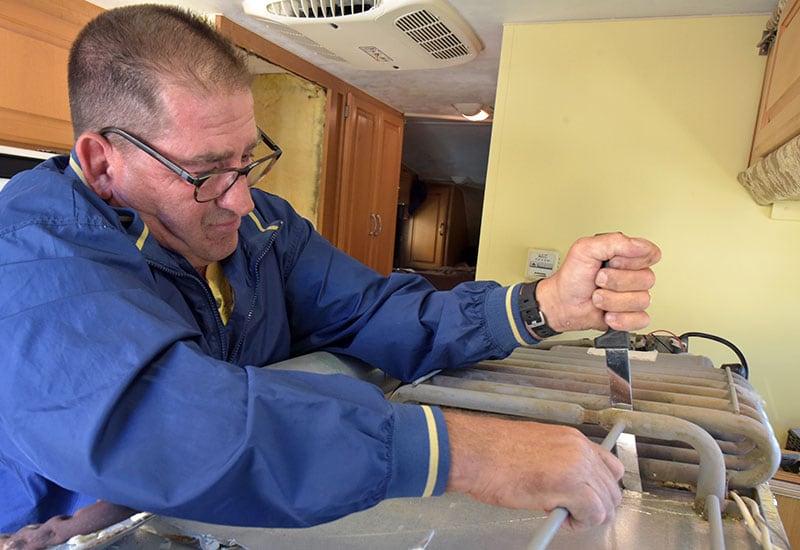
Above: Cutting through the back insulation with a knife
Above: Pulling out the assembly
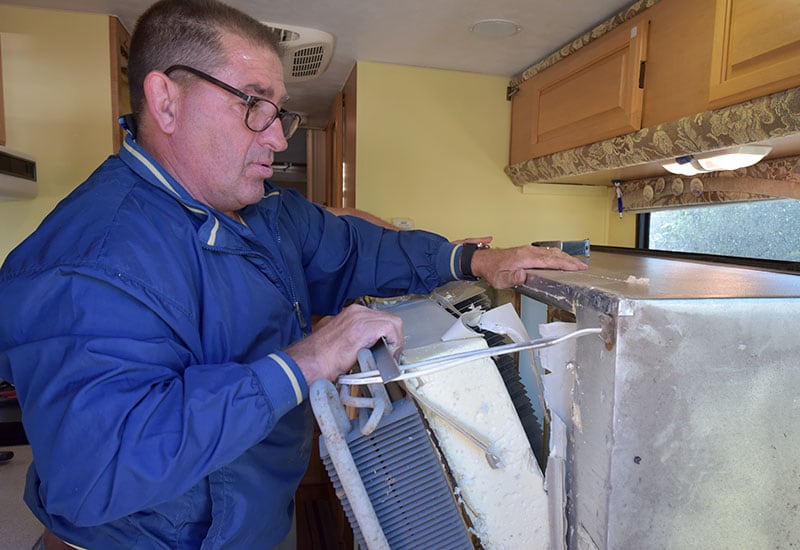
Complicating the execution, the design of the outgoing DM 2663 was completely integrated. The rear components of the refrigerator were literally glued and otherwise attached to the unit itself. You couldn’t just unscrew and remove the rear components. You had to physically cut them out. And cut them out. And cut them out. Oh the horror!
Above and below: Rear assembly of the old refrigerator leaving the camper and then the box coming out
Finally vanquished, the Dometic team carried out the old refrigerator’s carcass and remains through the entry door. Even with the vital components removed, it took some care to pass the cold steel body to the other side.

Rest in peace DM2663. You were one cool component.
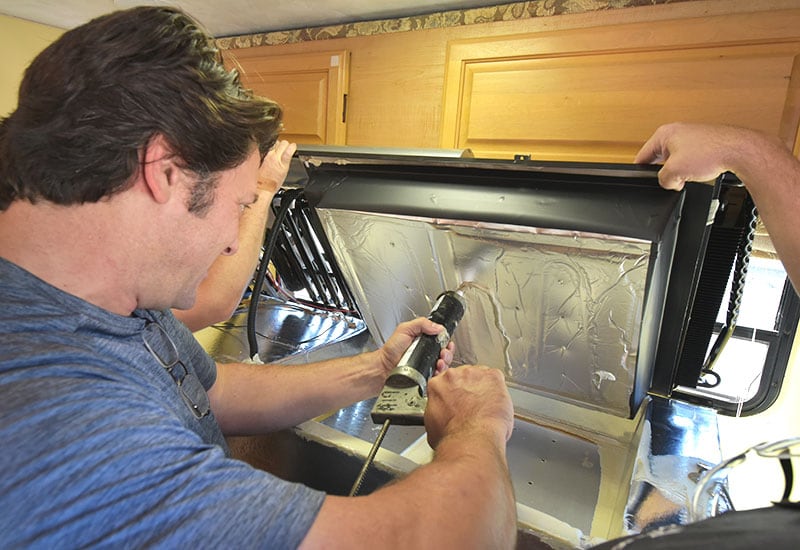
Thankfully, installing the new Dometic DM2682 was far less violent. The Dometic team had disassembled the unit prior to our arrival and the chassis and components would through the entry door with relative ease – with one possible catch.
“Is the freezer door going to hit the air conditioner?”
Noting the depth of our ceiling-mounted air conditioner shroud, and the height of the DM 2682 freezer’s door, it looked like the freezer’s door might impact the air conditioner.
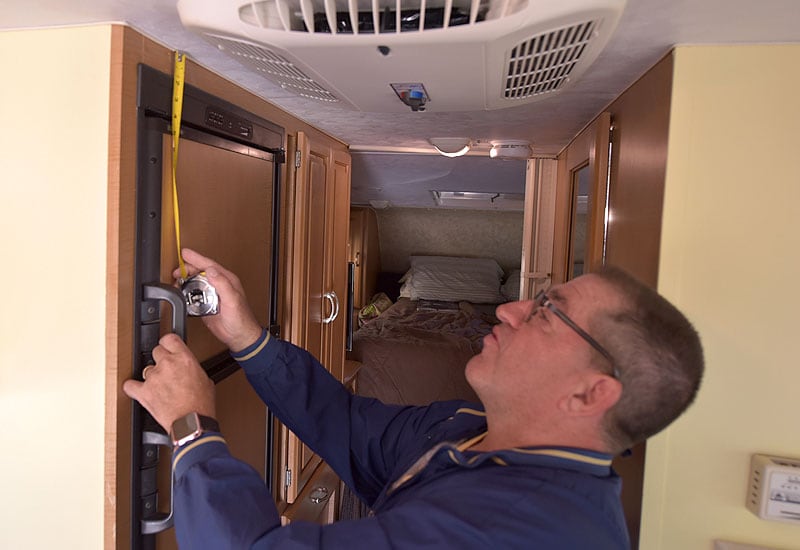
Above: Measuring the ceiling to top of freezer height. Note the air conditioner in the swing-out area for the freezer
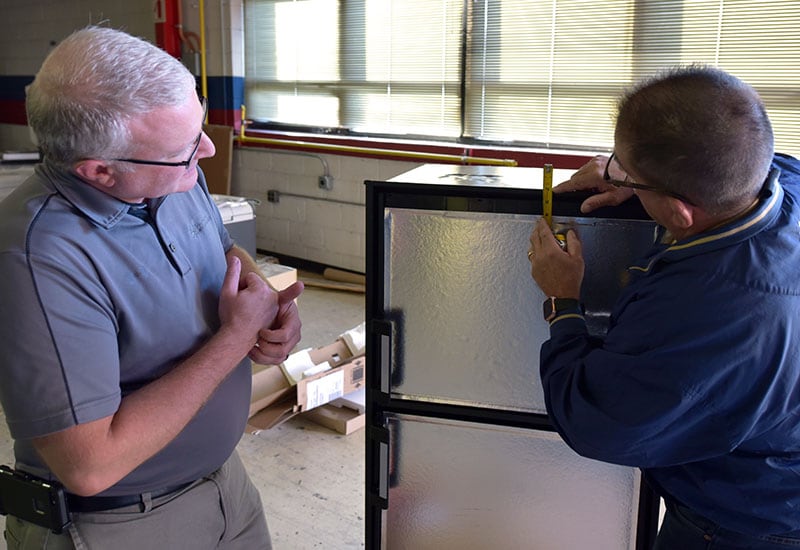
Above: Measuring the new freezer’s top area to see if it will fit
A few measurements of the refrigerator and air conditioner didn’t calm this concern. The only way to really know was to do a dry fit.
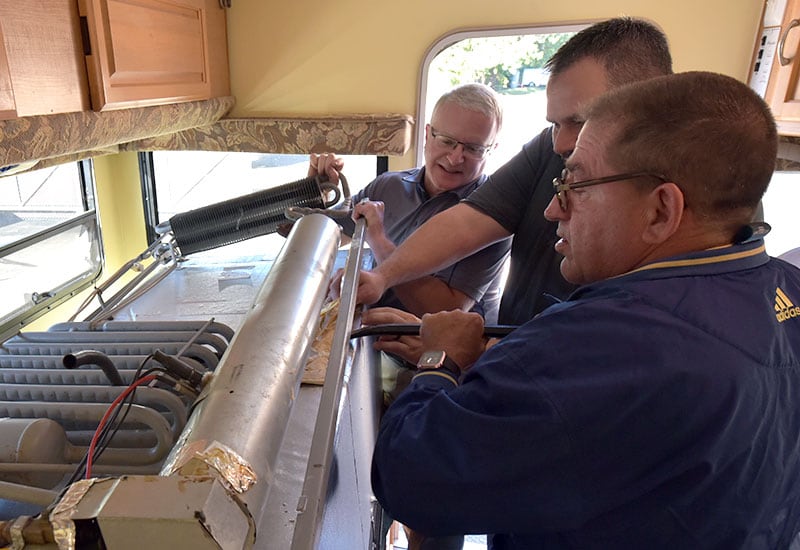
Above and below: The new refrigerator’s front and back going through the camper’s door
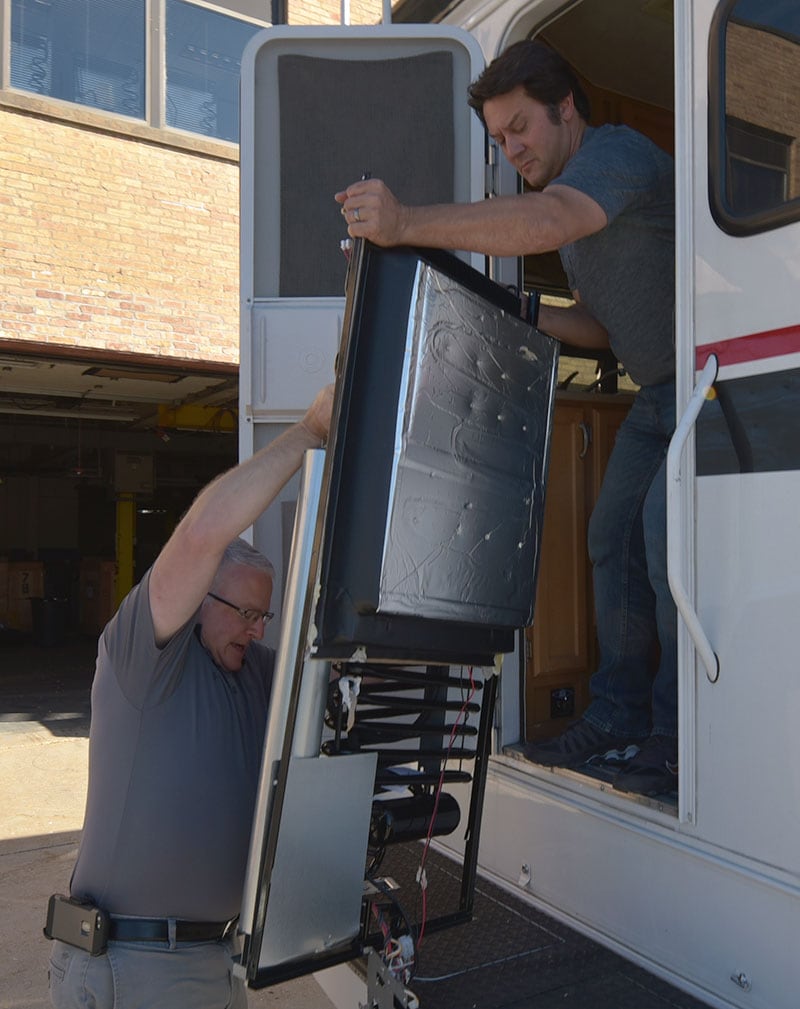
For the dry fit, the Dometic team lifted the refrigerator’s chassis through the entry door and pushed it into the refrigerator’s cavity.
Above: The refrigerator going in for the dry fit
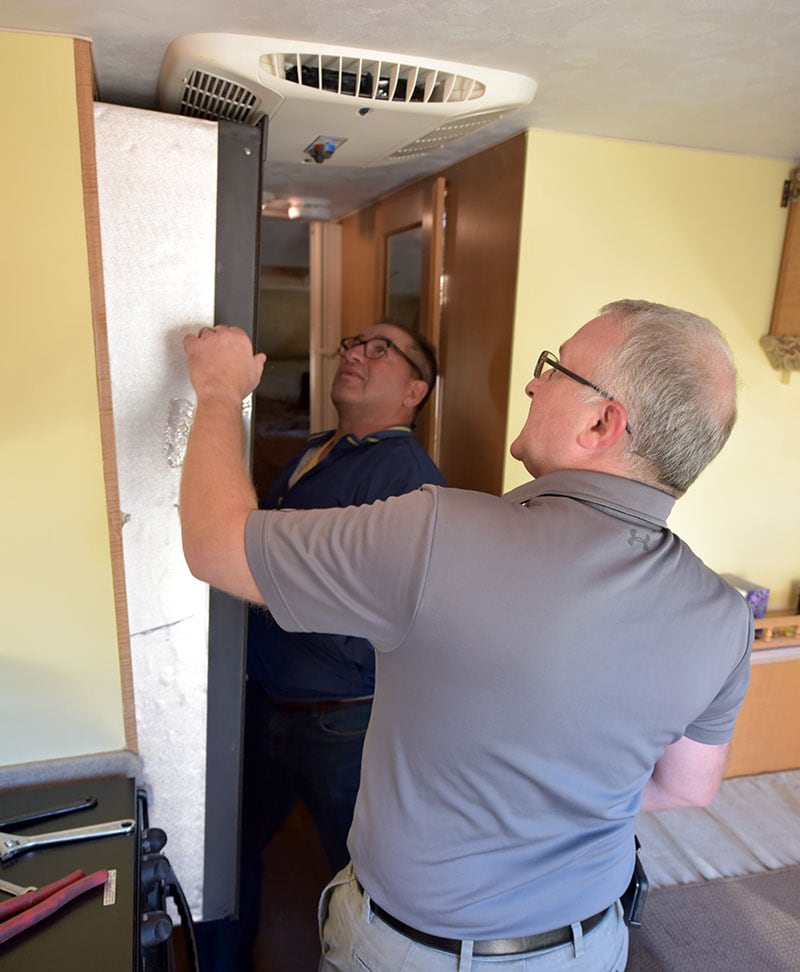
To lower the refrigerator as much as possible, they removed the feet from the underside of the unit.
They then installed the freezer door and swung it open.
With an audible sigh of relief from all in attendance, the freezer’s door just barely cleared the air conditioner’s shroud and controls.
This is the kind of installation challenge that’s hard to anticipate. The DM 2682 was exactly the right size to replace our DM 2663, but with a few design changes. Who would think about the air conditioner possibly conflicting with the freezer’s door – until it does? Lucky for us, it didn’t.
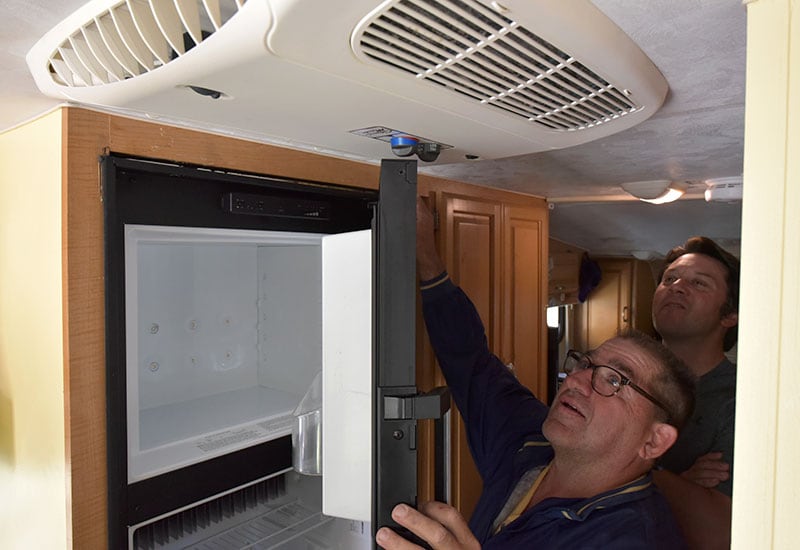
As this was only a dry fit, the team removed the freezer’s door, pulled the unit out of the cabinetry, and placed it facedown in the dinette.
There the modular components were installed with heat conductive thermoplastic sealant (shown below).
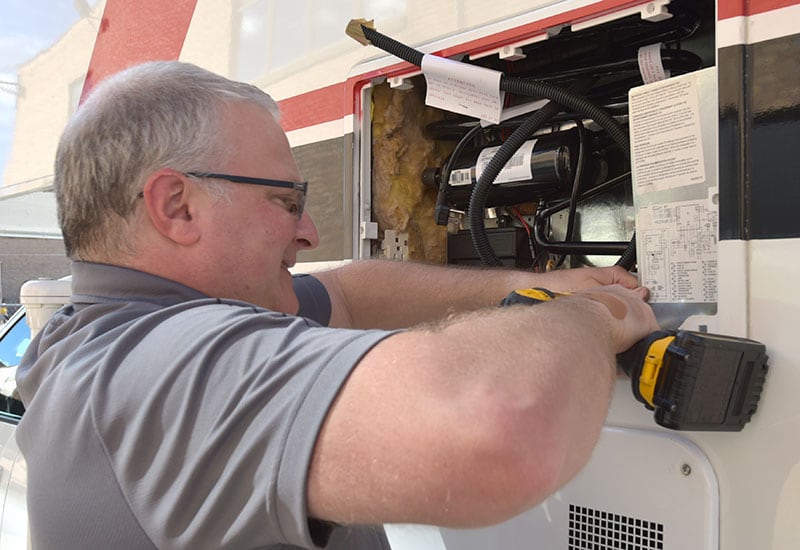
The required electrical connections completed, the refrigerator was reinstalled into the cabinetry vacated by the DM 2663.
We were now in the home stretch. Screw the refrigerator into the cabinetry, slide-in the door panels (black or stainless was available), attach the electric and gas line, and power up the unit for testing.
Everything proceeded flawlessly.
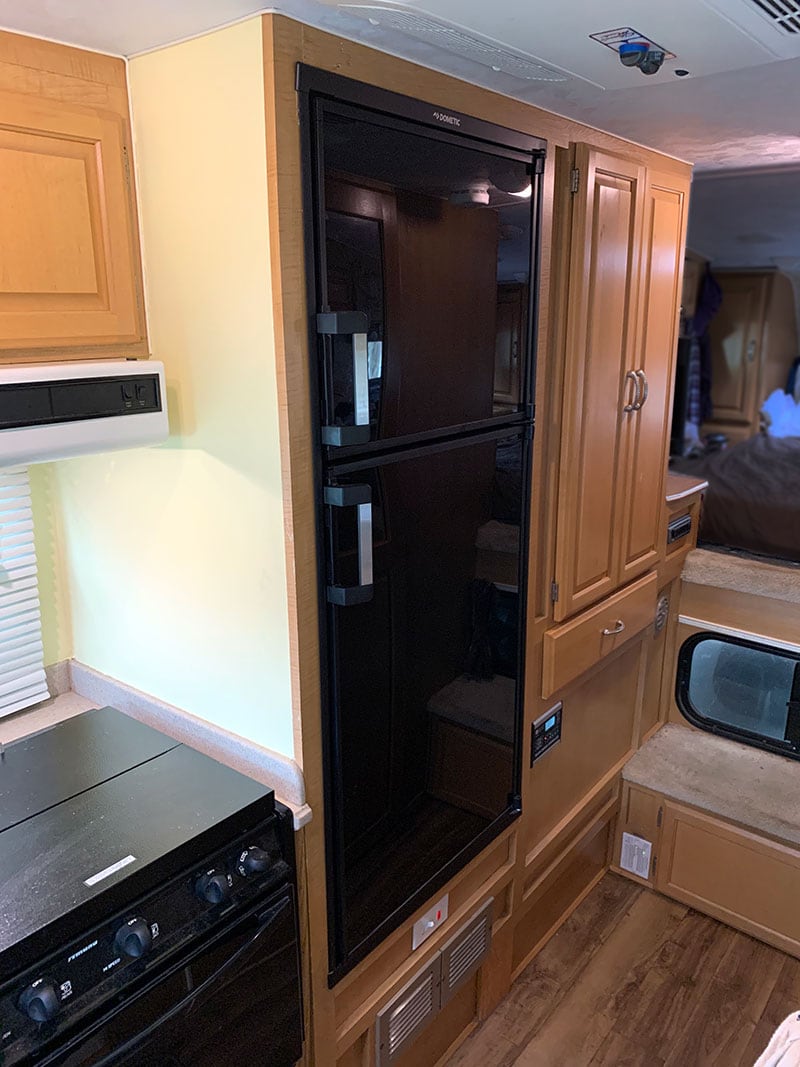
As of this writing, we have had our new refrigerator for about three months. On electric and propane, it has run perfectly and maintained appropriate temperatures in the freezer and refrigerator.
We monitor the temperatures in our RV refrigerator and freezer with an AcuRite Thermometer and wireless sensors. The system display alerts us if the refrigerator and/or freezer is running a little hot or cold.
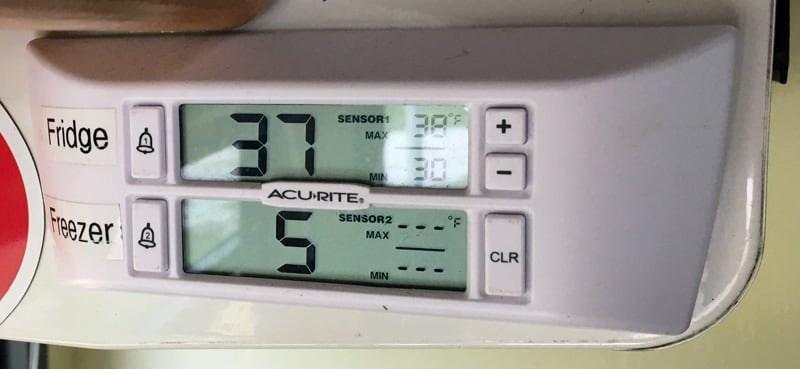
With the old refrigerator, we were getting wild temperature swings. With the new one, it’s steady as she goes. It took us a few days to get the settings on the new unit where we needed them, but the refrigerator (mid-30s) and freezer temperatures (single digits) have held beautifully ever since. Running on gas or electric, it’s been a fantastic unit.
That stated, I do have a few nitpicks about the DM 2682’s design.
If I had a significant nitpick with the new refrigerator, it’s with the location of the LED status lights.
As folks who boondock on a regular basis, it is very important to know that the refrigerator is running, and what power source it’s running on.
On our old Dometic refrigerator, the LED status lights were on the top of the unit’s exterior. At a glance we could immediately see that the refrigerator was on, what power source (propane or 110-volt) it was using, and what temperature level was set.
Two lights up and down – it’s running on auto-gas. Two lights at an angle – it’s running on auto-110-volt electric. One light only – we have a problem. No light – we definitely have a problem.
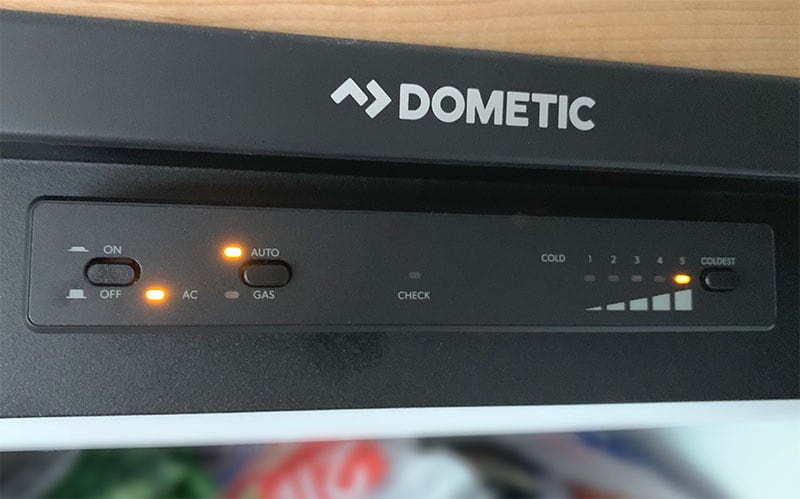
With the new model, the LED status lights are located inside the freezer. You need to open the freezer’s door to see the LED status lights. Not only is this less convenient, but you’re forced to let cold air out of the freezer just to check the unit’s status.
I believe the Dometic design team thought that moving the status lights inside the freezer made the exterior presentation of the refrigerator more attractive. If that was the goal, the refrigerator’s design does appear more modern and domestic without the exterior lights.
That said, most truck campers would probably prefer being able to see the refrigerator’s status at a glance. When you’re camping, an operational and cold refrigerator is a big deal. Before this new unit, we glance-checked the refrigerator multiple times a day. Now I find myself forgetting to check. Someday that might catch up to us.
Admittedly, this is a minor nitpick, but it irks me every time I open the door of the refrigerator at night. The interior light is positioned directly at you when you open the door, and it’s a very bright white.
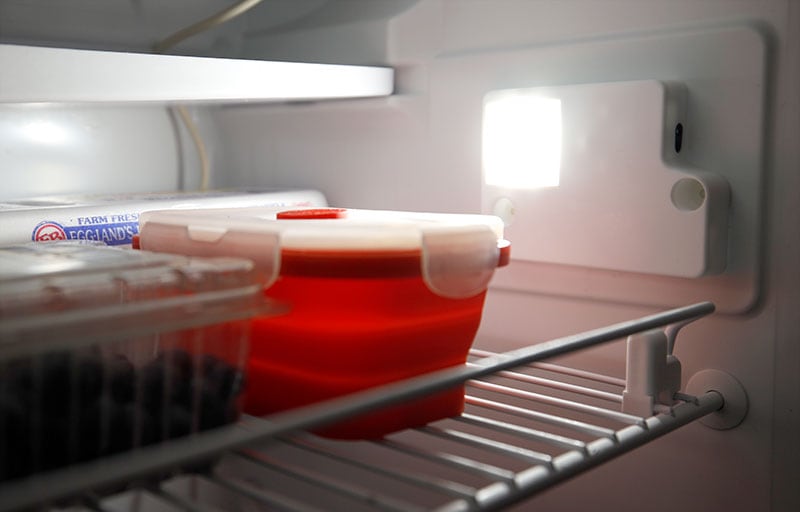
During the day, the light is good. Unless it’s very cloudy outside, the refrigerator’s light color and intensity matches the daylight. At night, the bright white light pointing directly in my eyes feels like a police interrogation.
“Where were you last October 18th, Mr. White?”
“I don’t know! Seriously, I don’t remember. I just want to go home and pet my cat, Harley. He needs me. Please let me go.”
I am making light of this bright white light, but it’s one of those features that makes me think, “Nobody on Dometic’s design team used this product at night while camping.” Now that may not be true, but I can’t imagine the designer, opening this refrigerator for a late night snack and not thinking, “Holy cow! We need to move that light and turn it down!”
Maybe Dometic can put a sensor on a future design to detect the time of day and adjust the color and intensity of their interior lighting – just like many of our phones do now. Until then, I’ll be in interrogation room three.
This issue probably wouldn’t bother most folks, but the refrigerator has a built-in cooling fan that activates on the rear of the unit when the unit gets hot. This fan improves the efficiency of the unit, but it is also quite audible inside the camper. Many folks wouldn’t notice or care, but I do.
The likely solution is one of the many refrigerator fan modifications we have seen on truck campers over the years. Using these mods as inspiration, we will likely upgrade the Dometic fan to higher-capacity and significantly quieter fan in the future.
There are several important lessons we took away from this experience. First, it’s very likely that truck camper owners will need to dismantle and destroy their existing refrigerator to get it out the door. Always measure and remeasure before making such a decision, but that’s the reality you’ll probably face. It’s a crowbar and serrated knife type of job.
Second, do your best to anticipate any obstructions created by differences in the new refrigerator design. They might look identical, but every millimeter in a truck camper is often critical. We were very fortunate that the freezer’s door passed the air conditioner’s controls, but it was extremely close. Whenever possible, measure and conduct a dry fit first.
The MSRP for this unit is $1,715 but we have seen it sold for hundreds less. Naturally you need to add installation to that cost making a new refrigerator a major expense. Then again, we’re talking a vital component that – with appropriate maintenance and care – should last a decade or more.
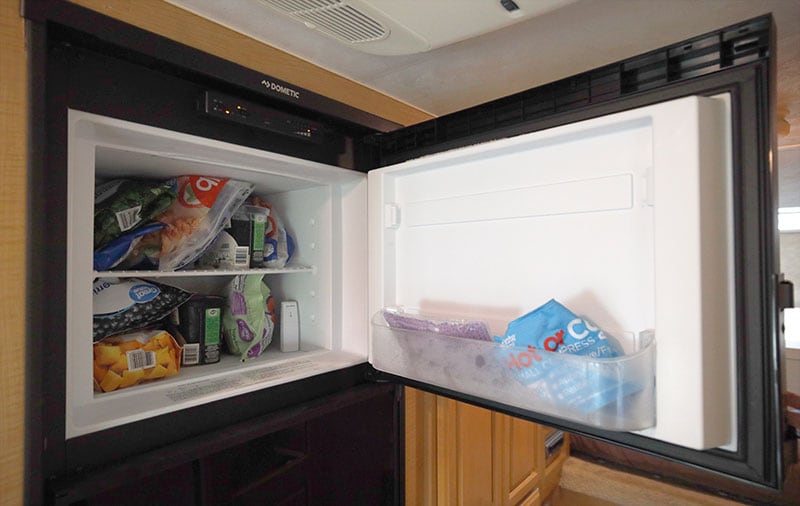
Overall, we absolutely love our new Dometic Americana Plus DM 2682 Refrigerator. Even though it features the same 6-cubic feet of storage as our older unit, it seems a bit larger with better allocation of space.
Given how long the outgoing Dometic refrigerator lasted, we anticipate many years of trouble-free service. Time for a beer.


