Mike Kernagis, Service Manager at Palomino RV, shows how to properly maintain camper seals. Get your caulk guns ready.
Today’s article is about how to maintain your camper’s seals. Maintaining camper seals is one of the top five questions we get at TCM. To help us get a definitive answer on this important issue we talked to Mike Kernagis, Service Manager at Palomino RV.
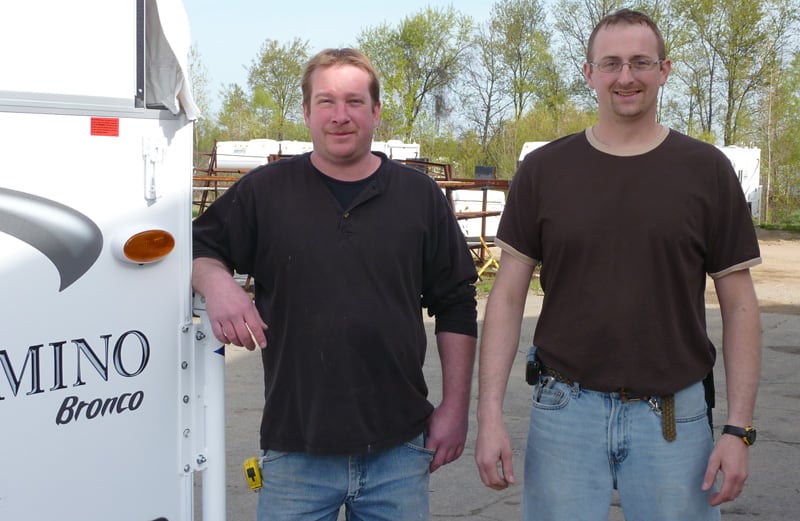
Tom Noirot, Service Technican and Mike Kernagis, Service Manager at Palomino RV
We also met Tom Noirot, Service Technician, who brought in a Palomino 8801 hard side camper and a Palomino Bronco 1251 for our seal maintenance article. Tom has been in the RV service industry for seventeen years and Mike has seven years of RV service experience. They have sealed hundreds, if not thousands of truck campers.
“Constant inspection of the seals is the key to keeping water out and your RV looking like new.”
Mike recommends that you caulk your camper twice a year; once after you de-winterize and once right when you are winterizing in the late fall. Mike also recommends two different sealants for truck campers.
For FRP or rubber camper roofs, Mike uses Dicor roof sealant. Dicor is the industry choice for sealing RV roofs because it is a self-leveling sealant.

For the remaining exterior of your camper, Mike uses Geocel MHRV (Motorhome/RV) heavy duty sealant. Geocel has a high UV rating, which makes it an excellent choice for truck campers.
Dicor and Geocel are available at most RV supply stores and many hardware stores. Mike does not recommend using silicone based sealants unless it is an emergency, such as sealing a leak in a rain storm.
1. With mild soap and water, wash your entire camper. If you have a pop-up camper, wash your camper with the pop-up closed. If your camper is not clean, you are not going to see the seals as easily.
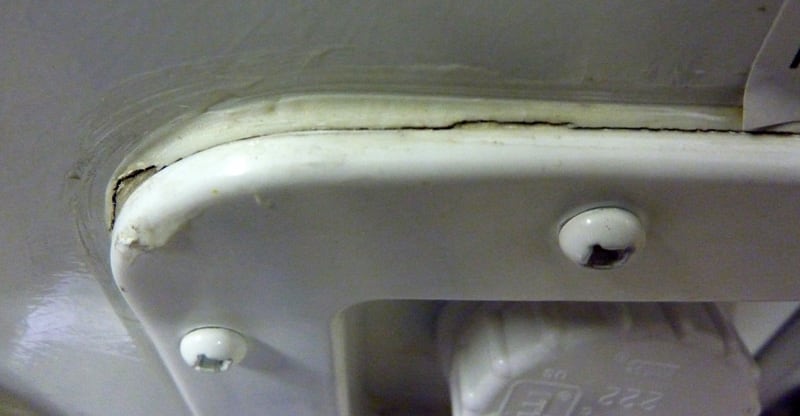
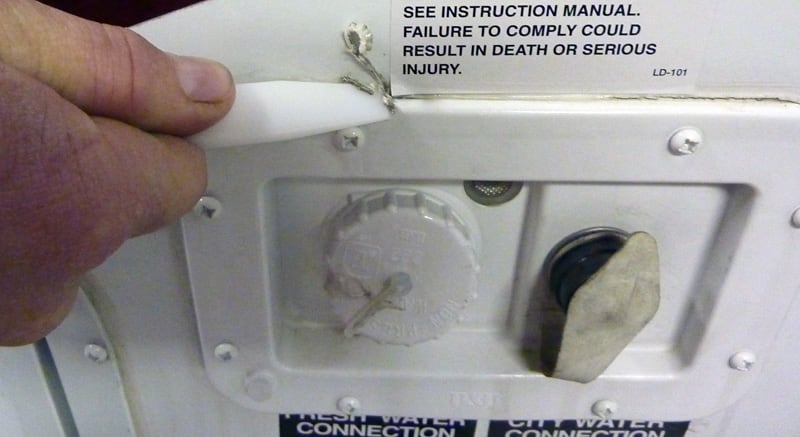
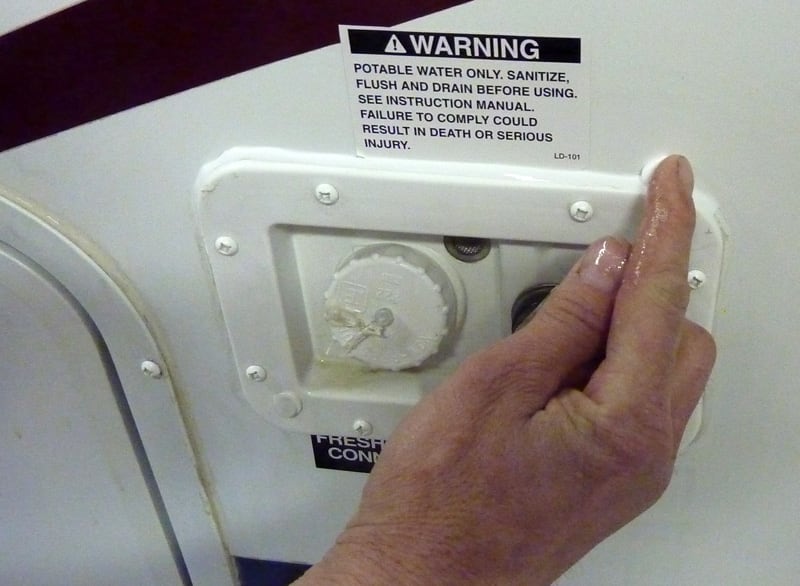
2. Inspect your entire camper for seals that are cracked or coming away from the fixtures (above). Mike recommends focusing in particular where fixtures meet the roof or side walls.
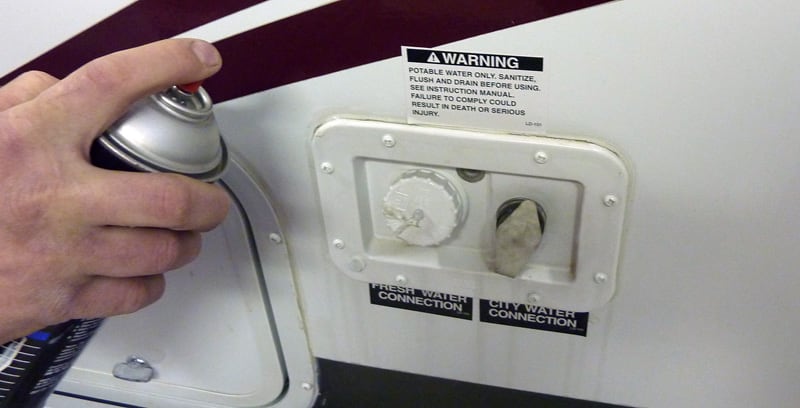
3. Remove the old caulk by spraying the caulked areas with a strong citrus cleaner (above). Mike recommends Goo Gone because it is a strong citrus cleaner that works well.
4. Use a “putty buddy” or other plastic scraper to remove the old caulk. For easy removal, use a thick, high quality scraper (above).
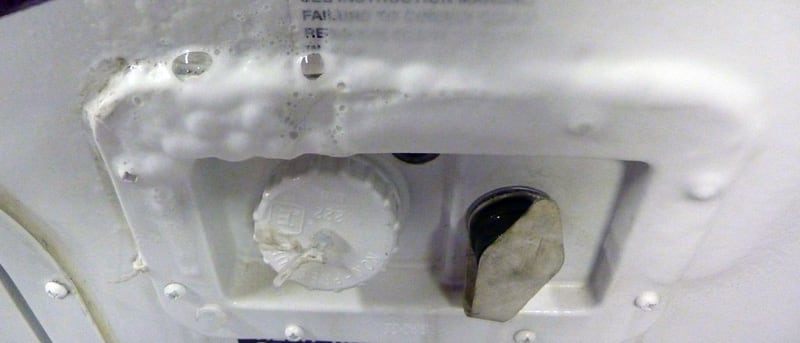
5. After removing the old caulk wash any difficult to remove sealant with the citrus cleaner. Then clean it off with soapy water and wipe it clean. If you do not wash the citrus cleaner off, it could dissolve in the new caulk and make it so the new caulking does not completely seal.
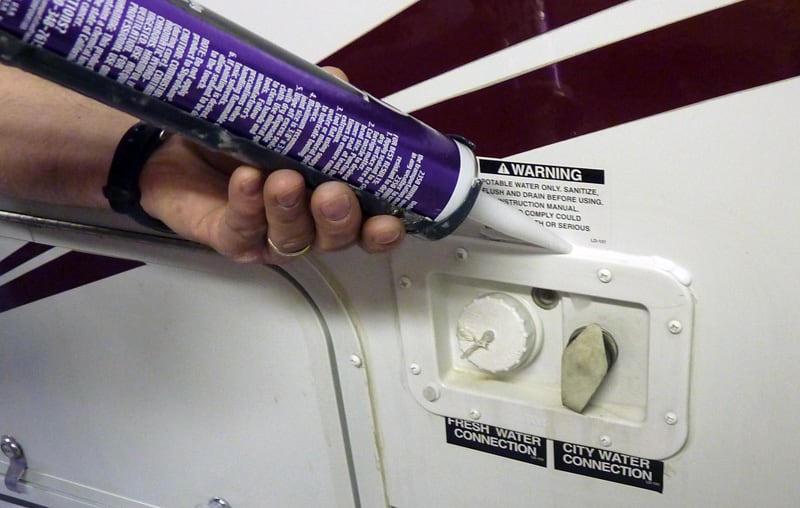
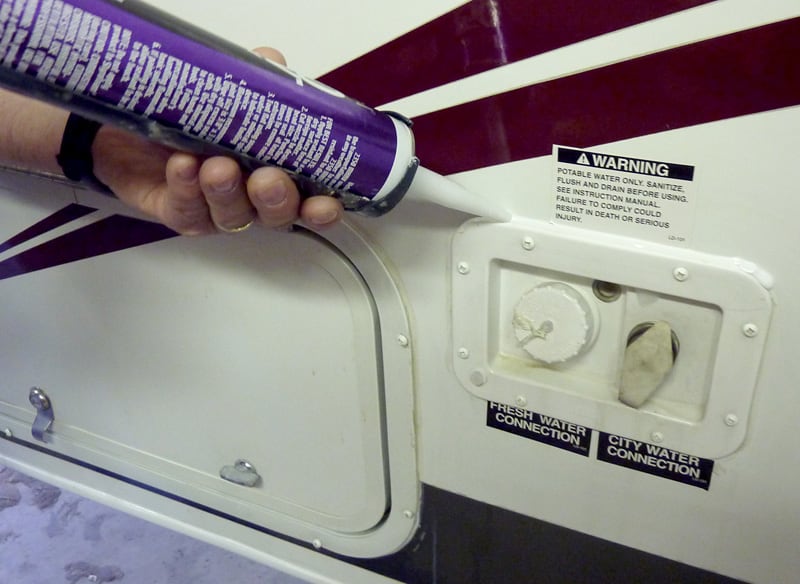
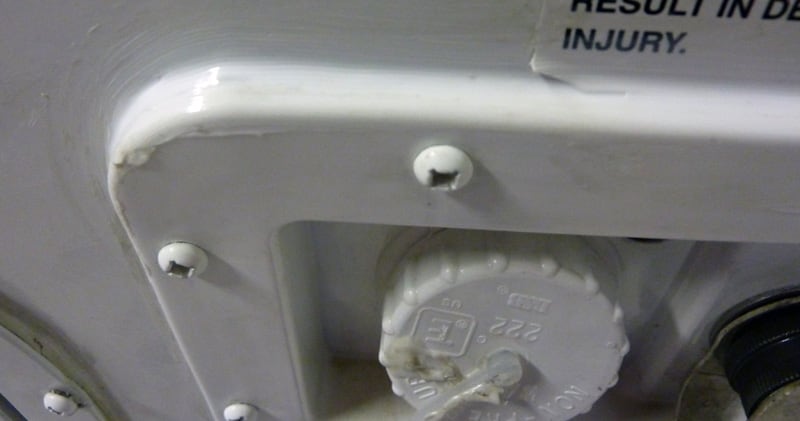
6. Using a caulk gun, seal the body of the camper with Geocel (above) and the roof with Dicor. After applying the caulk, it should look like the photo below.
7. Use a spray bottle to spray soapy water on your hand.
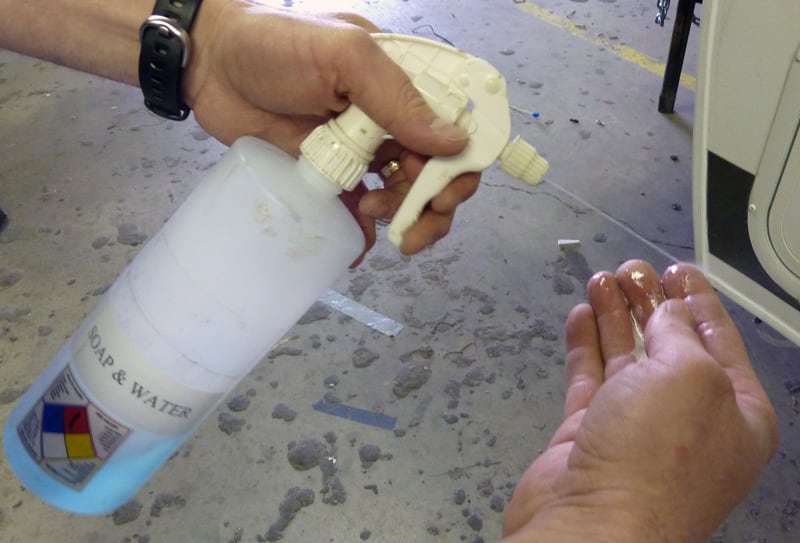
With your soapy fingers, wipe the excess caulk off with your fingers (below photo). This cleans up the caulk and keeps your hands clean.
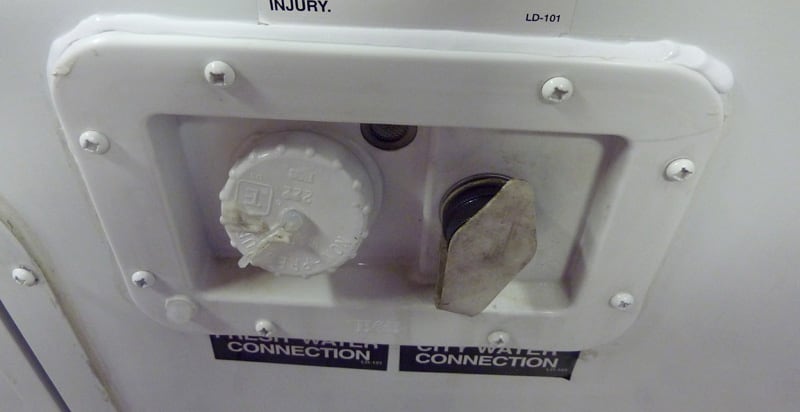
After you wipe away the excess caulk, the finished seal should look like the photo below.
Once you complete the caulking, let your camper dry for at least two hours. It’s very important that the camper does not sit out in the rain during this time.
If you are using Dicor, do not travel or let the camper sit out in the rain for at least twenty-four hours. If the outside temperature is lower than seventy-five degrees Fahrenheit, it will take longer for the sealant to cure. The lower the outside temperature, the longer it will take for the sealant to cure.
“Take your camper off your truck and check the underbody seals. Also, check the sealant on the roof!”
There are three critical areas that are often forgotten when re-caulking a camper. These areas are around the jack brackets, near the camper’s front overcab lights, and under the rear underskirt of the camper. On a pop-up camper, the areas around the four corners where the soft-wall meets the corners are also frequently missed.
It’s important to check the rear skirt of the camper when the camper is raised or mounted on your truck. By having the camper raised, you can clearly see the areas that need to be caulked. Road spray wears down these seams. On our project camper we have tried Rubber In A Can to help maintain the rear skirt area.
“If you allow your seals to crack and deteriorate, water will seep in and you will have a leak.”
Water is one of the main enemies of any truck camper. It doesn’t matter if you have wood framed, aluminum framed, or a molded fiberglass camper. If you allow your seals to crack and deteriorate, water will seep in and you will have a leak. We want to thank Mike Kernagis, Tom Noirot, and Palomino RV for helping us to address this extremely important maintenance issue.
Click here to read another in-depth article about inspecting camper seals. Please also read Tips For Buying A Used Camper and How To Inspect A Used Truck Camper before you purchase a pre-owned unit.


