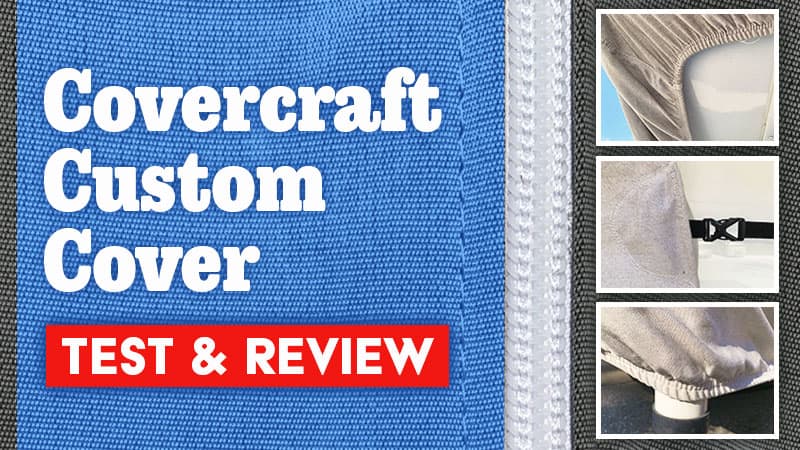
Truck Camper Magazine orders, tests and reviews a custom Covercraft RV cover for their truck camper. Here’s the story behind the measurement process, installation experience and the real-world test.
When we first got into truck camping, we assumed the reason people covered their RVs was to keep off the rain and snow. When we later met Jeff Jegelewicz, Marketing Director for Covercraft, he quickly dispelled that notion. Jeff explained that the primary purpose of a quality cover is to protect a camper from the sun’s harmful UV rays.
Over time, UV rays will dry out critical exterior seals leaving cracks and holes for water to penetrate the unit. More than any other factor, water intrusion is what eventually destroys RVs and campers. With a UV-blocking cover, the exterior seals are protected.
The other principal reason to cover a camper is to protect exterior decals and interior fabrics. We’ve all seen RVs going down the road with faded logos and graphics, or noticed the chair or sofa near the window is lighter where the sun hits it every day. With a UV-blocking cover, the decals and interior fabrics are protected.
Of course, a waterproof cover also keeps the rain, snow, and leaves off a camper. In turn, metal components from camper jacks to screw heads are given more protection from rust. As Jeff told us at the Covercraft factory way back in 2007, “Be religious about covering your camper when you’re not using it.” Amen.
The process of ordering a custom camper cover from Covercraft is straight forward, but requires effort and a measuring tape. The first step is to download the “Slide-In Camper Dimension Sheet” from the Covercraft website.
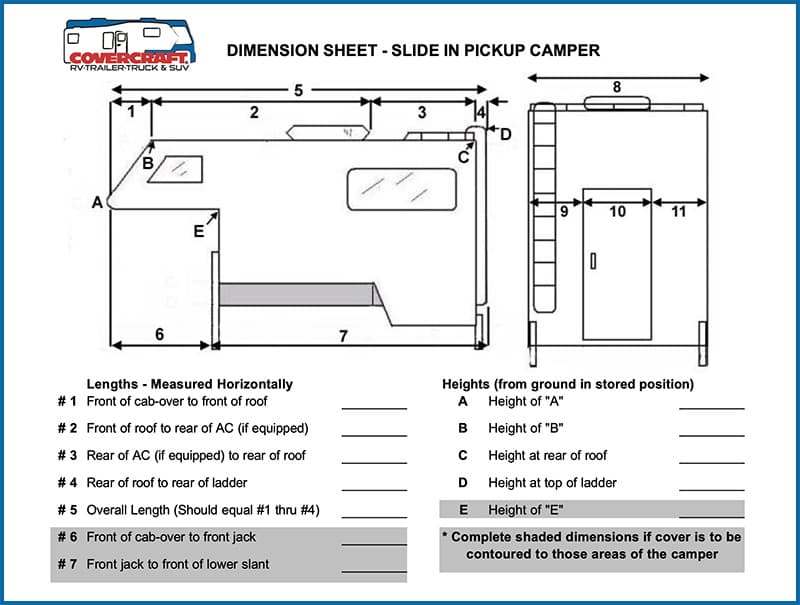
This sheet requests about 17 different dimensions including overall length, width, and height (on jacks), to extreme specifics like, “front of cabover to front of roof”, “rear of roof to rear of ladder”, and, “front jack to front of lower slant”.
Be prepared for about a half-hour of measuring (or more) including getting on the camper roof. If possible, bring a measuring buddy. It’s a two-person job.
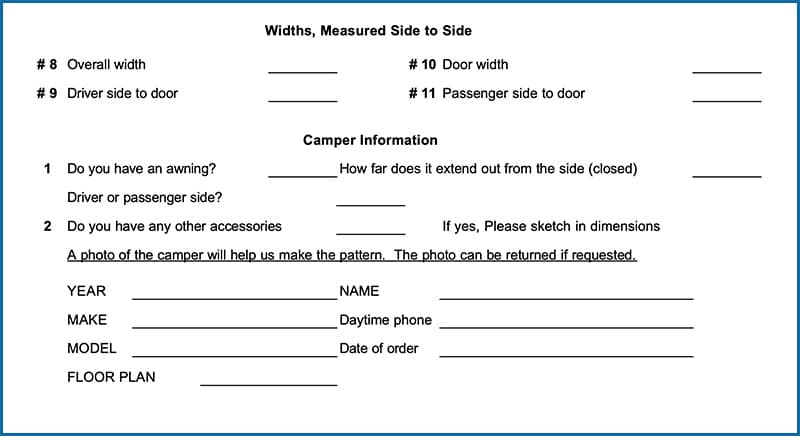
Think of the measuring process as ordering a handmade suit or dress. The tailor or dressmaker might measure your chest underarm, shirt collar, shirt sleeve, pant hips, pant outseam, and other dimensions usually reserved for close encounters of the romantic kind. It’s all a bit invasive until you get the resulting shirt, coat, pants, or dress. Then you understand the motivation behind the measurements. You look marvelous!
“You look marvelous!”
– Billy Crystal, SNL (1985)
For visually-oriented folks like yours truly, Covercraft includes a diagram with the dimension sheet. Otherwise, Angela and I might still be out there pushing a measuring tape around and having a PG-13 conversation.
After taking our camper measurements twice, I asked Paulo Lopez, Research & Development for Covercraft, if the cover would be made exactly to our data. As a born worrywart, I was concerned that the cover might be too tight and thus challenging to install and remove. Paulo assured me that they give their custom covers the perfect amount of allowance. They did.
The Covercraft team has made hundreds of custom truck camper covers over the years. Each custom cover is recorded in their CAD (computer-aided design) system for the year, make, and model of the camper that was made. For example, our 2008 Lance 1055 Covercraft cover is still in their system. This means it’s theoretically possible that Covercraft has your exact camper’s dimensions ready to go, especially if your camper is a more common brand and model.
However, given the investment custom RV covers require, and the increasingly unique nature of truck campers and their various exterior options and modifications (solar panels, satellite dishes, racks, pods, rear decks, and porta-botes on a storage tree, etc.) I still highly recommend carefully measuring your rig and completing their handy camper dimension sheet. As Ellen Ripley famously said in 1987’s Aliens, “It’s the only way to be sure.”
“It’s the only way to be sure.”
– Ellen Ripley, Aliens (1986)
Once submitted, Paulo reviewed our camper’s dimension sheet and gave us an approximate shipping time of ten days. The cover shipped on time and we were sent a UPS tracking number. About two weeks from submitting the dimensions, we had our cover. The feeling that we were working with a well-oiled machine was unmistakable. If only every company, product, and service could be handled with this level of professionalism.
Covercraft offers two different fabrics for different climates and requirements. Since our camper would be covered in Florida, they suggested Sunbrella.
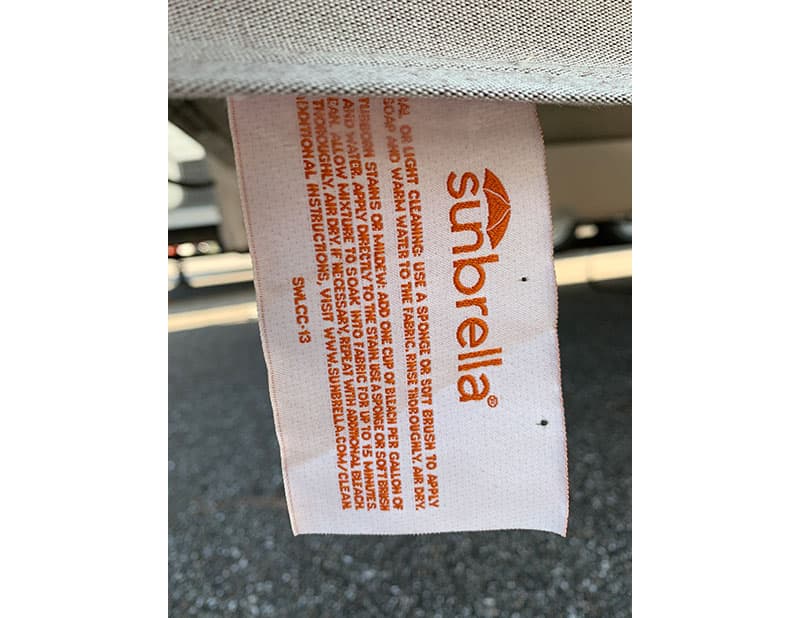
Sunbrella is a material developed over 40-years ago for the marine industry.
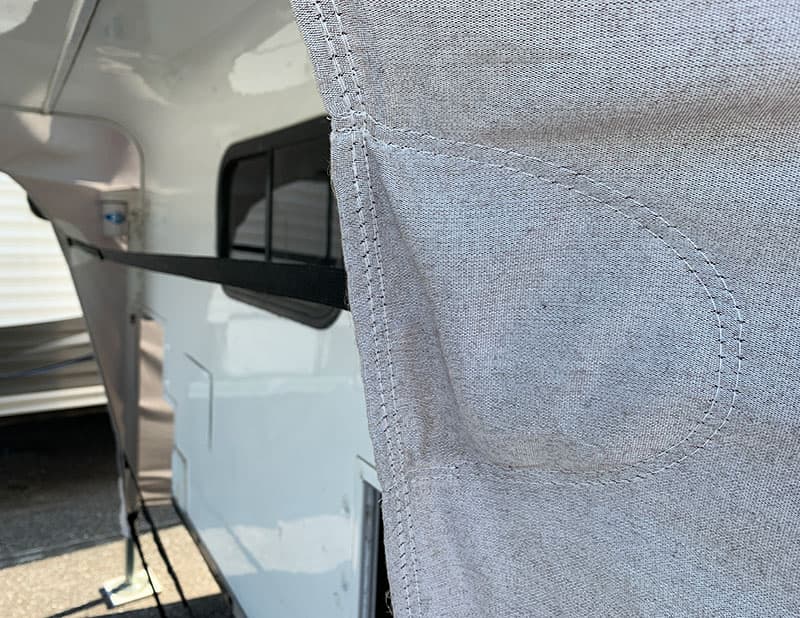
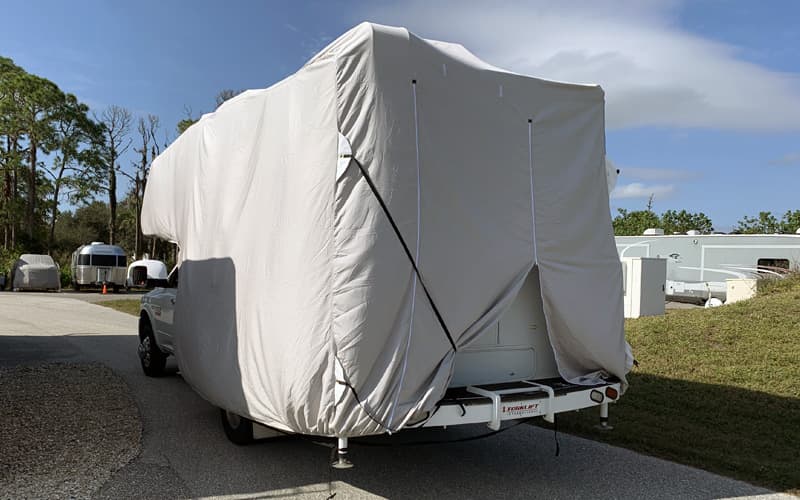
Above: Our Covercraft RV cover was custom made with Sunbrella material
Sunbrella’s primary attributes are durability, being waterproof, and high UV protection. It’s commonly used for upholstery on boats and other year-round outdoor extreme-sun situations.
The second material option is Dupont Tyvek. Tyvek is made for all-weather protection including UV rays, rain and snow and is 100-percent to prevent mildew. For RV owners in northern climates, Covercraft is likely to recommend Tyvek.
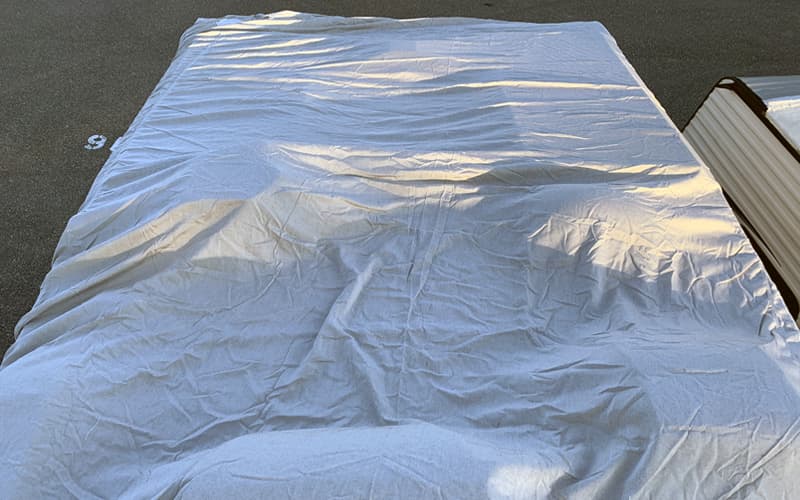
When the cover arrived from Covercraft, it was impossibly small and dense. Inside the box, the cover was wrapped tightly in plastic and looked something like a battleship grey sleeping bag.
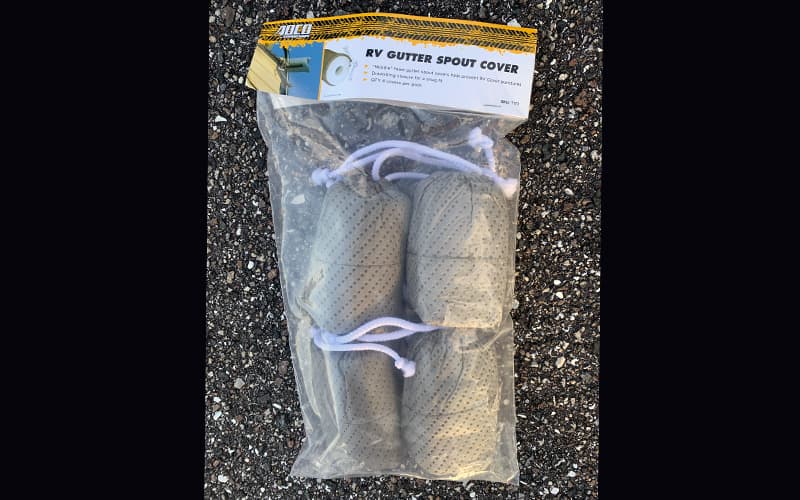
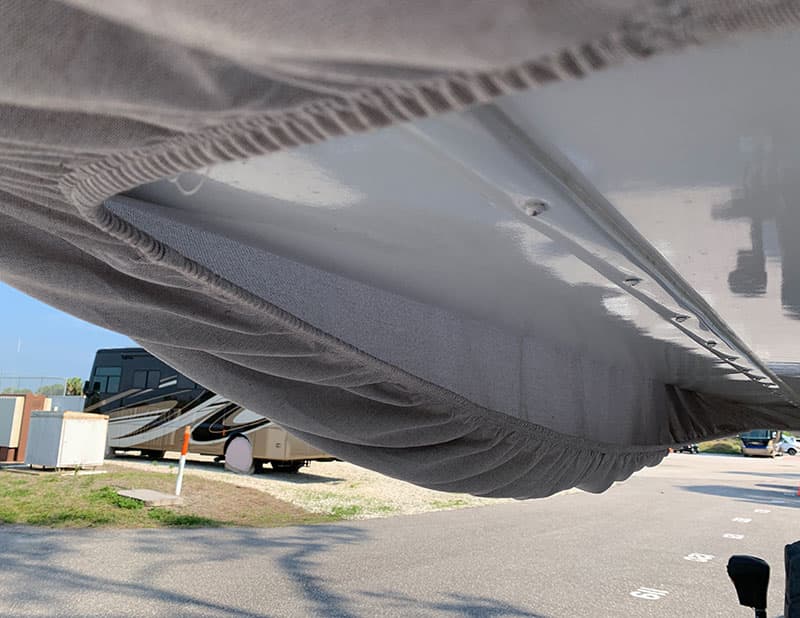
Also in the box was a set of four Adco RV Gutter Spout Covers (shown above). The spout covers resembled mini versions of the rolled-up camper cover, down to the shape and color.
After reviewing the product photos and instructions for the gutter spout covers, we tested them on our camper. Long story short, our spouts were too short. The covers are cleverly designed for standard RV gutter spout lengths (about 3.5-inches). No matter what we tried, the included spout covers would not stay on, at least not as intended.
From experience and plenty of feedback from readers over the years, we knew that RV gutters love nothing more than to wear, tear and poke holes in RV covers. That’s why Adco makes fancy spout covers. As much as we wanted to cover our camper right away, we needed to find a spout cover solution first.
In July of 2020, Neil and Yoly Mullen sent in a cultured solution; cut sections of two-inch thick memory foam zip-tied around each spout and topped off with Activia yogurt containers. These spout covers not only aided in digestion but, according to Neil and Yoly, were nearly impossible to dislodge. We attempted a similar approach, but even this idea wouldn’t work for our nubby gutters.
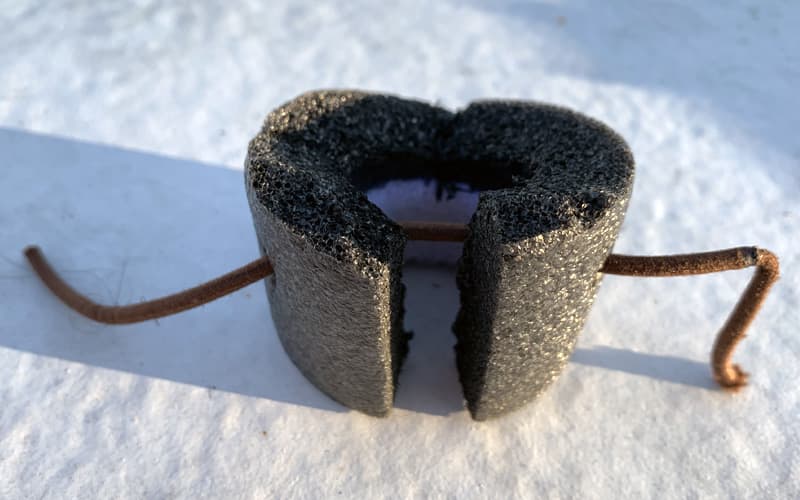
Finally, we combined a number of ideas into one; split-foam pipe insulation, a cut hair-tie, and industrial velcro. First, the velcro was applied to the underside of the gutters and the inside of the split-foam pipe insulation.
Next, the split-foam pipe insulation was cut to the length that fit our embarrassingly tiny spouts. This had the added benefit of tightly holding the right shape around the spout form. The last step was pushing the hair-tie through both ends of the pipe insulation and tying it together. The result was ugly but it worked.
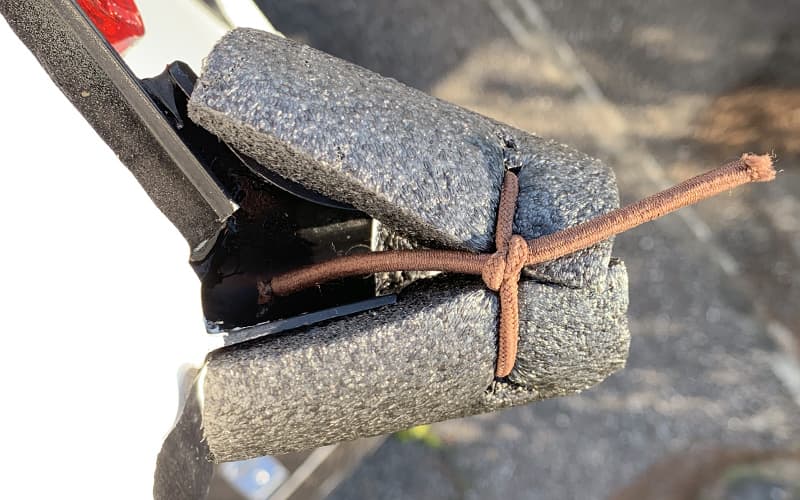
If your camper has standard 3.5-inch spouts, the Adco RV Gutter Spout Covers should work well. If your spouts are nubby like ours, have a solution ready. There’s no sense in ruining a custom cover with runty gutters.
With our unseemly but effective spout covers in place, we very carefully cut the plastic wrap off the cover. Once the plastic was off, we followed Covercraft’s instruction video.
If the above video does not play, click here to watch it on You Tube.
Here’s the gist, in text form:
First, you identify which end of the cover is the front by finding the tag that says, “Front”. Then you lay the cover on the ground lengthwise with the exterior side of the cover facing up.
Next, you fold in the sides toward the center. Once that is completed, you loosely roll the cover from the rear. Then you place the rolled cover at the back of the camper with the front-facing forward.
Now the real fun begins. Hold the front of the cover and climb the rear ladder until you’re on the camper’s roof. If you don’t have a rear ladder, use a step ladder.
When you’re on the roof, pull the rest of the cover onto the roof. Be very careful at this stage not to get the cover caught on anything as you’re pulling it up.
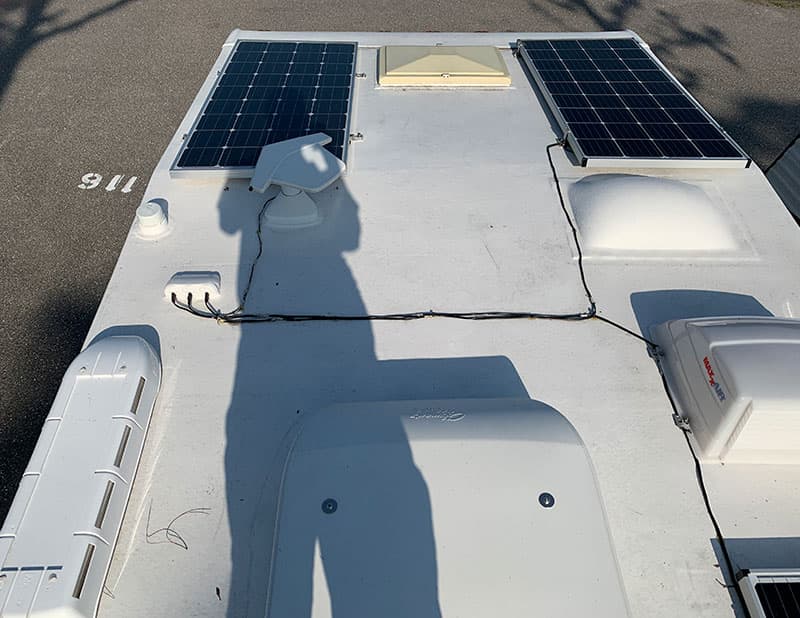
Once the cover is completely on the roof, move the cover unit it runs down the center of the camper front to back. This was a bit challenging as we had a lot of items on our roof including sharp solar panel corners (see note of caution below).
Next, you throw the cover over the side of the camper starting with the front, then both sides. This is literally picking up and throwing the fabric overboard. Needless to say, this was my favorite part. “Look out, Angela!”
Once you reach the rear of the camper, throw the fabric over the side opposite the ladder. Then descend the ladder bringing the cover material with you.
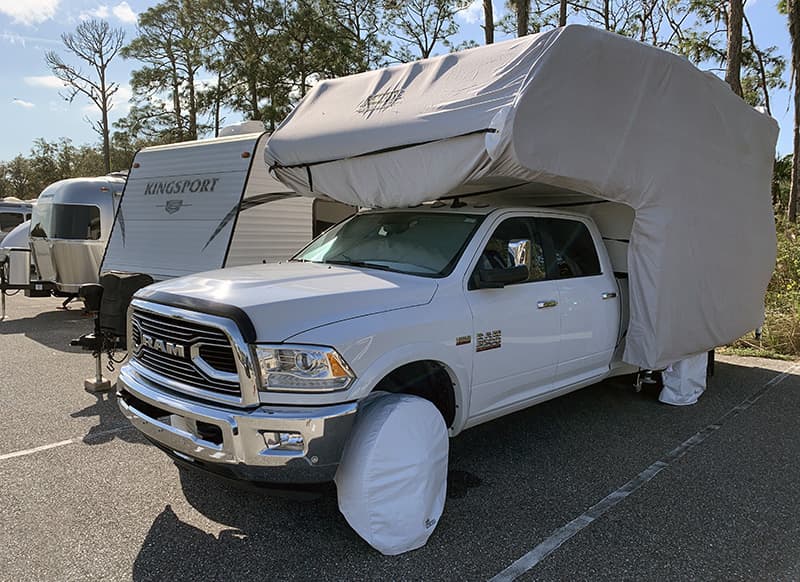
From the ground, walk around the camper adjusting the cover from side to side. When the cover is fully deployed and even around the camper, it’s time to buckle up.
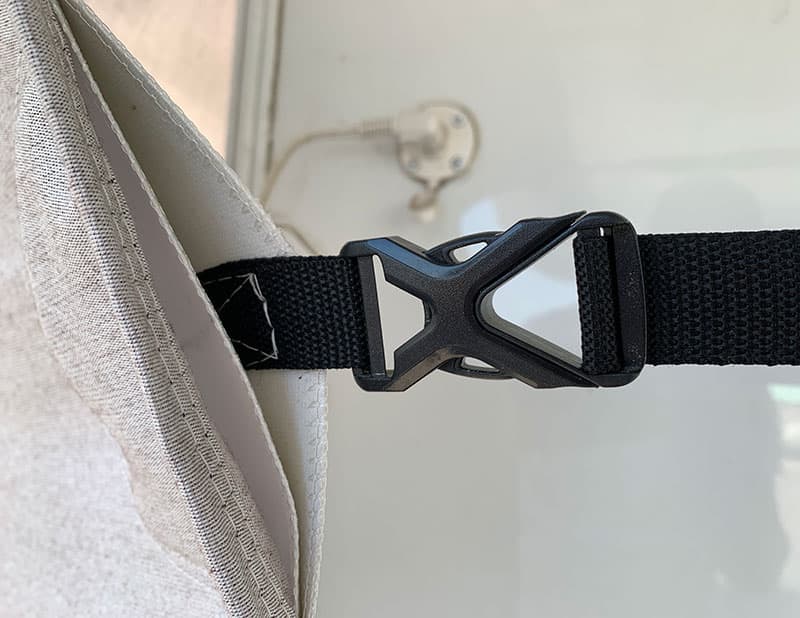
The cover features a series of adjustable tie-down straps with quick-release buckles. The straps start on the driver’s side and have corresponding receivers on the passenger’s side. The buckles make a very satisfying click when connected and the adjustable straps are easy to pull snug. Click! Nice. Click! Sweet.
Getting everything to fit right (centered and balanced side-to-side, not too tight, not too loose) took a bit of futzing. Once it was right, it looked great. Like a custom suit. Marvelous!
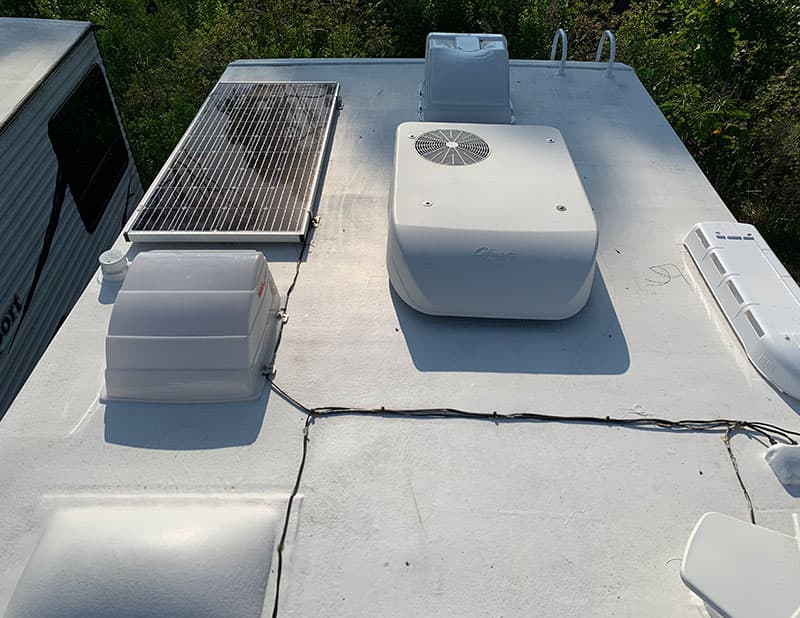
When the cover material is loosely spread out on the roof, you cannot directly see what you’re walking on. Our camper roof is a veritable minefield of awkward objects including three sharp and relatively fragile Zamp solar panels, lengthy solar panel wire runs, a Zamp solar junction box, vents covered with protruding plastic MaxxAir covers, an air conditioner, refrigerator vent cover, black and grey tank vents, a ready-to-catch-your-foot King Jack antenna, and a rather delicate molded cabover escape hatch and vent.
It’s a lot to navigate by lumps and memory. It’s also potentially hazardous as you (a) don’t want to break these items, (b) don’t want to cut the cover on them, and (b) don’t want to trip over them and wind up camping in the clouds. My advice is to know your physical abilities and move carefully.

I’m man enough to admit I crawled a bit during this part. Only the squirrels could see me, and they already had the popcorn out anyway. If you’re reading this, I probably made it.
Once the cover was installed, we unzipped one side of the rear door section. Our careful measurements paid off again as the door was exactly where it should be. This made getting into the camper a breeze.

Before leaving the camper in storage, we cracked the jalousie windows in the main living area as well as the front pass-through window. This would allow airflow through the unit and prevent condensation in the humid Florida weather. All other vents and windows were sealed tight.
To make sure air could circulate throughout the camper, we also opened all the cabinets and drawers. Finally, we verified that the propane and refrigerator were off, cleaned out the refrigerator, and propped the refrigerator and freezer doors open.
From that point, we regularly checked on the camper and cover. These checks consisted of an exterior walk around observing the front, sides, and rear cover material for any signs of wear or puncture, as well as the roof.
Since our camper is stored without access to power, we were initially concerned that the solar panels would not be able to keep our batteries charged with the cover on. To our surprise, the solar panels were able to keep our batteries charged with the cover installed.
One explanation for this is that we have 490-watts of solar panels on our roof, and we parked the camper fully charged. Furthermore, we always use the battery disconnect to prevent parasitic draw while stored. However, we did load and unload the camper a few of times when we needed to use or service and/or exercise the truck; a considerable amp draw. The batteries quickly returned to full charge.
Technically, the fact that our solar panels were able to keep our batteries charged proves that some sunlight did penetrate the Sunbrella material. In this case, we were actually pleased that this was the case, but it also means the Covercraft cover does not offer 100-percent protection from the sun.
Beyond keeping our camper protected, our other concern has been keeping the truck in good working order. While the rig was parked, we had access to an SUV that fits in our garage and gets nearly double the fuel economy of the truck.
The lot where the truck and camper were stored has something of an oval-shaped course around the various RVs and boats. This is not a roadway by any stretch of the imagination, nor are there a lot of people that frequent this area. This gave me a completely nutty idea. Let’s drive the camper around with the cover on!
“But with the blast shield down, I can’t even see! How am I supposed to fight?”
– Luke Skywalker, Star Wars (1977)
Obi-Wan would not have been impressed, but it worked like a champ. First, we went into the camper and closed up all the cabinets, drawers, and refrigerator. We also made sure anything that was left out was put away; a basic pre-flight check. Then, we closed the camper entry door and zipped the door closed. Next, we carefully unclipped any cover straps that ran underneath the camper and truck and carefully tucked them out of harm’s way.
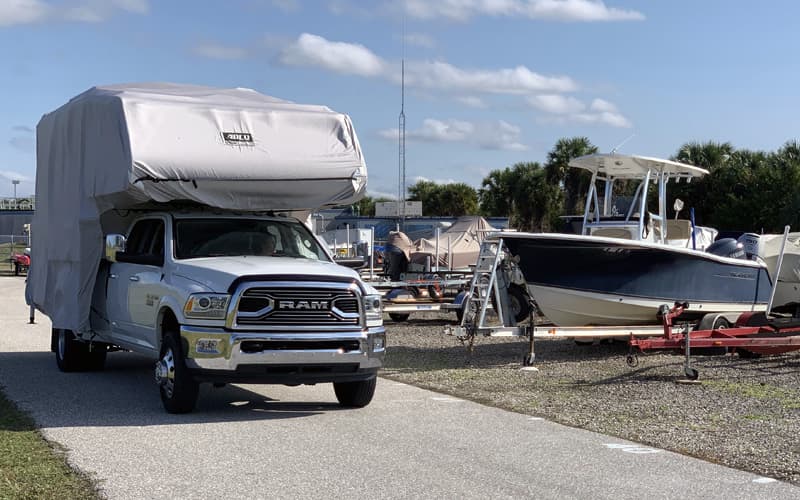
Then Angela slowly pulled the truck and camper forward as I watched from outside to see if anything would drag or catch. Everything stayed in place, so Angela drove about 10 miles per hour around, and around and around the lot to exercise the truck. I think she might have driven the truck a few more laps than necessary since she so missed our adventures so much. Me too.
After the exercise, we returned the rig to its space, lowered the jacks, reconnected the straps, entered the camper, and opened everything back up for airflow. In total, we drove the camper covered at least a half-dozen times. Angela might have the unofficial world record for the most miles driven with a covered camper. Somebody call Guinness.
Driving a covered truck in a storage lot is not an idea I’d recommend to everyone, but it worked well for our camper, our cover, and our situation. It was also good for the jacks to be exercised as intended.
In six months and at least a dozen checks, there is little to nothing to report on the cover. Even after months of intense sun and a good number of powerful storms, the Covercraft cover stayed put and showed no sign of stress or breaks.
A small amount of water might collect in the cover under the front nose after a drenching rainstorm, but it was easy to push out. We did find a few ants in our camper during our checks. That’s Florida, and certainly not the fault of our cover. Let’s just say that was something we ant-ticipated.
The lead-up to this review is detailed in the article, “From Full-Time To The Future”. For three years up to the Covid outbreak, we had been living full-time on the road in our truck camper. At that point, situations in our personal lives combined with the pandemic made living on the road essentially impossible. We were very lucky to have a place to park our rig, a high-quality cover to protect it, and the means to find a safe solution.
Finally uncovering our camper was like opening the best present possible on Christmas morning. Okay, the Atari 2600 dad got me when I was eight takes the cake, but this was really close. Angela and I were practically jubilant.
We are also excited to see how nice the camper appeared. Other than a little dust, dirt, and mostly dead bugs, the camper looked fantastic.
Above: Our camper roof exactly as it was immediately after I took the cover off.
Covercraft RV covers are sold by the linear foot. Covercraft RV covers made from Sunbrella are $28.99 per linear foot and come with a 5-year warranty. Our camper cover is 20-feet long and made from Sunbrella (20 feet x $34.99 = $699.80).
Covers made from Dupont Tyvek are $28.99 per linear foot and come with a 4-year warranty. If our 20-foot camper cover was made from Tyvek, it would have been $579.80.
Custom Covercraft covers are literally hundreds of dollars more than the pre-made camper covers you see online and in RV dealer stores. Based on the impeccable quality and custom fit of our Covercraft cover, we fully understand and appreciate the cost, but that doesn’t mean a custom cover is for everyone.
You can get excellent results with a more affordable camper cover. Just be prepared to use materials like foam pipe insulation and pool noodles to cover any sharp or protruding edges on your camper, stay vigilant watching for wear and tear and be prepared to patch. Most if not all of the cover companies offer patch kits.
Even if you opt for the Covercraft cover, the same recommendations are in order. We are not concerned about the Covercraft cover wearing or getting a puncture, but we are going to take good care of it anyway. Treated right, I believe a Covercraft cover will last many years and keep our camper looking good.
We were extremely impressed with our first custom Covercraft cover 13-years ago and are even more impressed in 2021. Covercraft covers are anything but cheap, but they are worth every penny for someone who has a camper they intend to keep in good condition and needs to store it outside. I rest a lot easier knowing our camper will be stored under a Covercraft custom cover when we’re not using it.
Pros
Custom made to fit your specific truck camper or RV
Made using proven, rugged, and UV resistant Sunbrella or Tyvek
Quality of fit, material, and stitching are first-rate
Sunbrella cover allowed solar panels to charge batteries
5-year warranty (Sunbrella) or 4-year warranty (Tyvec)
Can be sold with your camper increasing the overall value
Cons
Significantly more expensive than non-custom alternatives
Required measurements for custom fit are extensive
Custom manufacturing requires a waiting period
Sunbrella did not stop all sunlight, dirt, or insects
Installation and removal requires caution – see Note of Caution above
You may need a custom RV spout solution to prevent breaks
Covercraft RV
Phone: 800-274-7006
Web: https://www.covercraft.com/
Quality, Customer Service and Long-Term Reliability
Truck Camper Magazine inspects all reviewed truck campers (and related products) for design, material, and quality issues and reports what we find. However, since Truck Camper Magazine reviews only brand new truck campers and products, our reviews cannot fully address long-term quality, customer service or reliability.
To learn about a brand’s long-term quality, customer service and reliability, Truck Camper Magazine recommends talking directly with truck camper owners at truck camper rallies and online via truck camper forums and truck camper owners groups.
Please be sure to balance your gathered feedback across multiple sources including direct correspondence with the truck camper manufacturers and your closest truck camper dealers.
If you are new to truck campers, please start in the Newbie Corner.
For more information about Covercraft’s custom truck camper covers, click here.


