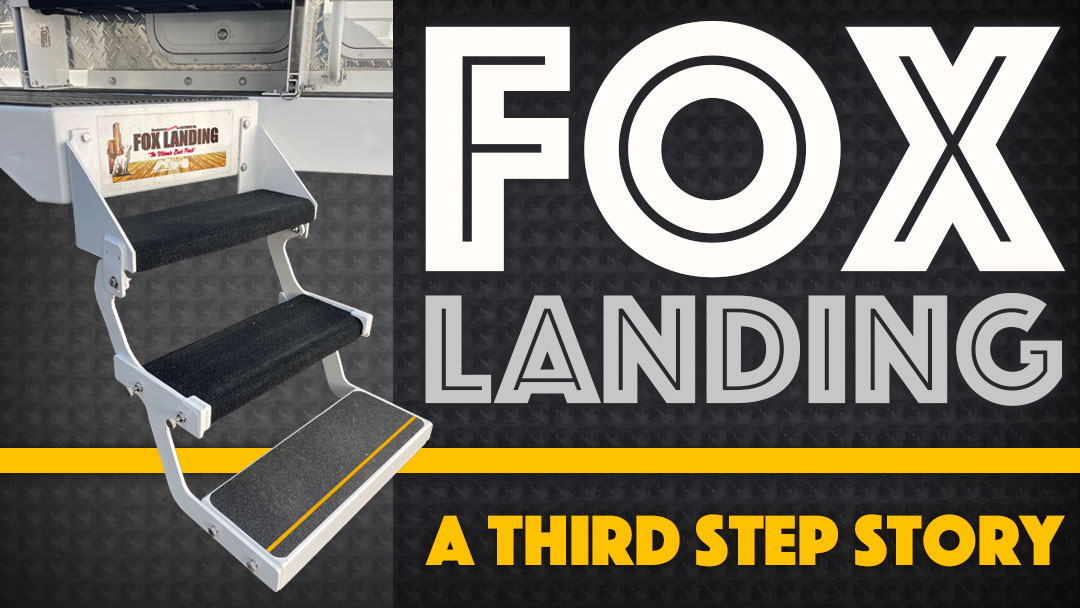
Need one more Fox Landing step? With AutoCAD and a laser cutter, Allen McCarriston created one of the most factory-looking mods we’ve ever seen. Step aside step stool. We’ve got a third step story!
Launched in 2011, Northwood Manufacturing’s Fox Landing folding bumper and step was designed to transform rear-entry truck campers (including Arctic Fox and Wolf Creek models) with a convenient side-entry system.
Developed in conjunction with Torklift International, the Fox Landing’s side-entry approach uniquely spanned heavy-duty hitch extensions—including Torklift’s SuperTruss—making for easier and safer camper access while towing.
The Fox Landing solved a real-world truck camping and towing challenge and became an instant hit. In fact, we see more Northwood truck campers with Fox Landing systems than without.
What’s even more telling about the Fox Landing’s popularity is the number of modifications we’ve seen over the years, from adding steps on both sides, to adding a guard rail, to mounting the system on non-Northwood units. While all of these mods have been impressive, Allen McCarriston’s third step takes Fox Landing mods to another level—literally.
To find out more about the third step, we asked Allen to give us the details and build photography behind this clever mod.
by Allen McCarriston
My Third Step story began shortly after selling our third towable camper. We have had three Jayco trailers; a 2006 Jayco 298 Travel Trailer, 2012 Jayco 365 QSBH fifth wheel, and a 2016 Jayco 355 MBQS fifth wheel.
Dave, a friend of ours, got us into camping with our first travel trailer purchase. From this point, we progressed to the fifth wheel campers. But before any of the campers entered into the family photos, we were Boy Scouts camping in backyards to Boy Scout campsites in Maine and Blue Angel Air Shows.
One day, while watching TV in our last fifth wheel, Donna asked, “Why do we need this big camper?” Since we already had a nice Ford F-350 for hauling a big fifth wheel, I’d already been exploring the idea of a truck camper. Donna was open to the idea, leading us to explore a few truck campers in New England. We learned a lot at Truck Camper Warehouse in New Hampshire from Bill and Ryan Penney.
We looked at non-slide and slide-out campers. Moving from a spacious fifth wheel, we agreed on wanting a slide. We kicked a lot of tires—more like jacks—before we decided on an Arctic Fox 811.
Donna and I love the Arctic Fox 811 for its size and spaciousness. We’ve gone from having anything and everything in our past campers to only having what we need for each of the four seasons.
Just like the readers of the Truck Camper Magazine, we enjoy tweaking and designing stuff for our truck camper. I’m always thinking of enhancements that make our camper more useful including camper guides and storage cubbies for our truck bed and adding additional exterior lighting.
About a year ago, Truck Camper Magazine included a story about our camper guides and storage cubbies. It was very exciting to share an idea that I had found useful.
Now, a year later, I wish to share another design. This design dates back a few years to when we purchased our Arctic Fox 811.
The design was spurred on by a mishap that I’m sure many of you can relate to. One day, we stepped out of the truck-mounted camper, walked onto the Fox Landing, and continued down the steps onto a black folding plastic step stool. When our foot landed on the stool, it went right through the top seam.
For the remainder of that camping experience, I had a small piece of wood duct taped to the top of the stool for support. As an engineer, I knew something better had to be done.
After seeing the optional third step design for Northern Lite truck campers, I started to design something for the Fox Landing. Using AutoCAD design software, I was able to make the design come to life. Using the AutoCAD file, I converted it to a software used in a laser cutter.
Prototyping the design pieces in corrugated cardboard from a laser cutter was easy. It was simple to alter pieces of the cardboard to create better “Form, Fit and Function”.
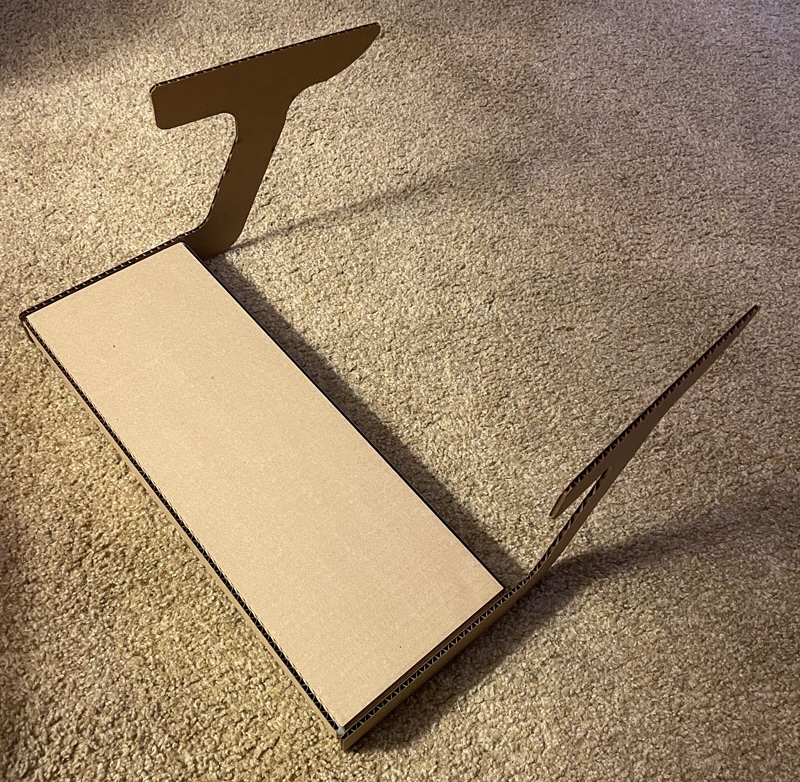
Above: Initial Design Layout
As seen in the photos, the design starts out with an initial prototype and was quickly modified to a realistic cardboard model.
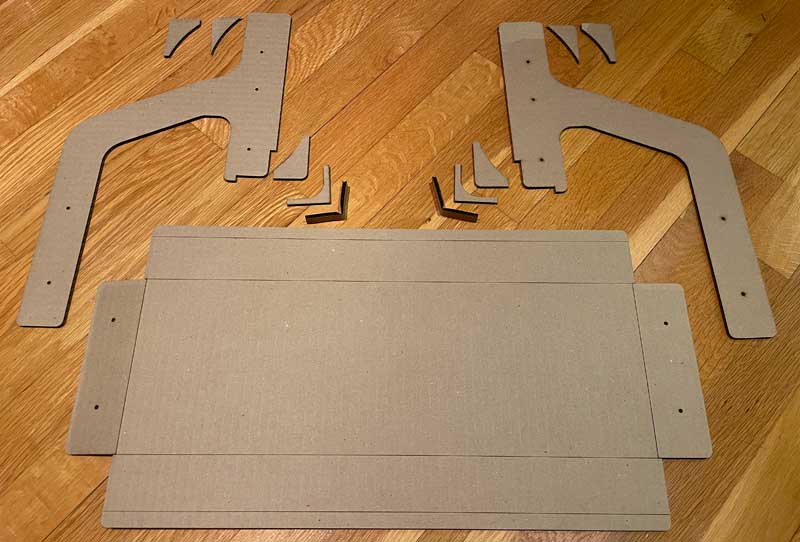
Above: Final Design Laid Out Using Cardboard
Once the cardboard assembly was completed, the material process and hardware selection were the next focus.
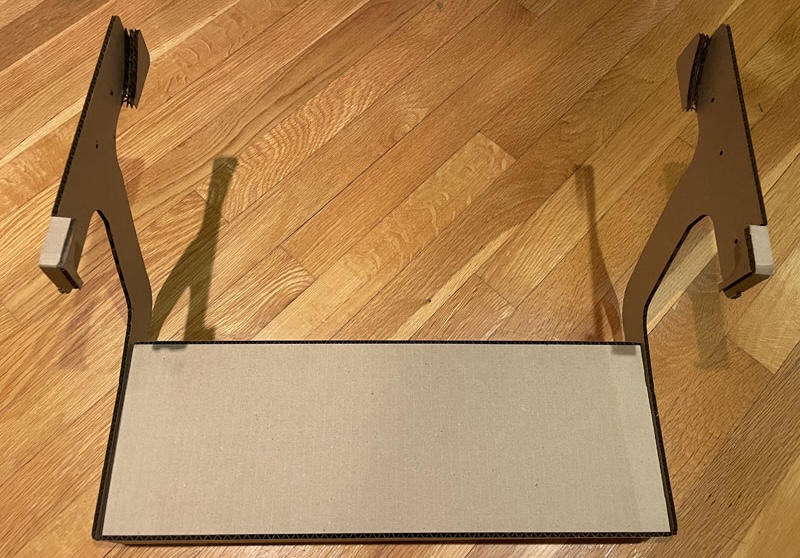
Above: Final Design Cardboard Assembly
The manufacturing process for this assembly could be performed using matched metal dies used in metal stamping, but that would be very costly. So, I reached out to a machine shop for another kind of machining process, waterjet cutting.
I stopped by the last known address of this company in Beverly, Massachusetts. The company was no longer at the address. Looking at my phone contacts, I called the phone number and they answered. Hooray! They are still in business and their new shop is in Danvers, Massachusetts, where I live.
The owner, Bob Mucci, took on my project and highly recommended the waterjet cutting machine. The AutoCAD file could be converted to the waterjet cutting software easily. The software could also lay out all of the pieces to minimize material waste. The water cutting process also provides minimal post-cutting ‘cleaning’ operations.
There are two types of aluminum used in the manufacturing process. For the side supports, Bob selected 0.25” thick 6061-T6 aluminum. This thickness matches what is used in the framing and supports of the Fox Landing step design.
The step has another type of aluminum, series 3003. This aluminum can be bent and folded for the forming process of the step. The right and left side support pieces are clamped together for the welding process. The side support 6061-T6 Aluminum provides for a very strong and ridged step support. The step section itself is bent, formed, and welded in the fashion of a ‘torque box’ to be as rigid when standing on it.
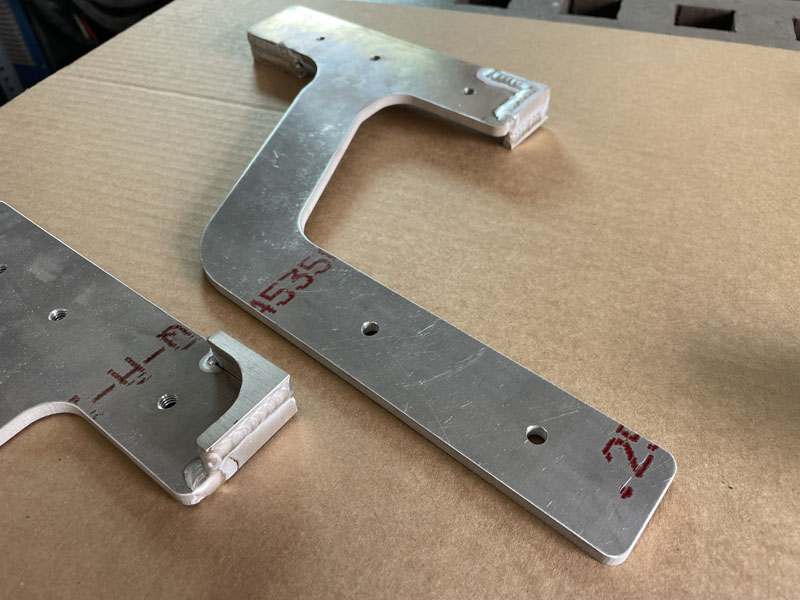
Figure 4, Left Side Support Welding Fabrication
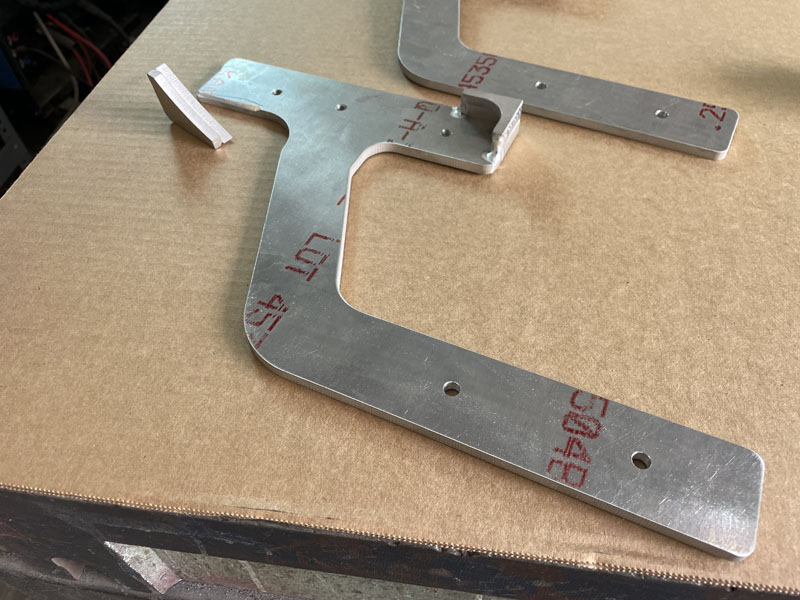
Figure 5, Right Side Support Welding Fabrication
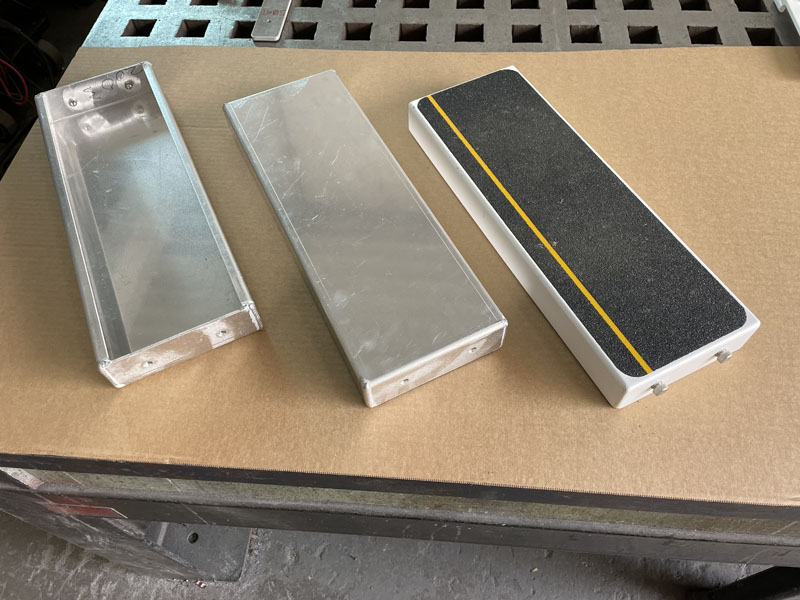
Figure 6, 3rd Step Layout; upside down (left), right side up (middle), finished step (right)
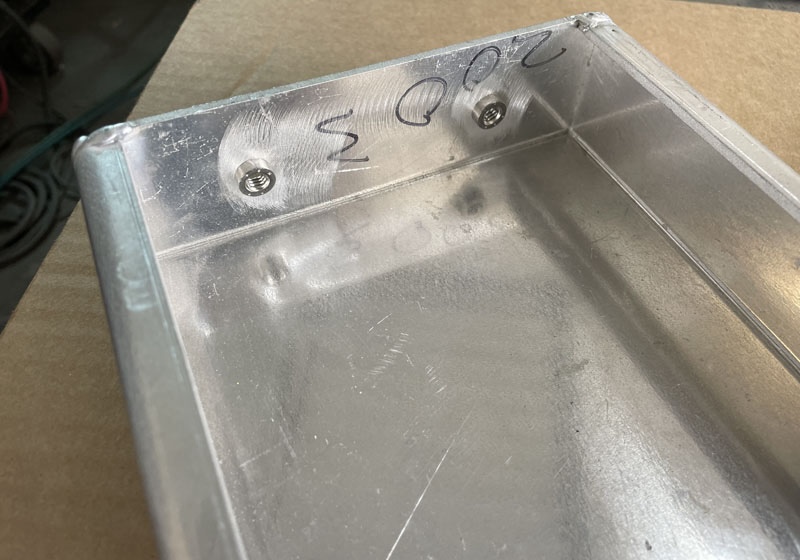
Figure 7, 3rd Step upside down showing weldment and threaded inserts.
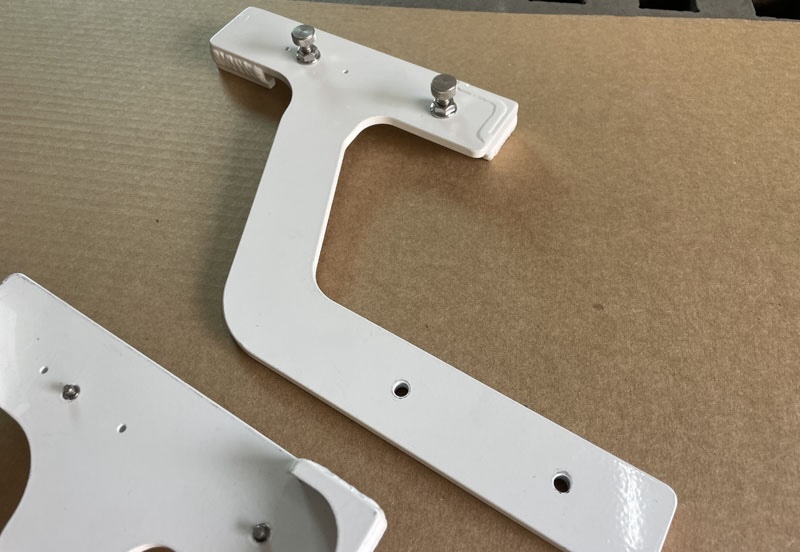
Figure 8, 3rd Step Left Support in White Powder Coating with Selected Stainless Steel Locking Plunger Hardware, (locking knurled knob – frontside, and locking plunger pin – backside).
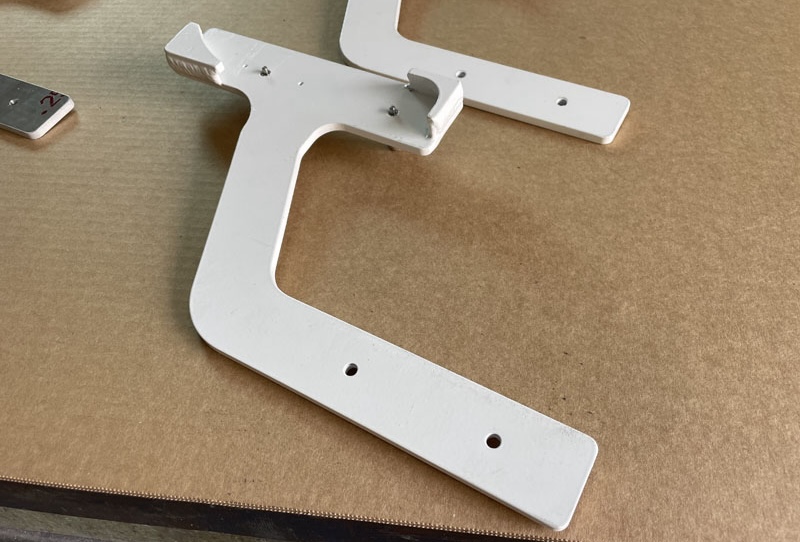
Figure 9, 3rd Step Right Support in White Powder Coating with Selected Stainless Steel Locking Plunger Hardware (locking plunger pin visible).
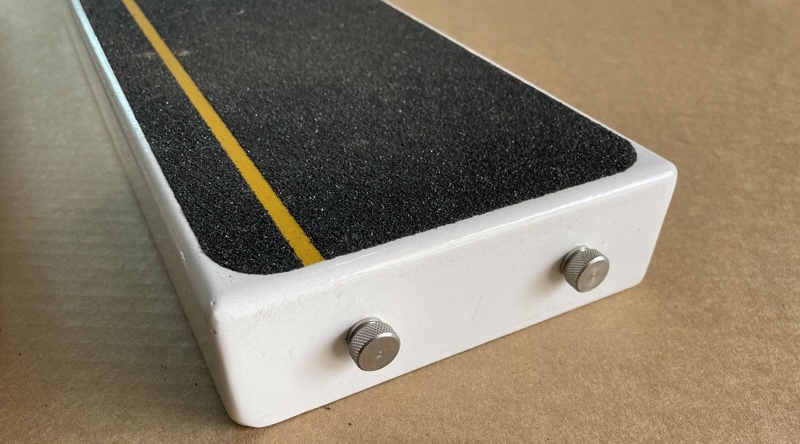
Figure 10, 3rd Step Base in White Powder Coating with Selected Stainless Knurled Thumb Screw Hardware (2 per side), along with a step tread with reflective front stripe.
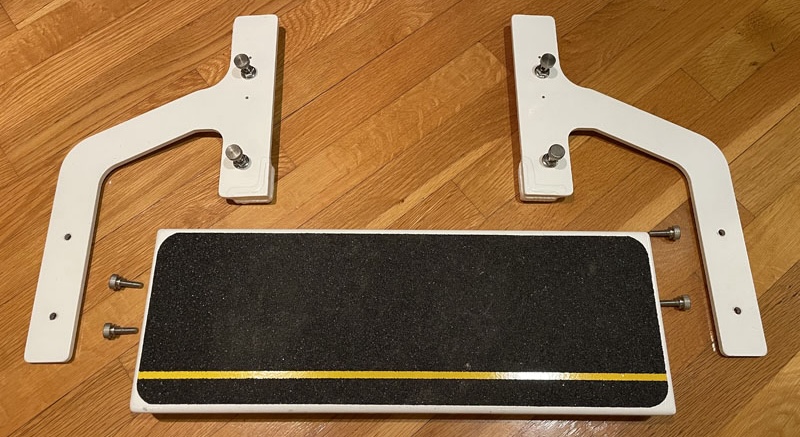
Figure 11, 3rd Step Base in White Powder Coating with Adhesive Backed Tread with built-in reflective front edge stripe, along with Left and Right Side Supports and Selected Hardware.
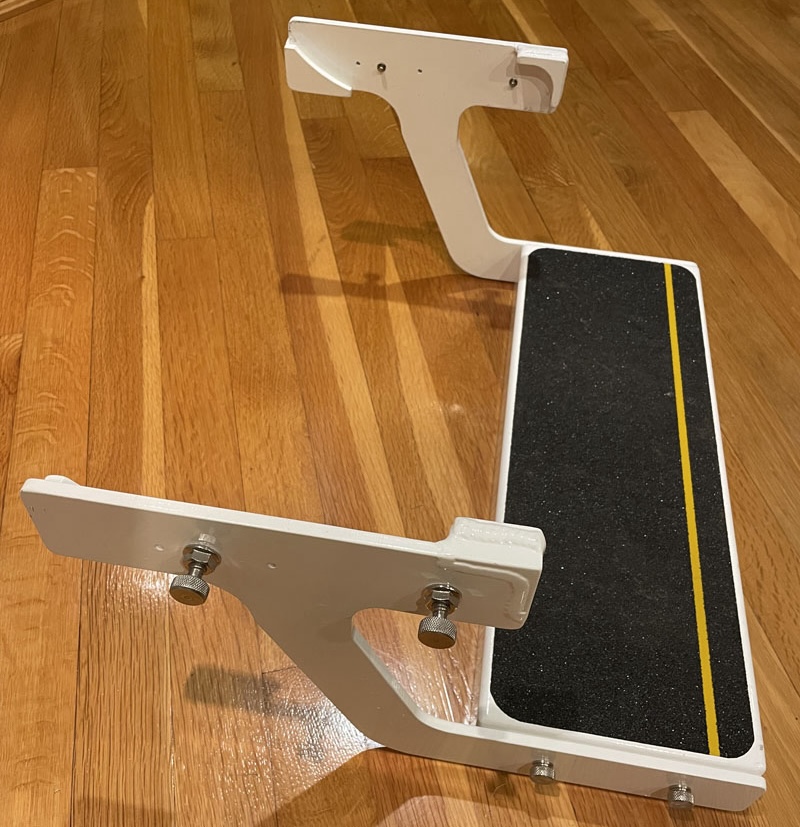
Above: Third Step assembly showing the selected hardware and fully assembled
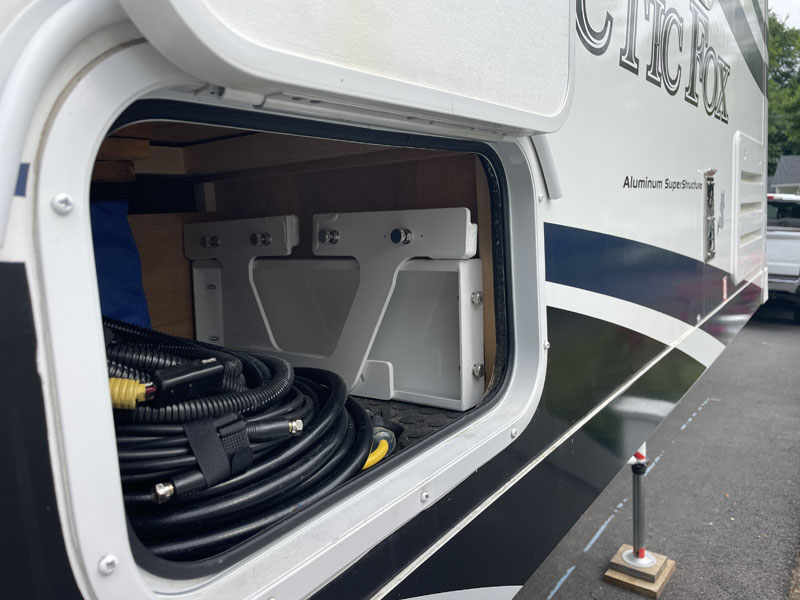
This third step assembly is not designed to be permanent. It’s designed to be used on an as-needed basis. And when not used, it can be disassembled into three pieces and stored in an outside storage compartment. We store our third step in the outside dinette compartment in our Arctic Fox 811 (see picture below).
This third step is specifically designed to be used in conjunction with the Northwood Manufacturing Fox Landing step system.
Once we reach a destination on or off-grid, I retrieve the third step components from our storage area. Then I assemble the third step without any tools. The hardware was selected to be tightened by hand and locked in place with knurled, finished gripping heads.
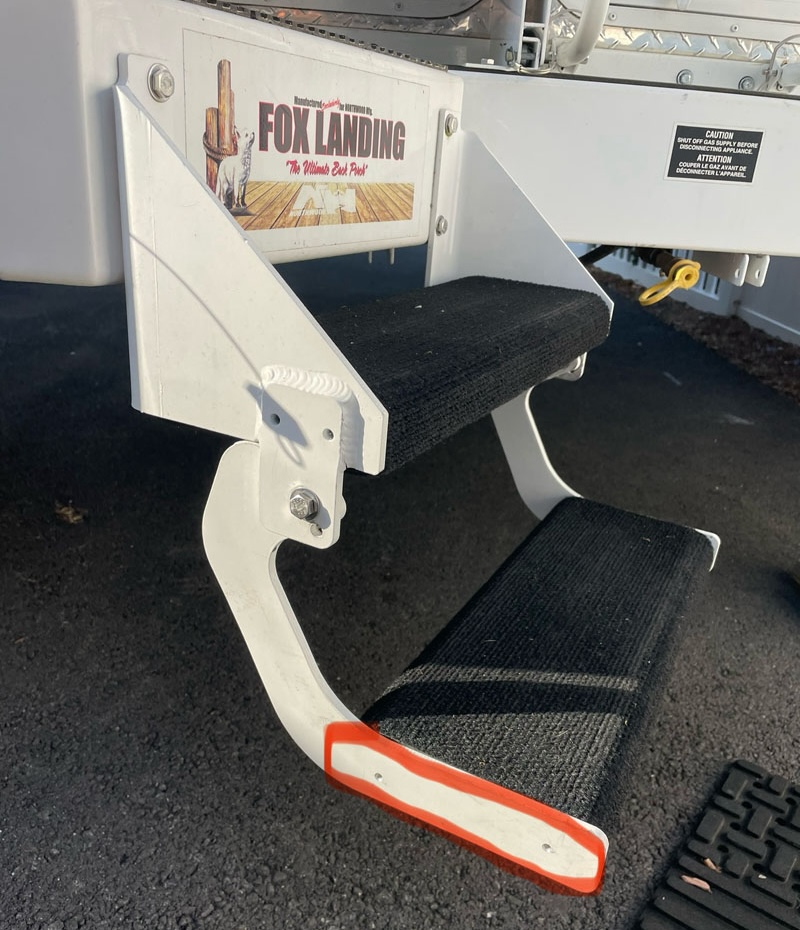
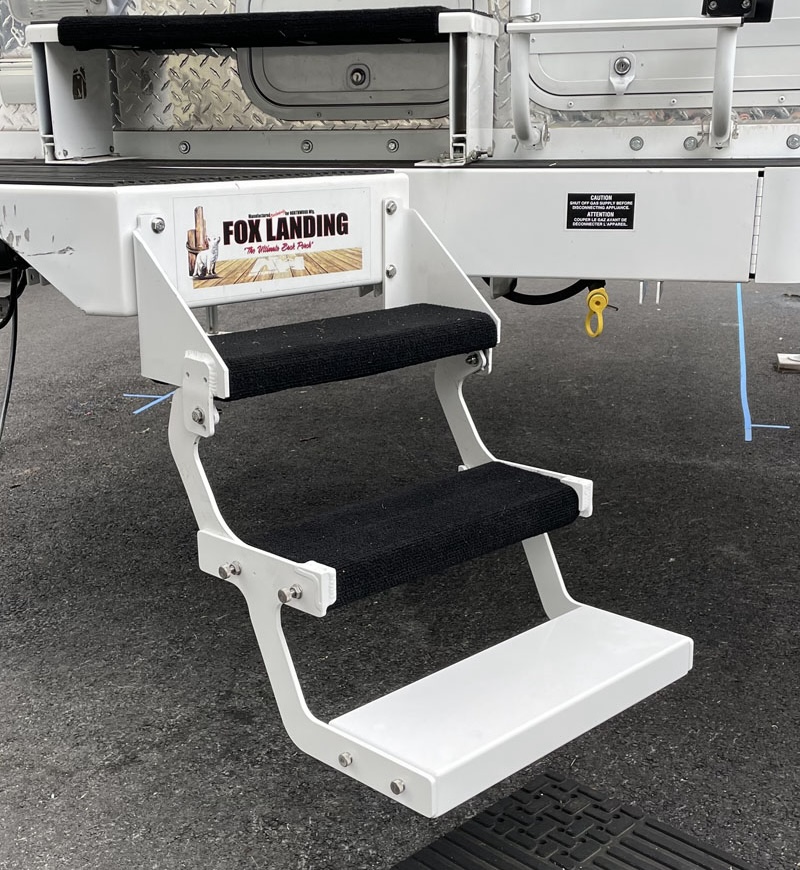
With the third step assembled, I slip it onto the existing bottom step of the Fox Landing and lock it in. That’s it. From then on, we enjoy a secure third step.
This design was created for my personal needs when using our Ford F-350 and our Arctic Fox 811 camper. Since its start of being fabricated in cardboard to now of being a finished product, it looks and feels like it was made for the Fox Landing by Northwood Manufacturing.
This is not a business. However, people with Arctic Fox and Wolf Creek truck campers have asked me to make third steps for their Fox Landings. I’ve made them in black and white powder coating to match their existing step color.
Above: Third Step preparation to include two 3/16” holes drilled on each side of the original bottom step.
Above: Step installed without stair tread for illustration purposes only
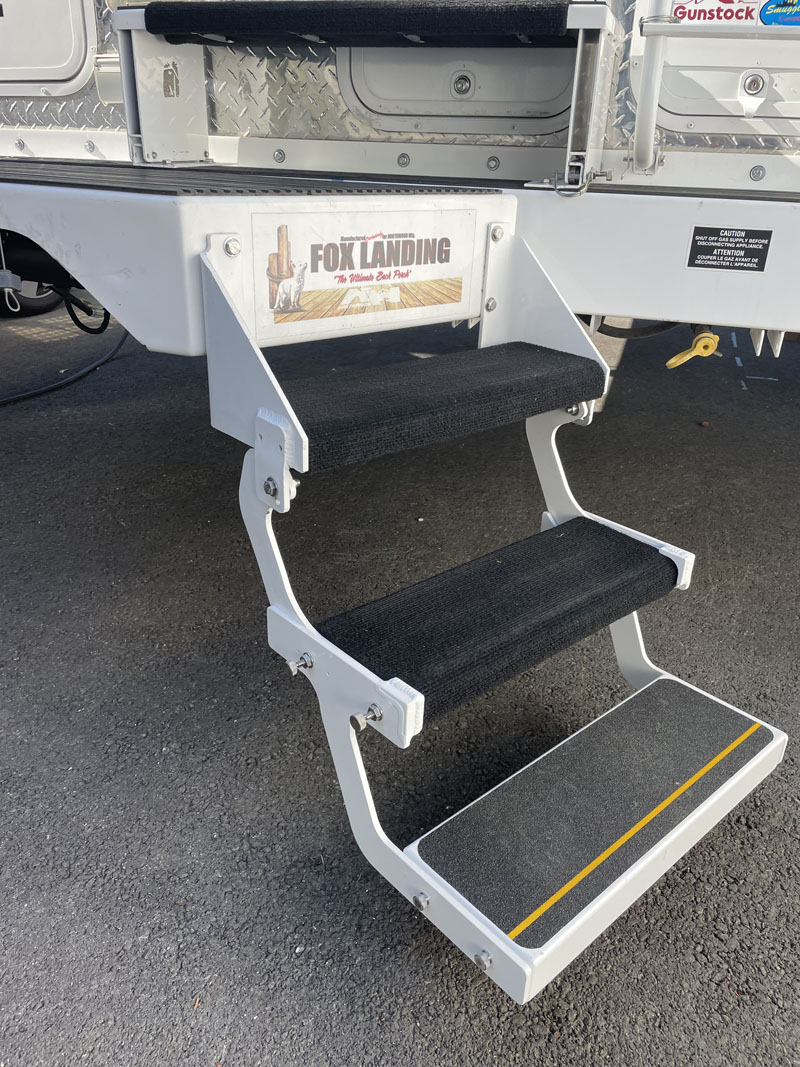
Above: Final third step on a Fox Landing bumper
Anyone interested in a third step for an Arctic Fox or Wolf Creek truck camper that has the optional Fox Landing “Ultimate Back Porch” option can contact me.


