Welcome to the first entry in October’s Mega Mod Contest. One Mega Mod will be published in every Email Alert in October. At the end of the month, we’ll hold a reader vote to determine October’s winner. Click here for information about the 2022 Mod Contest, including how to enter.
Cliff Richard, Edmonton, Alberta
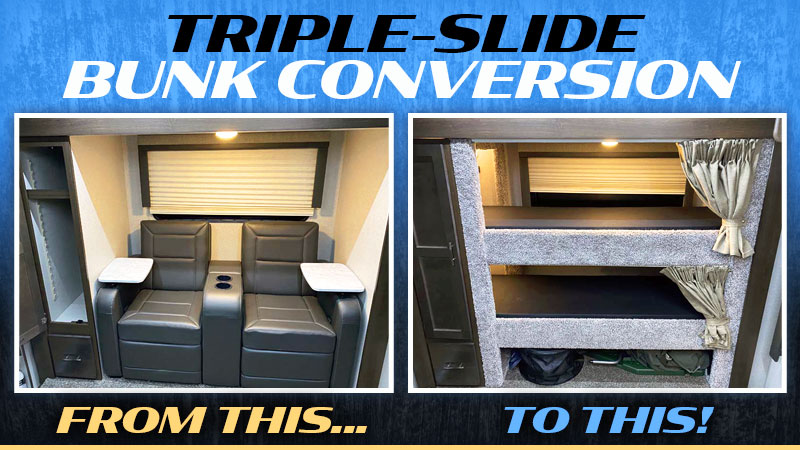
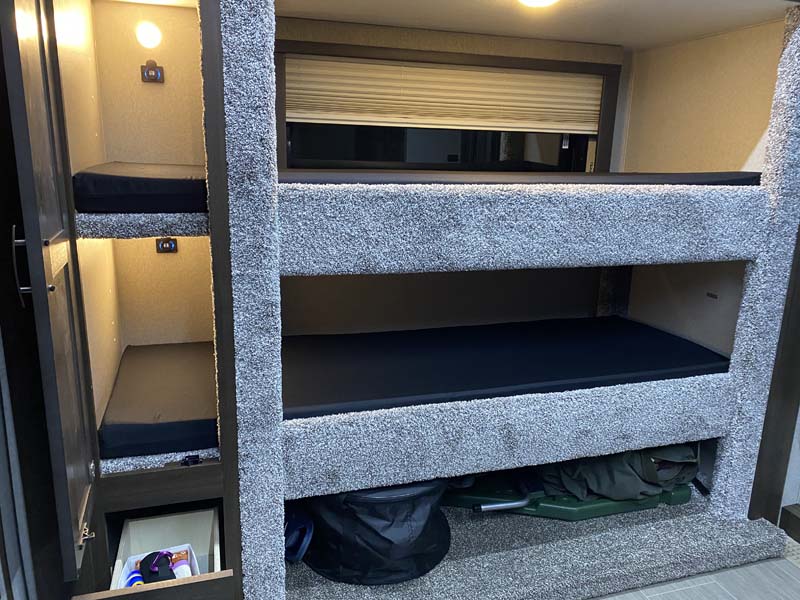
Triple-Slide Bunk Beds
2020 Ford F-350
2020 Eagle Cap 1165
Our family of four enjoys camping, boating, and exploring the innumerable beautiful parks and lakes across Canada and the United States.
The tenting thing just wasn’t doing it anymore. A couple of decades in the military somehow seems to take the fun out of sleeping on the dirt. Bringing the boat was still a must. No trailered camper for this guy. I chased down the largest and comfiest truck camper I could find, and it worked great for a while, but the kids for some reason just keep growing and growing.
One night – while tripping over the tall teenager sleeping on the floor, feverishly holding myself from tumbling onto the youngster sprawled across the dinette bed, and staring at the rear-slide theatre seats that had become little more than a repository for the piles of baggage, laundry, toys, and electronic devices that accompany the children on every trip – I had an epiphany.
For the penalty of departing with a pair of seats we never seem to use, perhaps each kid could have their own private bunk and I could abstain from making and unmaking impermanent beds every night and morning.
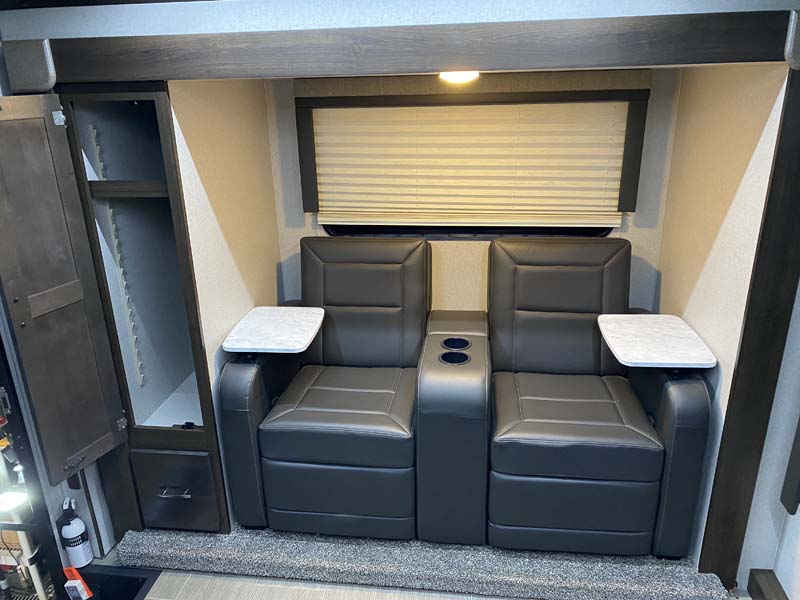
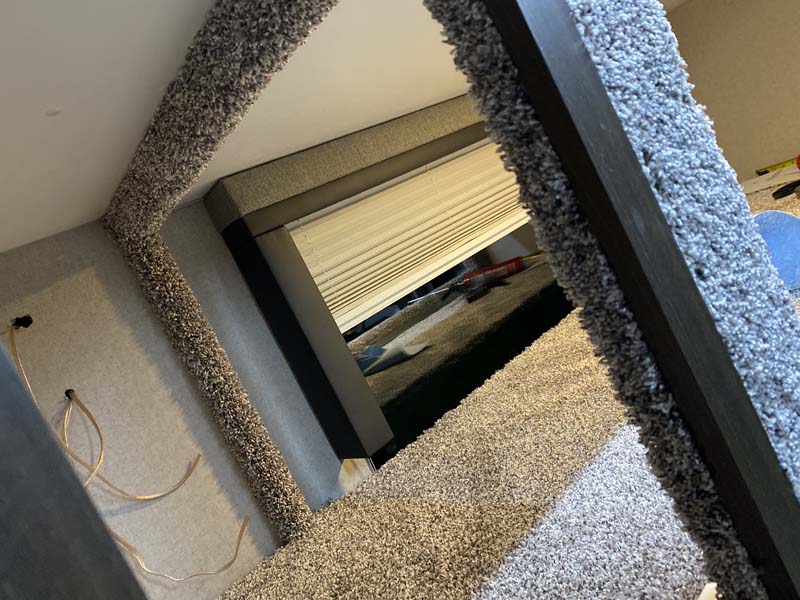
It all started with the rather perplexing realization that there was no way those massive theatre seats were going to fit through the narrow camper door. I must assume those fine folks at Eagle Cap furnish the slides before attaching them to the rest of the camper, or at least that they never envisioned a wannabe craftsman like me attempting to undo their handiwork.
Disassembly was not exceptionally arduous, but a couple of the wooden framing pieces across the back did not survive my inelegant, hammer-fueled disassembly process. I will say that I was quite surprised at just how heavy that theater seating assembly was. This little bunk bed scheme of mine just might shave a pound or two off of our lumbering road tripping rig.
Next up was devising a strategy and taking some measurements. As much as it was a shame to have to lose the handy closet, the sheer length of my ever-growing offspring dictated its demise. I decided to keep the drawer, along with the framing and the closet door (mostly for aesthetics but also as a unique form of access to poke at sleeping kids when breakfast is ready).
It was clear that I was going to have to do some delicate cutting work, a task my clumsy and impatient self is not particularly well suited to. I enlisted the help of my uber-craftsman father, Clarence. We got to it with a couple of clamps, a level, a rotary cutting tool, and only minor cursing as our desired straight edges came out looking like we had both had one too many. Anyway, it was nothing that some carpeting work wouldn’t nicely hide while preventing bumps and bruises as the kids roll around in their beds at night.
Some back-of-napkin sketches and a few more measurements revealed that, with the closet wall absent, we would be able to craft bunks 26-inches wide and 77-inches long. That’s big enough for even my own lanky 6’4” frame to squeeze into when my better half, Nicole, puts me in the doghouse, but small enough to be able to keep the rear window valance and blind in place. By resting the lower bunk atop the drawer framing, we would have plentiful space beneath for baggage, gear, and beer cases.
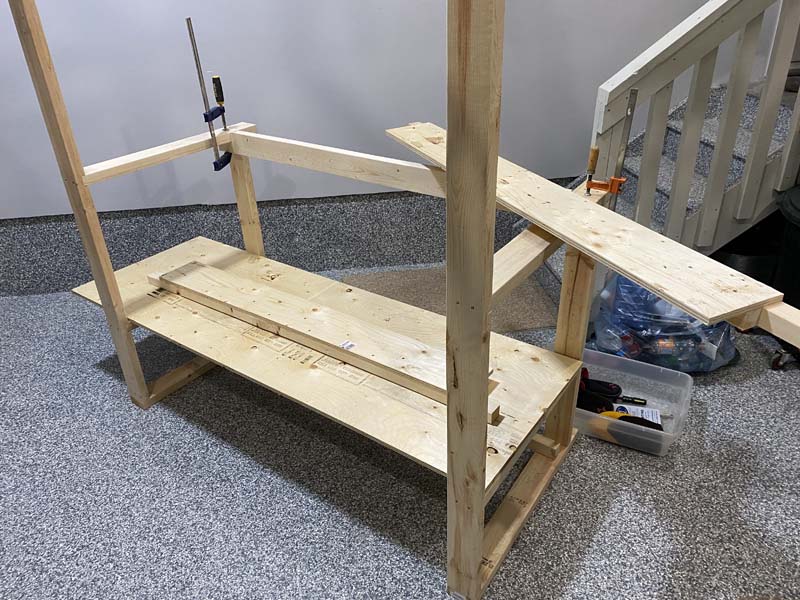
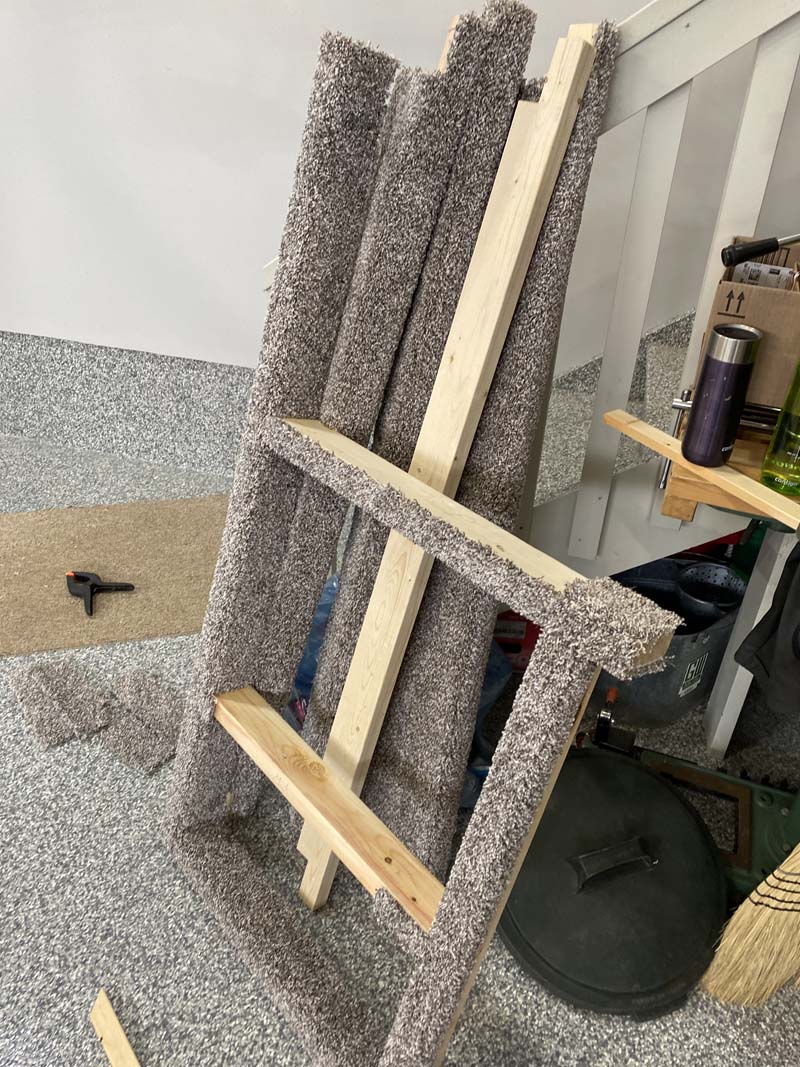
I went off to Home Depot for wood products, then over to dad’s workshop to cut, assemble, and carpet what we could. I had earlier picked up a 9-foot by 12-foot roll of plush carpet, somewhat matching the OEM carpet and enough to cover everything, top, and bottom. Various lengths of 2x4s were provided for the frame and horizontal support beams, while plywood formed the bunks themselves and a lip to retain the mattress and, hopefully, the kids.
One pleasant finding was the slide light’s 12-volt power line behind the closet rear wall. I was able to splice lines to power individual reading lights and USB charging ports (several styles available on Amazon and elsewhere). Anyone with teenagers in this day and age surely knows that sufficient off-grid-capable USB charging ports can mean the difference between a pleasant glamping experience and the misery that accompanies dead phones and tablets and whatever that tick-tock thing is.
Installing our woodwork was largely drama free, save for a bit of trimming here and there to make everything fit while accounting for the extra thickness of the carpet covering. Once the framing and plywood were screwed in place, I carpeted over the remaining exposed wood and installed some aluminum molding pieces over exposed carpet edges to prevent fraying and, well… to look nice.
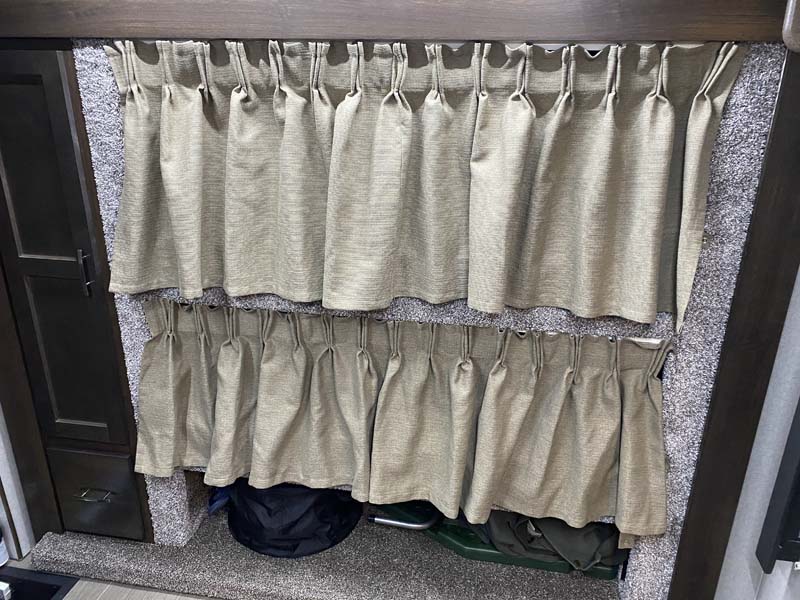
Next up was an online order for a pair of custom foam mattresses from The Foam King in Calgary, reinstallation of the rear window blind and valance, installation of the curtain rods, and handcrafted curtains from my dear mom, Beverley, and a few other finishing touches.

The whole thing turned out better than I had expected, and the kids are super excited about it. I’m especially pleased with the copious additional storage space under the bottom bunk and the notion of some semblance of organization the next time the whole family heads out on a holiday with two weeks’ worth of clothing and all the other bits and pieces!
This project was undertaken and completed in December. Those who know Alberta know that winter isn’t exactly prime camping season. But we have tested the bunks with heavy adults and they are plenty spacious for youngsters and, so far, no fires from my amateur wiring modifications. Assuming the kids don’t suddenly become incurable claustrophobes, the prognosis for camping season is good!
Materials Needed:
Two sheets of 5/8-inch plywood, eight 2x4s (8-foot length), assorted fasteners, wire connectors, glue, aluminum corner molding (four 8-foot lengths), etc. – $400 at Home Depot
Carpet (108 square feet) from a local carpet store – $375
12-volt USB outlets and reading lights from Amazon (many different styles available for both) – $80
Curtain tracks from Amazon – $100
Curtain material from Fabricland – $30
Two custom mattresses (25-inches by 75-inches) and covers from The Foam King – $740.
Blood, sweat, and tears from unpaid family members – priceless!
It took two people thirty hours each to complete this modification and cost me $1,725 and about forty new grey hairs. In my opinion, the skill level of this modification is medium.
Disclaimer: The modifications above are submitted by Truck Camper Magazine readers. It is your responsibility to make sure that any do-it-yourself modification project you undertake is safe, effective, and legal for your situation.
Enter Your Mods Now!
If you’d like to enter a modification you’ve done on your truck camper, click here. You can enter as many mods as you want, at any time. Good luck mod makers!


