Welcome to the seventh entry in June’s Mega Mod Contest. One Mega Mod will be published in every Email Alert in June. At the end of the month, we’ll hold a reader vote to determine June’s winner. Click here for information about the 2021 Mod Contest, including how to enter.

Dave Riddle, Burbank, Washington
SeeLevel II Tank Monitoring Upgrade
2015 Chevrolet 3500HD
2017 Host Mammoth
This modification was done to improve the accuracy of the tank monitoring capabilities in my camper.
Like most truck campers, our camper came with the same bothersome and inaccurate tank level indication system that our other campers came with. After more of the frustrating less-than-accurate indications, and subsequently finding out about SeeLevel, I engaged in the changeover.
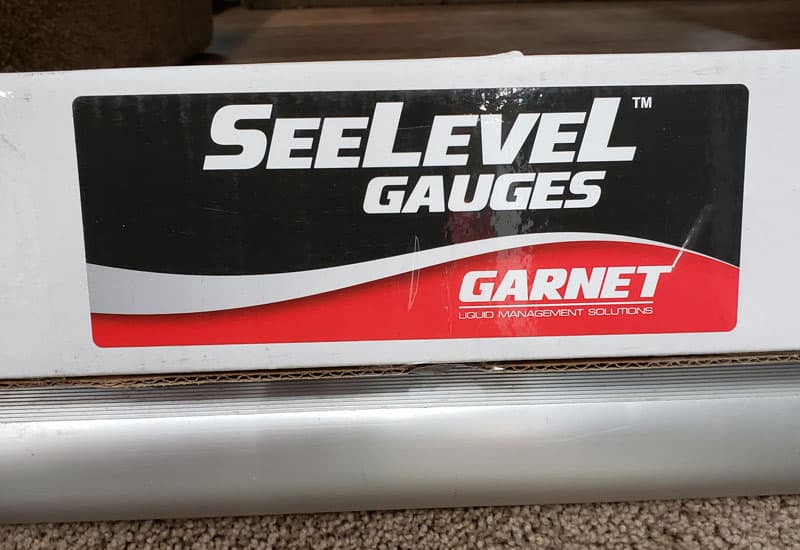
The SeeLevel II system I purchased is the Garnet 709-P3 SeeLevel II Tank Monitoring System. I customized the order by calling the folks at RV Upgrades to exchange the sensors that would typically be in the kit for ones that were more appropriate for my application.
But before going on, some timeline transparency is in order. I completed the change from the old system to SeeLevel in the spring of 2019, just prior to the camping season.
My thought was that if I wrote about the change too soon, there would be little information I could pass on about the effectiveness and lessons learned from the change and how the new system worked. Little did I know that the camper use in 2020 would be minimal thanks to Covid 19, but that’s another story.
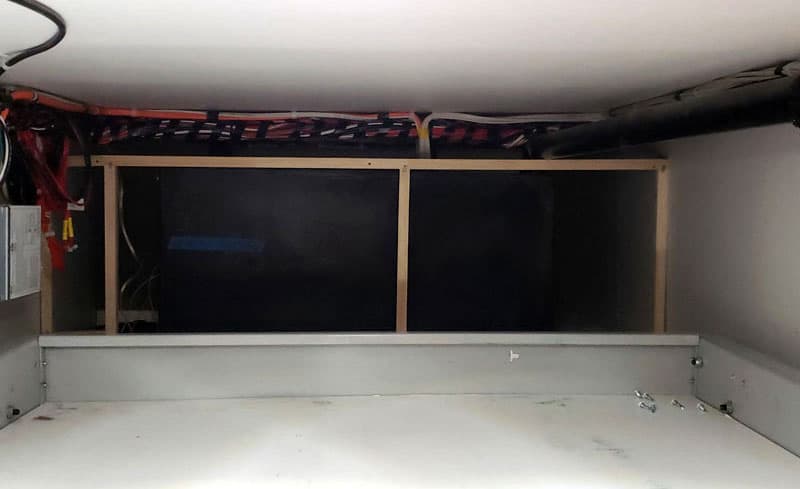
The actual conversion was simple enough, although crawling around the camper’s lower levels, and fishing new wire from one place to another was the toughest part. As you can see in the picture above, this is not something that I’d recommend if you’re claustrophobic.
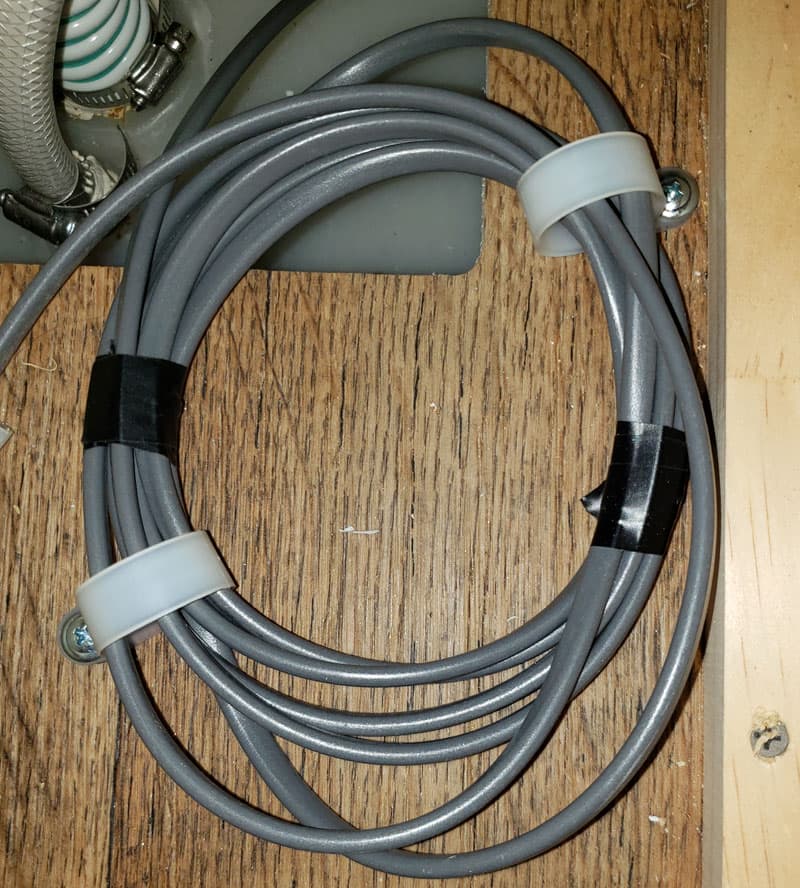
I had hoped to use the wire that was already being used for the existing system but, for whatever reason, this was not possible. I tried on several occasions to make the new system work with no success. So, I pulled a new shielded cable, as shown in the picture above, from the existing monitor location to the black, grey, and fresh tanks. The wiring for the pump worked fine with the new monitor and did not need to be replaced.
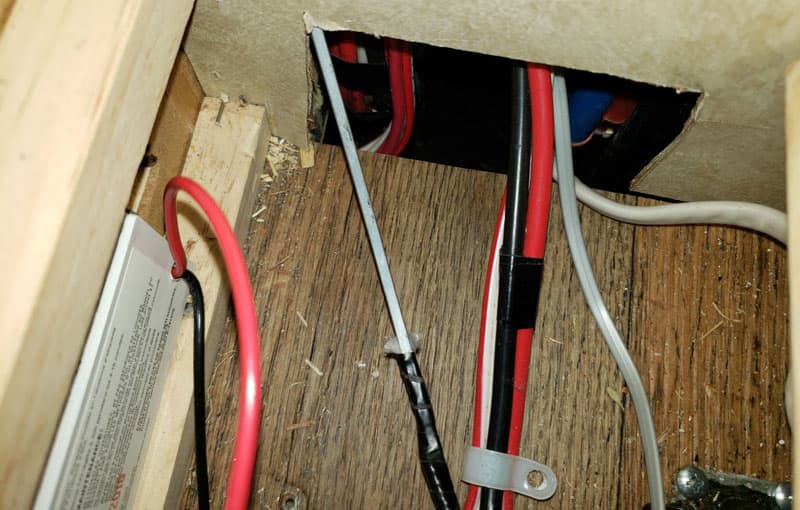
Generally pulling the wire presented few technical challenges. They were mostly physical challenges of finding access points and contorting my body into small cramped spaces. The picture above shows one of the access points that I had to work the electrician’s fish tape through to get the new wire through.
The most difficult area was going from the back of the upper section of the pantry and into the area where the existing monitor was located. There was framing in this area and it took some time to find a way through this without taking the entire wall apart.
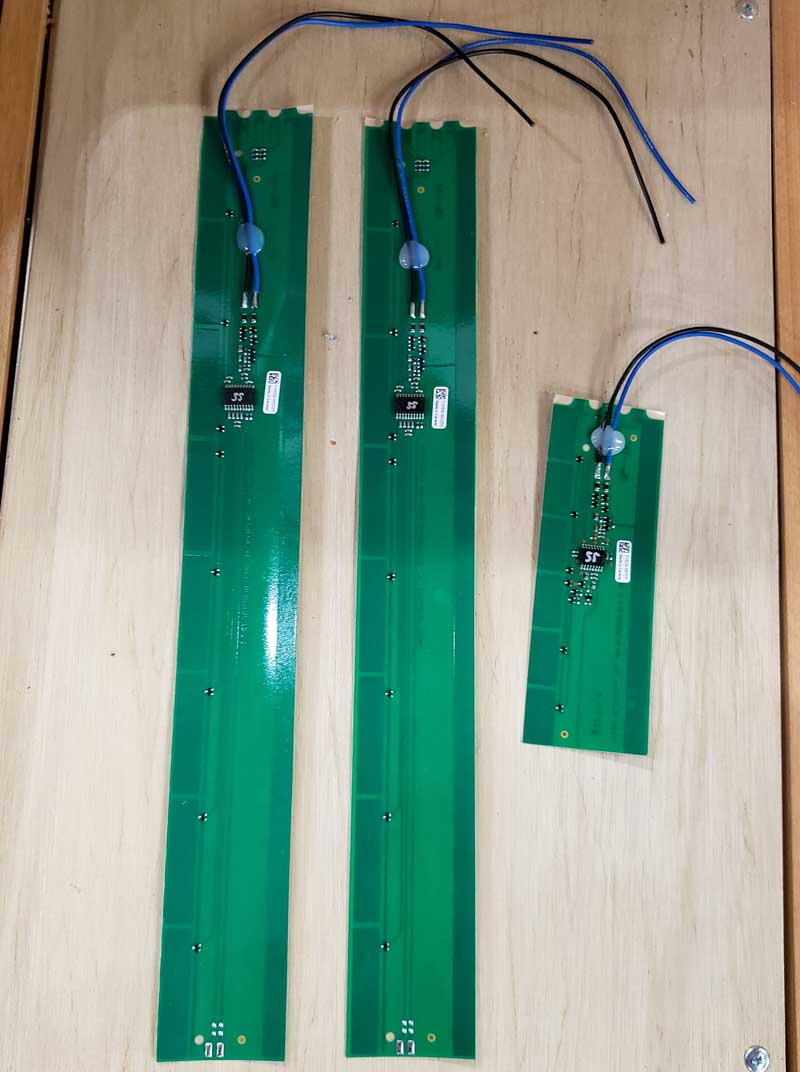
Once the wire was in place I went ahead and started tying the new sensors in place. With the three tanks, I ordered a package that contained the sensors for each tank as shown in the picture above. The sensors are a given length, and as close as possible to the size of the tanks. If that’s not quite the right length for your application, then you cut the sensor to make it fit your tank. Yes, that’s right. You cut the sensor.
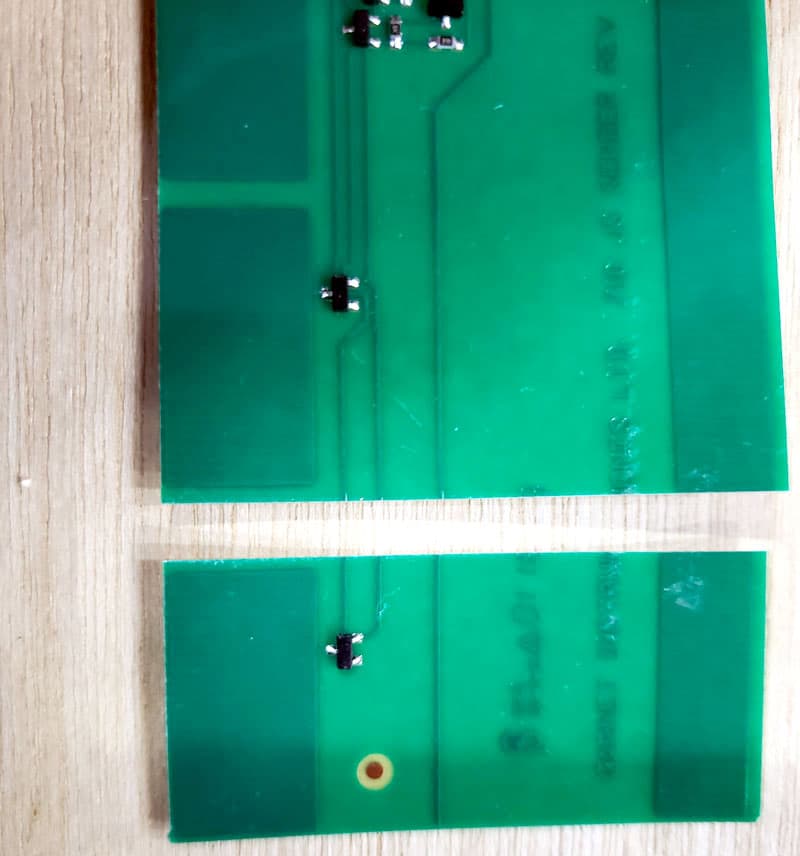
Of course, there is a place to cut and not cut, so following the instructions is definitely a must. The picture above shows the sensor being cut. I had to cut two of the sensors in my upgrade; the grey tank and the fresh water tank. The black tank sensor was the correct length for my application.
Once the sensors are the correct length, you temporarily connect the wires and tape the sensors on the tanks and to the monitor. Gorilla tape was my go-to choice to temporarily mount the sensors on the tanks.
Knowing the precise number of gallons for each of the tanks is necessary when you get to this next part. The SeeLevel instructions tell you where to position the sensor on the tank and to initially tape the sensors on so they can be moved. The SeeLevel system provides readings in percent full. This is where knowing how much water is in the tank and what that should read is a definite must.
I added water to each tank that represented 25-percent of the tank’s capacity. Then I read the percentage for that tank on the monitor. If the percentage reading was inaccurate, I moved the sensor that was temporarily taped to the tank, then took the reading again. I continued to move each sensor to ensure that the percent indicated on the monitor accurately represented what was in the tank.
The sensors come with a very permanent bonding tape that is on the back of each sensor. Once the reading was accurate, the sensor can be applied directly to the tank with the self-stick tape. This makes moving the sensor again virtually impossible.
The lessons learned were to make really sure that the sensor is vertical on the tank. The more vertical and square the sensor is on the tank, the more accurate the measurement. A line drawn on the tank with a square worked well to get the sensors aligned correctly.
The other challenge is that the tape that’s on the backside of the sensors is very sticky and permanent once attached. Making sure the sensor is lined up correctly and goes on smoothly without wrinkles or bubbles, is critical to the sensor accuracy.
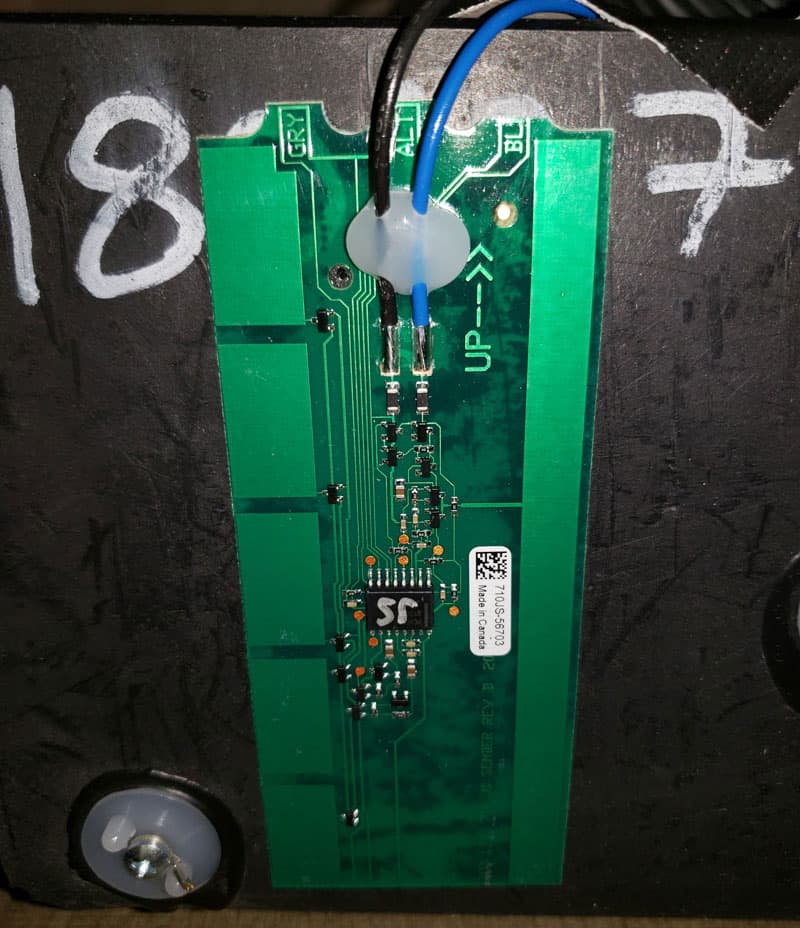
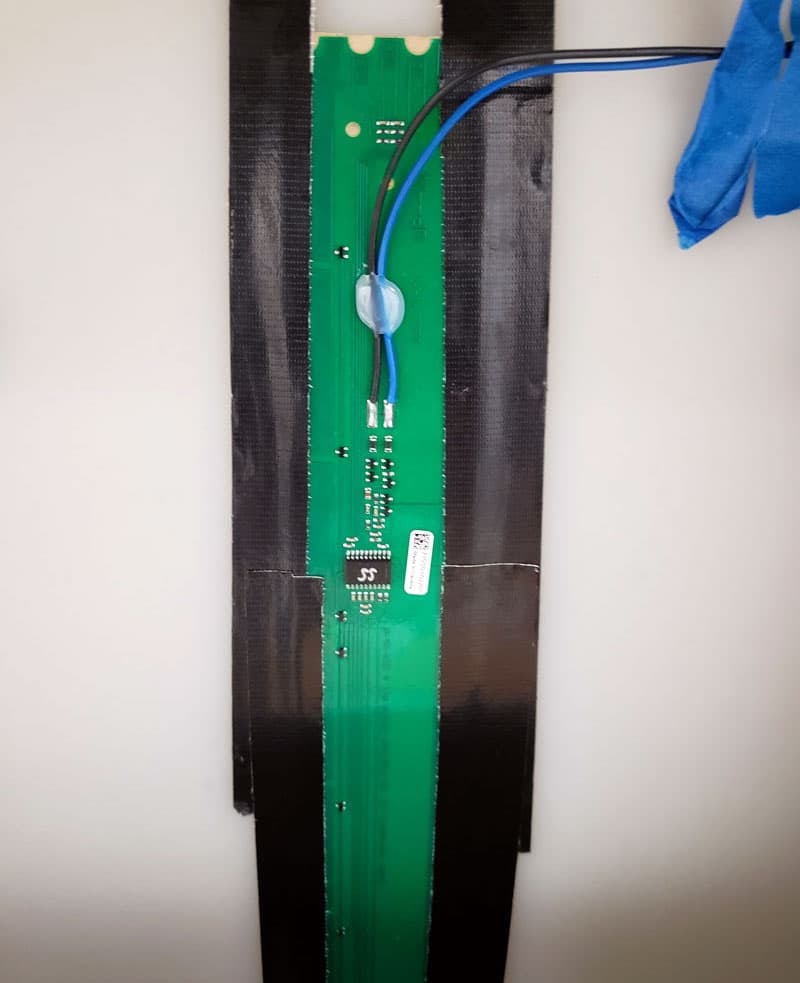
The picture above shows the sensor permanently attached to the black tank. Also visible is one of the in-tank sensors that was disconnected.
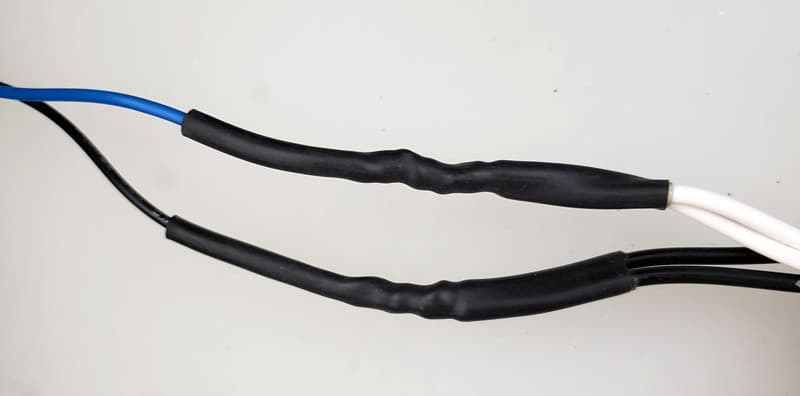
Once all the sensors were permanently attached to the tanks I made the final electrical connections. I’m definitely more comfortable with soldered connections, so all the connections were soldered, and then the shrink tube was placed over the connection.
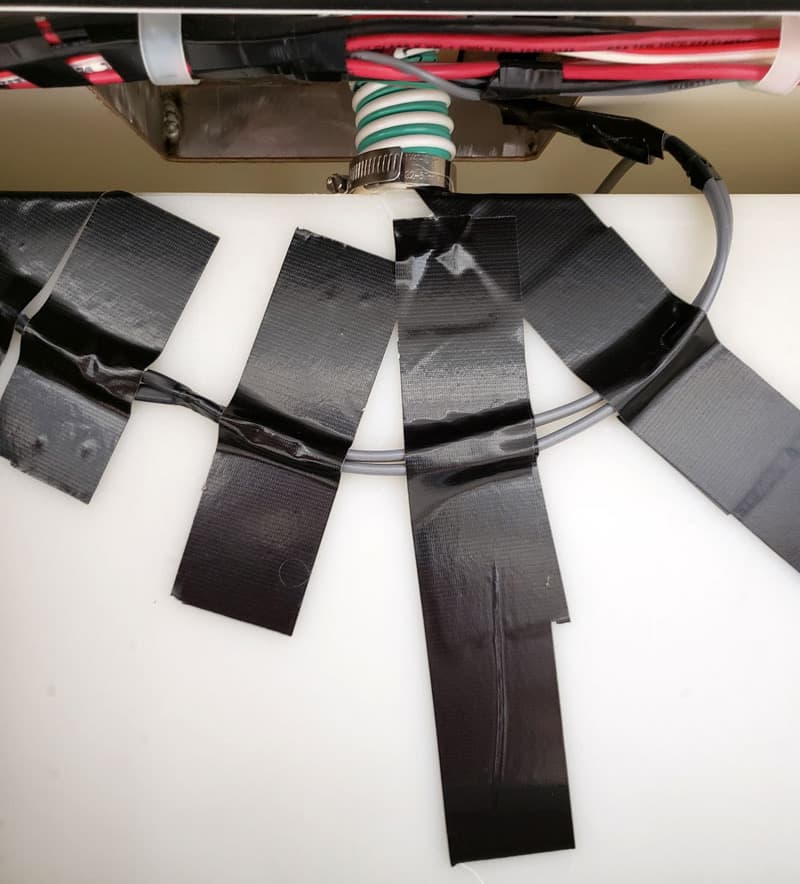
Finally, the wires are taped in place as shown above to ensure that they stay in place while the camper is being used and to make sure I don’t have to crawl back down in the basement to reattach anything.
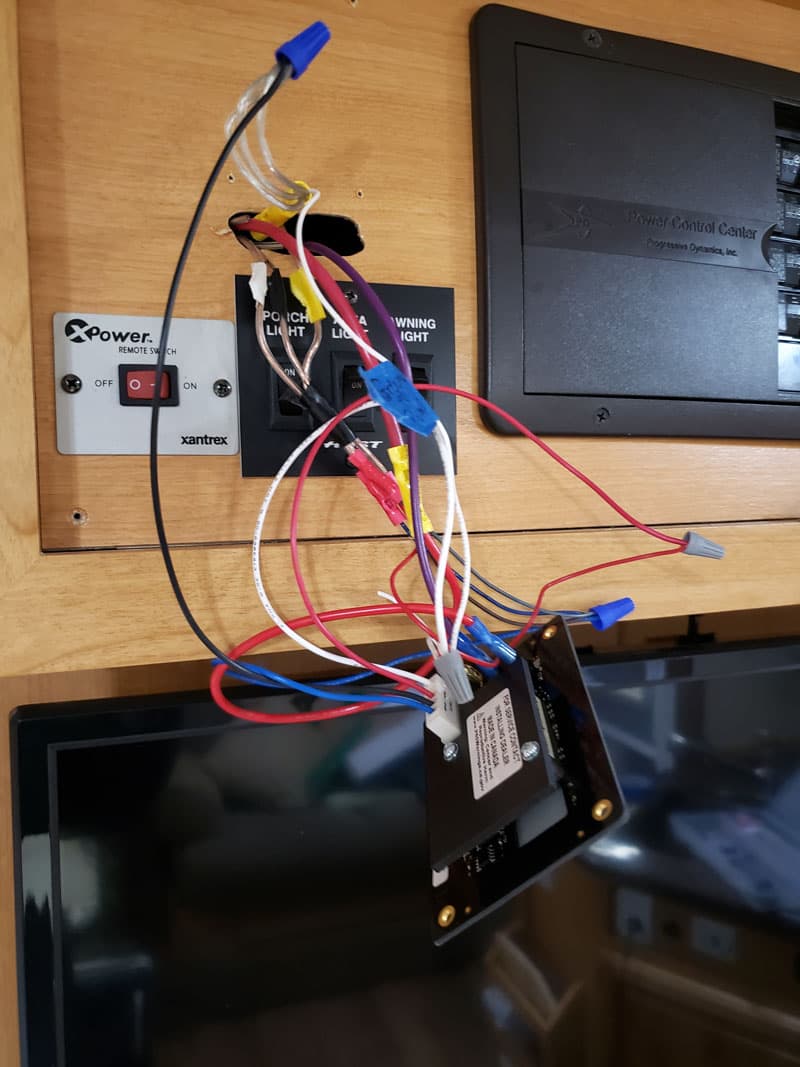
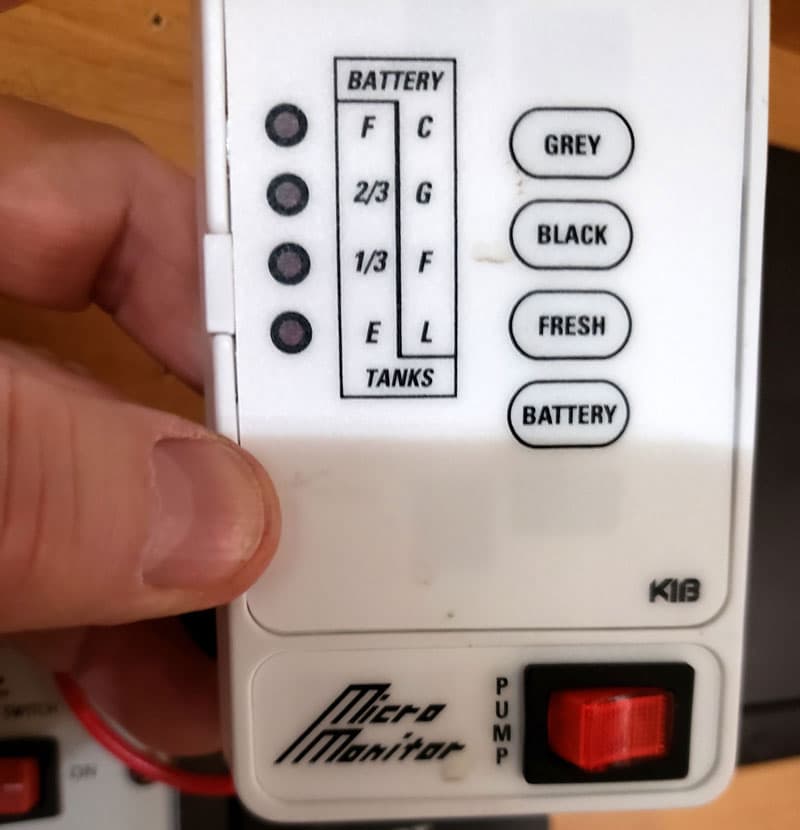
On the monitor end of the project, there was a significant amount of wiring that had to be completed as well. The control panel has all of the readings for battery, fresh, grey, and black tanks, and also a pump switch for the in-house water pump.
The switch does have some amperage limitations so checking that limit against what the amperage is on the pump is a worthwhile exercise. In my case, the pump amperage was listed in a sticker located on the pump.
I made sure all of the connections were properly soldered and shrink tubed. Then I carefully pushed the wires back into the hole that was provided for the original monitor.
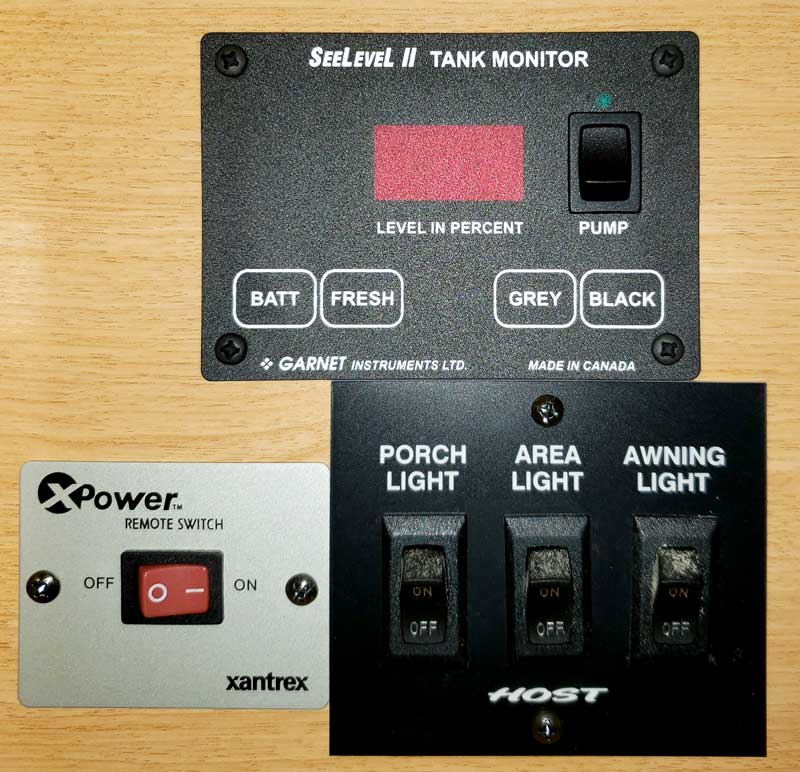
The original monitor was taller than the new monitor leaving two screw holes exposed. I filled the holes with two small screws from the original monitor (circled in red in the photo above) that made it look like they are supposed to be there.
This upgrade ended up costing me about $300 dollars for the SeeLevel equipment, new wire, and incidentals like cable ties, shrink tube, etc. The directions from SeeLevel were very good, and the help line was even better. I did call the SeeLevel help line three or four times and the technicians were excellent in providing answers to my questions.
After a year plus of camping use, I can say that the system has worked without failure and is very accurate. Each time we access the monitor and check a tank level or battery status is a reminder of how inaccurate and untrustworthy the previous system was and how important it is to have accurate measurements, especially when boondocking as we often do.
The bottom line is that this upgrade was worth every minute of time, skinned knuckle, and dollar spent!
It took me 40-hours to complete this modification and cost me $300. In my opinion, the skill level of this modification is hard.
Disclaimer: The modifications above are submitted by Truck Camper Magazine readers. It is your responsibility to make sure that any do-it-yourself modification project you undertake is safe, effective, and legal for your situation.
Enter Your Mods Now!
If you’d like to enter a modification you’ve done on your truck camper, click here. You can enter as many mods as you want, at any time. Good luck mod makers!


