Welcome to the fourth entry in February’s Mega Mod Contest. One Mega Mod will be published in every Email Alert in February. At the end of the month, we’ll hold a reader vote to determine February’s winner. Click here for information about the 2022 Mod Contest, including how to enter.
John Sell, Manitowoc, Wisconsin
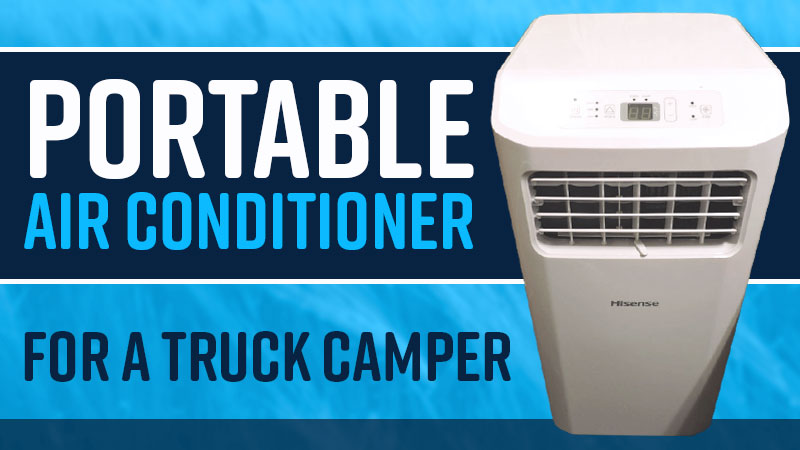
Portable Air Conditioner For A Truck Camper
2002 Dodge 3500
2004 Lance 850
I wanted to add air conditioning to my unit. Since I store my camper in an aircraft hanger with a 10-foot high door, a roof top air conditioner would make my camper too high to fit through the door.
After researching alternatives, a portable air conditioning unit made sense to me. Being a retired engineer, I took on the project knowing that there would be a few problems to solve along the way. In the end, the system works well and the cost was a fraction of what a new roof top air conditioner would be.
There are many advantages to a portable air conditioner versus a rooftop air conditioning system:
1. The units themselves are inexpensive. Mine was about $350. This is a fraction of the cost of a rooftop unit.
2. No permanent modifications were necessary to my camper.
3. Most portable air conditioner systems come with remote controls so the air conditioner can be controlled from the cabover bunk. There is no need to get out of bed in the middle of the night to adjust the temperature.
4. The units are light. I lifted mine into the truck camper all by myself.
5. Installation does not require getting up onto the roof and trying to handle and install a heavy and awkward rooftop air conditioner unit.
6. Unlike a rooftop unit, there is no chance of a water leak. Many truck campers are destroyed by water leaks.
7. The air conditioner is easily removed when it is not needed, such as in the winter.
8. There is no rewiring. The unit is designed to be plugged into a standard home outlet.
9. An extended warranty is usually available for these units for a little extra cost. I took advantage of this and I have a three-year warranty on mine.
Of course, there are some disadvantages:
1. My unit is only 6,500-BTUs, so it is not as powerful as a rooftop unit. This has not been a problem for me, but it could be for some users.
2. The unit takes up floor space. This is a major consideration but has not proved to be an issue for me since I only use my camper solo.
3. The unit can require the condensate to be emptied. My unit claims that the condensate evaporates and is exhausted with the hot air. So far this seems to work. It makes sense that the small volume of a truck camper would not require the same moisture removal capacity as a house. Also, this is helped by the use of a dedicated condenser cooling air supply (more on that later).
I use two fans to move air around my camper in addition to the portable air conditioner. This is because I don’t have the advantage of a central air discharge at ceiling level like a rooftop unit does.
This is not the standard use for a portable air conditioner. For this reason quite a bit of engineering has to be done and the installation will be different for each individual truck camper. There is an element of risk involved that the installation may not work at all. I am just relating how I installed a portable air conditioner in my unit. It may not work for your application.
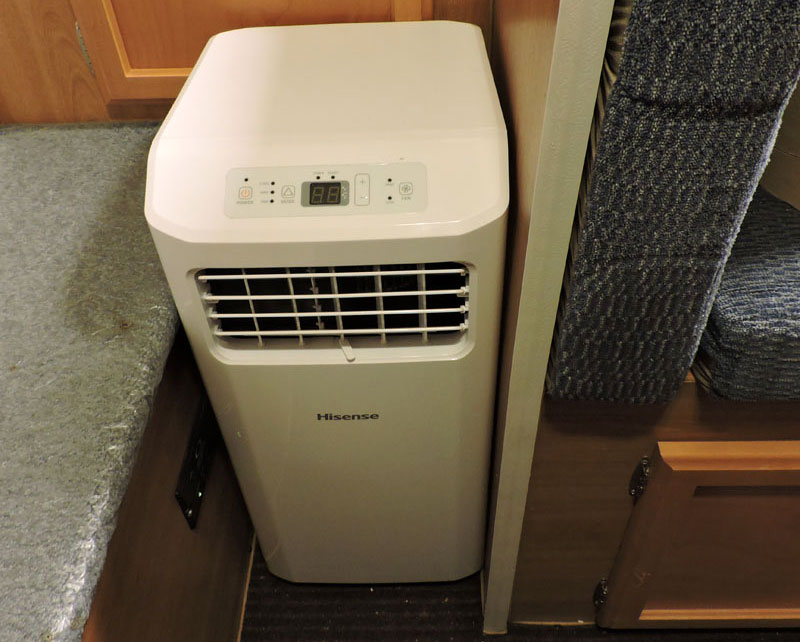
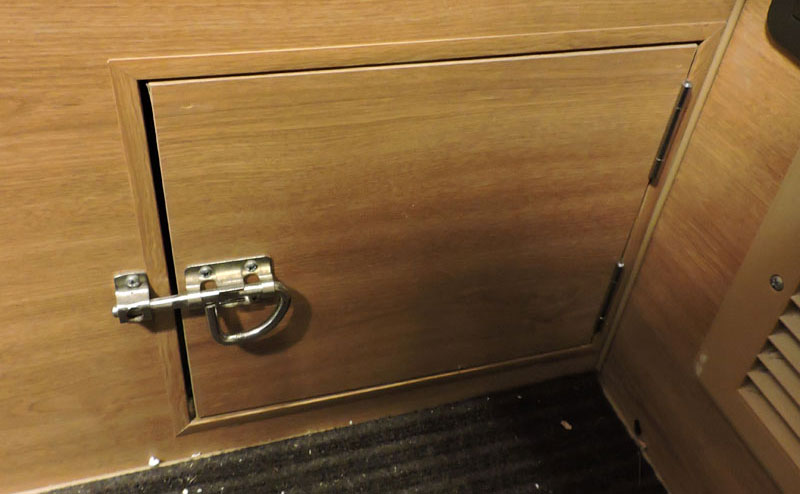
In my truck camper, I found an ideal space to store my portable air conditioner when it is not in use. It does not interfere with anything that I do when traveling. I am able to rig up my system for use in less than half an hour when I reach the camping site. I also have two doors located at floor level to access my truck bed. I have used these openings to route a duct supplying air to the unit’s condenser and on the other side a duct to exhaust hot air and moisture from the unit.
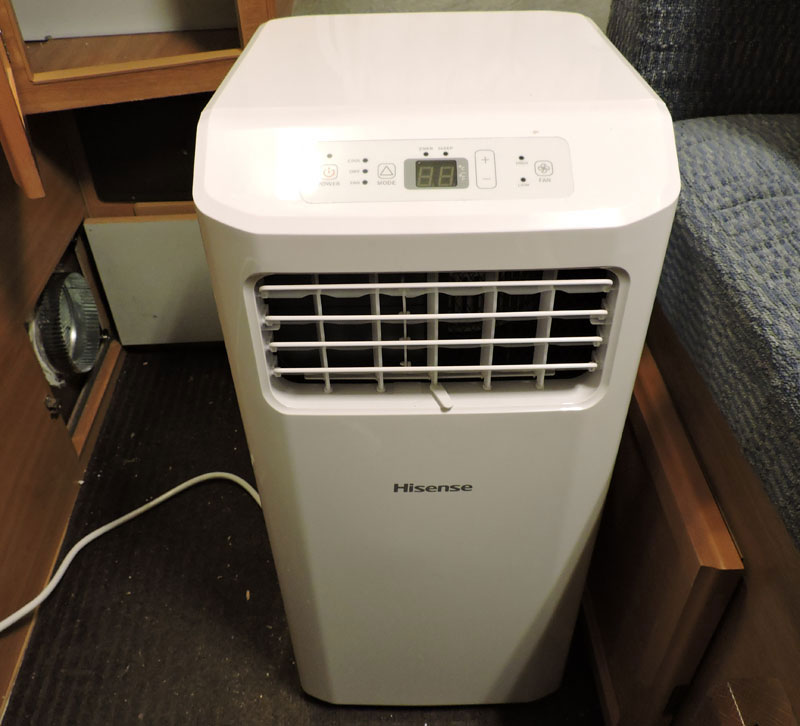
Almost all portable air conditioner units only use one duct to the outside. This duct is to exhaust hot air and moisture from the unit. This is normally led outside through a window.
The problem with this is that the air that is exhausted has to come from somewhere. It comes from leakage into the camper from the outside, around windows, doors, and other leaks. This is hot and humid air from outside the camper that is being sucked into the camper. Otherwise, the camper would be placed under a vacuum and crushed like a beer can (an exaggeration but the principle is sound).
This is a situation similar to leaving all the windows on your car open on a hot day and then wondering why the auto air conditioner is not cooling down your car! I tried this system using one duct at first and it didn’t work. The air conditioner unit blew cold air, but the camper remained warm.
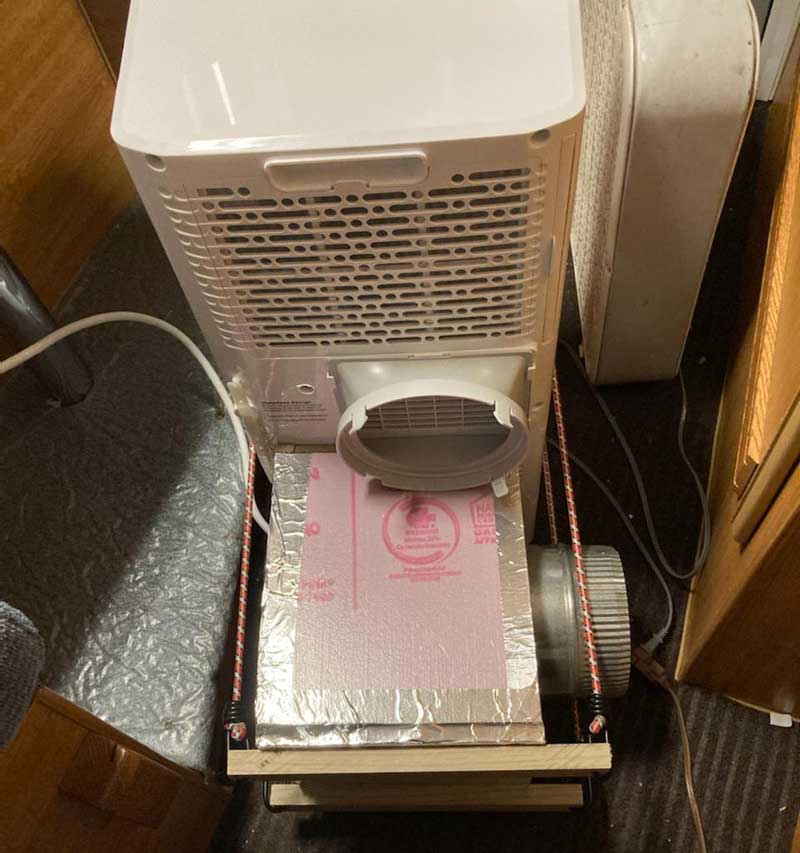
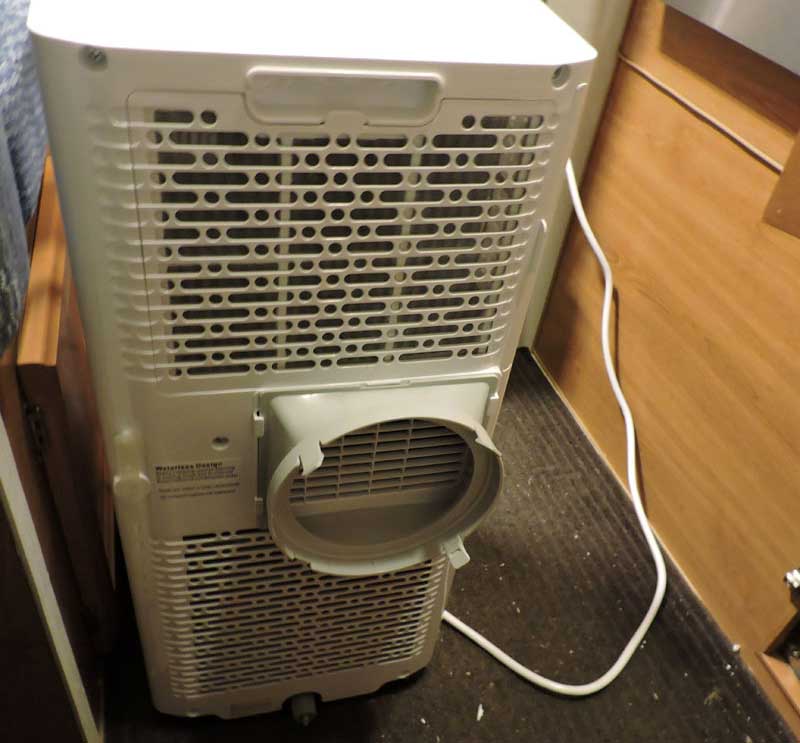
I then found out where my portable air conditioner unit took its suction to supply the condenser with cooling air. It turned out it was through a grill in the lower back of the unit. I found this out by carefully blocking this grill for a few seconds and noting that the exhaust duct flow was reduced to almost zero. I then constructed a plenum out of foam board to supply this part of my unit with air from the outside.
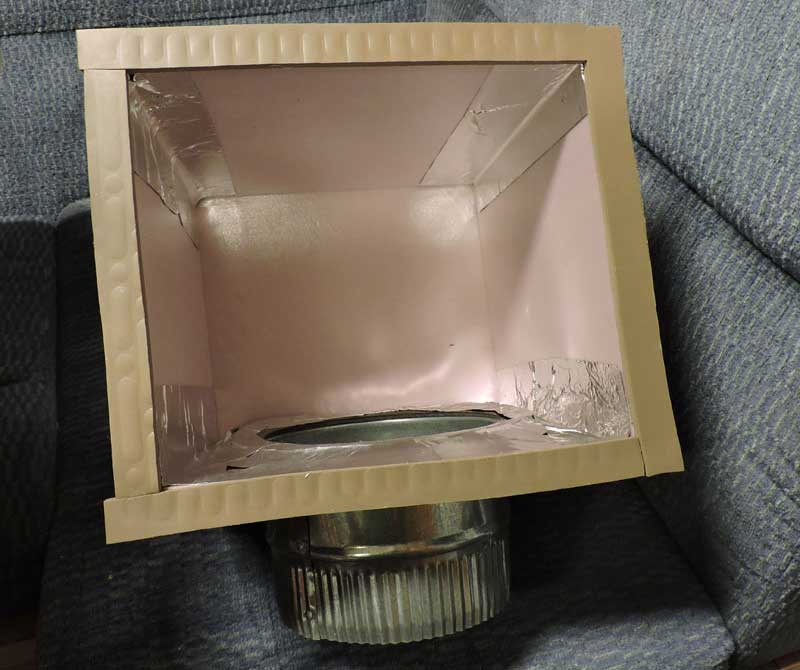
Since this supply is under a slight vacuum, the plenum and duct are under very little stress and light materials can be used. I weather-stripped my plenum so that it made an air-tight fit and bungee corded it to the back of my portable air conditioner unit. I fed the plenum with outside air through a cardboard duct made from an old shipping tube.
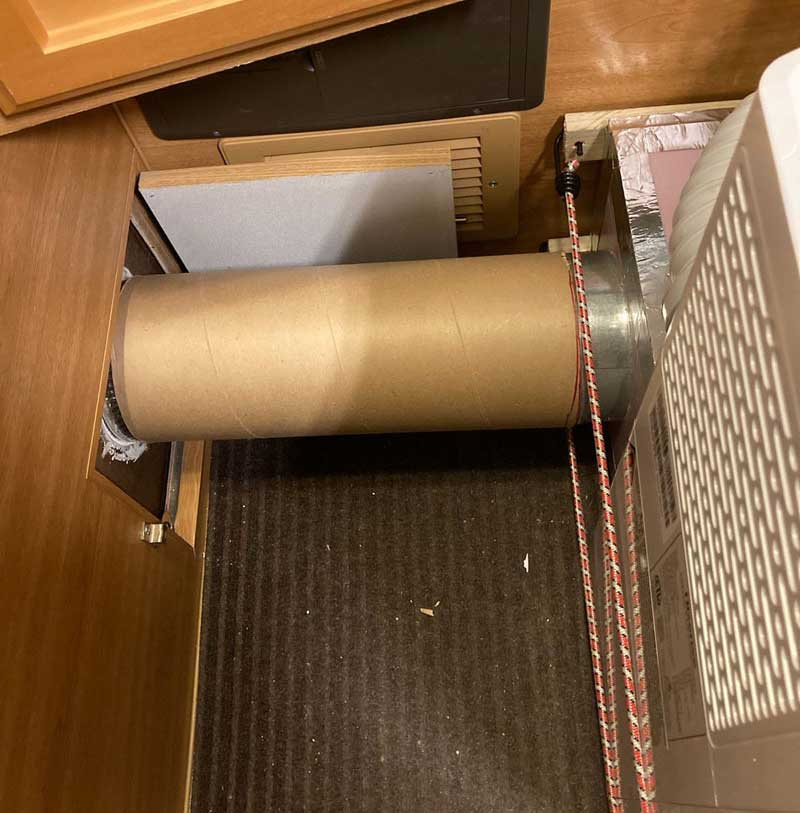
The outside air inlet is screened and is meant for a standard household dryer. I placed it in the truck bed access opening on the driver’s side of my camper.
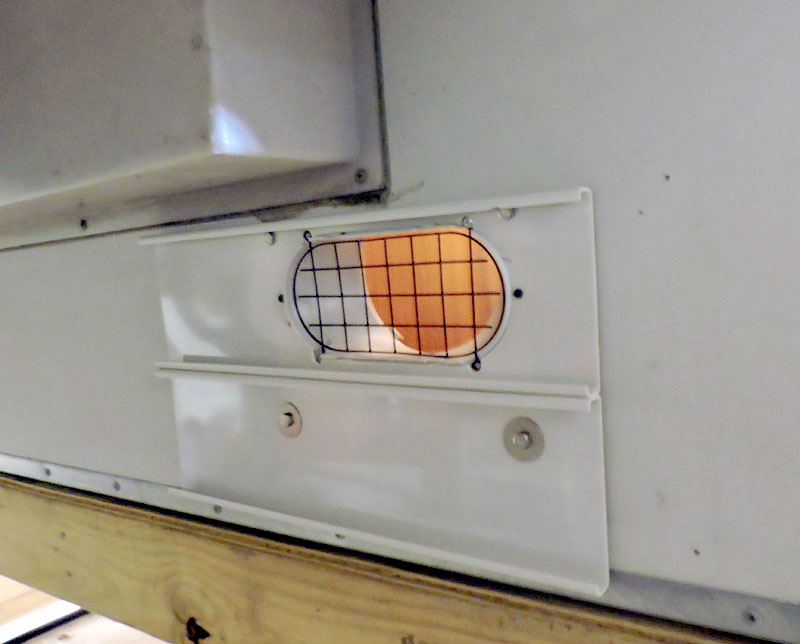
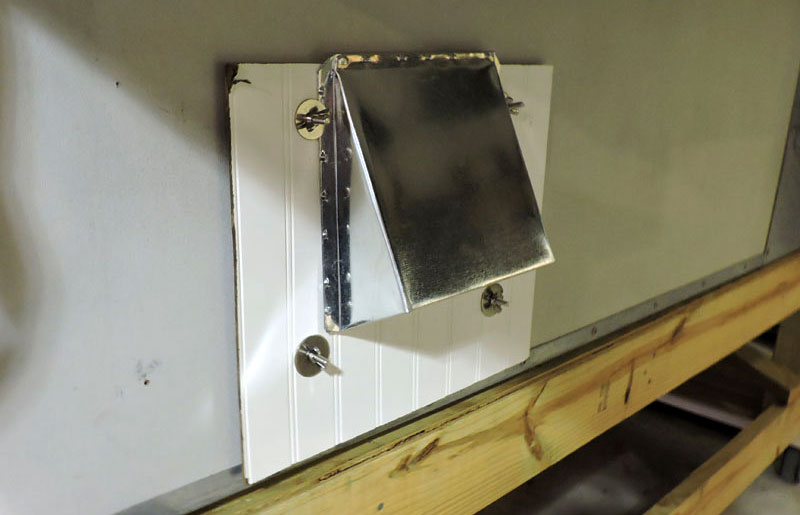
The dedicated outside air inlet made a night and day difference in my unit’s ability to cool my camper.
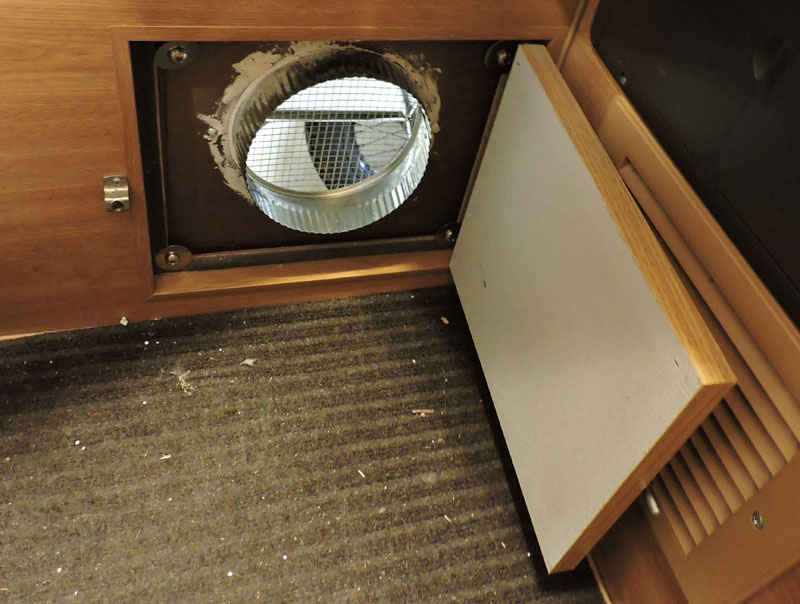
The hot air exhaust was supplied with my unit and was easily adapted to my other existing truck bed access door. In the interest of efficiency, I further insulated this exhaust duct to cut down on the heat it radiates back into my camper.
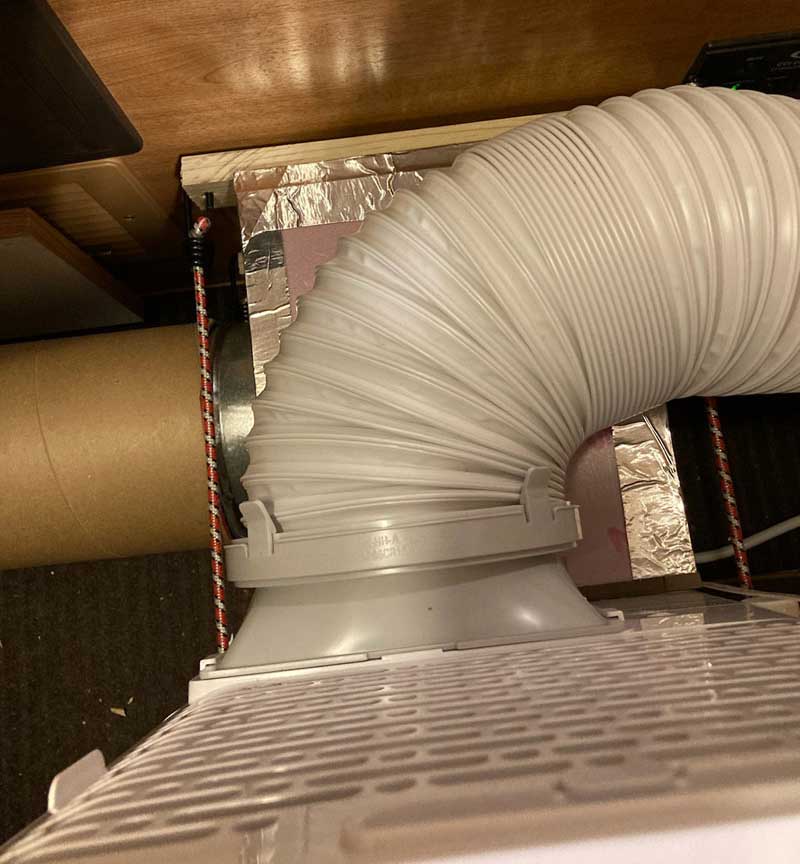
I used a system of bolts, washers, and wing-nuts for my condenser air outlet and inlet grills so that I can keep my truck bed access doors closed during normal travel and then easily remove the doors and install my ducts when I am parked at a campground.
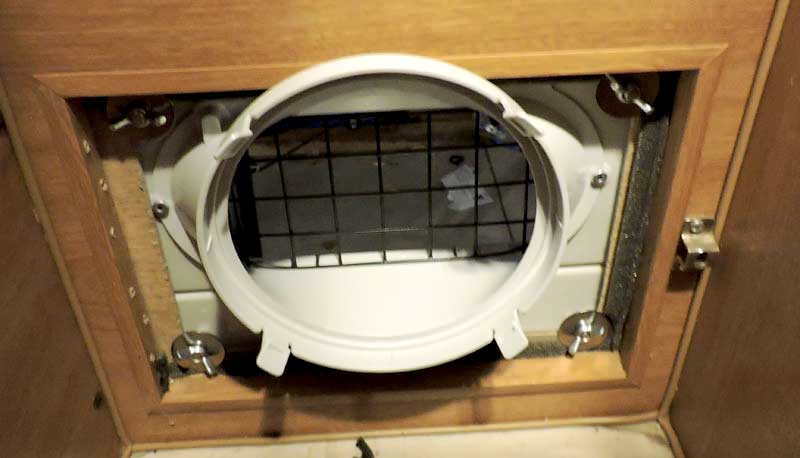
The whole rigging process takes less than a half-hour. Once again, I did not make any permanent changes to my camper.
Installation of a portable air conditioner will vary greatly from truck camper to truck camper. I was very fortunate to have truck bed access doors on each side of my unit which greatly simplified the routing of the air inlet and outlet for my condenser cooling air. I also had a perfect place to store my air conditioner unit when traveling.
I hope that this article will give other truck camper owners some ideas concerning how they can add a portable air conditioner so that they can stay cool and comfortable when it gets warm outside. Due to the camper-specific engineering required for each individual installation, I would categorize this modification as hard.
So far the unit seems to be working great! I am still refining it. My next refinement is to add a dedicated outlet for the unit so that I don’t have to run an extension cord to an existing outlet. I plan to power the unit from a line from my power panel to the roof top unit that was never installed. This is a pre-wire that was installed in my camper by Lance and the wire runs right behind where my portable air conditioner is being used. It should be perfect for my needs.
I bought the portable air conditioner unit from Lowes for $350. The foam board, tape, screws, nuts, and other hardware were also bought at Lowes for about $50.
It took me about 80-hours to complete this modification and cost me $400. In my opinion, the skill level of this modification is hard.
Disclaimer: The modifications above are submitted by Truck Camper Magazine readers. It is your responsibility to make sure that any do-it-yourself modification project you undertake is safe, effective, and legal for your situation.
Enter Your Mods Now!
If you’d like to enter a modification you’ve done on your truck camper, click here. You can enter as many mods as you want, at any time. Good luck mod makers!
