Welcome to the PowerMod truck camper mod contest, sponsored by Goal Zero. One Mega Mod will be published in every Email Alert in April. At the end of the month, we’ll hold a reader vote to determine April’s winner. Click here for information about the 2024 Mod Contest, including how to enter.
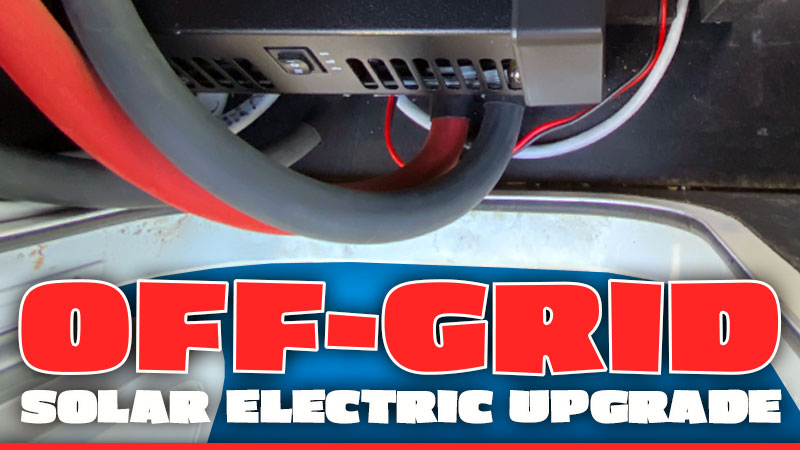
Matt R., Los Angeles, California
Off-Grid Solar Electric Upgrade
2013 Ram 3500
2017 Arctic Fox 811
My truck camper came equipped with two lead acid deep cycle batteries, 100-watts of solar, and an inefficient PWM charge controller.
Lead acid batteries can only be discharged to 50 percent capacity giving less available power over time. Prior to this mod, camping off-grid had no AC power options other than running our loud Cummins propane generator. The seven-pin umbilical from the truck to the camper barely gave much of a charge while driving.
Areas of desired improvement were battery performance and battery life, solar power capacity with a larger solar panel array, quieter AC power, faster battery charging while driving, and a phone app to provide monitoring and remote control of systems.
I had two primary goals for this mod. First, I wanted a stealth installation with nothing visible on the inside or the outside of the camper. I wanted to retain the factory stock appearance. Second, I wanted to minimize the loss of usable storage space that the project components may consume.
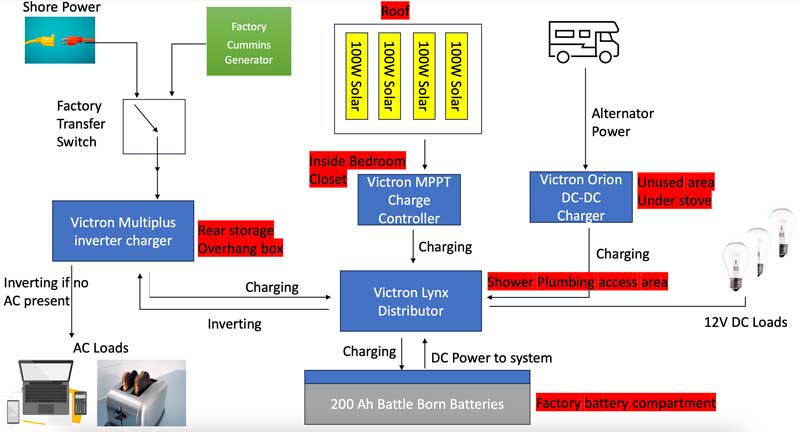
Note to the reader: Some of this may be difficult to follow. Please refer to the provided printable PDF file (also above) which helps give the lay of the land.
Two Battle Born 100Ah lithium batteries were installed. Lithium batteries can be discharged to nearly 0 percent of their capacity, giving greater reserve power on tap and lasting up to 5,000 discharge/charge cycles. This far exceeds standard deep-cycle lead acid batteries.
Important note: Non-internally heated lithium batteries should be kept in insulated and heated locations to prevent permanent damage in below-freezing temperatures. Never store any type of lithium battery in below-freezing temperatures or attempt to charge a lithium battery below-freezing.
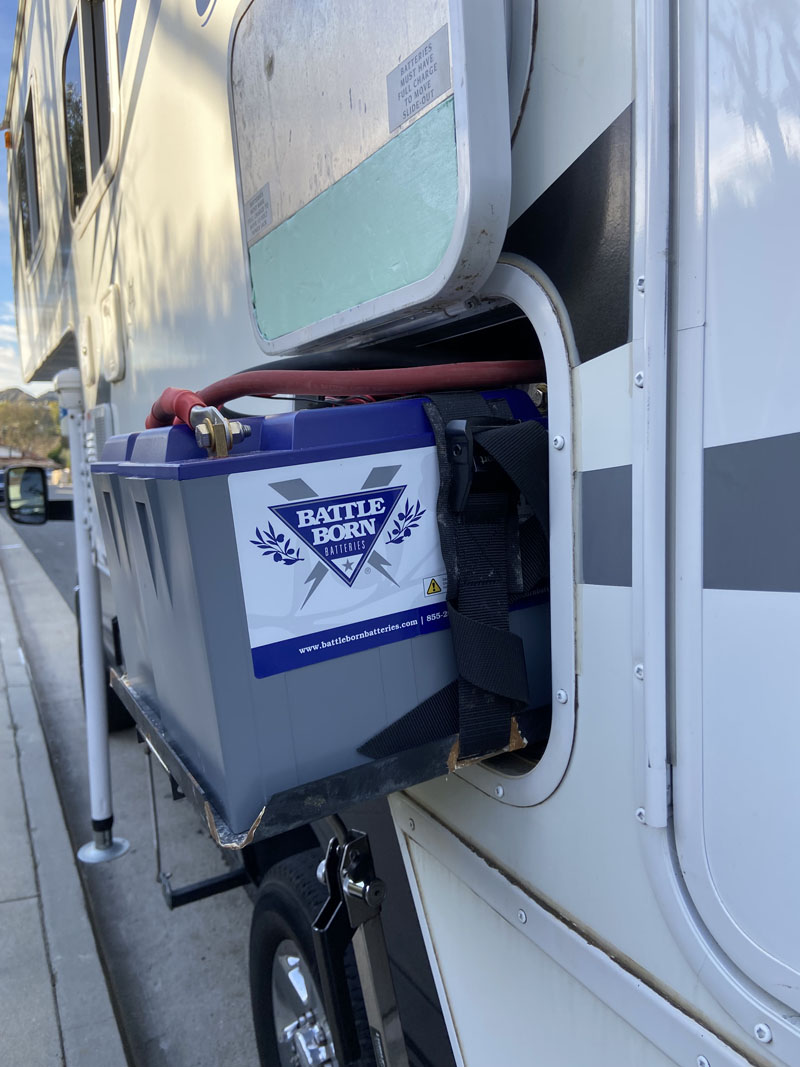
The lead acid batteries were removed from my existing battery tray and factory battery compartment. They were replaced with lithium batteries which were comparable in size but weighed half as much. The lead acid batteries were 60 pounds each and the lithium batteries were 30 pounds each.
The Victron shunt (electrical sensing device) was installed on a sidewall inside the battery compartment. Since the factory battery tray was retained, Battle Born batteries were strapped down using the same strapping from the original batteries.
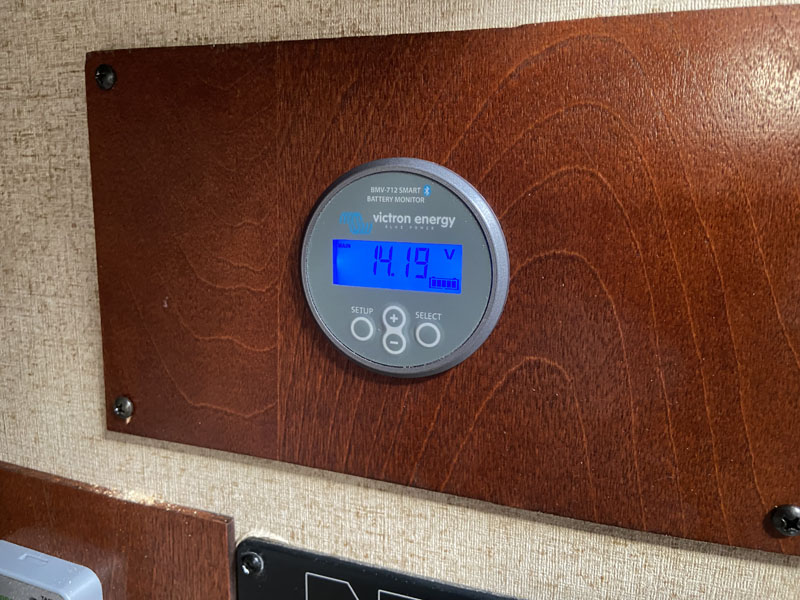
I am using a Victron BMV–712 battery monitor that provides monitoring of battery voltage, current, power, ampere-hours consumed, and state of battery charge. It consists of two pieces of hardware; the shunt is an electrical sensory device and a battery meter display unit that includes a Bluetooth module.
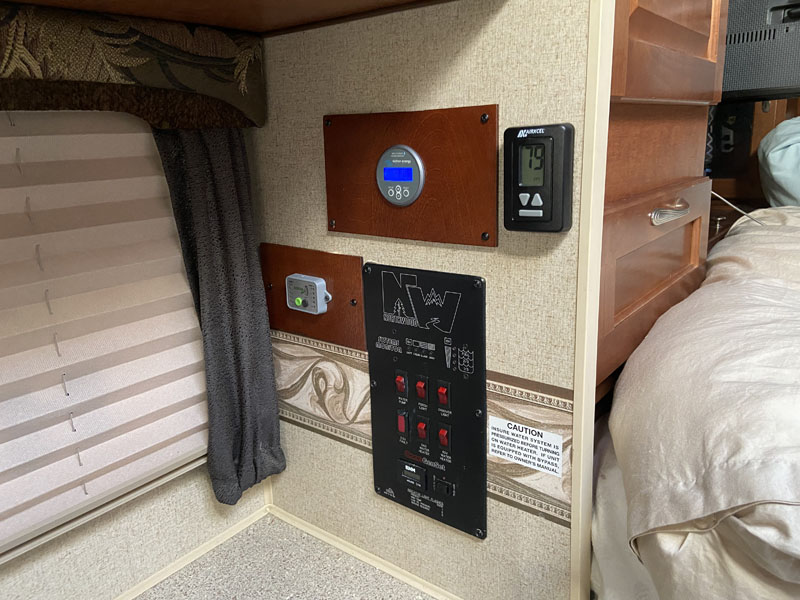
A Victron Lynx Distributor ties the wiring of all the electrical components and the lithium batteries together into one centralized location enabling a fused power distribution network.
The Victron Lynx Distributor was installed on the top of the battery box which was accessible from a small door intended for shower plumbing access. The small door provided limited space, making the mounting of the Lynx Distributor and master wiring connections a challenge. As the main power distribution point, connections and fusing for the solar charge controller, inverter-charger, and alternator DC charging were made.
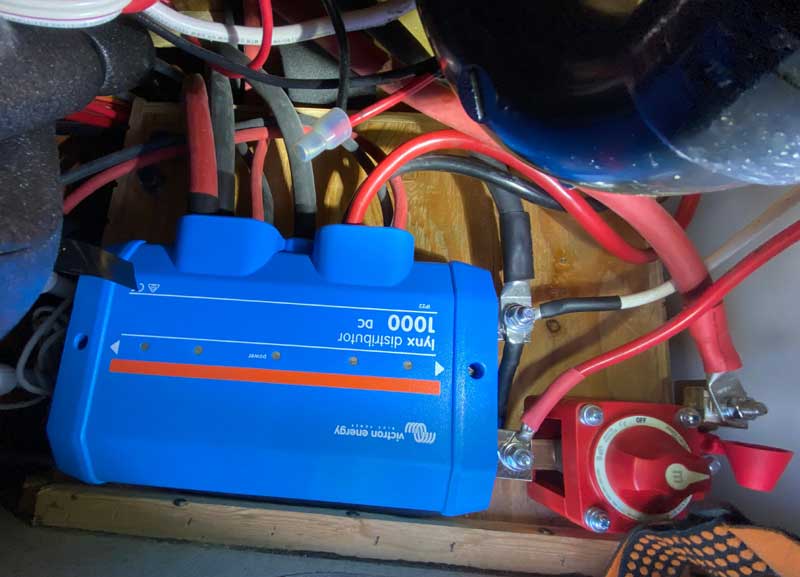
Existing wiring for factory DC connections (slide-out power, interior lighting, Rieco-Titan camper jacks, Cummins propane generator starter, etc.) was also connected to the Lynx distributor. From the Lynx distributor, the wiring was run to the different Victron components discussed below.
Wires were run as discretely as possible; under and through the kitchen cabinetry, behind the microwave often, and underneath the wet bath. Some of these were difficult-to-reach areas. Fish tape is your friend!
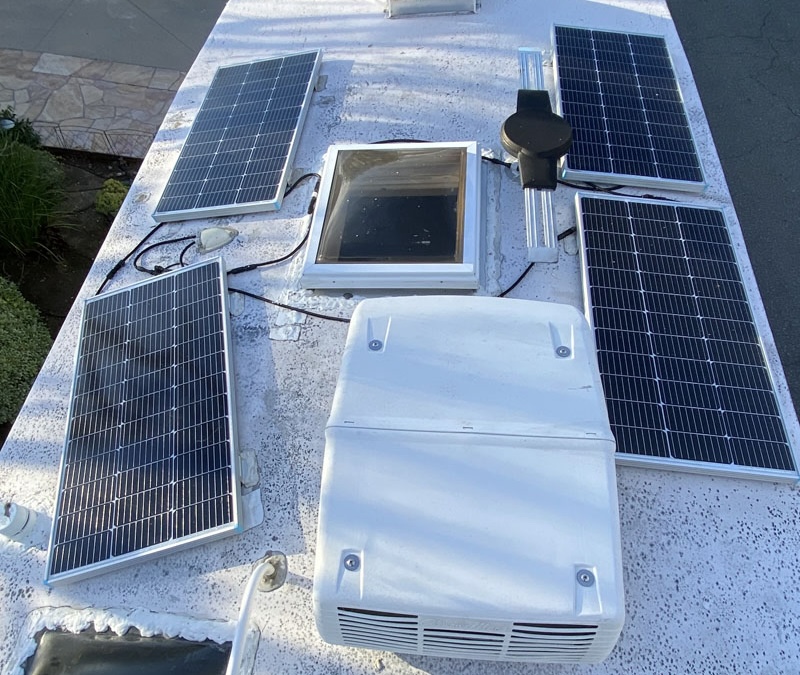
On the roof, the factory’s 100-watt solar panel was removed and four 100-watt Renogy solar panels were installed. I replaced the factory solar connection with a more robust waterproof version and wire gland.
A Victron MPPT 100/50 Solar Charge controller was installed. This enables smart charging of the lithium batteries from the electricity captured by the solar panels.
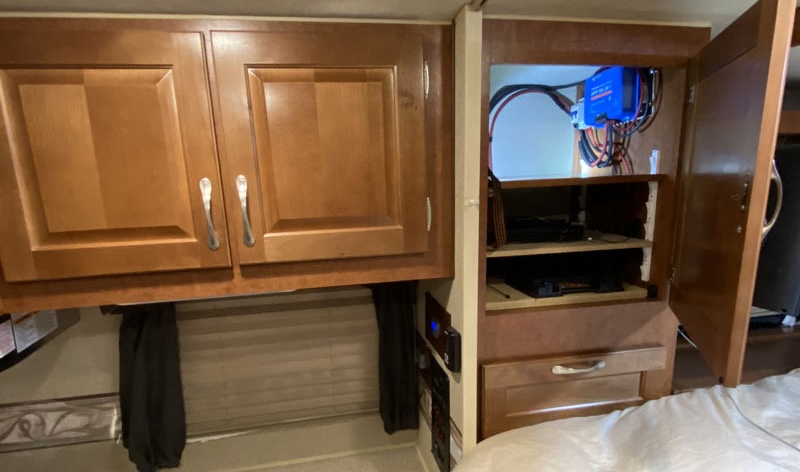
The charge controller was mounted inside a closet space that is below the rooftop solar panel wire gland. A solar isolation switch was placed between the solar panel’s main input feed and the charger controller input. Master “On/Off” switches are essential when adding additional components to the build. This allows for instant disconnection of the solar panels when needed.
Since the charge controller along with solar panels is now capable of increased current capacity, higher amperage (6 AWG) wiring was installed between the charge controller output and the Lynx Distributor. Wiring was run through kitchen cabinetry and behind the microwave oven.
A Victron MultiPlus 12/2000 80-50 120V inverter charger with V.E. Bus Smart Dongle to enable Bluetooth monitoring and control was installed. This enables the provision of 120V AC to all camper electrical outlets via the conversion of 12V DC from batteries to AC. The unit is also capable of DC charging (e.g. battery charging) when AC power is available from either shore power or the Cummins Onan propane generator.
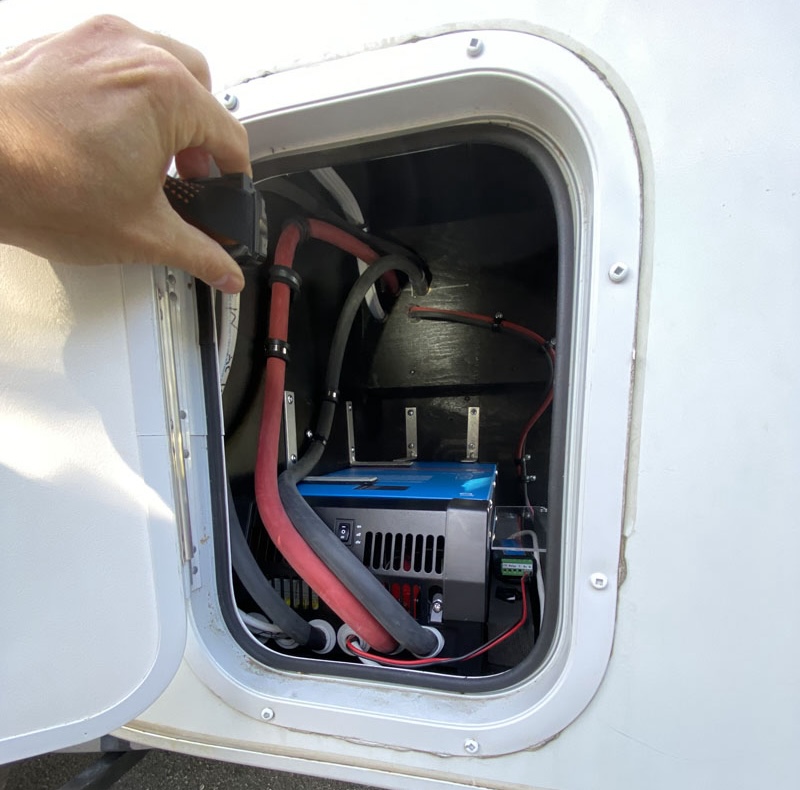
The Victron MultiPlus 12/2000 80-50 120V inverter charger was by far the largest piece of hardware at 20 inches long, 10 inches wide, and 6 inches tall. It barely fit in the rear overhang storage compartment. The MultiPlus was carefully placed to allow ventilation for the inverter/charger’s bottom air intake and top exhaust port. A shield to protect the V.E. Bus Smart dongle was made to allow some utilization of the remaining storage space in the overhang box.
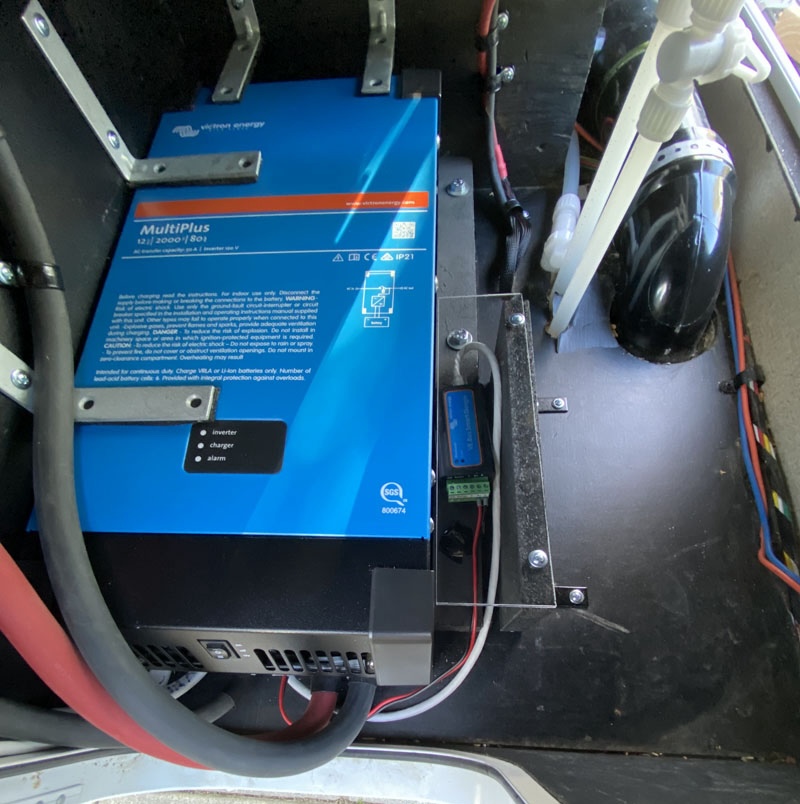
Due to the high DC current the unit consumes for conversion to AC, and the distance from the Lynx distributor (about 9 feet), care had to be taken in selecting appropriate wiring. This wiring not only needed to satisfy the amp requirements (neglecting this can cause a fire) but also to minimize voltage drop. Neglecting voltage drops can lead to reduced peak performance and reduced service life.
To meet these needs, large diameter 4/0 AWG flexible wiring was used. I ensured the voltage drop was less than 3% which is strongly recommended. For the AC side, there was a short direct connection from the transfer switch output to the AC breaker panel. The connection in the transfer switch was removed. A new AC wire was connected and routed from the transfer switch output to the MultiPlus AC input. The MultiPlus AC output was then run back to the AC breaker panel, and connected through a juncture box with the original input AC wire to the breaker panel.
I also installed a Victron Orion-TR Smart 12V-12V | 30A Isolated DC-DC Charger. This enables charging of the lithium batteries while driving. The truck’s alternator is used for charging.
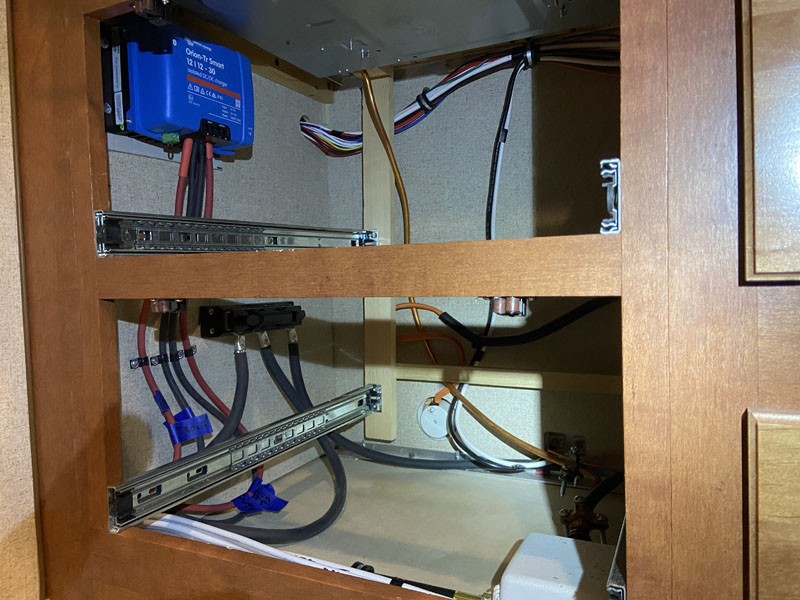
The charger was mounted under the stove. Wiring was run from the truck’s starter battery to the rear bumper of the truck. An Anderson connector receptacle was installed in this location.
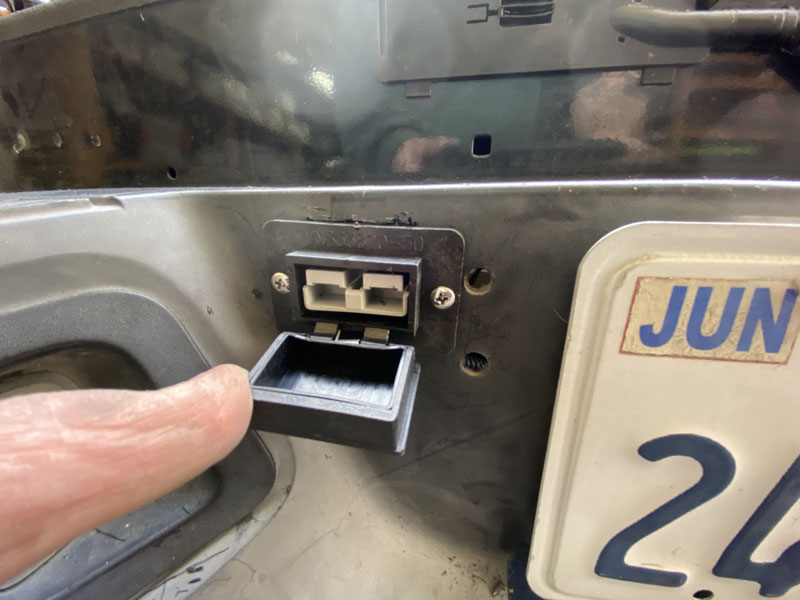
A custom cable was made to connect the truck’s DC power to an Anderson receptacle under the rear overhang box.
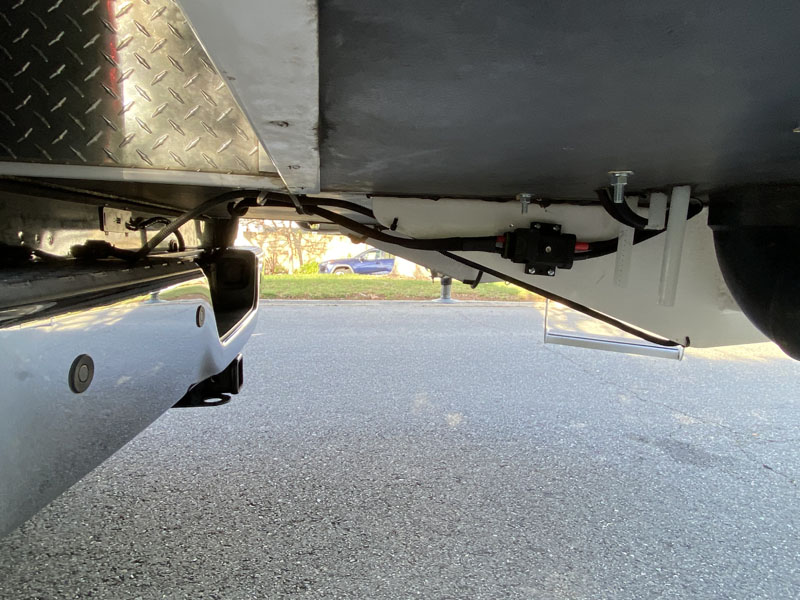
Wiring from the rear overhang box was routed to the charger input. The charger output was routed to the Lynx Distributor.
So far, the mod has been fabulous. All 110-volt outlets work now without having to run the Cummins generator. The maximum wattage for the system is 1500-watts, which is enough to individually run a microwave, toaster, or hair dryer.
With the alternator and solar charging, I can now drive and operate the refrigerator under 120-volts AC.
Hindsight is always twenty-twenty. When I first started this project, I did the solar portion first. At the time, I could not determine how to get the MPPT charge controller closer to the Lynx distributor. As I progressed with the build, I subsequently figured this out, but too much was already invested with the current MPPT installation. If I were to do it over, I would probably put the MPPT charge controller under the stove with the Orion-TR DC-DC charger.
Materials Used:
Two Battle Born 12V 100Ah Lithium batteries – $1,850
Vendor: purchased directly from Battle Born Batteries (a.k.a DragonFly Energy)
Battle Born Batteries | Reliable Lithium-Ion Batteries
Victron Components – $2,000
Vendor: Purchased from the Explorist.life website. I highly recommend this vendor because they not only sell Victron components but they are also incredibly knowledgeable about camper electrical builds. Victron leaves it to their vendors to support their products. There are many vendors out there that sell Victron components but don’t have expertise in installation. Explorist.life offers YouTube videos on DIY campers.
Renogy 100W Solar Panels (4) and mounting hardware – $350
Vendor: Amazon
Wiring – $500
It took me fourteen days to complete this project. A person with better mechanical skills could probably do it faster. The skill level is advanced. It cost me around $5,000.
Disclaimer: The modifications above are submitted by Truck Camper Magazine readers. It is your responsibility to make sure that any do-it-yourself modification project you undertake is safe, effective, and legal for your situation.
Enter Your Mods Now!
If you’d like to enter a modification you’ve done on your truck camper, click here. You can enter as many mods as you want, at any time. Good luck mod makers!
