Welcome to the sixth entry in September’s Medium Mod-Ster Contest. One Medium Mod will be published in every Email Alert in September. At the end of the month we’ll hold a reader vote to determine September’s winner. For information about the Mod-Ster Contest, including how to enter, click here.
Philip Bogardus, Bothell, Washington
Magnetic Laser Loading System
2014 Ford F350
2018 Northern Lite 8-11 EXSE
We recently bought our first camper. My Queen (aka my wife) and I found the loading of the camper was both time consuming and stressful.
I studied many YouTube videos on how to load your camper and tried several of them. I found some of them helpful, but we still found the camper loading experience was the same no matter what method we used.
I then found Charlie Coushaine’s Top Mod winning Laser Loading System on the Truck Camper Magazine website. Being an engineer, this looked like a very elegant solution. I showed the video to my Queen and she said I needed to build a laser for loading our camper.
I own a 2014 Ford F-350 Lariat. It has a rear seat and center head rest, so permanently mounting the laser as Charlie did would not work for my truck. I needed a laser system that could be installed when loading the camper and then removed after it was loaded.
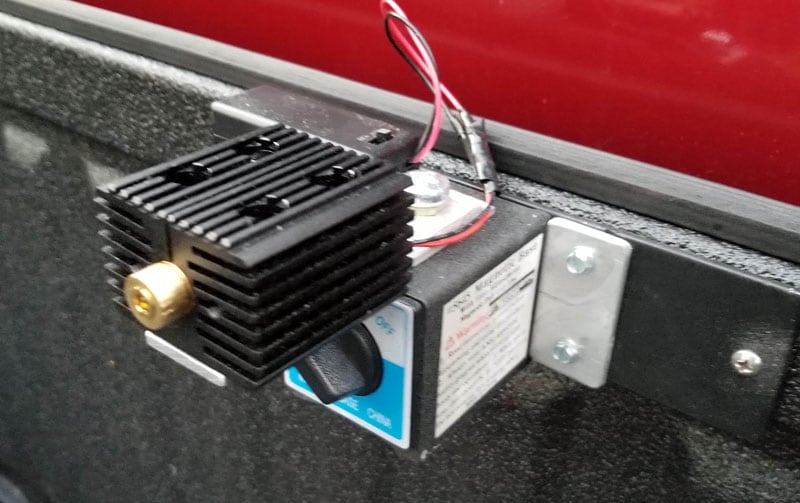
My solution was to mount the laser on a magnetic switch which could be installed and removed. I purchased the same laser setup that Charlie had used (Z-Bolt DPSS-5L, 12mm Green Line Laser, DC Power Supply and HS-1a Heat Sink).

I had a Harbor Freight Multi-Position Magnetic Base (Item #63663) which has a switch to turn the magnet on and off.
My pickup bed has a sprayed-in liner. The magnet did not have enough power to hold through the liner.
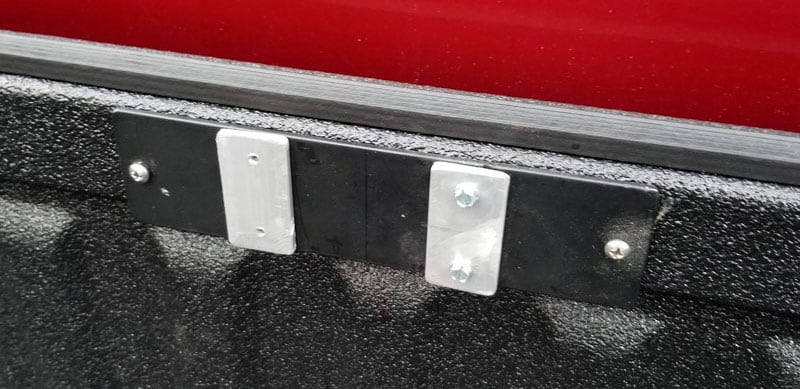
To solve this problem I took some flat bar, painted it black, and screwed it to the pickup’s bed rail near the back window for the magnet to mount on. If your truck bed is aluminum then you would also need to do this.
For the laser, I used two pieces of aluminum flat bar to mount the laser heat sink and battery supply to. The aluminum flat bars were then mounted with a single bolt into the screw mount of the switchable magnet.
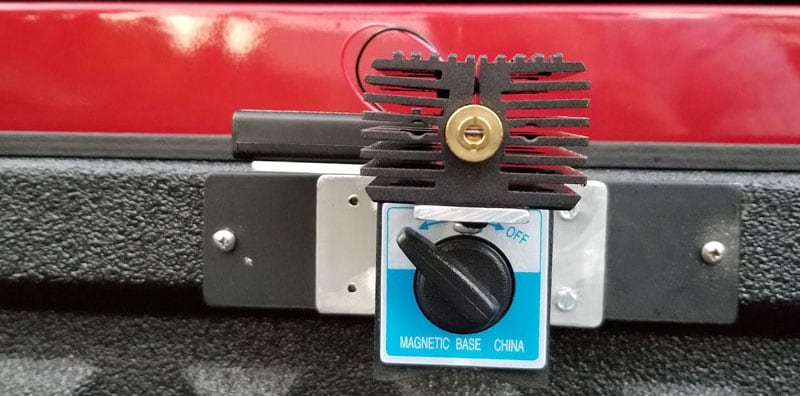
I measured between the bed rails to establish the center of the truck bed and marked the mounting plate. I then mounted the laser centered on this line. Using double-sided tape, a piece of aluminum flat bar with two holes predrilled was mounted along the vertical edge of the switchable magnet. This vertical alignment bar would serve as the laser’s registration line when being installed.
Next, I aligned the laser to center on the entrance end of the truck bed. I followed the instructions Charlie provided in his video to align the laser. I had to make some adjustments of the laser in the heat sink mount and on the magnet mount to get everything lined up. After some minor tweaking of each, the laser line was centered on the truck’s bed – just like Charlie’s.
Now that the laser was set and aligned, I drilled through the predrilled holes in the vertical alignment bar into the metal mounting plate. Screws were then installed to attach the vertical alignment bar to the mounting plate.
As you can see from the photo, I originally intended to install two vertical alignment bars which the laser would be mounted in between. After I got the first bar installed I realized that all I had to do was set the vertical edge of the switchable magnet flush against the vertical alignment bar and the second vertical bar was not needed.
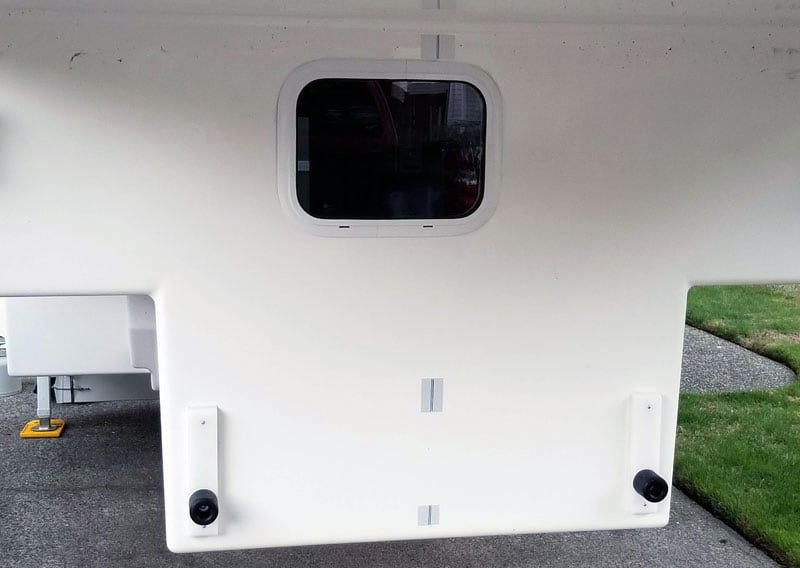
Finally, I installed 3M Silver White Reflective Vinyl Tape (from Amazon) on my truck camper as Charlie described in his video and we were ready to load the camper with the laser alignment system.
One thing I did discover is that I must adjust my camper side-to-side to match the reflective tape marks with the laser line. My driveway is sloped from side-to-side. As a result, the laser line is not truly vertical. By adjusting the camper side-to-side to match the laser I get the proper alignment for loading in one try.
I built a small wood box to store the laser mount in when traveling. I used some FastCap 30mm Foam (Woodcraft Item #850575) inside the storage box to protect the laser unit.
To load the camper, I set the switchable magnet’s vertical edge against the vertical alignment bar and attach the laser to the mounting plate. I then turn on the laser and then check that it is centered between the bed rails at the tailgate. I then load the camper and stop when the laser is very close to hitting the camper. I switch off the magnet, remove the laser and finish backing up the truck to the camper.
My magnetic mounting modifications for Charlie’s laser system have worked out great. It is the perfect solution when you can’t mount the laser in a permanent location. My Queen and I find loading of the truck camper is now much easier, faster and a lot less stressful. We can load it quickly and typically hit the mark the first time.
It took me six hours to complete this modification and cost me $120. In my opinion, the skill level of this modification is medium.
Disclaimer: The modifications above are submitted by Truck Camper Magazine readers. It is your responsibility to make sure that any do-it-yourself modification project you undertake is safe, effective, and legal for your situation.
Enter Your Mods Now!
If you’d like to enter a modification you’ve done on your truck camper, click here. You can enter as many mods as you want, at any time. Good luck mod makers!


