Welcome to the second entry in August’s Mega Mod Contest. One Mega Mod will be published in every Email Alert in August. At the end of the month, we’ll hold a reader vote to determine August’s winner. Click here for information about the 2021 Mod Contest, including how to enter.

David Romero, Shreveport, Louisiana
24 100Ah LiFePo4 CALB Batteries
2017 Ram 2500
2017 Cirrus 820
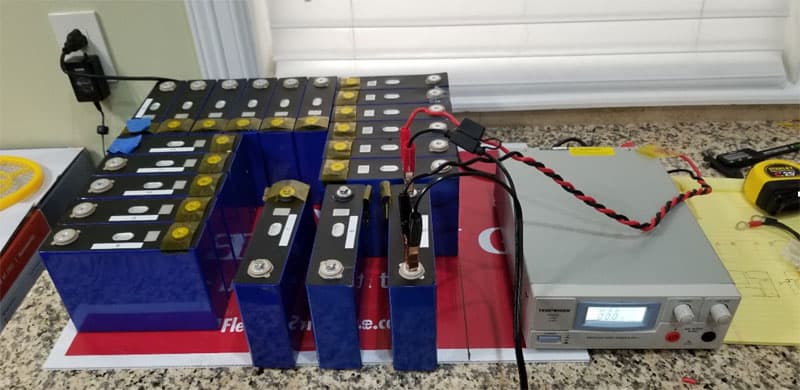
I purchased 24 new 100Ah LiFePo4 CALB batteries. I labeled and tested each one.
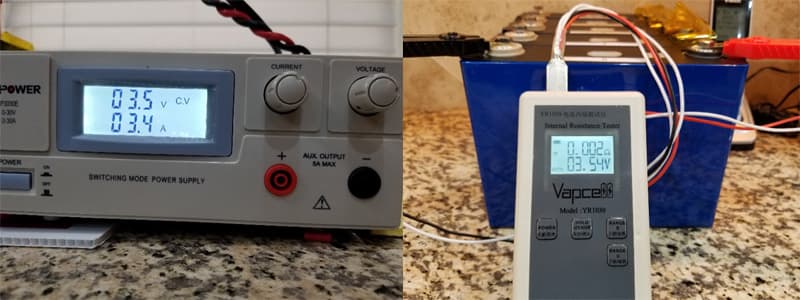
I charged each battery to the same level and then tested for internal resistance. I wanted to ensure that all of the batteries were matched within acceptable limits of each other. The test revealed they were all within .001 of each other, so they are well matched.
The process of charging each battery, checking the capacity, and checking the internal resistance took a very long time to complete. I spent about two weeks on this process. On the weekends I could do about four batteries a day. On weeknights, I would get one or maybe two batteries put through the charging and testing process.

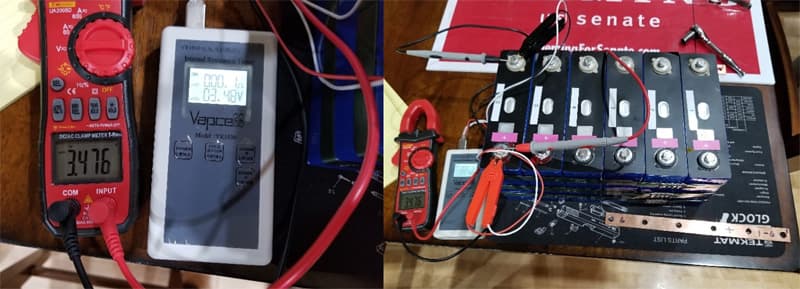
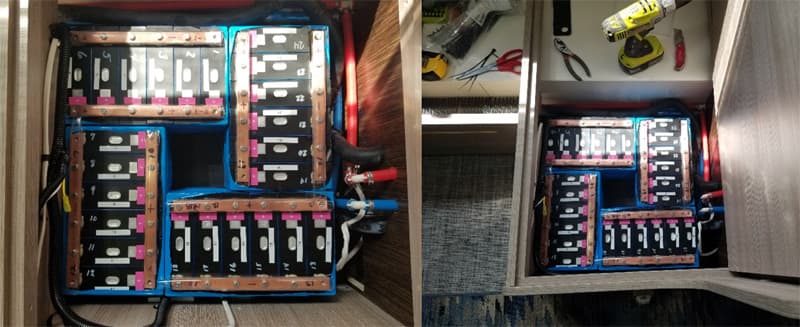
Once that process was completed, I banded the batteries together in parallel in banks of six. I bought 1-inch wide by 1/8-inch thick solid copper buss bars and cut and drilled the bass bars to match each bank of batteries. Next, I set all 24-batteries in parallel to the top balance. They were left for two weeks in balancing.
I topped off the batteries about four days into balancing because I wanted them to all be at 3.55-volts. I did not want to go to 3.65-volts as I did not see the advantage of the small increase in capacity. I chose to keep these at 3.55-volts and will eventually only charge to 3.5-volts, or 14-volts max when in series.
When that task was completed, I shrink-wrapped each bank for extra protection. It was hard to find shrink wrap that big, but it is out there.
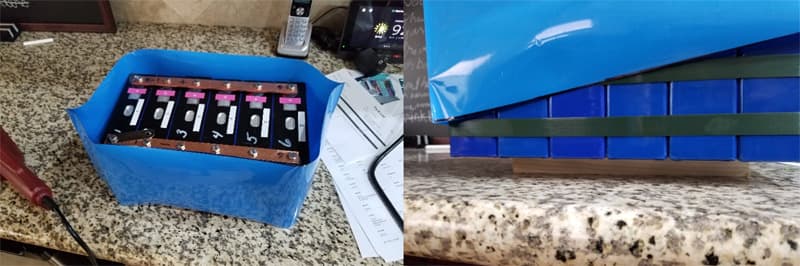
I set the batteries on a 1-inch board to allow the shrink wrap to shrink under the batteries as well as on top. A heat gun was used to shrink wrap; a pretty easy task.
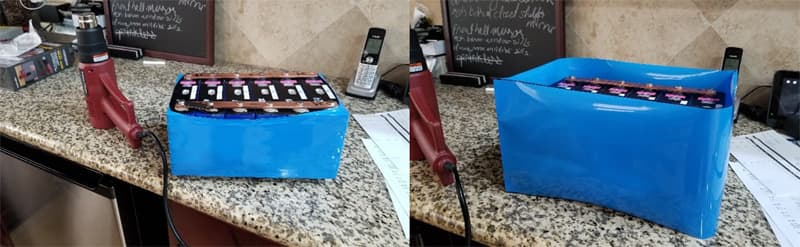
The picture of the shrink-wrapped bank is what not to do. I cut the wrap a little short and it did not cover the entire battery the way I had intended. I used another piece of shrink wrap and did the task again.
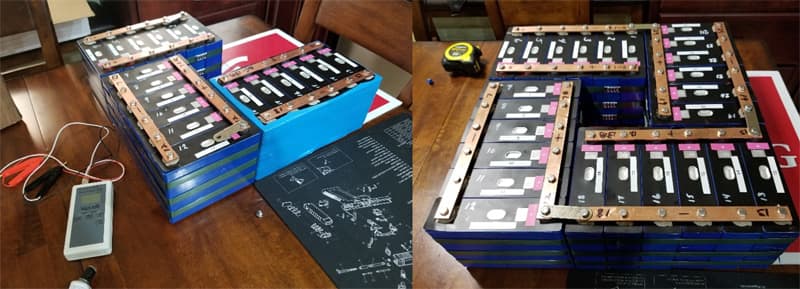
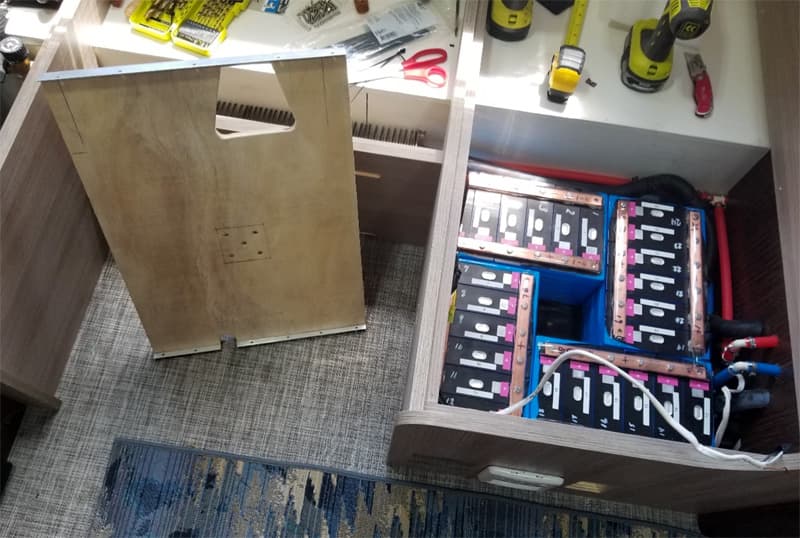
Above is the footprint I was using and the final footprint as it will be used. The square recess in the center of the battery bank will be used to support a wooden tray above the batteries. It will be more visible in a later picture.
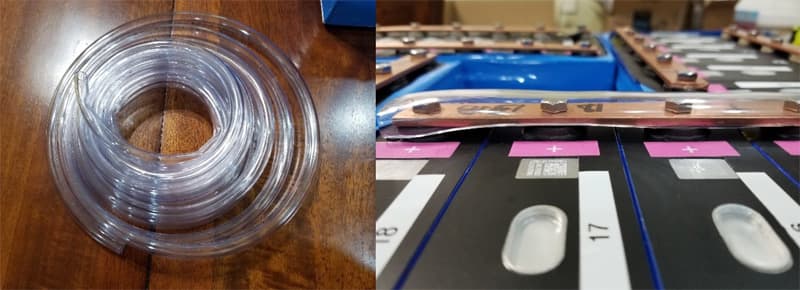
I purchased some 5/8-inch vinyl hose to use as a buss bar protector. I cut it to length and split the hose. The natural curvature of this hose would bite around the buss bars very nicely and created a nice protective cover.
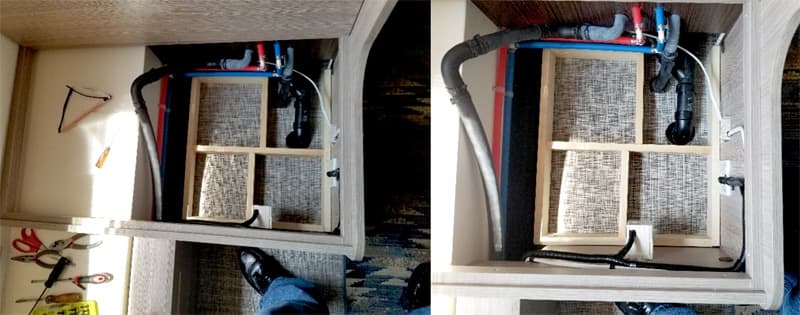
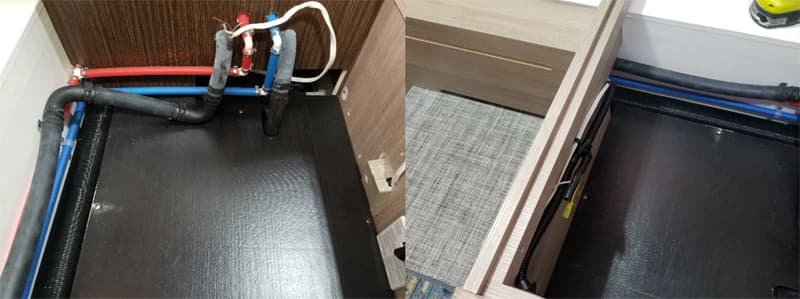
This picture shows the dinette seat in the Cirrus 820 to the back of the camper against the wet bath’s wall. I had to install a false floor to raise the level. The false floor goes over the top of the grey water drain in the top right and the Alde heater intake exhaust tube on the left. It is the dark area that runs the entire length of the opening.
In the picture, you will see that I had to pull up the Alde heater’s radiant hose. The hose runs from the heater, through the radiator in the dinette, to the radiator under the shower. I purchased and installed some additional heater hose to help this lay down in a controlled shape. The hose now fits nicely around the battery bank.
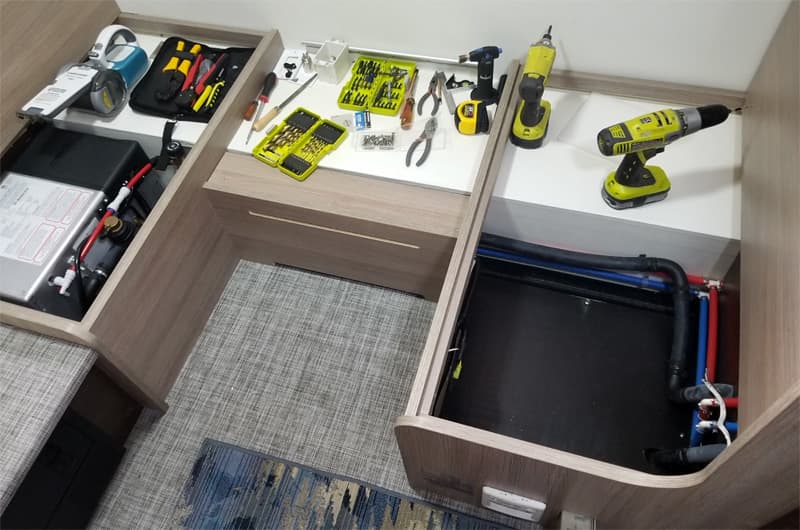
Now I have a platform that is solid and level with a rubber non-skid mat that is glued down to the 3/8-inch piece of plywood. I installed that on top of the 3-inch frame. I needed to do a little rewiring of plugs, but they survived in place. I just had to reroute the wire to create a cleaner installation.
In the picture, you can see the Alde heater under the dinette seat to the left, or the front of the camper towards the cab. The false wall in between the two seats has a radiator behind the wall.
The opening on the floor and the slot cut into the false wall panel allow for the Alde radiator to heat that area. The radiator runs the entire length of the slotted opening on the wall panel between the seats.
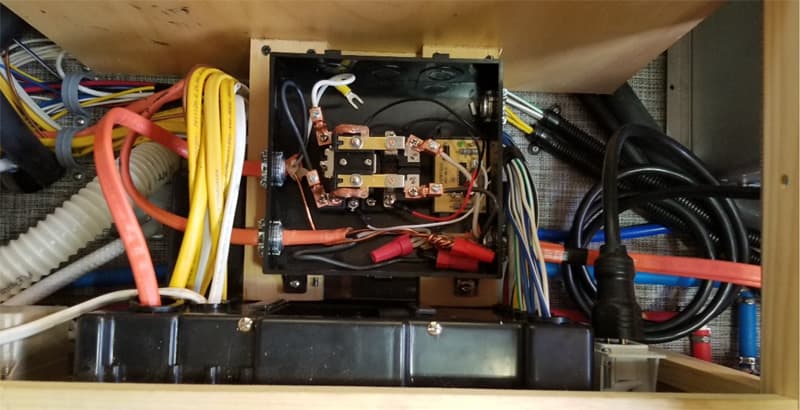
And the batteries fit, yahoo! The picture shows the cover removed on top of the radiator. If you look closely, you will see the radiator sitting in the small area. This area has a lot of wiring to accommodate the shore power, generator power, and transfer switch, 600-amps of roof solar, and return 120-volt and 12-volt power to the distribution fuse box.
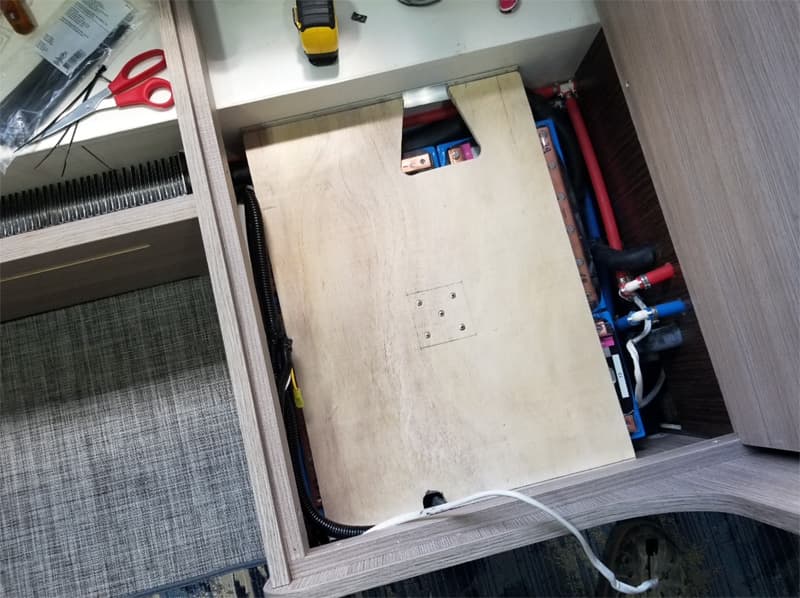
Above is a preview of the cover I put over the batteries. You can see the square in the center of the panel with five screws that attach to a solid 3-inch by 3-inch plastic block.
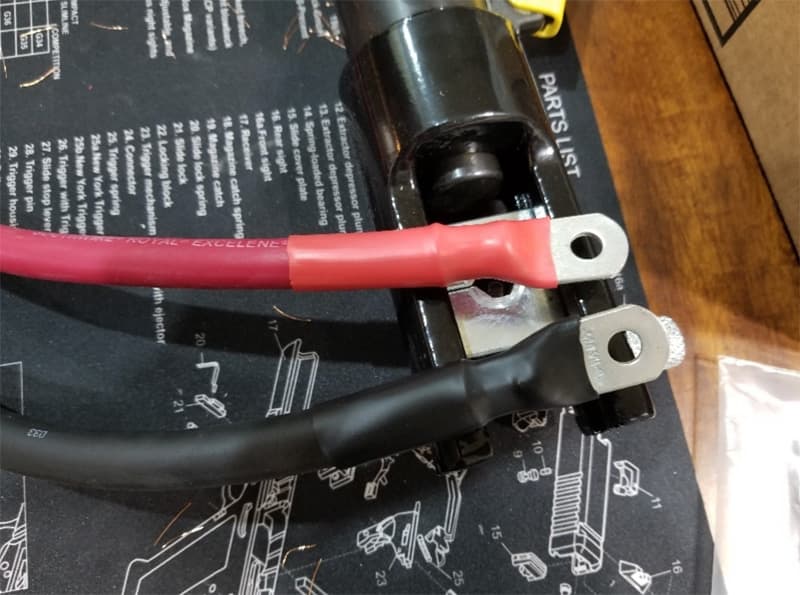
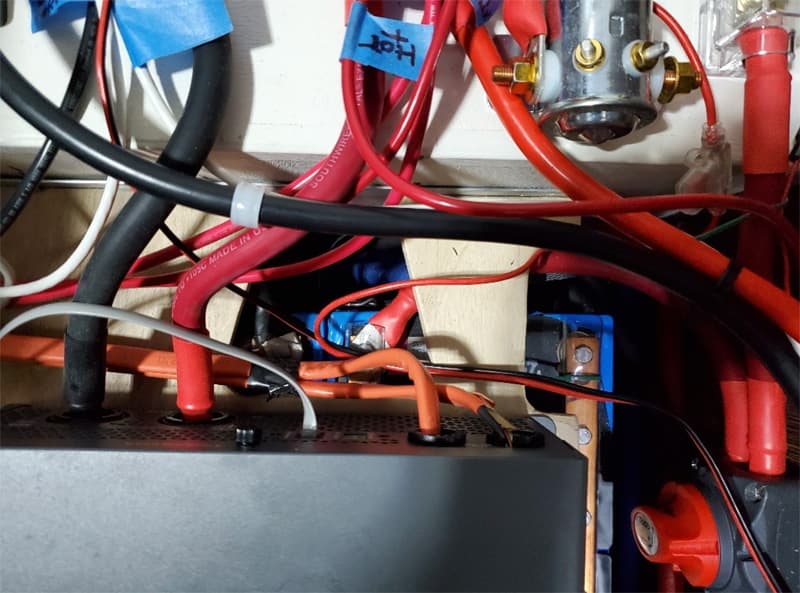
Of course, with this amount of battery capacity you need to cable the items correctly. I invested in the correct equipment to ensure the integrity of the cabling and build. The cost of the tools in comparison to the build is small.
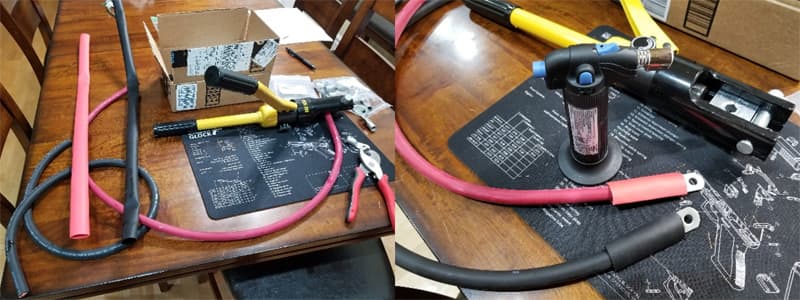
The wiring begins. I spent many hours planning, measuring, and calculating the installation I was going to build.
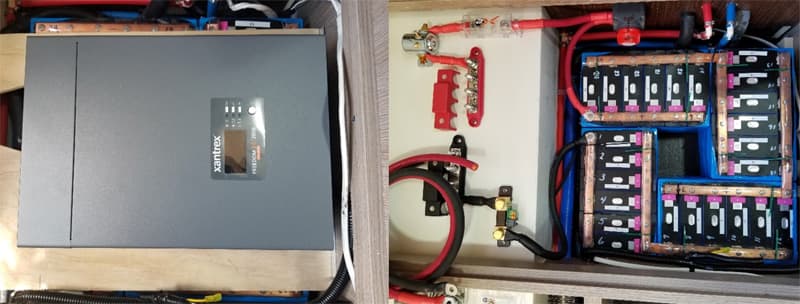
I fitted the Xantex inverter/charger in place many times to decide how to layout my components and wiring.
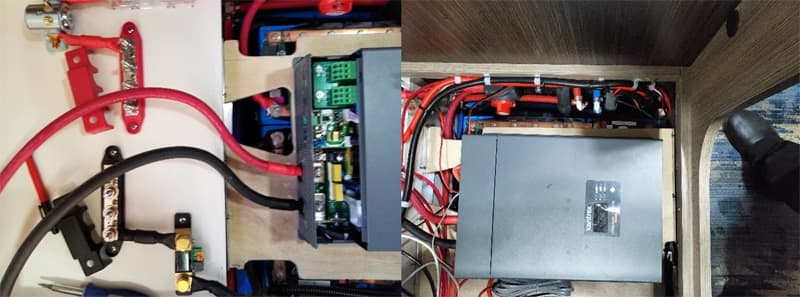
There was a lot of wiring pulled to this area. I pulled a complete set; positive and negative 1/0 wire from the batteries to an outside Anderson plug.
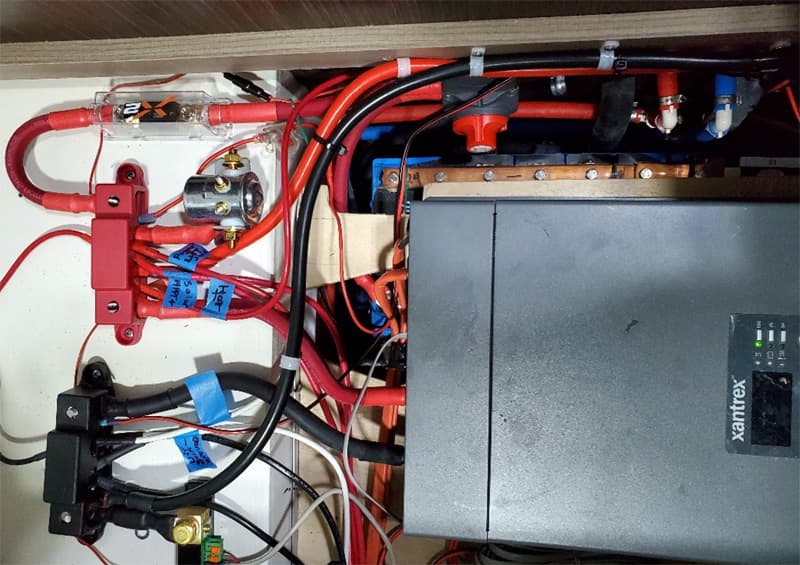
I have a matching Anderson plug installed under the bumper of my Ram diesel truck by the hitch. That also has a complete set of 1/0 cables pulled to the front driver’s side battery, hence the driver’s side battery.
In the above picture, I ran the shore power to the transfer switch. This transfer switch is a 50-amp with a 30-second delay. I have the generator run into this transfer switch as well. The generator is on the 30-second delay side and is the dominant feed.
When plugged into shore power, if I start the generator unit, it will power on. 30-seconds after startup it will transfer power from shore to generator. I installed it on top of the distribution fuse block/charger.
I ran the power from the transfer switch directly to the Xantrex 2000 XC inverter/charger. I ran out of the Xantrex inverter/charger back to the distribution panel.
I powered the entire 120-volt system and I did not localize any of the shore, generator, or inverter power. I did disconnect the converter in this box. I do not need it as the Xantrex provided my charging of the 12-volt system and the batteries provide 12-volt power to the 12-volt distribution side.
Yes, I can turn on my air conditioner from the inverter. It will run for about six-hours in extreme heat from the batteries. Then, the batteries will need to be charged. I did use the air conditioner in the summer in the evening. The batteries were fully charged.
I ran the air conditioner all night with high outside temperatures. It was in the 100s before the sun went down and finally got down to about 88-degrees Fahrenheit at about 3:00am. The air conditioner ran about 60-percent duty for the first couple of hours and then I could see that the cycling went down as the outside cooled off. I ran it until morning and the batteries were pulled down to 39-percent.
I started the truck and I was adding about 40-amps of power from the truck. The sun was not high enough to really add much power. You would think with 600-watts of solar it would help, but it did not until the sun actually raised up in the sky a bit.
My Cirrus is equipped with a Coleman Mach 8 9200-BTU air conditioner. I installed the Micro Air easy start on my unit. I also added the Bluetooth air handler cover, which is a great tool.
When the air conditioner is called on to cool, it comes up to about 300-watts with the fan blowing. Then you can watch it pull up to between 900 and 1100-watts depending on how hot it is outside.
On the second day out we had a generator failure. It was a brand new generator with less the six-hours on it but decided to stop producing power.
Since I was able to produce about 40-amps from the truck and about 450 to 500-watts of solar, I was pulling in around 420-watts or about 30-amps of power. So, I was able to keep the camper cool.
I kept the inside temperature at about 85-degrees Fahrenheit. Yes, that is cool since it was in excess of 108-degrees Fahrenheit outside. The air conditioner was cycling every 20-minutes. So I was consuming about 35 to 40-amps from my best calculations.
Couple that with the Victron smart MPPT Controller and the BMV-712 and I could watch and manage my power usage while we traveled. Well, actually, I just made decisions. My wife enacted the changes on my Android phone.
We never did get to full charge without our generator, but we were able to get an 80 to 85-percent charge before we would stop for the night. In the Guadeloupe Mountains of New Mexico, we did not need the air conditioner. We stayed at the national park and it was quite pleasant at altitude. So our batteries were full again.
We stayed off-grid for three-days using the solar and truck to provide charging and managed our camper’s temperatures. We would drive six to eight-hours a day until the sun started to set. That allowed us the ability to use our batteries for the air conditioner. We went through Oklahoma and Arkansas in August, and it was brutally hot. We decided to stay in Van Buren Campground in Arkansas for few days and hooked up to power and water.
It was nice not having to try to manage the batteries and camper cabin temperatures. We were able to sleep at a reasonable 75-degrees Fahrenheit in the camper. The batteries have done well.
I rated my batteries at about 540Ah as I chose not to charge them more than 14-volts. I did not see the need to go to 14.6-volts fully charged. I am not sure that 14-volts is a good number, but it worked well.
The Victron battery monitor BMV-712 would show us to use 440-amps total from the bank at a 23-percent draw down. So I might have a little mover capacity than 540Ah. It was my best guess. 23-percent and 440-amps show about 600-amps of storage. Maybe the batteries have more than they are rated for. I do not have a precise number. All I know is that the many hours of work paid off.
The 24 CALB 100Ah batteries were $1,800, Xantrex 2000 XC was $625, Victron BMV-712 was $206, the cables and supplies were $350, and the special tool was $650.
I used a power supply for testing batteries, meters, cable crimpers, cable cutters, and resistance testers. I did not keep a perfect total of all parts used. But this is close.
The total cost was about $2,630 and it took approximately 75-hours.
The skill level is high. If you do not feel comfortable with electrical wiring, I would suggest having a professional help you. The amount of power this bank of batteries can release is massive. It can inflict serious injury if not possibly kill a person. I would not undertake this project unless you are a professional or you are confident in your abilities.
This project took me a couple of months to complete using weekends and evenings. I hope I have encouraged some of you to consider lithium ferrous oxide batteries. They deliver stable power to my entire rig.
Disclaimer: The modifications above are submitted by Truck Camper Magazine readers. It is your responsibility to make sure that any do-it-yourself modification project you undertake is safe, effective, and legal for your situation.
Enter Your Mods Now!
If you’d like to enter a modification you’ve done on your truck camper, click here. You can enter as many mods as you want, at any time. Good luck mod makers!


