Welcome to the fifth entry in January’s Mega Mod Contest. One Mega Mod will be published in every Email Alert in January. At the end of the month we’ll hold a reader vote to determine January’s winner. Click here for information about the 2021 Mod Contest, including how to enter.
Dominik Knapp, Newark, California
Induction Cooktop and Convection Oven Conversion
2016 Ford F-350
2017 Lance 1172
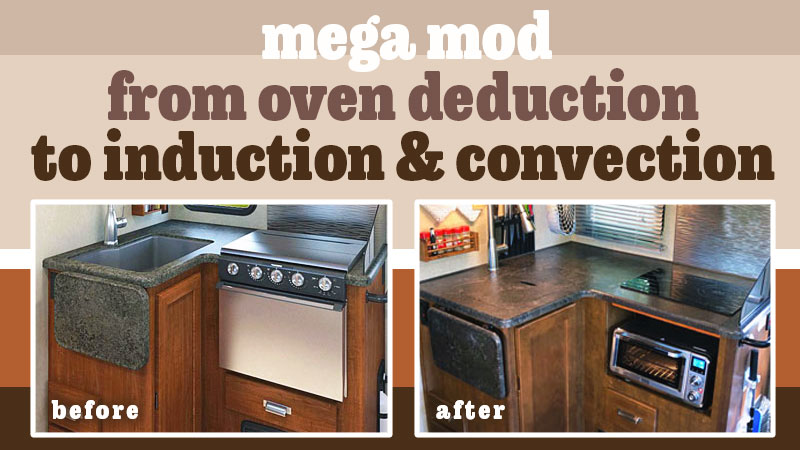
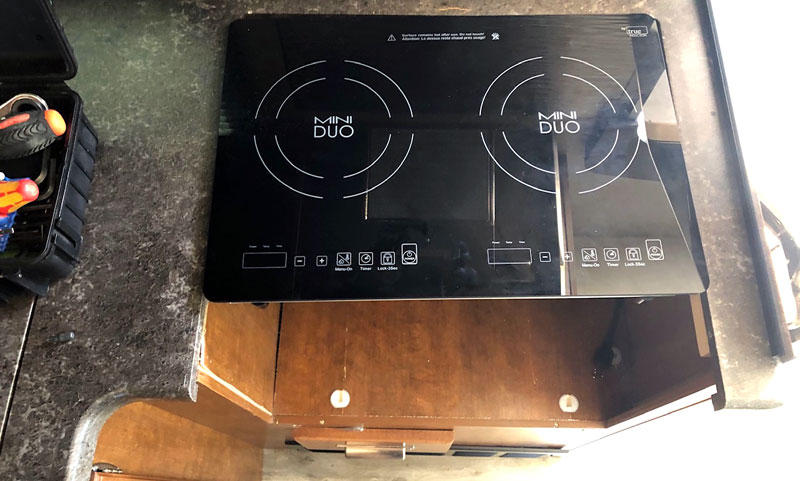
Above: Before and after. The picture on the right has the new induction stove top and the convection oven.
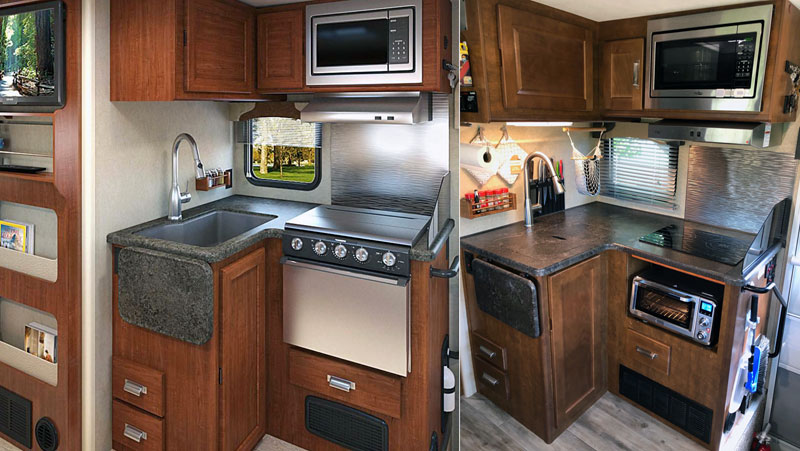
Our Lance 1172 came with an existing gas top stove with three-burners. Over the first year of ownership we discovered multiple drawbacks.
First, it can’t be used as countertop extension because it is not flush with the work space. Second, the cabin heats up significantly when using either the cooktop or oven.
Third, the oven is non-convection and food is very close to the flame. Even with the typical tricks, like adding a pizza stone), one can not solve the uneven heat distribution completely that burns part of your food while other parts are not done yet.
Fourth, the combustion gases are vented into the cabin and can cause bad air very quickly. This requires venting, even on the coldest of days.
Fifth, the combustion byproduct is H2O (water) which increases condensation issues inside the camper during the cold season.
And finally, the propane usage is one of the limiting factors of how long one can boondock. Reduction in consumption is helpful to extend times between refilling stops.
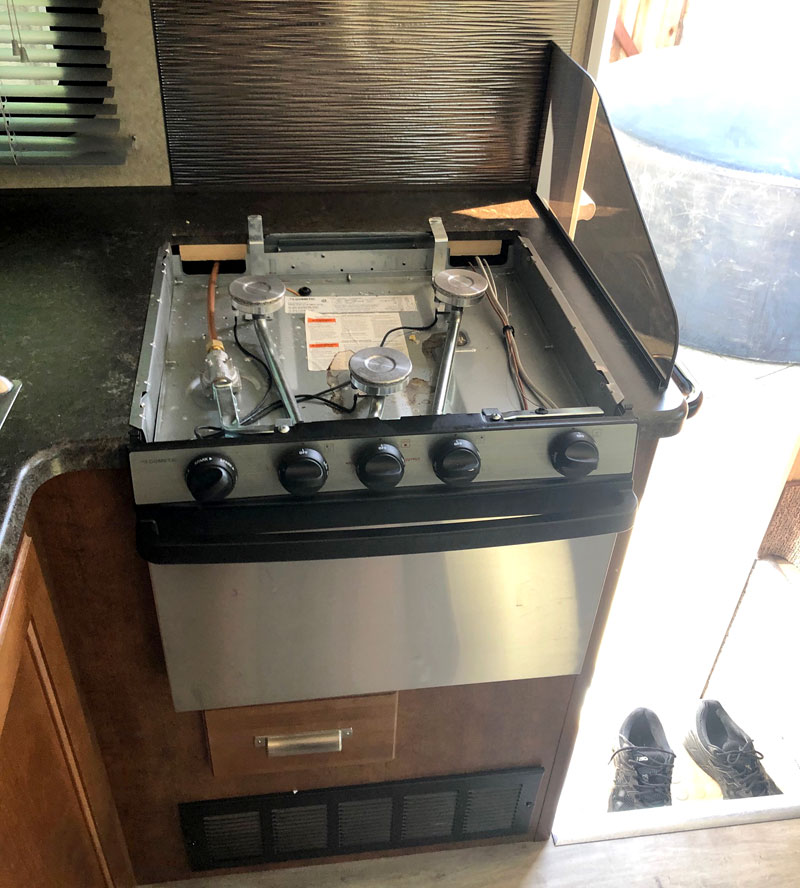
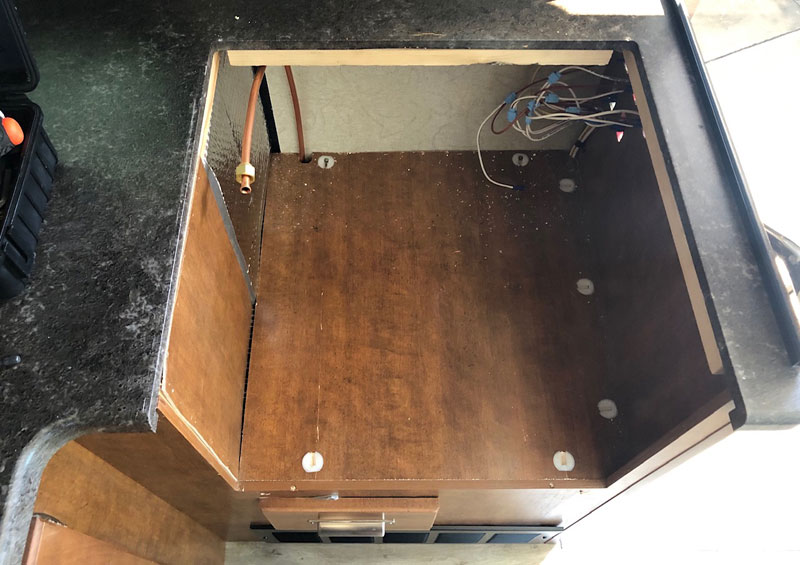
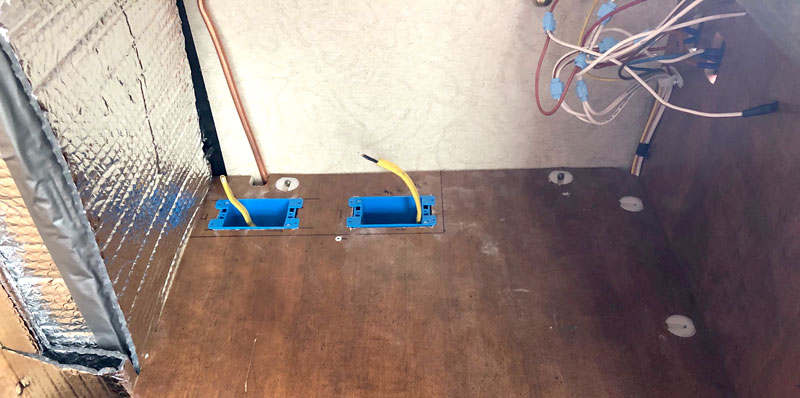
Removal of the stock propane oven and cooktop was pretty straight forward. Once it was removed, the gas line needed to be safely caped and moved out of the way.
I determined the available dimensions and went shopping for a 120-volt dual-induction cooktop and an insulated convection roaster oven air fryer.
The insulated type was selected to minimize heat losses (that need to be dealt with), reduce electrical consumption and faster preheat times.
The next step was to lay out the whole setup and check that it all fit together with the required clearances around the toaster oven.
The open section in front of the induction cooktop needed to be filled in and supported to ensure the full countertop space could be utilized.
Next up was the electrical supply. Both units are 15A or 1800-watt units. A total load of 3600-watts during meal prepping is not uncommon.
The standard 2500-watt onboard generator would not be able to handle this. A 600ah lithium battery system paired with 840-watts of solar panels and a Magnum 4024 MSH inverter has since replaced the generator. I plan on providing more details to that part at a later time.
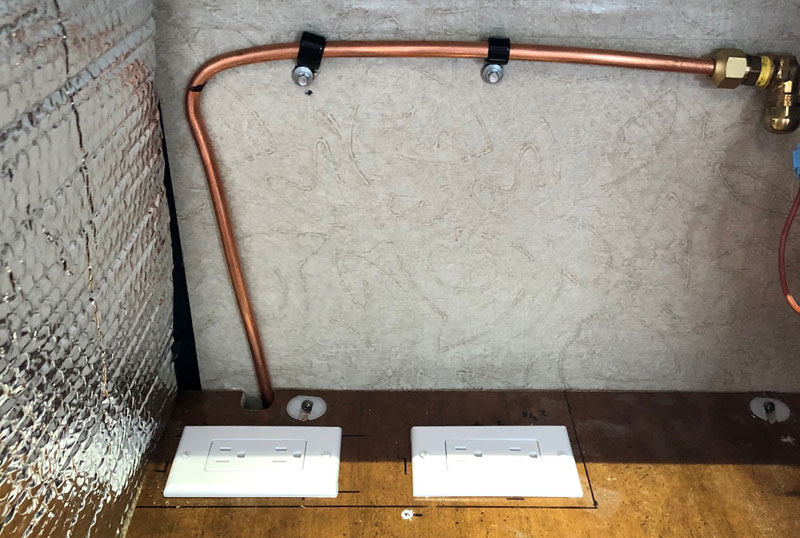
To plug-in both new appliances, I added two 120V outlets with 20A each in the area behind the original stove.
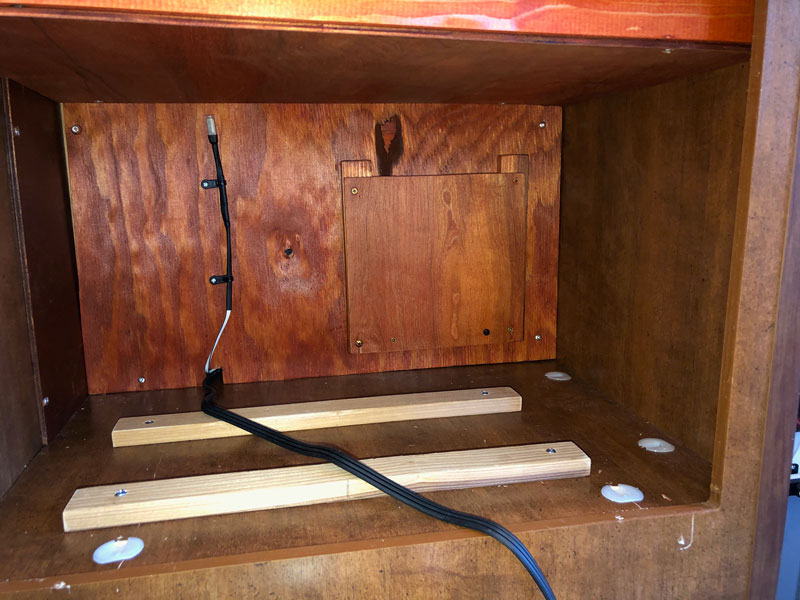
Both the cooktop and air fryer vent hot air during operation. To prevent them from dying a quick and painful death by overheating, a solution had to be found.
First, the cooktop and the toaster oven had to be separated. Otherwise, the up to 500-degree Fahrenheit hot air leaving the toaster oven would be sucked straight into the induction cooktop cooling fans.
Once separated from each other, the cooktop still has a lot of excessive heat that needs to be vented when in use.
An old fan from a bathroom vent is now connected to two thermal probes at the exit of the cooktop vent and in the top of the toaster oven compartment.
If it’s 110-degrees Fahrenheit in either of the two locations, he fan will turn on. The air will be pulled by the cooktop, down behind the toaster oven, and vent straight out to the roof of the toaster oven compartment. That will push out the sitting hot air.
All of the woodwork needed to be stained to somewhat match the existing wood and make it look more OEM like. Finally, the cooktop needed to silicone to insure no spillage will find its way down into the works.

We are extremely happy with this new setup. The convection oven is incredible and the induction cooktop is extremely easy to use without all the negatives of the original setup.
Best of all, we also retained the microwave for those times when you just want to heat up some cooked food.
It took me 60-hours to complete this modification and cost me $750. In my opinion, the skill level of this modification is hard.
Disclaimer: The modifications above are submitted by Truck Camper Magazine readers. It is your responsibility to make sure that any do-it-yourself modification project you undertake is safe, effective, and legal for your situation.
Enter Your Mods Now!
If you’d like to enter a modification you’ve done on your truck camper, click here. You can enter as many mods as you want, at any time. Good luck mod makers!


