Welcome to the seventh entry in October’s Mega Mod Contest. One Mega Mod will be published in every Email Alert in October. At the end of the month, we’ll hold a reader vote to determine October’s winner. Click here for information about the 2022 Mod Contest, including how to enter.
Johnny Noel, Huntsville, Texas
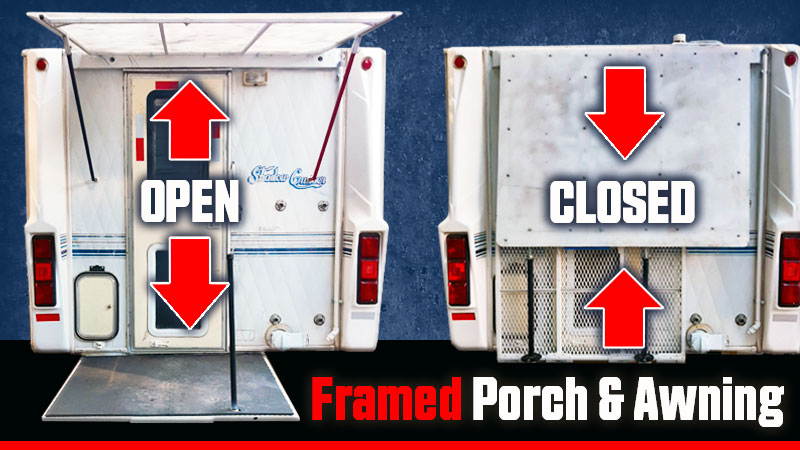
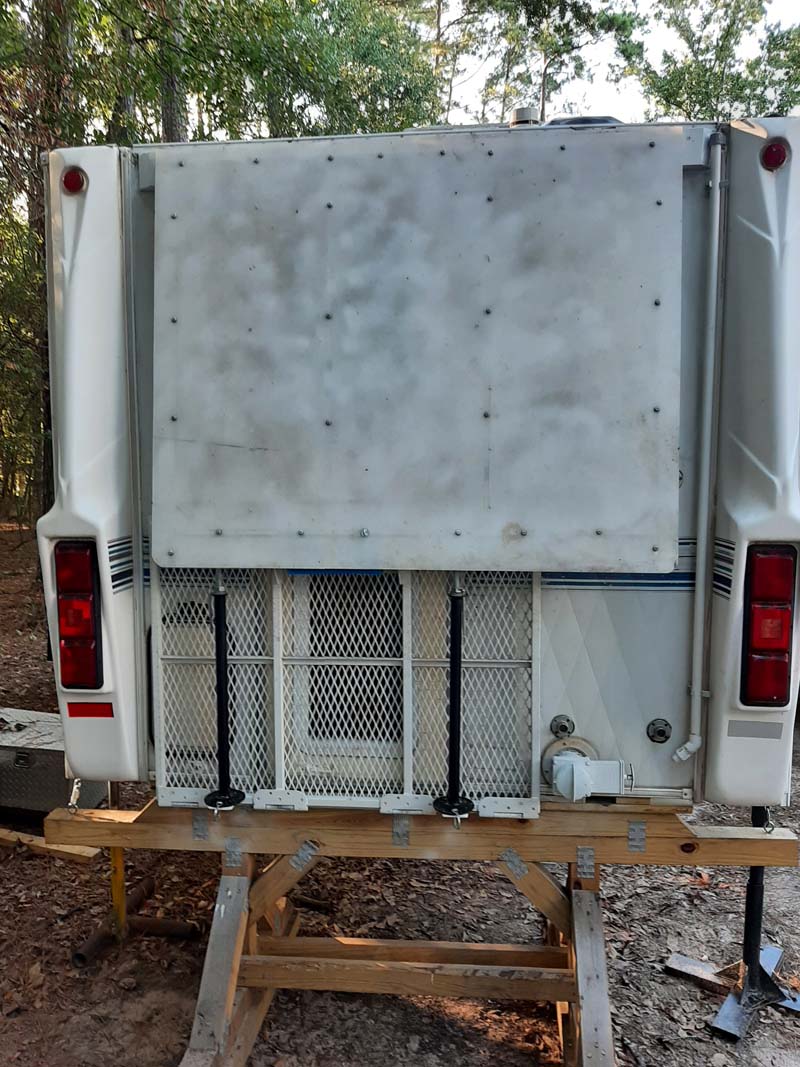
Framed Rear Porch and Awning
2001 Chevy Silverado 2500
1996 Shadow Cruiser
I wanted a rear porch that was out of the weather before entering the camper. It needed to be easy to access and have a place to keep dirty footwear.
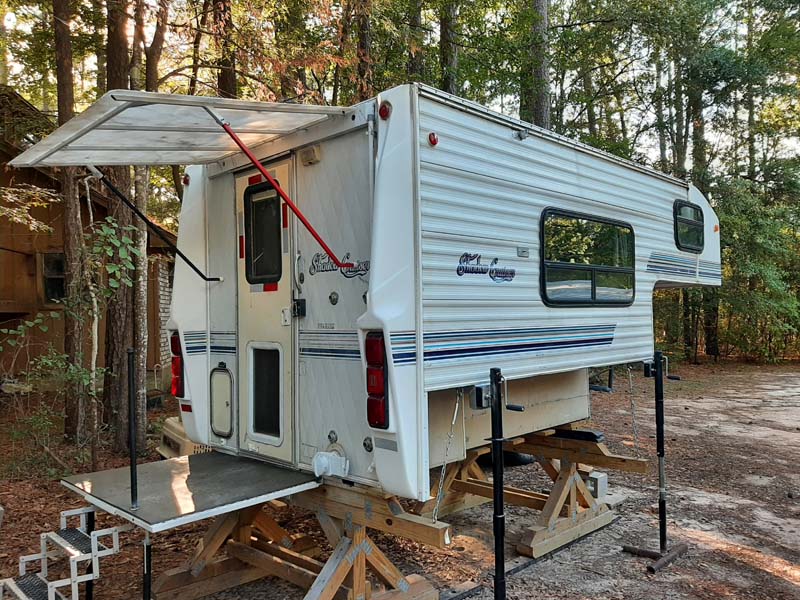
The porch and awning were prefabricated and bolted to the camper. The bottom porch frame is made from 1-inch square carbon steel tubing. The top awning frame is made from 3/4-inch square carbon steel tubing. The porch platform is lightweight expanded metal. The awning roof is plexiglass. The porch and awning are MIG welded.
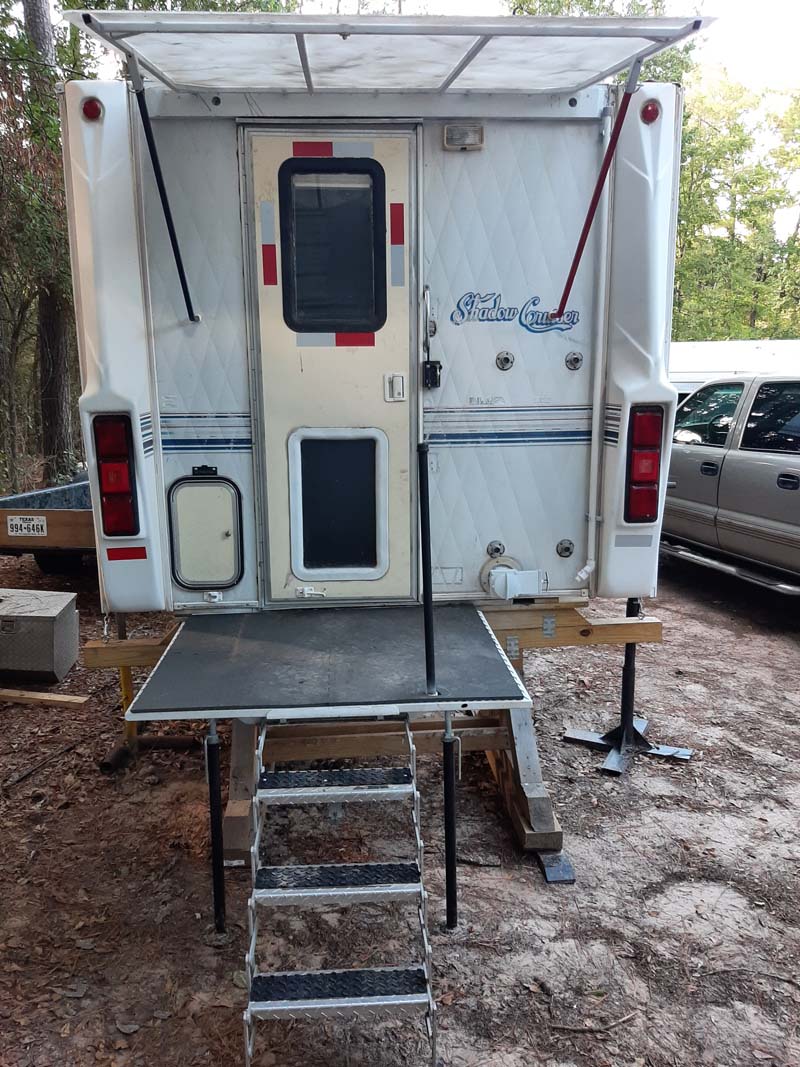
Both pieces weigh about 70-pounds in total. The jack stands are actually RV slide-out stands. The stands compensate for the uneven ground without having to use shim pads. All breakdown points are all pinned with D-pins. The porch will support over 400-pounds.
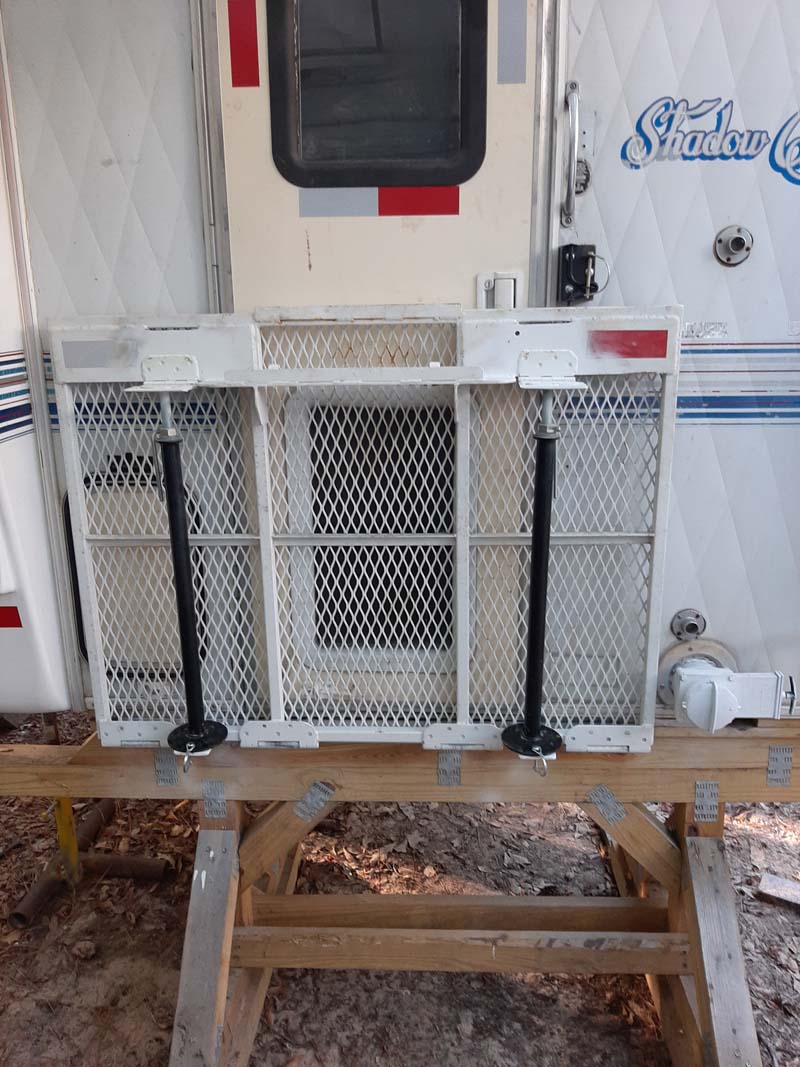
The porch and awning take less than four minutes to deploy and less to take down. They are very easy to handle, especially for an old man bumping 70 years old. For travel, the porch hinges up and locks onto the camper. The roof hinges against the porch and is fastened with a strap against the porch.
This modification has worked out great. My wife and puppy love it, especially after I added a cushion foot pad to the porch.
Materials needed:
Two slide-out support jacks – $50 (Amazon)
Four 8-inch T-gate hinges – $6 each (Home Depot)
Two 4-inch interior door hinges – $4 for a pack of 2 (Home Depot)
4-foot × 5-foot x 3/16-inch plexiglass (had it in the shop)
20-foot 1-inch square tubing – $35 (local steel supply)
20-foot 3/4-inch square tubing – $25 (local steel supply)
7-foot 2-inch x 2-inch x 3/16-inch angle iron – $15 (local steel supply)
4-foot 3-inch x 3-inch × 3/16-inch flat bar – $7 (local steel supply)
Assorted nuts, bolts and D-pins – $20, (Home Depot)
3/4-inch ×24-inch pipe with threaded cap and coupling – $15 (Home Depot)
Floor mat – $10 (Harbor Freight)
It took me about 12 hours to complete this modification and cost me approximately $300. In my opinion, the skill level of this modification is medium-hard.
Disclaimer: The modifications above are submitted by Truck Camper Magazine readers. It is your responsibility to make sure that any do-it-yourself modification project you undertake is safe, effective, and legal for your situation.
Enter Your Mods Now!
If you’d like to enter a modification you’ve done on your truck camper, click here. You can enter as many mods as you want, at any time. Good luck mod makers!


