Welcome to the fifth entry in September’s Mega Mod Contest. One Mega Mod will be published in every Email Alert in September. At the end of the month, we’ll hold a reader vote to determine September’s winner. Click here for information about the 2020 Mod Squad Contest, including how to enter.
David Romero, Shreveport, Louisiana
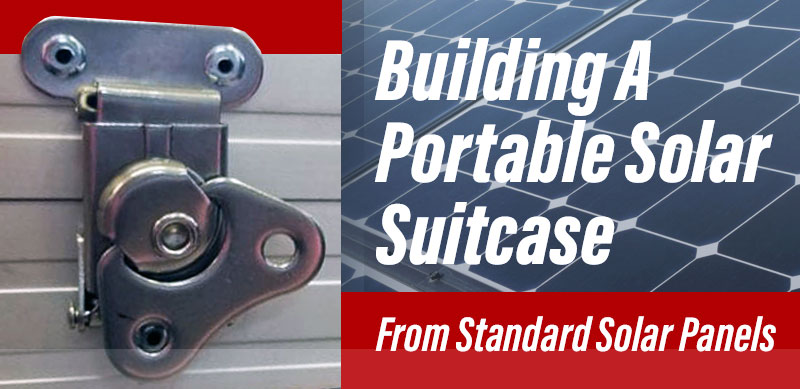
Portable Solar Suitcase From Standard Solar Panels
2017 Ram 2500
2017 Cirrus 820
When I installed 600-watts of solar on my roof I removed the two original panels that came with my Cirrus 820. You can see the entire roof installation another TCM mod entry called, Mega 600-Watt Solar Panel Installation.
What follows is the process I went through to make a solar suitcase out of the standard solar panels that came with my Cirrus 820.
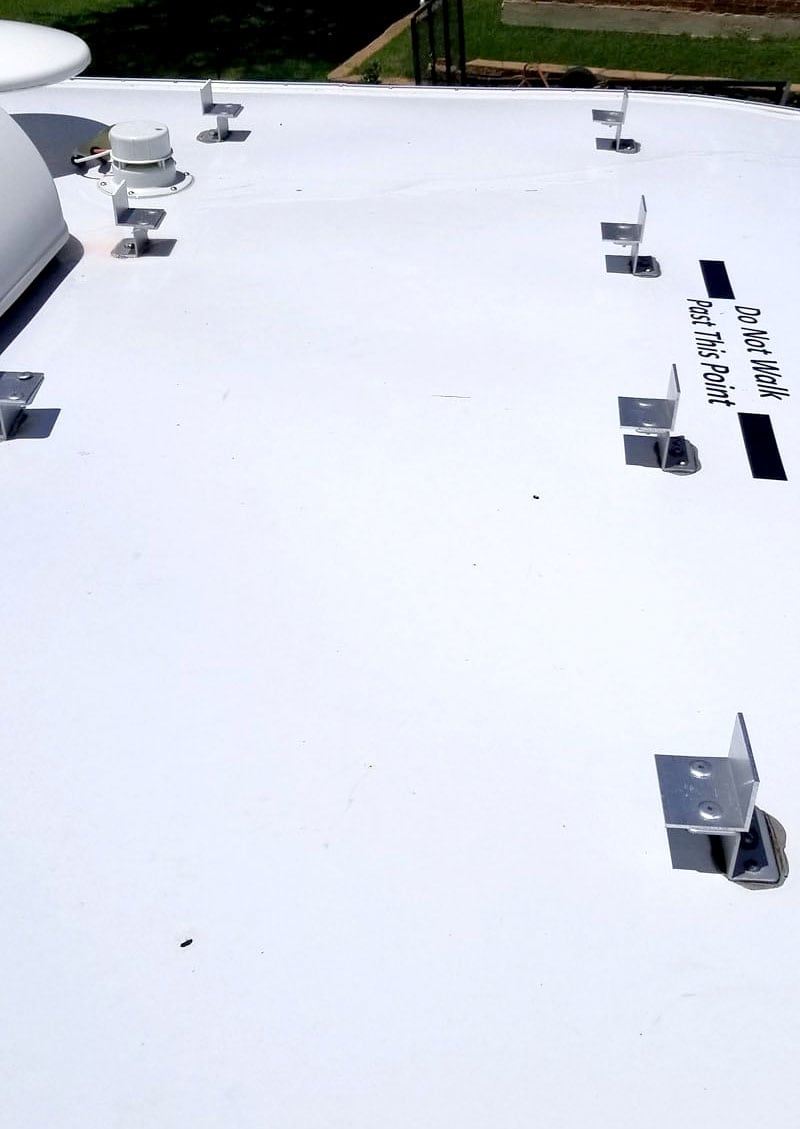
In the above photo, you can see where the solar panels were originally installed. I replaced these two factory solar panels with one Monocrystalline panel in this same location. Bracket modifications were needed for that installation.
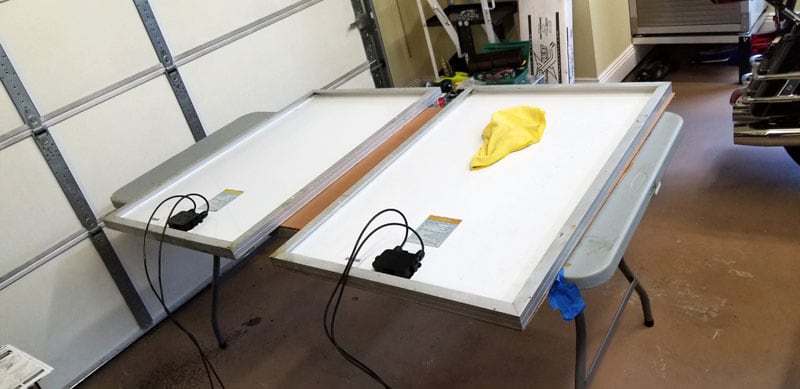
The process begins to make a portable suitcase solar panel.
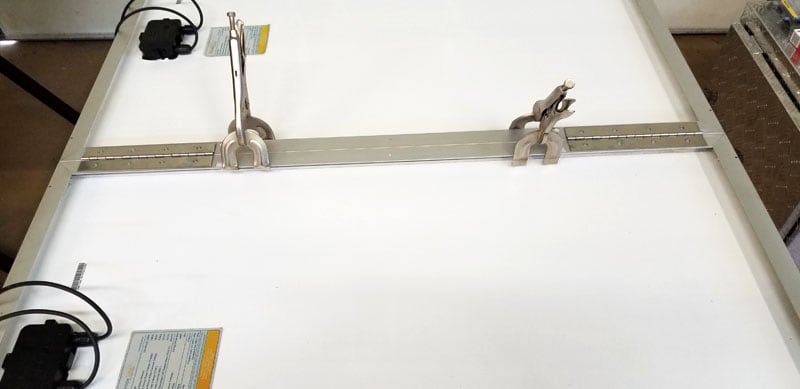
I moved the solar panels together and laid out stainless-steel piano hinges.
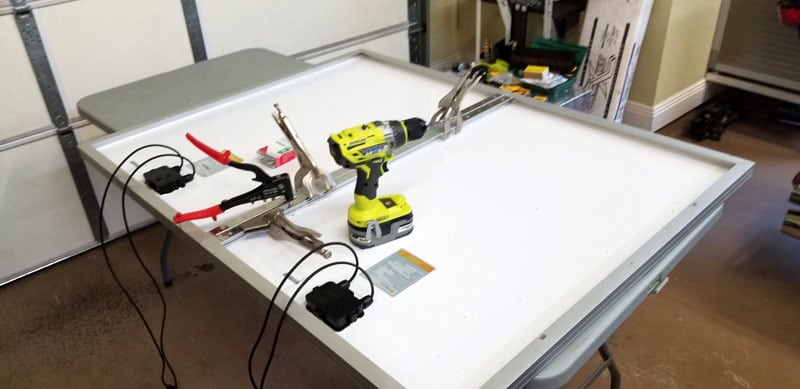
Then I drilled holes and riveted the solar panels together with the piano hinges.
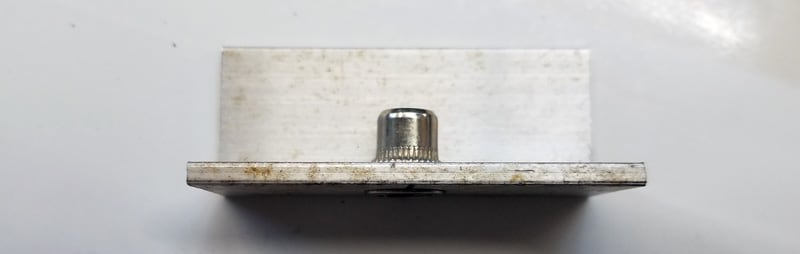
I cut and set Zert nuts into aluminum angle for holding the suitcase legs. Above is a close-up of the rivet nut.
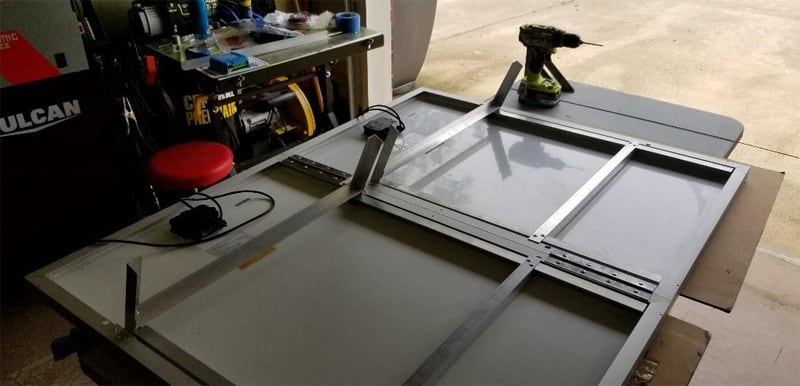
I cut some aluminum angle for support legs. The support legs would be attached to the panels using the rivet nuts and star screws.
Rivet nuts angles were riveted to the panels. Then I cut legs for the panels and sized them for standing at proper angles for the season.
I installed two adjustable leg sets. I want a very short set for the summer to allow a 3 to 10-degree angle and a taller set to allow angles of up to 50-degrees, or better.
In the picture above you can see the shorter legs extended. You can also see the longer legs sitting inside the panel.
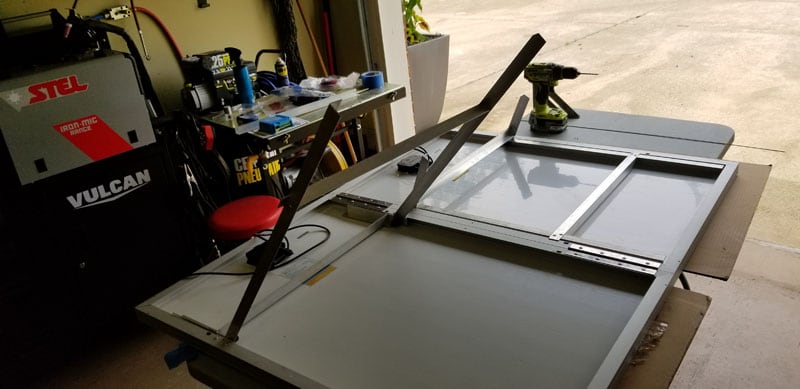
The longer legs and the shorter legs are attached to the same rivet nut and star nut.
I added angled gussets to support the long legs to make sure they do not rack. Notice that the cross members of each set of long legs extend across the panel’s edges. This keeps them from riding inside the panel and rubbing into the panel back.
Also, notice how the cross members are offset on each panel. When closed they will not reside on top of each other.

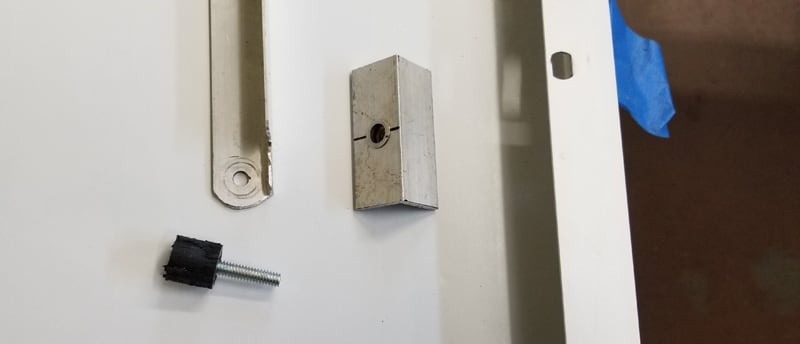
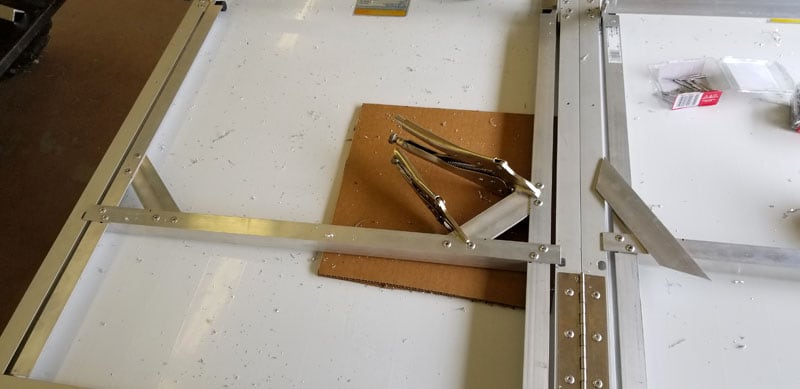
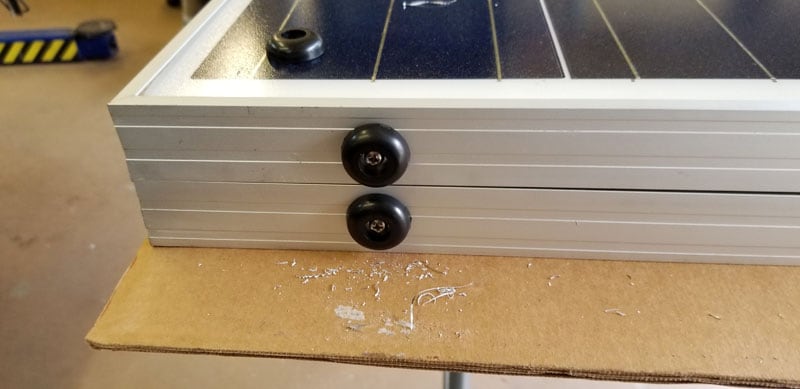
A close view of the attachment points for both sets of legs. They are stacked for fit. The star nuts ground down. At the time of this picture, I did not have tri knobs that were small enough to fit. I did purchase the tri knobs I needed and replaced with ones that were larger.

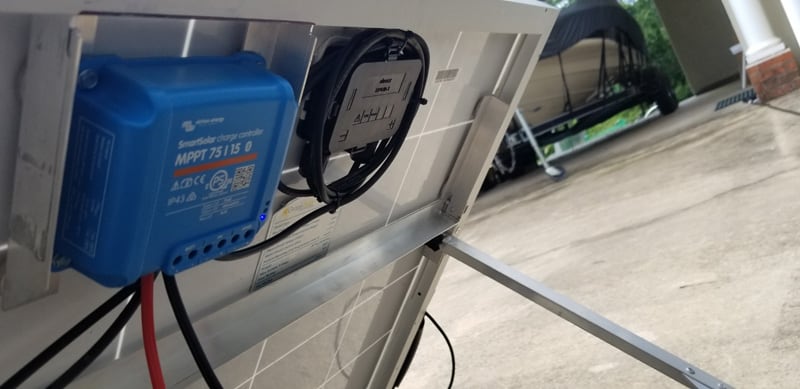
I added a Victron 75/15 SmartSolar MPPT controller to the portable panels. This complements the larger Victron 100/50 SmartSolar MPPT for the 600-watts on the roof and the Victron BMV-712 smart battery monitor. With this set-up, I can use my phone and/or tablet to monitor everything via Bluetooth.
I installed felt pads under the aluminum angle mount. If you look closely at the photo above you can see one of the felt pads on the left angle bracket. This will insulate and cushion the controller and the bracket from damaging the backside of the panels.
I mounted the controller solid. In contrast, some of the portable suitcase solar set-ups use a hinge to read the controller. Since this controller is Bluetooth and has no display, I do not need to hinge mount to see the controller.
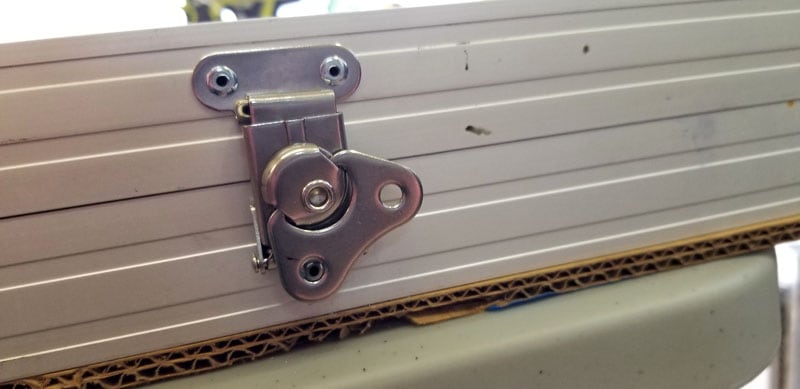
When I closed up the panel I used spring draw latches to hold the panels closed.
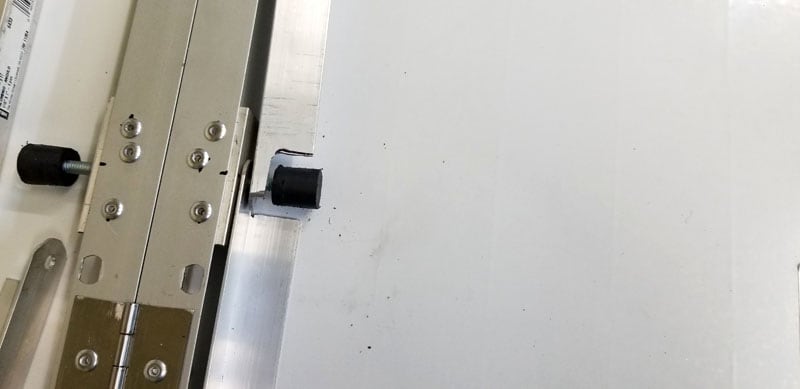
I added two bump stops to the bottom short end of each panel to allow standing the panels when I am ready to swing them open.
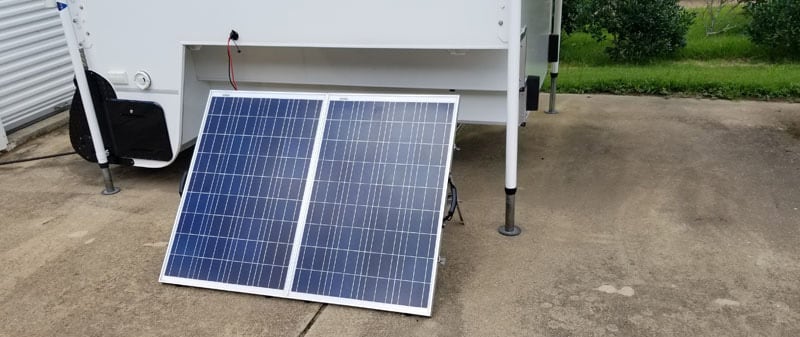
Above is a picture from my maiden run for the suitcase panels. You will see that I added a 10-awg wire port on the side of the camper. This ties directly to the lithium battery pack.
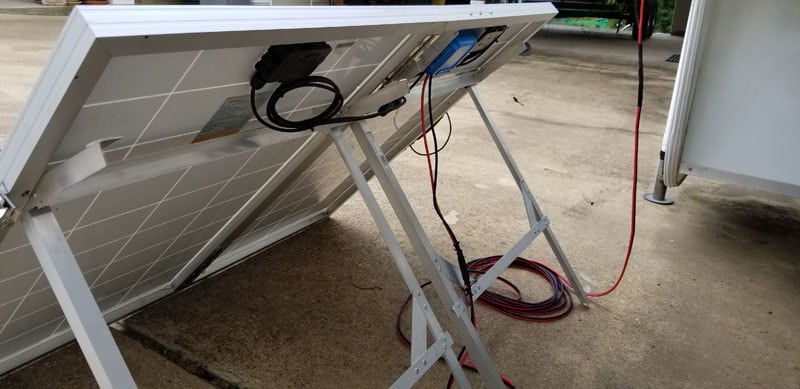
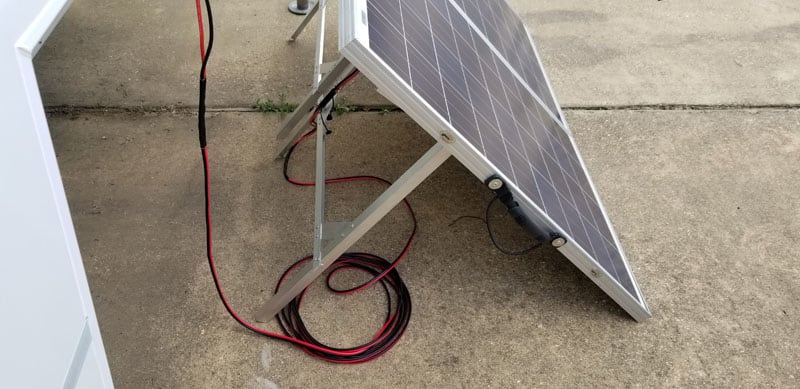
In the picture above you can see the panel with the long legs extended. The solar suitcase is plugged into the camper. Notice the 25-feet of 10-awg wire coiled on the ground. I also have another 25-feet of the same 10-awg cord as an extension should I need to move these panels out further away. In total, I have a 50-foot range.
This side shows the latch ends and one of the two kayak handles that I attached. The handles should take the UV and weather very well. I used stainless steel washers for a better hold on the handles and I riveted them into the panel.

I moved the short legs out so that you can see how they integrated with the long legs. I use one or the other. They use the same star nut to loosen and tighten.
I cut the two panel wires and ran the panel in series. I used an M4 connector between the two panels and zip tied the wires in place for a clean presentation.
It is easy to open and close my solar suitcase considering the size and weight. The panels are a little large for a suitcase solar panel system, but I had the panels and needed to do something with them.
The actual dimensions of the solar suitcase is about 40.2” x 26.4” x 3.25”. The suitcase weighs about 50-pounds with the cords inside. It’s handy that the folded suitcase accommodates the two 25-foot 10-awg cords and the Victron controller inside.
This project required a lot of careful fitting and measuring to ensure everything fit nice and tidy into the folded position. There was a lot of drilling and riveting to assemble all the components.
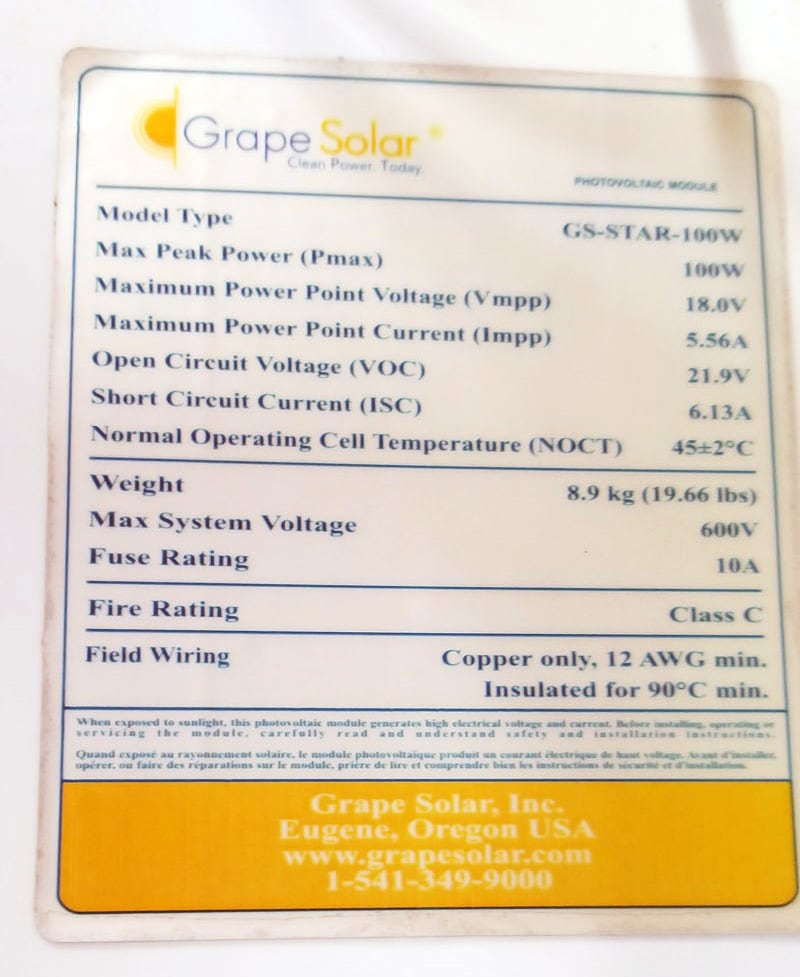
Here is a picture of the inside sticker if you were curious about the type and size of each solar panel.
The panels are about $100 each if you were to purchase them on Amazon. The controller was just under $90. The aluminum I purchased at a big box store, so it was not the cheapest way to buy it. I have about $200 into the build not counting the cost of the panels. With the panel cost, the complete build would be about $400.
I would rate this project as moderate to hard. You need some special tools to complete the solar suitcase and system.
Disclaimer: The modifications above are submitted by Truck Camper Magazine readers. It is your responsibility to make sure that any do-it-yourself modification project you undertake is safe, effective, and legal for your situation.
Enter Your Mods Now!
If you’d like to enter a modification you’ve done on your truck camper, click here. You can enter as many mods as you want, at any time. Good luck mod makers!


