
Forming Square Mounting Area Conduit
Welcome to the fourth entry in April’s Mega Mod Contest. One Mega Mod will be published in every Email Alert in April. At the end of the month we’ll hold a reader vote to determine April’s winner. Click here for information about the 2020 Mod Squad Contest, including how to enter.
David Romero, Shreveport, Louisiana
Mega 600-Watt Solar Panel Installation
2017 Ram 2500
2017 Cirrus 820
I began by removing two 100-watt solar panels that came installed with the camper.
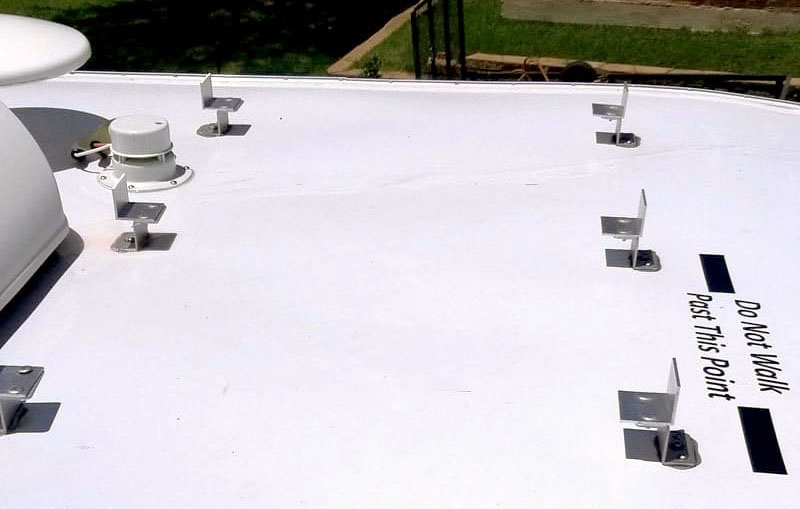
The original solar mounts were modified to accept the new 200-watt Monocrystalline solar panel. I added 2-inch aluminum angle to the original mounts to accept the slightly wider panel.
I did not want to add any more penetrations to the roof. I removed and resealed all of the original mounts with pure silicone to insure no leakage and riveted all the new aluminum to the original mounts.

My next goal was to add two 200-watt solar panels to the rear Maggie Rack. As I stated above, one 200-watt panel was installed in the old location in front of the air conditioner.
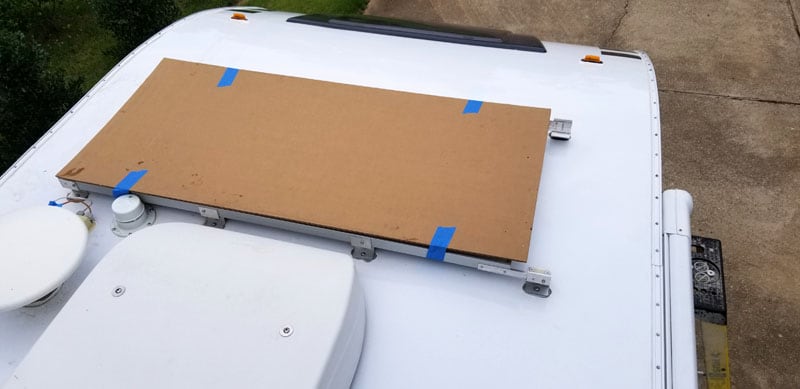
You will notice that panel is slightly shorter than the two original 100-watt panels, so I had to extend the panel with aluminum angle to be seated on the last mounts. I needed to keep the panel to the passenger’s side. I will explain shortly the reasoning for that.
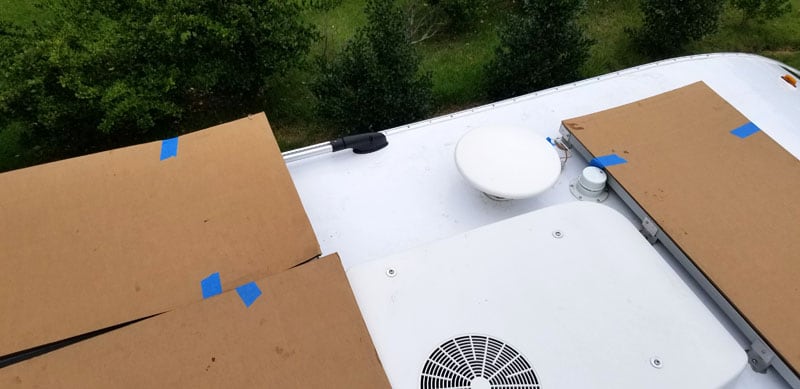
In the above picture all of the panels are mounted. Yahoo! 600-watts of solar.
I took the two original 100-watt panels that I removed and turned them into a suitcase portable panel (and an upcoming mod for TCM). With the rooftop and suitcase, I now have the ability to supply 800-watts of solar when dry camping.

The two panels on the Maggie Rack overhang the awning by only inches. They do not protrude over the back as it looks in the above photo.
Forming Square Mounting Area Conduit
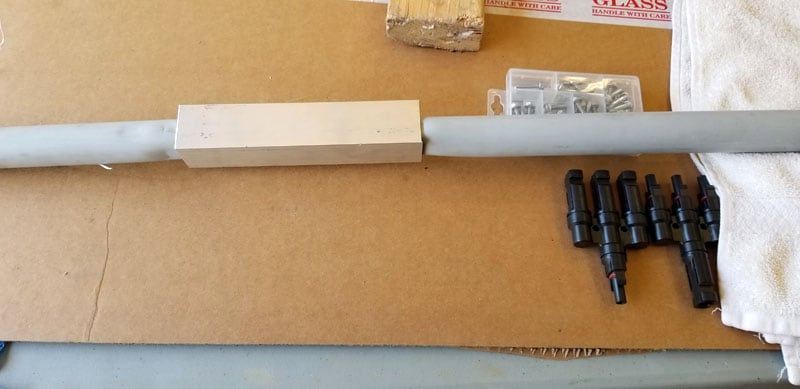
Aluminum Angle For M4 Connector Mounts
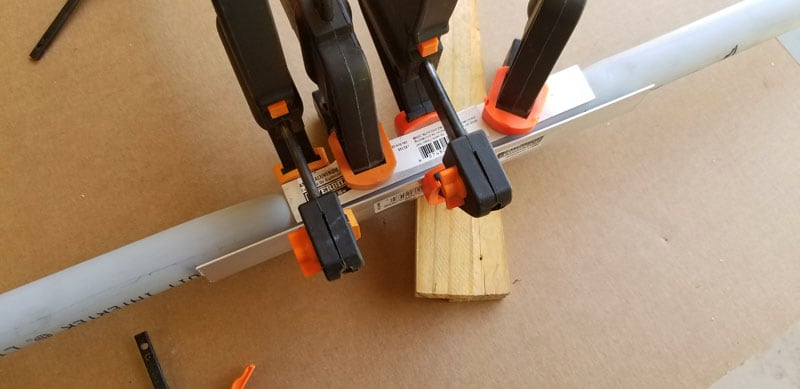
Aluminum Angle Clamped To Heated Conduit To Square Tubing
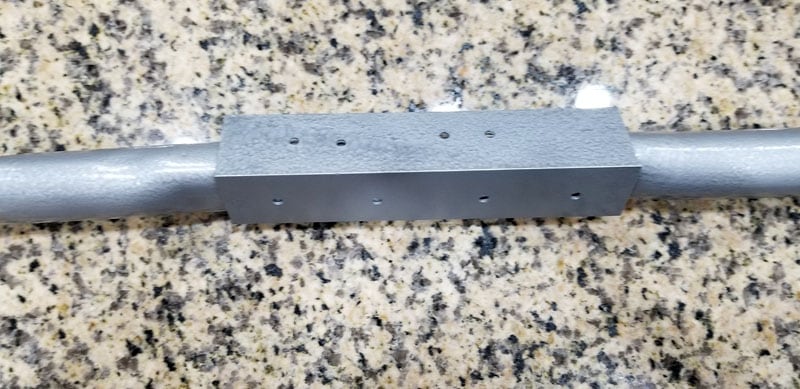
M4 Bracket Drilled Ready To Mount
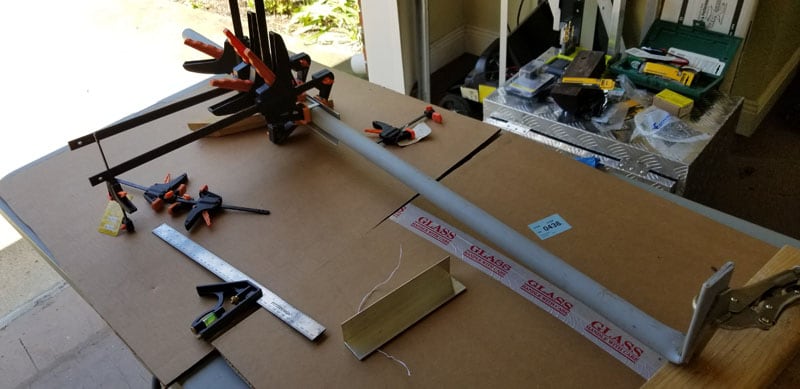
Above I am heating and shaping a piece of 1-1/4” electrical conduit. I had a desire to not have any cables lie on top of the roof of the camper. I decided to build a cable support bar. I shaped the conduit using a heat gun to flatten the ends for attachments to the panels. I also used some angle aluminum to square off a section of the conduit to accept aluminum angle and the MC-4 branch connectors.
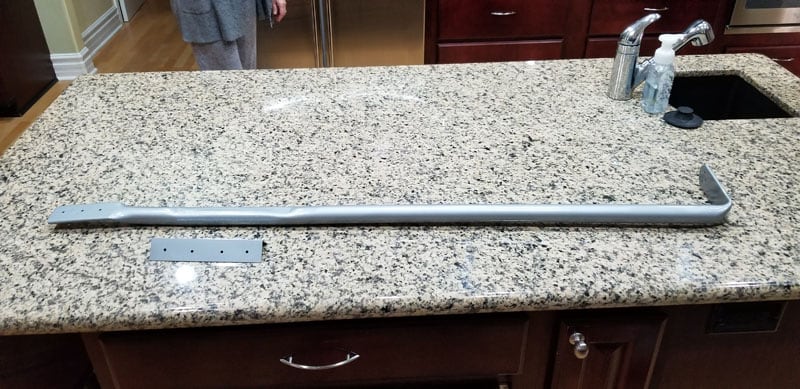
Above: Forming the square position on the conduit and the completed and painted version of the conduit.

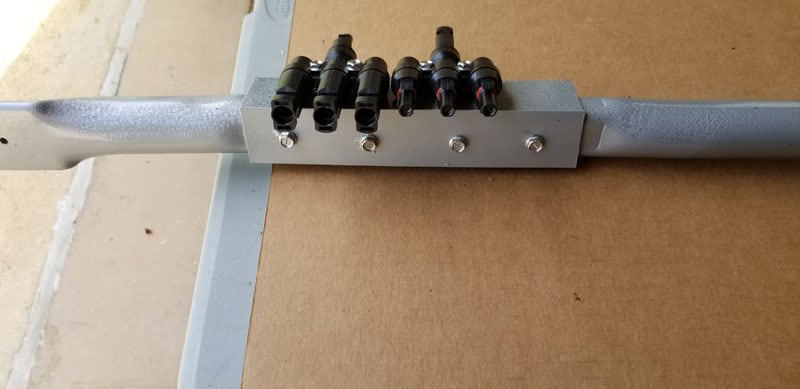
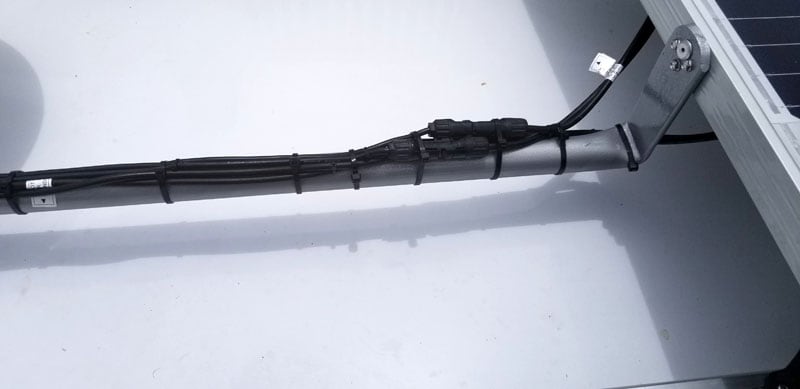
You can see above where I attached the conduit to the front and rear panel with the branch connector excepting the wiring.
I cut the wires to length and crimped on new MC-4 connectors. I did not want a lot of loose solar cable.
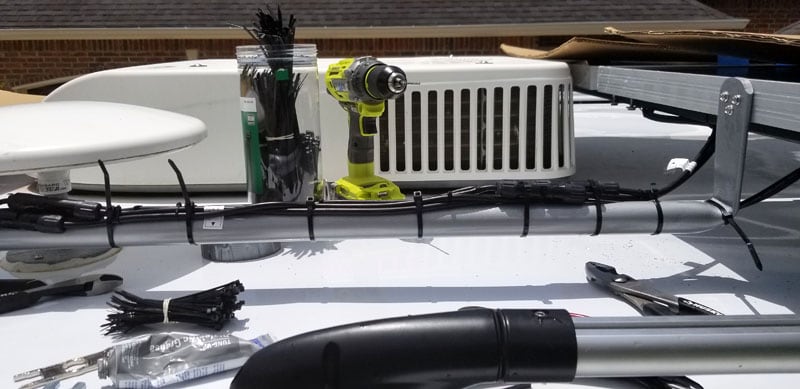
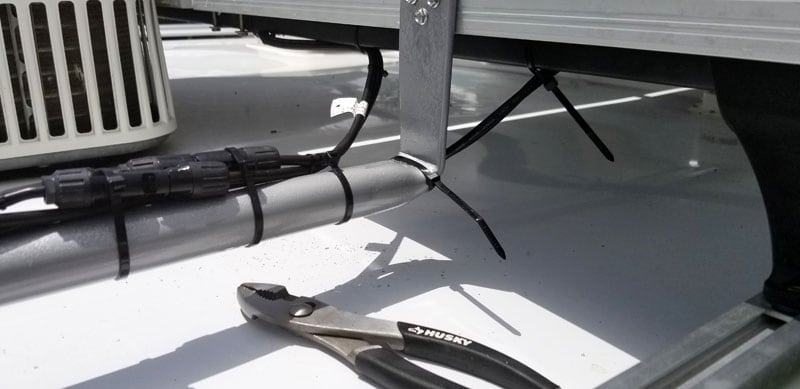
Above and below: The process of wiring and mounting the cables. In the top picture you can barely make out the roof penetration just behind the MC-4 branch connectors forward of the TV antenna. It is off-white in color. This is where it enters the camper, and it is the original penetration.
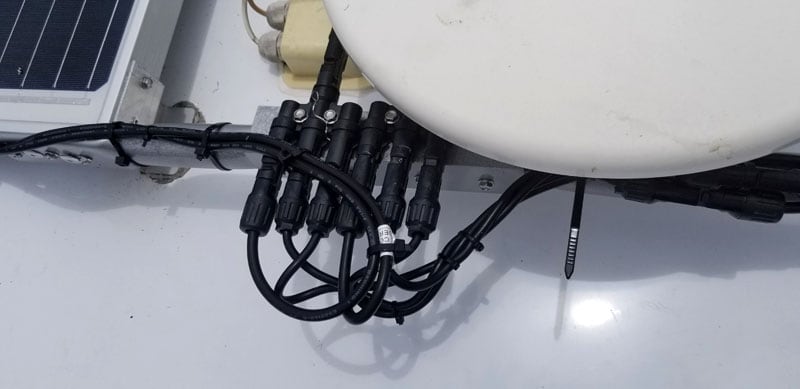
Above: Here is a better look of the penetration for the solar cables. These wrap under the antenna to the branch connector.
Above: Nice and clean cables, no roof top tape or sealer.
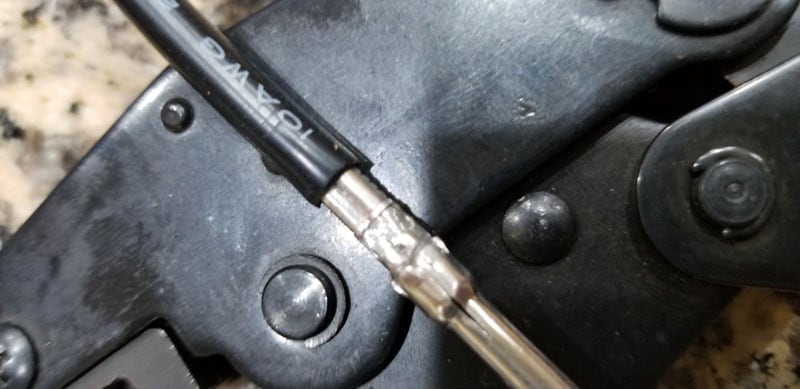
Above: These crimpers with the correct jaws in place crimp the connectors as if it was a factory crimp.
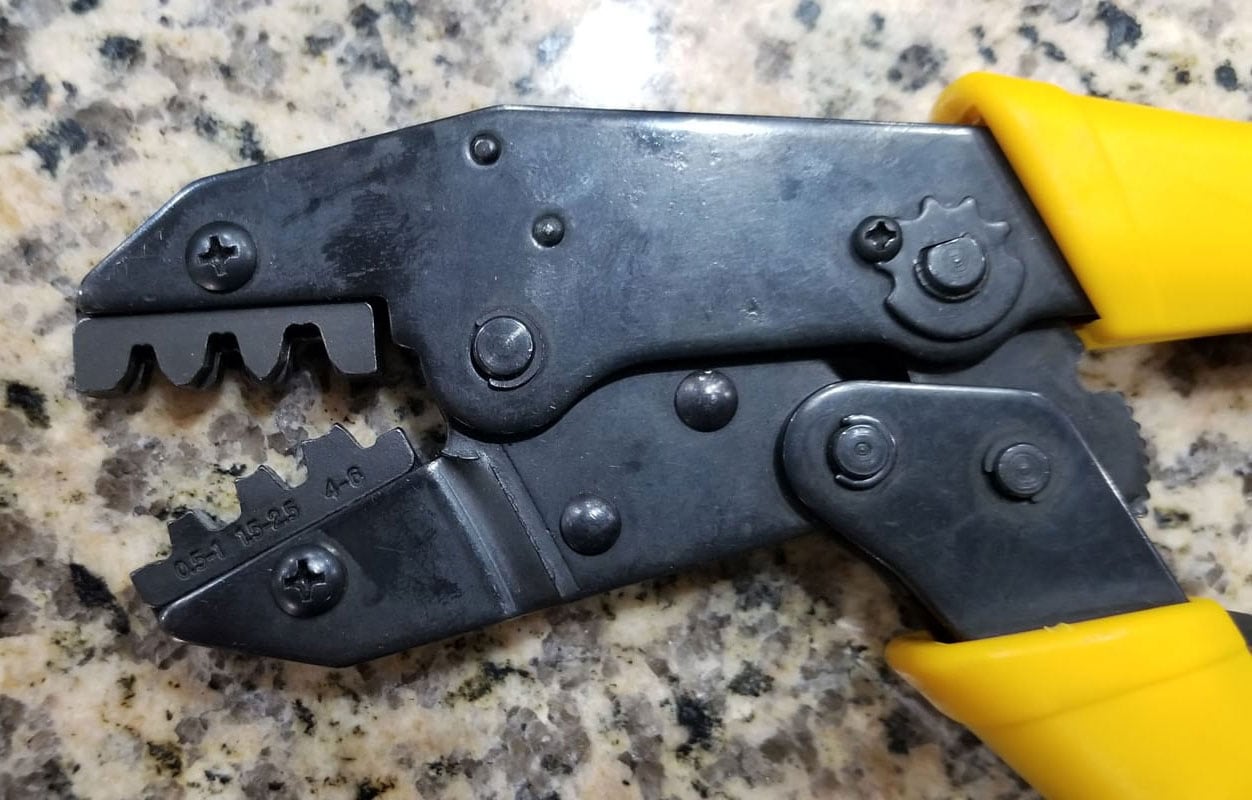
Of course, you need the tools to do the job. I crimped all MC-4 connectors to ensure the electrical contacts stayed secure.
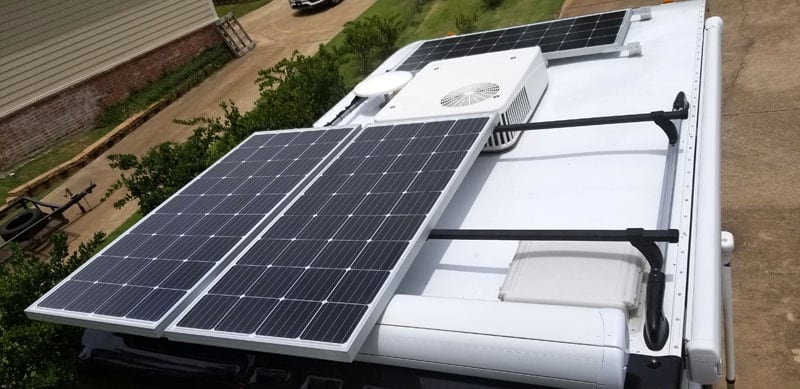
Above: The completed 600-watt solar panel installation
I have these panels running to a Victron SmartSolar MPPT 100/50 charge controller. These panels now feed into a 600ah lithium battery bank. The bank feeds a Xantrex XC 2000-watt inverter/charger, that supplies power to the entire camper including the 9200 BTU air conditioner. Yes I can power the air conditioner with the batteries.
I monitor the system with the Victron BMV-712 smart battery monitor and I use a Victron SmartSolar MPPT 75/15 for the 200-watt solar panel suitcase.
This project took about 8 hours to install after having all of the materials in place to proceed. The total project cost under $1,200. I think the skill level is advanced but, with a little reading and YouTube, most people could take this on.
It can be a little challenging if you have limited knowledge. My advice is to do your homework, read and reread everything and lay out your plans. I measured and planned this project more hours than it required me to do the actual install.
Disclaimer: The modifications above are submitted by Truck Camper Magazine readers. It is your responsibility to make sure that any do-it-yourself modification project you undertake is safe, effective, and legal for your situation.
Enter Your Mods Now!
If you’d like to enter a modification you’ve done on your truck camper, click here. You can enter as many mods as you want, at any time. Good luck mod makers!


