Welcome to the third entry in May’s Medium Mod Contest. One Medium Mod will be published in every Email Alert in May. At the end of the month, we’ll hold a reader vote to determine May’s winner. Click here for information about the 2022 Mod Contest, including how to enter.
Philip Bogardus, Bothell, Washington
Bugs Out Box For Campers
2014 Ford F350
2018 Northern Lite 8-11 EX CDSE
We have all have suffered from the flying bugs in our truck campers on those summer evenings. They drive you nuts as they congregate around the lights.
We use our truck camper mainly for fly fishing trips to the Yakima River in eastern Washington. When the sun goes down, the mayflies come in hoards with a few mosquitoes, caddis, and some other flying bugs following them.
The mayflies don’t bite, but they are prolific and bug the livin’ bejesus out of us. They follow us in the door every time the door opens. And I swear some of those buggers are so small they can get through the mesh of the screens.
Originally we bought a bug catcher that used a blue light and a fan. The light drew the bugs in and the fan sucked them down into a chamber and fly paper patch. This was quite effective if no other lights were on.
The problem was that it really didn’t work great when there were other interior camper lights on. The bugs always seemed partial to the white light of our LED fixtures. If we wanted to read a book or magazine, we couldn’t because when we turned on a light the bugs all headed over for that light and… wait for it… bugged us!
One weekend my queen, aka my wife, brought some clear window fly traps (a more modern version of fly paper). Her goal was to catch the black flies that sometimes showed up during the day. After the sun went down those darn mayflies came out and headed for the lights. I thought to myself, “Maybe if I taped one of those fly traps over the light, I could catch those bugs and enjoy the evening”. So, I did that and soon the fly trap was covered with bugs.
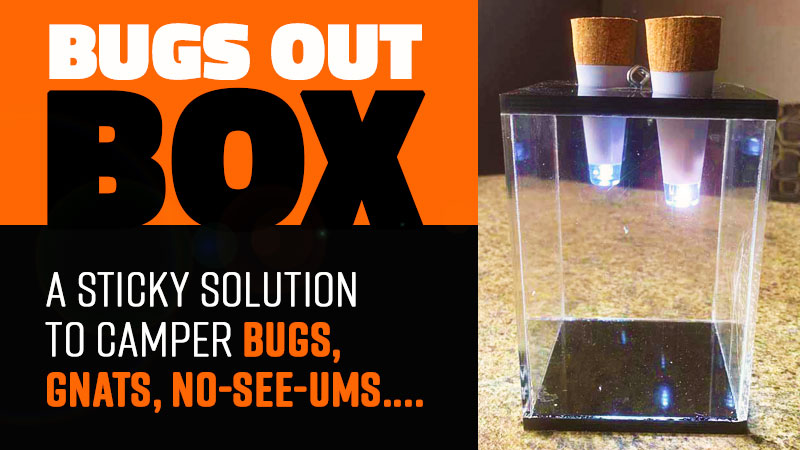
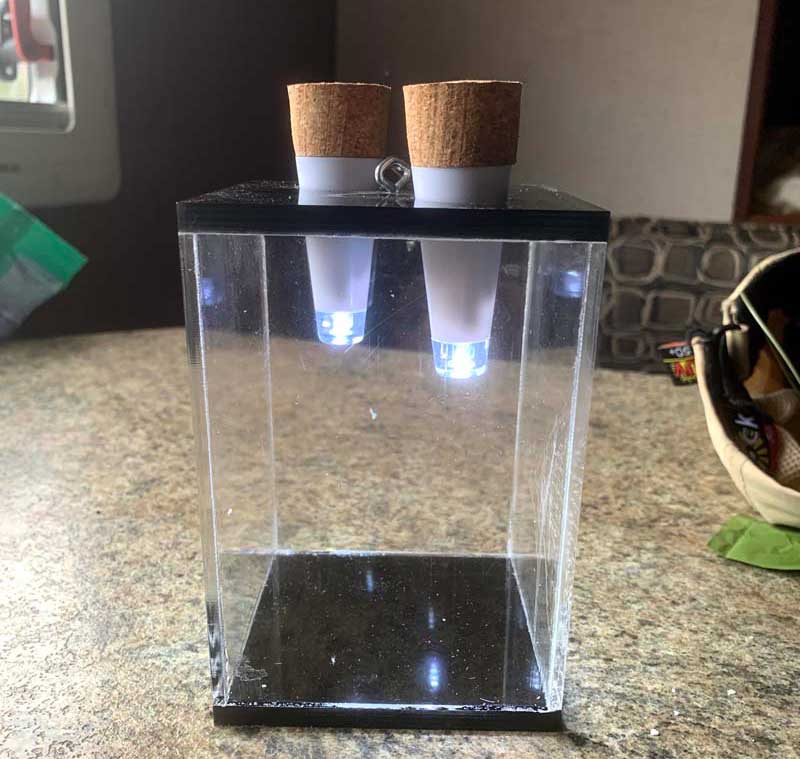
Instead of taping the fly trap over the light, I decided to build a box out of Plexiglass to attach the fly trap to. I built the box with a black top and bottom and the sides were clear. I sized the dimension of the clear sides to fit a half sheet of fly paper.
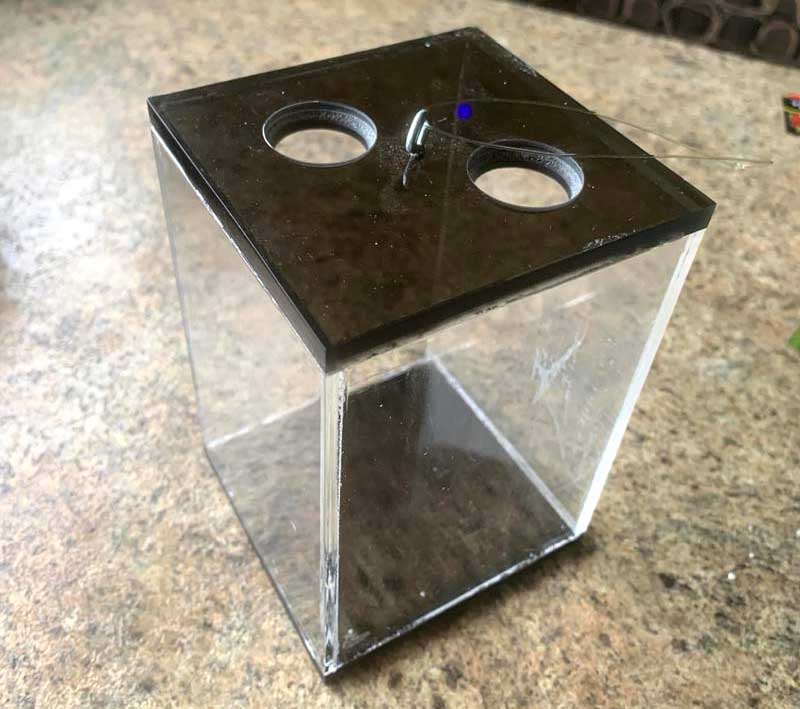
In the top black piece, I drilled two holes sized to fit cork-shaped bottle lights (from Amazon).
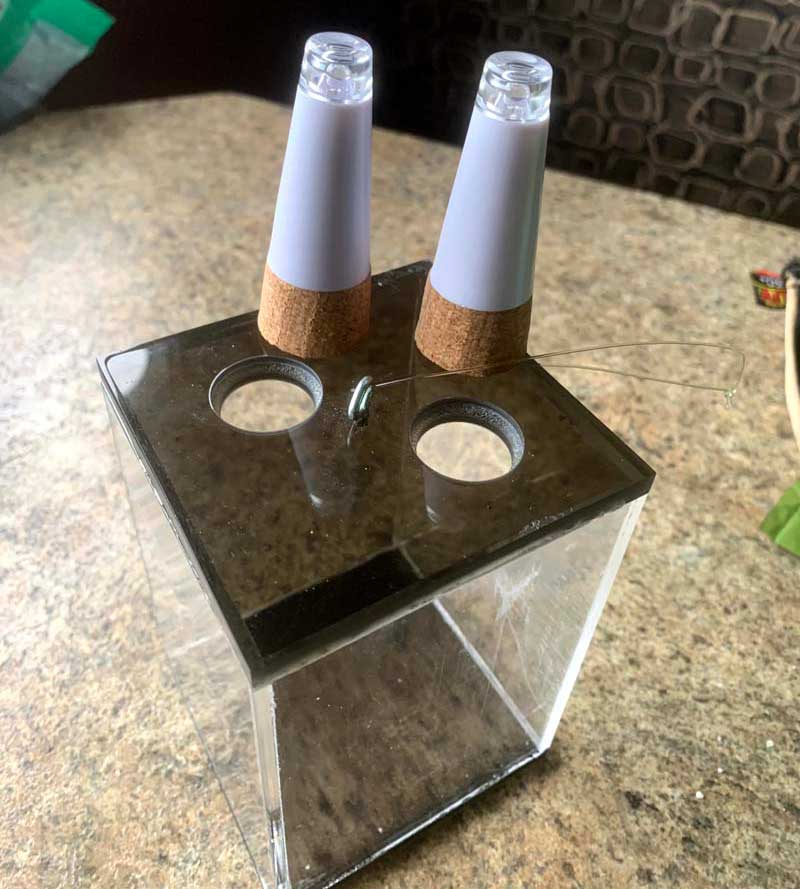
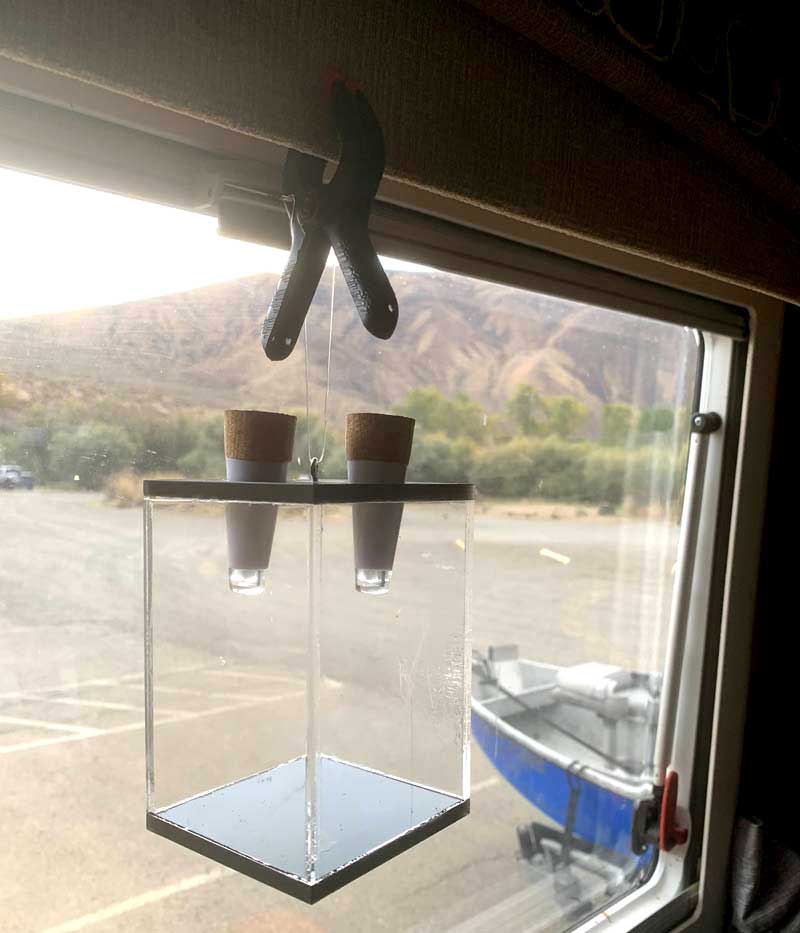
Then I glued up the plexiglass box and added a cup hook on top so I could hang it anywhere I wanted in the camper. Now I just turn on the bottle lights and put them into the holes.
I added a piece of 30-pound monofilament to hang it from. I found that a cheap spring clamp from Harbor Freight worked great for hanging it from the window valance. You can also set it on the table or counter if you want.
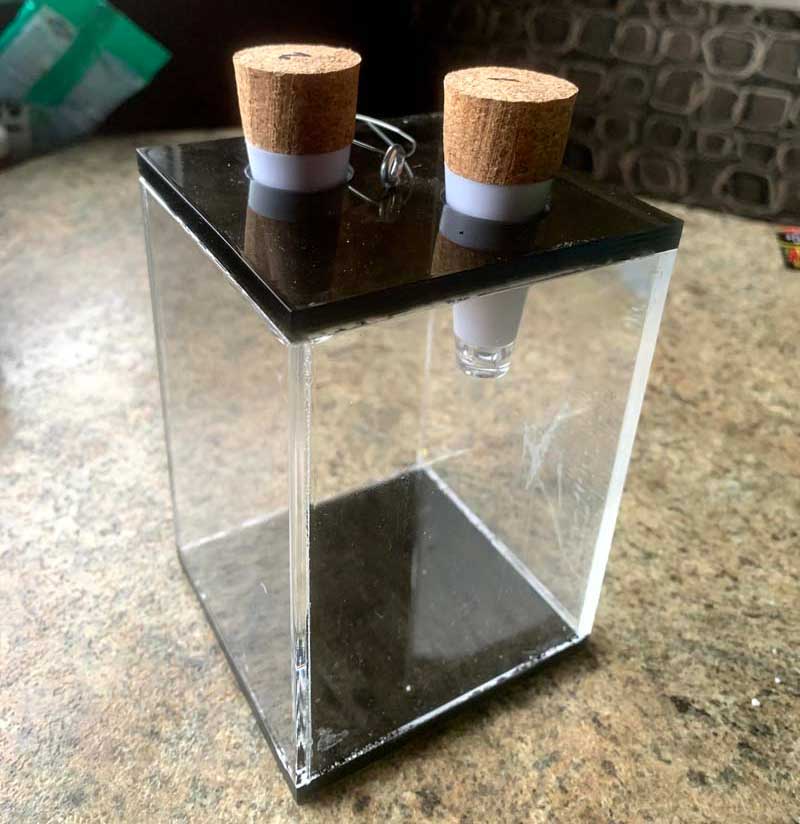
I bought Bug & Fly Clear Window Fly Traps from Amazon. I cut them in half and attached them to the clear sides of the box. It takes two traps to do all four sides. I pulled off the release liner and we were ready to roll. Don’t touch the fly trap paper. It’s super sticky.
We waited for dark, turned on the lights and the bugs came rushing in only to find themselves stuck on the fly trap. Big bugs and little bugs didn’t stand a chance. As soon as they contact the fly trap they are not going anywhere.
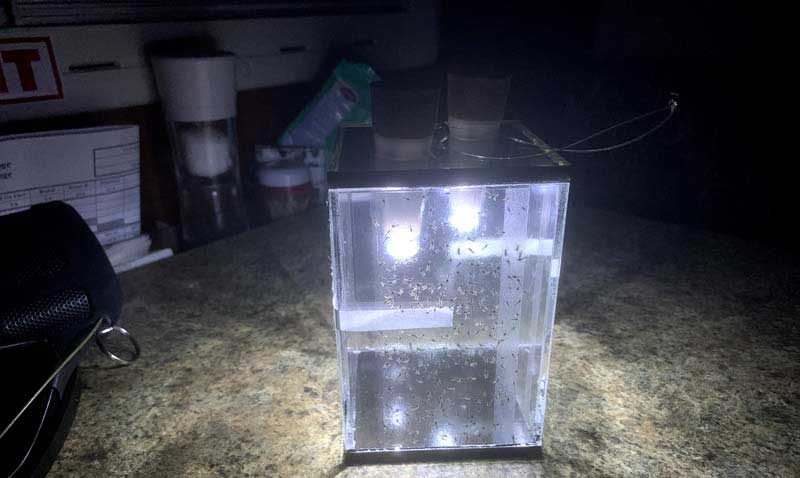
This bug catcher has been incredible. The light draws them in and then – BAM!
They are stuck and out of luck. After a few minutes, we are always amazed at the number of bugs we have caught. We have found that we can turn off our camper lights and they kick out enough light to read by. We usually leave one on when we go to bed and the bottle lights last for 4 to 6 hours. In the morning we just plug them into a USB port and they are fully charged in about an hour.
A word of warning: you will be drawn to watching the flies buzz in around the light and then get stuck to the fly trap. You may find that you are not reading as much as you are watching bugs stick on the trap.
Working with the plexiglass material is not as hard as you think. You can get the materials at your local plastics store. I use Tap Plastics and they have some great how-to videos.
With the right tools, you can do the cutting, drilling, and gluing yourself. Otherwise, your local plastics store will cut and drill all the parts to your requested dimensions. They might even build you the entire box for you if you want.
The box is small enough that you should be able to buy the Plexiglass from the scrap bin at your local plastics store. Tap Plastics where I go is usually $0.50/pound for scrap pieces.
Materials Used:
USB Powered Cork Shaped Bottle Lights from Amazon; $19.95 for 4 lights
Bug & Fly Clear Window Fly Traps from Amazon; $21.99 for 48 traps
2-1/2 inch Nylon Spring Clamp from Harbor Freight; $1.79/each, SKU 69290
It took me four hours to complete this modification. This bug catcher cost me around $42 for the lights and fly traps. I had the plexiglass, clamp, and other items around my shop. In my opinion, the skill level of this modification is medium.
Disclaimer: The modifications above are submitted by Truck Camper Magazine readers. It is your responsibility to make sure that any do-it-yourself modification project you undertake is safe, effective, and legal for your situation.
Enter Your Mods Now!
If you’d like to enter a modification you’ve done on your truck camper, click here. You can enter as many mods as you want, at any time. Good luck mod makers!


