Welcome to the PowerMod truck camper mod contest, sponsored by Goal Zero. One Mega Mod will be published in every Email Alert in April. At the end of the month, we’ll hold a reader vote to determine April’s winner. Click here for information about the 2024 Mod Contest, including how to enter.
Grant Davidson, Milton, Ontario
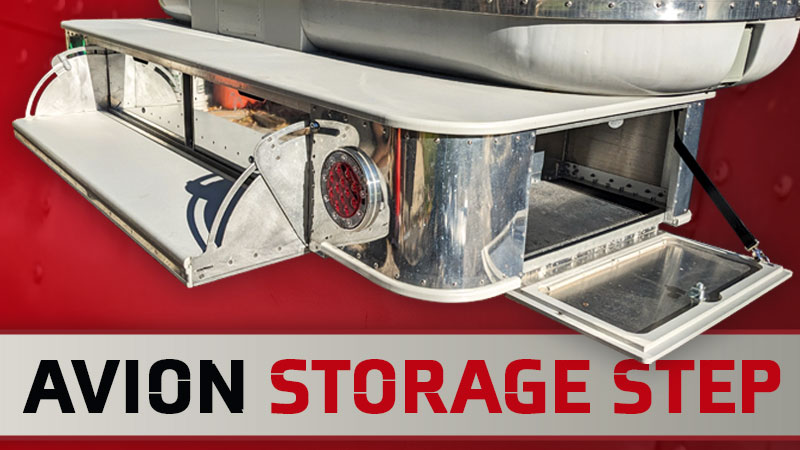
Avion Storage Step
2005 Ford F-350
1965 Avion C10
As I was renovating our 1965 Avion C10, a number of ideas came together to convince me that I should add a rear step. I wanted something that would make it easier to get in and out of the camper, provide some storage, and a way to contain the grey tank valve.
The camper didn’t originally have a grey tank but, since I was doing a major rebuild anyway, and the camper needed to sit higher in the truck, I had already built a basement to allow for grey tanks.
The basement I had built raised the camper four inches on 2-inch by 4-inch aluminum rectangular tubing. Let’s call them joists for convenience. There are three joists running front to back with cross members at each end. The joists provided an ideal structure from which to hang the step.
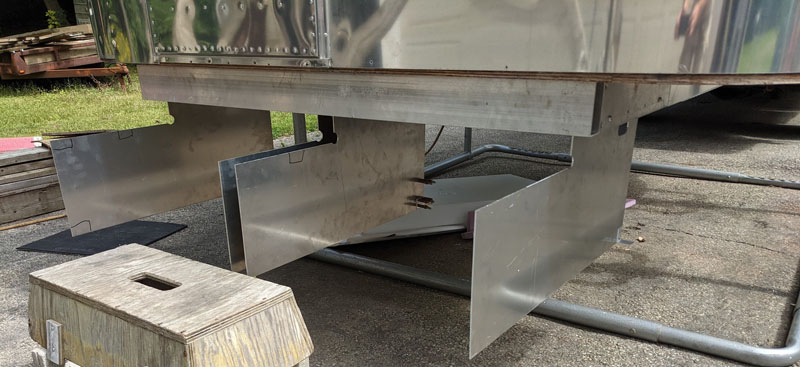
I used four pieces of 1/8 inch aluminum sheet; two bolted to each side of the center joist and one on the inner edge of each of the outside joists. This gave me a very solid attachment to the camper and allowed me to preserve the distinctive fiberglass ‘bustle’ that wraps the rear of Avion campers.
With the 1/8 inch aluminum sheet in place, the next step was to create a frame out of aluminum angle and 1-inch by 2-inch rectangular aluminum tubing.
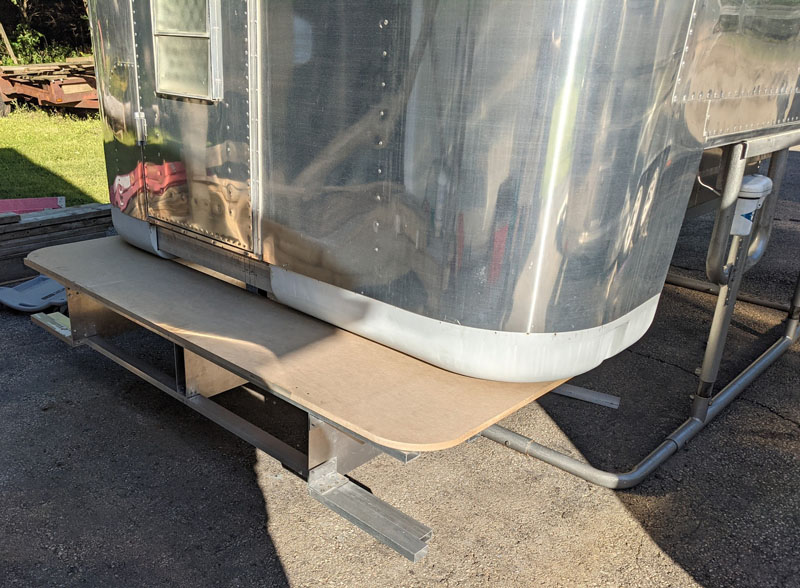
Above: Template made of MDF
I chose to use King Starboard for the surface of the top and the fold-down step. The material works easily with woodworking tools and is completely weatherproof, but it’s also expensive and a bit heavier than wood. So far, it’s proven durable and easy to clean.
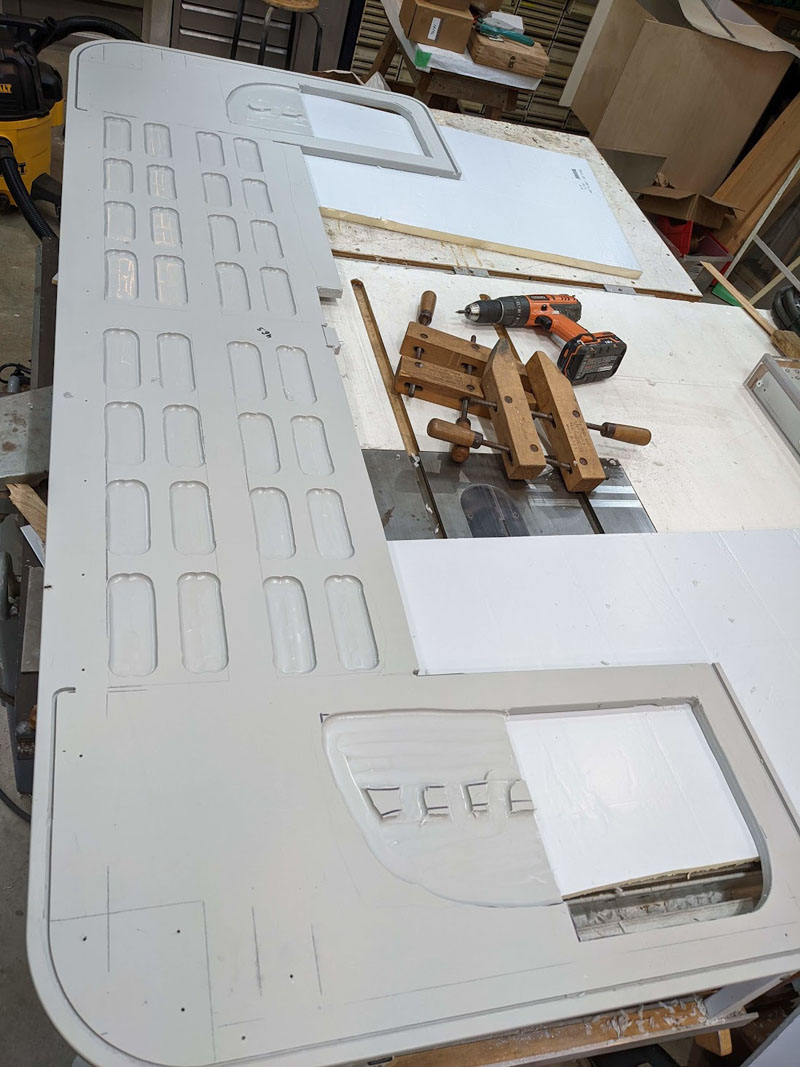
The deck is 3/4 inch thick. I used a router to remove pockets of material from the bottom to lighten it (see photo above). I also used Starboard to create trim pieces for the doors and lower edges. It’s so nice to work with that I may have got a bit carried away.
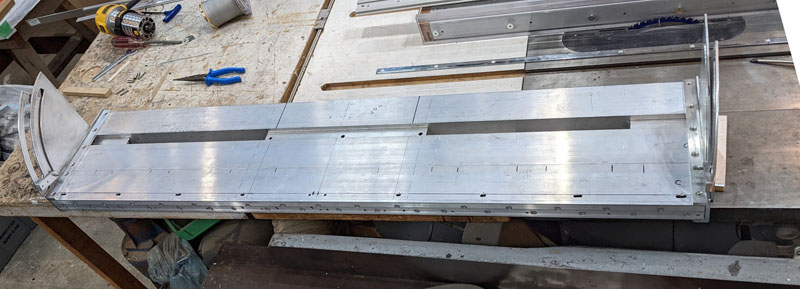
I built the fold-down step out of 1.5-inch rectangular aluminum tubing covered with Starboard. It hinges on 1/2-inch bolts with 1/8-inch thick supports of my own design at each end. The step is rock solid!
At the time I was building it, we had visitors with a large European overlander vehicle staying with us. They welded their steps several times and were considering how they could tactfully put a weight limit on visitors. This was my inspiration for over-building the step so we would never have to worry about it sagging or breaking.
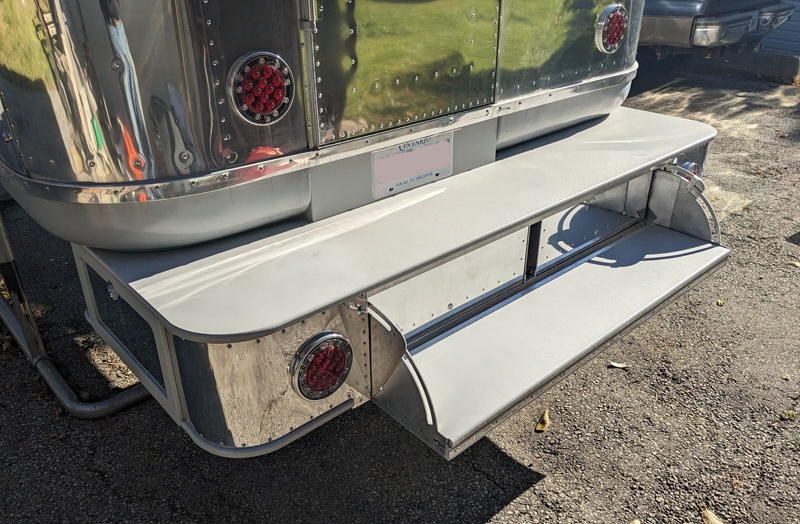
Behind the fold-down step are two drawers.
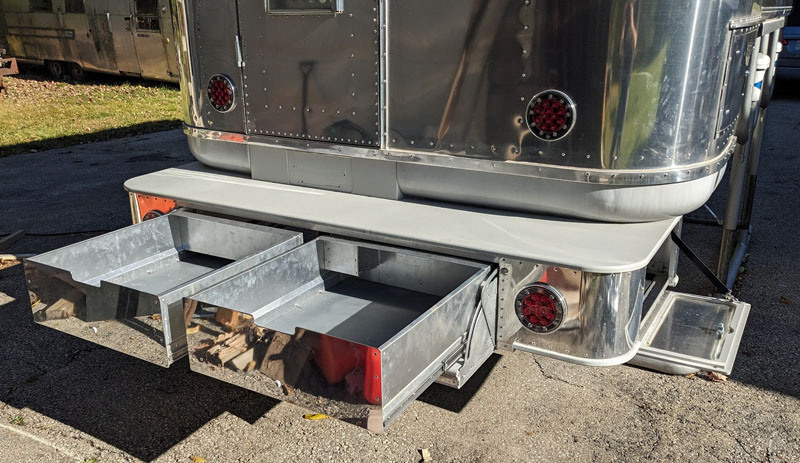
At each end of the step is a fold-down door for the side compartments. The curb-side compartment is storage (see below).
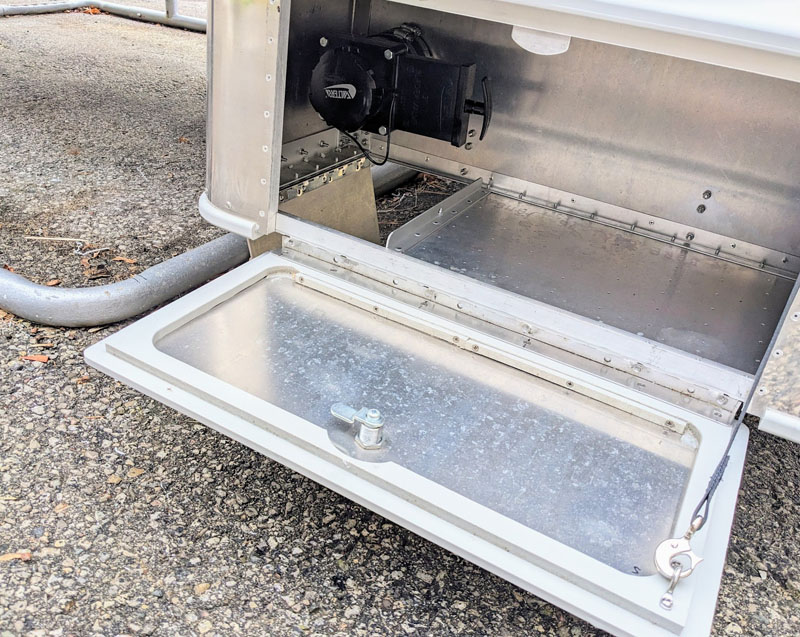
The street-side compartment has the grey tank valve, access to a quick-connect propane hose, and storage. Part of the floor of that compartment drops down for easier draining of the grey tanks, and the floor is perforated so it can be sprayed out. The total added storage is about 10 cubic feet.
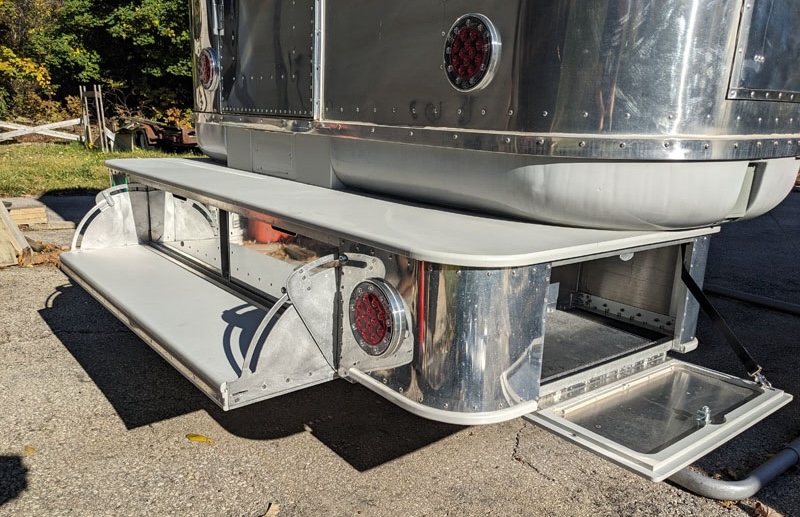
All materials are weatherproof, including fasteners which are stainless steel and aluminum.
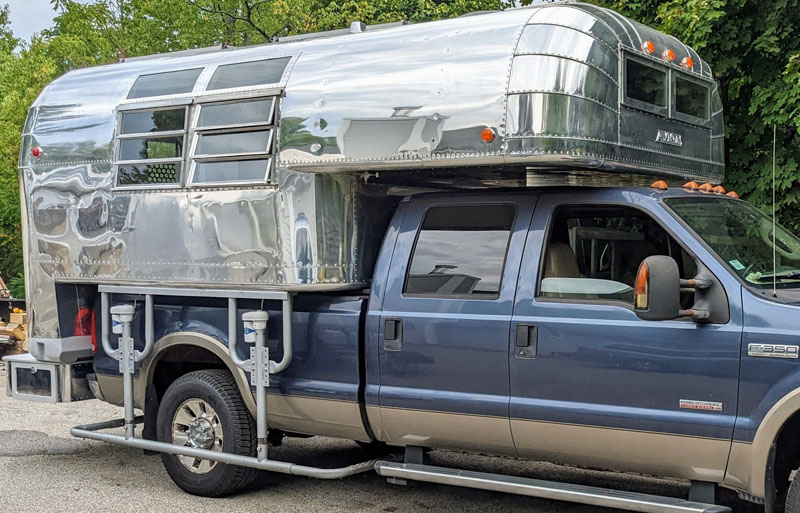
I am fortunate to have access to a well-equipped wood and metal shop. The design and building of this step was challenging, but I thoroughly enjoyed working on it and the result is very satisfying.
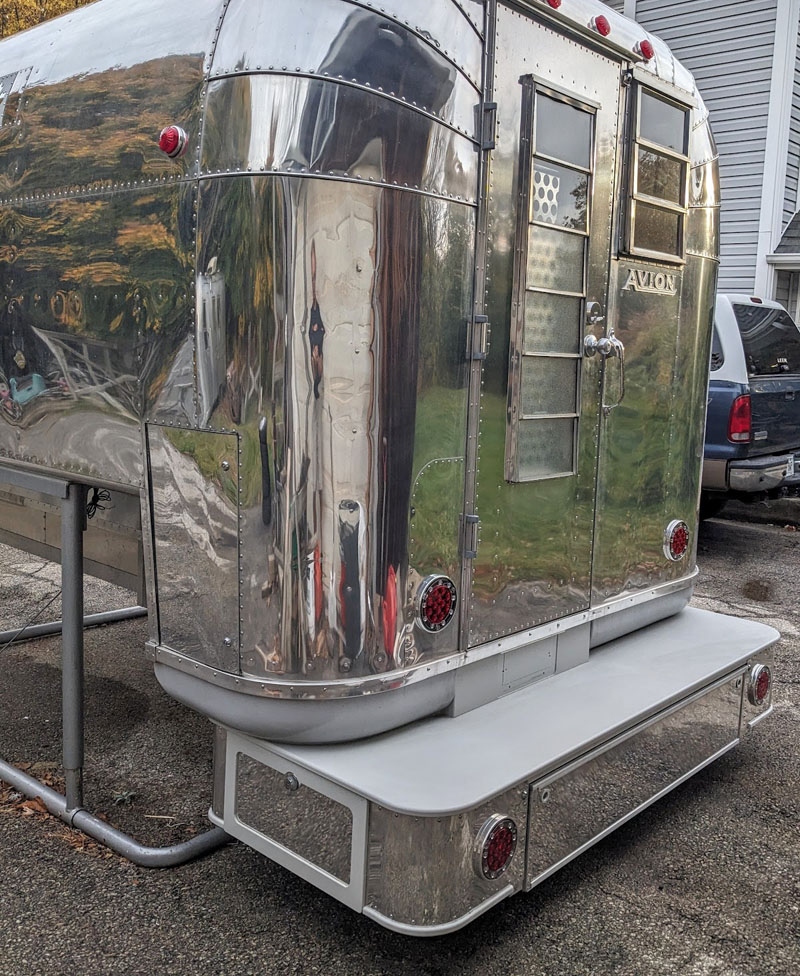
So far the mod has worked very well. We’re happy with the amount of storage, and it makes entering and exiting the camper much easier. I think it also complements the camper well.
Materials Used:
Aluminum – Metal Supermarkets – approximately $1,100
King Starboard (96″ x 54″ x 3/4″) – Bramur plastics $452
2 pair of 28-inch Stainless Steel Full Extension Drawer Slides – Rockler $215
Fasteners (stainless steel hardware and aluminum rivets) – approximately $100
Tail lights – Amazon – $50
Compartment locks – Amazon and Lee Valley $140
All prices are in Canadian dollars.
This mod took me hundreds of hours! I didn’t keep track of the time, but it took a lot of time because there were many pieces to make, some of which were curved. A lot of time was spent in planning and just staring at it trying to figure out what was going to work best. It cost me approximately $2,000 CDN.
Disclaimer: The modifications above are submitted by Truck Camper Magazine readers. It is your responsibility to make sure that any do-it-yourself modification project you undertake is safe, effective, and legal for your situation.
Enter Your Mods Now!
If you’d like to enter a modification you’ve done on your truck camper, click here. You can enter as many mods as you want, at any time. Good luck mod makers!
