Ten Medium Mods trow down with a well hidden money bag and safe, captured double-side dead space, a weld-done back door latch, three-way hosed water with Sharkbite technology, and more.

Welcome to the April 2017 Super Mod Cup Contest. Please review the following ten medium mods and vote for your favorite. We will announce the winner next week. For more information about the Monthly Mod Contest, including how to enter, click here.
1. Mark McVicker, Oregon, Ohio
Extra Storage in the Rear Camper Overhang
2005 Ford F-250
2014 CampLite 11 S
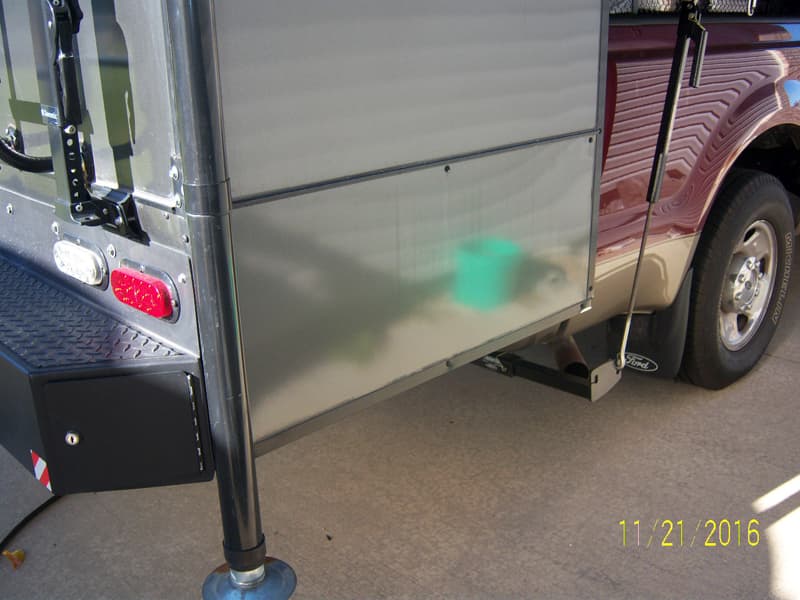
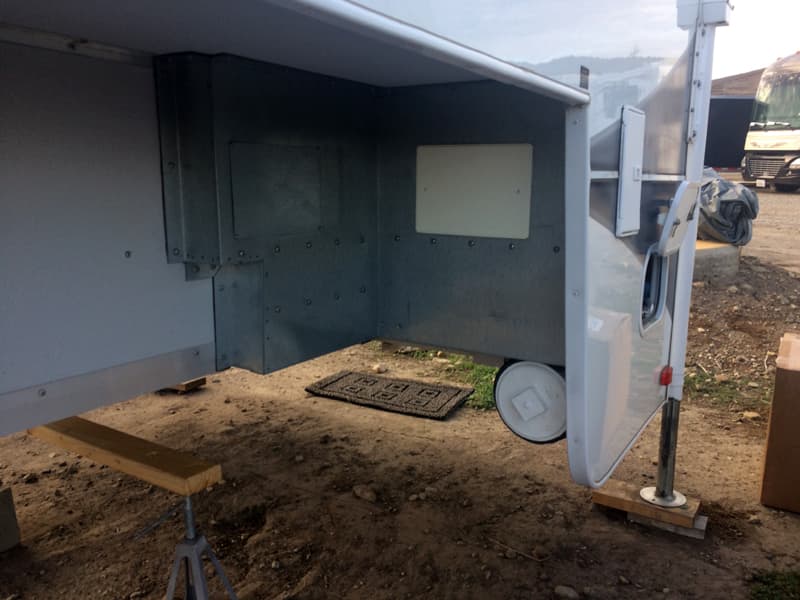
Above: Before the storage compartments were added
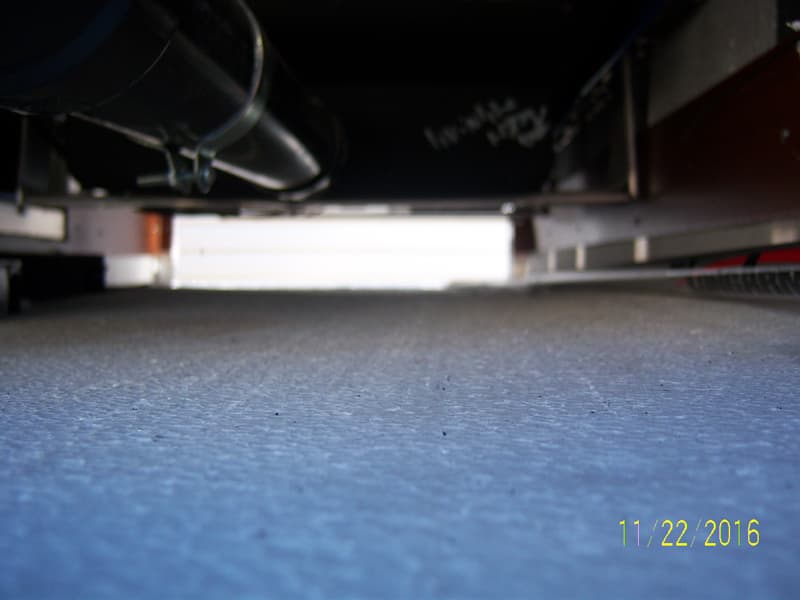
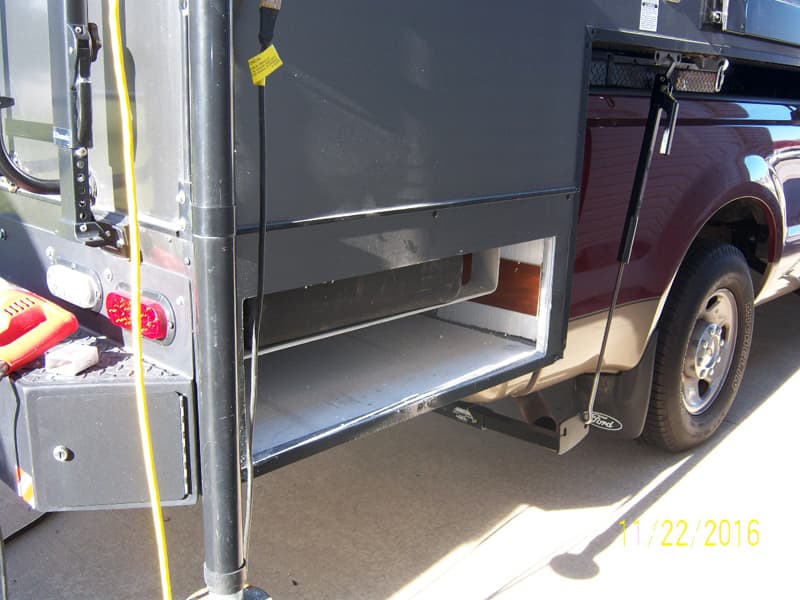
I wanted to make about 12 cubic feet available of unused storage space under the black water tank.
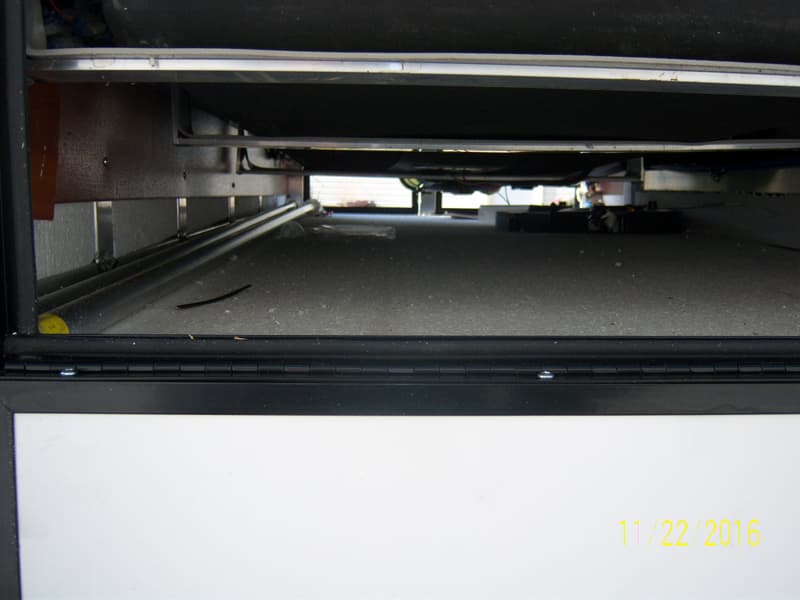
Above and below: Unused space in the back of the camper
I first checked with the camper factory about the modification. They approved the mod, and gave me the name of the door company that made the original doors.
I then measured the openings that I needed for the two doors and called Challenger Door company in Indiana to order the doors.
 |
 |
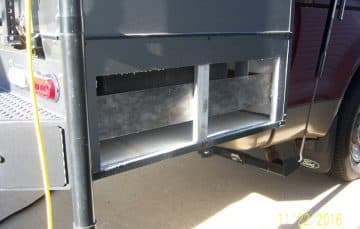
I used a Roto-Zip with a drywall bit to cut the openings in the outside aluminum skin. Then I cleaned up the openings and fit tested the doors.
I predrilled all the screw holes using the doors as a template. Before screwing the doors in place, I applied a healthy bead of black silicone to seal them in with screws.
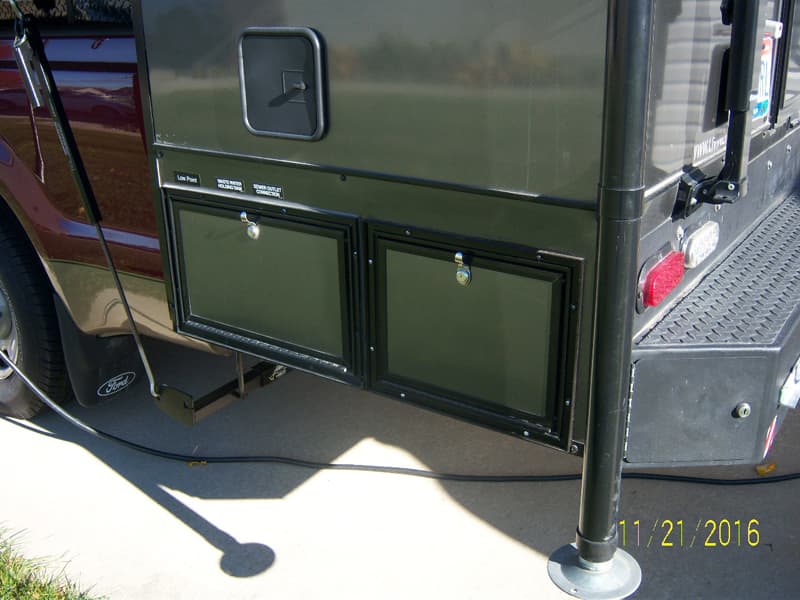
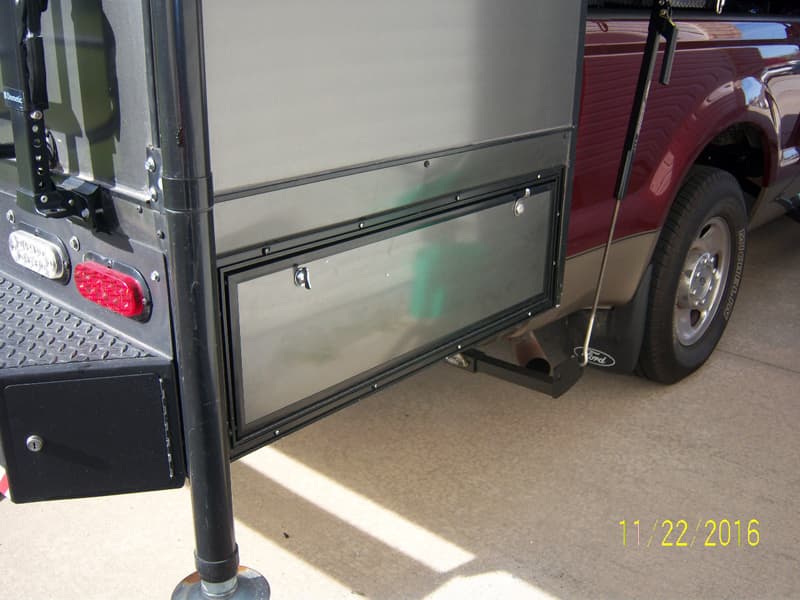
The doors look like they were installed at the factory. They have allowed storage space for both a 25-foot and a 50-foot water hose, two 25-foot 30 amp power cords, a 28-inch by 60-inch folding table, two 12-foot extending flag polls, and the long hook for the awning.
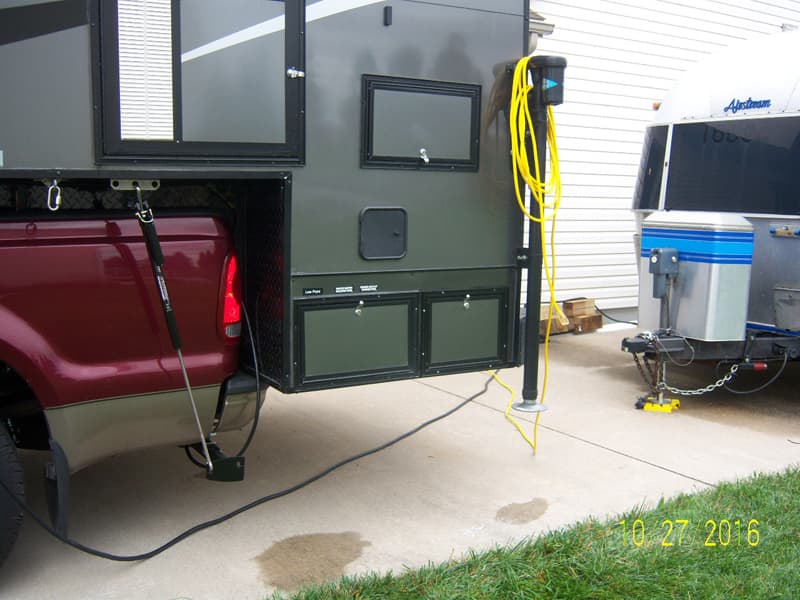
I am thrilled that I was able utilize this space. Our last trailer was a 25-foot Airstream, so we had the bed of our truck for storage. Having this additional storage certainly helps to make up the difference.
It took me six hours to complete this modification and cost me $200. In my opinion, the skill level of this modification is hard.
2. Barry Edwards, Mission Viejo, California
Extra External Sewer Storage Solution
2014 Ford F350
2014 Lance 1050S
The bumper storage area on my truck camper would not hold the 90 and 45 degree sewer hose elbows due to the size of the pieces. While it would fit, attempting to close the storage gutter would find the pieces becoming stuck.
Due to the sizes, I was storing the sewer hose in a bag inside the drain release valve compartment. To prevent contaminating this storage area, the idea of an extra external storage came to mind.
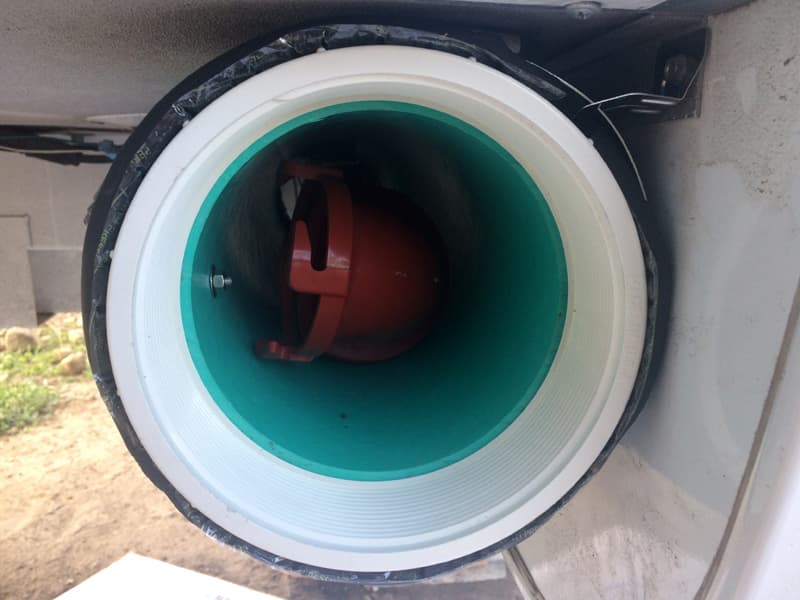
I started with a 6-inch diameter, 24-inch length PVC riser found in the sprinkler section. I bolted a threaded clean-out plug adapter to one end to prevent it from sliding off.
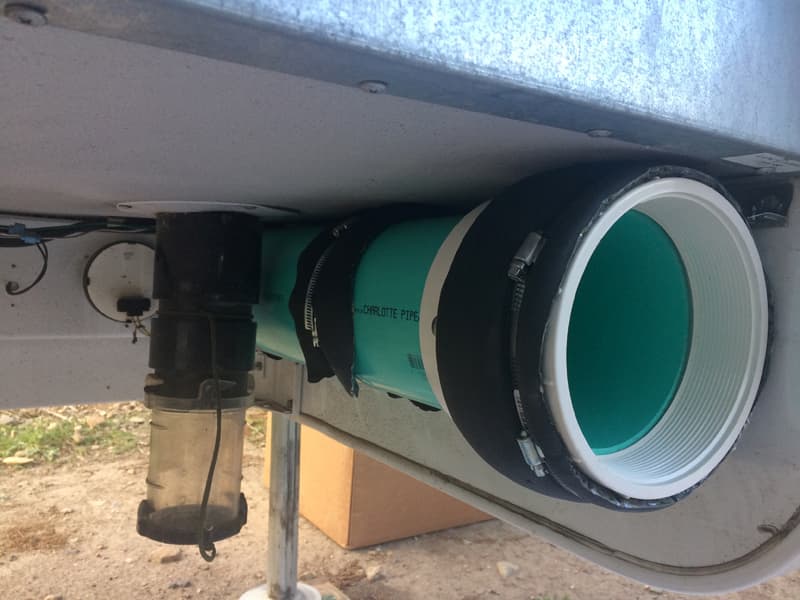
Using a few leftover clamps and metal brackets from my garage stash, I secured the assembly to the camper’s wing channel bracket in three areas (the third bracket is hidden by the downspout).
The addition of pipe insulation was used to prevent chaffing and bounce. The components store easily in the pipe and the cap screws on for security.
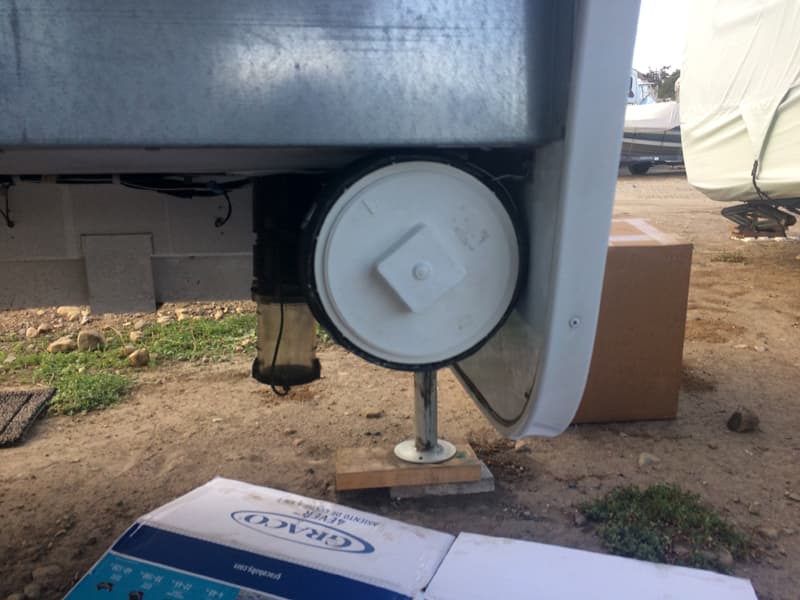
The mod has worked great. It’s on the sewer set-up side of the camper, and stays clear of the truck’s bumper when loaded.
It took me two hours to complete this modification and cost me $30. In my opinion, the skill level of this modification is medium.
3. David Kremer, Pasadena, Maryland
Installation Of A ProMariner ProIsoCharge 250A Isolator/Charger
2015 Ford F350
2000 Lance 1130
My mod is the installation of a ProMariner ProIsoCharge 250A smart battery isolator/charger (and proper wiring) so that I can charge my camper while driving.
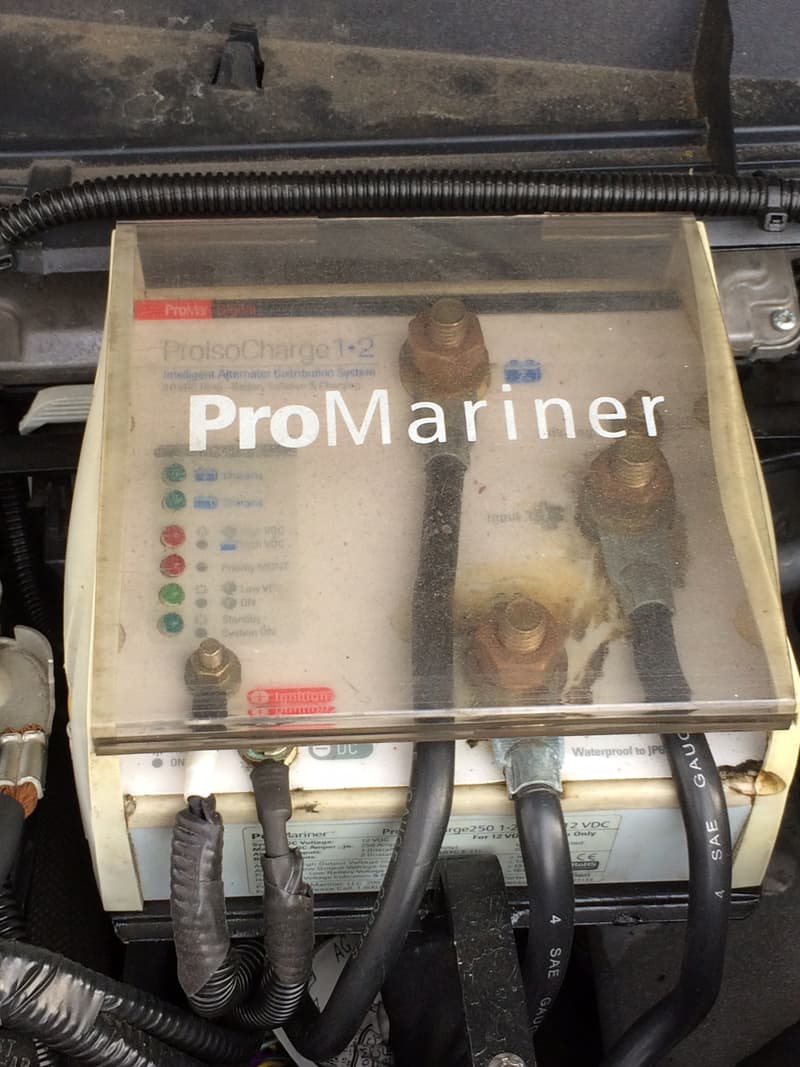
Unlike most of the battery isolators used, the ProMariner is a microprocessor-controlled system that independently reviews the voltage level in the truck’s starting batteries and the camper’s batteries. It prioritizes full charge to the batteries that need it.
This is vastly different then traditional isolators which simply separate the batteries when the key is off. When the key is on, traditional isolators do allow minimal camper battery charging. However, charging is greatly restricted by both the truck’s built-in voltage regulator and the restrictive (too small) wiring being used.
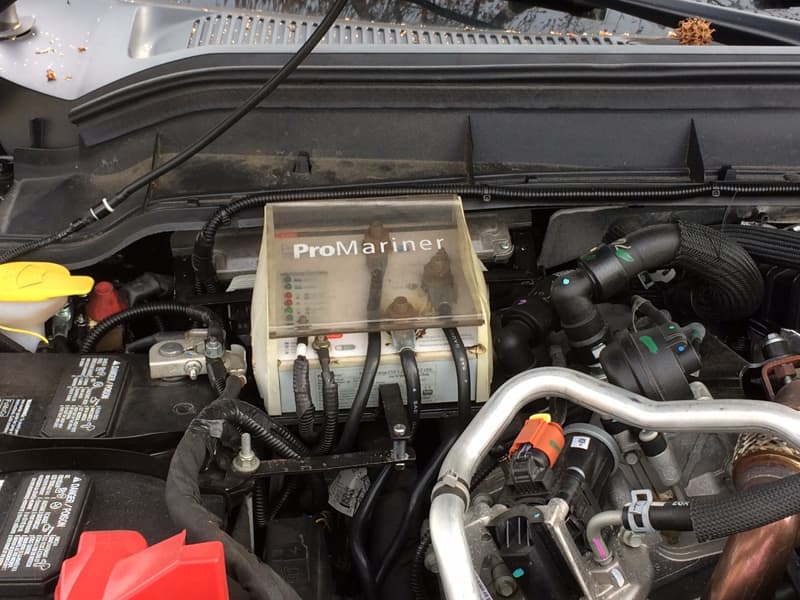
The most challenging part of this installation was determining the location for the ProMariner under the hood of the truck and fabricating a bracket to hold it. Once I found the right spot, I fabricated a bracket using simple L-brackets, a flat bar, and bolts from Home Depot. Building the bracket wasn’t hard, but took a little trial and error to bend up the flat bar in the correct way to be mounted on existing mounting points.
Once the ProMariner was in place, the wiring was next. The ProMariner has very good instructions, so I will be brief. The truck’s battery charging cable is removed from the battery and attached to the starting post on the ProMariner. Then a new battery cable (from an auto parts store) is connected to the alternator post on the ProMariner and then back to the truck’s battery.
A smaller 12-gauge wire is then attached to the Ignition post on the ProMariner and connected to a ‘Key On Power’ source on the truck. My 2015 Ford F350 has a wire built in. If yours does not, they are easy to find.
Another 12-gauge wire is run from the ProMariner Ground post to frame or battery ground. Next, I ran a significantly heavy 2/0 to 4/0 gauge cable from the ProMariner to the bed of the truck. In the bed of the truck, the cable is terminated to an Anderson Style forklift battery connector (eBay).
In the bed of the truck the cable can be mounted in several ways. You can simply run it up through the bed or, as I did, fabricate a mount in the truck’s wall.
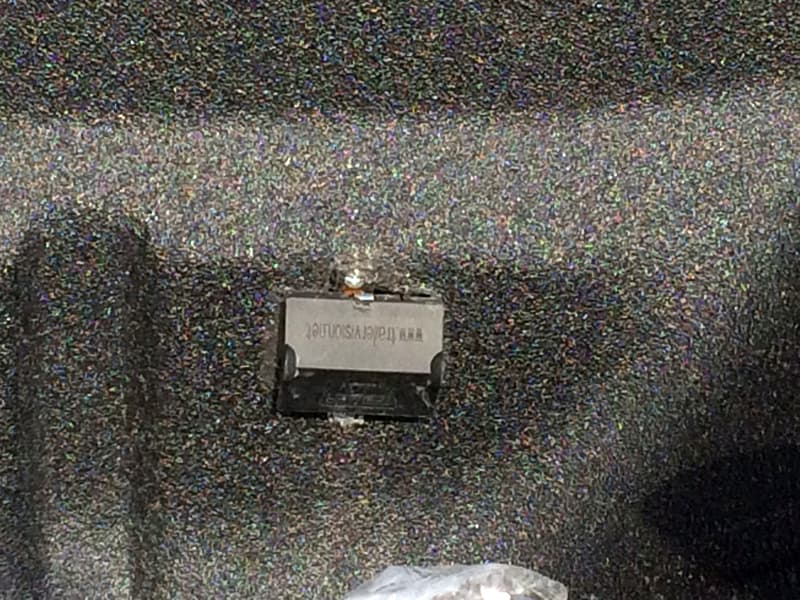
Above: The mount on the truck’s wall
The final part is to run cable from your camper’s battery to the other half of the Anderson Connector to be plugged into its mate from the truck.
This mod is not overly hard. It uses basic tools and wiring techniques. The hardest parts are figuring out the mounting and wire runs.
In my 2015 Ford F350 with my 2000 Lance 1130, I ran my cable back to the right forward bed well where I added two additional deep cycle batteries and interconnect wiring to the overall system.
This mod has been great! I now arrive at my location with fully charged batteries (I have a Trimetric battery monitor). Every time I start my truck to move locations, I know my camper batteries are getting some charge. When it’s winter and I am running my inverted 110-volt heated mattress pad all night long, a good battery charge is a must.
It took me 12 hours hours to complete this modification and cost me $350 for the ProMariner, cable, wire, connectors, and brackets. In my opinion, the skill level of this modification is medium.
4. Charles Coushaine, Punta Gorda, Florida
Single Manifold For City Water, Fresh Water, and Black Flush
2001 Ford F350
2012 Chalet DS116RB
My Chalet DS116RB truck camper has a rear compartment in which there are two hose hookups. One hookup is for the fresh/city water, and the other is for the black tank flush. Each hookup has a hose thread for you to hook up your hose. However, this necessitates you threading and unthreading your hose at every campground stop.
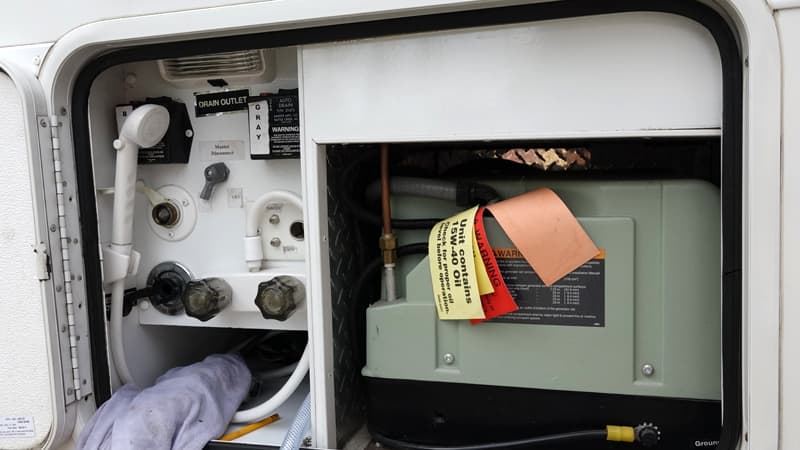
Above: Before the plumbing mod was completed
Additionally, to fill your fresh water tank, you have to go to the opposite side of the camper to access the fill hole. This usually requires a longer hose to fill it up. Although this works, it is not convenient for someone who travels extensively year round and all over the country.
The modification described here is to add a single hookup manifold that has three valved ports. Each port will hookup to either the city/fresh, black tank flush, or fresh water tank.
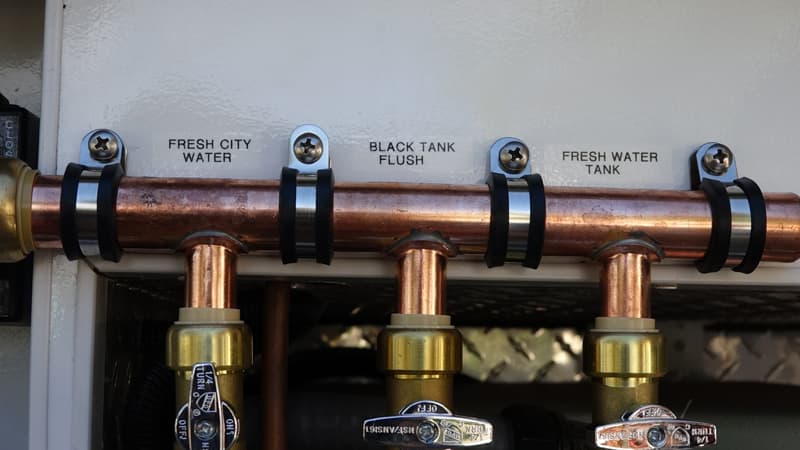
After searching the internet extensively, I was able to find a three-port copper manifold that used Sharkbite fittings (all lead-free drinking water safe). This allowed me to efficiently plumb the lines to their correct connections after mounting the manifold in the plumbing compartment area.
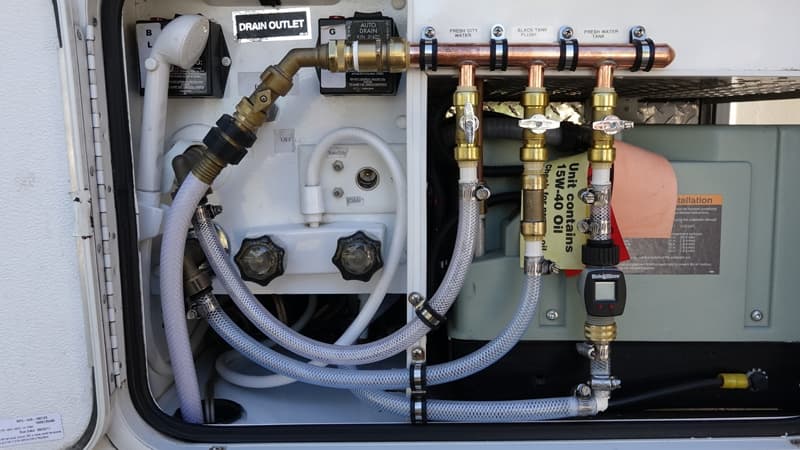
I was careful to add a check valve on the black water flush line so that water would never be able to back flow into the rest of the lines. I also added a water meter into the fresh water tank line so that I can meter how much water was added to the tank. That way I am not carrying more water/weight than I need.
Also note that this fresh water tank link goes further into the adjoining compartment and attaches at the input of the water pump. In this way it essentially ‘back fills’ the water tank.
The hardest and most time consuming part of this mod was finding the correct fittings. The install was easy!
Here are a couple of links for some of the components used:
3-Way Manifold and water meter.
I’ve used this mod multiple times all over Florida and all the way down to Key West. It works great. Now with one simple hose hookup I can connect to city water, flush my black tank, or fill my fresh water tank. This sure will come in handy as we travel to Alaska this summer. Wish I had thought of doing this sooner!
It took me 12 hours to complete this modification and cost me $125. In my opinion, the skill level of this modification is medium.
5. Brenda Davis, Massachusetts
Secret Safe Location In Closet
Rig information withheld for safety reasons.
Traveling six out of twelve months requires a certain amount of cash and passports. Our concern was where we stash our emergency money bag. We could be like grandma and put it under the mattress, however that may be too likely a location. I chose to make our wardrobe closet into our safe.
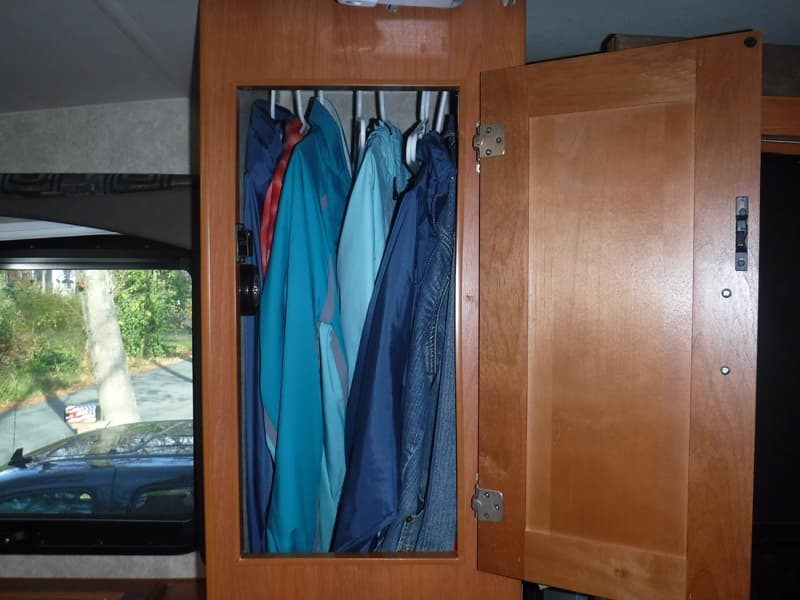
The first photo shows jackets and rain gear when you open the closet door. In the second photo, you can see that when you take out all the clothes and look inside, you don’t see anything but walls and the floor. The third photo shows the modification.
A piece of ⅛-inch plywood paneling was cut to the dimension of the closet floor. The right corner of the plywood paneling was notched 1-inch. Using industrial glue, four wooden blocks measuring 3-inches in height were attached to each corner side wall.
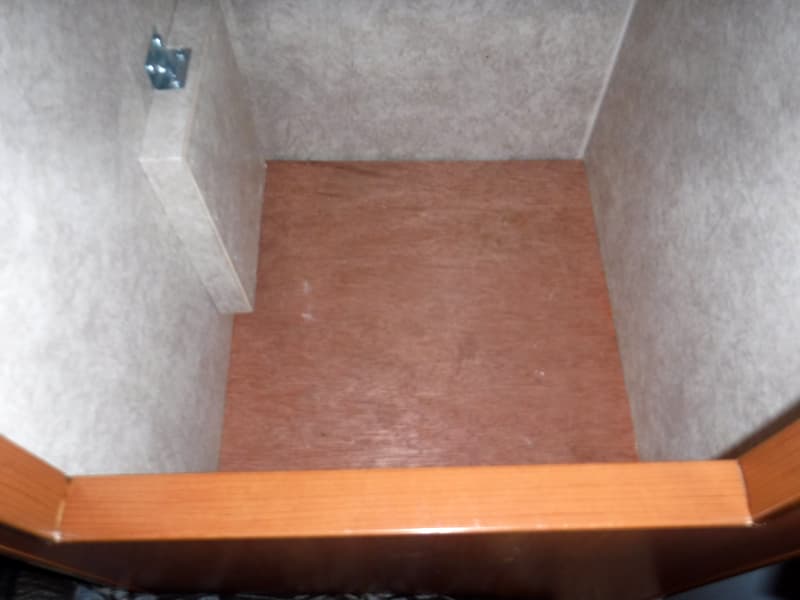
When the plywood paneling is in place, the notch allows the panel to be lifted using a single finger for access. One would have to put their head inside the closet and look down to see the notch.
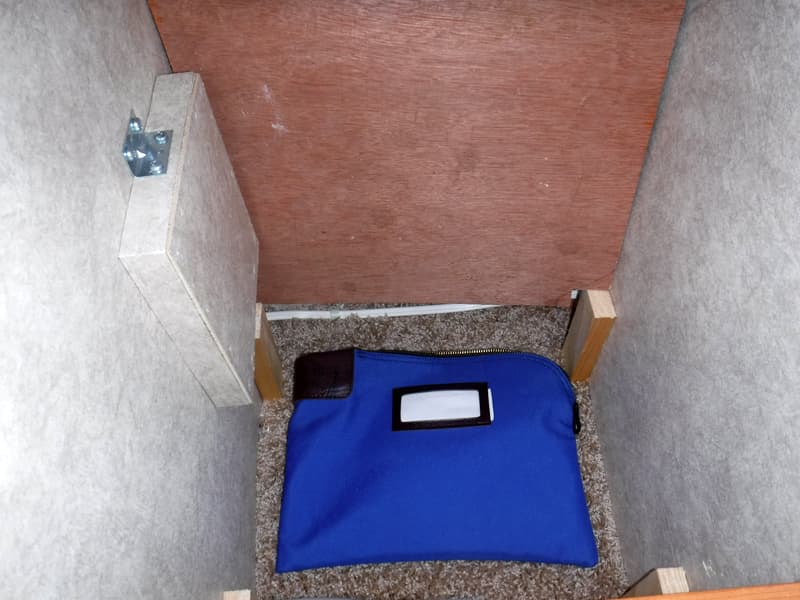
We also keep a small amount of quarters in a plastic container for the laundromats in the closet. Should someone make their way to the closet and find the quarters they may be satisfied to take them and look no further in the closet. We’re just cutting our losses.
The cost was under $6 for the sheet of plywood, and the four corner wood pieces were scraps that I had around the house. The money bag was bought on Amazon a couple years ago for $15. As for the level of difficulty, it was a couple steps below medium. The only consideration would be your experience in measuring and cutting of the plywood.
It took me one hour to complete this modification and cost me $6. In my opinion, the skill level of this modification is easy.
6. John Tseka, Hartland, Connecticut
Stamped Tin Backsplash Installation
2004 Chevy Silverado 3500
2012 Lance 850
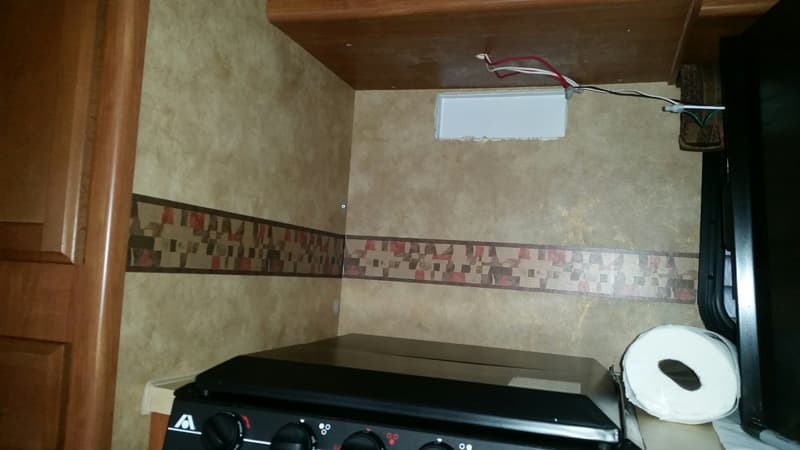
Above: Before the backsplash was installed
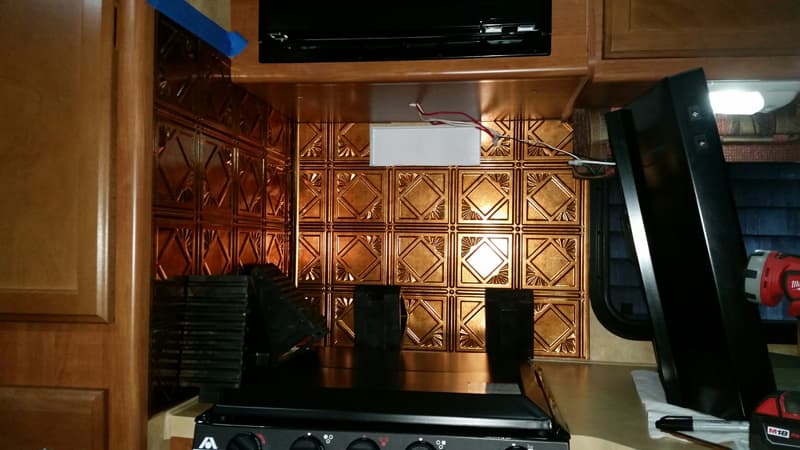
I installed a stamped tin backsplash for easier stove area clean-up and aesthetics.

I bought three backsplash panels, two edge trim, two inside corner strips, and a caulking adhesive PL 400 at Home Depot. I cut and dry fit all pieces.
A good set of siding snips works much better than a utility knife for cutting the panels and edge trim pieces. Once cut, apply the panel adhesive and panels. Tape the panels in place to prevent them from sliding while the adhesive sets up. I used rubber chock blocks to wedge the lower section of the panels against the wall until the adhesive set up.
I am very happy with the results. I always liked the look of stamped tin. The camper is put up on blocks for winter in our driveway, so it’s mod season. I can’t wait till spring!
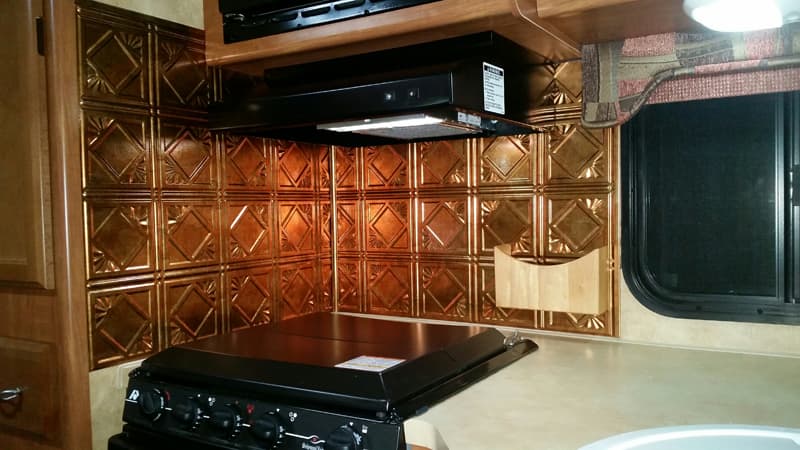
This mod took about six to eight hours to complete and cost me about $70. In my opinion, the skill level of this modification is medium.
7. Mike Tassinari, Peabody, Massachusetts
Additional Kitchen Shelf Space For More Storage
2002 Ford F350
2016 Lance 1172
There was dead space in the upper cabinet above the countertop in my 1172 that was unusable even though it was accessible.
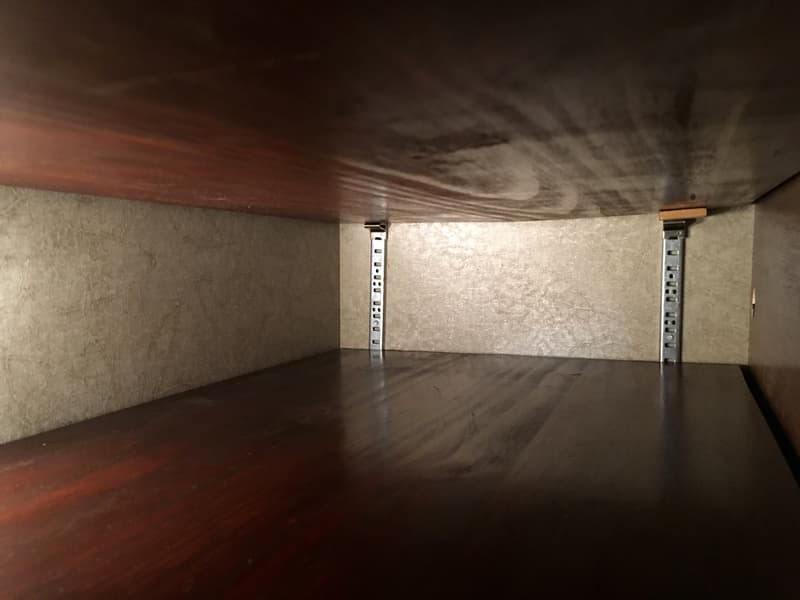
To gain more storage in this area, I tore out the divider with the small hole in the middle. It was not a structural wall. Second, I had to install four adjustable shelving tracks. I cut the adjustable shelving tracks to the height of the cabinet.
I mounted them to the back walls of the cabinet. Caution, you need long arms!
For the new shelves, I bought two pieces of wood that were ¾-inch tall by 14-inches wide. When I took out the piece that wasn’t being used, I used it to color match the stain that I bought from Home Depot.
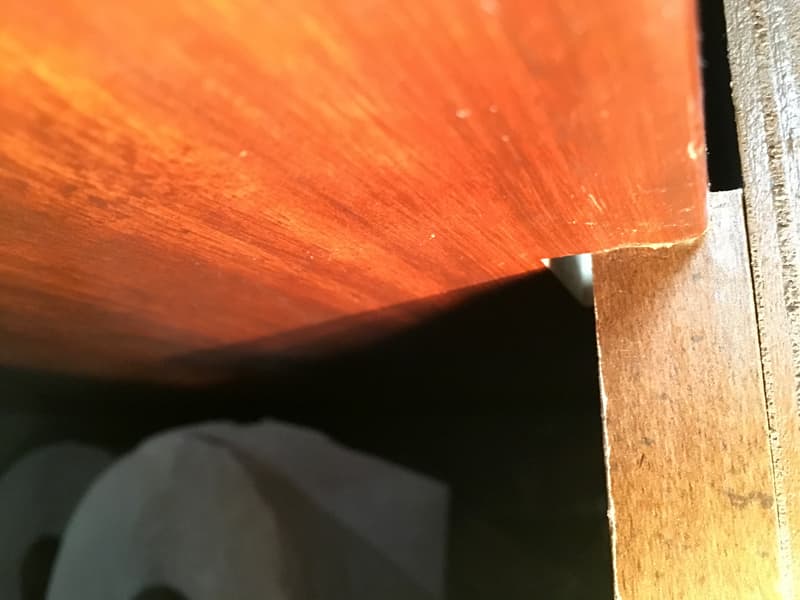
Once I got the wood, I cut it to the length of the cabinet and notched it for the blocking of the two cabinet hinges.
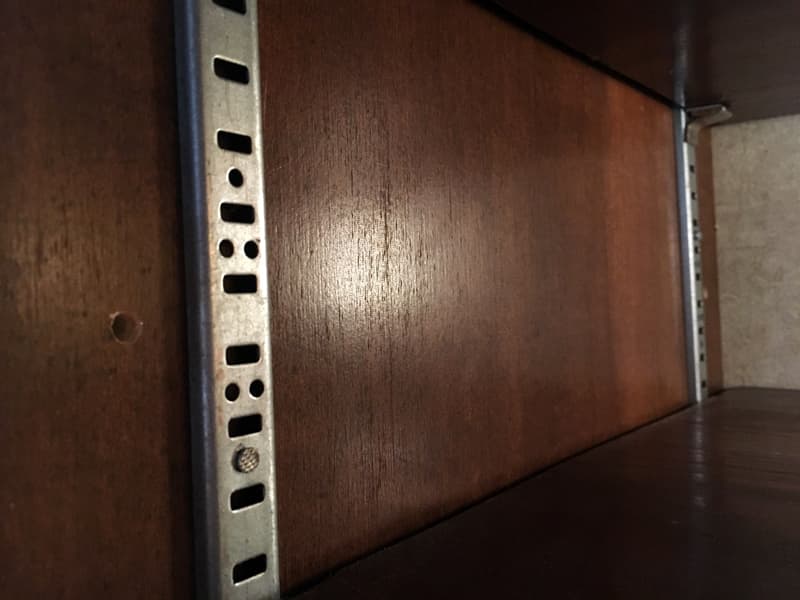
I put in shelving clips to mount the shelves at the desired height. They are adjustable for the future.
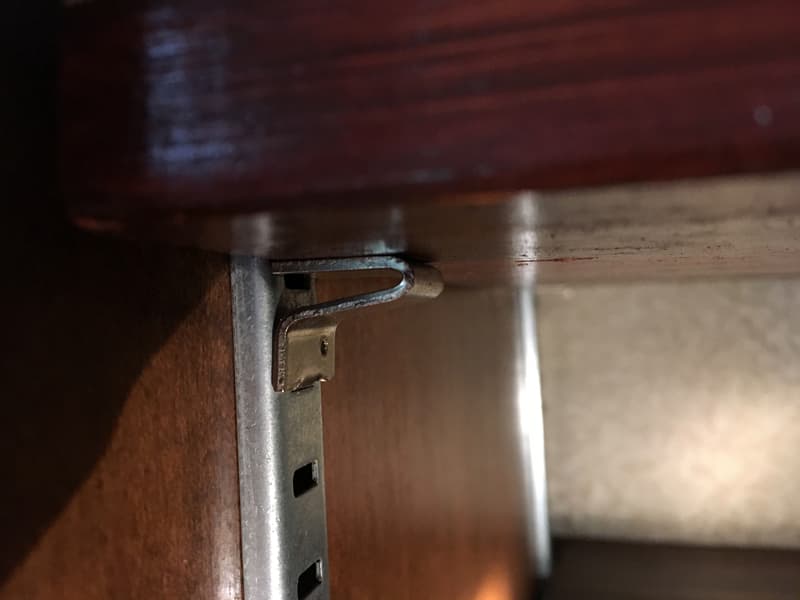
In order to get the shelves in, I had to tip both the wood pieces on their side vertically, slide them both in, and then move them both to the proper horizontal position.
The first shelf has to go higher than you want so you can put the clip in the track. On the side where you want to clip, mark it with a magic marker so that you don’t lose your place. That will help you to pre-determine where you want your clips to go.
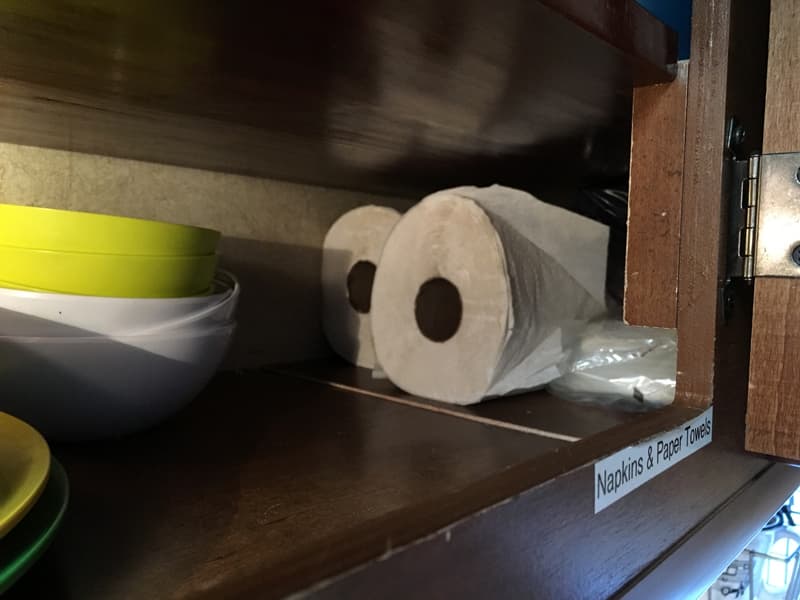
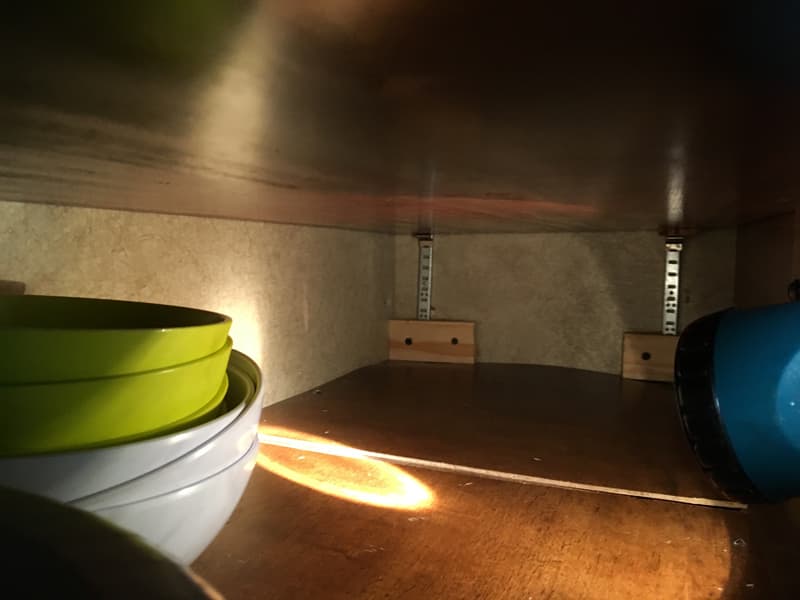
Above: Paper towels and paper products can fit in the new area of the cabinet
Put the shelves on the clips and then put in your bowls, cups, paper towels, etc.
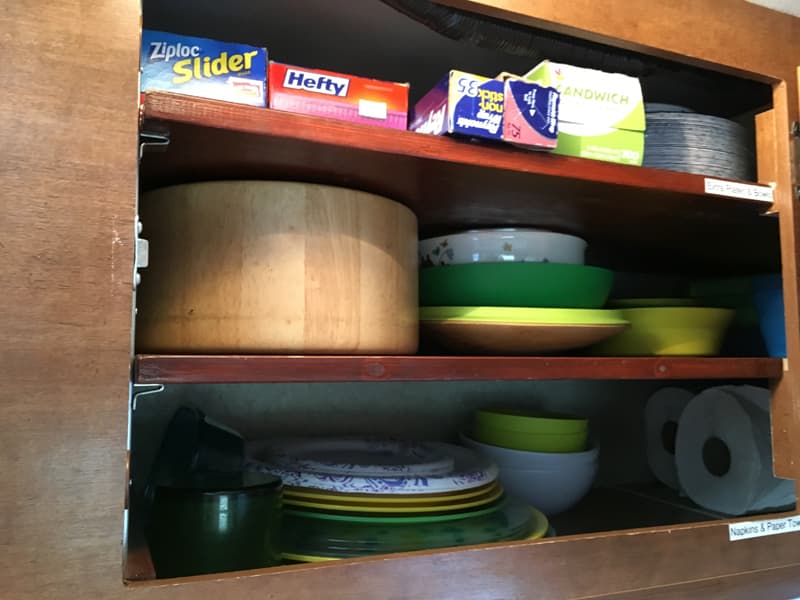
It has worked out well so far. Now I can use the space in the back of the cabinet.
It took me about five hours hours to complete this modification and cost me about $50 for the two tracks, two shelves, and the stain. In my opinion, the skill level of this modification is medium.
9. Ray Fair, Hopkinton, Massachusetts
Wire Rack Shelves With LED Lighting In Front Cabinets
2013 Silverado 2500 HD
2015 Eagle Cap 850
The Eagle Cap came with three clothes closets. Two are located on each side of the bed, and the third is above the radio/DVD. The closets are not convenient for storage of clothes that do not require to be hung such as T-shirts, socks, and underwear.
The closet heights are about three feet by two feet. Shelves were needed.
Measuring down 12-inches from the ceiling, I attached two pine boards (1 x 18 x ¾) on the side walls and a pine board (1 x 12 x ¾) on the rear wall with industrial adhesive for the top shelf.
Then measuring below that point, I attached three more pine boards; 1 x 12 x ¾ on the side, and 1 x 12 x ¾ on the rear wall. Varying the length of the shelves allowed access to the lower portion of the closet for shoes, sweatshirts, etc.
At the local box store, I purchased a white wire rack (8-feet x 3-feet) that had a 1-inch lip. The wire rack was cut to match each shelf.
I installed them with the lip pointing up. Hardware supplied with the wire rack was used to attach the rack to the wooden board to prevent the rack from moving.
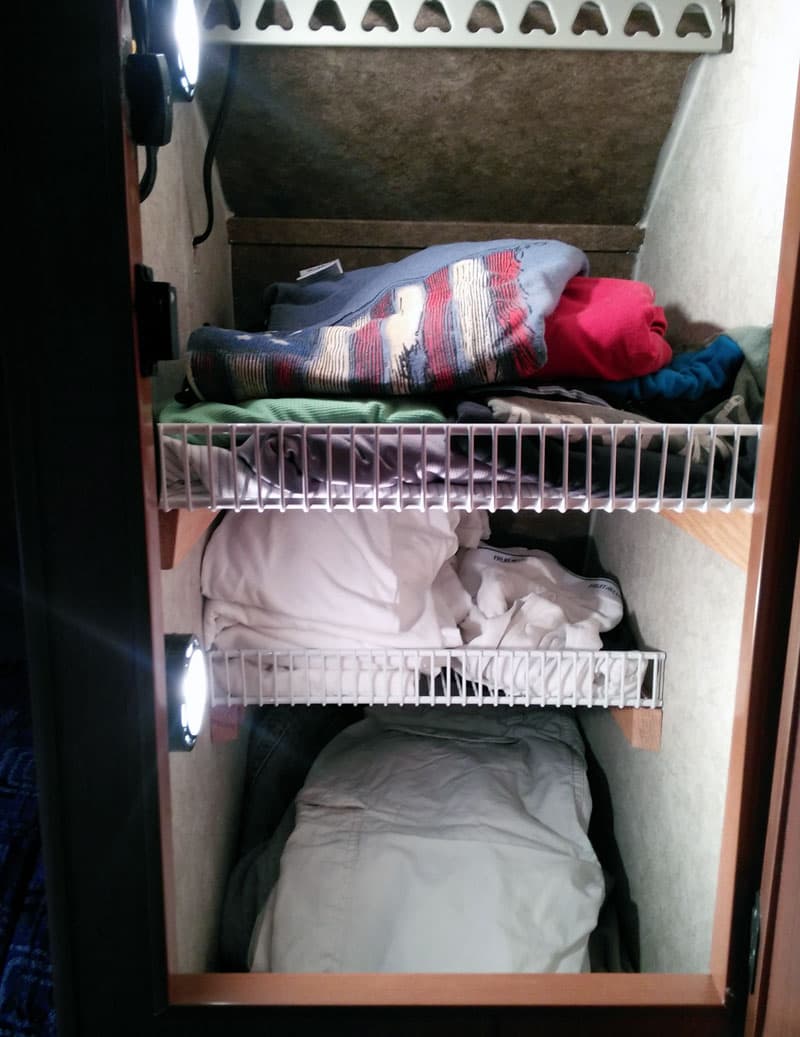
I purchased a lighting system for each closet from American Lighting which contained three puck lights and an accompanying 120-volt transformer with an on/off switch.
To install the lighting, the first task was to remove and discard the transformer. Next, I mounted each puck with the hardware provided to the side wall of the cabinet above each shelf. Then I soldered the on/off switch and mounted it to the side of the door frame. The lights were then wired to the 12-volt light over the bed.
It took me 1.5 hours to complete this modification. The lights are from American Lighting and the wire rack was from Lowes for a total of $35.
In my opinion, the skill level of this modification is medium due to the wiring and cutting of the wire rack to the right size and mounting of the wood on the side walls.
9. David Carvalho, South Hadley, Massachusetts
Rear Deck With Storage For Scissor Steps
2006 Dodge Ram 3500
2013 Alaskan
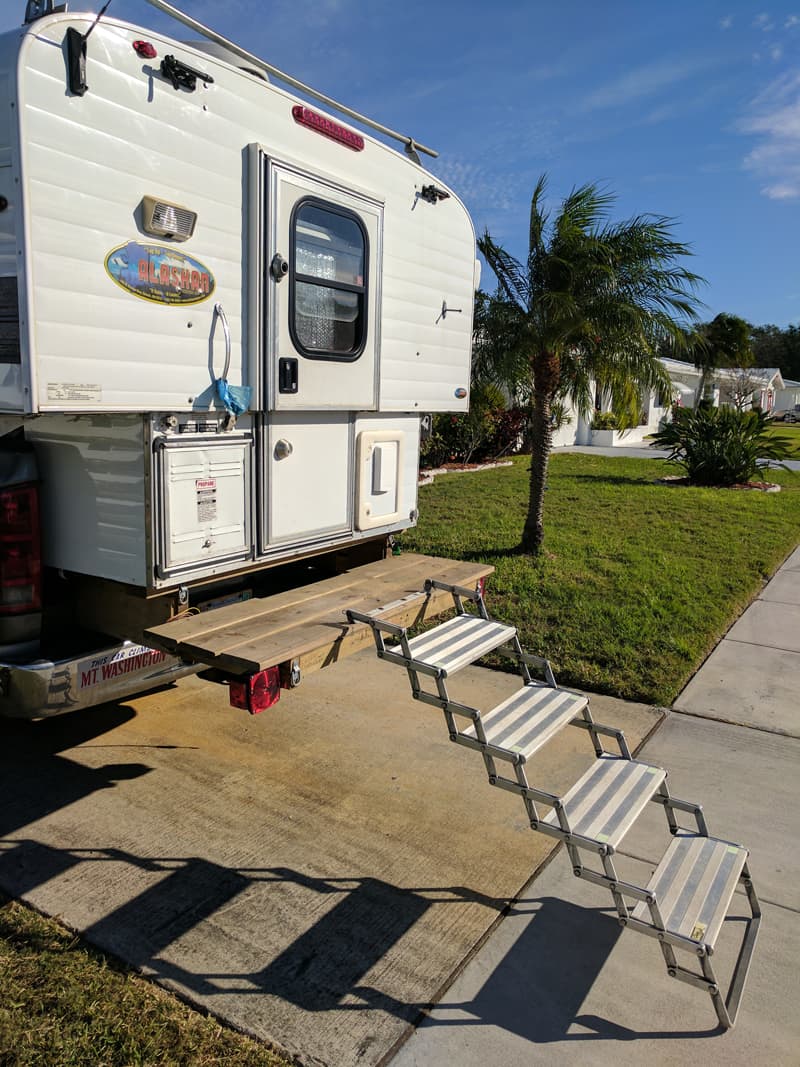
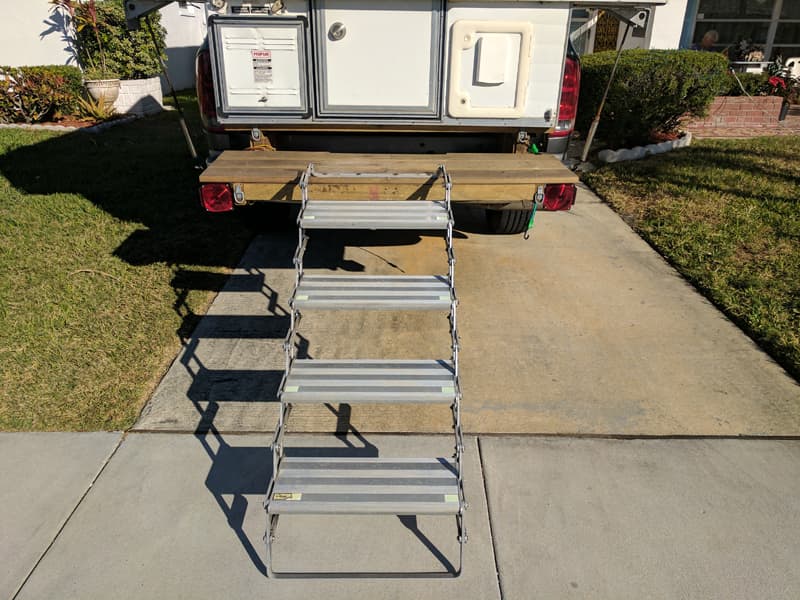
I installed a deck so that my stairs would travel better and for quick to take-down and put-up.
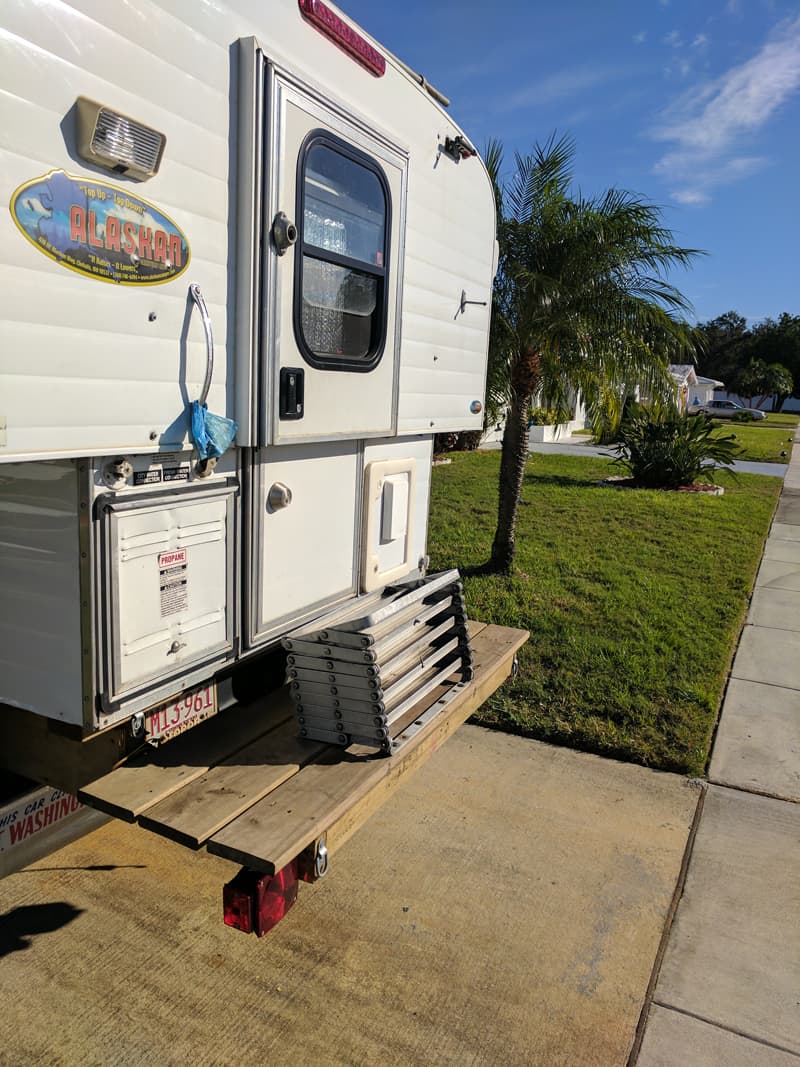
Additional benefits are that I have a table when I am pulled over somewhere, a carrier for a cooler, or a place to stand and load our kayaks.
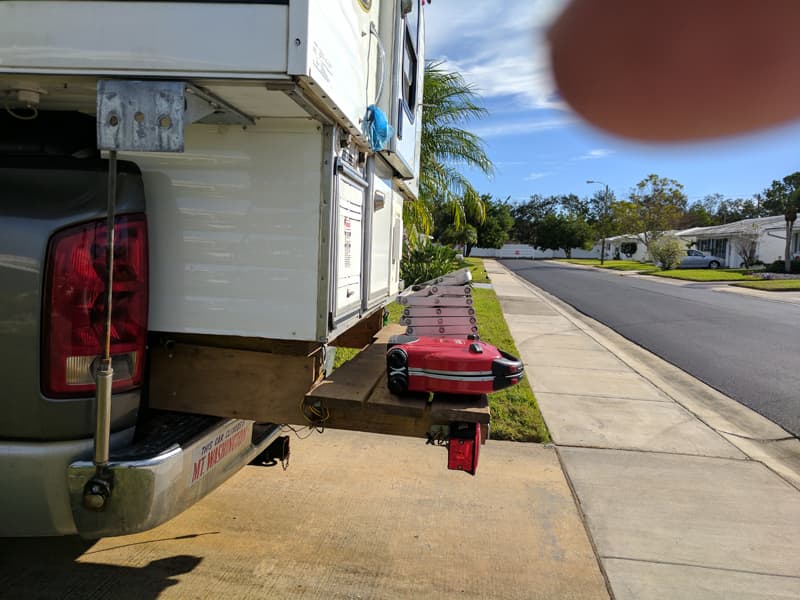
I made the deck out of scrap lumber by making a platform with decking material. I used plywood pieces to join it to the underside of the camper’s platform.
The platform can be easily removed if needed. The lights just plug into the trailer hitch connector. I will eventually stain it to match truck and camper.
Obviously, the mounting method will differ depending on your camper.
It has worked out great. It’s easy to load the bikes or kayaks. I can pull into a standard parking spot and have the deck overhang the other spot, or back into a grassy island area.
It took me three hours to complete this modification and cost me $30. In my opinion, the skill level of this modification is medium.
10. Jim and Anne Beach, Red Deer, Alberta
Easy Way To Unlatch Screen Door
2009 GMC 3500HD
2012 Arctic Fox 865
I wanted to be able the unlatch the screen door from the main door without having to open the slide on the screen door.
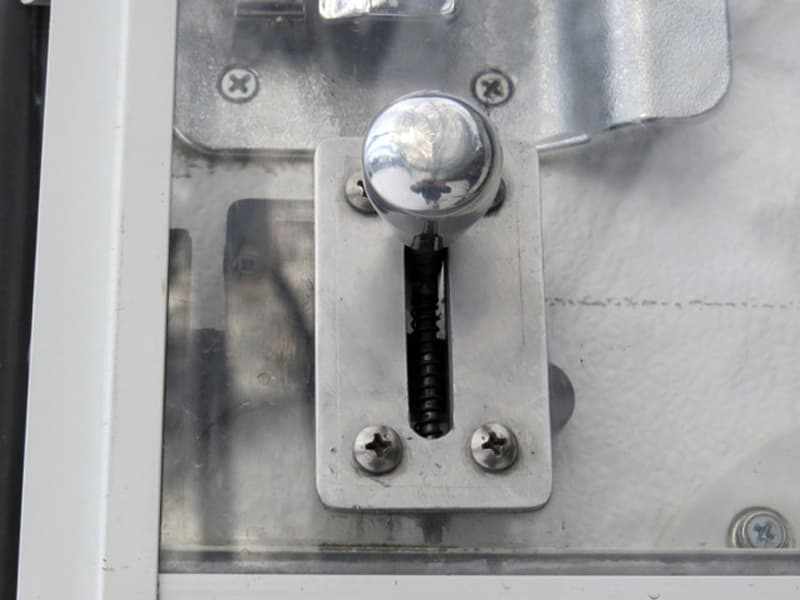
I happened to see one of these mechanisms on a newer fifth wheel and thought it would be a good idea on the truck camper. I looked for the availability of the parts in the RV aftermarket. I came up with a sliding panel, but it didn’t fit our truck camper door because it was the opposite hand.
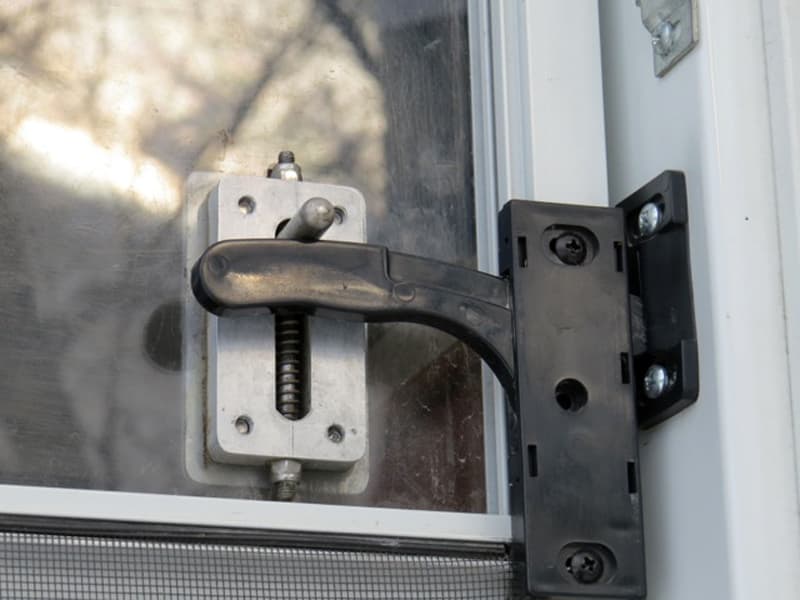
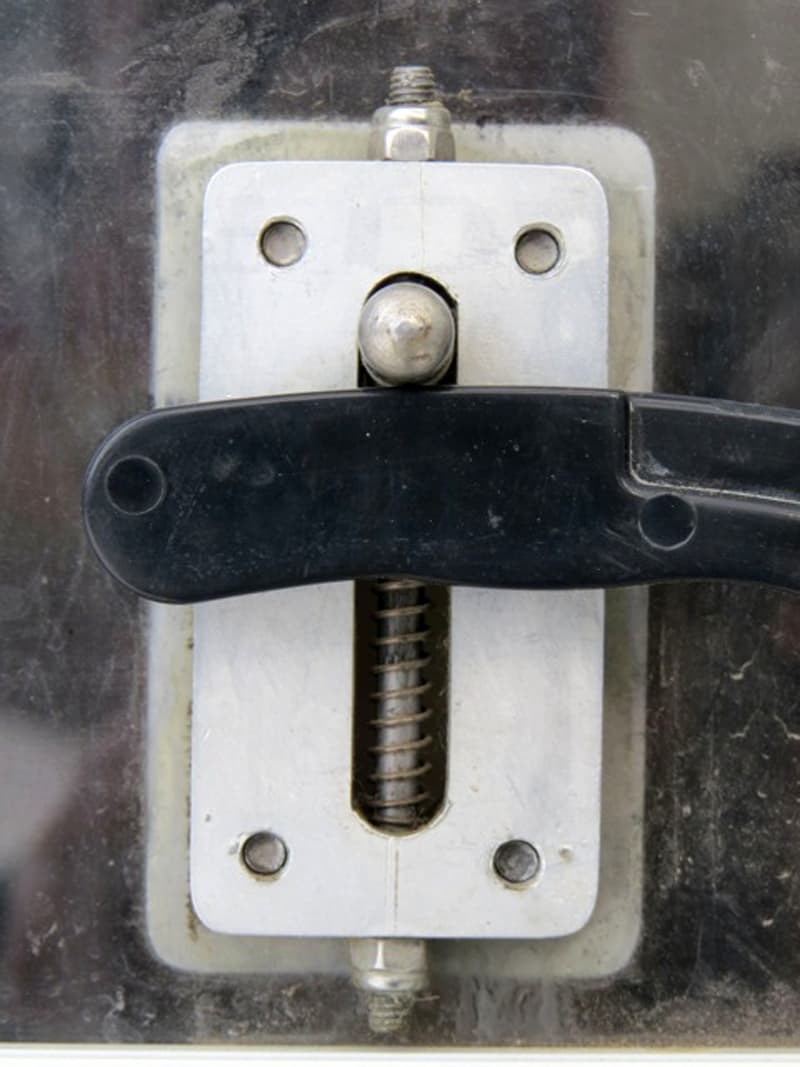
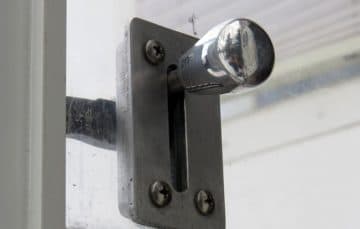
Then I thought it couldn’t be too hard to make something that would work the existing door panel. The mechanism I came up with was made out of 6061 alloy as it was what I had. It helps to have some fabrication skills and be able to scourge small piece of metal to fabricate things.
Most smaller welding or fabrication shops are too happy to give you scraps of most metals, if you ask. Offer to fund their beer fund with a few dollars for the trouble.
The parts where made with a hacksaw, drill press, and a few files. The layout was done with a 6-inch rule and a scribe. The spring I bought from ACE hardware. Most hardware stores have pretty good spring assortment.
 |
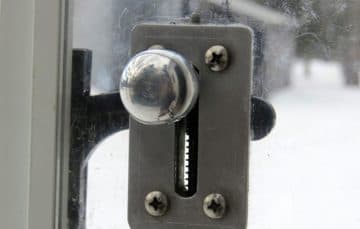 |
The pictures tell the story of how it works. After using it for the last few years, we wouldn’t be without one on any new camper we happen to buy. My wife loves it. That is all you need with any mod.
We are certainly not in the market for a new camper as our Arctic Fox 865 fits us perfectly. Maybe there will be a new truck before a new camper.
It took me a couple hours including thinking about how the idea would work. It only cost me couple of dollars because I had the buy the spring and the small nuts.
In my opinion, the skill level of this modification is hard because you need to have fabrication skills with metal – cutting, drilling, and filing.
Disclaimer: The modifications above are submitted by Truck Camper Magazine readers. It is your responsibility to make sure that any do-it-yourself modification project you undertake is safe, effective, and legal for your situation.
Enter Your Mods Now!
If you’d like to enter a modification you’ve done on your truck camper, click here. You can enter as many mods as you want, at any time. Good luck mod makers!


