Eddie and Pat Hayden envisioned a custom rig for their truck camping lifestyle. Start with a Phoenix Camper shell, build-out the interior to personal perfection, and add an aluminum flatbed with tricked-out storage. The resulting forward-thinking design is simply incredible.
I can’t tell you how many times we have dreamed of the ultimate truck and camper. Not the end-all-be-all rig for everyone in the truck camping universe – just for us. What we want for how we roll. It’s so much fun to envision this completely custom set-up, but we always know it’s just that. A vision.
In all fairness, we absolutely love our current truck and camper and wouldn’t change much. That said, if we had to start from scratch with an unlimited budget, there would be a lot of ideas we would pursue. For starters, how about an above-the-rails, mid-bath 11-foot non-slide? Maybe a side entry and – possibly – a rear sofa?
What fun it would be to design, experiment, test and finally build that camper! Anyone want to loan us a couple hundred grand? Please. PayPal is fine.
Eddie and Pat Hayden are world travelers who also happen to be dedicated truck camper owners and enthusiasts. And, like us, they had a vision for an ultimate truck and camper set-up that would take their adventures and capabilities to the next level. The difference? They had the gumption to make it happen.
With a lifetime of design and construction experience behind him, Eddie opted to have Phoenix Campers tackle the shell and complete the camper’s interior himself. This approach leveraged Phoenix Camper’s proven expertise for building solid custom truck campers with the freedom to complete the camper as Eddie and Pat saw fit.
What makes this rig especially interesting is how Eddie and Pat finished the camper to accommodate their personal truck camping lifestyle – item for item, location for location, detail for detail. Eddie is nothing if not meticulous in his design thinking and presents many concepts not commonly found in the truck camper world – or any RV for that matter.
What follows is a deep dive into Eddie’s vision and how he made it happen. Grab a cup of joe, a tape measure and some painter’s tape. You’re going to need it.
Two years ago you went from a 2013 Palomino Bronco 1251 pop-up camper to a Phoenix Camper shell model. Then you completed the shell’s interior yourself. Where did you get the concept for this highly custom truck camper rig?
In 2012 we bought a Palomino pop-up as an entry-level camper for our needs. After three trips to Africa and a few side trips, we have decided to spend more time in North America. We also wanted a camper that better suited our camping style and requirements.
We knew we wanted a shell camper. Based on positive online reviews, we gave Phoenix Campers a closer look. We later visited their facility in Commerce City, Colorado and explained our shell vision with co-owners, Robby and Cari Rowe. After reviewing our plans, they had no problem building what we wanted.
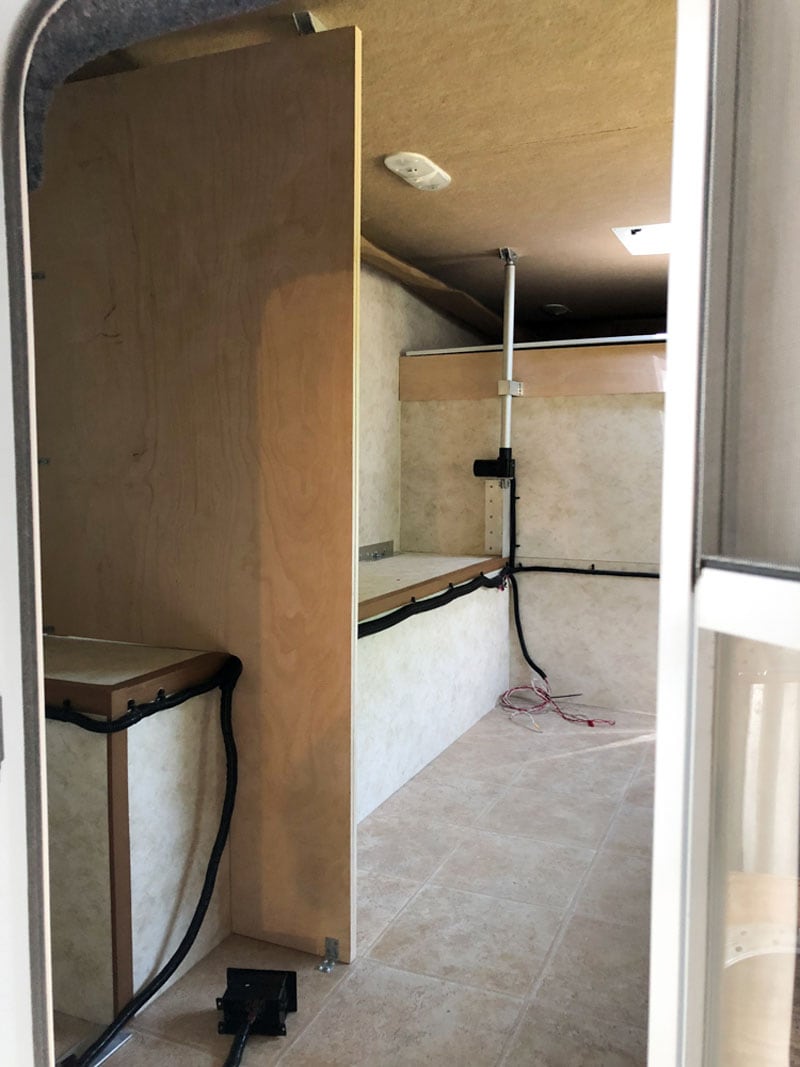
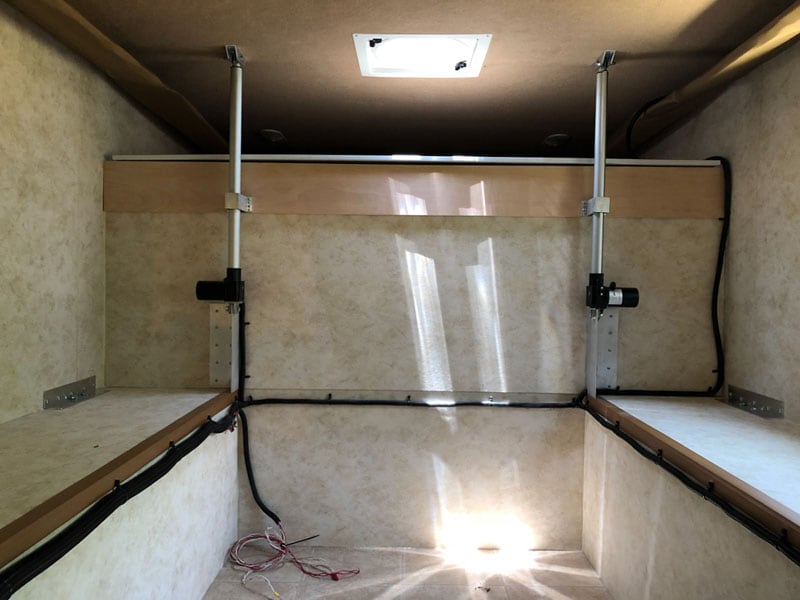
Above: The bulkhead panels that are visible in this photo are supports for the roof lifts
Our design excluded several items that are on most of their custom builds. For example, we didn’t want the window in the front wall between camper and truck.
Robby also installs an access door in the lower section of the camper for their in-house hold-down system. I had conventional hold-points installed to work with my Torklift frame-mount turnbuckle system.
I did have Robby build our cabover so that we could fit a 10-inch mattress. At 66 years old, comfort is everything.
With his decades of experience building custom truck campers, Robby added a few design details to ensure the quality and strength of the final camper. For example, Robby added bulkhead walls to support the roof system.
Before sending us home with the completed shell, Robby also added overhead lights, a fan, wired the roof lights, and installed running lights for the brakes and turn signals for safety.
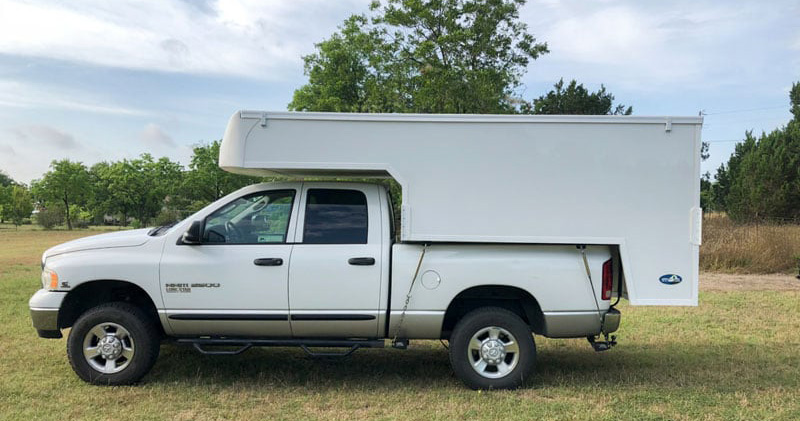
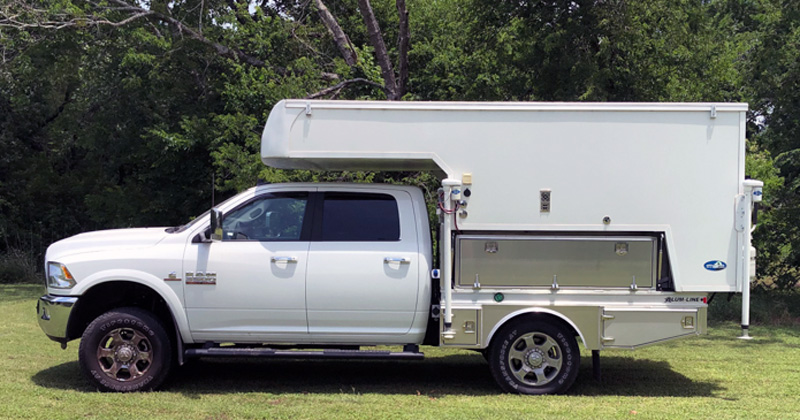
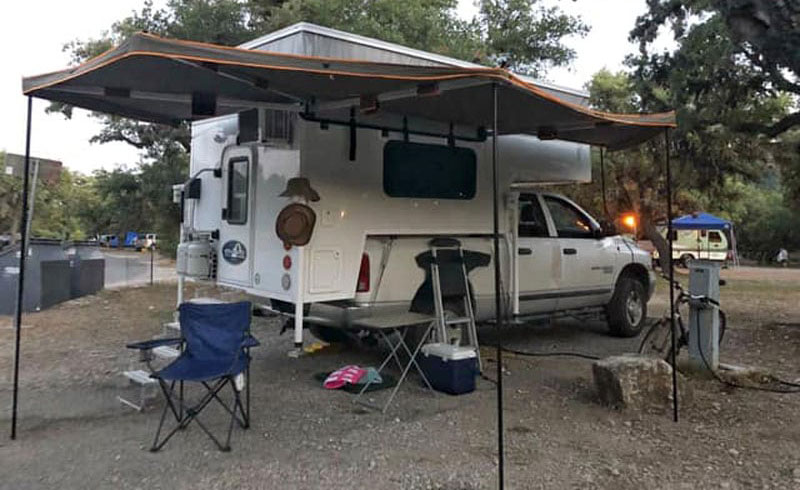
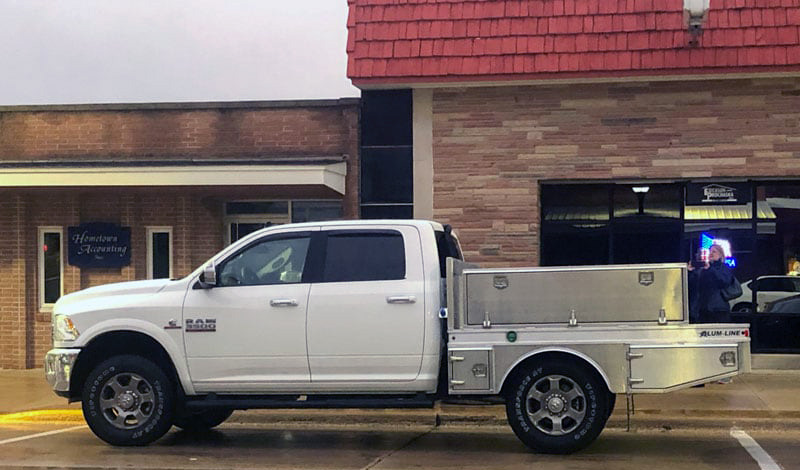
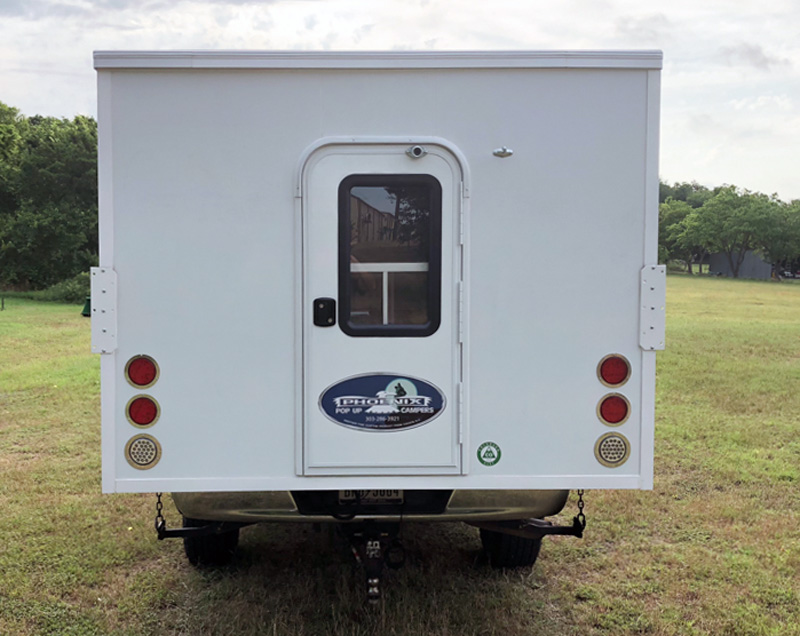
Above: The Phoenix Shell completed on their Ram 2500
Nearly all Phoenix Campers are built with custom finished interiors including cabinetry, installed appliances, dinettes, kitchens, bathrooms – whatever you want. Why did you forgo having Phoenix complete the interior and choose to build it yourself?
Yes, Robby and his crew could have built us a finished camper that would have been first class and met our wants and needs but, for me, it would not have been mine.
I grew up in a family of people that built things. I was a union sheet metal worker as was my dad. My uncle owned an electrical business. I’ve been around the building trades my whole life.
Thirty-five years ago, Pat and I built our house from the foundation up. We still live there. As they say, I’m a jack of all trades and a master of none – or I know enough to get myself in deep you know what.
The fact that Phoenix Campers would build us the custom shell we wanted – and then allow us to finish the interior – was exactly why I wanted a Phoenix Camper.
“As they say, I’m a jack of all trades and a master of none – or I know enough to get myself in deep you know what.”
When you designed the interior, did you start with an existing floor plan?
I’m a visual person so, each morning, I would make my coffee and sit in the shell with a roll of painter’s tape and a tape measure. I also ordered all the appliances we had selected so I could get true measurements to work with. My goal was to keep everything tight to the outside walls and maintain as much floor space as possible.

The first item I installed was the cassette toilet. There wasn’t any question where it was being installed. I placed the template and drilled reference holes.
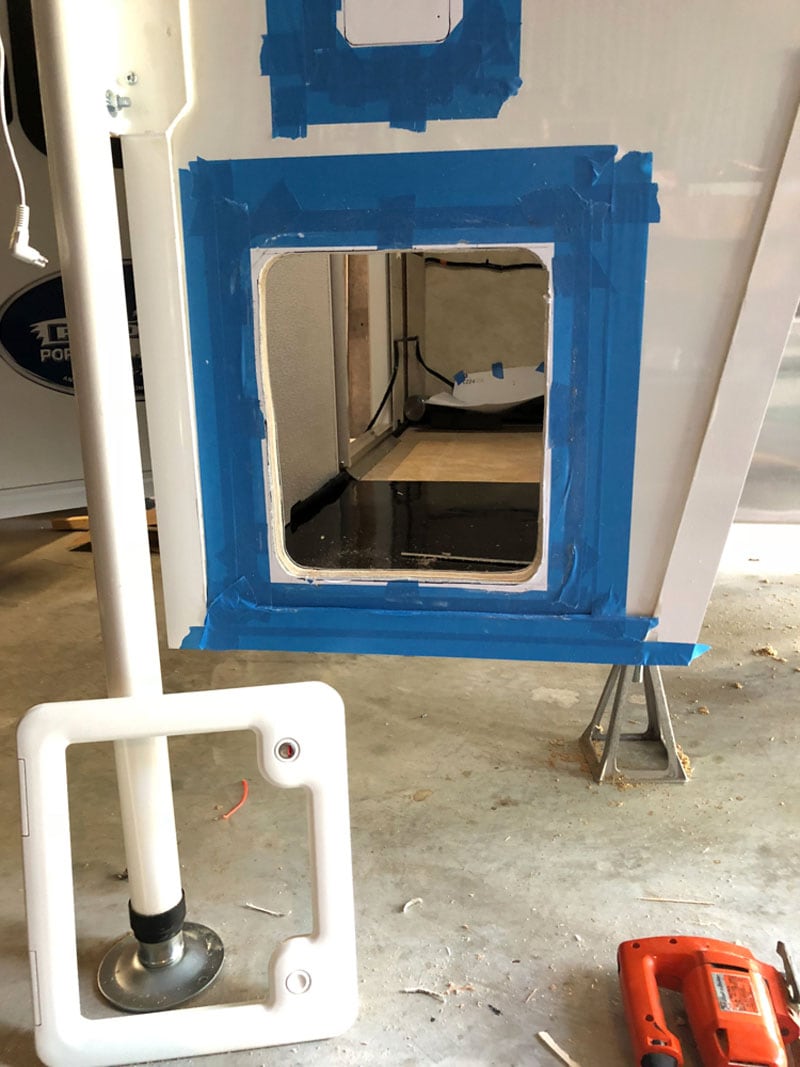
With the reference holes drilled, I laid out the holes for the access door and water fill. As you can see in the above photo, I used a lot of painter’s tape during this build for reference and to protect the surfaces.

Then I placed the water tank and started working on a place to mount the electrical components. Placing the water tank was another no brainer. I was doing my best to keep the heavy stuff in front of the center line of the rear axle.
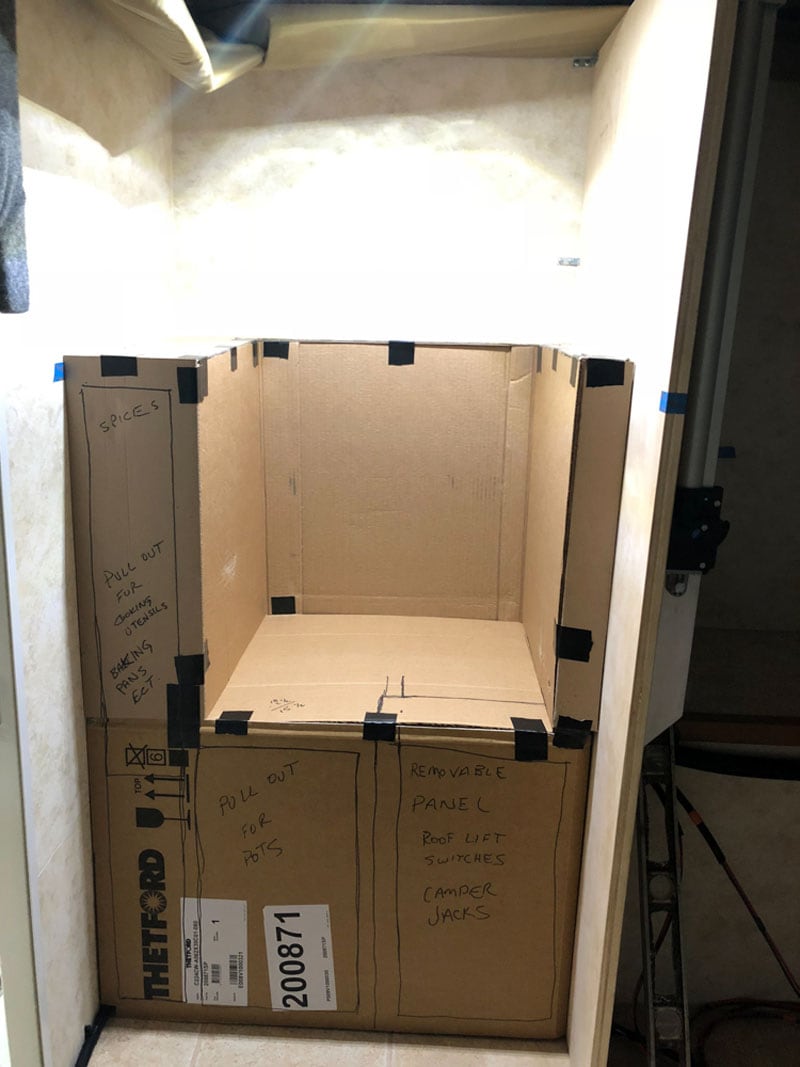
I built cardboard mockups so that I could visualize what I was planning on fabricating. It was also easier for Pat to see and I could get her stamp of approval. I’ve learned my lesson after forty-three years.
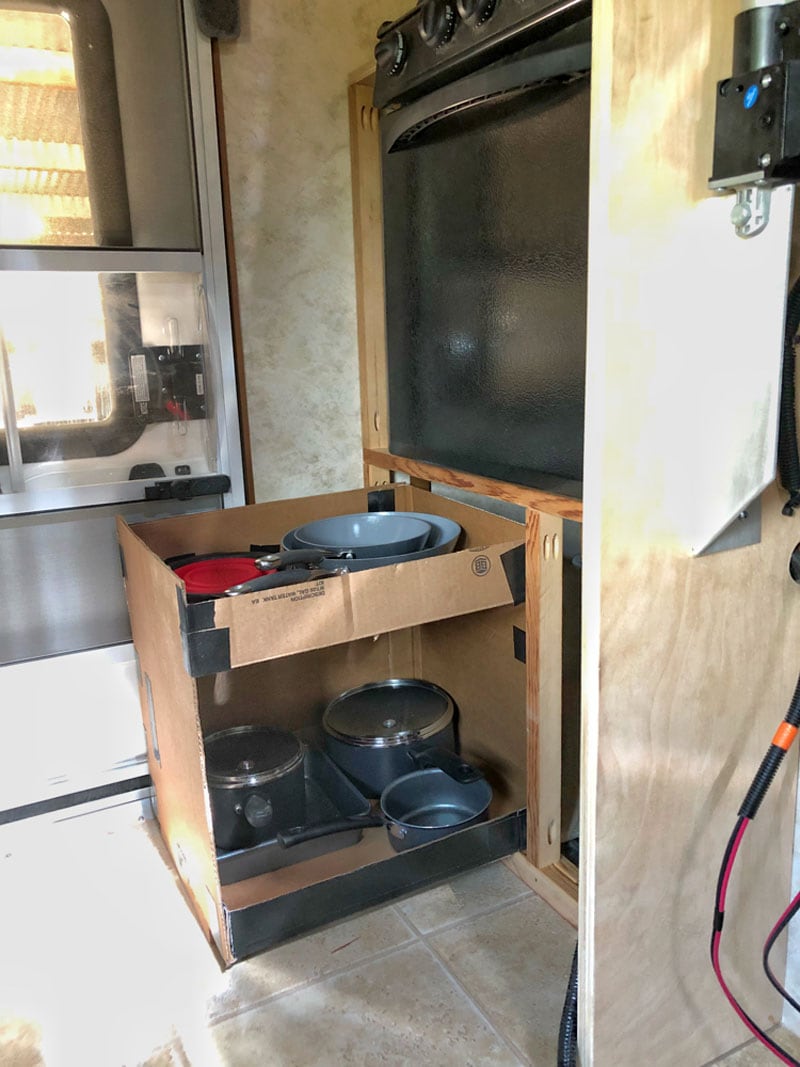
Here is an example (see three pictures above) of where a cardboard mockup allowed me to make sure our cooking utensils would fit.
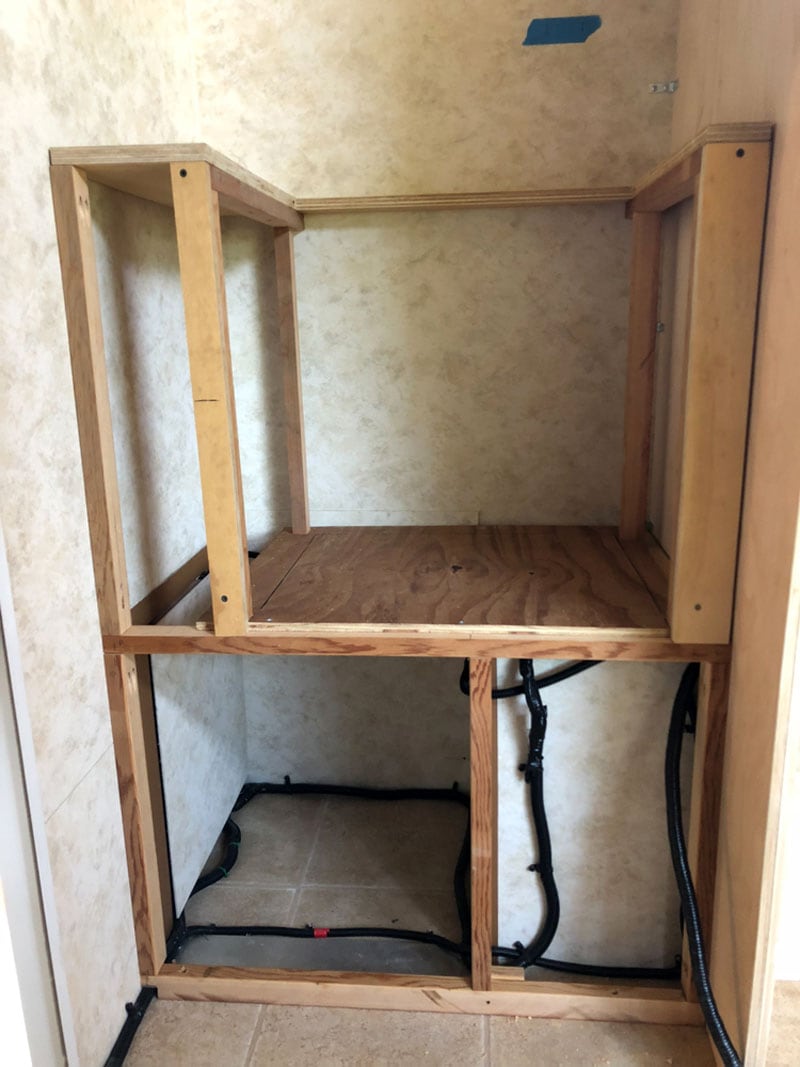
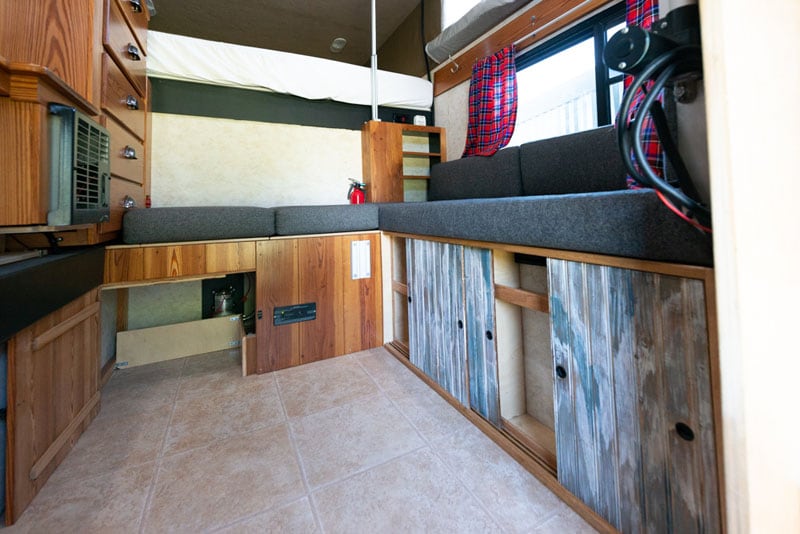
I knew we wanted a little wider seating area, so I built a narrow cabinet with sliding doors for canned goods and boxed items. This gave us a 24-inch wide bench with enough space for an adult beverage or two. In the upper right, I built an enclosure to cover the lift motor and a shelf with a USB outlet for charging our phones.

The jury is still out on the cabinet design. I’m not sure Pinterest is my friend. I was trying to simulate old painted wood. My wife doesn’t care. Our daughter doesn’t like it, but she has her own camper, so she doesn’t count. It grows on you.
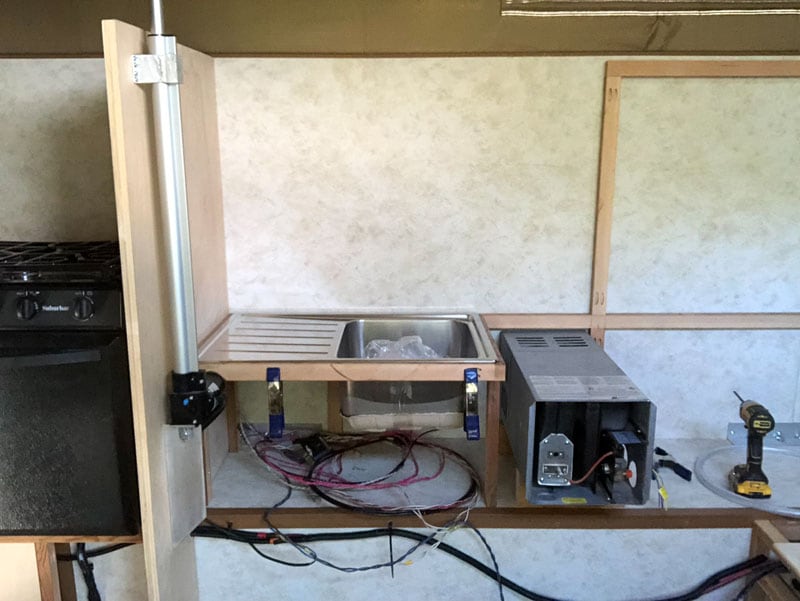
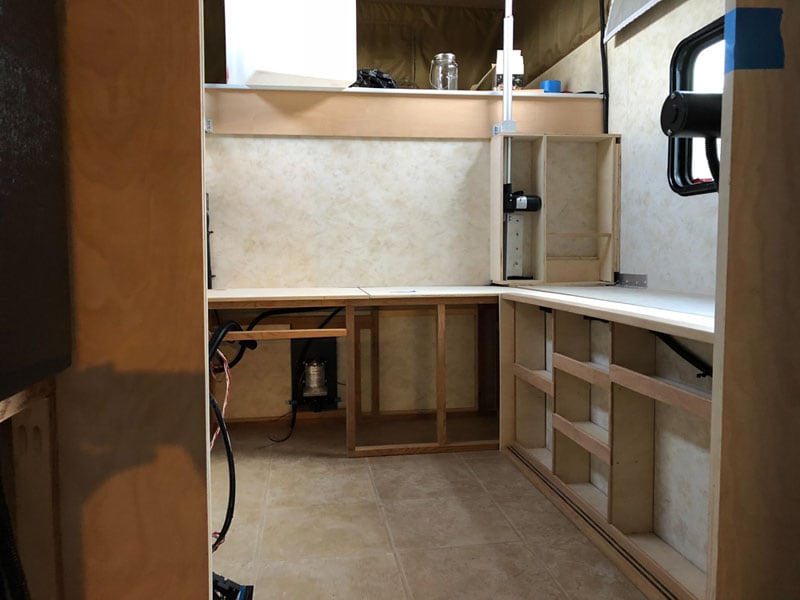
Above I have the sink set in place. The furnace is installed and I’m working on placing the sink.
The drawers were built and I was waiting for the fronts to be installed. I’m not sure what you call the wood that goes between the drawers. I installed those with one screw on each side, so they can be easily removed. Then the drawers come out and everything that is installed inside that location is accessible.
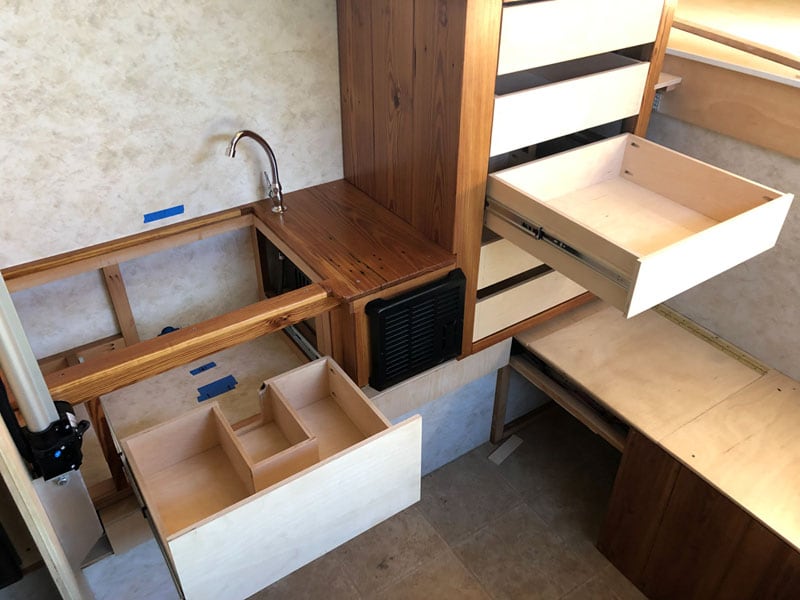
I tried to use all the available space. I built this drawer to wrap around the plumbing. Because of the shape of the sink, we can only put tall items on the left side, but it’s a very useful space.
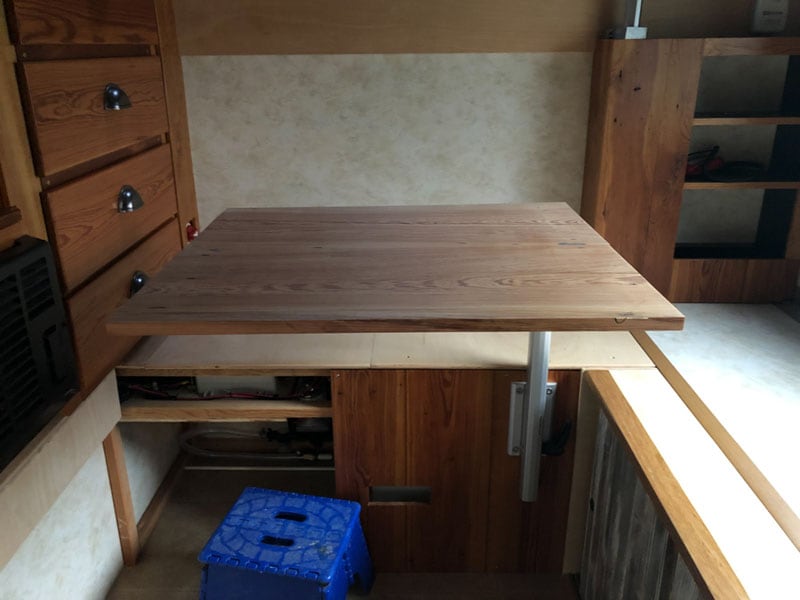
We also decided to use the Lagun table system. We like the way it can be swiveled around and placed out of the way. Most of our meals are cooked and consumed outside.
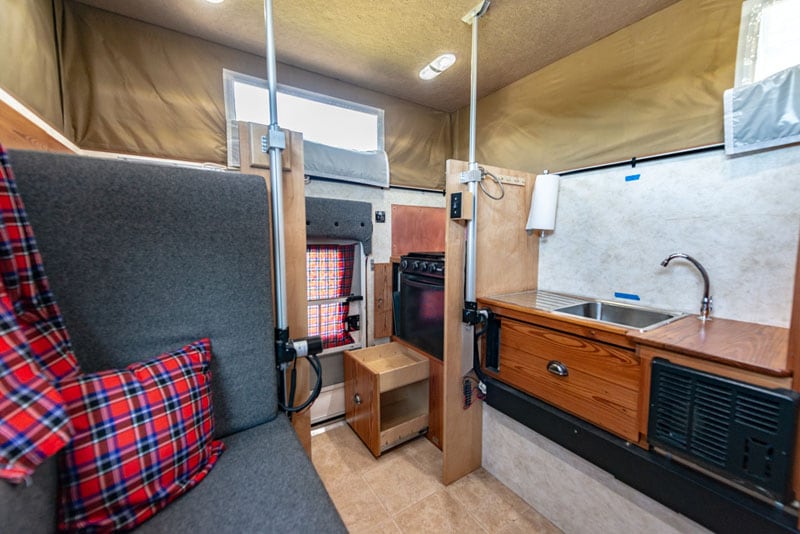
The picture above shows the area under the stove storage. We used the bulkhead wall for paper towels, a towel ring, and cup hooks. We also have a board that covers most of the sink for additional counter space. That cover board slides under our mattress when it’s not in use, or when we’re traveling.
In the space in the front, we put shoes, dog food, and miscellaneous stuff. Behind the sliding doors, we keep our canned goods and boxed goods. And it’s my bar.
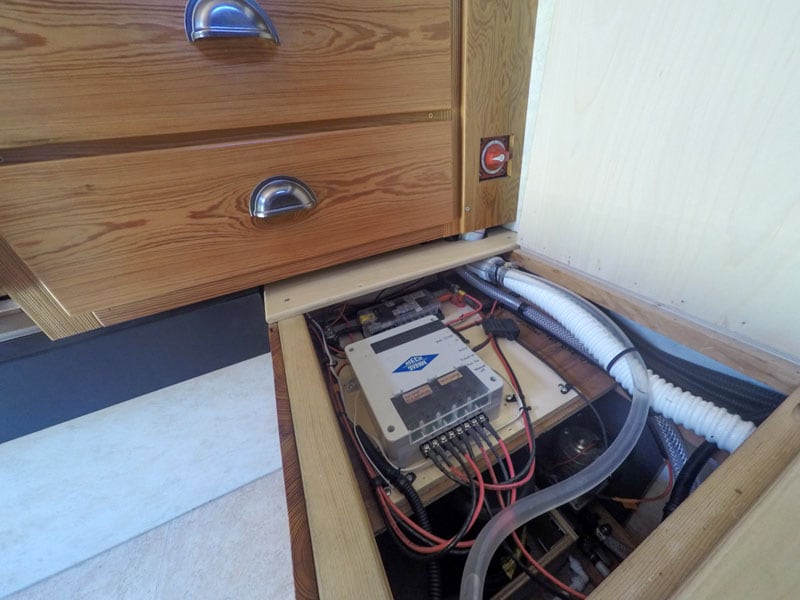
This is our 12-volt distribution center. The black cover hides the wiring that runs to the back of the camper. There is a breaker box for the 120-volt power on the upper side of the chest of draws on the mattress side.
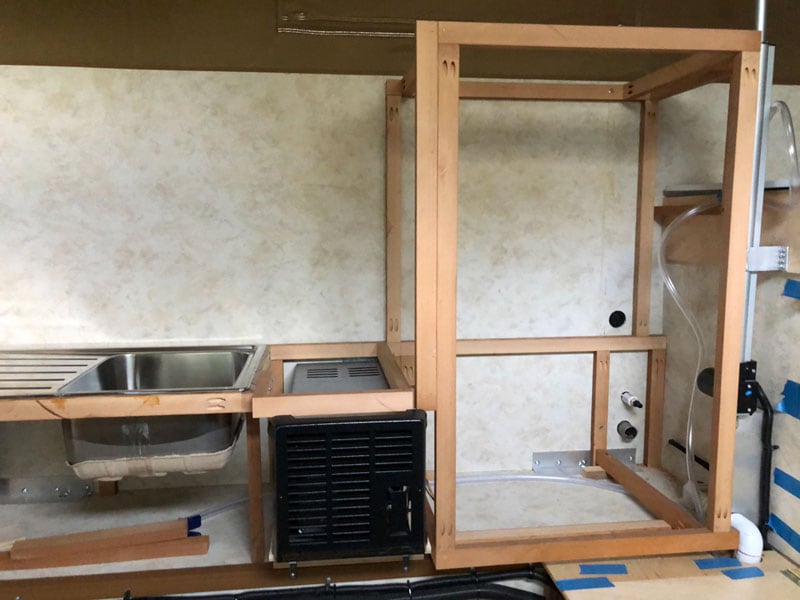
In the pictures above we see that there is a wall in between the sink and the stove and oven. Why did you separate the kitchen?
That wall was installed by Robby to support the roof-lift system. I could have removed it and re-supported the lift. However, after some thought, I decided it wasn’t a hindrance. The wall on the opposite side provides some privacy for the toilet. We also had an upholstered pad made for the other side to lean against.
It appears you designed and built the interior based on exactly what you bring with you. You didn’t just put a cabinet here and storage there.
That’s correct. We camped for seven years in our first truck camper and developed a pattern. That helped us to decide what we needed. When we designed the interior of the Phoenix, I laid out everything deemed essential and made a space for those items.
For example, I decided where the oven was to be placed. Then I designed a place for everything I needed while I am cooking to be right there by the stove and oven.
In our old camper, we often had to reach back for the items we wanted. In this camper, we wanted all the pull-out drawers where we needed them.
We don’t have a water heater. We found heating six-gallons of water to wash dishes was a waste of propane and time. We put the kettle on with a small amount of water. In a few minutes, the dishes are done.
Keep in mind that we are not full-timers. A lot of what we do might not appeal to people who live on the road year-round. We are weekend warriors that camp for a month or two at a time.
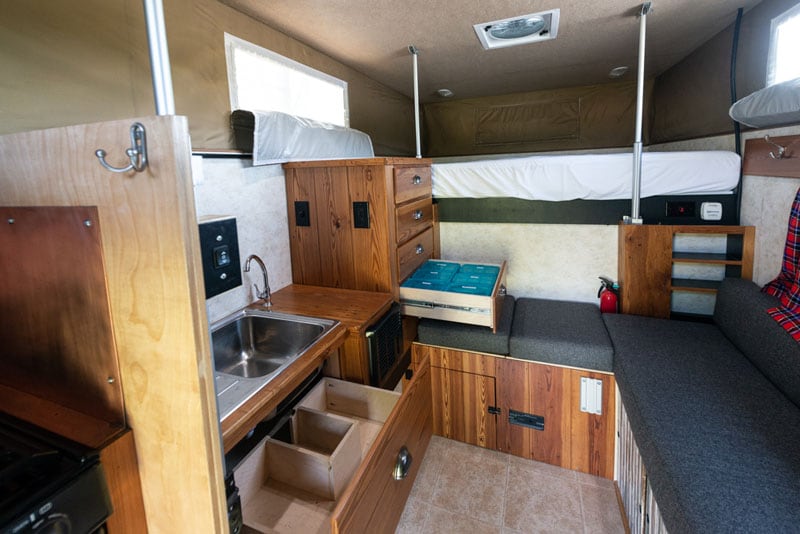
This is the finished product. The drawer that’s open at the top shows the way we store flour, sugar, coffee, rice, and other bulky items. There are twelve 4.5-cup containers. Under the sink, we store cleaning products.
“All the wood used for the framework was leftover straight grain Douglas Fir from when we built our home.”
It’s interesting how you reused materials for the cabinetry. Are the cabinets the only time you reused materials during the interior build?
I also had some sheet copper leftover from a project that I used around the stove. All the wood used for the framework was leftover straight grain Douglas Fir from when we built our home.
I had a friend of a friend mill the wood for our camper. Our home has a lot of wood trim, but a true woodworker would probably have a field day scrutinizing my woodworking skills.
It sounds like you also thought about maintenance down the road. What else was planned that way?
One of my main goals with this build was to install items so I could easily repair or replace them. Our water pump is mounted on a wood plate that slides into a track. With the removal of one screw, two hand tight connections on the inlet and outlet water, and two electrical spade connections, the pump is out.
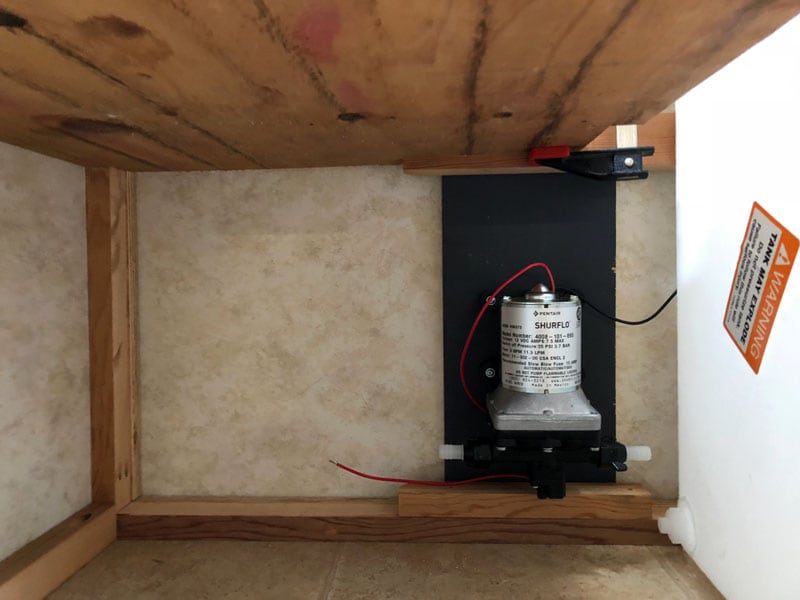
Above: This is one example of installing components for ease of future repairs. It was so easy to do – and it just made sense.
All the wiring in my camper is run so that it’s easily accessible and everything is protected on its own fuse. With a few exceptions, most everything can be repaired or replaced with a stop at any hardware store.
If something doesn’t fit in one of those categories I’ve thought about workarounds. This comes from my years working in the semiconductor industry. When we had a piece of equipment not working, we had to get creative.
For this build, you went from a Ram 2500 to a Ram 3500. Why did you change trucks?
When we bought the camper shell we knew we wanted to get a new truck at some point. I also knew a flatbed service body was also in the plans. With a flatbed in mind, I wanted a truck with more payload.
Water is one thing that can limit us for how long we can camp off-grid, so at some point, a new water tank may be in the works. I have two sheets of stainless steel stashed in the shop that has, “water tank” written on it.
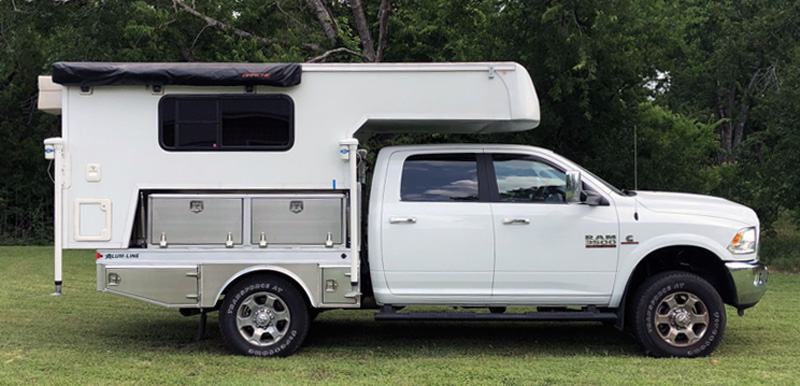
Above: The truck after picking it up from Alum-Line on a cold and rainy Iowa evening
How did you go about getting the flatbed?
I talked with Alum-Line and discussed options for a flatbed. They told me they could build pretty much anything I could draw up. I sent them a screenshot photo of a bed similar to what I wanted and a detailed drawing of how I wanted ours built. Alum-Line also built the storage boxes per my design.
What design features were part of your custom flatbed?
I wanted a full-length box on the driver’s side to handle the few larger and longer items we carry; a three-step ladder, camp chairs, fishing poles, and maybe a screen enclosure.
The driver’s side front lower box has our second lithium battery. The other lower boxes have blocks for leveling, hoses for filling water, a hose for our grey water and grey water tank. We also store our camp chairs, a small ladder that I use to unclip the roof, and power cords in the truck bed.
I had the passenger’s side divided in half. The front box closest to the cab and refrigerator has my outside stove. The drop-down door can be used to cook on if we’re camping off-grid. I’m still moving stuff around to find the most convenient place for things. This is a wonderful problem to have.
The jacks interfere with the two front lower boxes. I knew this before I designed and ordered it. I’m still on the fence on how I want to solve this minor issue. I can remove and store order hinged extensions, or build 2-inch spacers.
On our first camper, the house battery was mounted in front of the rear fender in the bed of the truck. Not having the battery stored in the camper made sense. It saves a considerable amount of interior space.
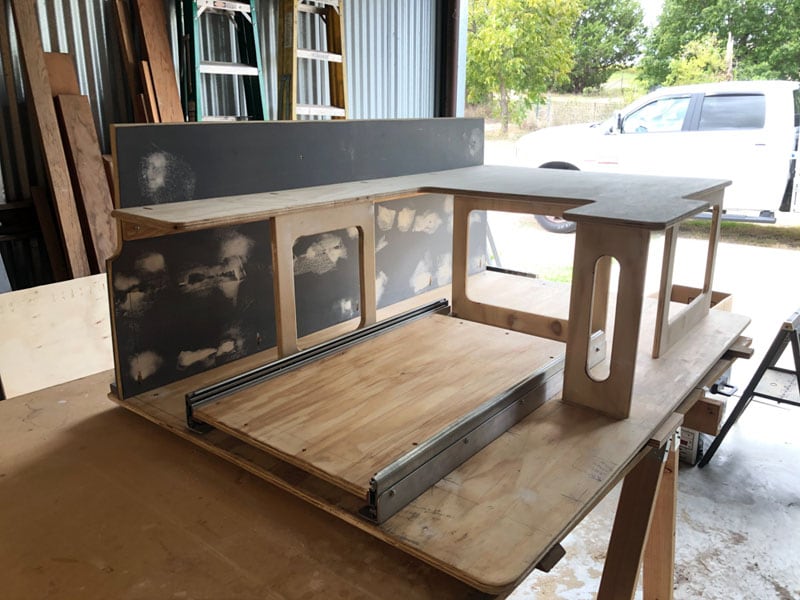
Above and below: This is the rear storage unit that replaces our rear truck seat. I reused part of the unit from our old truck. This took several fittings to get it the way I wanted it.
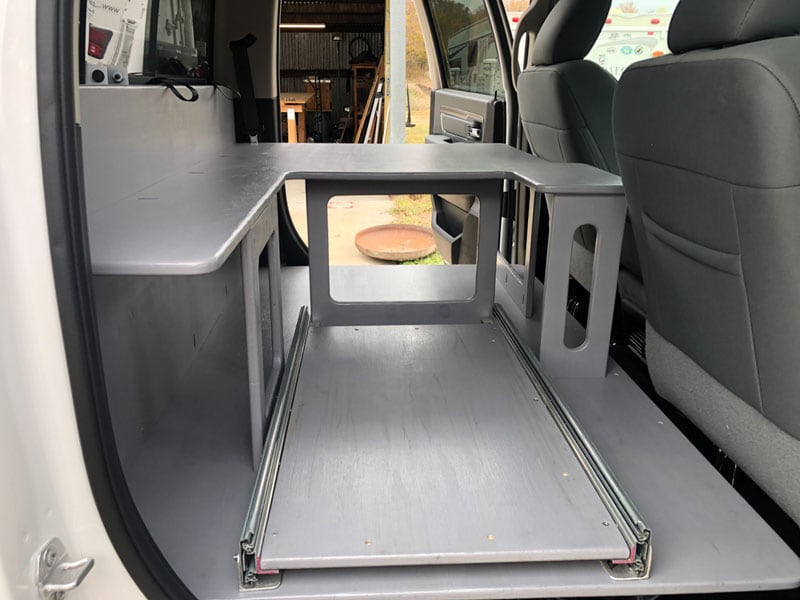
In our old camper, we started to have issues with the three-way refrigerator, so we purchased a National Luna compressor refrigerator. I rebuilt the storage platform we had in the old truck to accommodate the new refrigerator.
We got in the habit of dropping the camper and driving around without it. It was very convenient to have our food and drinks with us while out exploring and doing our photography.
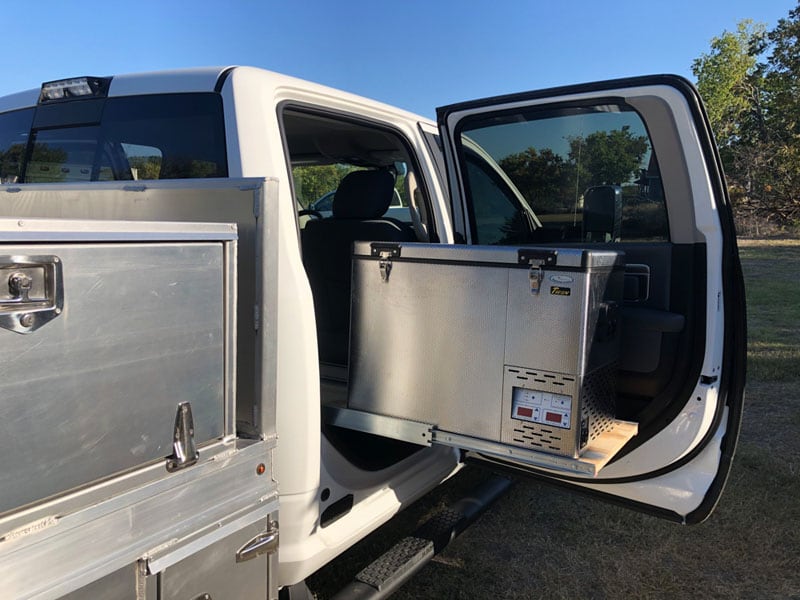
We wanted to still have that option in our new truck and camper. We spend the majority of our time outside of the camper. We also cook most of our meals outside of the camper so having the refrigerator easily accessible from the outside works for us.
Is there anything else that might traditionally be located in the camper that you moved to the truck or flatbed?
I am currently looking at a Zodi heating system and a Joolca Hottap propane water heater. The Joolca would be installed and stored in one of the lower rear storage boxes for an outdoor shower.
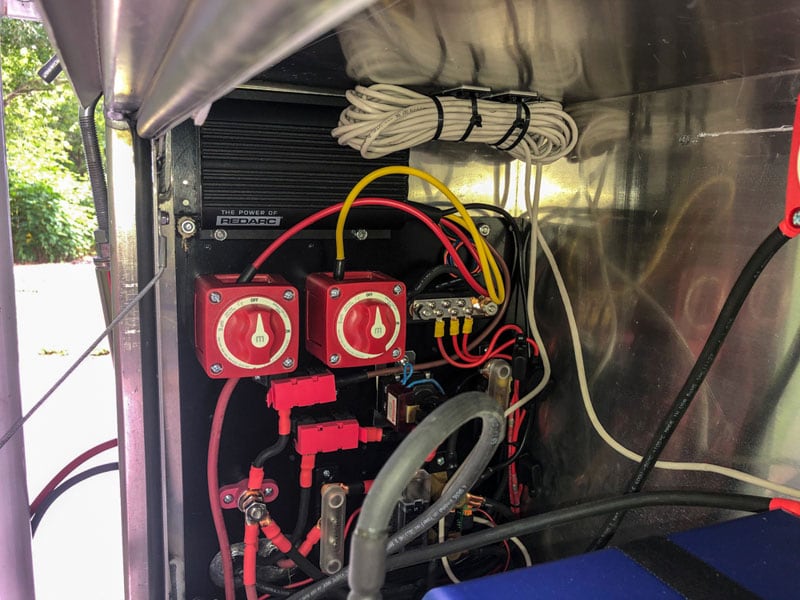
Above: This is the electrical panel that supplies the 12-volt power for the truck and camper. The black box at the top of the photo is a REDARC BCDC. The REDARC BCDC is a dual-input, DC-to-DC smart charger. It takes solar panel inputs and DC power from the truck alternator and charges the camper batteries.
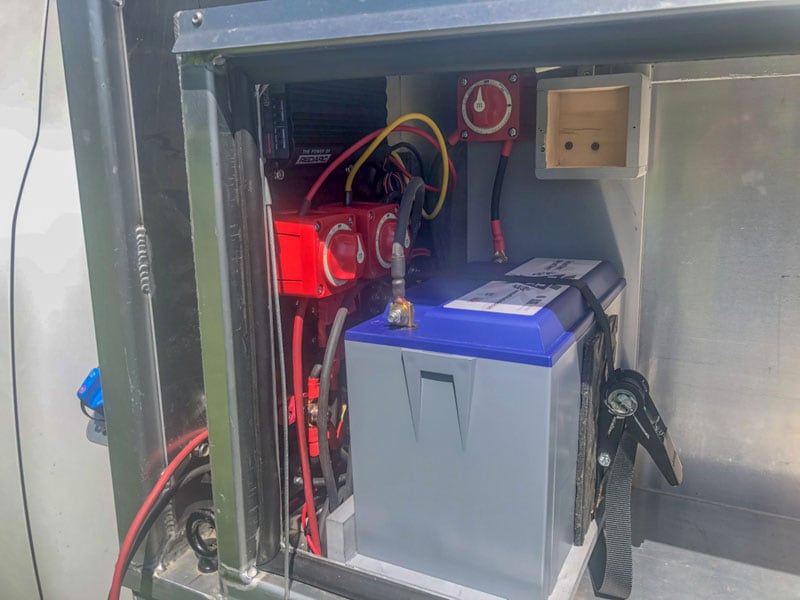
Above: This is with the upper battery installed. The second battery is mounted in the lower box. The little box in the upper part of the photo now houses a Victron 712 battery monitor that uses a Bluetooth connection. The Bluetooth connects to my phone so that I can see what’s going on with my batteries.
Does having your batteries stored in your truck storage compartments make loading and unloading the camper more challenging?
No. Our camper has a 60-amp Anderson plug that receives power from the batteries in the truck. When I’m loading the camper onto the truck, I just back up close to the camper and I have an extension cord to connect the truck and camper to power the Rieco-Titan jacks. When the camper is at the proper height I disconnect the power and position the truck and back under the camper. Once I have the truck and camper in position, I reconnect and lower the camper.
Is there anything else you are going to add to your camper at this point?
I have a 100-watt solar panel that I haven’t installed yet. I’m also looking for a porthole window to install above the sink.
Pat and I have had the opportunity to go on some amazing adventures involving boats, so a port hold window would be a nice focal point and reminder of those trips.
Our curtains are made from blankets we got in Kenya. I want to do some graphics, and we’re still trying to decide if we want to paint them or use cut vinyl.
For me, nothing is complete. Sometimes I grow tired of a project and just live with it, but I like to look for a better or different way of doing things.
It sounds like the rig may never be officially completed. However, how long did it take to get the Phoenix Camper shell, truck, and custom flatbed assembled?
We ordered the shell in May of 2017 and received it in May of 2018, exactly as promised by Phoenix Campers.
It took me 13-months from receiving the shell to our first outing. I had a few months of downtime during that time frame. We spent a month in Africa having fun and then I had hernia surgery that kicked me pretty hard.
From June to September I spent quite a bit of time sourcing parts and working on the design. After receiving all the big-ticket items, I started by putting tape on the wall and making cardboard mockups to make sure we liked the direction I was going.
Then we took a month break to go to Africa. When we returned I started building the framework for the water tank and drawers. We didn’t want cabinets.
Then I installed the heater and stove/oven. Once they were installed, they got framed in and I was making good progress. I had the camper ready for the finished woodwork when I went in for surgery.
Simple surgery isn’t always simple. I missed about two months of work on the camper and our April target got pushed to June.
Anyway, we took our maiden voyage in June of 2019. It was a long weekend with the camper on our old truck. We came home and I tweaked a few things and just hung out until August.
Then we spent a week camping with grandkids. We don’t normally camp between Memorial Day and Labor Day, but grandkids take priority. So, in September we took off heading west to New Mexico, Arizona, Utah, Colorado, and back to Texas.
Back in June, we purchased our new truck. In July I ordered the flatbed from Alum-Line. While in Utah we got a message our bed was ready, so we scheduled an install date. As soon as we got home we parked the camper and old truck.
I jumped in the new truck and headed to Iowa. In October 2019 we had the new truck with the flatbed at home. Shortly after that, I began to remove the rear seat and design the storage area for the new truck. With that built and the refrigerator installed I started on the electrical install.
Pat got us a reservation in the Florida Keys for March 1st, so I now had a deadline. Really it was the only one I’ve had this whole build. The last week in February 2020 we headed east along the gulf coast to Florida where we met up with you and Gordon.
Then we hit the Keys for five days and then up the east coast of Florida. When we got to Fort Pickens in Florida’s panhandle on March 16 we decided it was best to fast track home because of Covid-19.
It was five-months from the flatbed being installed to camping in the new truck and camper combination.
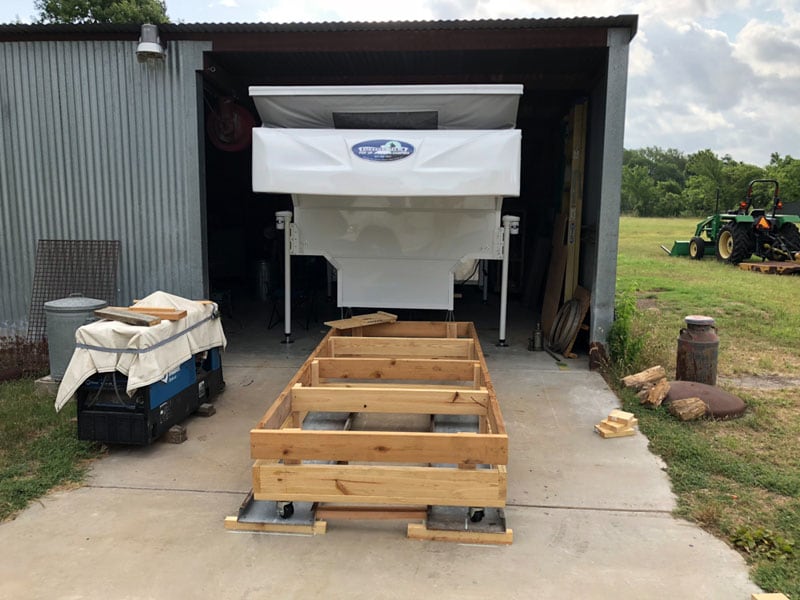
Above: Eddie built a dolly to roll the camper in and out of his shop
If you were to start this project again from scratch, what would you do differently next time?
I personally wouldn’t change the build. I had given a lot of thought to what we wanted. We’re both pleased with the result. Time will tell, but if something fails to perform as expected I wouldn’t hesitate to make changes.
I think someone thinking of fitting out a shell would benefit from camping in a truck camper for long enough to decide what works and doesn’t for them. Then, they would need to have the skills to complete the project. Also, don’t take on a project like this expecting to save big bucks. You will probably be disappointed.
The main reason for this build was to end up with a camper that worked for us. It was not to save money. I know a lot of campers out there will see this article and be scratching their head thinking, “What the heck is this?” – and that’s okay.


