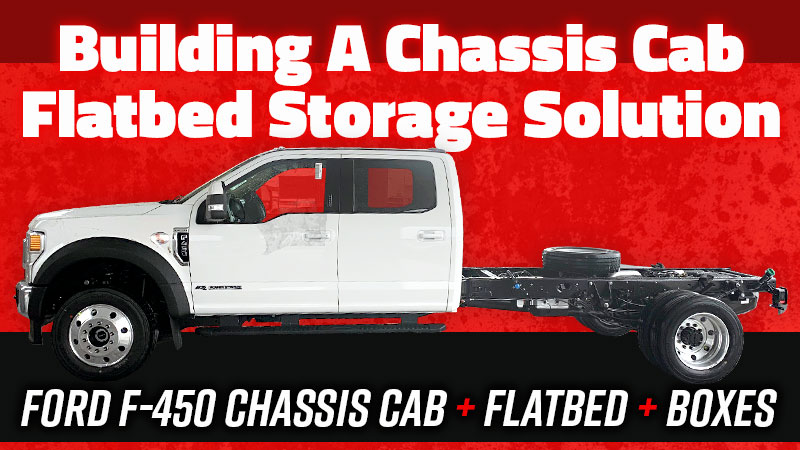
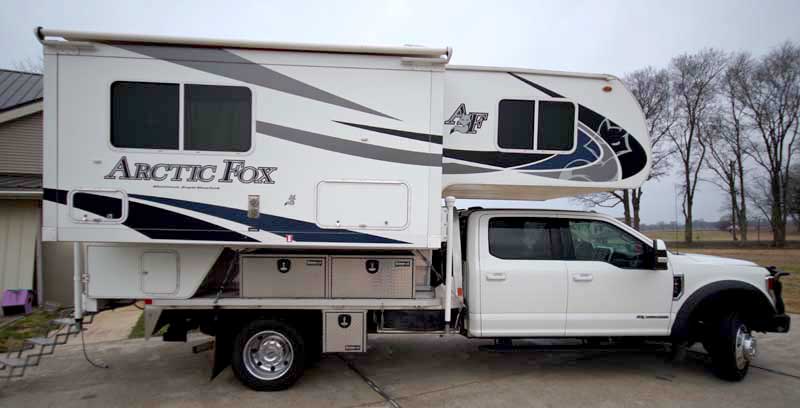
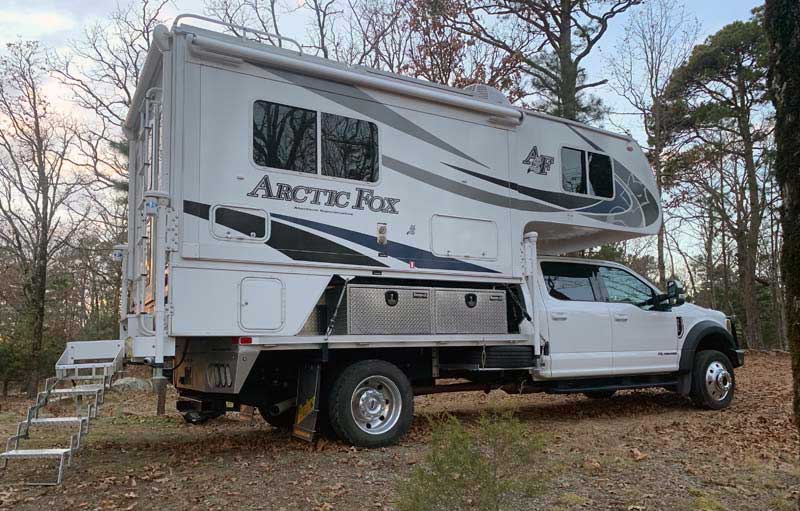
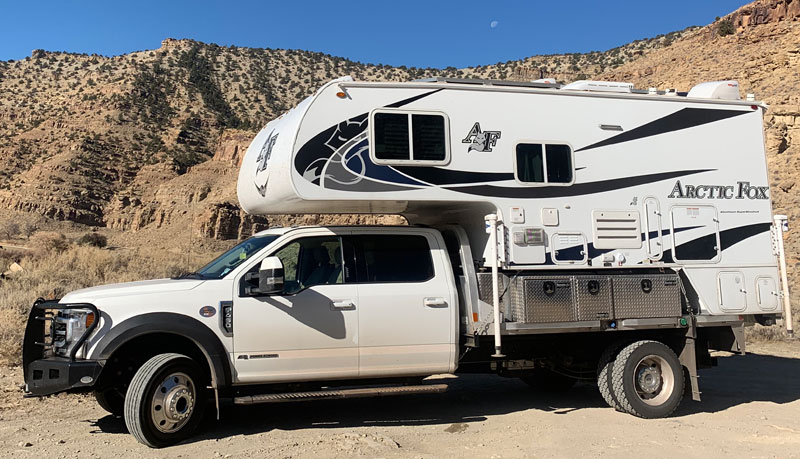
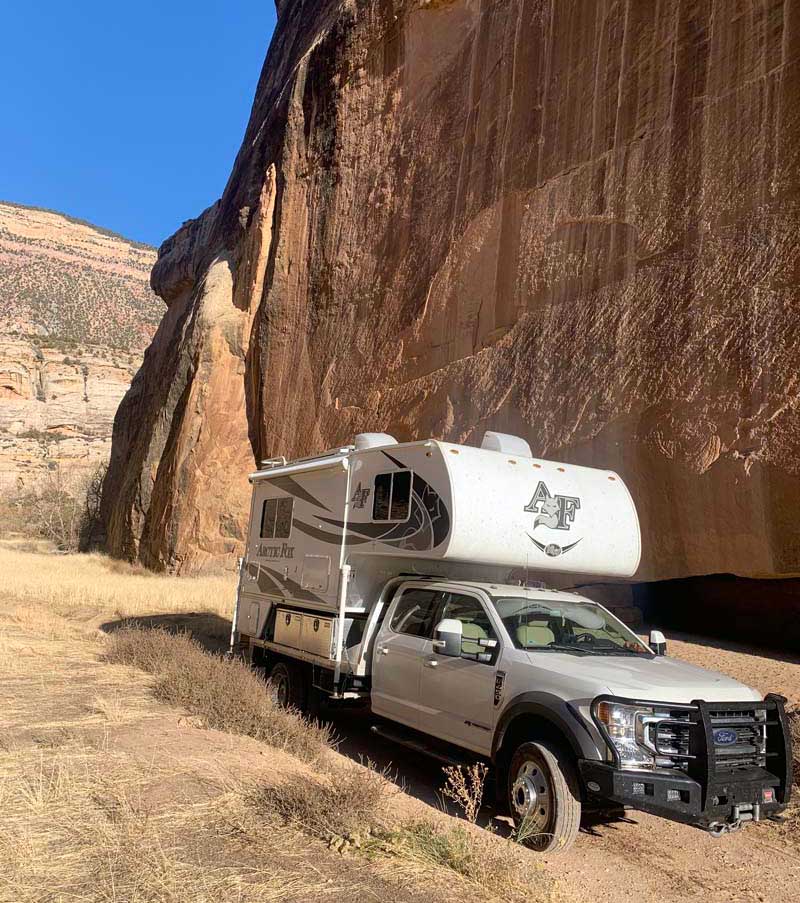
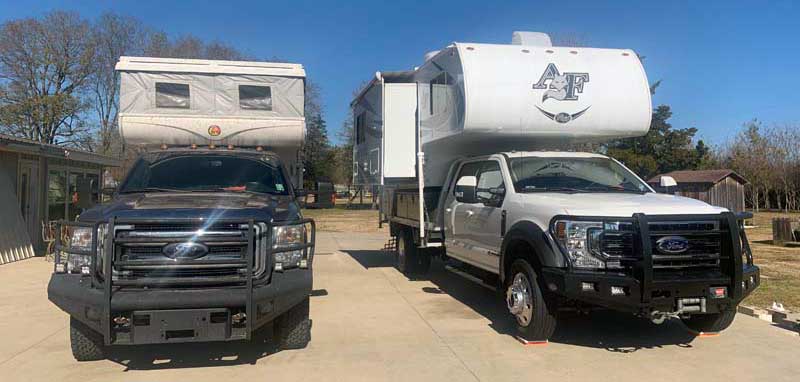
For his Arctic Fox 1140, Geep Moore assembled a Ford F-450 chassis cab, production-built aluminum flatbed, and aluminum boxes for a robust and modular truck and storage bed solution. Here’s how he did it, step-by-step.
To be absolutely clear, there is no poor man’s version when putting together a brand new Ford F-450 with an aluminum storage bed. What Geep’s approach exemplifies is a less-expensive and possibly more custom approach. Not cheap, but cheaper. Not necessarily better, but more modular.
Here’s the basic recipe. First, opt for an F-450 chassis cab. Not only does an F-450 chassis cab save upwards of $15K off the price of an F-450 pickup, but it adds 2,500-pounds of GVWR. Next, add a production-built aluminum flatbed from one of the many companies that offer them. Finally, add aluminum topside and underbody boxes from a company like Buyers Products.
Simple, right? Well, no. To successfully pull this off, you need to take meticulous measurements of your intended camper and flatbed to make sure there are no unintended points of contact. For example, the F-450 chassis cab bed is longer than a standard pickup possibly causing the camper and center of gravity to be pushed too far back. Next, the aluminum flatbed might have a tall headache rack that could result in an unexpected cabover intrusion. Over the years we have heard numerous examples of custom truck beds causing similar fitment issues. Please measure carefully and check everything before loading.
For those who are unfazed by the project’s scope and required planning, the results could be more functional, with more payload capacity, and certainly less costly than other truck and storage bed approaches.
What follows is the story of why Geep Moore decided to buy a new Ford F-450 chassis cab, and how he uplifted it to work with his Arctic Fox 1140 wet bath. Thank you for sharing your project and process, Geep. Your rig looks fantastic.
by Geep Moore
During our 2019 trip to Newfoundland, we were in a Hallmark pop-up and starting to think about changing to a hard side camper with more room and storage. We had seen an Arctic Fox 990 with its additional living area and North-South cabover and found that very appealing.
With that in mind, we stopped into a dealership in Georgia to look at an Arctic Fox 1140 dry bath. I stand at a little over six feet tall and I found the shower a little too tight.
On our way further north, we visited a dealership in New Hampshire to see an Arctic Fox 1140 wet bath. The 1140 wet bath was more comfortable and we became very interested in that model.
As we continued to travel the 12,000 miles to Newfoundland and returned home, we considered the impact of being a foot wider and three feet taller than our collapsed pop-up camper. That thinking led me to research flatbed trucks and a closer dealership for an Arctic Fox 1140 wet bath. We placed our camper order on October 1st, 2019.
Above: Geep and Sharon more on the California coast
With our camper being built, we placed an order for a Ford F-450 diesel chassis cab. I have several F-350 dually and single rear wheel trucks for my business, so I am sold on Ford. The camper came in on December 6th and the truck was scheduled for the first week of 2020. We picked up the Arctic Fox with my Ford F-350. With the camper completely dry and unloaded, it was not an issue.
Above: The new box is about one and a half inches wider than the original which had a top opening of about three inches.
After arriving home with the brand new Arctic Fox, I immediately started on truck camper projects. First, I removed the step and storage locker, increased its depth, and redesigned the build to accommodate our boots and shoes.
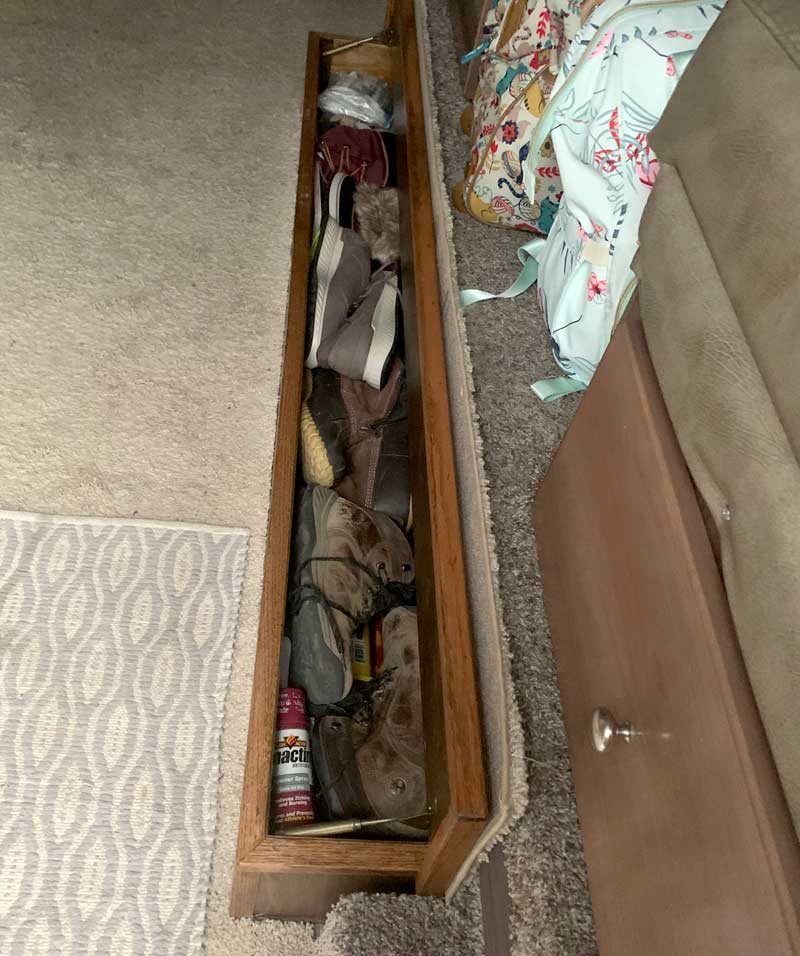
Above: Boot box and step to dinette modified to hold boots.
My wife is 5-feet tall and I’m 6-feet 1-inches tall. I couldn’t get her tennis shoes to fit in that space. A fishing rod could go in, but not her tennis shoes. So, I configured the space differently making it 1.5-inches deeper. I used the same material so that it looks like it came from the factory. I also had a custom carpet made and made the lid bigger for a better step surface. The space now holds all of our shoes, including my boots.
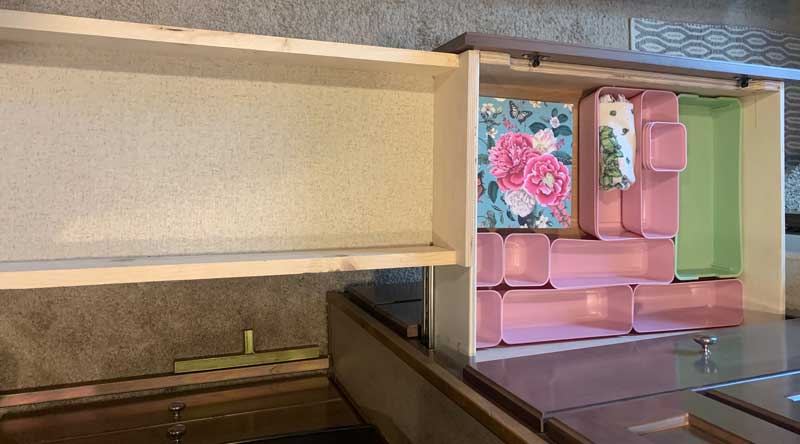
Above: The old drawer next to the extended one. The new one is 50% larger.
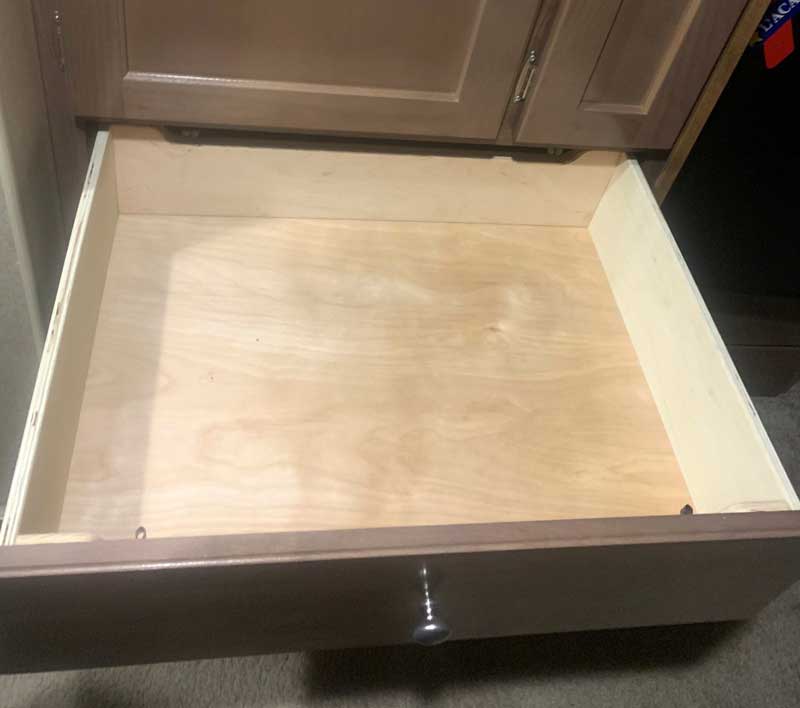
Above: This is the new 18-inch drawer. The same drawer front was used.
Second, I extended all the drawers to the full depth giving us about 50-percent more drawer space. It makes a big difference.
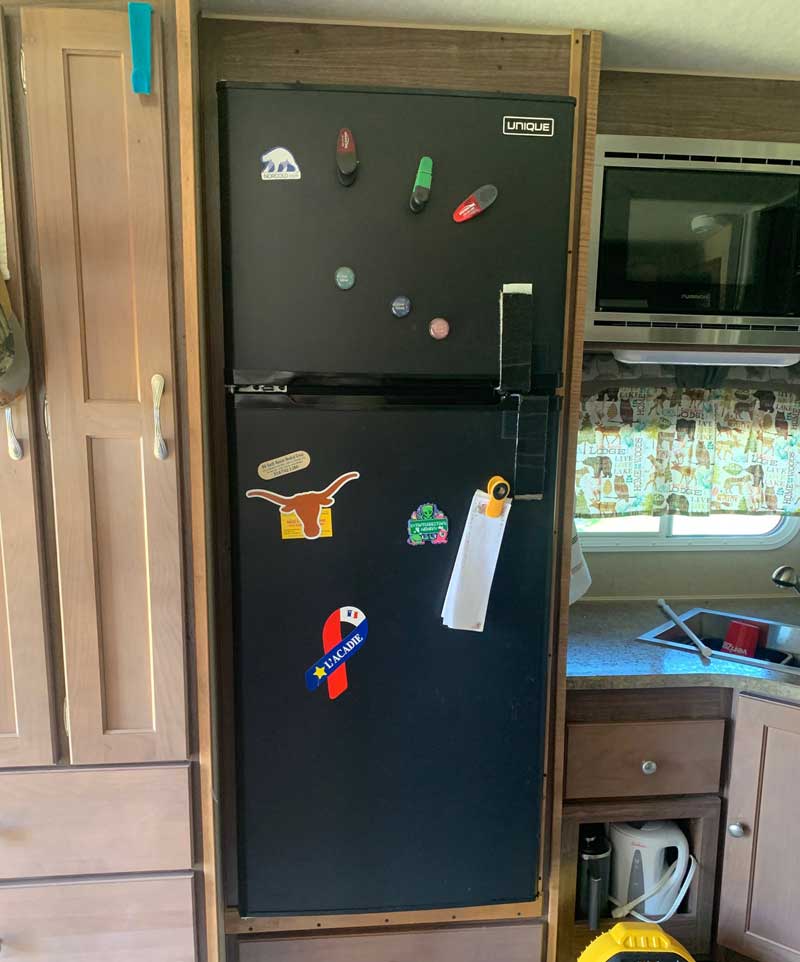
The most significant change was swapping the brand new Norcold 8-cubic foot refrigerator (12-volt/120 volt) for a Unique brand 10.3, Danfoss 12-volt compressor refrigerator. This took some cabinet modification but no existing storage space was lost.
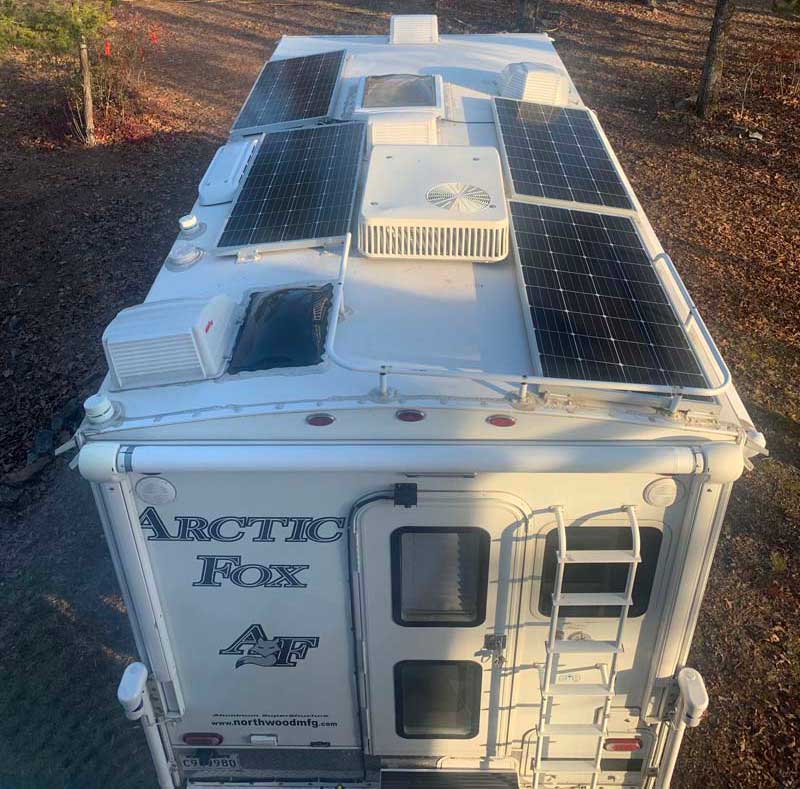
Now that we had a 12-volt refrigerator with 25-percent more space, I needed an additional battery bank with solar panels for additional power and charging. I added two additional six-volt AGM batteries, four 180-watt solar panels on the roof (360-watts total), and a Morning Star MPPT controller with electrical breakers and disconnect.
The truck arrived on January 11, 2020. I had four days before we were to leave to mount the camper. I needed temporary truck bed storage boxes, temporary tie-downs, and a temporary spare tire rack on the front of the truck.
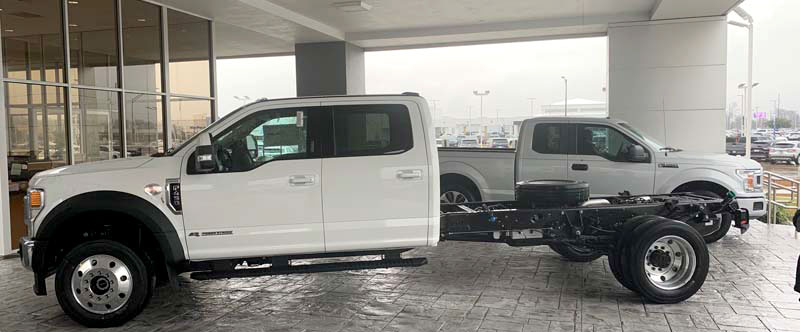
When the truck arrived it was just a chassis cab; no pickup bed. One of the biggest differences between a Ford F-450 pickup with a bed versus a chassis cab is an additional 2,500-pound GVWR (Gross Vehicle Weight Rating).
The chassis cab is rated 2,500 pounds more GVWR. Where an F-450 with a pickup bed has 14,000-pounds GVWR, an F-450 chassis cab has 16,500-pounds of GVWR. This is more than just a different calculation or sticker. The frame is a different shape from the chassis cab. It is straight across the top whereas the F-450 pickups have a different frame configuration.
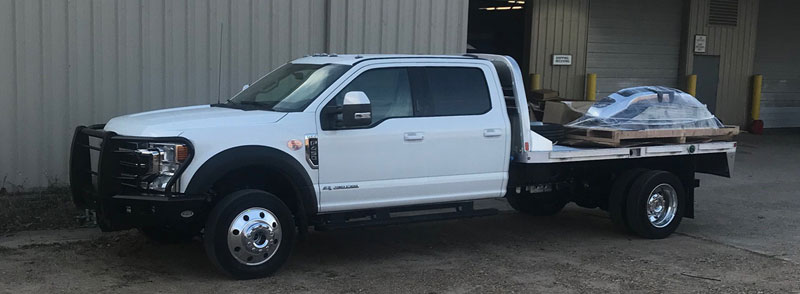
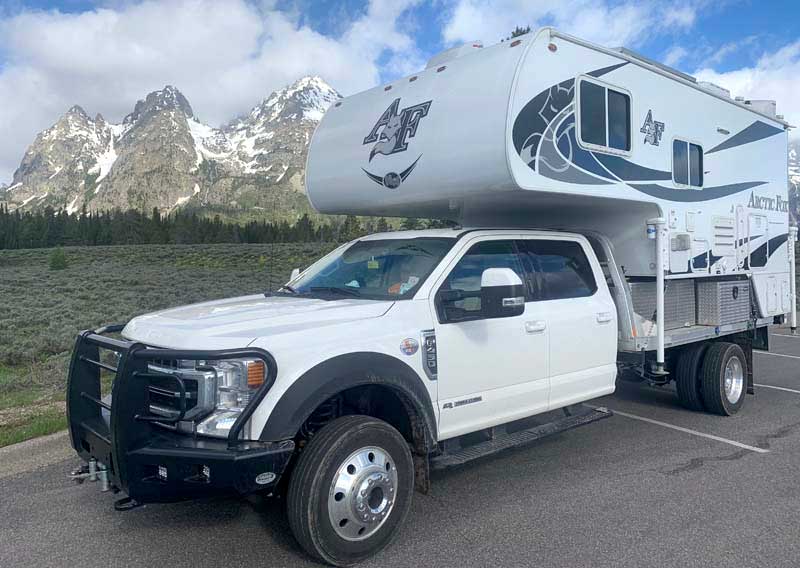
Once the aluminum bed was put on, it was ready for the temporary boxes. I had boxes from another truck so I could see how boxes would fit and work. On the return trip from Colorado, I mounted my camper with longer chains and then spent hours determining how to attach the camper long-term.
Another benefit of the F-450 chassis cab is the 60-inches or 84-inches you can get from cab to axle. With a traditional F-450 with a pickup bed, it’s 56-inches cab-to-axle. We have the F-450 with 84-inches cab-to-axle. That puts my center gravity way in front of the rear axle. Also, my turning radius is better than my old truck. Finally, I have kept the truck’s stock suspension with no airbags or stabilizers.
Once the camper was on the truck with the temporary boxes, we took a scheduled business trip to Nevada. Afterward, we spent some extra time traveling to the California Redwoods.
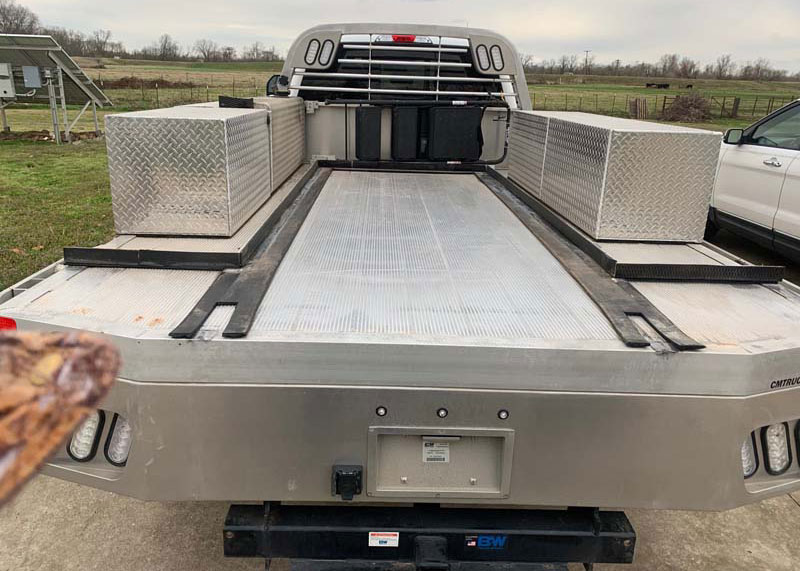
During that trip, I designed our storage box solution. I found that Buyers Products has the widest range and most useful box sizes. And they are all aluminum, fully welded, and competitively priced.
The Buyers boxes I have are 18-inches by 18-inches by 36-inches. They now make a 20-inch by 20-inch by 3-foot box, but they didn’t have that size when I ordered mine. The Buyers boxes have worked out great. I have 44-cubic feet of storage in total.
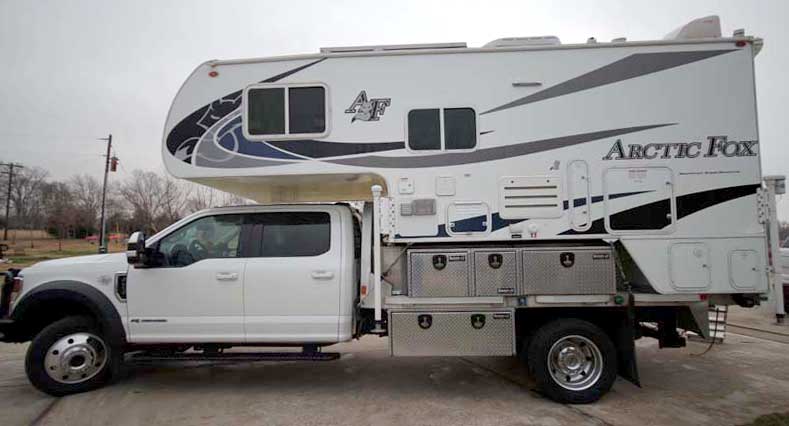
All the storage boxes are bolted to the flatbed, so they can be removed with wrenches if we want to take them off. In fact, when I went to unload the camper for the first time, I could have removed the boxes if the camper was too tight.
The storage boxes allow us to keep all our tools stored along with enough food for two weeks without removing the rear seat (as we did before). We have also been able to have our daughter and grandson travel with us with the extra space created by the exterior storage boxes.
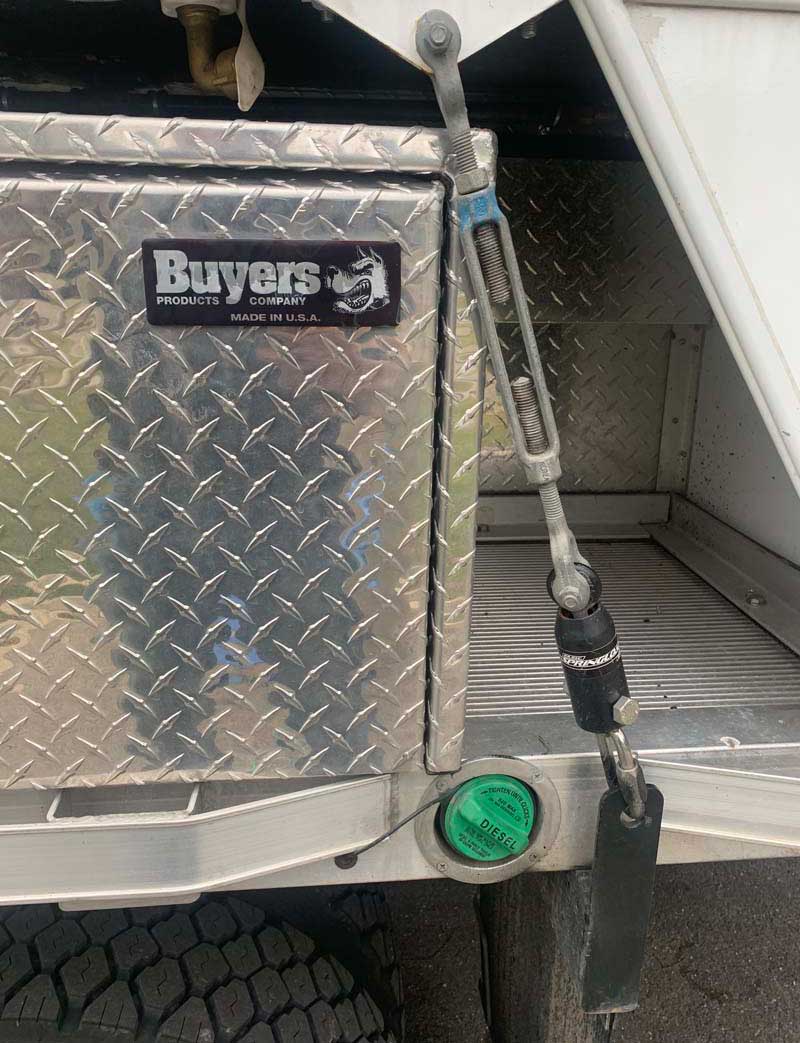
The only two boxes that are not fully welded are the two that I cut in half when I added an additional 40-gallon fuel tank. I cut those boxes down to only 9-inches in-depth, but they still fit my leveling blocks and fluids; antifreeze, oil, and DEF. For a new box back, I used a sheet of aluminum checker plate, a bender, pop-rivets, and silicone.
The crazy thing is that I still have room for two other small boxes. I’m not going to add them because I don’t need them and they would add weight. We have a set list of what we bring with us each time. I even have a box that’s somewhat empty. It’s extra for dirty clothes. We just chuck the bag in there.
My loading tolerances are close; closer than if I was mounting my camper on a traditional pickup bed. Even though the space is tighter, I haven’t had any trouble loading and unloading. And I don’t unload and load often. Prior to this, I hadn’t had my previous camper off in two years. The boxes are now mounted and the extra fuel tanks. It’s still not difficult to load or unload, and it’s good to know I can get the camper off with the tighter tolerances.
Above: Removal and reinstallation of camper went really well even with tight tolerances in the fit. The fuel tank is front left.
The flatbed is 8-feet wide, so there were no problems with the swing-out jack brackets being out far enough. We did make sure that we were on level concrete when I loaded and unloaded the camper. Since the bed is the same width as my Arctic Fox, all I had to do was back up, look in the mirrors, and line it up. I crept underneath fractions of an inch at a time. Then, I attached the four tie-downs and the two umbilical cords; one for the camera and one for the camper.

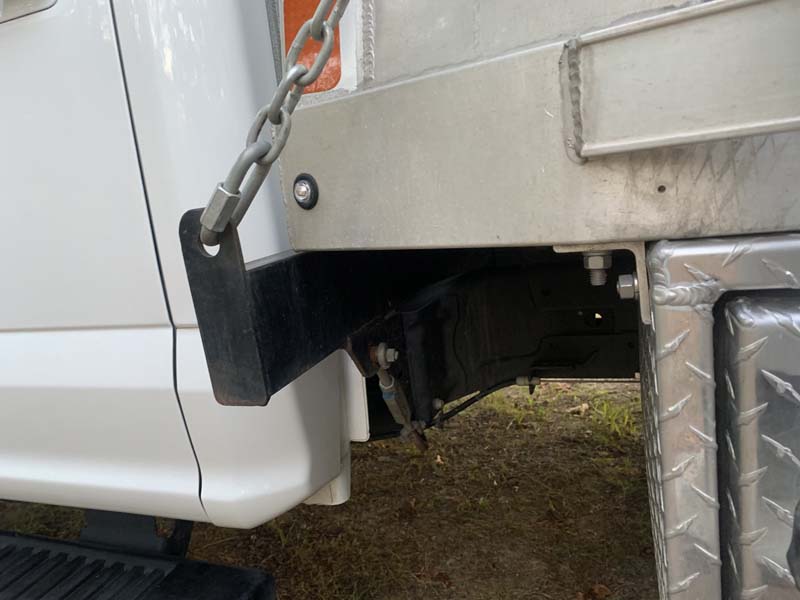
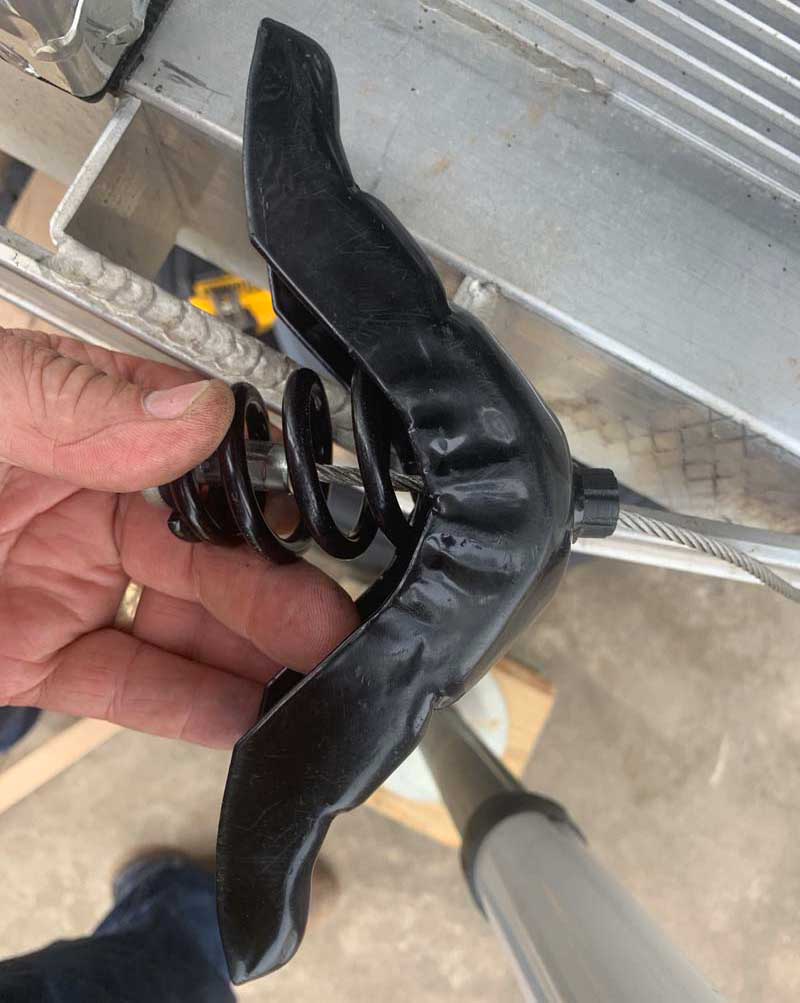
Above: Front view of tie-down to the camper.
Above: Rear tie-down to coach with spring load for shock.
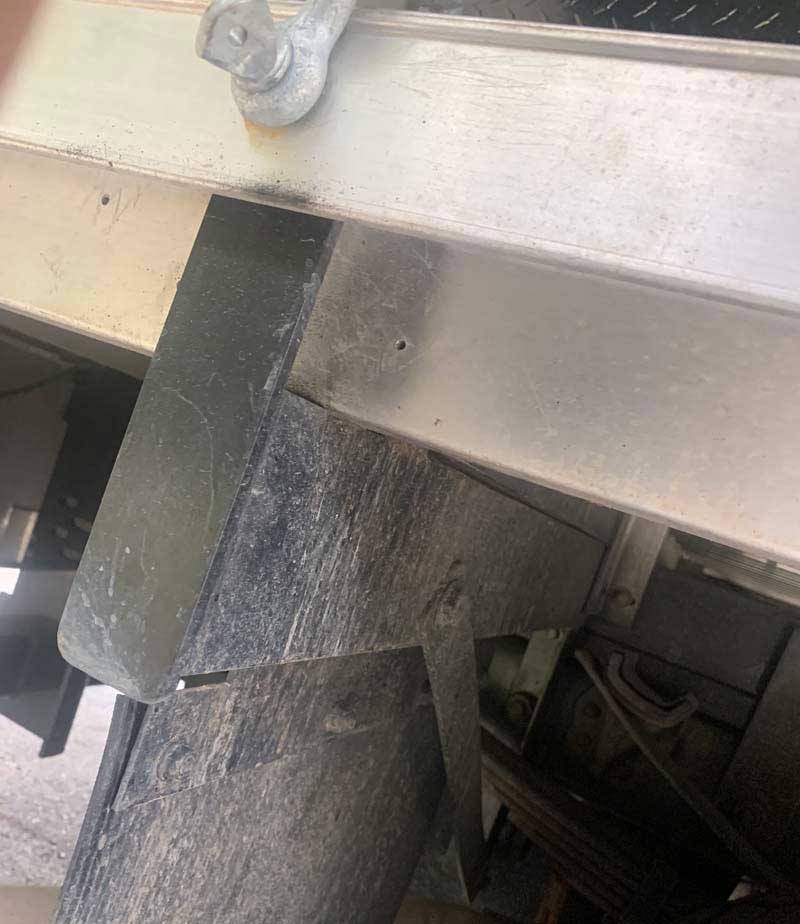
I also designed a solution for permanent tie-downs. I laid down under the truck and thought about it. I went to sleep thinking about it. And then one day it was crystal clear to weld to the front two runners, and then back. It was simple and not too different than other things I’ve done. My plan made sure that I would not have to disconnect my turnbuckles to get into the storage boxes.
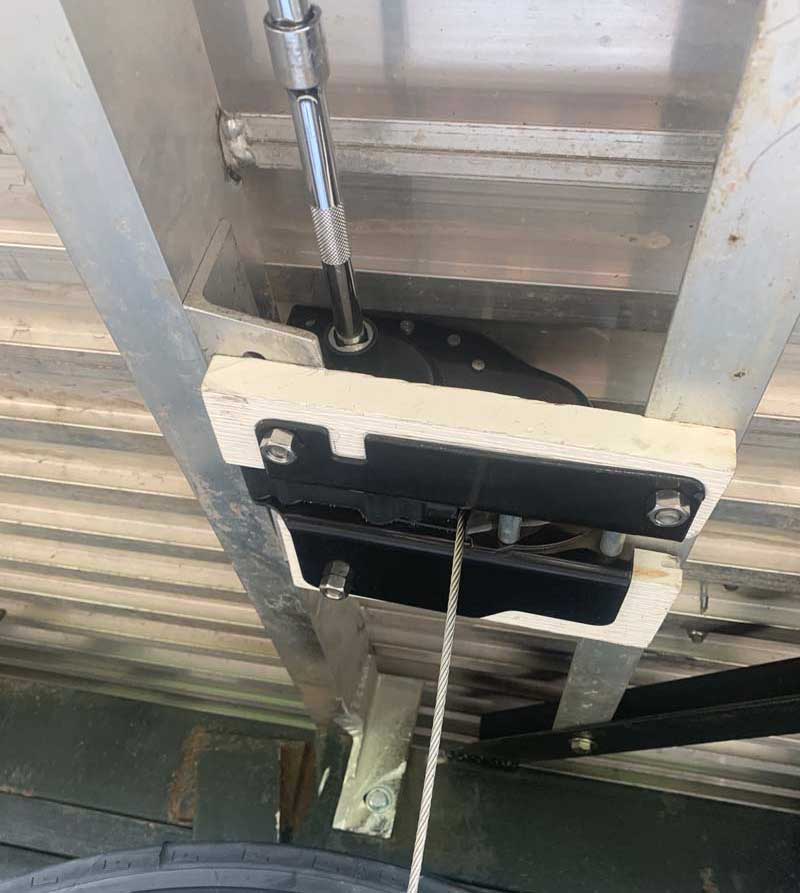
Above: The passenger’s rear tie-down is welded to the flatbed support channel and braced downward.
Above: The driver’s side tie-down is similar to the other side.
The tie-down system is fabricated with a 4-inch channel that I had professionally welded in place.
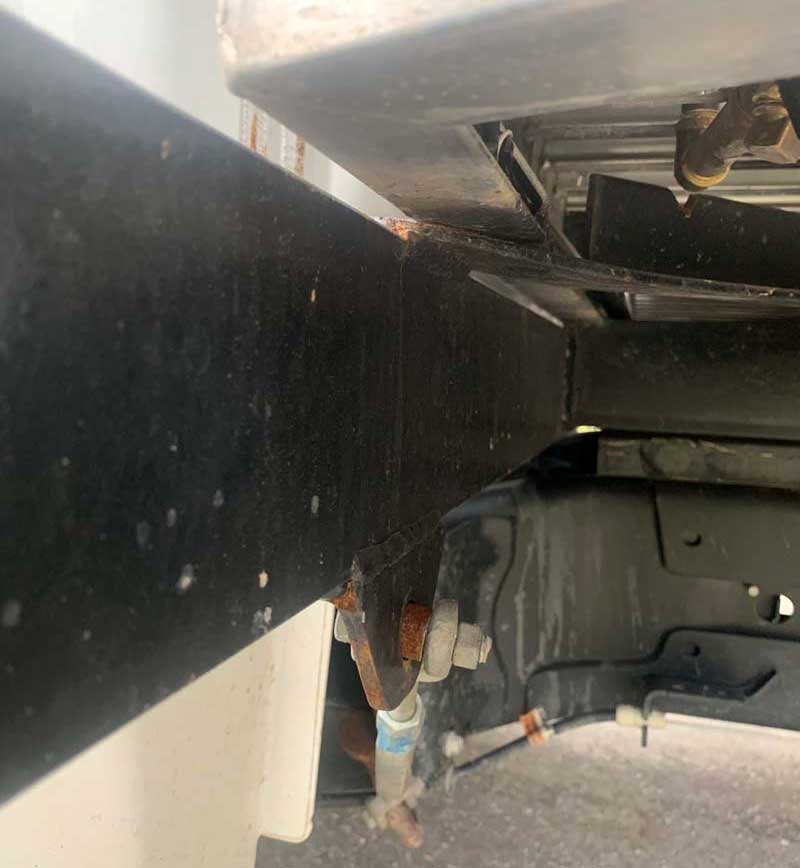
This channel goes across to catch both front tie-downs and is welded to the flatbed channels.
Above: The front channel is braced off to the truck frame with an adjustable turnbuckle.
I fabricated ends where I attached the 3/8-inch turnbuckles. All of this was professionally welded, and braces were bolted to it for additional strength. The tie-downs are the only things that are welded onto the bed.
The turnbuckles are a full 3/8-inch heavy-duty buckle. They hold my camper down with a huge rating. My turnbuckles have nuts, so I screw them on and wrench them tight. I tighten them where the spring moves a little out of the shell, and it doesn’t get looser than that.
I prefer this approach more than what’s commercially available because it avoids open hooks. I wanted closed ends because I have lost turnbuckles in the past.
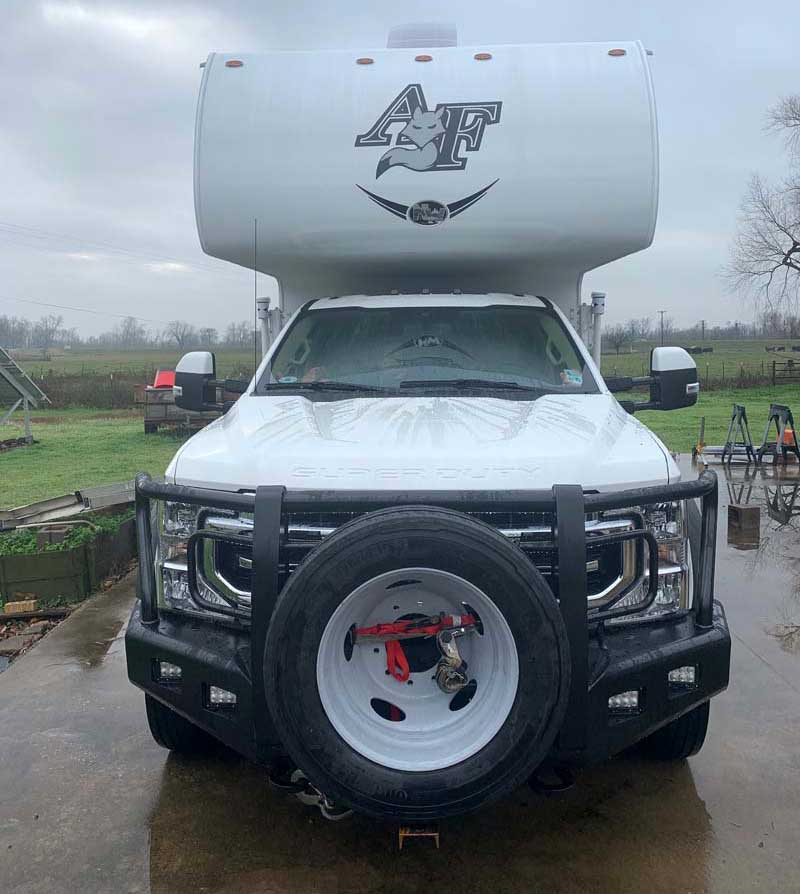
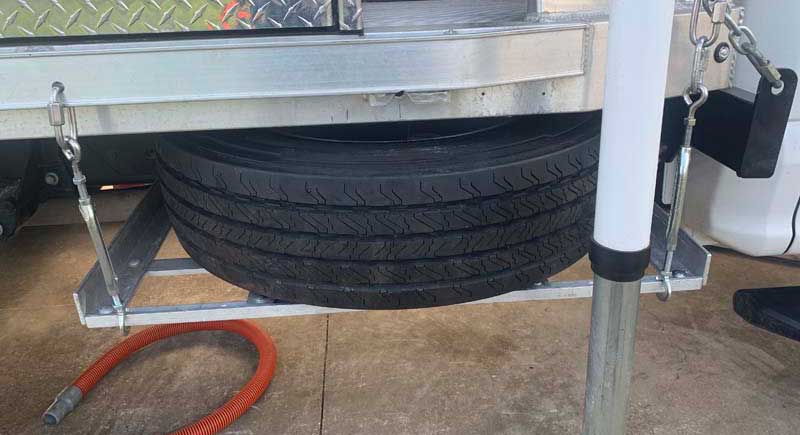
Above: Before the under carriage spare tire holder was built, a 2-inch receiver was used and a plate to carry the spare
For our first trip, I mounted my spare tire to the front of the truck, but I didn’t like it. It was a quick and easy way to bring along the spare but, when I got back, I built a cradle for the tire.
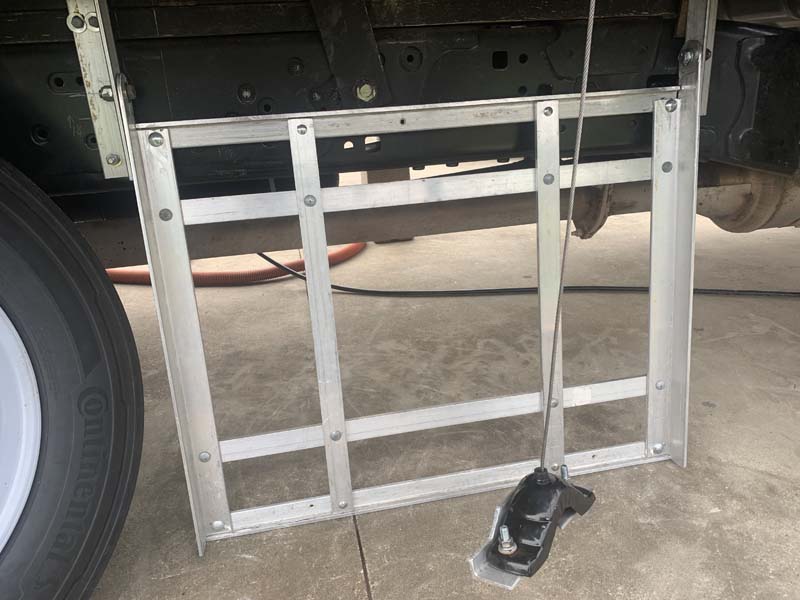
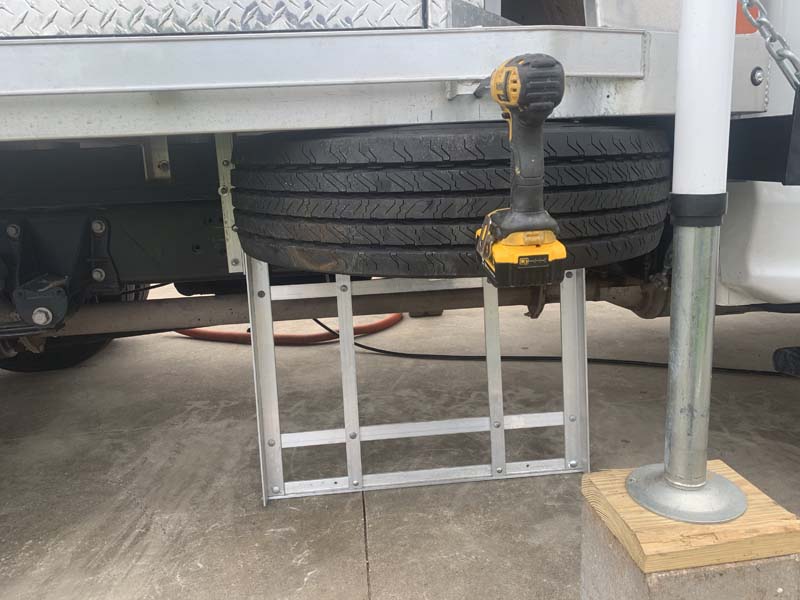
Above: Aluminum cradle that was built to support and secure the tire once it is winched up
I put a lot of thought into the cradle. The work was not a lot in comparison to the thought process. The winch is more than capable, so the cradle is not necessary, but it’s there to ensure it doesn’t come loose. It is the same winch mechanism as any truck. I ordered it online and have a bar to guide it into the mechanism.
Above: Typical truck tire winch that was mounted
Above: Winch mounted under the flatbed
I made the cradle out of scrap aluminum. To install the cradle, I used a wrench, lifted it up and it pulled it tight. Nothing can come down. If you don’t know how to get the tire down, you are not going to. There is a hole in the flatbed that I use a 1/2-inch socket and the tire comes down. I have room for a second tire, but I’d have to install a second winch.
Above: The winch is driven with a three-eighths adapter and drill
With my other truck, I had three blowouts and had to pull the tire out. I wanted to make sure there was easy access to get it out so that it’s never a problem. My son talked me into installing a cordless impact wrench on the truck. I can take them off without having to put a lug wrench on them. I stick the wrench on the winch and I do not have to manually do it.
Above: Tire is secured in spare tire holder
The tire goes all the way to the chassis and does not stick out past the jacks. I have seen similar spare tire set-ups, but they have installed them at a slight angle so that they do not stick out. I have E-rated 19.5-inch tires with a 4000-pound capacity.
Trees are our biggest problem. Our total height is 12-feet 9-inches to the top of the air conditioner. A tree smacked our round antenna unit. I bought a new one and then bought the largest vent hood to put over that unit. It guides tree branches over it. There are two places with the flatbed that could lower my unit in height by 4 to 5-inches.
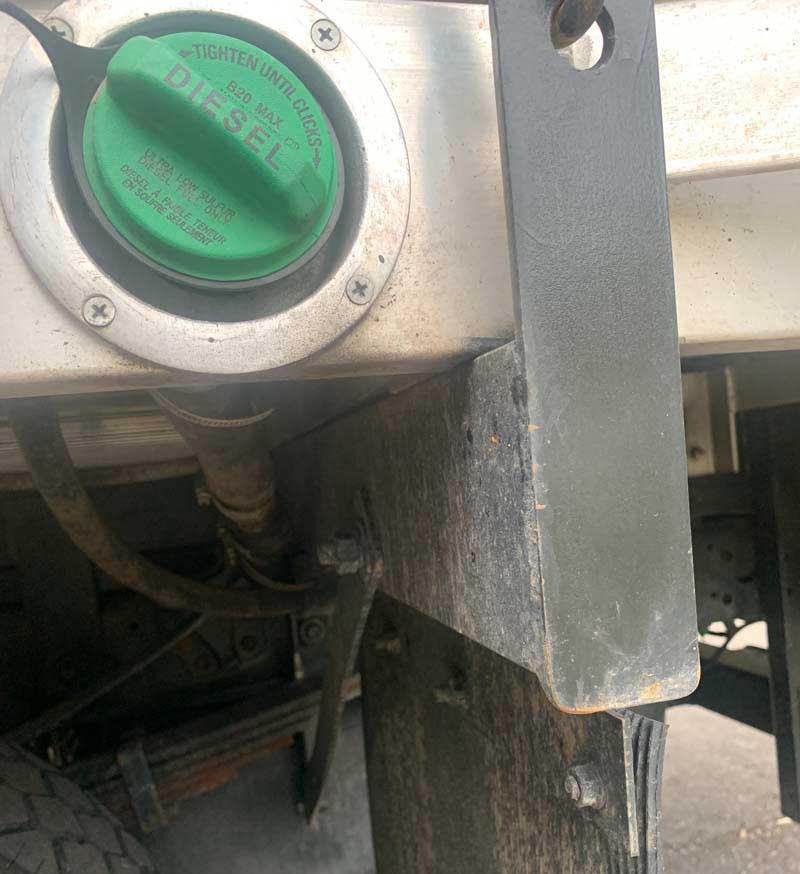
My truck came with the fuel and DEF fill on the driver’s side. When they welded the rear tie-downs, I had them move the fuel fill backward and the DEF fill forward. It put the fill closer to where the actual fuel tank is located. I keep looking at that and may need to redesign it again. My advice is to keep your fuel fill in mind.
With a flatbed, the fuel fill is on that side regardless of truck brand. The fill is also in a little higher position. The extra height prevents the dribble-back effect. With my redesign, I will bring it above the flatbed through the checker-plated wall.
There is nothing on the Arctic Fox I would change. I did try to get them to delete the refrigerator, but they wouldn’t. I have a brand new refrigerator in my shop with three hours of use on it. I now have 720-watts of solar and two battery banks. It’s more than enough to run my compressor refrigerator.
If I had to do this all over again, I would order the same camper, truck, aluminum bed, and boxes. I am pleased with them all.
We still have our Hallmark pop-up camper because I use it in my business as my work truck. Plus, it has come in handy during the pandemic when we have made short trips. We’ve had access to our own bathroom and didn’t have to use or find public restrooms.
Sharon and I will have been married 50-years in October 2022, and we enjoy each other’s company as we travel across the United States and Canada.


