Bryan Appleby, the Extreme Boondocker, takes us through the steps of installing a solar panel system on a truck camper roof rack. Ready to unplug this summer? Bryan shows you how.

Truck campers are truly the Swiss Army Knife of recreational vehicles. They offer capabilities to camp off-the-grid in four season weather, travel down roads far from the reaches of designated campgrounds, and tow just about anything. In fact, many of us have chosen a truck and camper rig because of this unique versatility.
As a full-time truck camper with extensive off-road and off-the-grid boondocking experience, I have recognized five essential elements that make extended dry camping – my favorite truck camper capability – both comfortable and enjoyable. This list includes:
1. Shelter and safety
2. Source of fresh water
3. Source of warmth
4. Adequate food supply
5. Source of reliable power
For this article, it is my intent to focus on a relatively easy and affordable solution to the fifth element; a source of reliable power. From a straight forward approach, I will demystify installing a solar panel system on a truck camper.
What makes this solar panel installation different from any other? Simple! I am providing a power survey template to help you to determine your solar power needs, a complete parts list, and a cost budget for your installation.
But what really sets this article apart is where the solar panel installation takes place; a truck camper’s roof rack. Many truck campers have roof racks installed as standard from the factory, and these racks can make excellent platforms for a solar panel installation.
While many have demonstrated this use and application, my approach is a different in two ways. First, I keep the installation to no more than two inches above your existing roof rack. Second, my installation approach provides protection from the inevitable tree branch collision.
Most truck camper owners and dealers attach accessories to roof racks, including solar panels. With this type of installation the solar panels are typically six to eight inches above the existing roof rack. Mounting a solar panel in this fashion subjects the solar panel to wind, thus potentially stressing the panel, mounts, and wiring.
My installation drops the solar panels below an attachment bar (Unistrut) and only two to three inches above the existing roof rack.
Utilizing a Unistrut is key to this installation. There are many aluminum alloy struts available online, but I prefer the lower cost and strength of steel Unistruts. Unistruts are also easy to replace and there are numerous Unistrut attachments available at big box hardware stores and electrical supply stores, easily found along anyone’s route or home base.
If you have ever considered adding solar to your truck camper tool belt, and you have a roof rack installed on your truck camper, this is the solar installation project for you! Let’s get started.
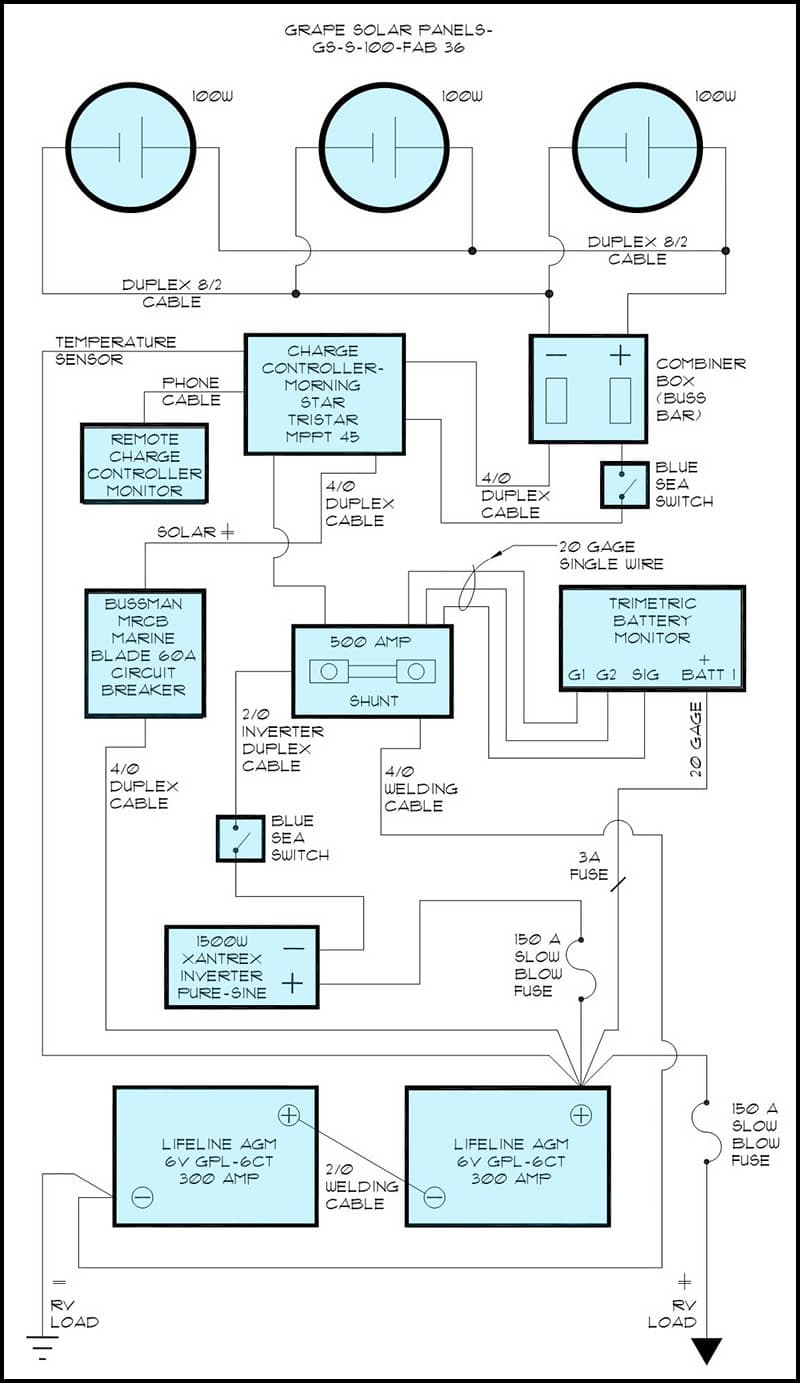
Above: Bryan’s roof rack solar installation schematic by Frank K.
1. Complete a power use survey
Prior to purchasing a solar panel system, it is critical to complete a power survey to determine what your solar power needs will be. By knowing what your power needs are, you are able to ensure that you install the correct size and amount of solar panels.
Click here to download my power supply survey. You can increase the size of the survey by changing the size in the PDF.
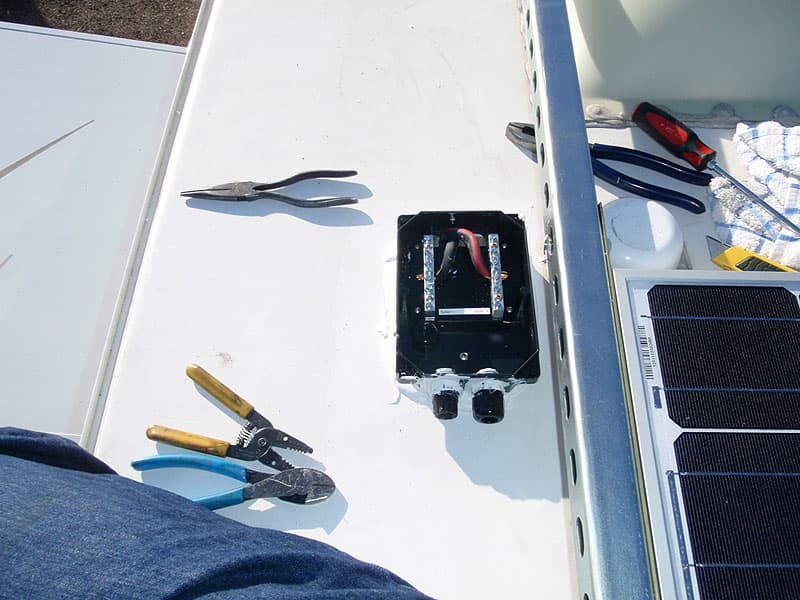
2. Required parts and tools
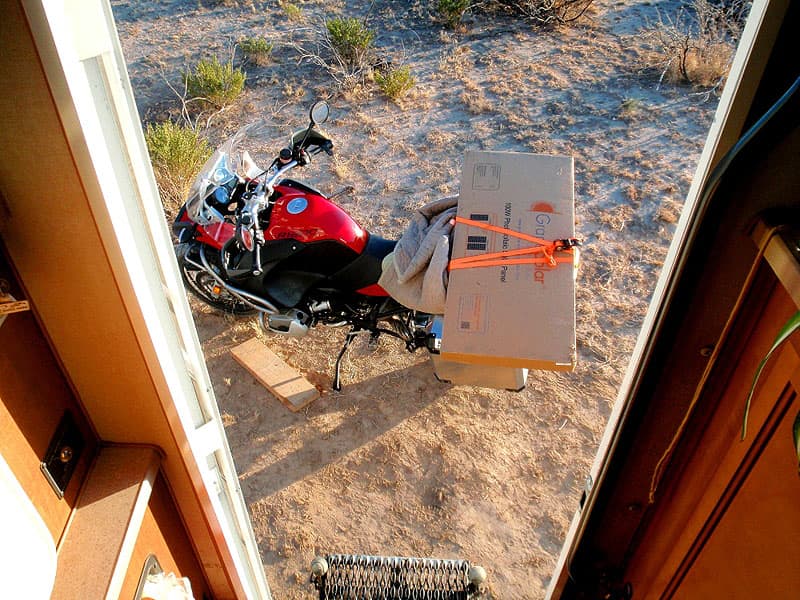
There’s nothing like getting a UPS shipment, held at will call, when you are boondocking out in the desert. My work space can be thousands of acres of open cattle range. I just have to ride into town – about 40 miles away – to pick up my latest solar panels. Of course you may have your supplies delivered to your home, or on the road.
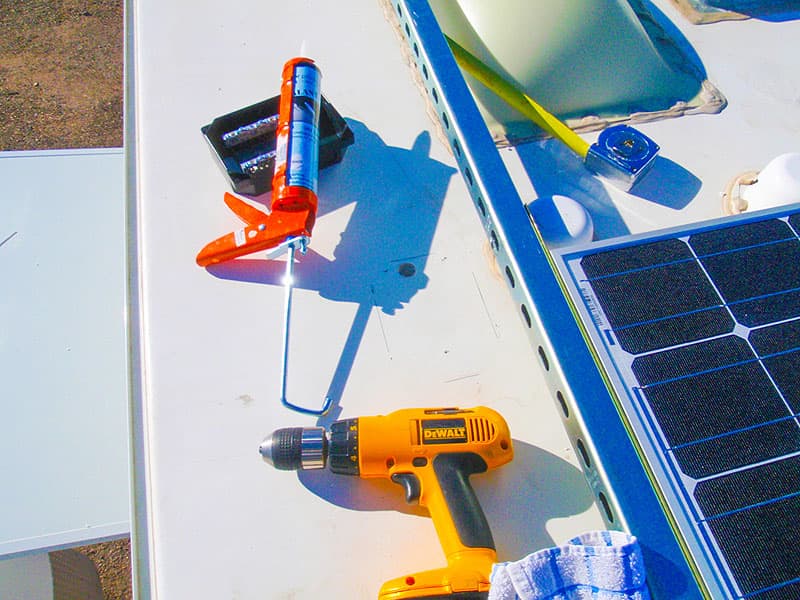
I have kept the required parts and tools to complete this project to a minimum. With the exception of the solar panel and controller, the required parts and tools are common, and easy to source at big box hardware stores, like Home Depot or Lowes.
3. Begin the installation
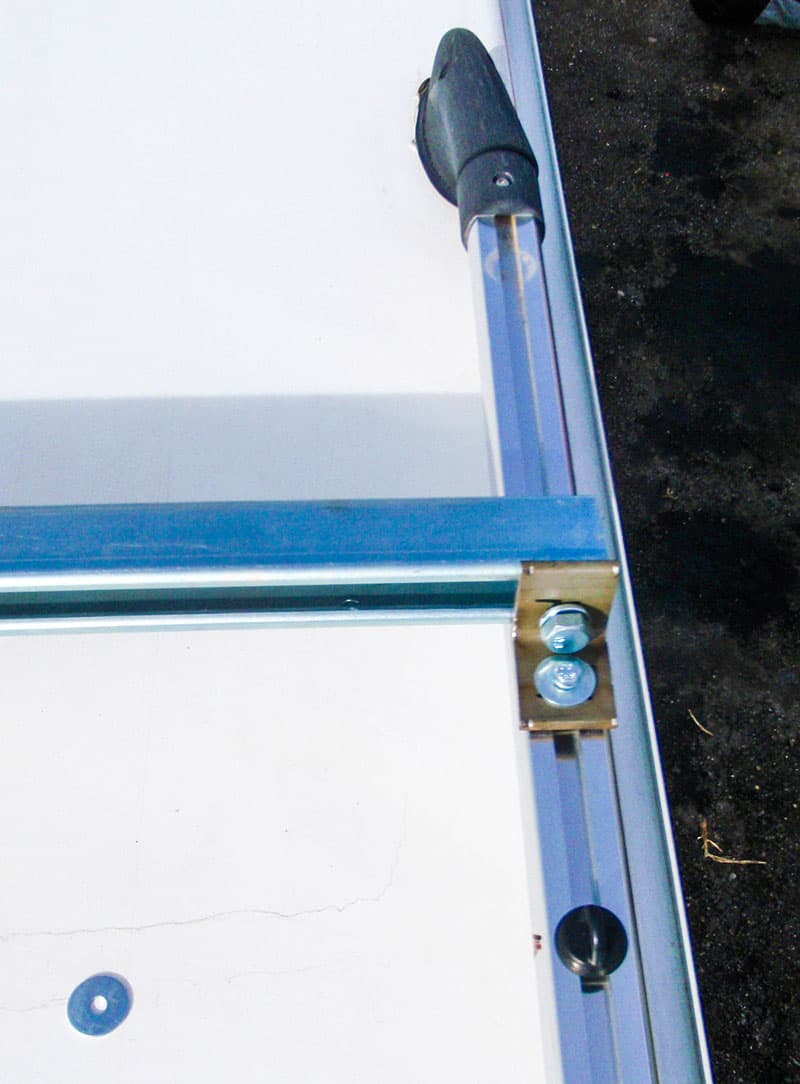
Above: Maggie Rack Clamp With Unistrut
To begin the project, I drilled two 2-inch stainless steel L-brackets to fit the existing nut inserts on the roof rack system. The bolt size was 5/16-inch-18.
Next I cut the two 10-foot Unistruts to the width of my truck camper roof rack system. The above mentioned L-brackets were then attached to the Unistrut slots, simply with Strut Bolts available the same location as you purchased your Unistruts.
I measured the length size of my selected solar panels and set the distance of the Unistruts to that distance, on the roof rack rails. I left the bolted L Brackets/Unistruts loose for final fitting.
I installed my solar panels separated so they can (a) tilt towards the sun for optimum charge, and (b) allow me to walk between them, when I’m on the roof of my camper.
4. Roof rack nut inserts and button bolts
Above: Installing the Unistrut to the Roof Rack
When you inspect your truck camper roof rack system, you should find additional nut inserts, again 5/16-inch-18. These will be on both sides of the roof rack system along with little “button bolts”. The nut inserts are where I attached the Unistruts using the L-brackets.
5. Cutting the slotted steel beams
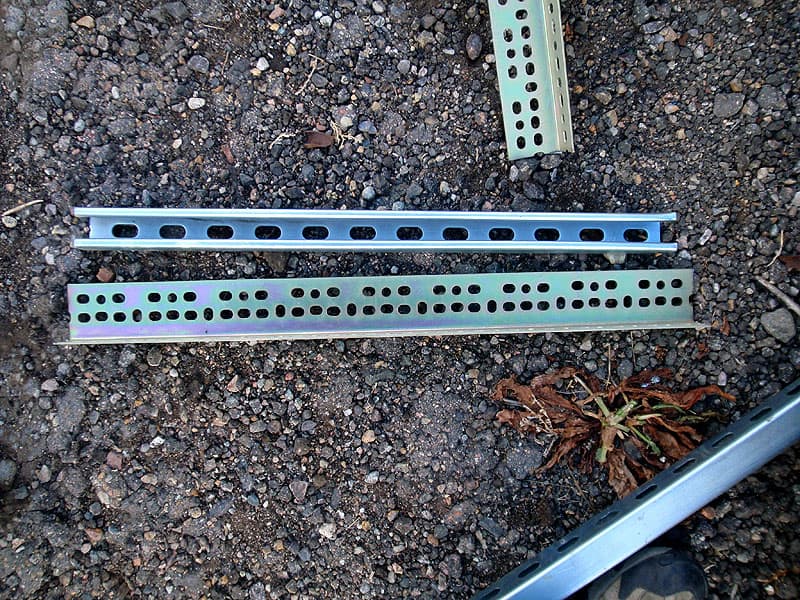
Above: Slotted Steel Bracket of Solar Panel Mounting
Depending on the length of your solar panels, shorter slotted steel beams are available at big box stores, and longer slotted steel beams are available at garage door installation companies.
I cut the slotted steel beam to fit the width of the of the solar panels, including extra length to allow tilting and attachment without reaching under the panels. Note that I mounted the panels to the bottom of the solar panel frames to add strength to the solar panel frames.
 |
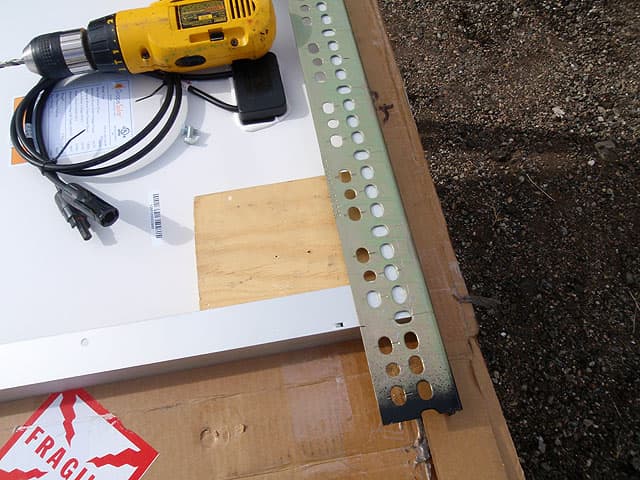 |
Above left: Installing Slotted bracket to bottom of solar panel, Above right: Installing slotted bracket with wood block to protect solar panel from an accidental drill bit strike.
I made sure not to install any brackets onto the sides of the solar panel frames. This could put stress upon the glass surfaces of the solar panels and damage the panels, and/or defeat their efficiency.
Above: Installation of Solar Panel Cables
Many solar panels come with MC4 connectors. Others do not. It is not necessary to use MC4 connectors or go to the expense of purchasing additional cables. I recommend using 10/2 UV resistant cables for your charge controller, whether you are wiring in series, or parallel.
7. Shrink sleeves for moisture protection
Above: Moisture protection is accomplished by using shrink tube
I installed shrink sleeves over all of the wire connections to minimize moisture intrusion from traveling and weather events. Shrink sleeves (also called shrink tubing) can be found at auto parts suppliers and the big box hardware stores. Once applied, shrink sleeves provide a water tight seal for electrical connections.
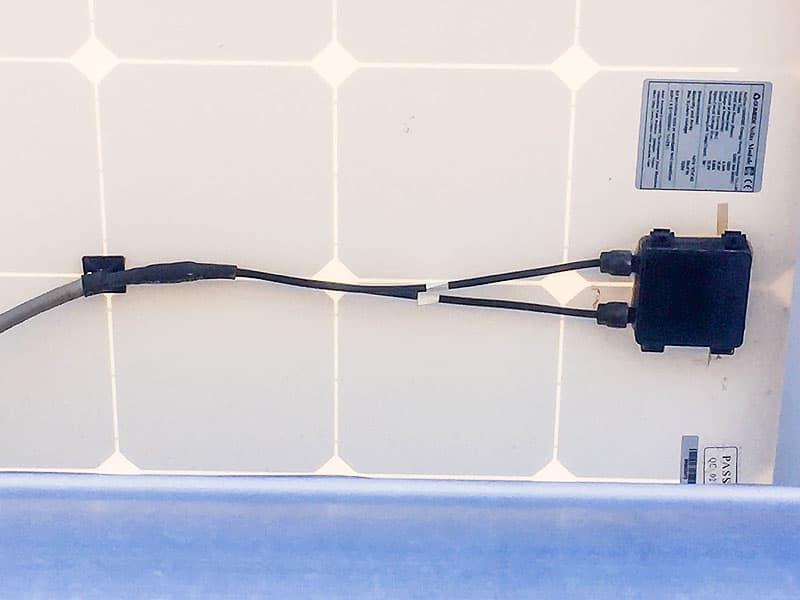
8. Combiner box installation
Above: Combiner Box installation
The cables from the solar panel are brought to a central location, a Combiner Box, combined into one duplex cable, and routed through the roof to a solar charge controller that’s installed inside the camper.
Routing the wire through the roof can be done by drilling a hole through the roof of your truck camper, or by running it through a refrigerator vent. If your refrigerator is located on a slide-out, you will not have a roof top refrigerator vent and will need to drill a hole in your camper’s roof.
For this application, the combiner box was installed near the Unistrut to eliminate the need to run the solar panel cables along the roof.
9. Installing the solar panels onto the Unistrut
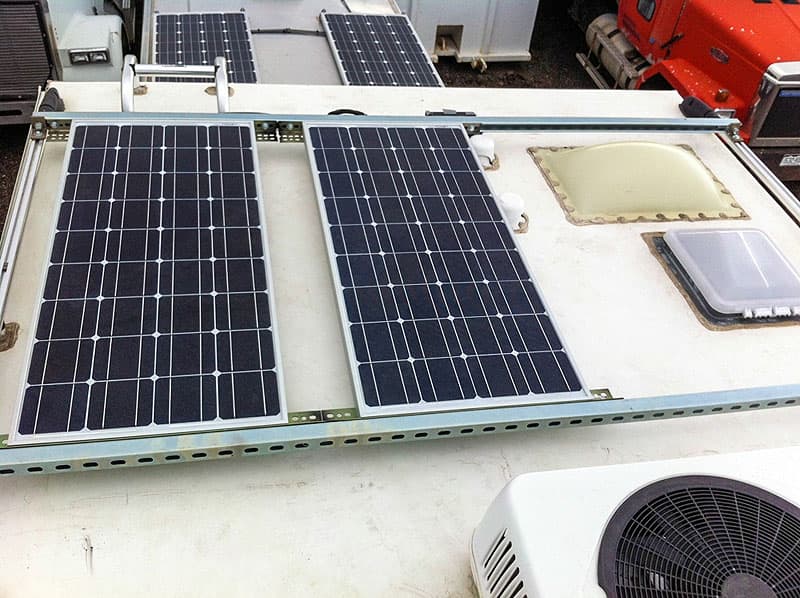
Above: 200w of Solar Panels on the Roof Rack
Installing the solar panels is done by using Unistrut cone connectors – 1/4-inch or 3/8-inch – to attach to the slotted steel L brackets. Both cone connector sizes are available at big box hardware stores.
It would be safer to have someone help you to lift the solar panels up and onto the truck camper’s roof. I was by myself and used a rope. Also, I made sure to cover the panels to avoid the panels from generating power, to the connected cabling.
10. Sealing the combiner box
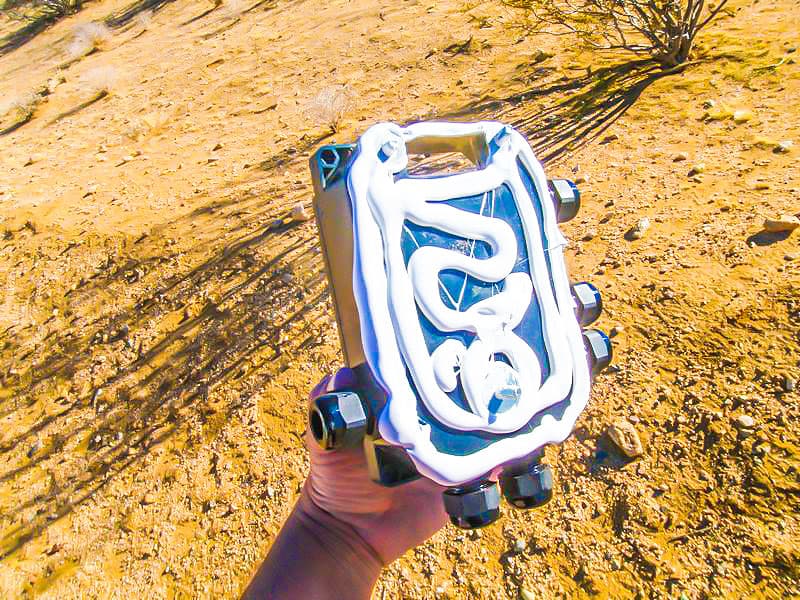
Above: Sealing the Combiner Box with Dicor
Next I applied Dicor self-leveling roof sealant to the back/bottom of the combiner box. I pre-drilled the opening for the cable and laid a cross hatch/line of Dicor sealant to the Combiner Box to bed it down to the truck camper’s roof.
A thick washer between the combiner box and the mounting screw allowed the combiner box to be elevated above the roof of the truck camper enough to avoid squeezing out the Dicor sealant. This ensures a good seal for the hole drilled into your camper’s roof and the bottom of the combiner box.
11. Combiner Box installation location
Above: Combiner Box installation onto roof of truck camper
The roof location of the Combiner Box was also situated over an interior wall space. The plumbing vent cap was used to provide a wind break. This will reduce the contact patch where the combiner box is attached to the roof of a truck camper.
12. Combiner Box with cables
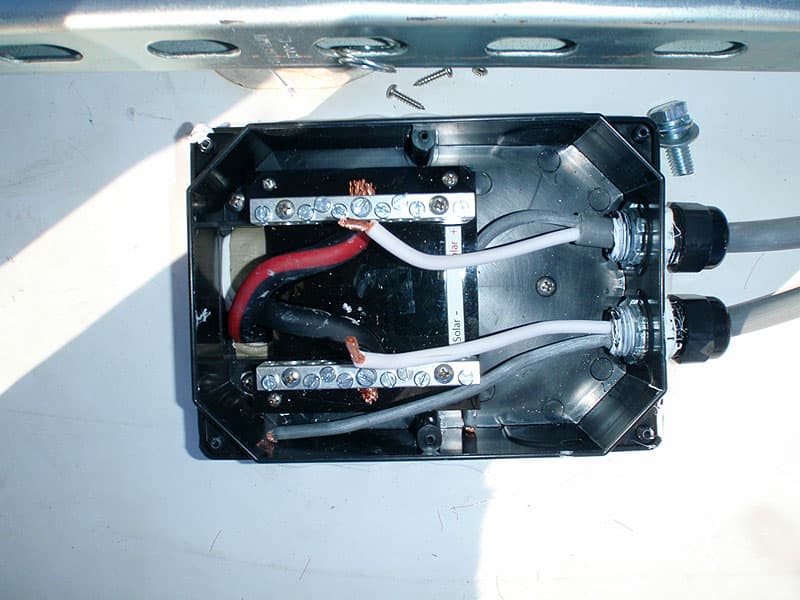
Above: Combiner Box installation with cable runs from solar panels
The 10/2 UV resistant cabling was routed to the bus bars, located inside of the Combiner Box. It’s important to pay attention to the fact that the solar panels are now producing amps if they are not covered from sunlight. For this reason, I prefer leaving one leg open (-) and disconnected until my battery bank and charge controller are online.
13. Attaching the solar panel cables to the Unistruts
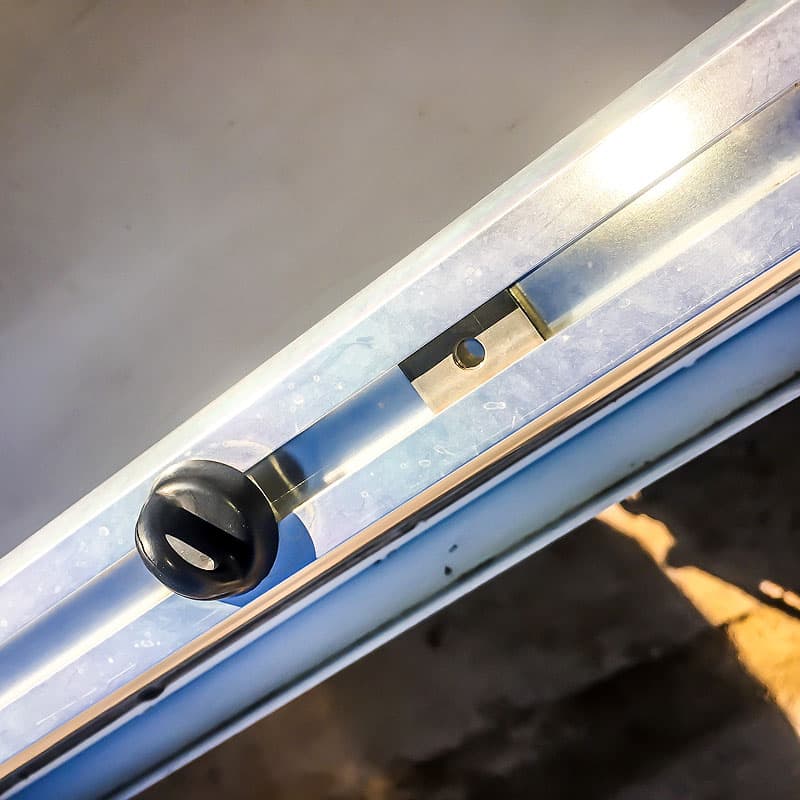
Above: Solar panel cable attached to Unistrut
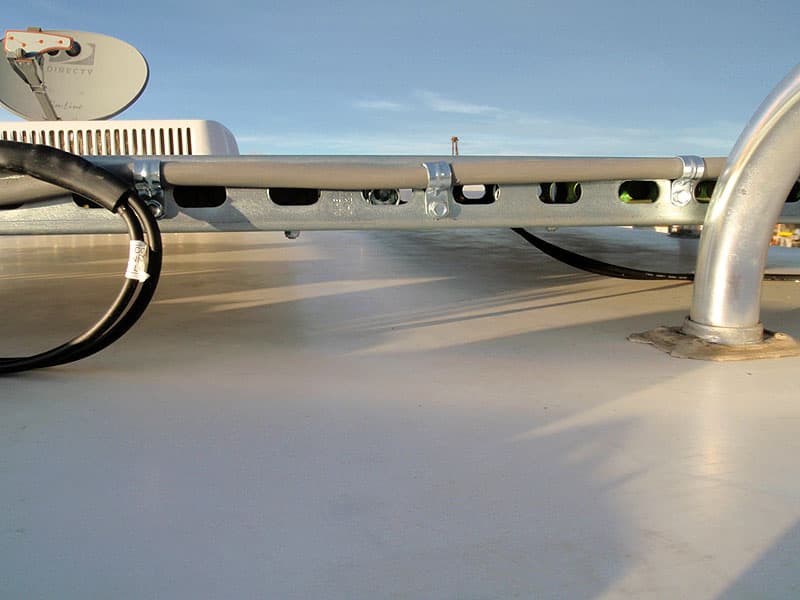
I used small connectors for attaching the solar cables to the Unistrut. These cables were attached with sufficient slack to allow tilting. These connections were done to avoid attachment to the TPO truck camper roof material. I avoided using wire ties and other plastic connectors to avoid the issue of UV deterioration.
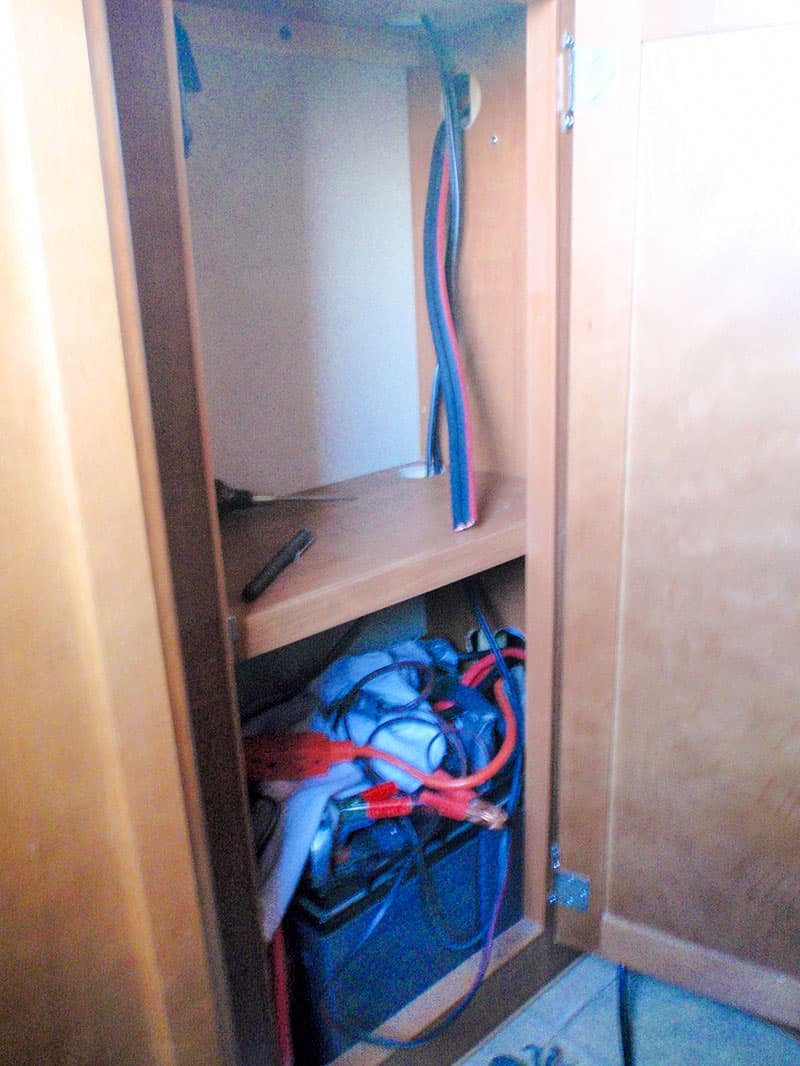
14. Running the duplex cable through a wall void

Above: The cables running through the wall void
Cables are easy to run through cabinets and wall voids. The Duplex 4/0 gauge cable, viewed in the above photo, was routed to the charge controller via a cabinet.
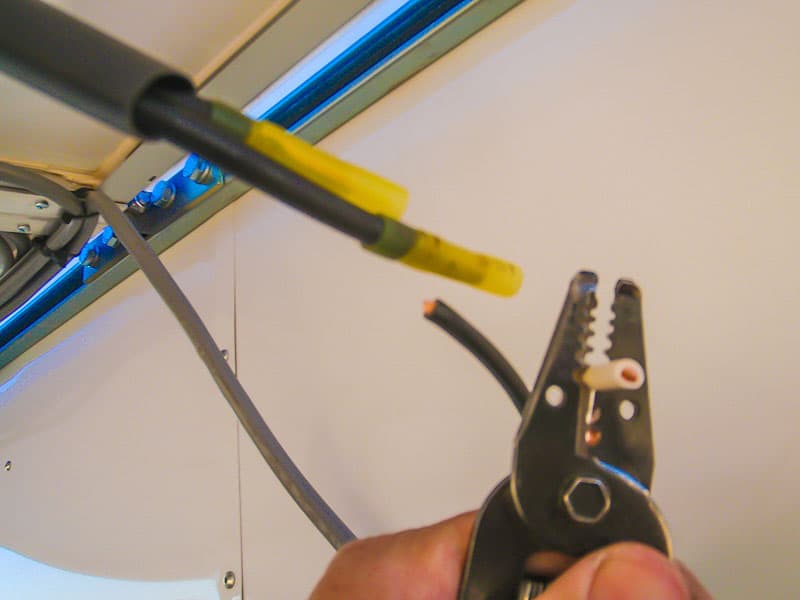
15. Specialized cable cutter and crimper
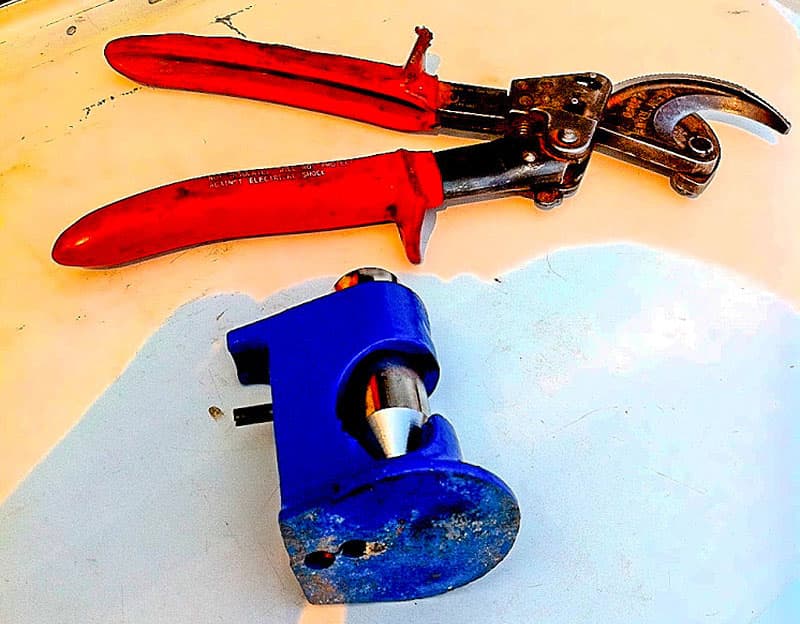
Above: Specialized Cable Cutter and Crimper
I have a cable cutter and crimper, valuable tools for a solar panel installation, available online.
16. Selecting the Charge Controller location
Above: Charge controller location in camper’s cabinet
For optimum solar panel efficiency your priority must be in keeping all cable runs short. When possible, install a Charge Controller 6-feet or less from your battery bank. A nearby cabinet or outside storage compartment is often the best choice.
17. Charge controller cables
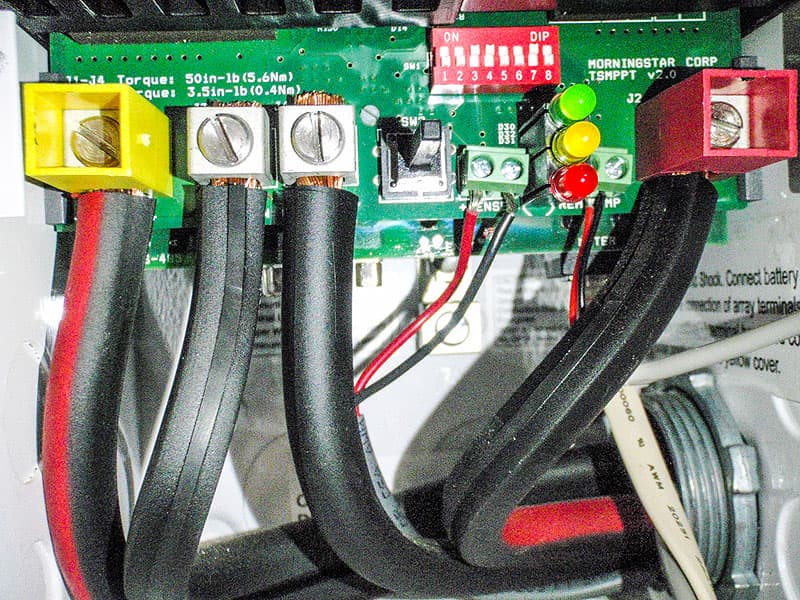
Above: Charge controller cable installation
When selecting cable size and wire size, use available online charts. Do not scrimp on your wire/cable to save money as it will reduce your system voltage, negating your hard work and investment. Also, follow your Charge Controller manufacturer’s recommendations when powering up your controller. Failure to do so may result in irreparable damage to your Charge Controller electronics. Most Charge Controllers advise them to have the battery bank leg connected before bringing your solar panels online to the Charge Controller.
18. Charge controller in a truck camper cabinet
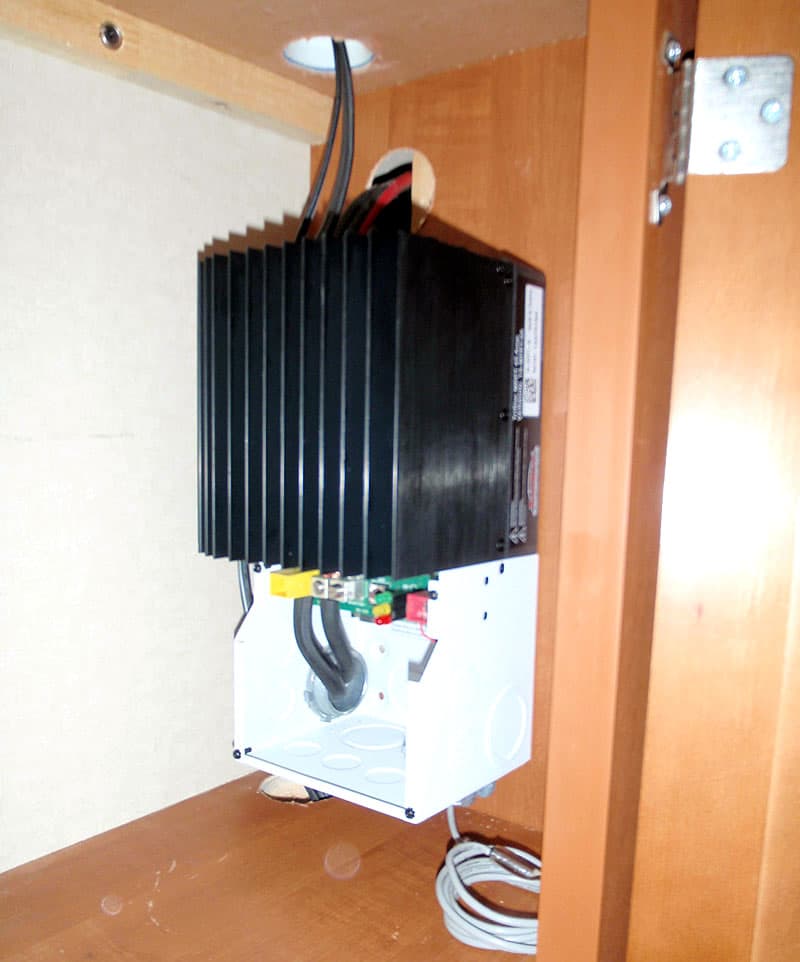
Above: Here you can see the MPPT Charge Controller installed in a truck camper cabinet with adequate ventilation for seasonal changes and operational temperatures.
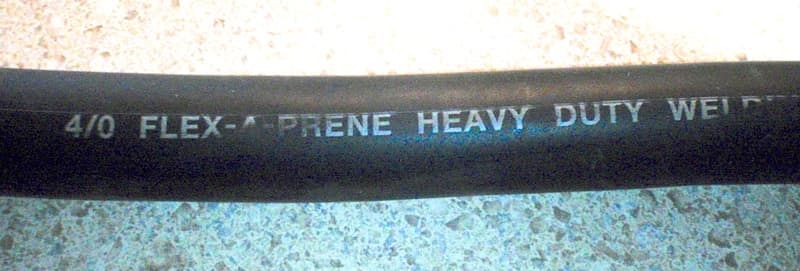
19. Battery bank cables

Above: Heavy duty cable
All weather welding cable (2/0g) was used to allow flexible cables and low resistance. These cables may be sourced from welding supply centers. Many of these centers are able to custom cut cable lengths and attach the ring connectors, for a nominal cost.
I use inexpensive clothes-line cord to check the distances for the final cut cables. This helps me to avoid the mistake of cutting an expensive cable too short, or purchasing more expensive cable than I need. For cable sizing charts, click over to directwireusa.com.
20. 500 amp shunt cable run

Above: 500 Amp Shunt for Roof Rack Solar
Above: A welding 4/0 cable was used for the cable run to the 500 amp shunt to the adjacent battery bank
21. 500 amp shunt (-)
A shunt was used to measure (battery monitor) the amps traveling from the solar panels and charge controller as it is fed to the truck camper’s battery bank.
22. Buss 60a blade fuse (+)
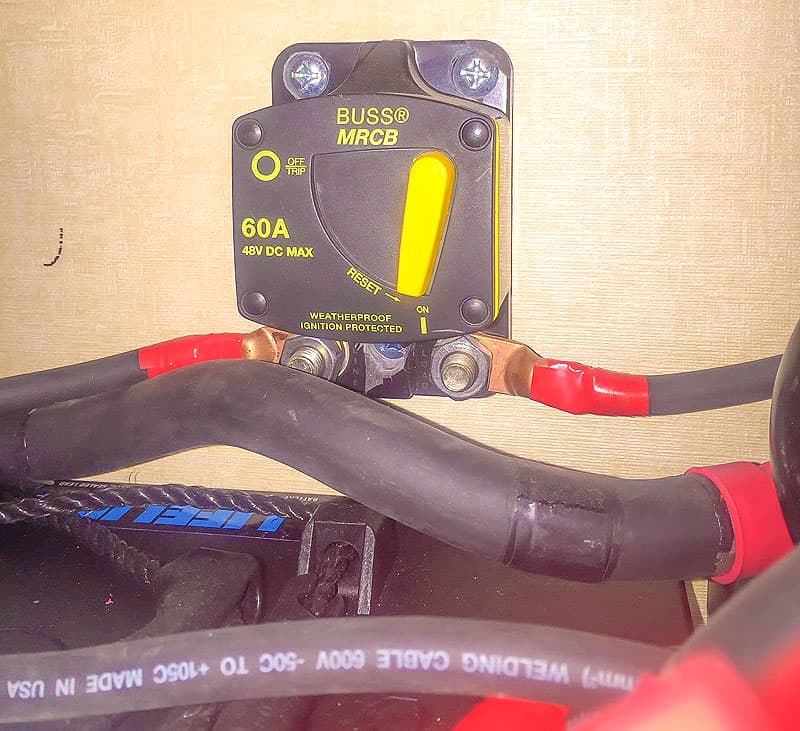
Above: 60 amp Buss Blade fuse for solar
The positive (+) cable run from the Charger Controller is run directly to the battery bank. There is a buss fuse installed to provide a break in this run, as well as for needed interruptions and maintenance. This will protect the electronics from a battery bank failure, or spike.
23. Installation of remote monitors
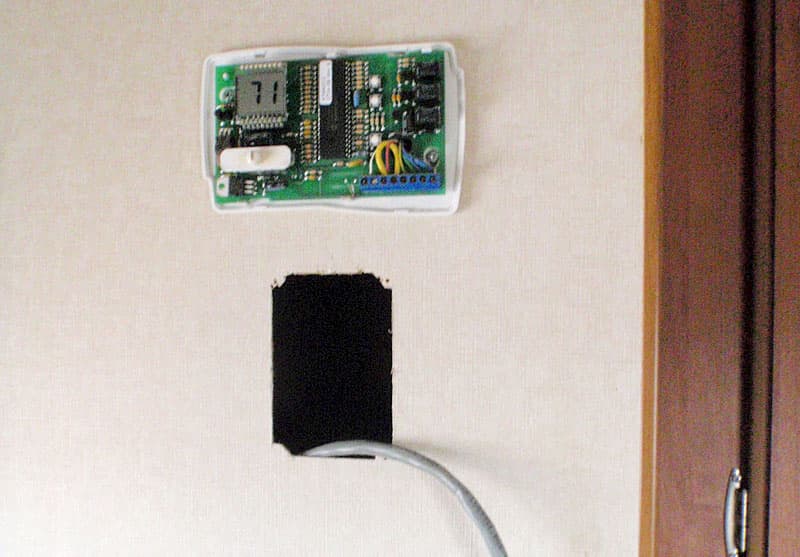
Above: Installation of remote monitors on the wall of truck camper
Within a truck camper there are many locations where additional monitors may be installed. Whether in a wall of a cabinet, or a partition wall. Grouping these monitors provides an organized appearance.
24. Completed installation of remote monitor
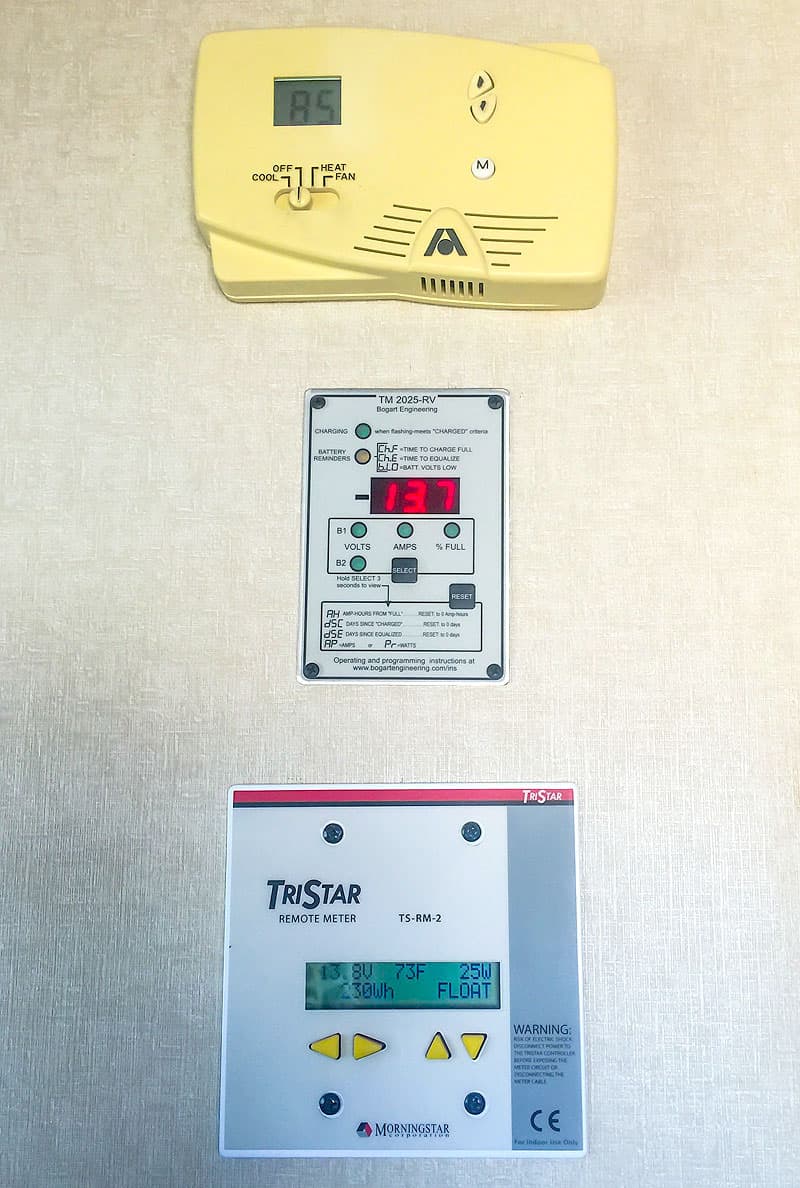
Above: Wall mount remote monitor
This wall mount remote monitor was installed where the existing truck camper thermostat is located. This was a choice to locate the remote monitor out of the line of sight from the seating or sleeping locations – especially if you don’t want to see lights or blinking lights during the night (the monitor shown can be turned off display mode). Having these remote monitors here will allow you to scan these monitors as you enter your truck camper. If you are like me, this will become a habit as you scan the monitors.
25. Battery bank choices
Batteries are aged by the number of cycles – complete charge to 50% discharge. When you hear of batteries “lasting years”, the reality is that the life of a battery is determined by the number of cycles and how much you impacted the state of charge (SOC).
Traditional flooded wet cell batteries will work very well and last for a considerable number of cycles/years. But, their potential for outgassing requires them to be located in a vented exterior compartment, or in an exterior vented sealed interior box.
In contrast, AGM batteries are much more expensive, but require almost no maintenance, do not outgas, and can be located within an occupied space.
If you are a heavy daily user of your battery banks – like I am – you will find that flooded wet cell and AGM batteries will last about the same amount of time. Also, if you are not going to monitor your batteries, and/or subject them to serious impact discharges, you might not wish to spend more money for an AGM battery. In that case, a flooded wet cell battery will serve your needs, for a third of the price of AGMs.
The ultimate choice of batteries is subjective. But, investing in good batteries should be high on your priority list when planning any solar panel system.
26. Locating the battery bank

Above: Sealed AGM batteries can be located inside the camper because they do not outgas
With sealed AGM batteries, there is no potential to outgas from the batteries making them safe to use in areas occupied by people. For this reason, I prefer AGM batteries. These AGM were located in an existing cabinet, of my truck camper, just 3-feet from my battery bank, Charge Controller, AC inverter, and whole house DC cable connection.
27. 300 watts of solar panels on my truck camper
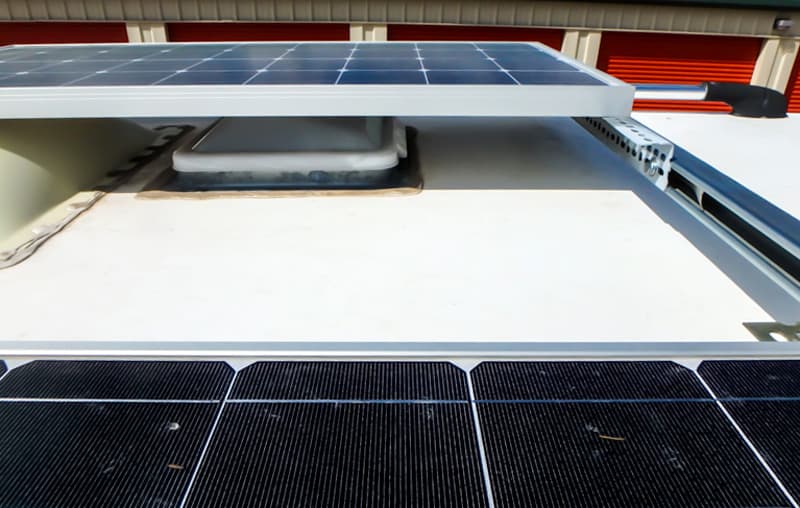
Above: 300 watts of solar on the roof rack my truck camper, bathroom vent underneath can be opened and is usable
This is the completed view of three 100 watt solar panels. You might note that the bathroom vent is usable under the solar panel installed above it.
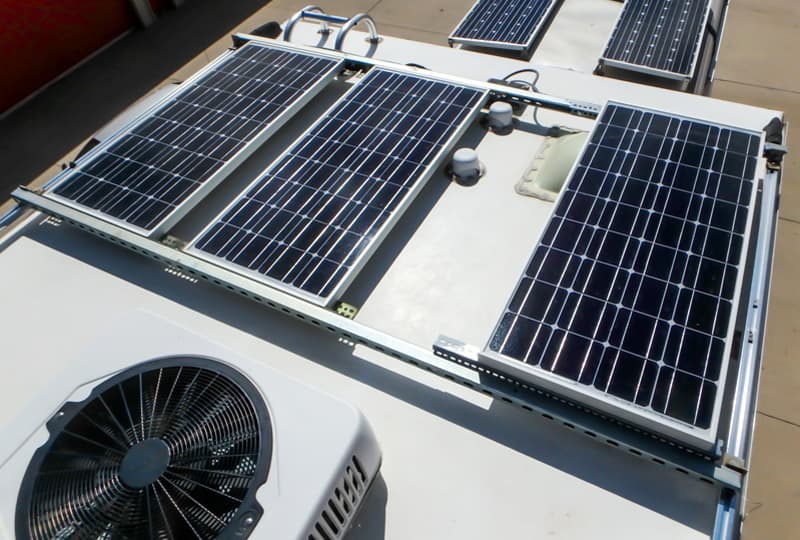
Above: 300 watts of solar on the roof rack my truck camper
There is also space so that these solar panels can be tilted toward the sun, and I can step between the panels when necessary.
Your New Source of Reliable Power
For many, there is not enough time, or a desire, to research what is needed for a solar panel system installation on a truck camper. Just like cooking something for dinner, many desire a recipe, while others would just like to pick up a prepackaged dinner on the way home. With the previous pictures and above parts list, this article should provide you a project in almost a kit form.
Hopefully this has put a needed tool into your truck camper tool belt. Once completed, this project will provide years of truck camper power without the restrictions of looking for a campsite with shore power hookups.
To read more of Bryan’s articles on solar and batteries, stealth camping, full-time truck camping, personal safety, and more click here.
Disclaimer: It is your responsibility to make sure that any project you undertake is safe, effective, and legal for your situation.


