For Part 2, Truck Camper Magazine and Team Emerick install the Zamp Solar Controller, finish the install, and test the solar system. Then TCM kills two batteries, and learns an expensive lesson.

This article picks up from Installing a Solar Panel System. If you haven’t read that article, please start there.
With the Zamp 150-watt solar panel and junction box installed on the camper roof, we moved inside the camper to install the solar controller and required wiring.
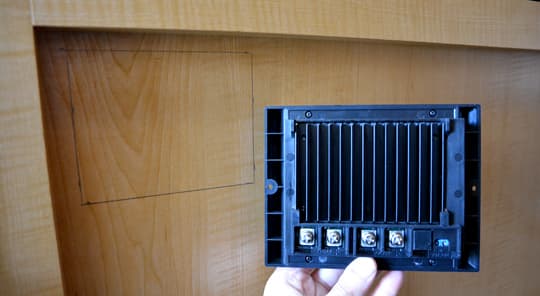
Donny Emerick measured the solar controller and penciled the required opening (top left) for the solar controller on the interior camper wall.
 |
 |
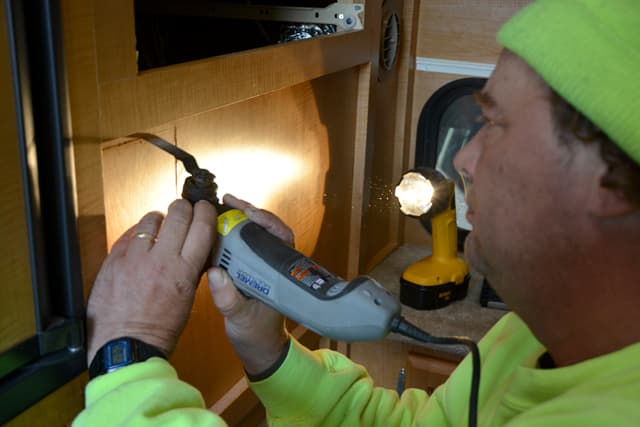 |
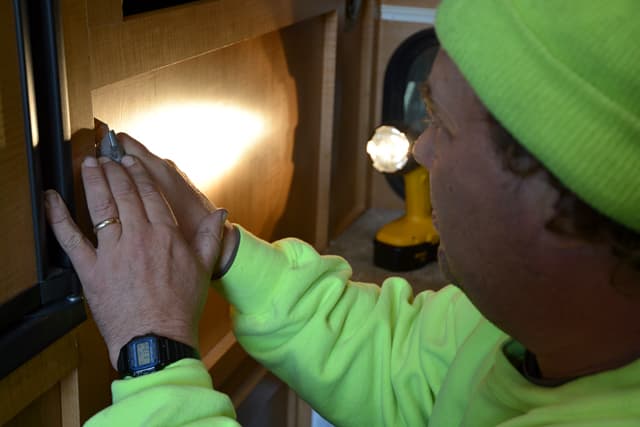
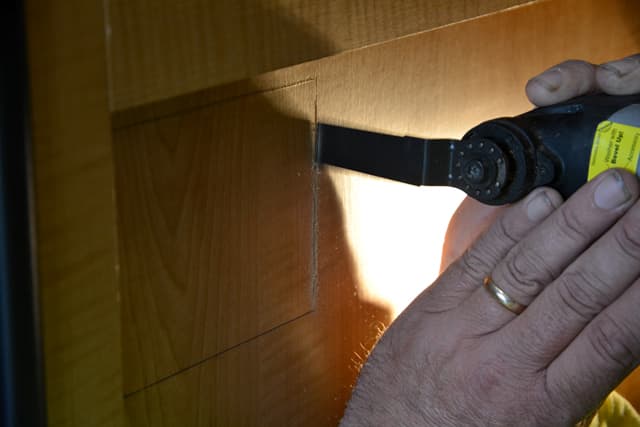
He then used a corded Dremel Multi-Max to cut the panel space out from the wall. This tool requires a steady hand to avoid cutting through the panel board.

With the panel cut, we were ready to connect the wires from the solar panel to the solar controller. Before we cut the 8-gauge wire to length, we verified that it was conducting power from the solar panel with the multi-meter.
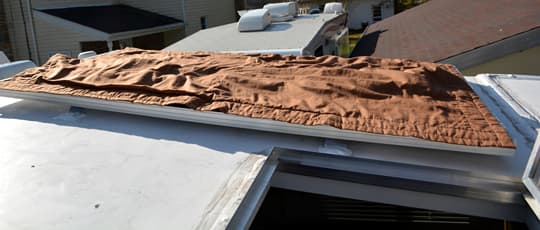
Once verified, Tom had us cover the roof mounted solar panel with a blanket to avoid a possible shock when cutting and handling the wiring. With Tom, it’s always safety first.
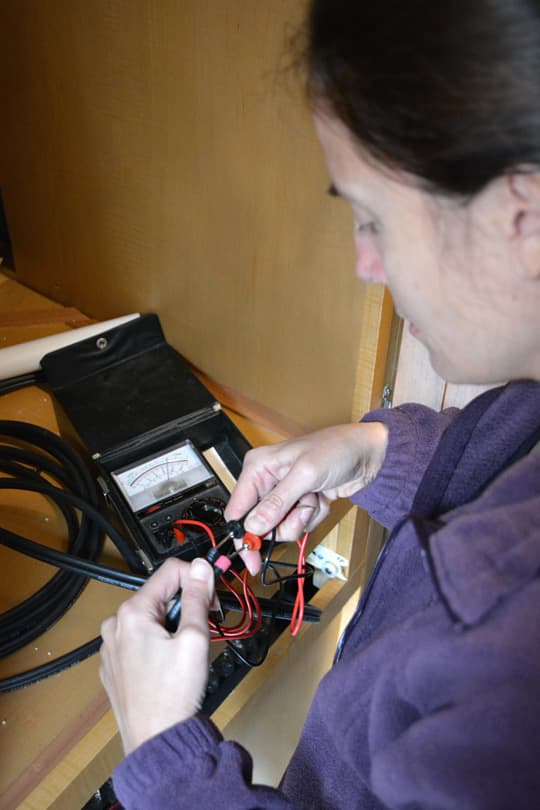
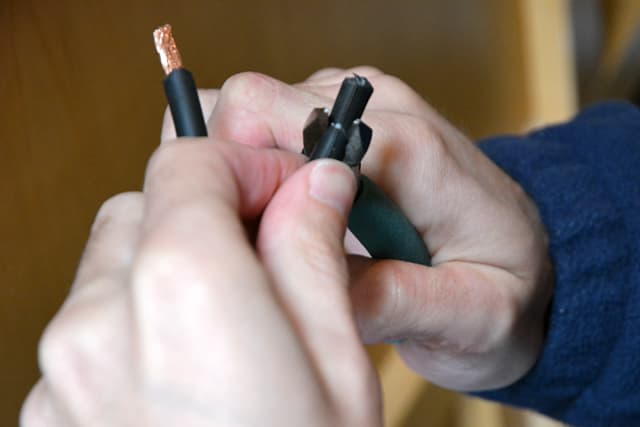
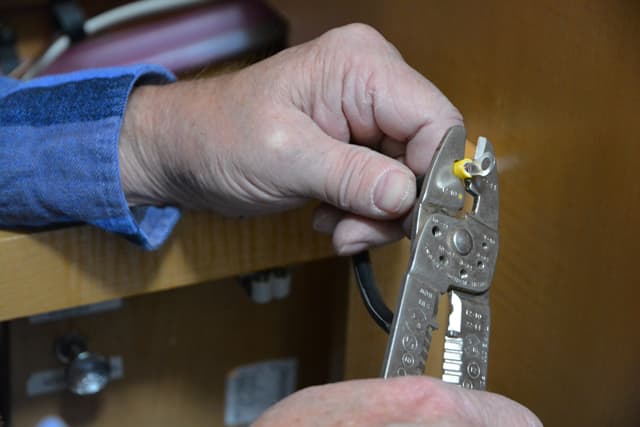
The 8-gauge wire featured a ridge on one side of the plastic insulation. Using the multi-meter, we were able to determine that this ridge identified the positive wire and the non-ridge flat side was the negative wire.
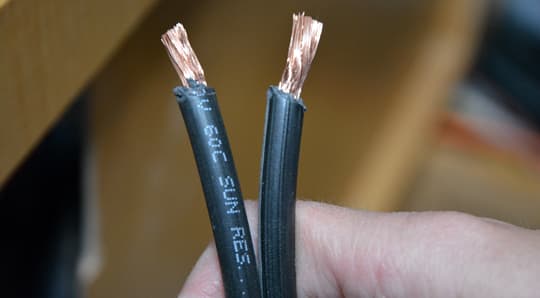
Using a pair of snips, cutting the 8-gauge wire was relatively easy, but stripping the wire proved quite a challenge. The wire was too thick for a typical wire stripper, like the one we used during the CO and LP detector install.
To cut back the insulation and expose the bare wire, we used the same snips we had used to cut the wire, and carefully cut into the plastic insulation as to not cut the metal wire inside. With the plastic insulation cut back, we crimped the Zamp supplied connectors onto the wire.
Above: Harley overseeing the installation to make sure it was done correctly
 |
 |
 |
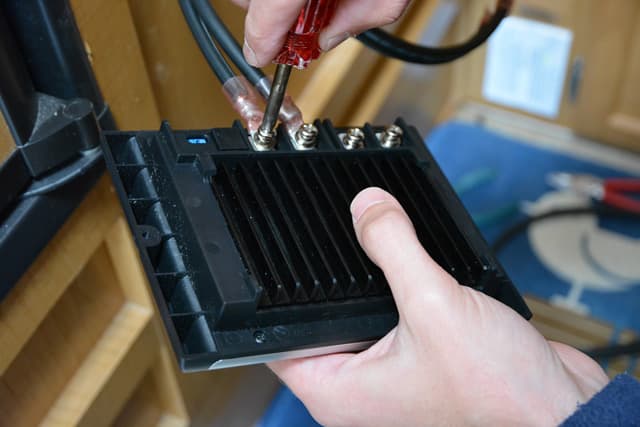
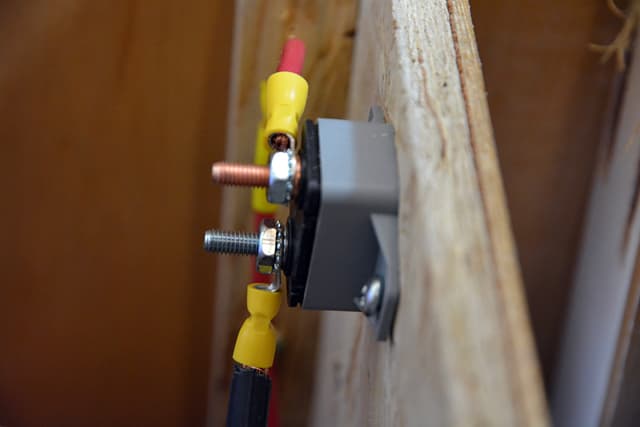
With the positive and negative wires identified, we connected the 8 gauge wire to the Zamp solar controller accordingly.

Above: Harley helping with the solar controller installation
The positive and negative terminals on the Zamp solar controller were very well marked and, with a Phillips screw driver, simple to connect to our freshly cut, stripped, and crimped 8 gauge wire.
Connecting the Solar Controller to the Battery
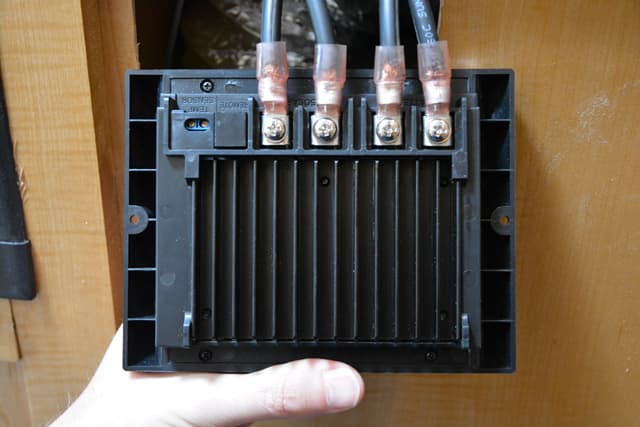
With the solar panel connected to the junction box, and the junction box connected to the solar controller, the next step was to run 8-gauge wire from the solar controller to the battery.
Under the step-up to our cabover is our main fuse panel and circuit breakers. In this area we found a space to mount the resettable circuit breaker included as part of the Zamp kit.
A resettable circuit breaker (also known as a polyfuse or polyswitch) is designed to protect against power surges and faults. In this case, the resettable circuit breaker will protect the battery bank and solar panel system. If the resettable circuit breaker is triggered, it will reset itself once it cools.
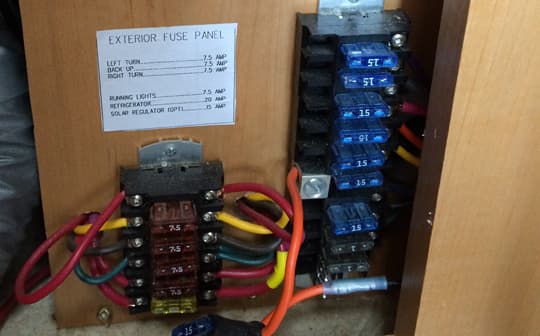
Above: In the back of our fuse panel was a pre-wired fuse slot for a solar panel system
Like many modern truck campers, our camper was pre-wired for solar. On our camper, this pre-wire was found under the cabover step as an 8-gauge wire coming from the battery compartment. Locating and identifying this wire made the installation a lot easier. Had this wire not been installed by the manufacturer, we would have needed to run an additional 8 gauge wire from the resettable circuit breaker to the battery box.
Tip: Before installing a solar panel system, determine if your truck camper is pre-wired for solar. If it is, locate the pre-wire in advance. You may need to consult your owner’s manual or call your dealer or manufacturer for this information. If your camper is older, or is not pre-wired, make plans for an additional run of 8 gauge wire.
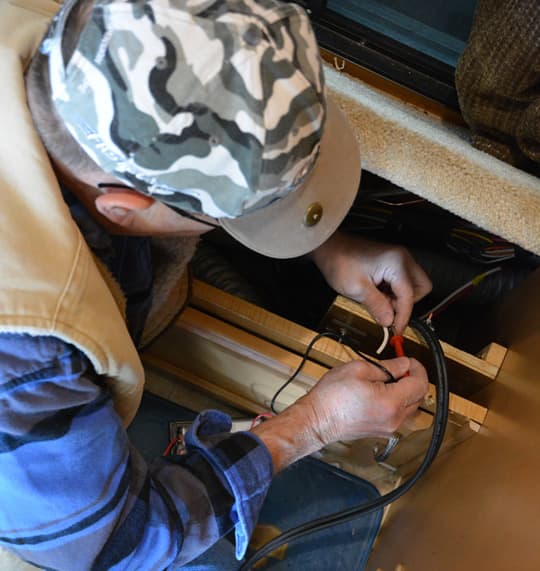
Additionally, our camper had a space in the main fuse box pre-labeled for solar. We installed a 20-amp fuse in this location in the corresponding fuse slot and connected the wires to the resettable circuit breaker. When the fuse was installed and the wiring was connected, we checked the connections with a multi-meter to make sure everything was connected correctly.
 |
 |
 |
Above: Installing and connecting the resettable circuit breaker
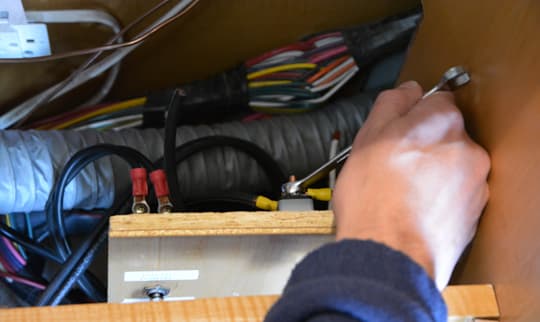
Above: Tightening up the wires on the resettable circuit breaker
With the resettable circuit breaker installed, we connected the 8 gauge wire from the battery to the copper-color terminal (negative), and the 8-gauge wire from the solar controller to the silver-color terminal (positive).
At this point, everything was both installed and connected. All that was left was to reconnect the batteries. Following important safety practices, we reconnected the positive cable first, and then the negative cable.
Above: Tom looked over our work to double-check that everything was working properly
Once the battery bank was reconnected, we removed the blanket from the solar panel to see if the solar controller reported a charge from the solar panels. In other words, was the Zamp solar panel system charging the batteries, and working as it should?
When the blanket was removed, the solar controller instantly read 13.5 amps. The system was working beautifully. At this time we also set the Zamp controller to its wet cell batteries setting. If we had AGM batteries, we would have changed to the AGM battery setting.
For one more system check, we pulled the battery disconnect. If we had connected the system correctly, the solar panel system would continue to charge the battery bank. It continued to read 13.5 amps, and was working well.
Two Dead Batteries
With the installation completed, we said good-bye to the Emericks, drove home, and put our truck and camper in the storage lot we use. Before leaving the rig, we pulled the battery disconnect, and checked the solar controller. Everything appeared to be fine.
With the battery disconnect pulled, the camper 12-volt system was disconnected from the batteries. In turn, the solar panel and solar controller would keep the battery charged and healthy. This is a primary advantage to having a solar panel system on a RV; the solar panel system maintains the battery while the camper is winterized.
The only other option is to plug-in the camper over the winter (not an option for us), or pull the batteries and keep them in the garage on a battery minder. For years we have pulled the batteries and kept them on a battery minder. Removing, monitoring, and reinstalling the batteries works fine, but it’s a pain in the butt. Now that we had the solar panel system, we no longer needed to do that. At least, that’s what we thought.
Fast forward about two cold winter months. Angela and I return to the camper, bring the rig to our house, pack it up, and drive south to Florida. To heck with this dark overcast Pennsylvania winter thing. We can work from almost anywhere; we might as well be warm.
On our way south, we stopped at two friends’ houses, and plugged in. In North Carolina we filled the camper with fresh water and de-winterized. A day later, we pulled into a Walmart in Jacksonville, Florida. After feeding the cat, and ourselves, we turned in for the night.
The next morning, Angela looked at the Zamp solar controller. The battery voltage read 10.8. Something was terribly wrong. After driving over six hours the day before, mostly in sunshine conditions, the batteries were essentially dead. What happened?
Two New Batteries
After checking the battery compartment and connections, which looked okay, we called the Interstate Battery store in Jacksonville, Florida and made an appointment. Interstate Battery stores will check your batteries for free, an offer we were glad to accept.
Within minutes of our arrival, the technicians at Interstate were checking our batteries with a hydrometer. A hydrometer tests the liquid in the battery cells and measures the state of charge in those cells. The news was not good. One battery had a dry cell, and the others were very weak.
Upon closer inspection, the Interstate technicians were able to determine that our batteries were a few years old. Furthermore, the battery condition suggested they had possibly sat for an extended period of time before we took ownership. We knew the camper itself had sat for an extended period prior to our purchase, so this information certainly made sense.
While they didn’t recommend it, the Interstate team said we could bring the batteries back, but they would never be anywhere near 100%. Not wanting to take chances with our battery power – a vital part of our ability to work on the road – we asked for their advice.
After a quick inspection and measurement of our battery compartment, the Interstate team suggested two Group 31 AGM batteries. In their pitch, they said the Interstate AGM batteries had a 36-month free replacement warranty. We were excited about the prospect of Group 31 AGM batteries, and the warranty was too good to pass up.
Since Then: The Solar Story
Six months have passed since we bought the AGM batteries and everything has been working remarkably well. Our daily power use barely puts a dent in the Group 31 AGM battery charge and the Zamp solar panel system keeps them topped off effortlessly. While we still enjoy being plugged into shore power now and then, we really don’t need it.
That will likely change as we install an air conditioner and camp in hot summer temperatures. We are still deciding about adding a Honda EU2000i generator, but our inclinations for now are to go without. We already nixed a microwave as we have adapted our camper cooking and prefer the big kitchen cabinet it would consume.
Down the road, we will continue to study our Zamp 150-watt solar panel system, and our 12-volt truck camping lifestyle. It’s not entirely out of the question that we’ll add a second 150-watt panel, but we’ll only do so only if we need it. For now, we’re more than happy with the solar and battery system we have.
Bryan Appleby wrote an article called, RV Solar Systems Charged and Challenged. His article goes into whether or not one even needs a solar system on their camper. Please consider reading that article, and doing an energy audit, before determining whether or not a solar panel is right for your rig.