TCM installs a low profile Coleman Mach 8 RV air conditioner on their project camper. Step one was figuring out how to get the 90 pound unit on the roof.

This particular project all came down to our furry feline friend, Harley.
Like most truck campers, we avoid extreme heat whenever possible. That said, there are times when we need to stay put in temperatures above ninety degrees. For example, when we’re touring a factory, or attending a summer truck camper rally. Heat happens.
While we can escape the heat inside an air conditioned building or drink cold water in nothing more than T-shirts and shorts, our cat Harley does not have these options. Worse, he always wears a fur coat, and refuses to drink cold water when told. He’s stubborn like that.
In the rare instances when we needed to dry camp in hot weather, we have come up with some creative solutions to keep Harley cool. First, we crank the Fantastic Vent to high and open a single window to pull air over where he’s sitting. Second, we put a bag of frozen peas on him. And third, if it’s really stinking hot, we’ll soak him in cold water in the bathroom sink.
These solutions work, but they’re only temporary. If the forecast shows heat for days on end, we will change plans and seek out shore power or cooler elevations. Just this past June we were forced to hurry up our schedule in the Northwest to escape temperatures surging well past 100 degrees. We found relief in the altitude of the Bighorn Mountains in Wyoming.
Choosing the Coleman Mach 8
Our current project camper arrived last summer without an air conditioner. It also arrived with broken seals, outdated detectors, rusty exterior screws, de-lamination on one side, and a number of other issues that can come with an eleven year old used truck camper.
We were aware of most of these challenges and excited to roll up our sleeves, learn best practices from experts, and report our experiences and discoveries here in TCM. So far we have done exactly that with a series of project camper articles in the Tech section.
After a very positive experience with a Coleman Mach air conditioner on our demo 2014 Northstar 8.5 Arrow U, we knew we wanted a Coleman Mach air conditioner for our project camper. Specifically, we selected a Coleman Mach 8 9200 BTU low profile high-efficiency air conditioner that is able to operate with a Honda or Yamaha 2000-watt portable gas generator.
Above: The Coleman Mach 8 9200 BTU low profile high-efficiency air conditioner – click to enlarge
According to Airxcel RV Products, manufacturer of the Coleman Mach 8, the unit is the lowest profile RV air conditioner on the market at eight-inches high and the lightest weight low profile RV air conditioner available. Honestly, we were mostly interested in its ability to be powered by a portable 2000-watt generator. That ability extends our off-grid capabilities, and might mean the difference in staying where we want for an extra day, or heading for the hills.
Total Pallet Freak Out
We were very excited on the day the Coleman Mach 8 shipped. Then we looked at the UPS tracking information. The shipment weighed 160 pounds. What?
The product literature clearly stated the Coleman Mach weighed 90 pounds. Where did the extra 70 pounds come from? And how were we going to lift and maneuver something that weighed 160 pounds when it arrived?
When we contacted Airxcel, they immediately solved the mystery.
“That’s the weight of the air conditioner, its packaging, and the pallet it was shipped on. It’s been sent via UPS Freight. You’ll get it later today.”
Thankfully, our UPS Store was accustomed to receiving palletized products and even handled the disposal of the pallet itself. Once separated from the pallet and packaging, the Coleman Mach 8 was relatively easy for us to lift and place into our VW hatchback.
In retrospect, I don’t know why we were surprised that the air conditioner was shipped via freight on a pallet. It’s not like it was going to fit in our mailbox. The lesson is, for anyone out there who’s considering ordering and installing an RV air conditioner, make plans to receive a 160 pound (or more) pallet.
Installing the Coleman Mach 8
We live in an HOA (homeowner association) community that has strict rules against parking RVs for more than a few hours and prohibits us from working on our camper or truck. On the flip side, we love our townhouse condominium and don’t have to worry about fall leaves, snow removal, or really anything else outside while we’re away. Everything has trade-offs.
To install the air conditioner, we once again teamed up with truck camping friends Tom and Pat Emerick and their sons, Michael and Donny. Team Emerick, as we have come to call them, have not only been incredibly gracious with their time, but also have the professional skills and tools to do just about anything electrical or mechanical on a truck camper.
When we asked Tom how we were going to get the air conditioner on the truck camper roof, he said, “The same way we got my son Michael’s RV air conditioner on his Adventurer truck camper; scaffolding.” See what I mean? Not only did he have an answer, and the scaffolding, but he and his son, Michael, had already successfully installed an air conditioner before.
Okay Team Emerick, let’s get to work.
Finding the Pre-Wire
Nearly every hard side truck camper and many pop-up truck campers come with either a roof top air conditioner (as standard or optional), or a vent where a roof top air conditioner could be later installed. Most hard side and many pop-up truck campers are also pre-wired for a roof top air conditioner in this location.
Above: The pre-wire box in camper”s wardrobe – click to enlarge
Fortunately, our camper was pre-wired for an air conditioner as standard. When we removed the roof vent, we hoped to find that pre-wire right there, ready to go. It wasn’t. We finally found the pre-wire tucked into a white box in the nearby wardrobe. We also located a spot on the breaker box labeled “Air Conditioner”. With these two items located, we were ready to begin the installation.
If our camper had not been pre-wired for an air conditioner, or did not have a breaker ready for an air conditioner, this would have been a much more involved and potentially complex installation. Please check that your camper is pre-wired for an air conditioner before proceeding with this installation.
Now, it was time to remove the vent where the air conditioner would be installed.
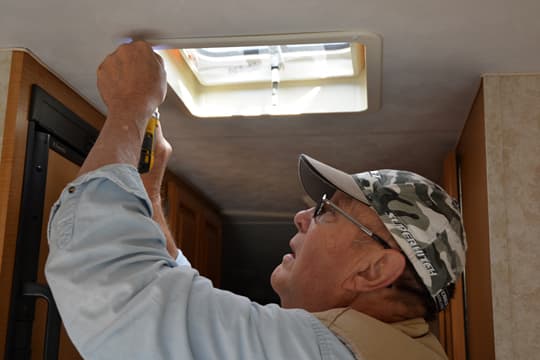
Above: Tom removing the interior vent frame
Above: The interior vent frame is off, but we can”t fully take the vent off until the exterior caulking is removed
Caulk On, Caulk Off
While Tom and I worked on the wiring, Gordon was on the roof removing the caulking that had sealed the now removed vent. To get a proper seal, the air conditioner requires the old caulk to be completely removed and the TPO material cleaned.
The previous Fall we had removed any dry, cracked, or otherwise damaged Dicor roof sealant and replaced it with Sikaflex 715. Fortunately, the vent in question still had a strong Dicor seal and did not require removal and repair with Sikaflex 715.
 |
 |
 |
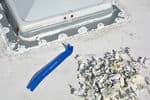
Above: Removing the Dicor and getting the screws out of the vent”s frame – click to enlarge
To remove the Dicor around the vent, Gordon started with the sharp end of a small crowbar. As he broke into the Dicor with the crowbar, he was especially careful not to cut into the TPO material under the sealant. A large flathead screwdriver would also do the trick, but the sharp crowbar made it easier to cut into and begin pulling up the tacky Dicor.
Once the crowbar had opened up the Dicor, Gordon was able to pull off sections of Dicor in quarter-sized pieces. Getting all the Dicor off took the better part of an hour.
When all of the Dicor was removed, Gordon removed the screws holding down the vent. As each screw was removed, he examined it to see if there was any rust on the screw. Rust is an indicator of water intrusion and possible rot underneath. Thankfully, the screws came up clean.
Once all the screws were removed, Gordon used the crowbar to begin prying up the roof vent. Even after eleven years, the butyl tape had a powerful grip on our camper’s roof. It took both of us pulling on the vent to remove it.
Above: Removing the Butyl tape – click to enlarge
With the vent removed, the next step was to scrape off the Butyl tape material and the remaining Dicor remnants with the crowbar and a paint scraper. Some of the butyl came right up while other pieces put up a good fight. This took another fifteen minutes.
Above: The sealant and Butyl tape are off – click to enlarge
When that process was completed, Gordon brushed the scraped off material into a dust bin and lightly sanded the TPO roof around the vent. With the wipe of a wet cloth, the TPO material around the vent was now as clean as it was going to get.
Pre-Wire Prep
Inside the pre-wire box, our project camper had yellow colored 12/2 flexible sheathed insulated wire that led to the aforementioned air conditioner breaker in the camper breaker box.
Above: Inside the pre-wire box the wire had been capped for safety – click to enlarge
This wire had been capped for safety by the factory. Before we removed these safety caps, we switched the air conditioning circuit breaker in the camper to off. The camper was also not plugged into 110-volt shore power. Safety first.
Above: The pre-wire box was unscrewed so that we could feed another yellow 12/2 flexible sheathed insulated wire. You can see the pre-cut channel in the top left of the wardrobe. Click to enlarge.
Above: The pre-cut channel in the vent area (bottom left in foam) – click to enlarge
In addition to the pre-wire box and 12/2 flexible sheathed insulated wire leading to the camper circuit breaker, there was a pre-cut channel in the ceiling’s insulation leading directly to the vent area where the air conditioner would be installed.
Please note that the 12-volt red and white wires shown in the vent area are not related to this installation. These wires are for the ventilation fan.
Above: The yellow 12/2 flexible sheathed insulated wire (center) was fed from the pre-wire area in the closet to the vent area where the air conditioner will be installed – click to enlarge
Into this pre-cut channel we fed another yellow 12/2 flexible sheathed insulated wire. This second 12/2 flexible sheathed insulated wire now ran from the vent area where the air conditioner would be installed, to the pre-wire box.
Above: Tom drilled an additional hole in the pre-wire box to accommodate the second 12/2 flexible sheathed insulated wire – click to enlarge
Using a drill press, Tom drilled an additional hole in the pre-wire box to accommodate the 12/2 flexible sheathed insulated wire running to the vent area.
 |
 |
 |
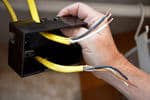
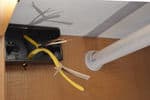
Above: Feeding the wires through the box, splicing the wire, and capping the wires – click to enlarge
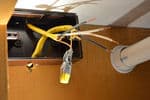
With the caps off the pre-wire running to the breaker box, we spliced the pre-wire with the wire running to the vent area. With over forty years professional experience working with 12 and 110-volt wiring, circuits, and electronics, Tom completed the required copper wire, black wire, and white wire splices, checked his connections with a volt meter, capped them with wire caps, and screwed the pre-wire box closed.
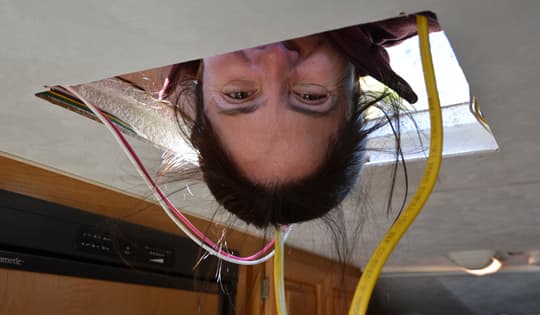
In the vent box area on the ceiling, we left the 12/2 flexible sheathed insulated wires exposed. Once the air conditioner was on the roof and positioned, these wires would be connected to the air conditioner electrical leads.
Getting the 90-Pound Air Conditioner on the Roof
The pre-wiring prep and roof vent removal and clean-up were completed about the same time. A few minutes later we had the scaffolding set up along the passenger’s side of the truck camper.
 |
 |
 |
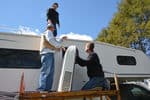
Above: Getting the air conditioner on the roof using scaffolding – click to enlarge
With a quick lift, Tom and Gordon got the air conditioner onto the scaffolding platform. Per the instructions, they were careful not to use the outer shroud for lifting. From there, Donny, who was on the camper roof at this point, literally one-armed the air conditioner up and onto the roof. Don’t mess with Donny!
If you’re seriously considering installing a RV air conditioner yourself, please take a minute and really think about how you’re going to get the unit on the roof. We were fortunate that Tom had scaffolding, and Donny.
Had it been just Gordon and I, I’m not sure how we would have safely put that 90-pound air conditioner on the roof. This was, by far, the most challenging part of the installation and should be taken very seriously. In retrospect, we would not have even attempted this part of the installation without help. Please be careful, and take the appropriate steps for safety.
Aligning the Air Conditioner
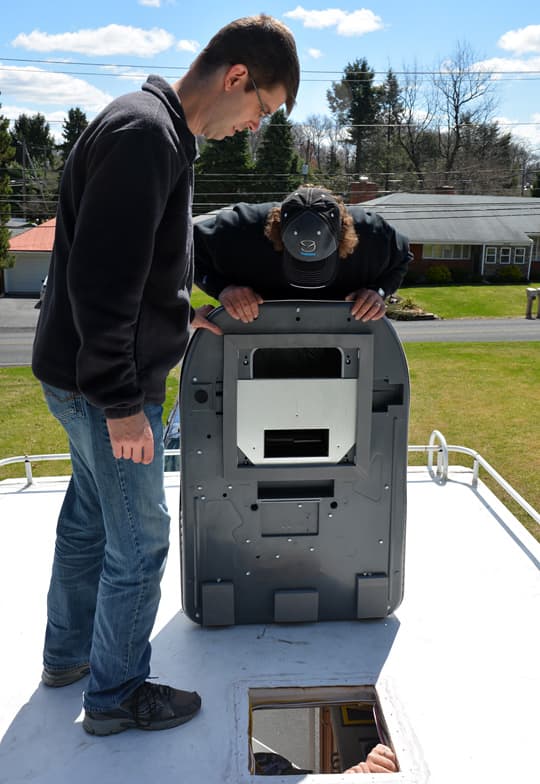
Above: Donny and Gordon getting ready to place the air conditioner into position
Once the air conditioner was on the roof, Gordon and Donny carried it over to the open vent. From inside the camper, Tom then guided the air conditioner as Gordon and Donny lowered it down.
Above: Donny and Gordon lining up the air conditioner. You can see Tom”s hands inside the camper guiding it into place. Click to enlarge.
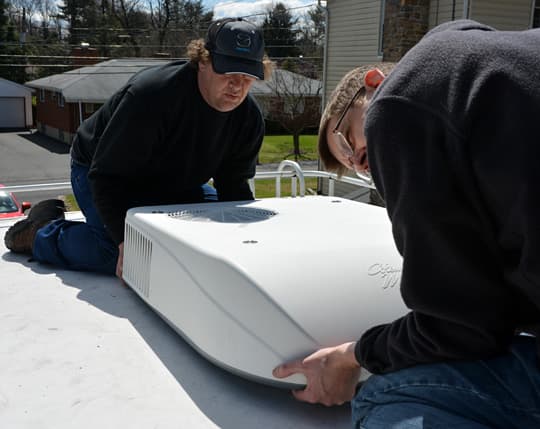
Above: Donny and Gordon listening to Tom”s instructions from inside the camper, and making small adjustments
The trick was making sure the air conditioner was not only lined up, but also square with the camper. With Tom guiding and Gordon and Donny making small adjustments, the air conditioner was squared up and in position within minutes.
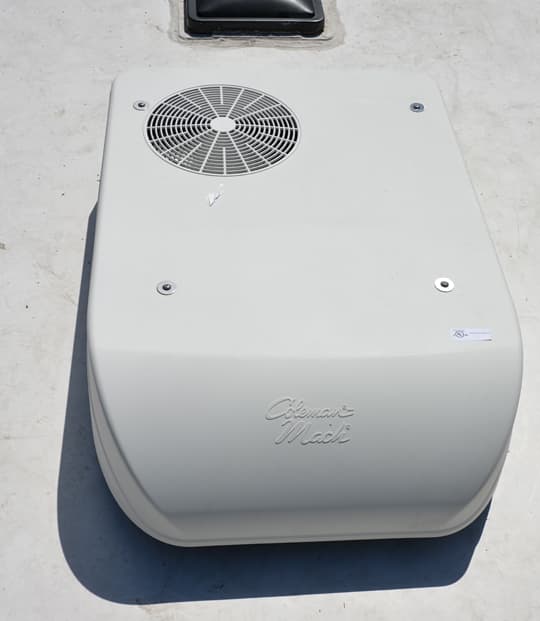
Above: The Coleman Mach is now in place on the camper”s roof
 |
 |
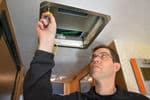 |
Above: Four bolts were then screwed in on the interior of the camper to secure the unit into place
An interior metal frame and four bolts secured the air conditioner onto the camper’s roof. The bolts were at proper tension for the air conditioner’s gasket seal when four tension indicators located on the air conditioner unit made contact with camper roof.
Interior Frame, Shroud, Duct Collar, and Ceiling Assembling
Once the interior metal frame and screws were installed, three more components remained; an inner shroud with electrical junction box, the outer ceiling assembly with controls, and a fabric duct collar.
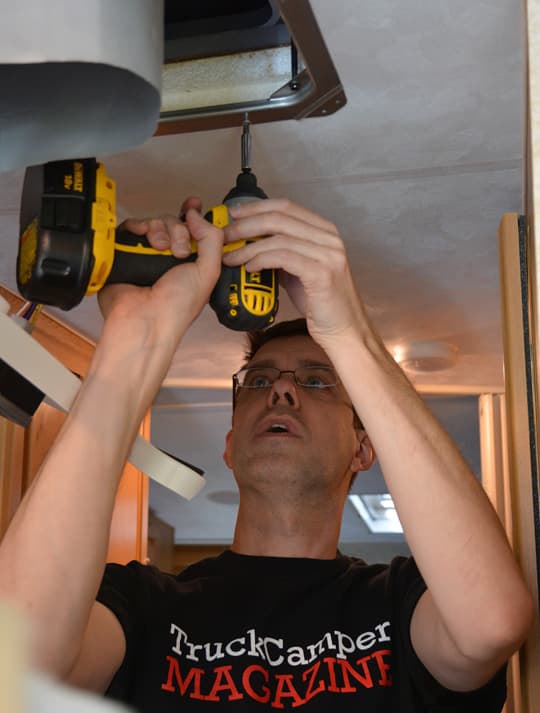
The fabric duct collar was the first item to be installed with four screws.
Above: The 12/2 flexible sheathed insulated wire was inserted into the inner shroud – click to enlarge
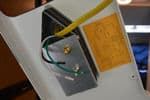
The inner shroud was the second component to be installed. The 12/2 flexible sheathed insulated wire running from the pre-wire box was inserted into the roof-facing side of the electrical junction box on the inner shroud.
 |
 |
 |
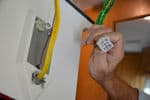
Above: The junction box and 9-pin receptacle on the inner shroud – click to enlarge
On the floor-facing side of inner shroud, the wiring was then spliced together; checked with a volt meter, and capped with wire caps. Again, Tom expertly handled this part of the installation, and screwed the junction box closed.
Above: The wiring was spliced together, checked with a volt meter, and capped with wire caps – click to enlarge
On the roof-facing side of the inner shroud is a 9-pin receptacle that accepts the 9-pin electrical cord from the roof top air conditioner unit. The 9-pin cord was connected to the receptacle before screwing the inner shroud into the interior metal frame.
Above: Installing the interior metal frame
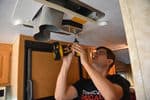
Above: Gordon holding the inner shroud with the inner shroud and outer ceiling assembly. You can also see the fabric duct collar attached. Click to enlarge.
 |
 |
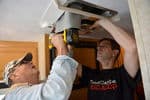 |
Above: The inner shroud being attached to the outer ceiling assembly – click to enlarge
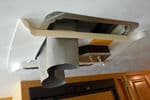
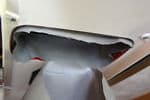
With the inner shroud mounted to the interior frame, the fabric duct collar was pulled through the inner shroud and cut to length. Gordon used scissors to cut the fabric duct collar, but a utility knife would also be suited to the task.
 |
 |
 |
Above: The inner fabric duct collar being cut to length and sealed into position – click to enlarge
Once the fabric duct collar was cut, a pre-installed ring of adhesive tape on the inner shroud was peeled allowing the fabric duct material to be sealed into position.
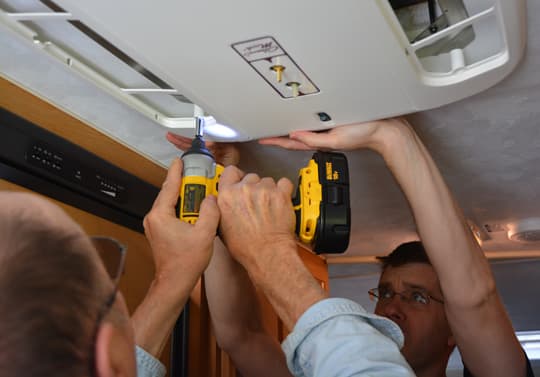
Above: Installing the outer ceiling assembly
The next step was to install the outer ceiling assembly. This is the interior part of a RV air conditioner that can be seen on a finished installation. The outer ceiling assembly screwed into the interior metal frame with four screws.
 |
 |
 |
Above: Installing the control switches and air filters – click to enlarge
To complete the installation, we pushed the control switches on and snapped the two air filters and side covers in place.
Testing the Unit
After looking over the entire installation, and carefully checking the wiring, we plugged the camper into shore power, switched on the air conditioner breaker, and turned on the air conditioner.
The Coleman Mach 8 immediately roared to life. With the air conditioning set to low, the camper began to cool down. Although we avoid it whenever possible, we were now ready for hot weather camping.
Wrap Up
After going through the experience of installing an air conditioner, with considerable help from Team Emerick, I don’t recommend this project for everyone. If you don’t have help for the 90-pound lift to the roof, or lack electrical knowledge and/or skills, this is not something you should attempt. My first priority is always safety, and this installation has more than a few opportunities to get into trouble. If you’re at all in doubt, have a dealer do it.
I also caution that the installation instructions seem to assume that you have some experience with installing RV air conditioners. There were parts of the installation process that didn’t exactly jive with the paper instructions, or were vague.
The instructions also veered heavily from Airxcel’s YouTube video showing a Mach 8 install. The Mach 8 we installed not only looks different than the Mach 8 in the video, but it looks different than the Mach 8 in the instructions. Unless you’re the kind of person who can build an Ikea dresser in an hour without looking at the instructions, you’ve been warned.
On the flip side, we love the Coleman Mach 8 air conditioner. It’s exactly what we wanted and needed for hot weather camping. The low profile on the roof, low profile inside the camper, low weight, and high-efficiency make it a no-brainer.
Since the install, we have camped in hot weather on a number of occasions. From these experiences, we can report that the 9200 BTU Coleman Mach 8 is very well suited to keeping the camper comfortable when it’s in the high 80s to low 90s and humid.
On days that push into the upper 90s, we found the 9200 BTU unit would cool down the camper, but not to temperatures we would consider completely comfortable. That said, we don’t camp often in temperatures in the high 90s, and don’t expect miracles from a high-efficiency 9200 BTU roof top RV air conditioner.
If you need more cooling capacity, Coleman offers 13,500 BTU and 15,000 BTU versions of the low profile Coleman Mach 8. They are not as energy efficient as the 9,200 BTU version, but they will provide more cooling capacity when plugged into shore power or used with a suitable generator.
Our project camper is really coming along. We still need to replace the eleven year old water heater and water pump, and figure out what to do about some de-lamination, but it’s getting there.
It’s also good to know more about the systems in our camper. For example, should something go wrong with our air conditioner, we would know a few places to check before we called a technician. Beyond just extending the quality of our truck camping experience, that knowledge, and our ability to share it with you, is what this whole project camper is about.
