Here are seven different and equally clever solutions for storing and supporting your truck camper off your truck. Give your camper jacks a breather. Support your camper!
One of the biggest advantages of owning a truck camper is the ability to demount the camper and either use it or store it separately from the truck. I cannot count the number of times we needed to demount our camper somewhere to get something serviced on either the truck or camper.
Even though a camper is designed for use off the truck, it’s not designed to be used that way for an extended period of time. You can do it, but your camper jacks, jack brackets, and jack attachment points on the camper will take a lot of stress. Sometimes that can lead to trouble.
The best solution is to support your camper from underneath. The idea is to transfer the weight – as evenly as possible – from the camper to the ground. This has the added benefit of making the camper more stable when using it without the truck. Even better, your jacks could last longer.
What follows are some really clever solutions to support your camper during use or in storage. Thank you to all the readers who sent these in over the years. We appreciate the support!
Submitted by: Wade and Becky Johnson, 2004 Ford F350, 2004 Lance 1130
We have a new barn that we wanted to store our camper in but the barn isn’t big enough to maneuver the truck and camper around. We need the camper out of the way. To solve this, I wanted to create a rolling camper rest that would allow us to push the camper to the side once it was off the truck.
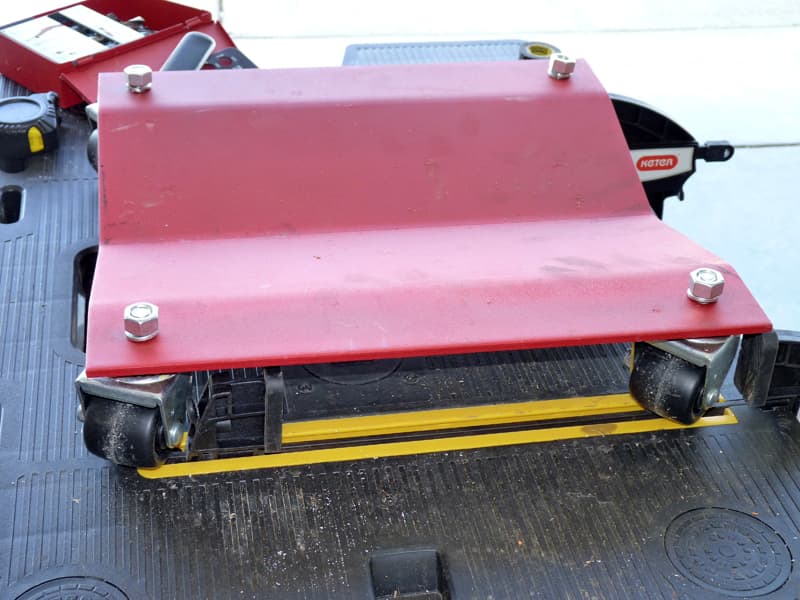
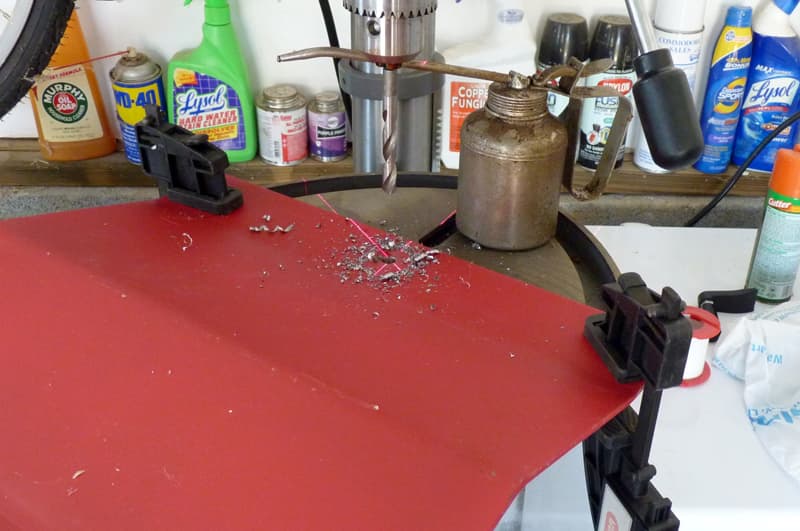
I used car skates that are designed to go under a car’s tires. They allow you to push the car around a garage, and they will go under a framework that would hold the camper.
 |
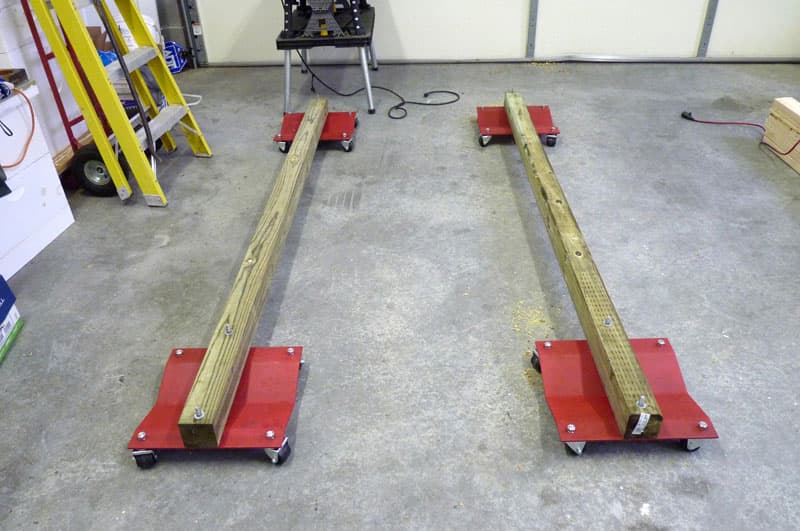 |
Basically, I used 4x4x8 lumber to connect the four skates and built reinforced sawhorse-like frames on top of those.
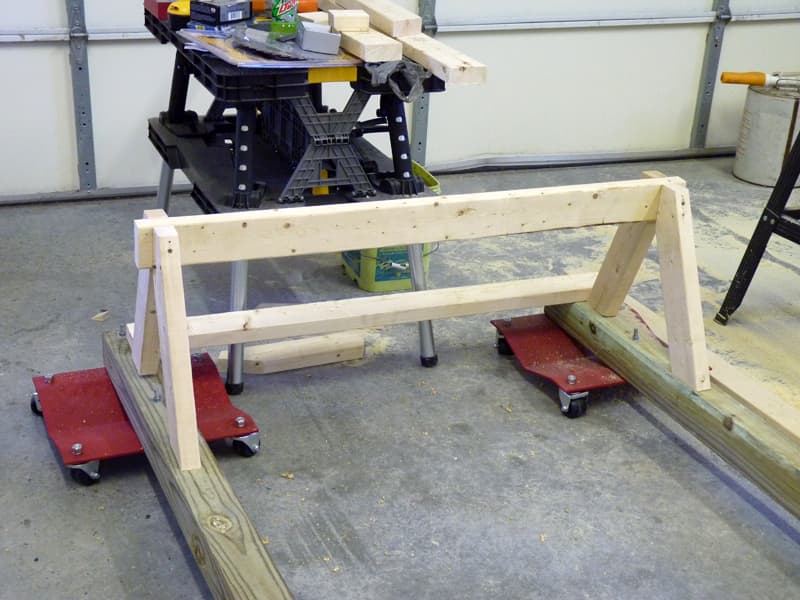 |
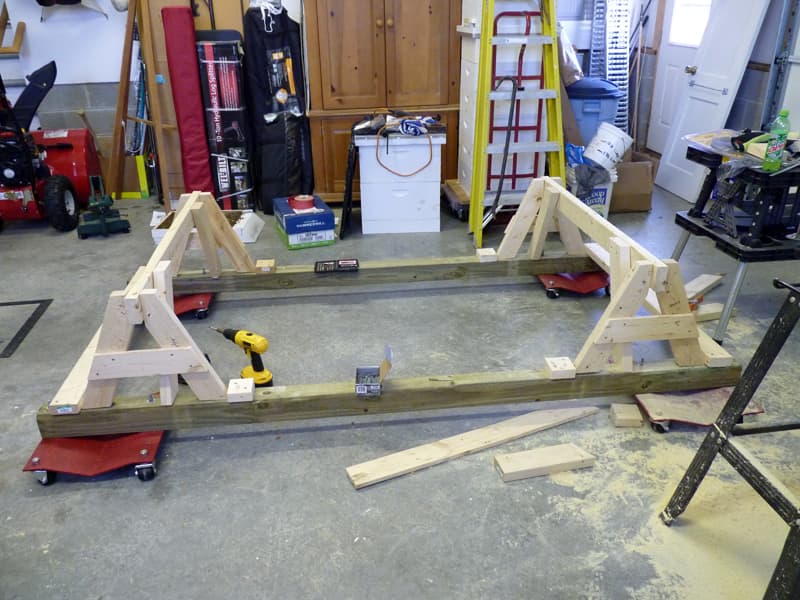 |
The hard part was figuring the angles to make a strong framework. That took some trial and error.
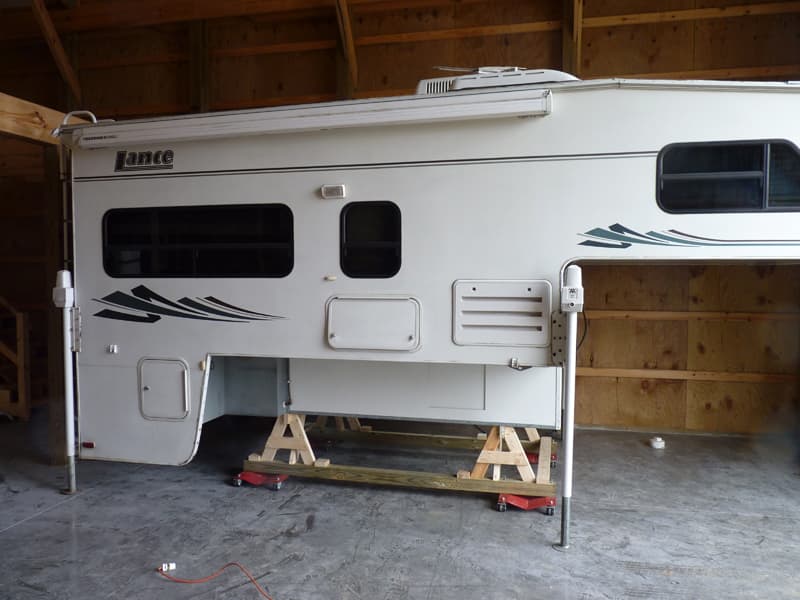
We backed the camper into the barn, jacked it up, pulled the truck out, and lowered the camper slowly onto the rest. To my delight, the rest took the 4,000-pound camper and didn’t even groan.
However, it was just too heavy to roll by hand, so we used a couple of 2×4’s as levers and moved the camper a few inches at a time by prying on the sides of the 4×4’s. It was slow, but the camper rolled slowly into place with no problem. Once in position, we lowered the legs to provide additional load-bearing and stability. We were very pleased.
It took me eight hours to complete this modification and cost me $140. In my opinion, the skill level of this modification is hard.
Submitted by: Russell and Gretchen Berquam, 2014 Ford F350, 2015 Arctic Fox 1140
We like to remove the camper from the truck when we are in a location for several days. Without some way to support the camper, I wouldn’t feel safe living in the camper off the truck.
When we take our camper off the, truck it wiggles and moves around a little, even when we lower it down to the low position. That is not good for the jack mounts and it will eventually loosen and weaken the mounts or the jacks.
To stabilize the camper when off the truck, I made a stand to set the front onto. The stand takes most of weight off of the legs. With our camper on the stand, it is very stable doesn’t seem to wiggle at all.
The stand stabilizes the camper and takes most of the weight off of the legs.
The stand was made to fit our camper. Since all manufacturers use their own dimensions for things, no specific sizes are included.
The support breaks down into four pieces for easy storing in the truck. The two white cross pieces are bolted together. The red uprights slide into the cross braces and are bolted at the desired height.
The support is stored in the bed of the truck alongside the angles that keep the camper from moving around in the truck bed.
The cross brace has an angle support to keep the camper from wiggling side to side with adjustments for height. The foot has angle braces to keep the camper from wiggling front and back.
The cross support is pinned together in the center with a 1/4-inch bolt. The support was built with 1-inch square tubing with a 1/8-inch wall for the uprights and cross braces.
A 1¼-inch angle with a 1/8-inch thickness was used for the foot, the adjustable slides, and the center connector.
The support is adjustable for uneven ground and from 12-inches to 24-inches high. I put a stop at the 12-inch position so the vertical posts could not impact the overhang of the camper.
The stand works like a champ and is very stable.
The materials cost $27 and the welding was about $10. Not including design time, it took about three days to cut, weld, and fit all of the pieces together. In my opinion, the skill level of this mod is hard.
Submitted by: Tim Wishum, 2019 Ford F250, 2008 Lance 861
I needed a 1.5-inch space under my 2008 Lance 861 to clear the rails and cab of my F-250. I also wanted something to stabilize my camper when it is not on my truck.
I cut a 3/4 inch piece of exterior plywood into four pieces, 48 inches by 22.5 inches. I then cut a 3/4 inch grove, in the middle, halfway (11.25 inches) through each piece. I then painted the plywood.
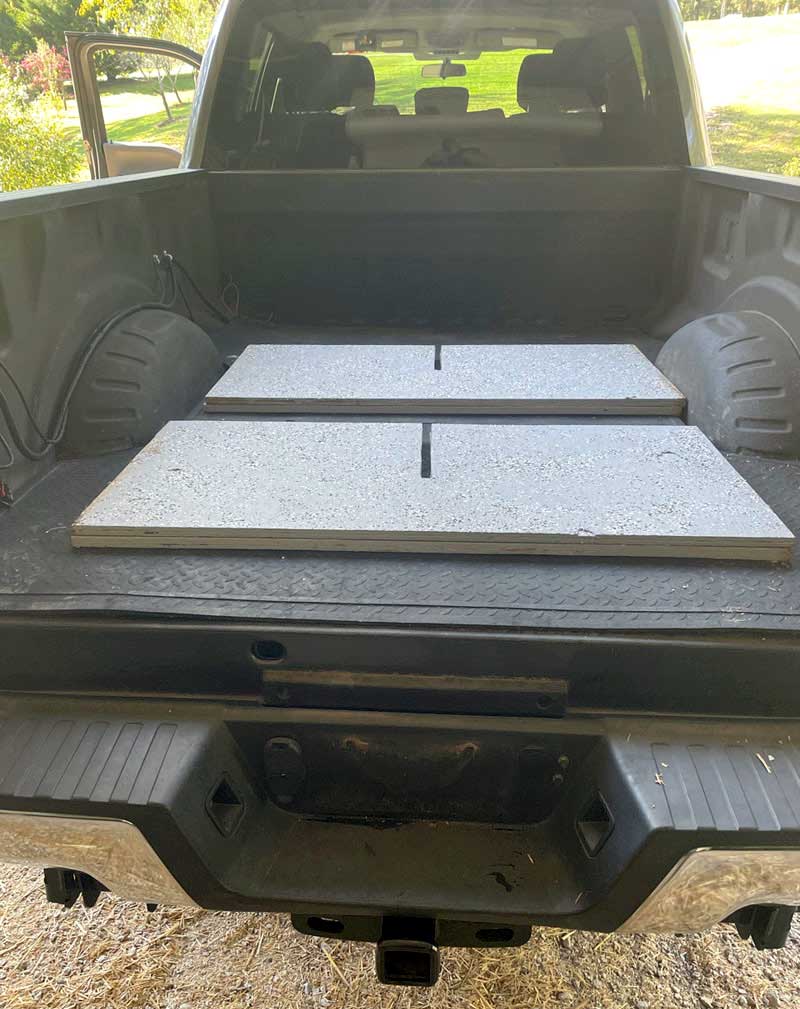
I stack the two pieces together and my camper sits on two of these in the bed of my truck.
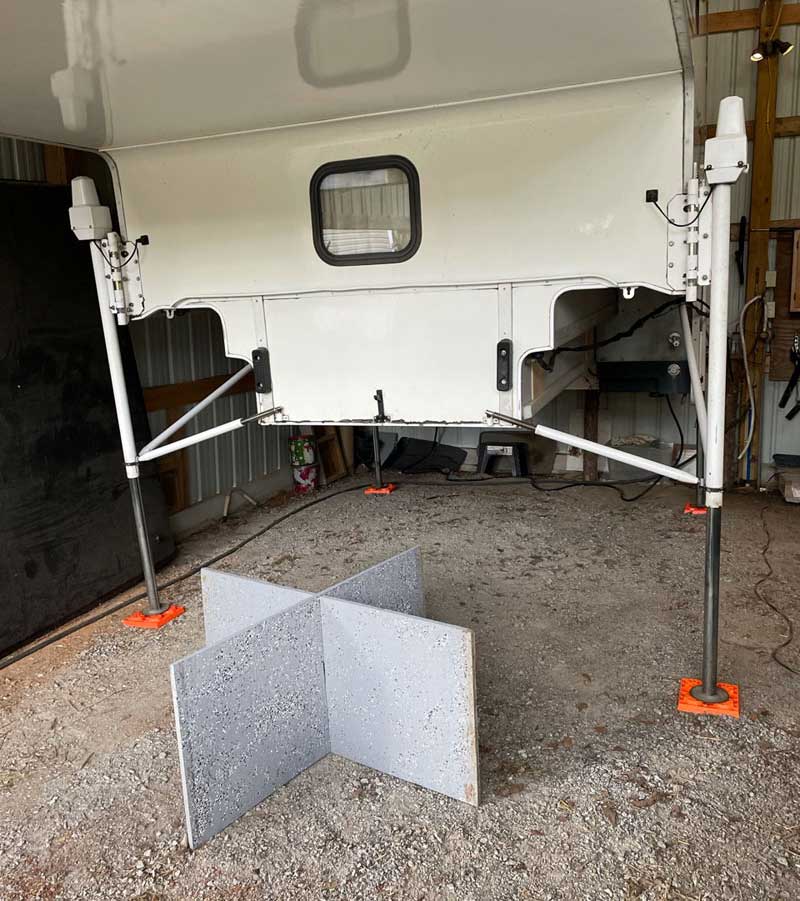
When I take the camper off, I place two of the pieces together to form two crosses. I place both crosses under my camper to support the camper.
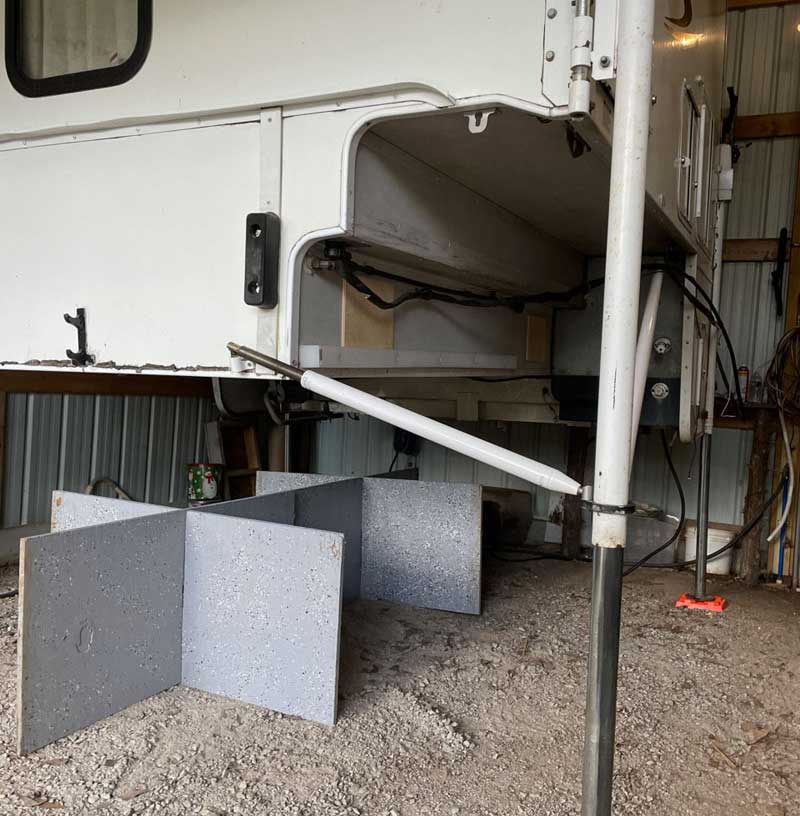
I have used this on my old Sun Lite camper and on my Lance. We drove to Alaska summer of 2019 and this worked great when we took the camper off the truck.
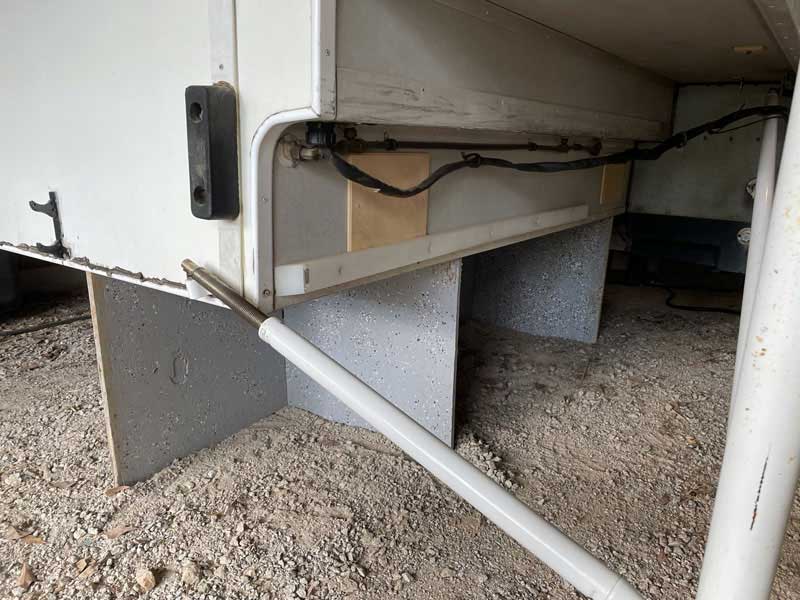
Materials Used:
Pressure-treated plywood 4 by 8 foot $51
Two pints of exterior paint $13/each
One pack decorative paint flakes $12
It took me four hours to complete this modification and cost me $89. In my opinion, the skill level of this modification is easy.
Submitted by: James Thomas, 2013 Ford F-350, 2020 Northern Lite 10-2EX CD LE
Northern Lite suggests using a full belly support, which is something I had done in the past as well. We had tried using saw horses but, feel much safer using the Eaz-Lift supports. They are also much easier to adjust to the terrain.
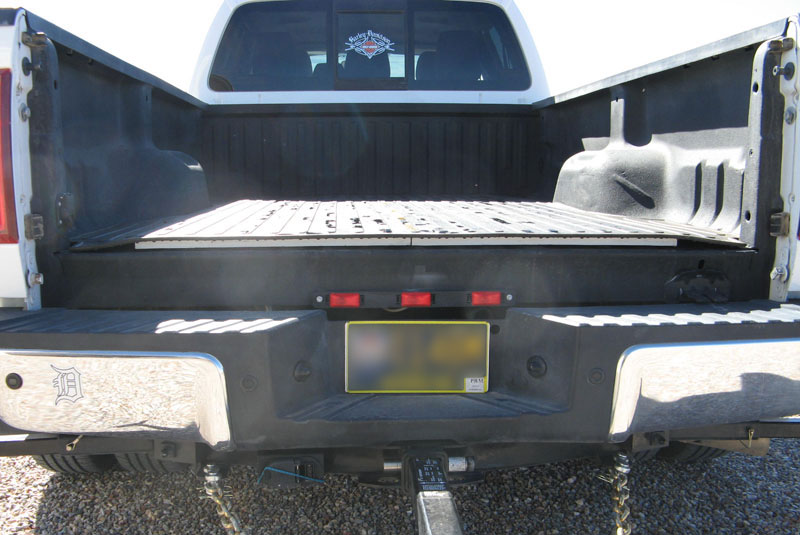
We don’t usually remove the camper from the truck during a trip (we tow a vehicle or ATVs). If we do remove the camper, I use the same method for short-term and long-term storage. As a side benefit, we place the 3/4-inch plywood sheets under the truck bed mat for additional camper to truck cab clearance.
The Eaz-Lift jack stands have gotten expensive since we bought ours in 2013. Look at the aluminum jack stands to see if they work for you as they are usually the same 6,000-pound rating, albeit much cheaper.
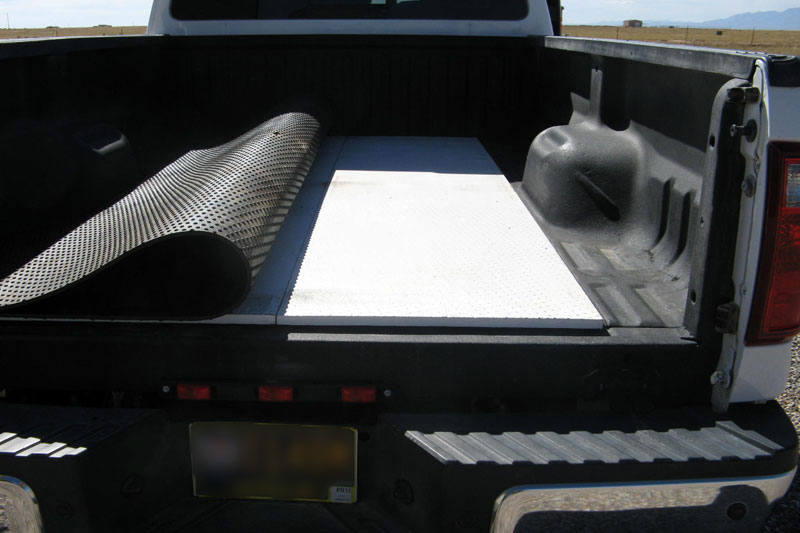
Set up involves removing the camper from the truck and leaving it on the same plane/level as the truck. Remove the 3/4-inch plywood from under the truck bed mat. The full sheet of plywood is split in half lengthwise for handling ease by one person.
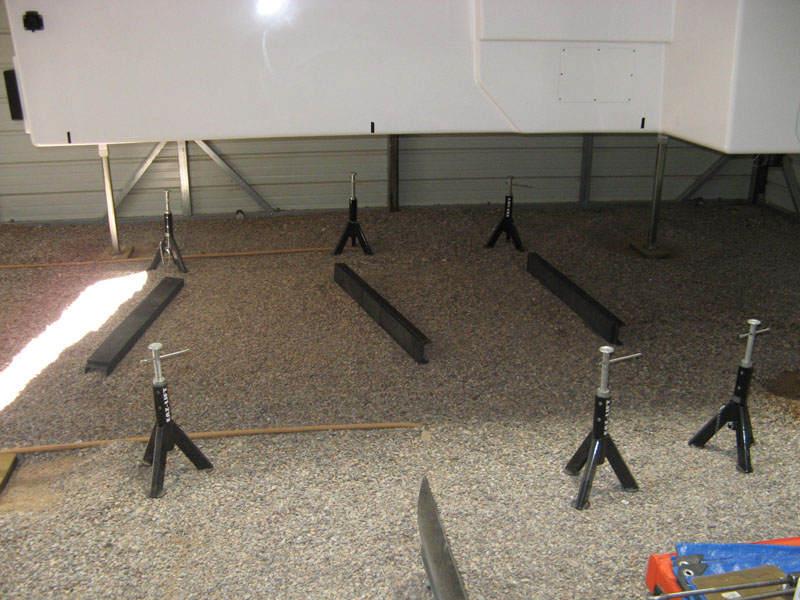
The six jack stands are then set up and spaced (per black tape marks on camper belly).
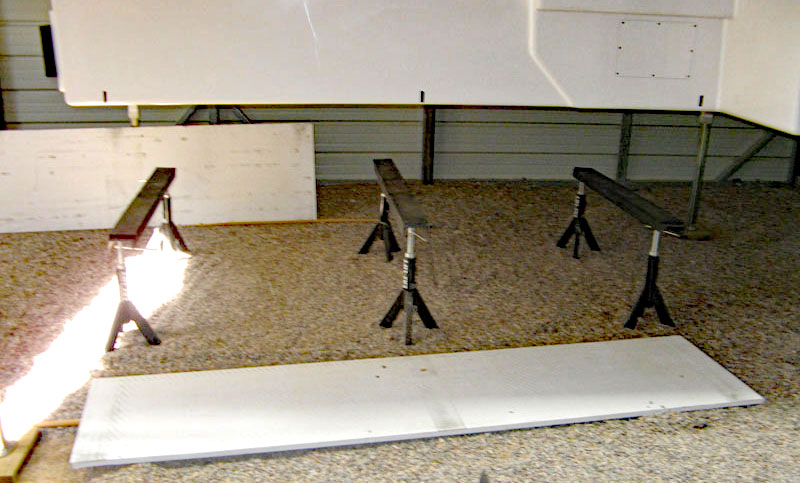
The 4-inch channel steel is placed across the top of the two jack stands, then the two plywood sheets are placed on top of the channel steel.
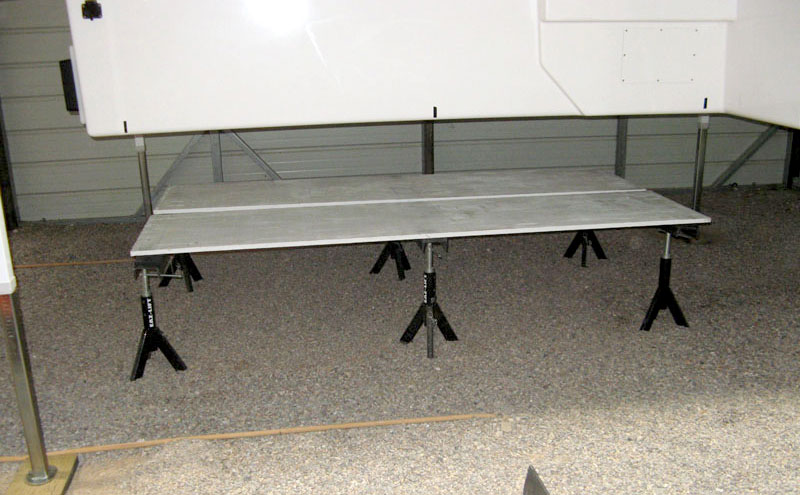
The channel can be used flat-side up or down. My personal preference has been flat side up for better plywood support/strength.
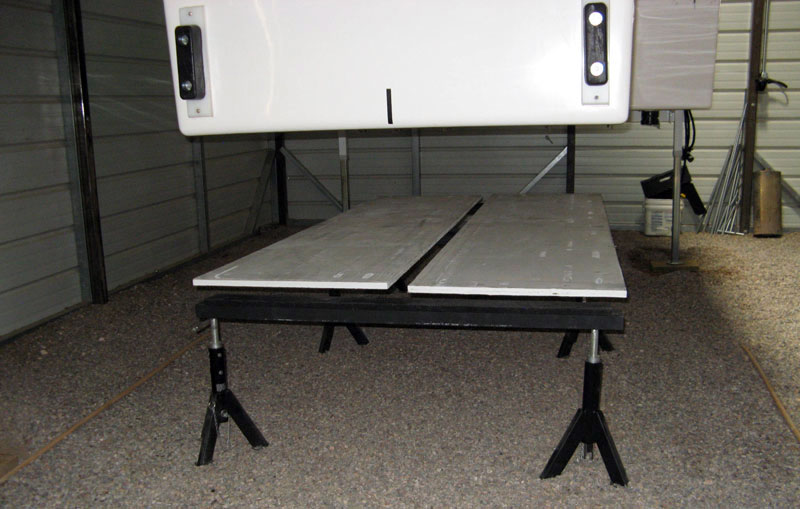
Lower the camper down to your preferred height and the jacks/plywood are raised until snug against the belly of the camper. Keep the camper jacks in contact with the ground for additional stabilization.
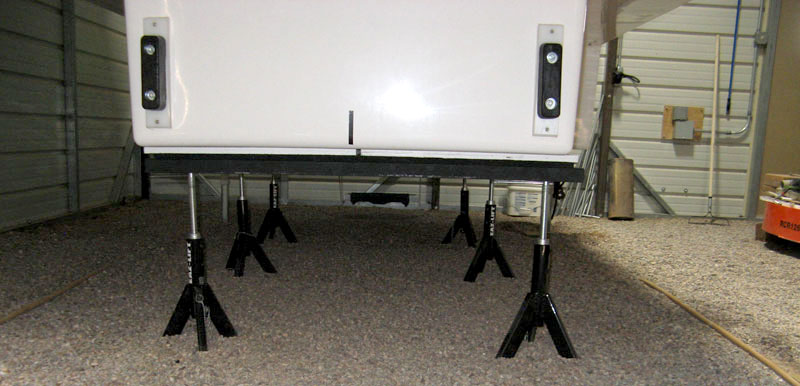
This mod has worked well for the two different campers we have owned. It is fully adjustable and quick to set up. You don’t usually need to level the camper if you are just storing it, so I usually leave the camper as it was (level wise) on the truck to make it easier to load the next time it is used.
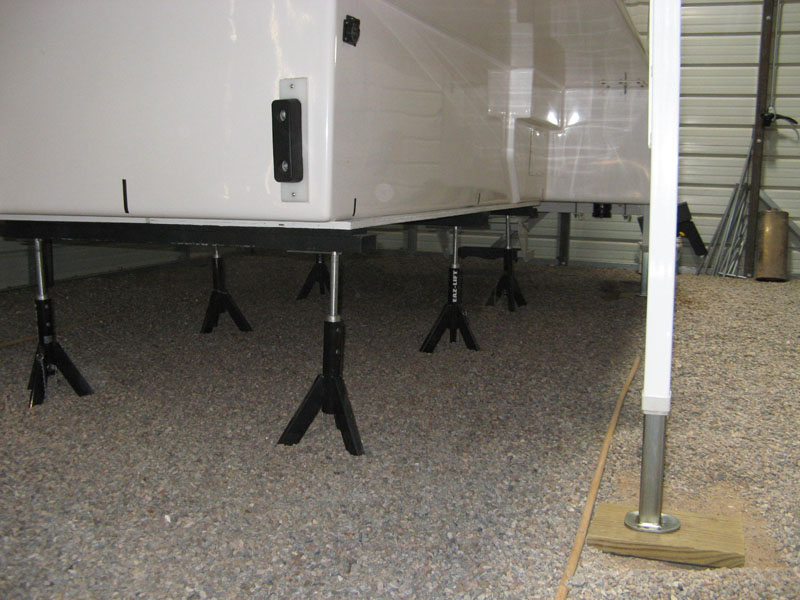
As pictured, the camper jacks are left down for additional support as well.
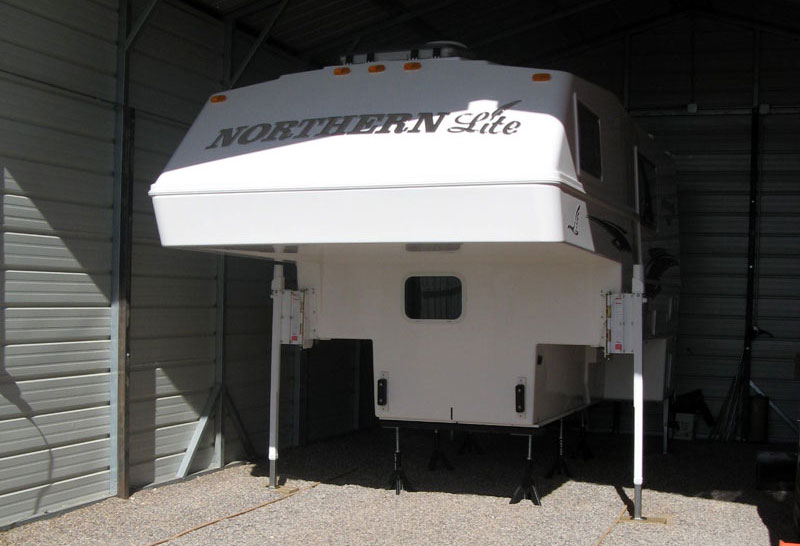
I bought the Eaz-Lift adjustable supports at Camping World. I also used 4-inch channel steel. I got three pieces cut to length for camper belly width from a local steel supplier. The horse stall mat was from Tractor Supply. It was not required and I probably wouldn’t use it again but, I had glued it already to the channel steel for a previous camper.
The 3/4-inch plywood cut in half lengthwise and latex paint and primer to extend/preserve plywood was from Lowes Home Improvement. The cost of the mod for us was a bit less than shown as most items were bought BC (Before COVID).
It took me two hours to complete this modification and cost me approximately $185. In my opinion, the skill level of this modification is easy.
Submitted by: Ted Werner, 2011 Ford F-550, 2019 Northstar 12STC
After unloading our Northstar 12STC, I was concerned about its stability while moving around inside the camper. The folks at Truck Camper Warehouse suggested adding a low sawhorse under the front to take some of the load off the front swing-out jacks. The rear jacks being shorter and close-in to the camper would be just fine.
I looked at pre-made kits that are designed to hold the camper in the off-season near the height of the truck bed. They were expensive ranging between $300 and $400.
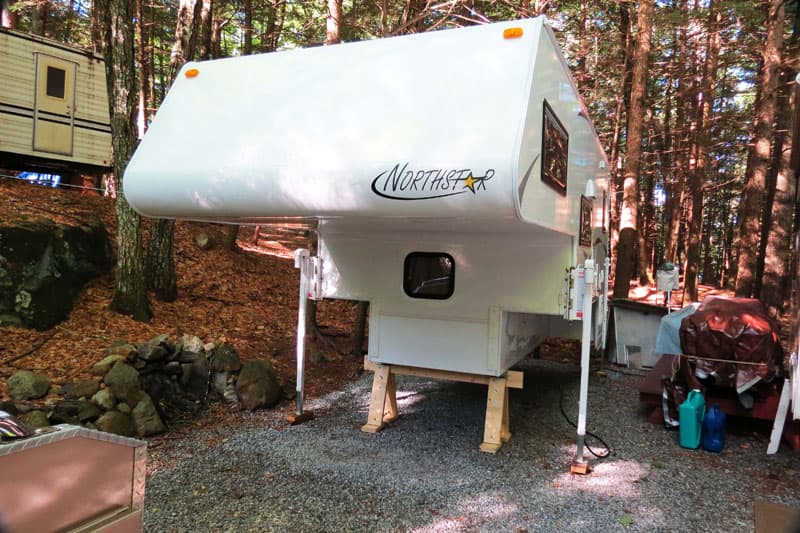
As pictured, I used 2 x 6-inch lumber and attached the 22-inch legs using 10-inch gate hinges. The hinges are attached to each leg using 3/8-inch bolts, washers and lock-nuts.
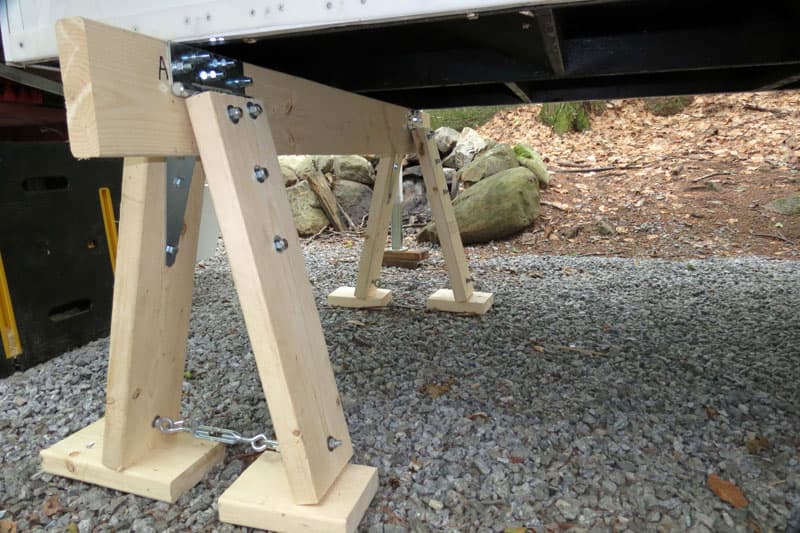
Each of the leg hinges are attached to the cross beam secured with lock washers and standard nuts. This allows for disassembly and storage in the bed of the truck during travel.
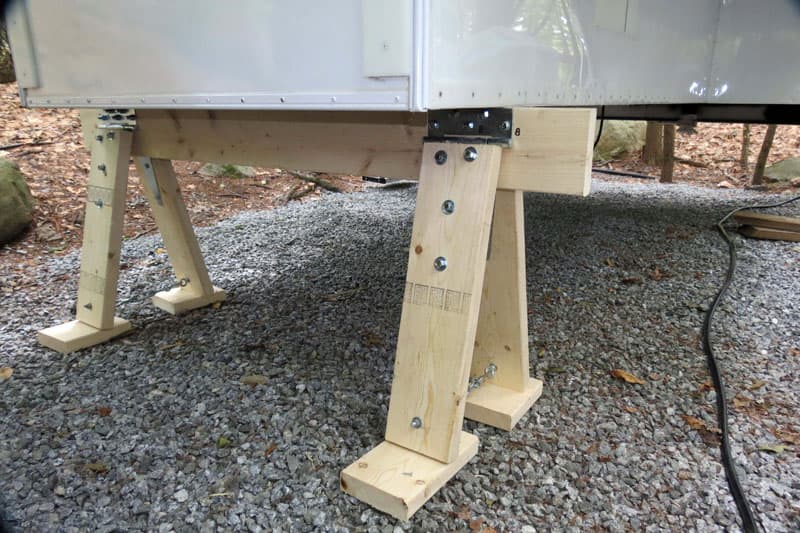
The legs can be adjusted for ground irregularities using the turnbuckles. This hardware is also removable for travel storage. Once the sawhorse is assembled, I lower and level the camper at about 24-inches off the ground. I used the turnbuckles to firmly set the beam against the frame of the camper.
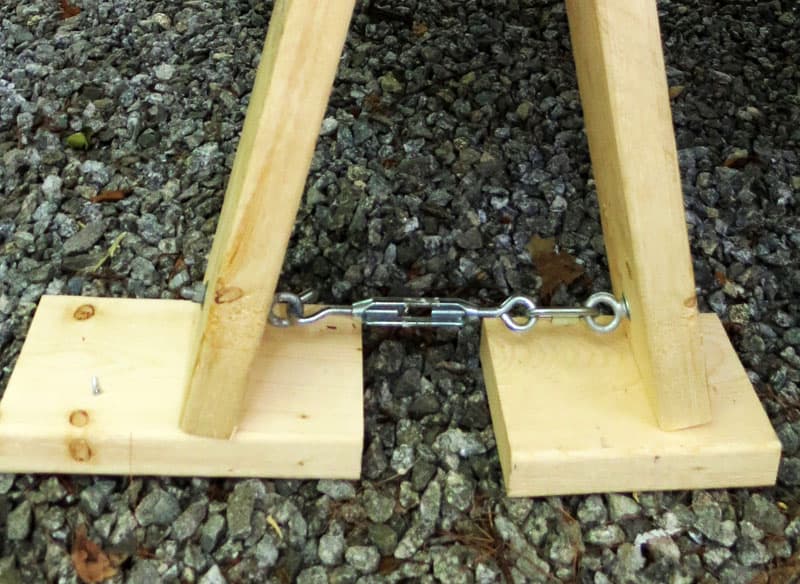
If the legs require more spread, a short length of 1/4-inch chain can be added. The sawhorse can support the full weight of the front of the camper, but I leave the jacks down and only place 10 to 20-percent of the weight on the support.
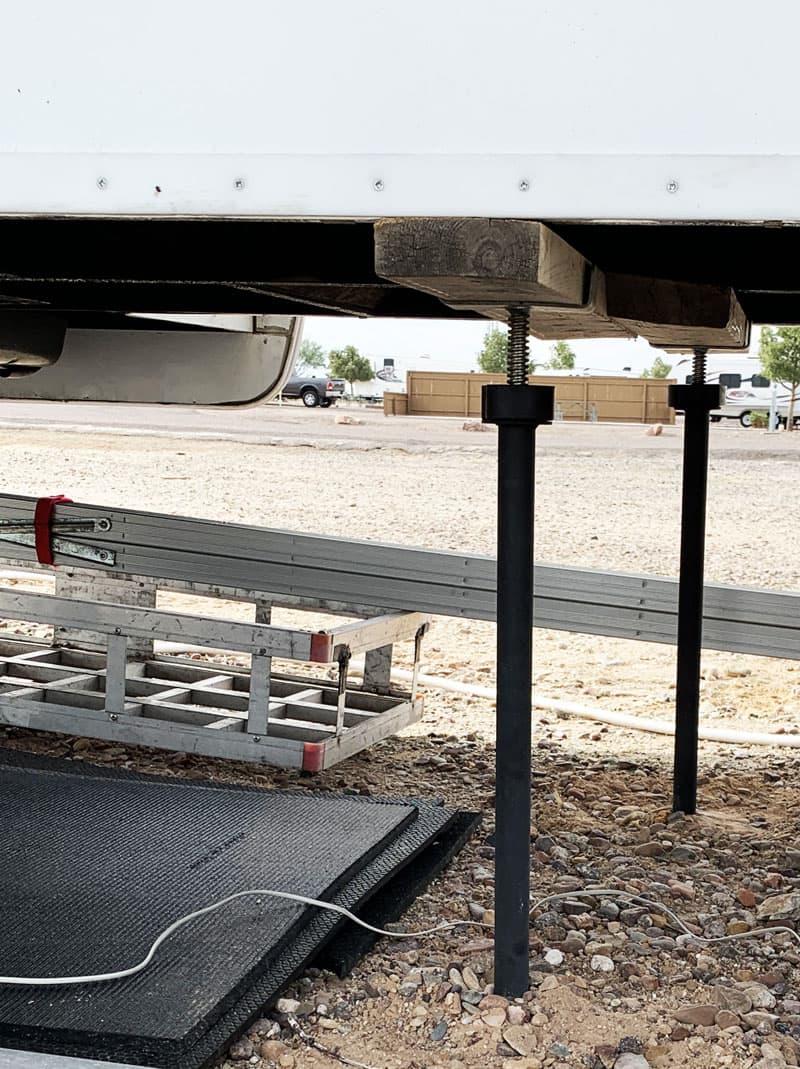
Additionally, I have placed a trailer slide-out stabilizer jack halfway along each side to further support the camper while we are staying in it. This is probably not needed, but I feel more confident with them installed.
Here is a bill of materials for the sawhorse. These items can be found at any home improvement store (items below cost about $85):
Two 8-foot 2-inch x 6-inch boards cut to 5-feet for the beam, four 22-inch legs, and the scrap for ground pads
Four 10-inch gate hinges
Twenty-six 3/8-inch x 2.5-inch bolts
Sixteen 3/8-inch flat washers
Sixteen 3/8-inch lock-nuts
Ten 3/8-inch lock washers
Ten 3/8-inch standard nuts
Two 5/16-inch x 9-inch hook/eye turnbuckles
Four 5/16-inch eye bolts
Two 1/4-inch quick links
The slide-out stabilizer jacks, 16-inch to 28-inch, can be obtained in a set of two from Amazon for $40.
It took me two hours to complete this modification and cost me a total of $125. In my opinion, the skill level of this modification is medium.
Submitted by: Charles Coushaine, 2001 Ford F-350, 2012 Chalet DS116RB
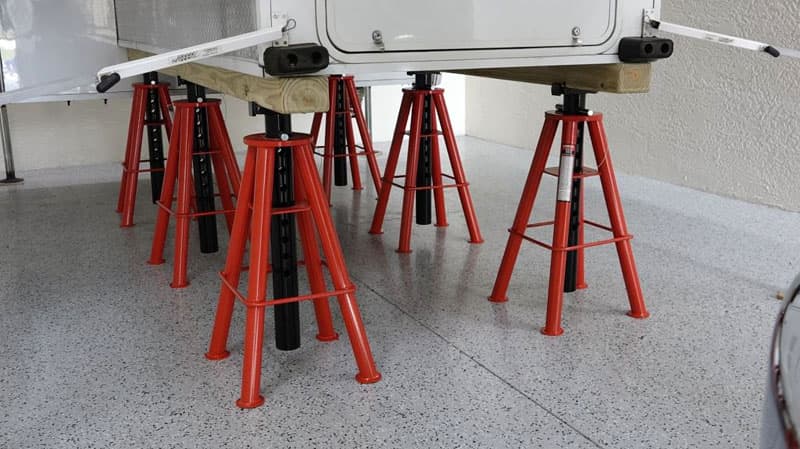
Once you unload your truck camper off the truck, it’s left to be supported by four jack legs. Camper jacks usually allow quite a bit of sideways movement. This just doesn’t feel safe for long-term storage, or long-term use.
My goal was to come up with a height-adjustable rock-solid system that supports the camper from the underside like a truck bed does. I also wanted to take the stress off the jack legs and create a solution that was stable enough to allow you to live in the camper indefinitely and is easily stored away after use.
I researched many other support systems ranging from X-shaped plywood to cement blocks to sawhorses. They all lacked my ultimate goal of height adjustability and ease of storage after use.
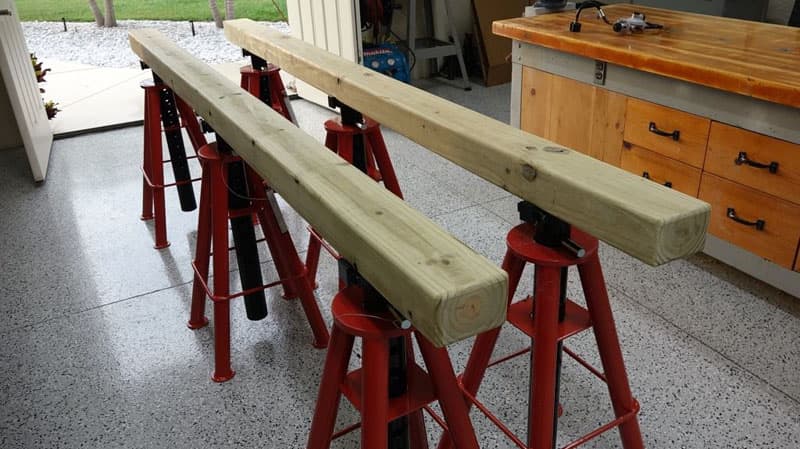
I then found some tall, height-adjustable, fully welded pyramid-shaped jack stands capable of supporting 10-tons a set! I purchased three sets of these jacks and cut some 4-inch by 6-inch beams to fit the top yoke of the jack stands.
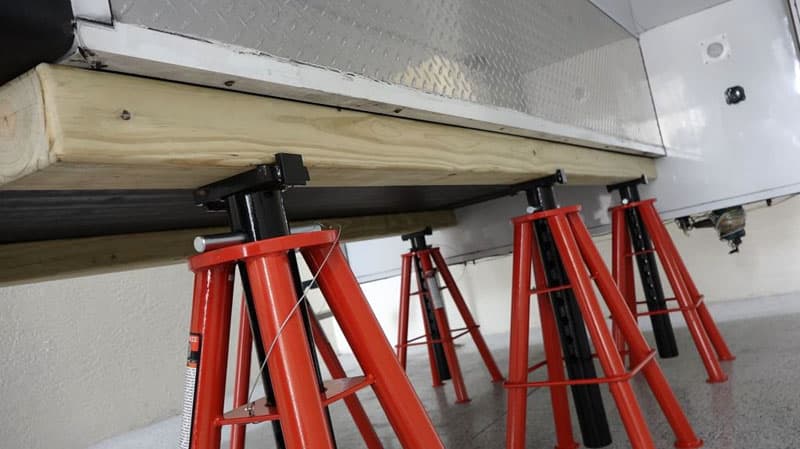
I placed the beams on the jack stands spaced along the 8-foot camper bed about 4-feet apart to support my camper’s 5,000-pound dry and empty weight. I then lowered the camper until the jack stands supported the entire weight with the jack legs off the ground. To add an additional level of safety, I then lowered the jack legs until they just touched the floor.
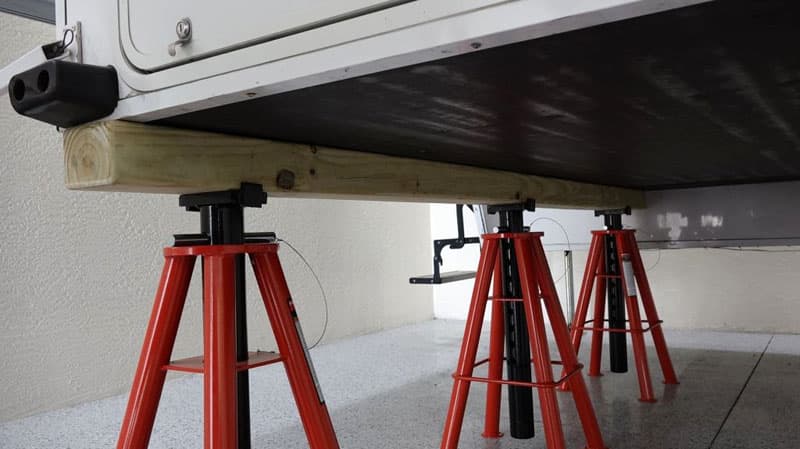
In the video, I explain how I looked over all the previous long-term storage support systems and came up with one that not only provides rock-solid support but also allows for easy storage!
After putting the jack stands under the camper, I asked my wife for her unbiased opinion if the camper was indeed more stable and suitable for long-term storage, or even living in.
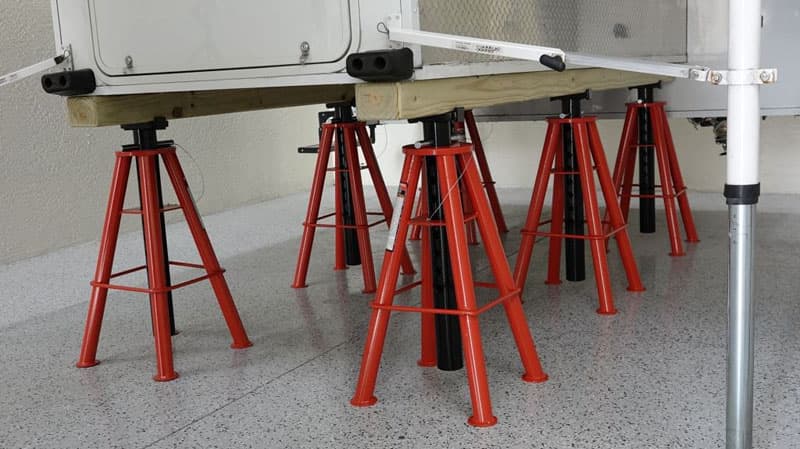
Upon entering and trying to shake the camper, she felt immediately at ease with the stability such that she started to dance, and said we could even disco in here now!
That’s a high endorsement!
It took me eight hours to complete this modification and cost me $700. In my opinion, the skill level of this modification is medium.
Submitted by: David Carvalho, 2006 Dodge Ram 3500, 2013 Alaskan 8’
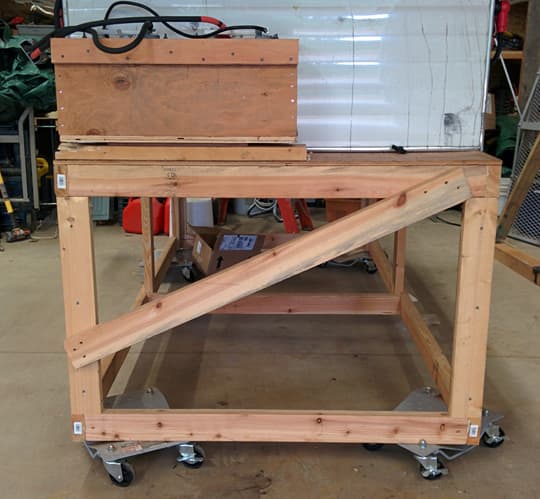
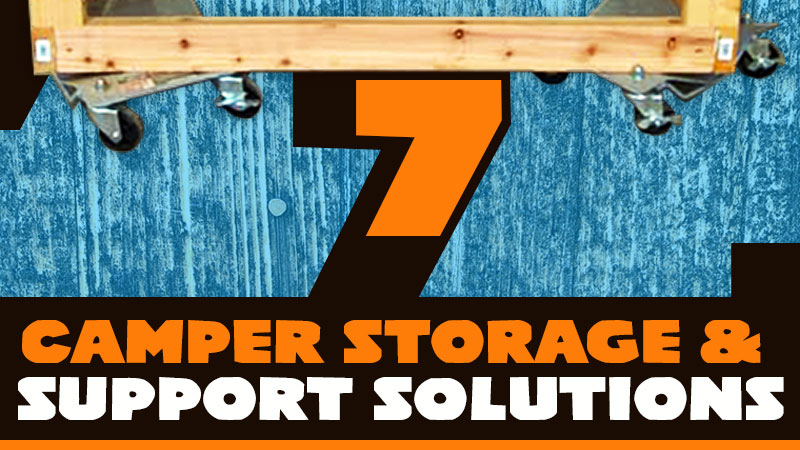
This simple wooden frame is the same height as the bed of the truck. Once the camper is taken off the truck, the platform is slid under the camper and the camper is lowered. The platform sits on four car dollies and can be moved around the garage. When the camper is on the truck, the platform becomes a mobile work bench.
For even more camper storage ideas, check out How to Store a Truck Camper – Sit or Stand and Storage Supports For Your Camper To Sit On.
Disclaimer: The modifications above are submitted by Truck Camper Magazine readers. It is your responsibility to make sure that any do-it-yourself modification project you undertake is safe, effective, and legal for your situation.
