Adding extra batteries can substantially extend your time off-grid. An extra space in your truck’s bed or camper’s storage area could be utilized for more batteries. Five TCM readers share their extensive projects accomplishing this goal.
Submitted by: Jim Duarte, 2015 Ford F350, 2013 Eagle Cap 850
As we are always off-the-grid, we depend on our battery power a great deal. I have a 2500 watt inverter built into my system for basic AC needs like using my coffee maker. The twin, solar charged batteries were not getting us through a complete coffee brewing cycle, so I decided to first add two more batteries and then, if needed, increase my solar panels.
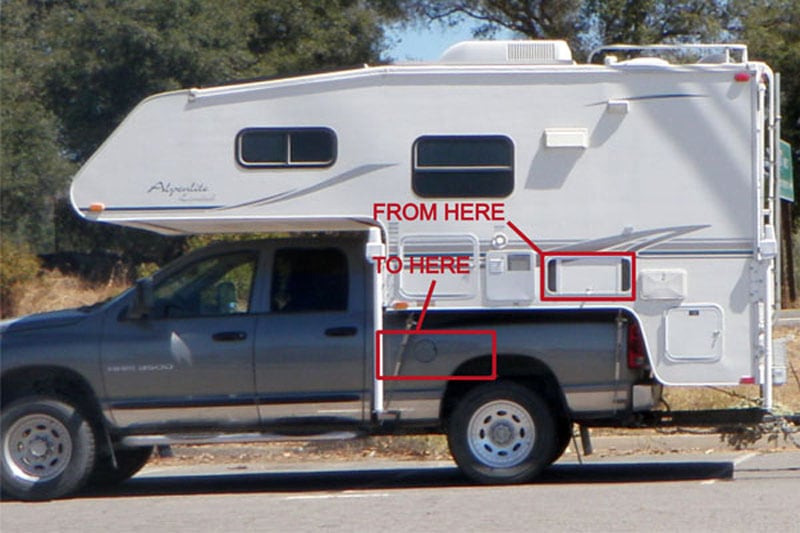
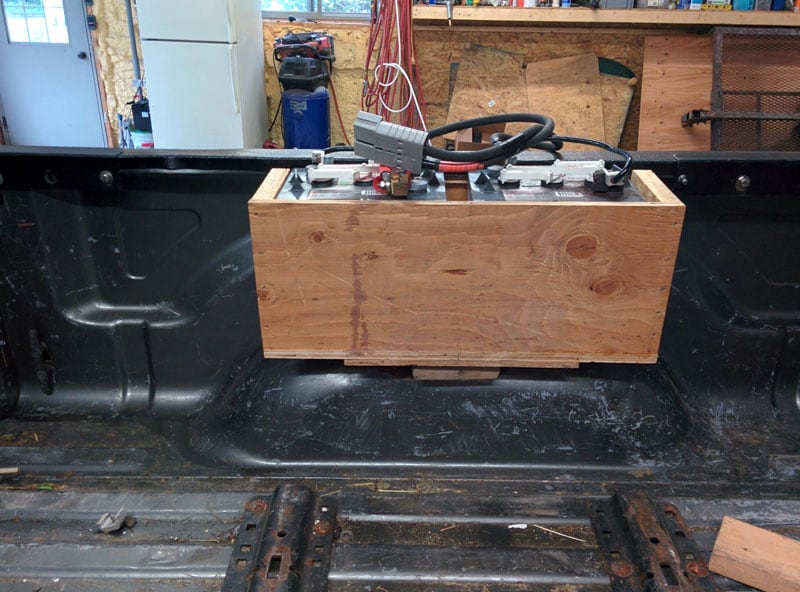
The battery compartment on the Eagle Cap didn’t have room for larger batteries. I decided I could mount a pair of identical batteries in the bed of the truck and connect them with 4 gauge cable and a large plug. I already had a really strong 175 amp Anderson Powerpole plug that I had bought as a connector for the winch on the old truck, but never used it. There’s a start!
I downloaded the data sheet on my Trojan 27TMH batteries to get some dimensions. I then did some measurements in the truck bed. This will work, I thought.
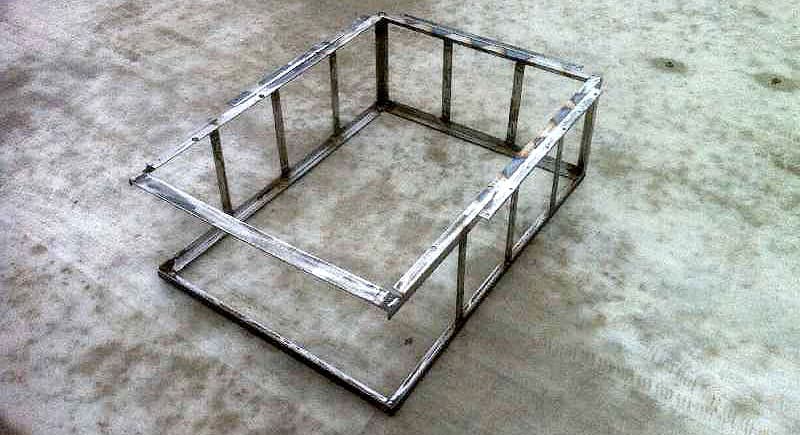
I picked up some 1.5-inch angle iron and some .75-inch square steel tubing at Home Depot and began to fabricate my auxiliary battery tray. After completion, I sanded everything down, cleaned and sprayed it with two coats of Rust-Oleum primer and three coats of black Rust-Oleum semi-gloss. I let the tray and brackets dry overnight and started fresh the next day.
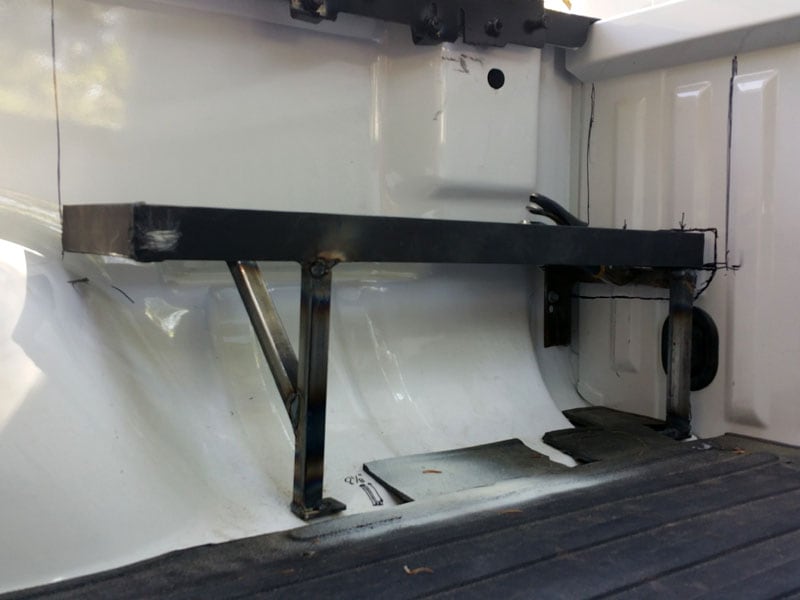
Above: The auxiliary tray without the new Trojan 27TMH batteries
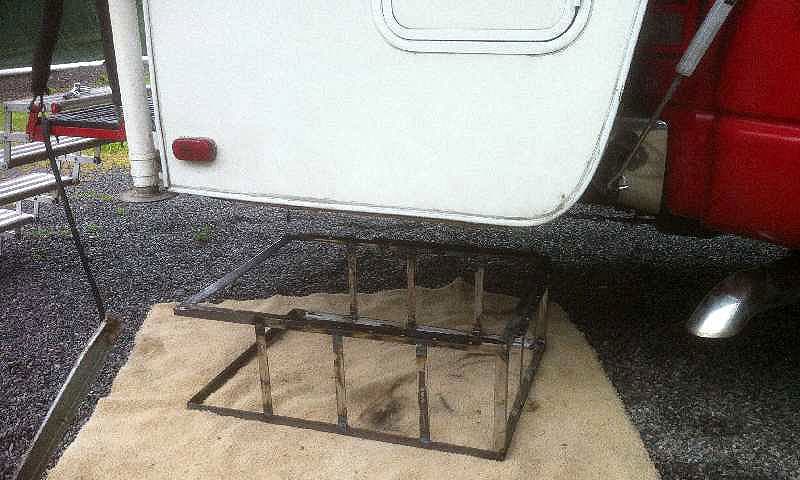
I was able to use the bolts from one of the factory tie-down hooks as my front mounting point and drilled a single hole in the bed for the rear point. I mounted everything and tightened it all up. Then I called it a day.
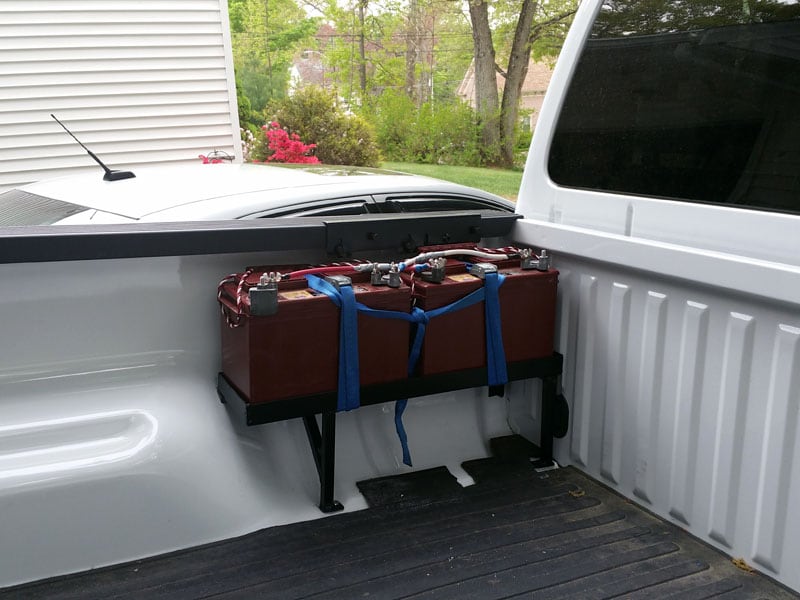
Above: The auxiliary tray with the new Trojan 27TMH batteries
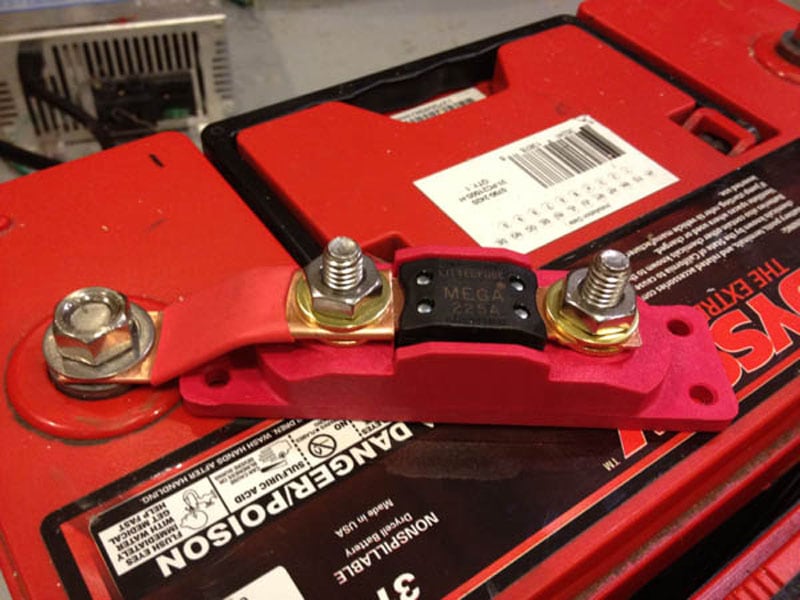
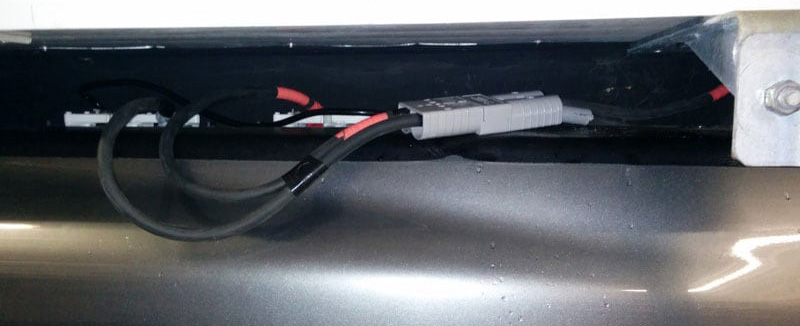
The next day I bought the new Trojan 27TMH batteries, brought them home, got them mounted, and then cabled them before it got dark. I took the connector cables from the truck and camper inside and soldered the Anderson Powerpole ends on in the comfort of my workshop.
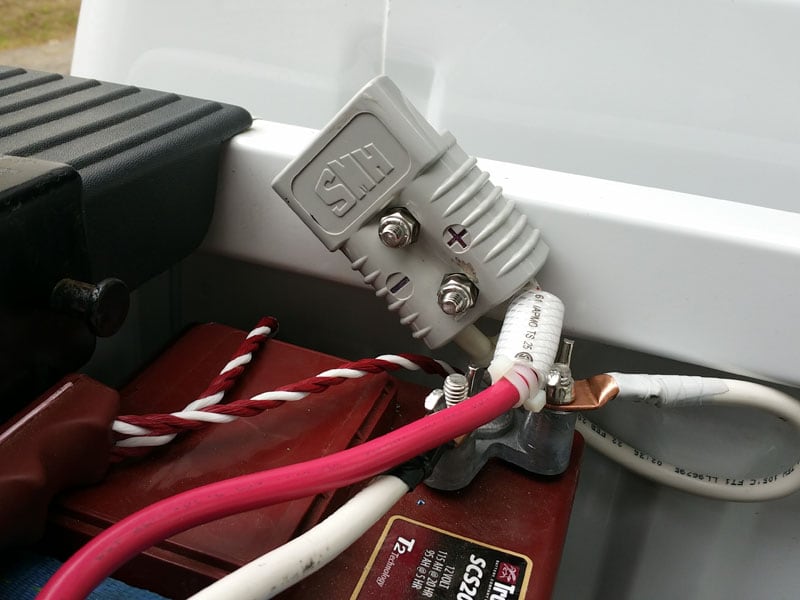
Above: The truck’s half of the 175 amp Anderson Plug, bolted in place for convenience

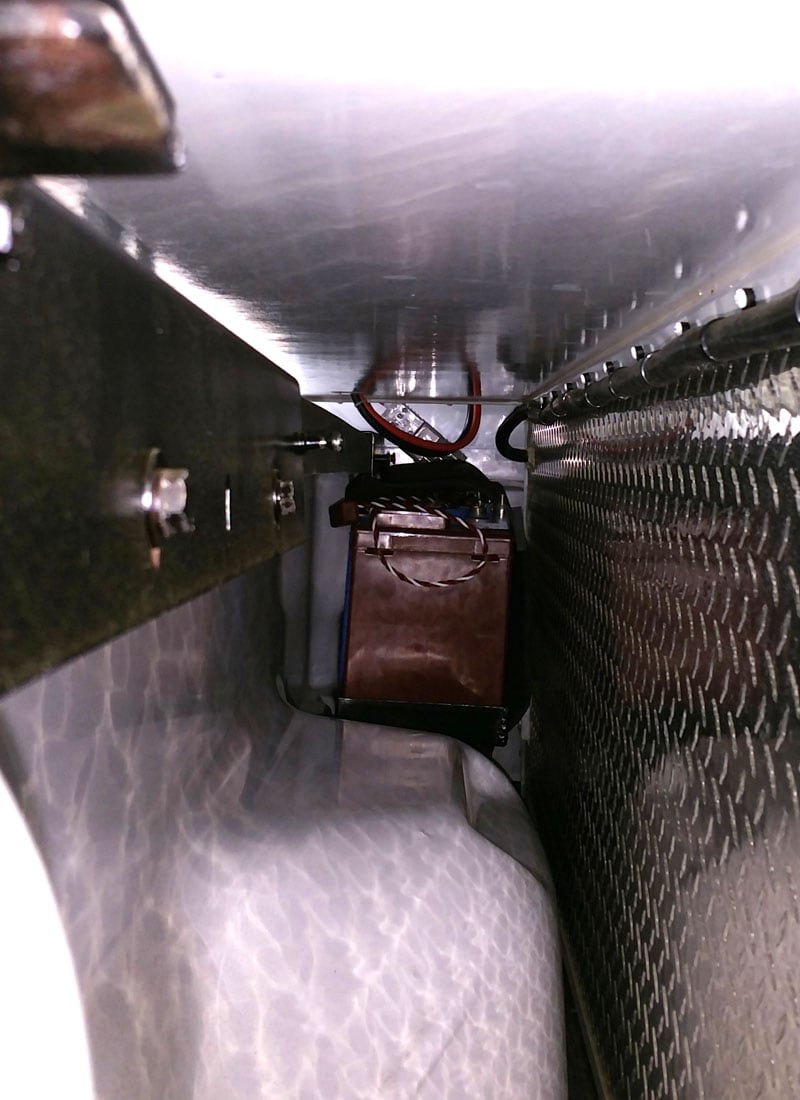
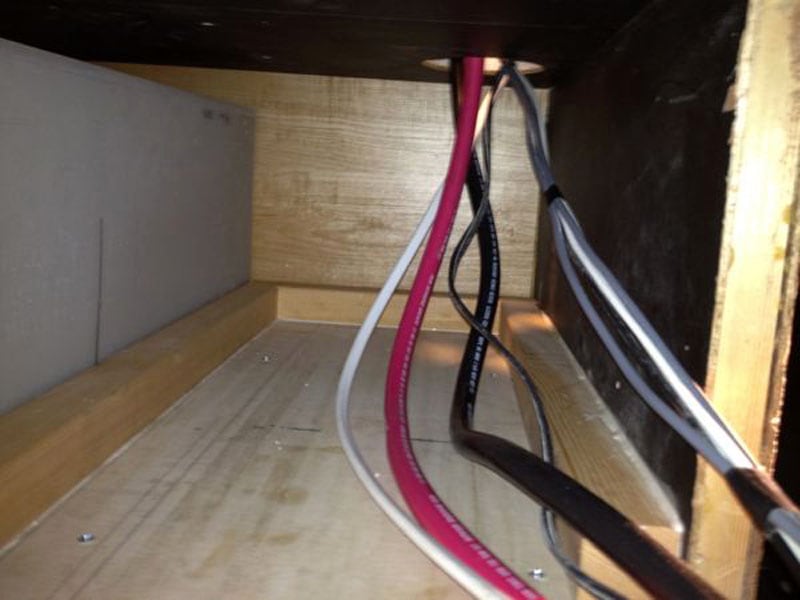
Above: The camper’s half of the connection, dropping down through one of the drain holes
The next morning I went out and installed the truck connector cable and its half of the big plug. I actually bolted it to the front of the bed so that it would be easier to plug into. I then mounted the camper end up through one of the battery box drain ports and to the outboard camper battery. I tightened all battery connections on all four batteries and then backed the truck back under the camper. I checked the battery voltage in the camper, disconnected the house power, and I was ready.
I left the camper battery compartment open so that I could see any issues as I plugged the new Anderson Powerpole into the truck. Everything went together fine with no issues.
Above: The batteries inside the bed with the camper on the truck
One final test before plugging the house power back in; a capacity check! I turned on all the camper lights inside and out, and the Fantastic Fan. Then, I loaded the coffee pot with twelve cups of water. I plugged it in, turned on the inverter, and turned on the pot. Fourteen minutes later, the pot was brewed (just hot water – no coffee) and my battery voltage was still reading 12.9 volts. That’s what I wanted to see. The solar panel was only giving about 0.4 amps as there was no sun!
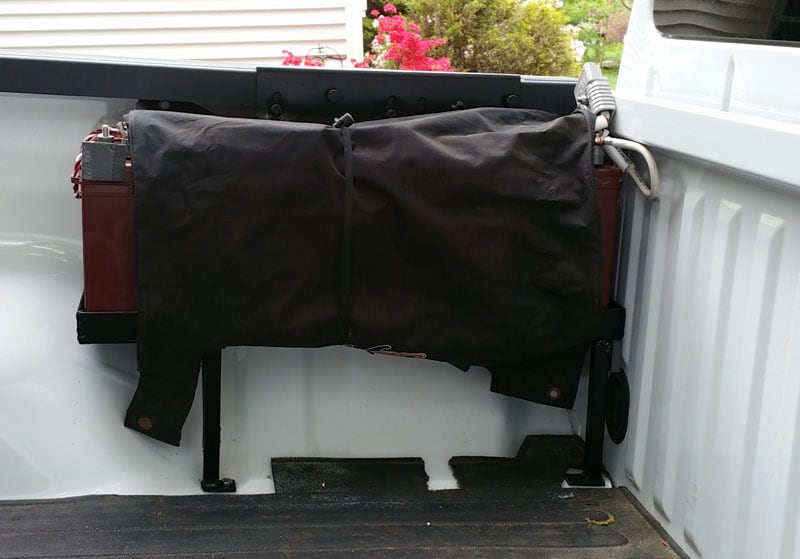
Above: The batteries are covered when the camper is not on the truck
There’s nothing like a project that does what you had hoped it would do. After checking it over the course of several days on the beach, it’s evident that the single 140 watt solar panel will keep us going. Mod complete!
This mod took me 18 to 20 hours to complete and cost $450, including the batteries. In my opinion, the skill level of this mod is hard because there is welding involved.
Submitted by: Mark Siminoff, 2005 Dodge Ram 3500, 2004 Alpenlite Saratoga 935
I chose to upgrade my camper’s electrical storage system for three reasons.
1. I wanted to have more total capacity so that I could boondock for extended periods of time without the need to start the generator or truck engine. Also, I wanted to be off-the-grid during times of overcast skies or in a dense forest. Those are conditions in which the solar panels would be shaded.
2. I wanted a battery bank that could supply sufficient current and capacity to operate high current devices (via a 2000W sine-wave inverter), such as my convection oven/microwave, induction cooktop, or even the roof air conditioner.
3. I wanted the batteries to be in a better location than where they were originally installed. In my case, better means that the temperature is controlled so that the battery capacity and service life will be extended. I also wanted the batteries as low and as close to the front of the truck camper as possible to contribute to shifting the camper’s center of gravity down and forward.
The fact that I wanted the batteries to be in a climate controlled space meant that I needed to use absorbed glass matt (AGM) batteries. AGM batteries, when properly charged and discharged, do not vent hydrogen gas and, as a result, they are safe for installation in spaces with limited ventilation. Conveniently, this battery type can provide extremely high discharge rates (perfect for running the microwave) and also accepts very high charge current. I can charge at over 100A from either my alternator or my inverter/charger.
I selected to use three Odyssey PC2150 (Group 31) batteries for my installation. These were a size that would fit in my intended location in the basement, offered 100Ah of capacity each (at 20/hour rate), and have an unlimited charge current rate.

Above: The T-shaped configuration of the three Odyssey PC2150 (Group 31) batteries
Above: The fuse and fuse holder – there is one of these on top of each of the three batteries
In addition, Odyssey has a nationwide dealer network and their batteries carry a three year warranty.
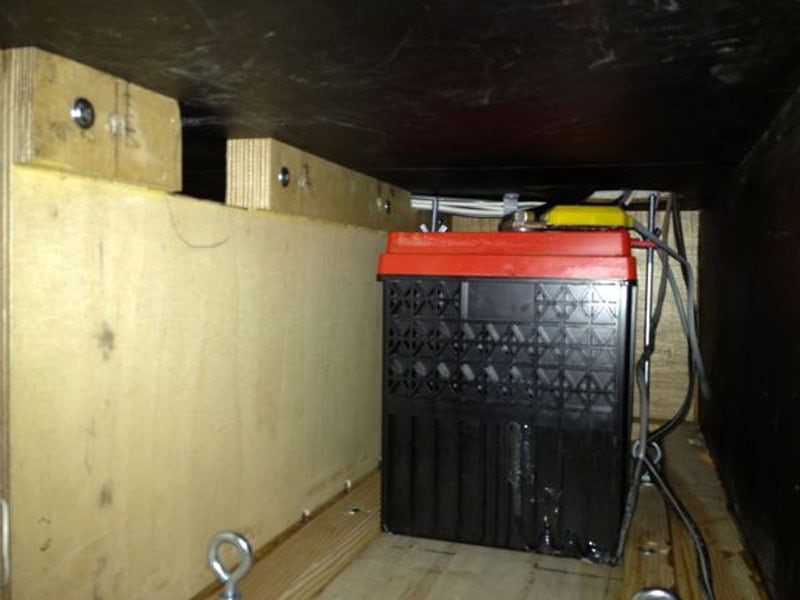
Above: The factory battery location and the relocated area in the basement
I moved the batteries from their original location in a battery box on the side wall of the camper into the basement up against the front wall of the camper. This move meant that I needed to do a significant reinforcement of the structure of the front of the camper and basement floor so that the 230 pounds of batteries could be safely supported.
Above: The assembly of the battery mounting components in the basement. The white box on the right is the camper’s fresh water tank.
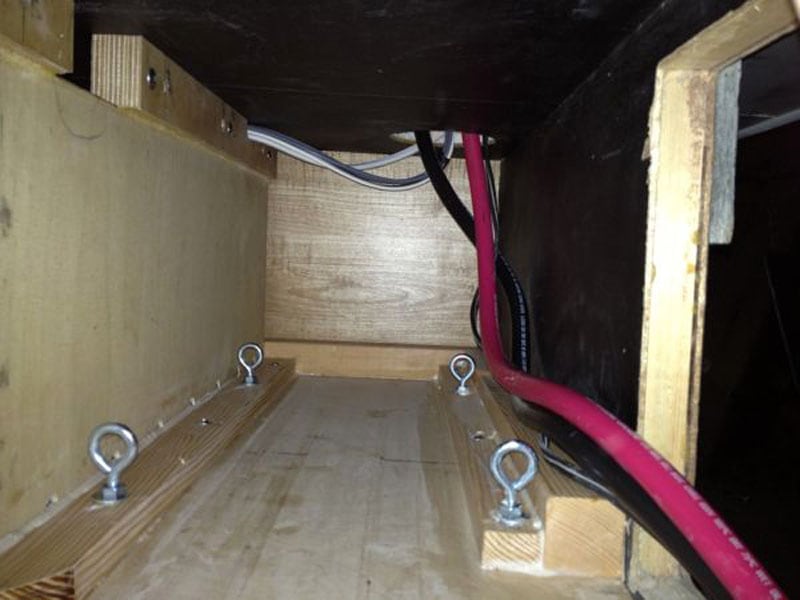
Above: The eye-bolts are used to securely tie-down the batteries and they are screwed into T-nuts which have been installed into the plywood base plate.
Above: You can see the temperature probes for the inverter/charger and solar charge controllers.
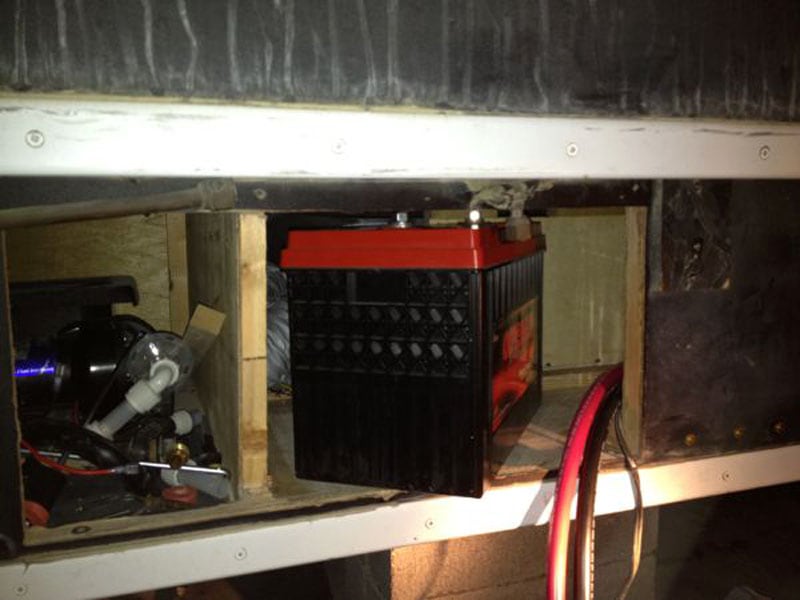
Above: The batteries are installed into the compartment through an access panel in the side of the basement.
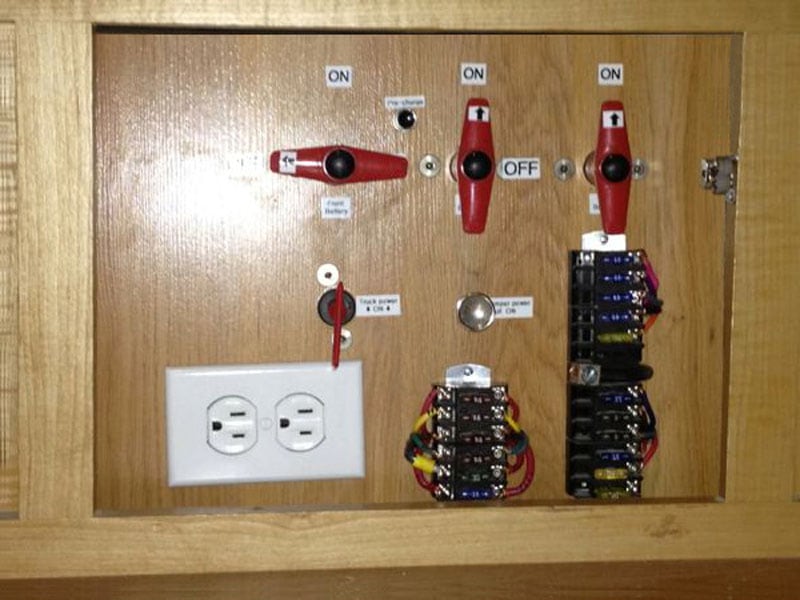
Above: The three battery disconnect switches (the red t-handles). The positive bus-bar is mounted directly to the contacts of these switches. The black pushbutton (between the left and middle t-handles) is for a pre-charge circuit which allows the capacitors in the inverter to charge slowly which prevents arcing and pitting of the contacts in the battery switches. The red handle above the Edison outlet is the electrical disconnect between the camper and truck. The silver pull-knob is the camper’s interior DC power switch.
In addition, I built a new switch panel that has a dedicated high-current switch for each battery. The switches are connected to a common solid copper bus bar. Of course I also created a negative bus bar. There are three equal length runs (36” of both positive and negative) of 2/0 gauge cable running from the switches to the batteries. This balanced wiring approach ensures equal load on each battery during both charge and discharge cycles.
The cable from the bus bars to the inverter/charger is 4/0 gauge and only one foot long. There is a fan in the truck camper just above the batteries which provides ventilation and climate controlled air to the basement.
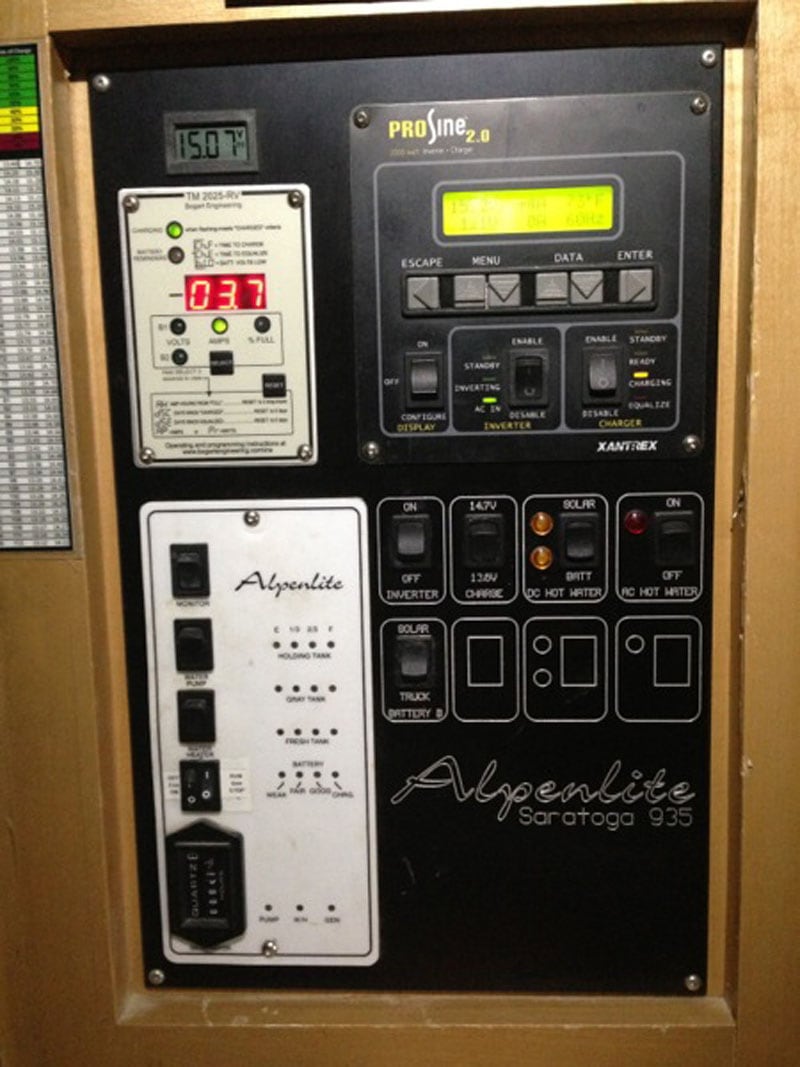
Above: The power monitoring panel I made which includes the Trimetric, Digital Voltmeter, and Inverter/Charger control panel.
To allow for simple tracking of battery capacity and performance, I also installed a precision digital voltmeter and TriMetric battery monitor and a 500A shunt.
It is very convenient to have 300A (~150A of which is useable) of battery capacity. It means that our family of four can live in the camper with the same electrical conveniences that we have at home. We use the lights, radio, television, water pump, computers, and cooking appliances without ever thinking twice about having enough available battery capacity.
Even with no solar charging, no starting of the truck engine, and no generator running, this is sufficient battery capacity for more than six days of dry camping. I can easily operate the roof air conditioner for up to four hours or the convection/microwave for an hour. This is convenient for times when the generator cannot be run, like in a campground at night.
It took me 30 hours to complete this mod and cost $1,350. In my opinion, the skill level of this mod is hard.
Submitted by: Douglas Tatman, 2005 Dodge 3500, 2003 Lance 1130
Our 2003 Lance 1130 came with a built-in Generac Impact 34 generator. They were notoriously troublesome for some and, when mine broke (again), I decided to just remove it.
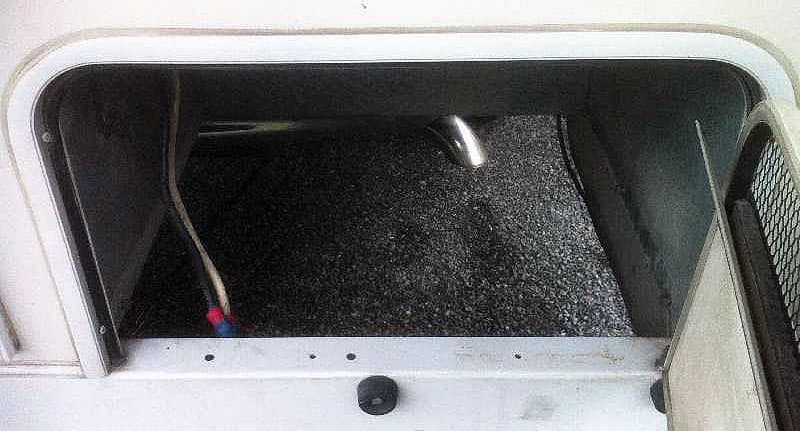
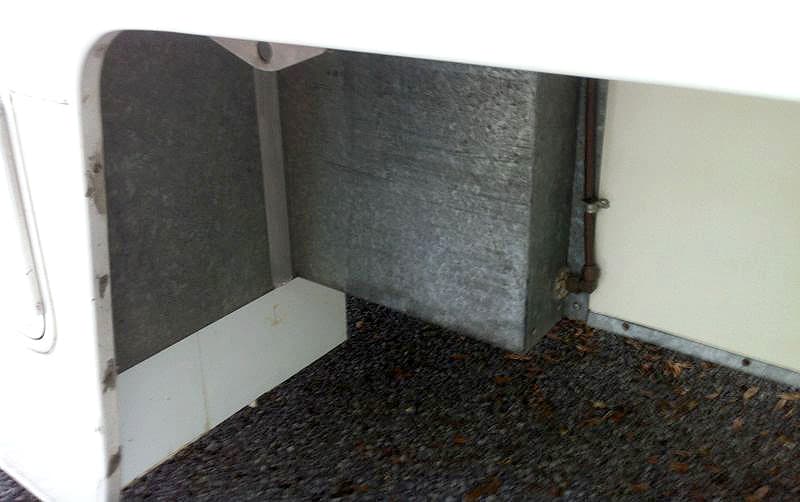
I was left with the galvanized metal box that Lance used for the generator. Like many, I decided to attach a floor across the base of the opening to repurpose it as a storage compartment.
But, realizing there was a huge amount of space beneath that box, I added a framed basement for additional depth and volume.
At the time, I was already looking for a way to add an additional battery to the camper. The metal frame was built for the purpose of holding the battery weight, as opposed to just a lightly framed box.
The framed box hangs securely from the original generator support bolts and lag screws, and is sealed to the underside of the floor of the camper. In all, I added just under eight cubic feet of storage to the truck camper.
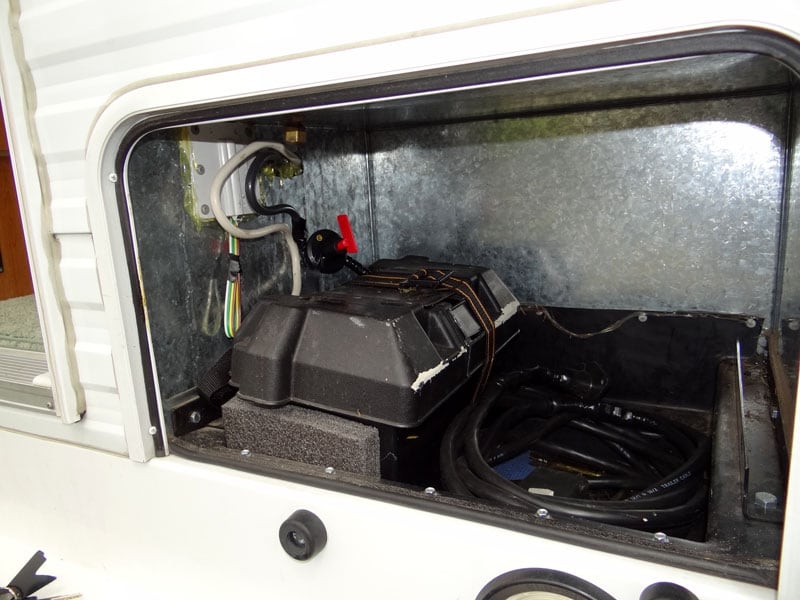
The Generac was electric start. Since Lance ran its starter wires straight from the camper’s house battery, I decided to repurpose them as a direct connection to add to the capacity of the existing house battery.
In the pictures, you can see the Generator starter wires. The battery will be mounted at the back of the box. There are room for two batteries.
The dimensions of the box were restricted to be no lower than the camper’s wall-skirt (left side of picture) and short enough not to hit the truck’s back bumper or tail lights with the camper loaded.
The outside of the box was waterproofed with aluminum flashing and glued with contact cement. While my materials of choice for the sides could have been better, it’s what I had at the time. The ventilation screen on the generator’s door was also sealed with aluminum flashing.
So far, the new battery box not been tested in severe wet or dusty conditions. The seals of the back door have been enhanced with additional weather stripping, but that’s a detail that hasn’t been tweaked yet.
While welding was done on this particular mod, the framework could easily be cut and bolted together using nothing more than a hacksaw, a hand drill, and fasteners. Considering this was a prototype, the materials of choice, both metal and sides, could be vastly improved.
It took me ten hours to complete this modification and cost me $100. In my opinion, the skill level of this modification is medium.
Submitted by: John Wells, 2002 Ford F350, 2005 Lance 1025
We do a lot of boondocking. We already had a solar panel and digital charge controller. We also had a Honda EU2000i suitcase generator.
How could we get more battery storage capacity in a camper only designed for one Group 31 battery?
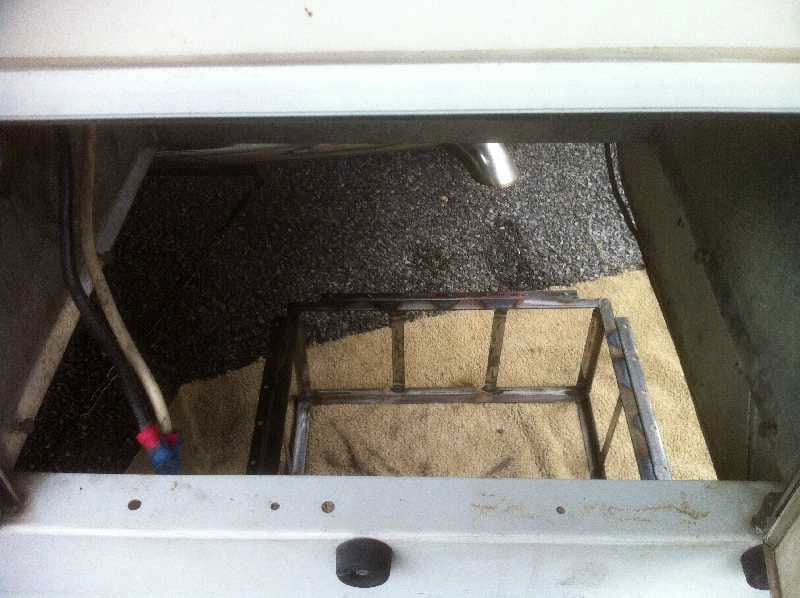
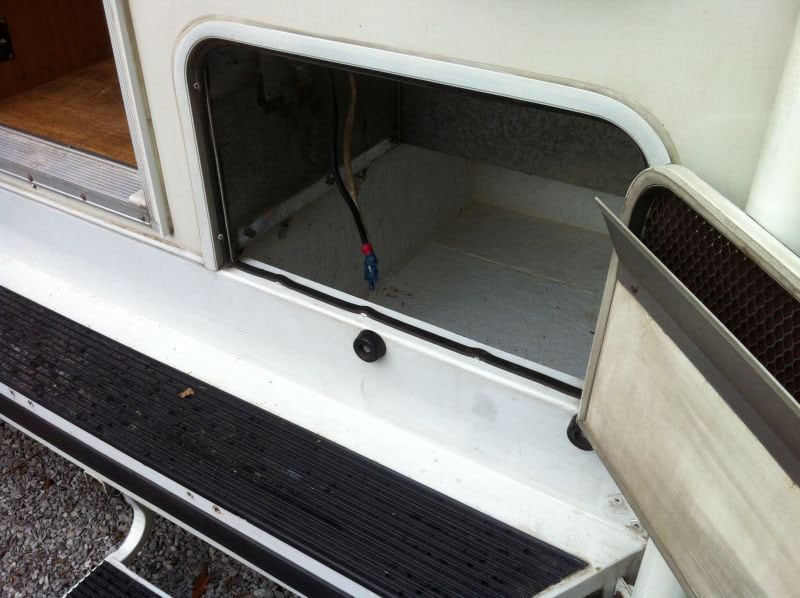
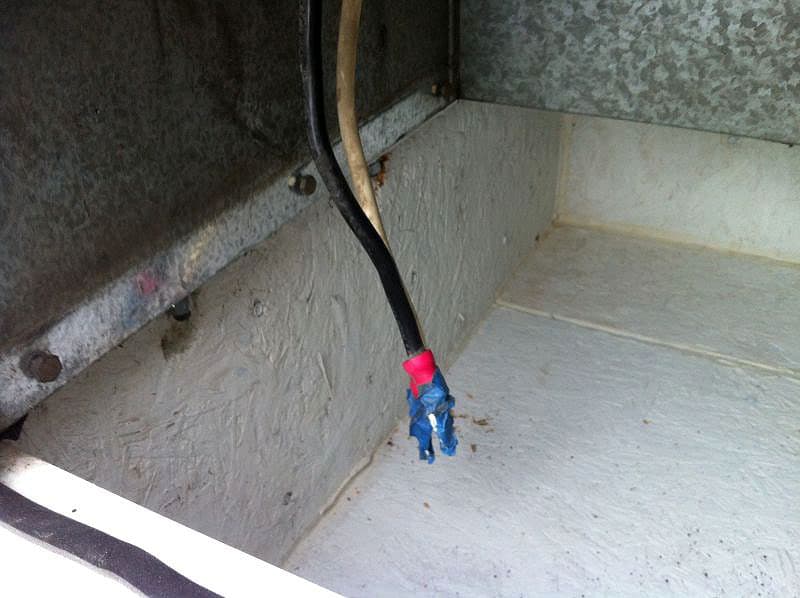
We converted the unused generator cabinet to hold another Group 31 AGM battery. Generator pre-wiring in the Lance allowed the unused cabinet to hold another Group 31 AGM battery. Unused generator wires, very heavy gauge, are already carried to the cabinet in the bathroom that holds the solar charge controller and is adjacent to the battery compartment.
I converted the generator leads with battery terminals and connected them to the existing battery after drilling an access hole in the battery compartment. The hole was sealed with Duxseal after passing cables through. Back in the new battery (old generator) compartment, I installed a heavy duty cut-off switch in the hot lead, added battery terminals to the cables, and connected in parallel to the original battery.
I reinforced the floor pan in the compartment with several extra hold-down bolts to better support the battery weight. Due to the common recommendation to not hook old and new batteries together, I purchased two new Group 31 AGM batteries when performing this conversion. AGM batteries are needed for this conversion due to minimal off-gassing during charging.
The red key is the cut-off/isolator switch for this battery. Even after the conversion, there’s still plenty of storage space left for a tool bag, jack pads, etc.
Submitted by: David Carvalho, 2006 Dodge Ram 3500, 2013 Alaskan 8’

In an effort to quickly unload the camper, I came up with a battery box that sits over the wheel well with a connector with 250A rating wired with 2/0 cable. The box is held in place by the lip of the bed and the wheel well. No fasteners are used to hold it in place.
The box currently has two 6V golf cart batteries that are eight years old. When the batteries finally die, the box will be extended to the front edge of the truck and hold four golf cart batteries with a 450AH capacity.
It used to take longer to setup the batteries to load the camper. Now all I have to do is set the battery box in place and load camper.
Once the camper is loaded, I just mate the two connectors. There are also external connector ports where the original camper wiring connects.
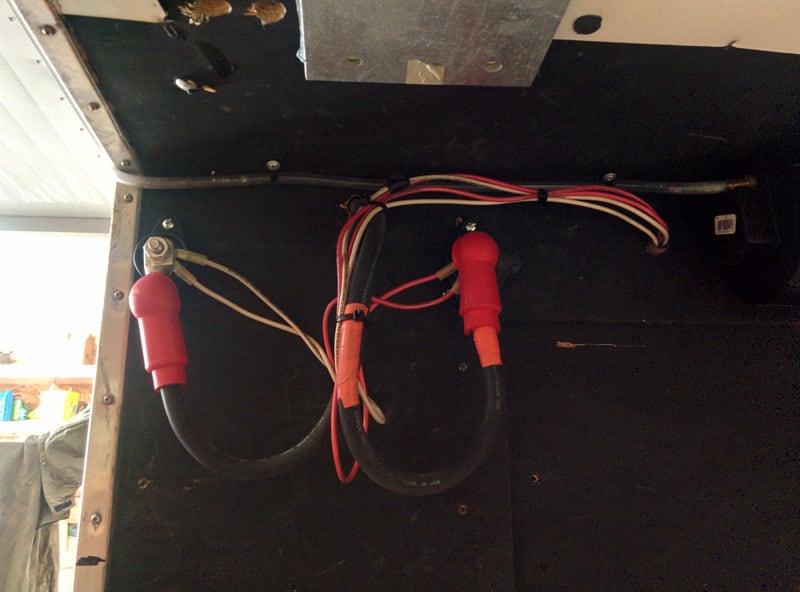
These ports allow for future expansion such as solar or wind to charge the batteries.
Disclaimer: The modifications above are submitted by Truck Camper Magazine readers. It is your responsibility to make sure that any do-it-yourself modification project you undertake is safe, effective, and legal for your situation.


