The space between a truck cab and a camper cabover is notorious for trapping air. This breaking wind can be loud or silent, but it’s always deadly to your fuel economy. With one of these four air dams and deflectors, you can pass that gas station and let ‘er rip.
Submitted by: Jim Bennett, 2014 Ram 3500, 2011 Lance 1050S
I wanted to move air more efficiently around the cab of the truck and the under-cab area of the truck camper. I also wanted to minimize bug splatter on the under-cab area of the truck camper. This mod could possibly improve aerodynamics by preventing trapped air between the truck camper overhang and the cab of the truck with the hope of providing a small improvement in my rig’s miles per gallon.
I had researched other airfoils from the RV.net website and wanted to build one a little sturdier than the plastic gutter material that other truck camper owners have used. A close friend of mine works in a manufacturing facility that uses thin gauge stainless steel materials. The facility has equipment for doing anything with the metal.
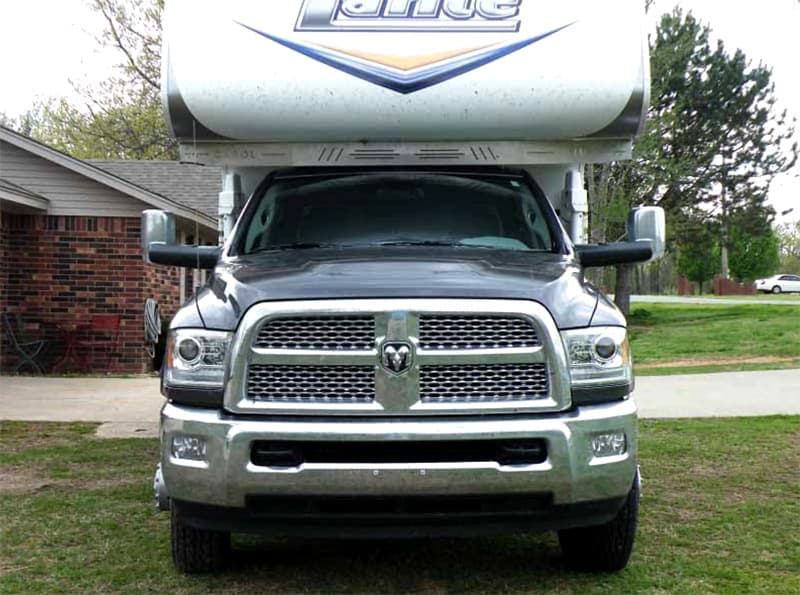
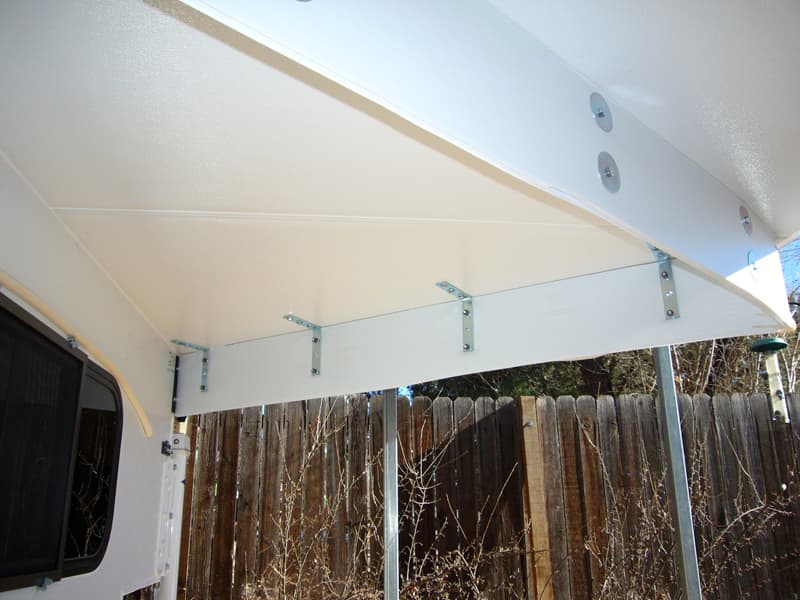
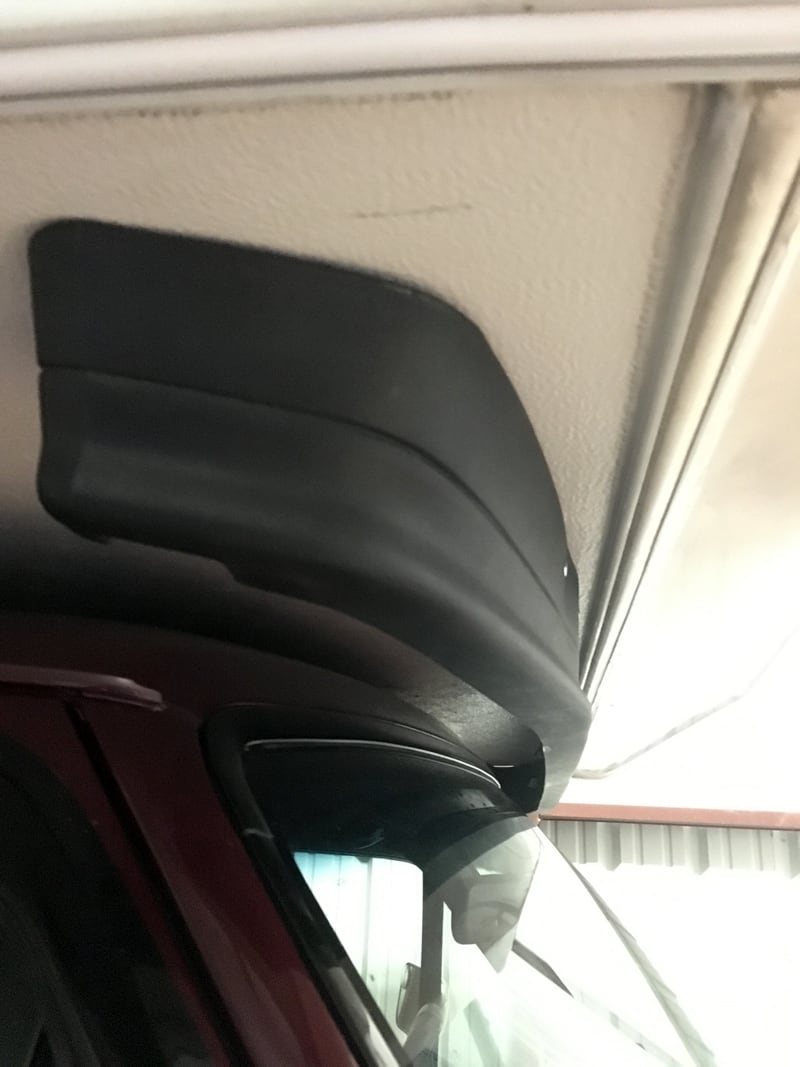
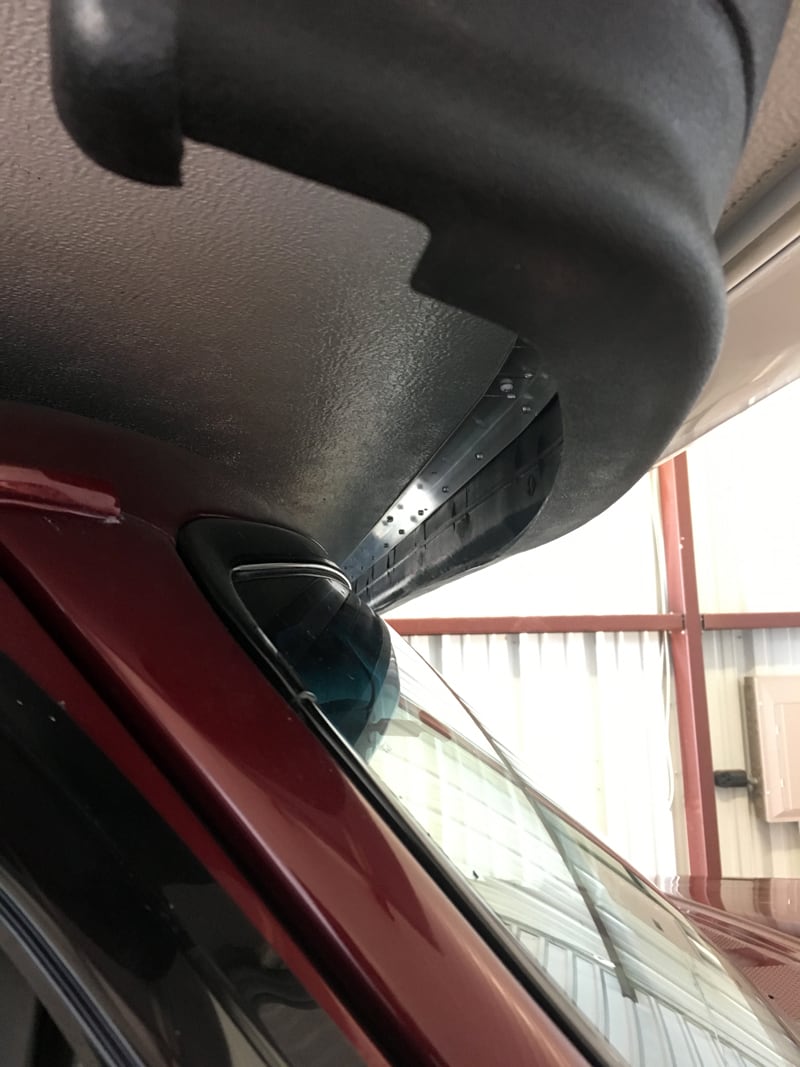
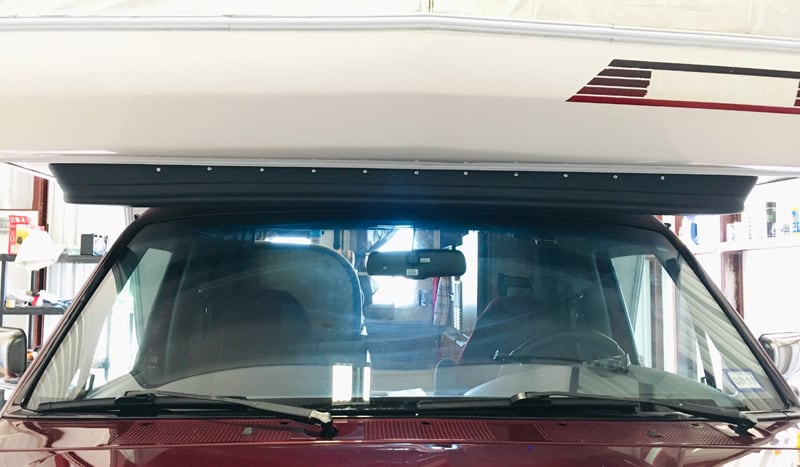
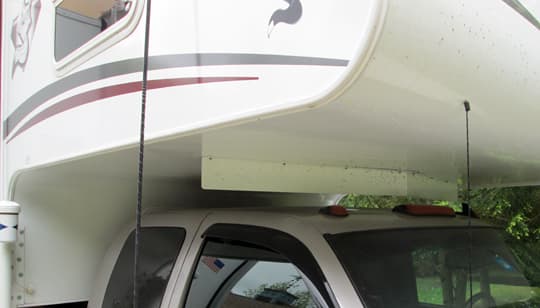
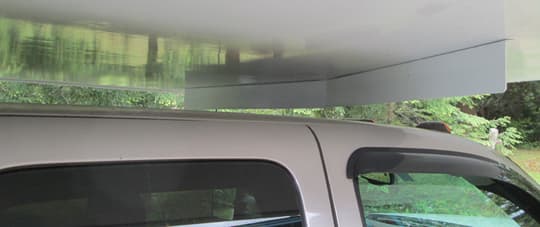
Above: Jim’s air dam is located between the truck cab and the camper cabover
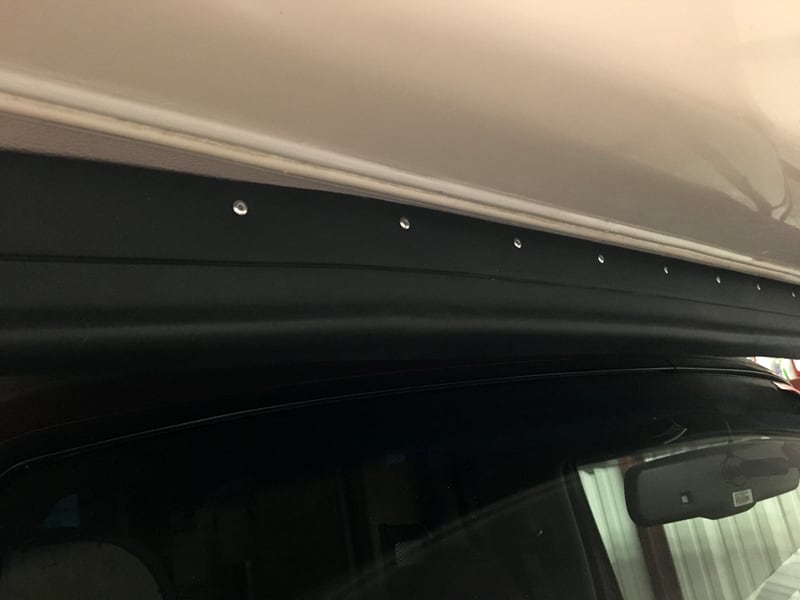
I drew up the plans with dimensions on my computer and carried them to the shop. With his help, we cut and bent the stainless steel into the shape that I had drawn. We measured the location of the screw holes in the truck camper where the cap joins the fiberglass sheet underneath the overhang and drilled holes in the now formed air dam. I attached the air dam using the existing screws.
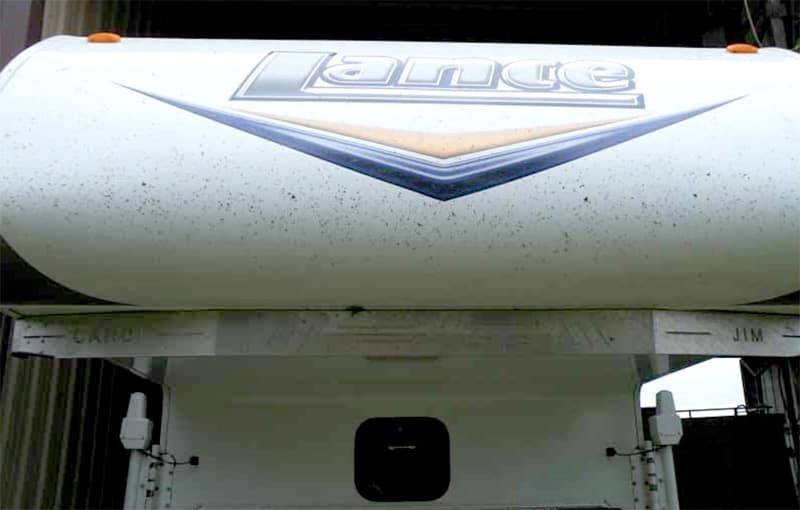
Above: If you look closely, you can see the slots and their names cut into the air dam. Also, under the cab, there are no bugs, but on the front nose, there are tons of bugs!
I also had some slots and our names cut into the front of the air dam to reduce pressure variations that would form. Large bugs that hit the slotted areas are made into smaller pieces that mostly do not stick to the truck camper. The stainless steel air dam cleans up nicely.
The air dam has worked very well in reducing noise, reducing trapped air, and eliminating almost all the bugs that accumulate on the frontal area underneath the truck camper’s overhang. I did not do a before and after mile-per-gallon recording so I can only guess that there might be an improvement.
It took me three hours to complete and cost $250, which included water jet cutting of the slots and our names. In my opinion, the skill level of this mod is hard.
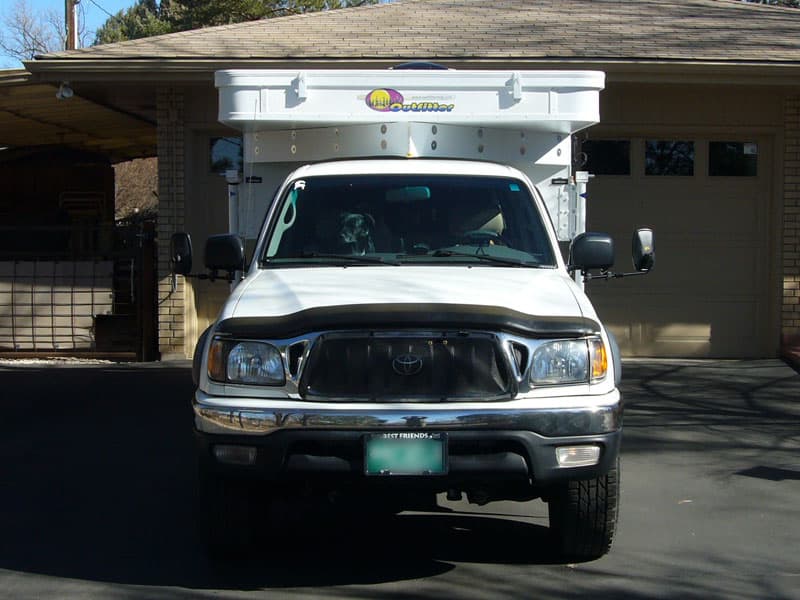
Submitted by: Tom Fitch, 2002 Toyota Tacoma, 2016 Outfitter Caribou Lite 6.5
This mod is all about smoothing the airflow around our camper and perhaps gaining a bit of fuel economy. I had about a 7-inch space between the truck and the cabover section. As I drove, the wind hit the flat wall. I figured I could improve the situation.
My inspiration was a Truck Camper Magazine article on Stephen O’Neal. Stephen mounted his camper on a flatbed truck and did a number of very impressive improvements. My take-away was a metal-air diversion that he fabricated. Clearly, I don’t have the skills or tools that he does, so I had to improvise.
I bought a sheet of 10-mil fluted polypropylene, which you can buy (or order in) from a business that deals in plastic fabrication or distribution. It isn’t cheap at about $70 for a 4-foot by 8-foot sheet, but I use the stuff for all kinds of things around the house.

The material is very strong for the weight and comes in a bunch of different colors, so you don’t have painting to deal with. I also bought some 5-inch shelf brackets, screws, bolts, washers, zip ties, and nylock nuts. You can cut the polypropylene with a utility knife. On my camper, the underside of the cabover was a good purchase for the screws that hold it up.

I took my first trip of the season last month and drove about 750 miles in all. I do believe this modification cut down on wind buffeting somewhat.
The first third of the trip I had a sweet tailwind, the second third of the trip was a calm day, and the last third I had a headwind. I feel like I had an average of all of the typical driving conditions, with the exception of severe side wind.
My total miles per gallon for the trip was 17.3. That’s about one mile per gallon better than usual. Of course, conditions are never the same, but I do suspect mileage is a bit better with this mod. I also think the truck looks better without that 7-inch gap, so there’s that!
It took about two hours to complete this modification and cost less than $100. I also had most of the polypropylene left over. In my opinion, the skill level of this modification is somewhere between easy and medium.
Submitted by: Traci Hill-Duncan, 1996 Ford Bronco, 1996 Lite Craft
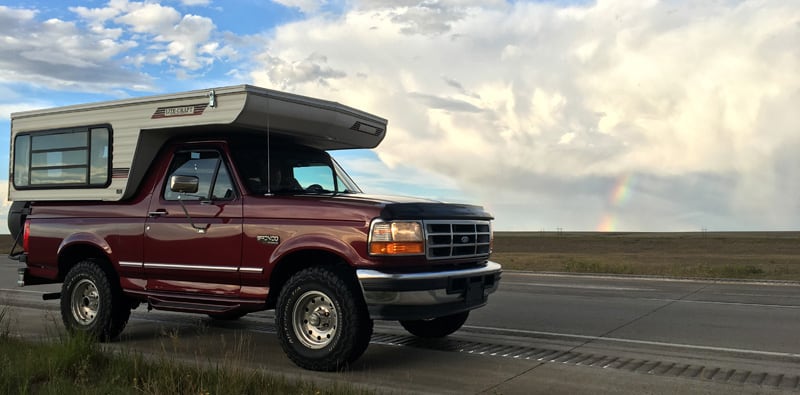
While driving at higher speeds with headwinds, our pop-up truck camper experienced excessive wind noise and popping sounds. On long drives, we could drive no faster than 60 miles per hour to avoid noise.
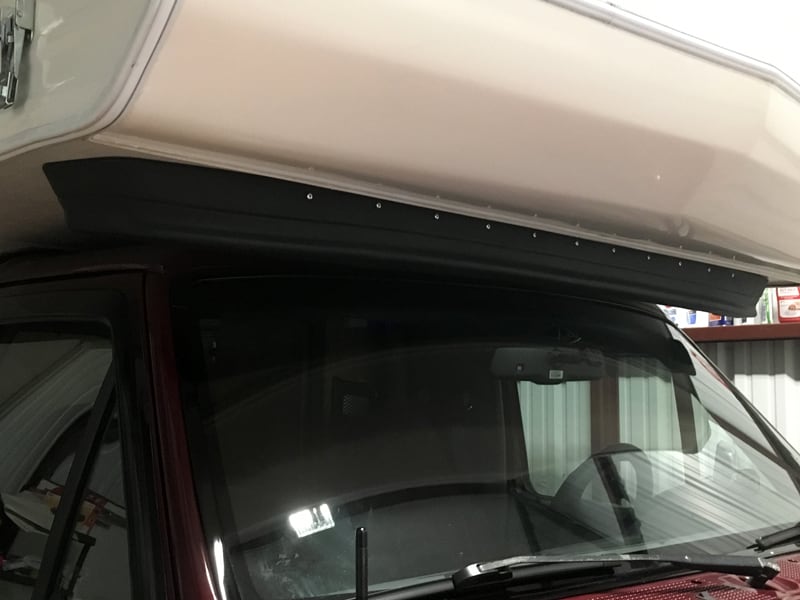
To reduce wind noise, improve vehicle handling, and get better fuel economy we mounted a bumper valence on the underside of the cabover of the pop-up camper.
Our Ford Bronco has a large plastic bumper valence. With its shape and ease of mounting, we thought it would be a good solution for our problem. Also, the cost of the valence was under $25, so it would be a cheap and good looking option.
Due to the space limitation, we cut the bumper’s valence down by about 1.5-inches and mounted a 5-foot aluminum L-shaped corner behind the valence. We used rivets to fasten the valence to the aluminum brace.
Aluminum was shaped to follow the contours of the valence. We screwed the valence on the underside of the camper’s cabover. The finished project has a professional look and works great.
We have taken the camper out on test drives and were able to take it up to speeds of 75 and 80 miles per hour without roof popping noises. Wind noise was much better and the handling of the camper was also improved.
It took me 3-hours to complete this modification and cost me $24. In my opinion, the skill level of this modification is medium. We used a knife, screwdriver, drill, and pop rivet gun to build and mount it. The bumper valence was ordered from a car parts store.
Submitted by: Rudy Drexler, 2006 Chevy Silverado 3500, 2012 Arctic Fox 1150
We have a bug, wind, and noise issue. There’s a large gap between my Arctic Fox camper and the Chevy Silverado’s roof.
A lot of air gets trapped between the camper and truck. This creates some lifting of the camper, oil canning, and noise.

To eliminate both issues and reduce bugs on the camper’s wall, I simply made a wind deflector with a fifteen-degree angle by 4-inch drop bolted to the underside of the camper overhang in the position shown, and “Voila”, clear noiseless motoring was the result.
Disclaimer: The modifications above are submitted by Truck Camper Magazine readers. It is your responsibility to make sure that any do-it-yourself modification project you undertake is safe, effective, and legal for your situation.


