In a magazine far, far away… Rebel mod makers have attacked cabover cabinetry and stolen the plans for the ultimate storage solution. That’s no mod, it’s a sofa station!

Welcome to the October 2017 Super Cup Monthly Mod Contest. Please review the following ten Medium Mods and vote for your favorite. We will announce the winner next week. If you’d like to enter mods into TCM’s Monthly Mod Contest, click here.
Congrats to Kim Ragoza for winning this month’s Mod Contest!
1. David Pellegrini, Evergreen, Colorado
Modified and Added Cabover Cabinets
2003 Dodge Ram 3500
2017 Cirrus 820
This effort focused on the bedroom portion of our Cirrus 820. A couple of things drive us in many aspects of our life – efficiency and organization.

The first thing we wished to modify was the 60-inch long side board storage lids.
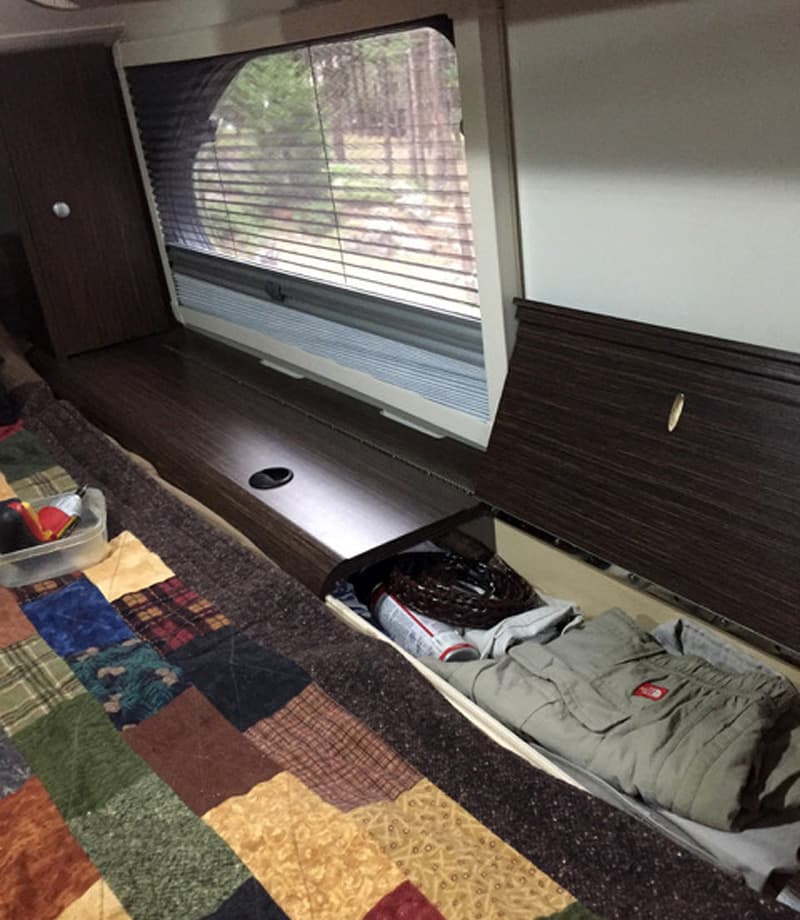
We were cautioned to lift from the factory installed cup handle very carefully as it was tasked with a significant amount of wood weight and the handles had broken on other rigs. So, making two lifting lids was logical.
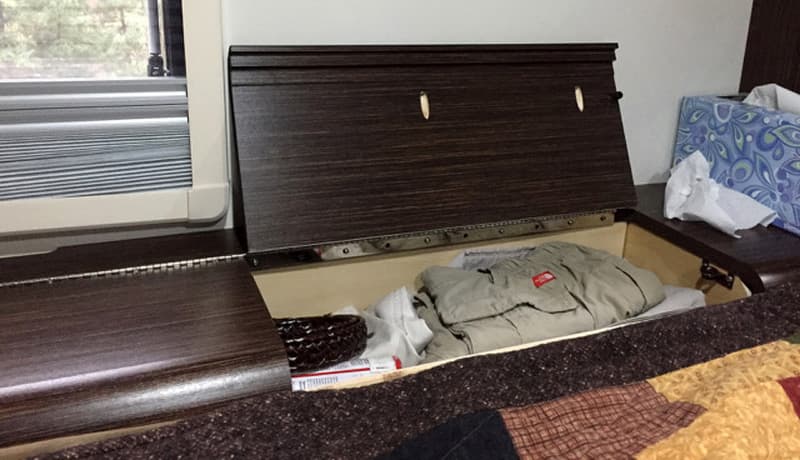
I cut both lids into a 40-inch / 20-inch combination. My wife’s side was further modified with a 3/4-inch divider to separate the spaces. She will fabricate a foam base for her birding scope to rest there while traveling.
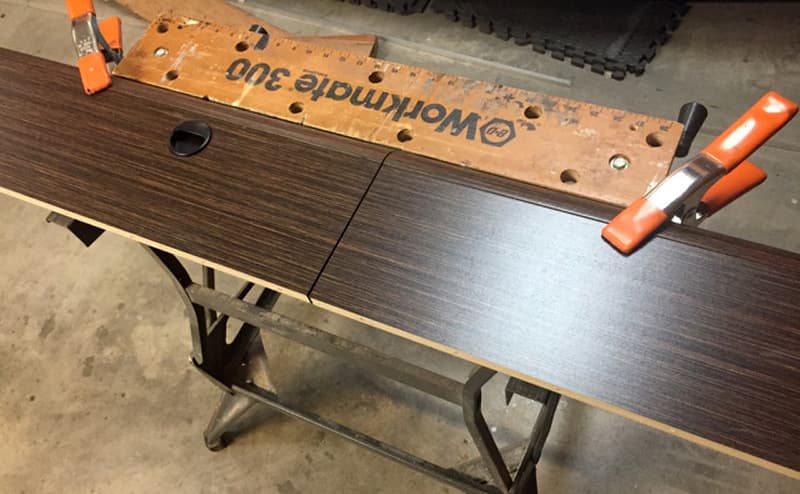
I had to remove the entire length of the piano hinges from the units and lids. I cut the hinge on the lid side, leaving the box edge intact.
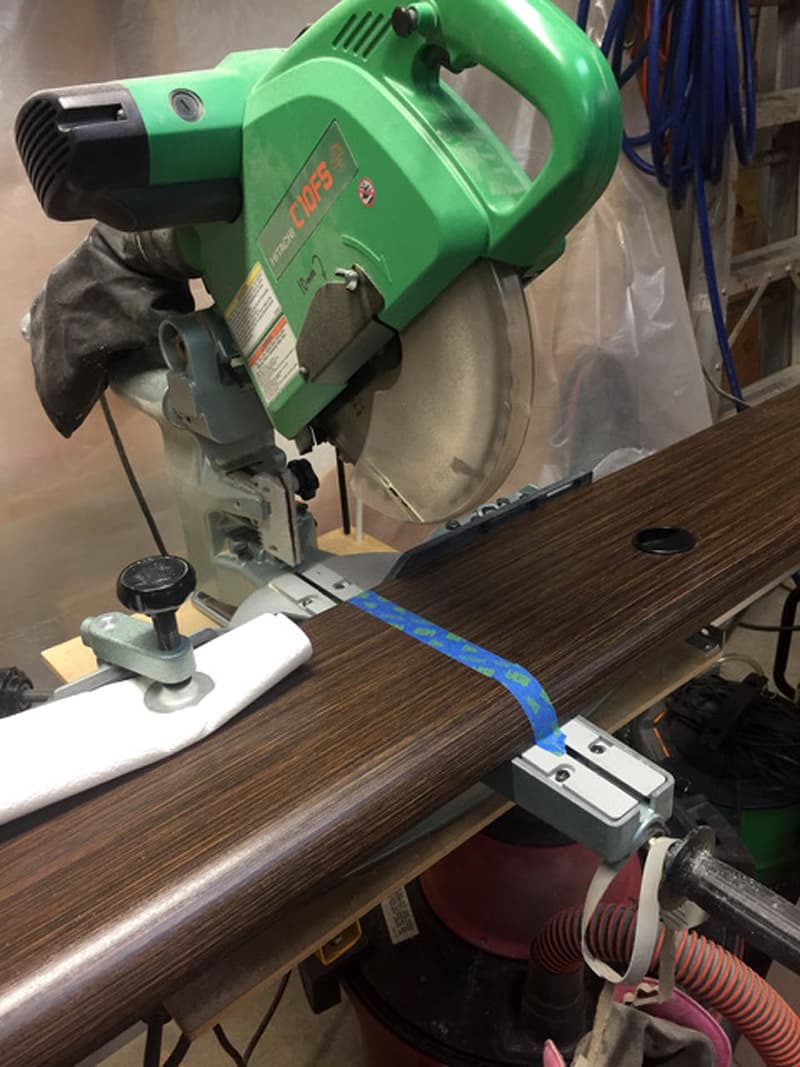
To prevent splintering, I taped the area to be cross cut on my compound miter saw.
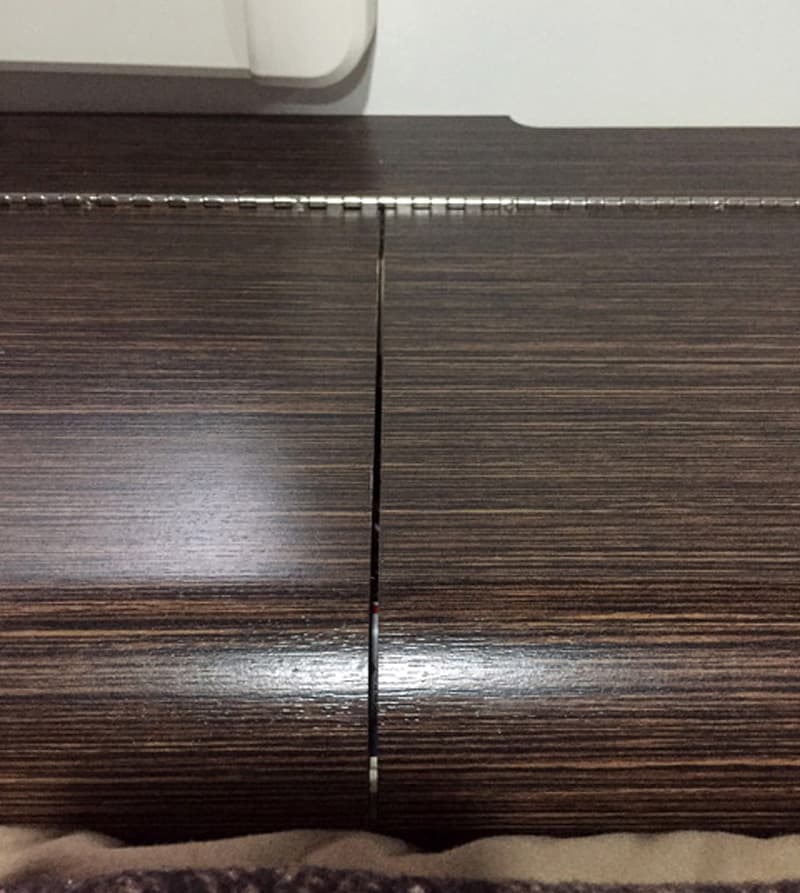
I used a thin kerf blade to minimize the gap it would create.
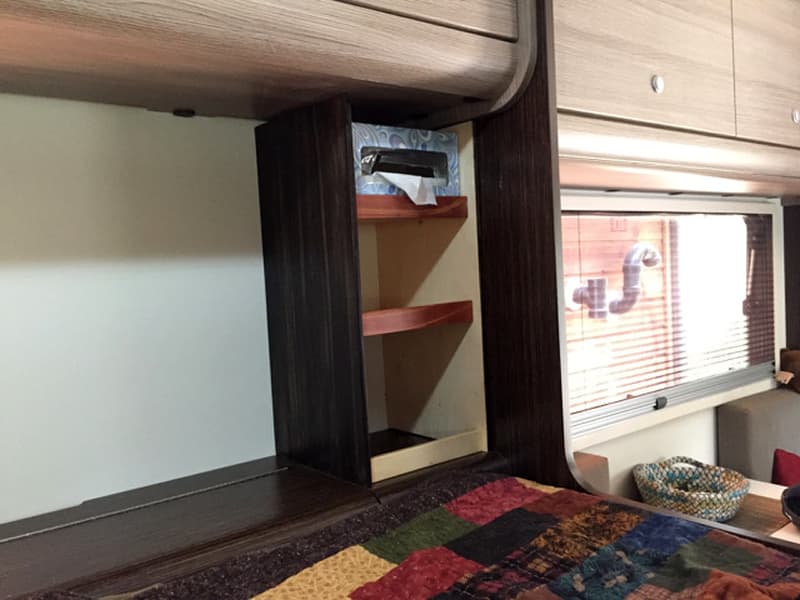
The second addition to the bedroom area is a small shelf system at the end of the side board on the passenger’s side of the rig. I made his addition to the passenger’s side because the television took up the space on the driver’s side.
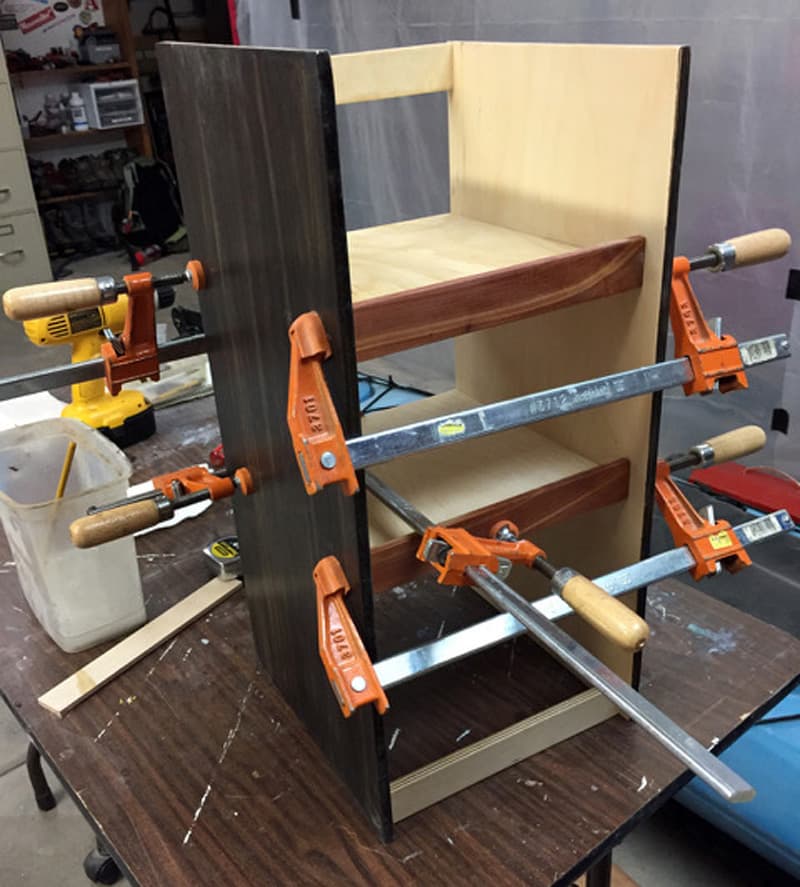
It was fabricated from 3/8-inch Baltic Birch plywood for the sides and 1/4-inch Baltic Birch plywood for the shelves. I dadoed the vertical sides to accept the shelving. This method provides a very strong joint.
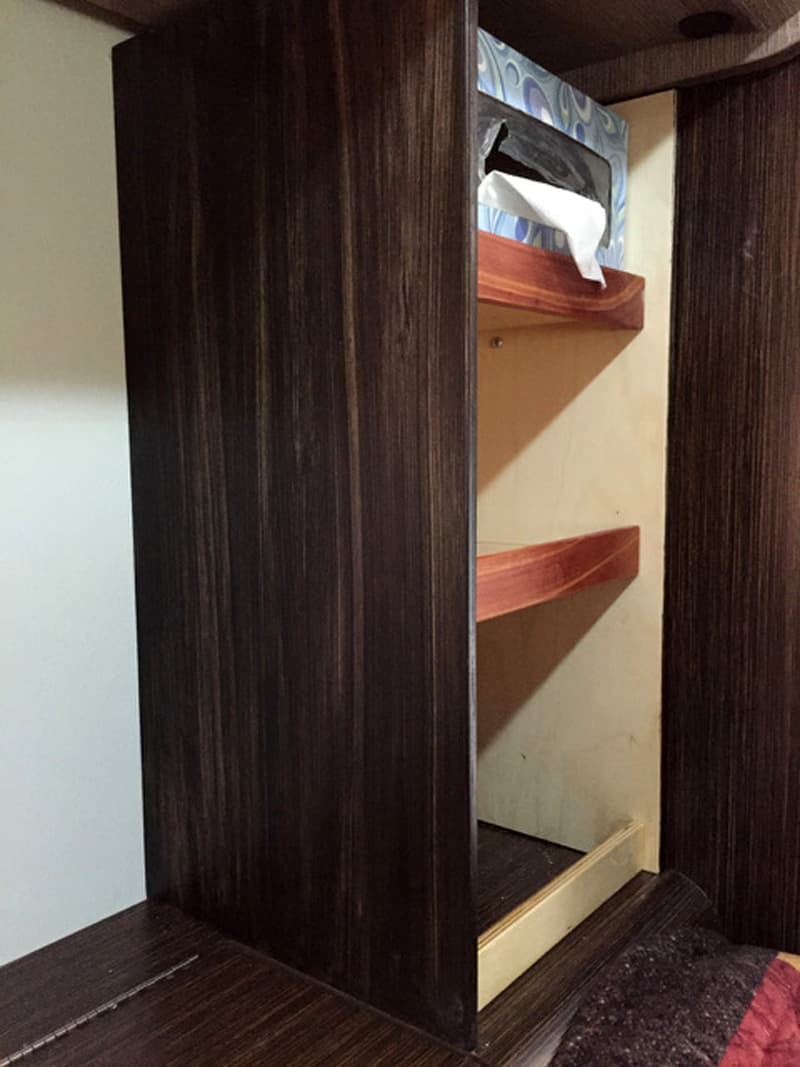
I used only wood glue to bond the shelves to the sides. The lower front and upper rear cross piece were also pinned in place in addition to the glue. The finish was achieved using a sanding sealer on the raw wood, followed by a penetrating stain, a wiping stain and a top coat.
A coarse brush allowed me to streak the wiping stain to closely match the factory supplied laminated panels. For durability I use polyurethane top coat which is thinned, applied twice, sanded, steel wooled and buffed to a silky smooth surface. It is totally water resistant and very durable.
I just finished both of these modifications. They will provide us the organization we need to operate in such a small space. Once we begin putting the keys, wallets, watches, and pens into the small baskets on the lower two shelves and have access to our side board items via lighter lifting lids, we will be happier campers!
It took me ten hours to complete this modification and cost me about $18. In my opinion, the skill level of this modification is hard.
2. Darryl and Kathy Stolica, Blountville, Tennessee
Dinette to Sofa Conversion
2005 Dodge Ram 3500
2012 Chalet TS116
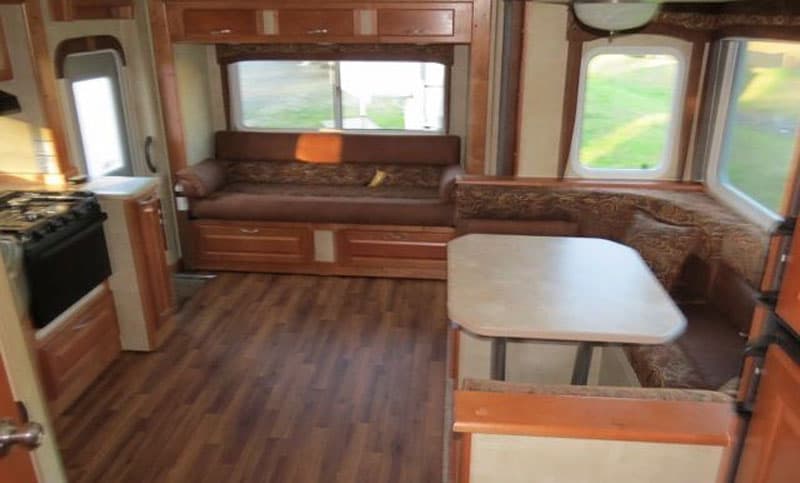
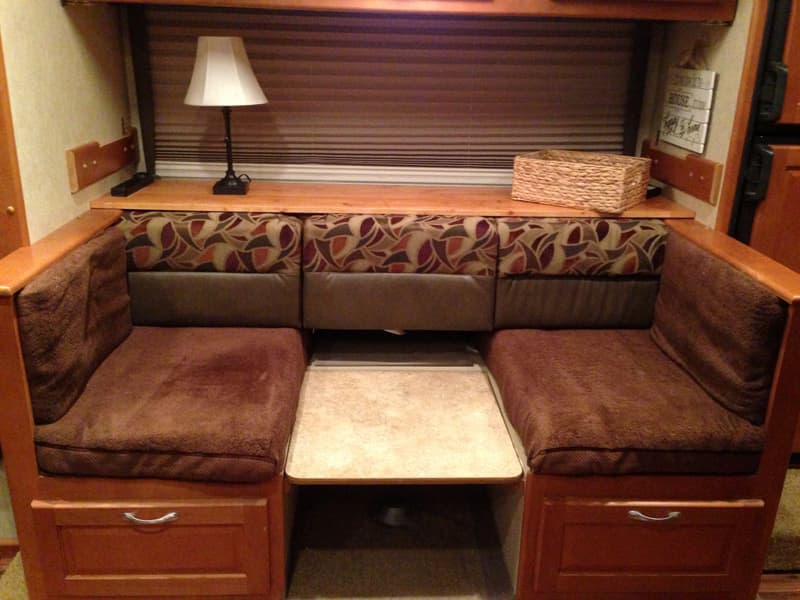
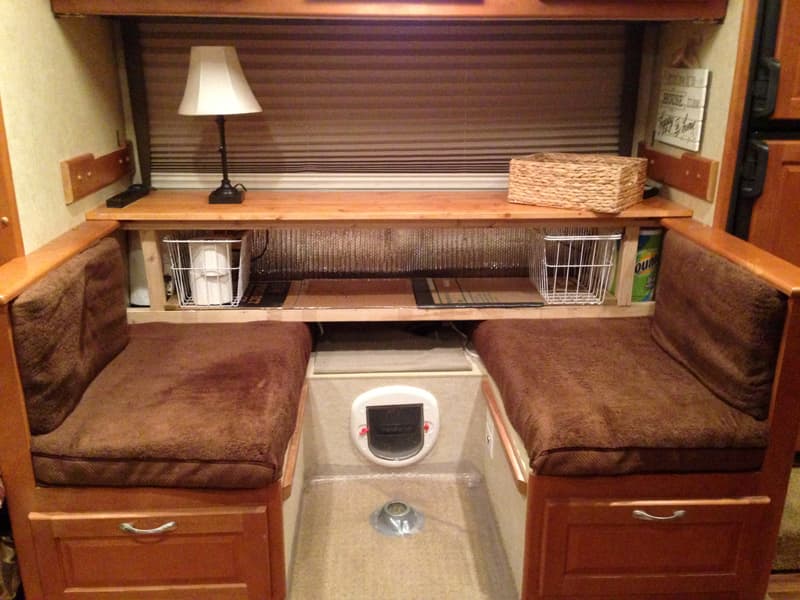
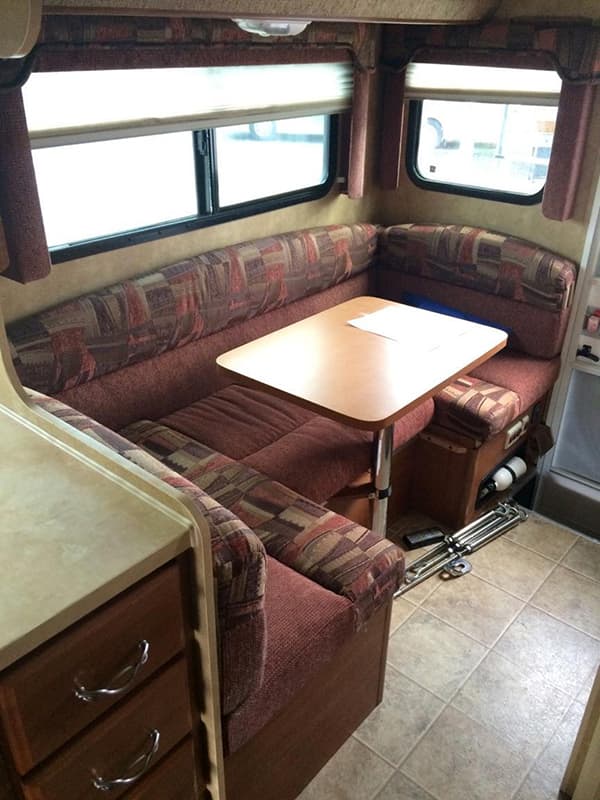
Our Chalet camper originally had a couch and a U-shaped dinette. We live in it for months at a time and wanted a second comfortable place for seating. It is usually just the two of us so we did not need the U-shaped dinette, but still wanted a small table for eating. Our compromise was a couch-table quick conversion.
We removed and stored the two back curved cushions from the U-shaped dinette and the large table. We bought a 16-inch by 72-inch by 3/4-inch pine shelf and placed it on top of the dinette frame next to the window. We stained it to match the cabinets.
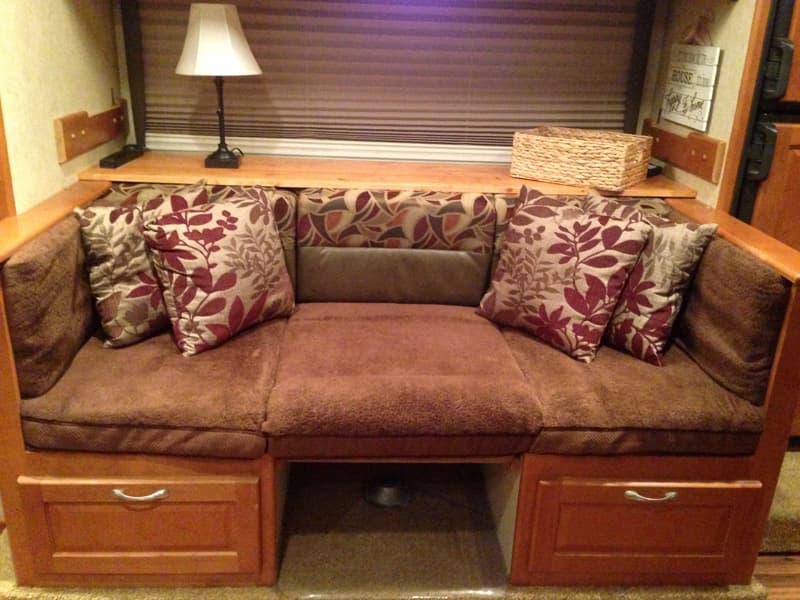
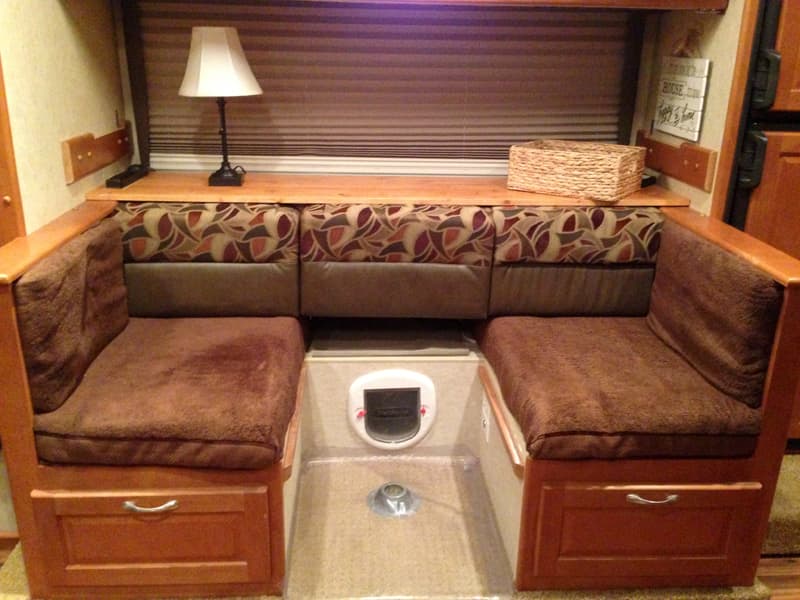
We built a skeleton box frame out of 1-inch by 1-inch scrap lumber to support the back cushions for the sofa and temporarily secured it to the underside of dinette frame. The remaining three back cushions and three seat cushions from the dinette were simply rearranged to form the couch. We didn’t have to buy a single cushion!
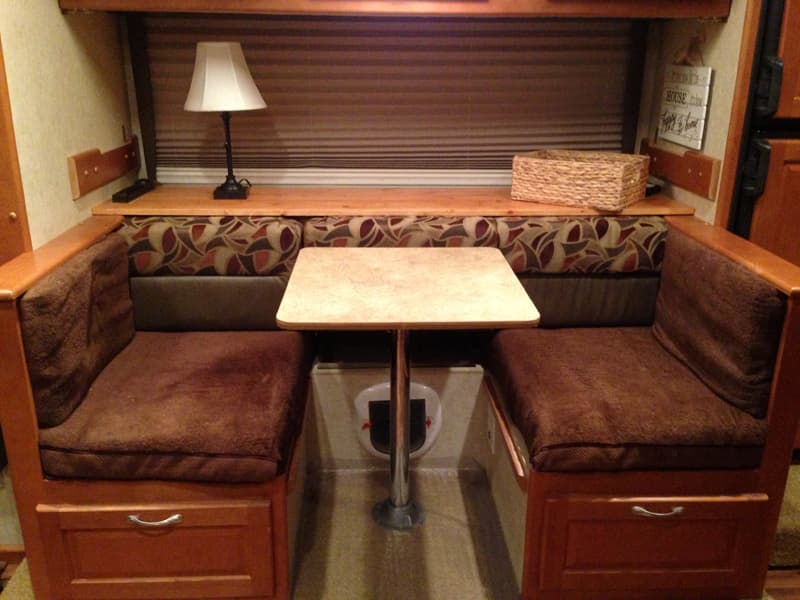
We used the small table that came with the camper (that made the dinette into a bed) as our new mini table. We added a table base to the bottom of the small table and reused the post from the large table.
Now we can have four to six adults sit comfortably on the two couches. When it’s just the two of us, we each have our own couch and can pop up the table for dinner in just minutes.
The board across the back of the couch acts as a great buffet for food when we eat and a work station for computers, lamps, and storage baskets the rest of the time.
A bonus is the extra storage behind the cushions for items we don’t need to access daily such as paper towels, toilet paper, etc. The best thing is that nothing is permanent and can be put back in its original condition for resale.
It took me about one hour to complete this modification. The total cost was $26 for the 72-inch pine board from Lowes. In my opinion, the skill level of this modification is medium.
3. Robert Williams, Mammoth Lakes, California
Glowing USB Ports In Truck
2012 GMC Sierra 3500 HD
1994 Fleetwood Caribou
Whenever I take my family on a road trip, the kids (ages 14 and 16) immediately ask if they can plug in their phones to charge. The truck came with a USB charger in the dash and two 12-volt ports (one in the dash and one in the center console). I really don’t like the cords running all thru the cab, and those cheap little 12-volt to USB adapters really don’t work well.
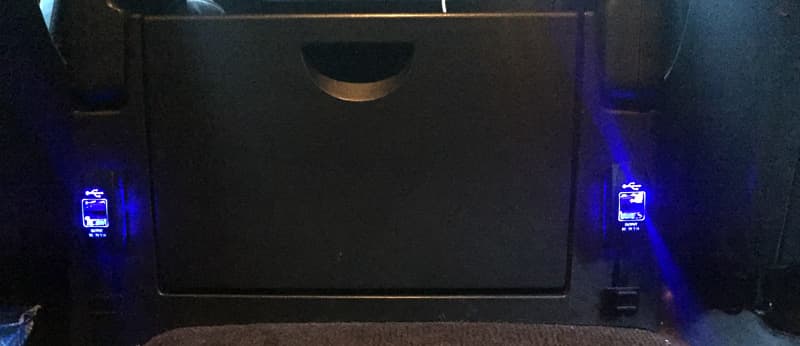
For $11 each on Amazon I ordered two double USB charging ports and installed them in the back of the center console. I used the 12-volt power supply to the stock 12-volt ports on either side of the drink holder.
It works great. Now the kids, or any back seat passenger, can charge up to four electronic devices without passing cords to the front of the truck. The best part is that those in the front seats can control the music since the USB port in the dash connects to the stereo.
It took me 30 minutes to complete this modification and cost me $23. In my opinion, the skill level of this modification is easy.
4. Morgan Swisher, Madera, California
Drawers In Cabinets
2015 Chevy Silverado 2500
2015 Wolf Creek 850
I had trouble reaching items in back of the cabinets above the sink and stove. I also wanted to stack smaller items. 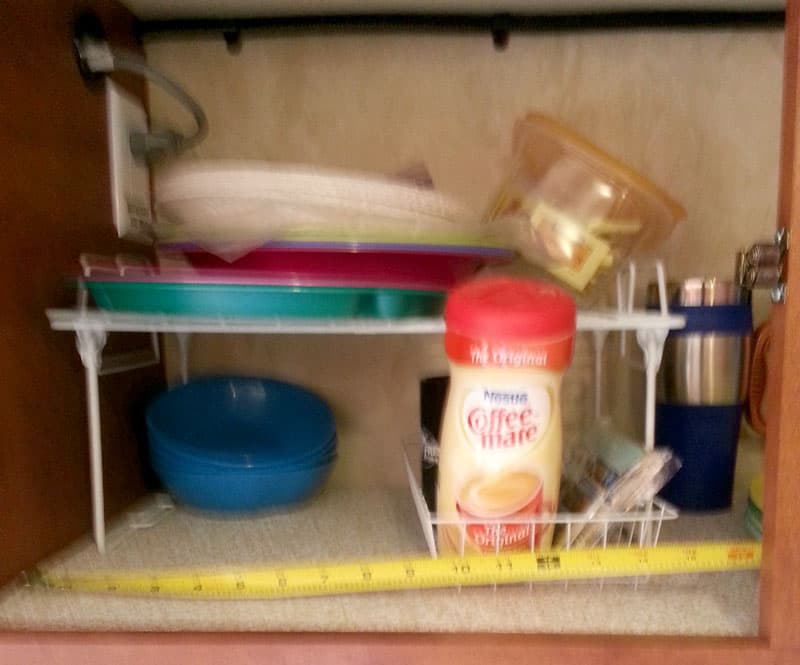
I installed a sliding drawer in one of the cabinets. I basically built a box and bought some short drawer slides.
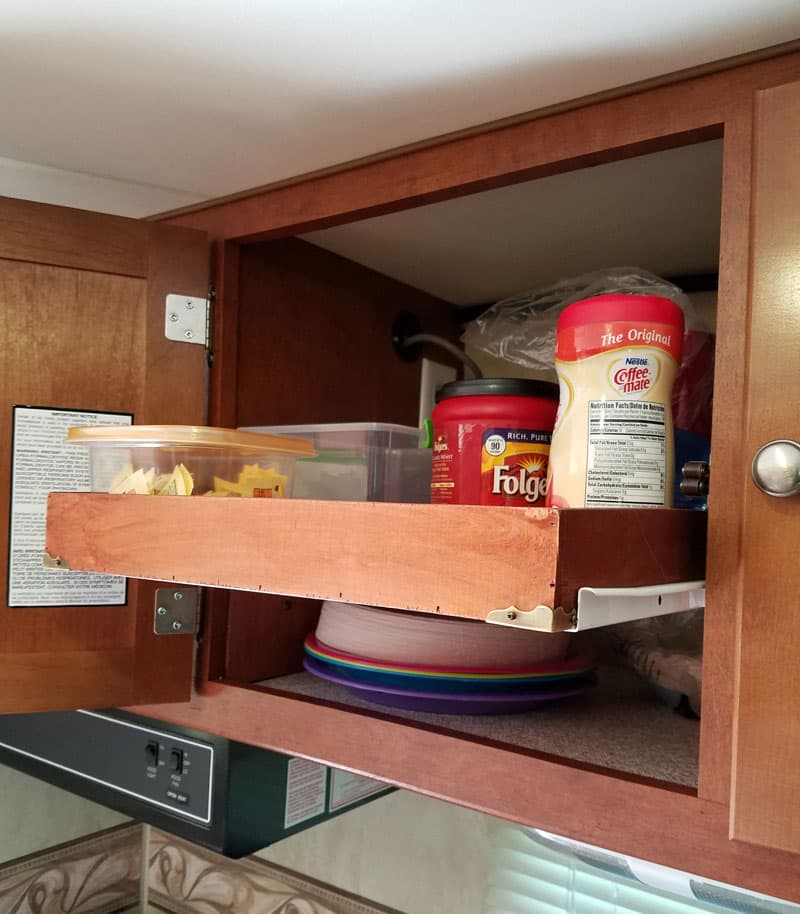
I had to add a 1/8-inch piece of plywood on the left side to make it flush with the opening and built a support system behind the center post. I used an air nail gun, but brad nails would work. I glued everything.
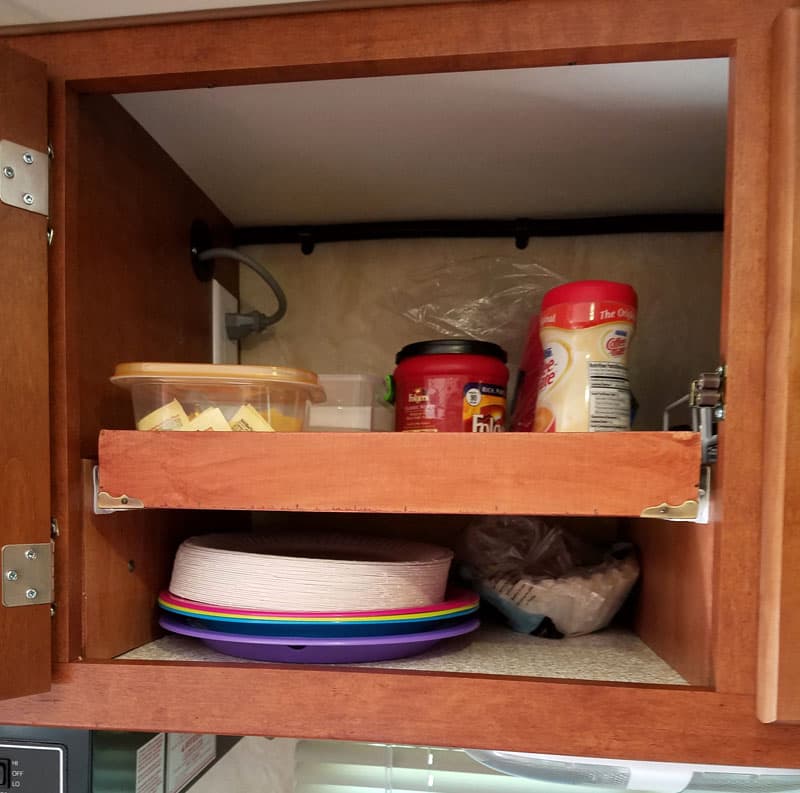
I stained the drawer and supports to match the cabinets. I had everything except the slides on hand from previous projects.

It works great! Now I can keep my paper plates and small items on the bottom and taller items on top.
It took me four hours to complete this modification and cost me $20. In my opinion, the skill level of this modification is hard.
5. Vic Smith, Coquitlam, British Columbia
Cabover Storage to IKEA Folding Boxes
2013 Adventurer 89RB
2015 Ford F350
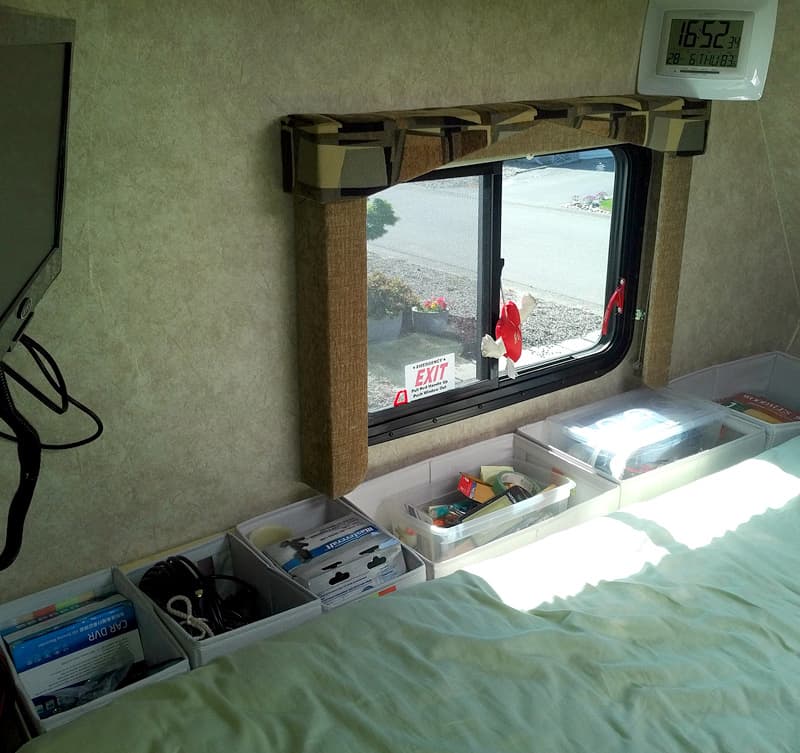
I’ve owned three campers since 1981. All of them have had a long storage hampers next to the bed; either on the sides, or the headboard. It was frustrating to use these storage hampers as the hamper lid does not remain open.
Additionally, the opening is 60-percent of the total length of the hamper storage area. Many items get stuffed into the far ends and are difficult to keep organized or reach without taking everything back out.
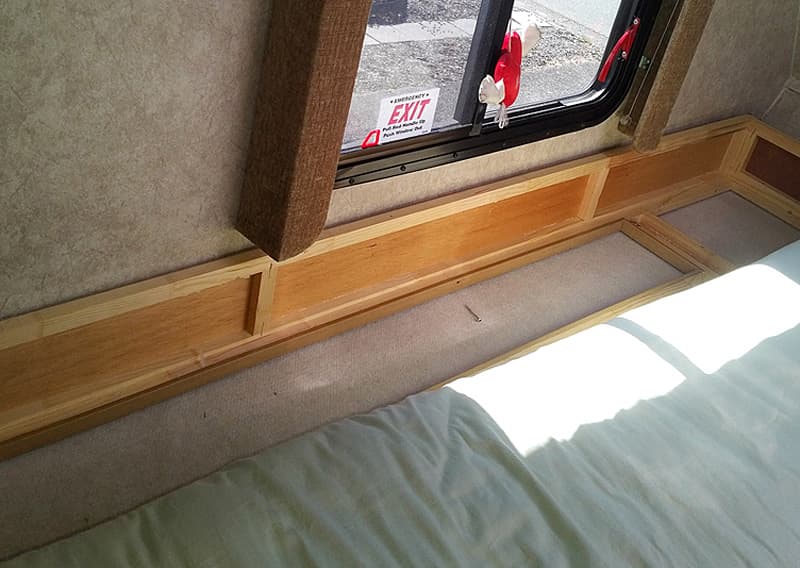
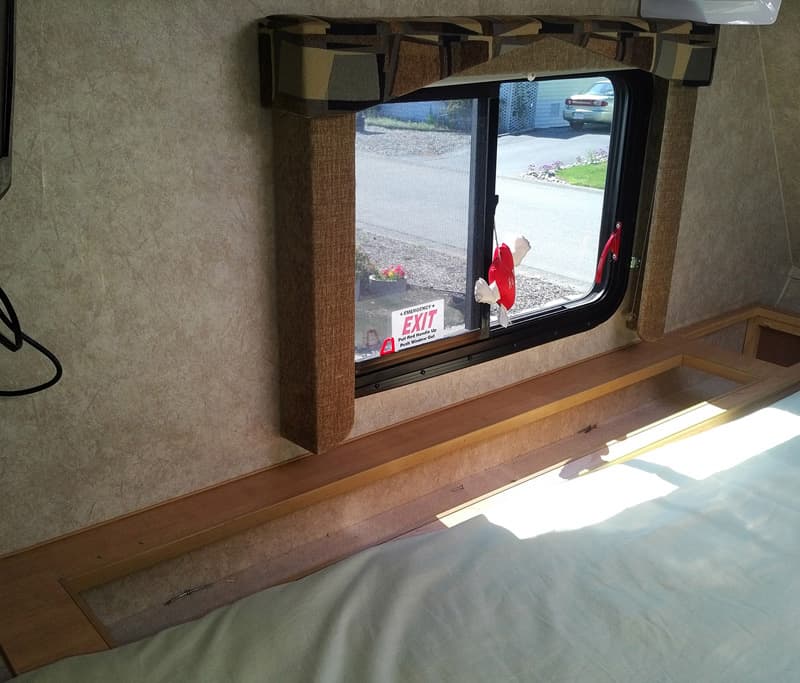
Not wanting to completely discard the storage hamper (in case I wish to return the unit to factory settings), I removed the long door and hid it under the mattress. I then removed the 20 plus wood screws that secured the cabinet into the overhead floor and walls. When that was completed, I turned the L-shaped cabinet over putting the finished wood side towards the wall under the window.
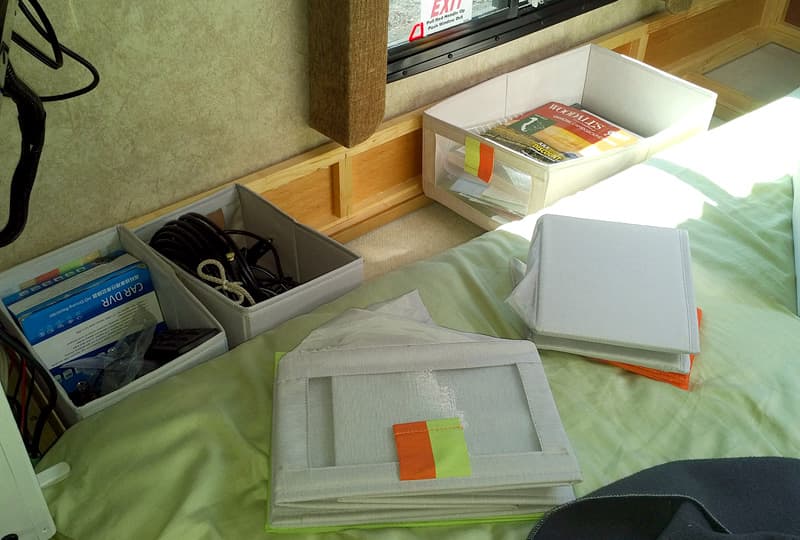
IKEA has folding fabric storage boxes. The 10-inch by 8-inch boxes were $4 Canadian and the 10” x 16” boxes were $10 Canadian. They fit perfectly.
Now, everything is better organized. We have better storage usage and ease of access. It’s a vast improvement.
A camper is something that needs to be worked. It is not a pretty showcase or a shrine. So often the RV manufacturers put in cabinets that really are difficult to use on a daily basis. My unit is still clean, neat and tidy – and now even more functional.
This modification was $42 for the IKEA folding boxes. In my opinion, the skill level of this modification is easy to medium. The final result is priceless.
6. D Kaiser, Bruceville, Texas
Snow Skiing Storage
2016 Ford F350
2015 Lance 1052
We needed a place for skiing equipment. The storage over the dinette covers too much of the table when it’s lowered, so I made a box that sits on the storage supports. It leaves us plenty of room to continue to use the table.

I took a 4-foot by 8-foot sheet of birch plywood and cut two feet off, which made it 4-foot by 6-foot. Then, I cut a 4-inch piece six feet long and cut a piece 20-inches wide and six-feet long.

I used a biscuit jointer and joined the two together with wood glue and then clamped them together. I let it dry overnight. The next day I cut out the areas to go around the window in the camper. I sanded it and stained it with polyurethane.
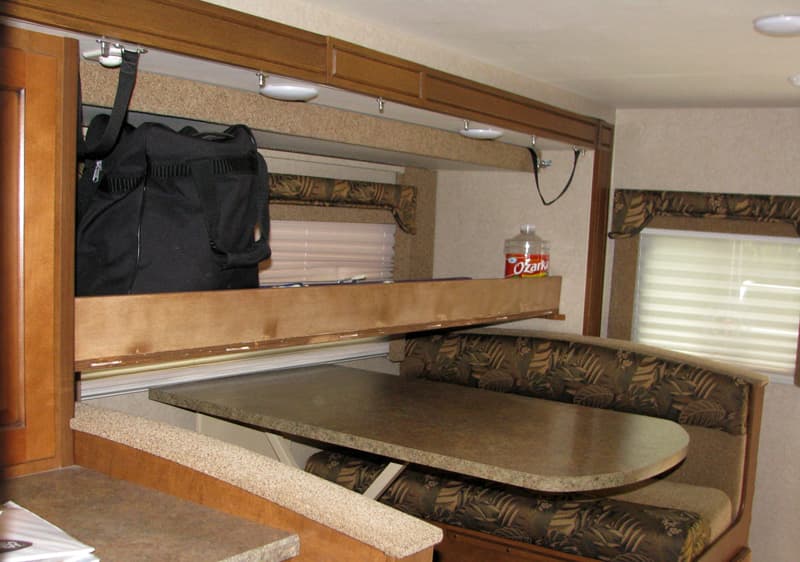
This modification has worked out great for us! It is very handy for when carrying long skis, poles, and boots. We can also use it for storage. It does take up two spots in the dinette, so we use it when it is just us two.
It took me six hours to complete this modification and cost me $50. In my opinion, the skill level of this modification is medium.
7. John Tseka, Hartland, Connecticut
Overhead Bunk Storage Shelf
2004 Silverado 2500HD
2012 Lance 850
I was looking for a storage area for my surf rods, fly and spinning rods, and tackle. I also wanted to store other long items like a quick set clam screen shelter and Sunbrella beach umbrella.
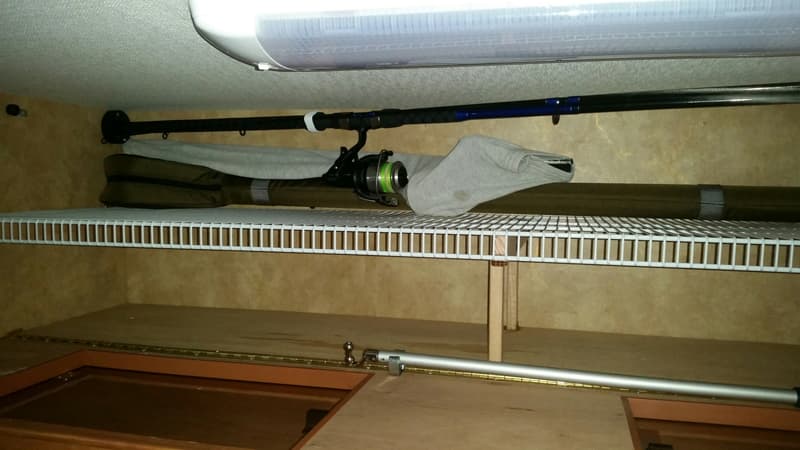
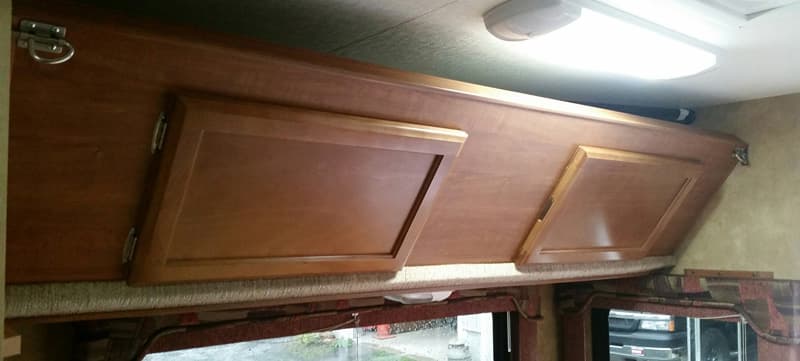
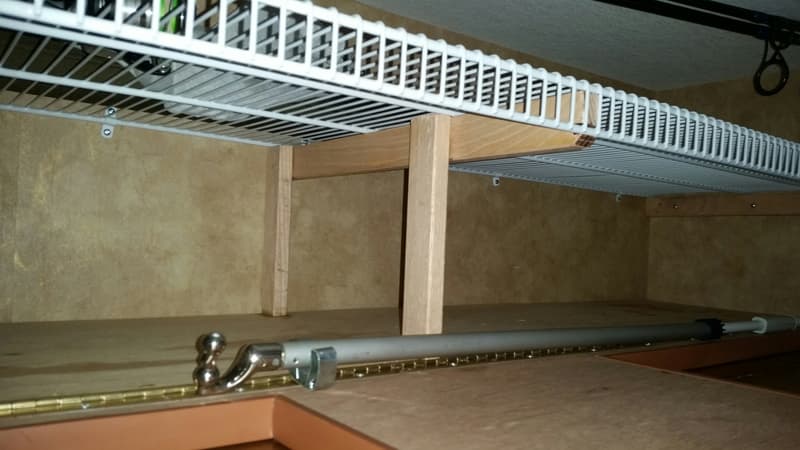
I installed a 6-foot by 20-inch wire shelving section that is 8-inches down from the ceiling in an overhead bunk over the dinette.
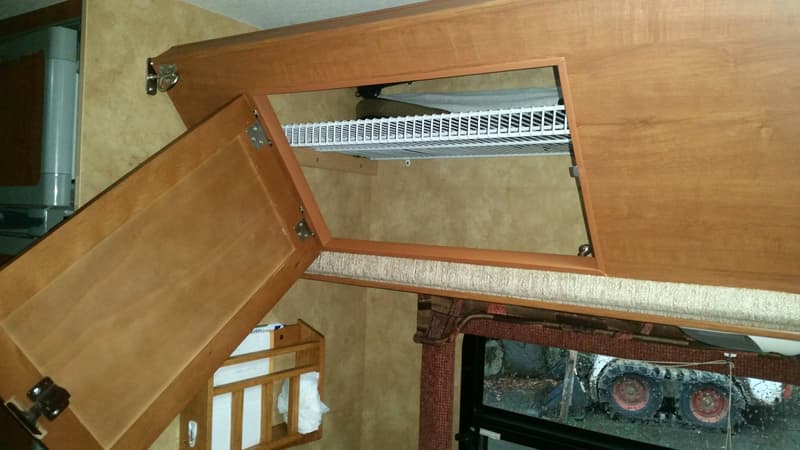
I pushed the bunk/door panel up to the new shelving. Then, I marked the location for two additional catch pockets to the wall.
Caution: Be careful not to drill or screw through the wall into the refrigerator or it could be a costly oops. Beer screwed to the side of the refrigerator can be messy.
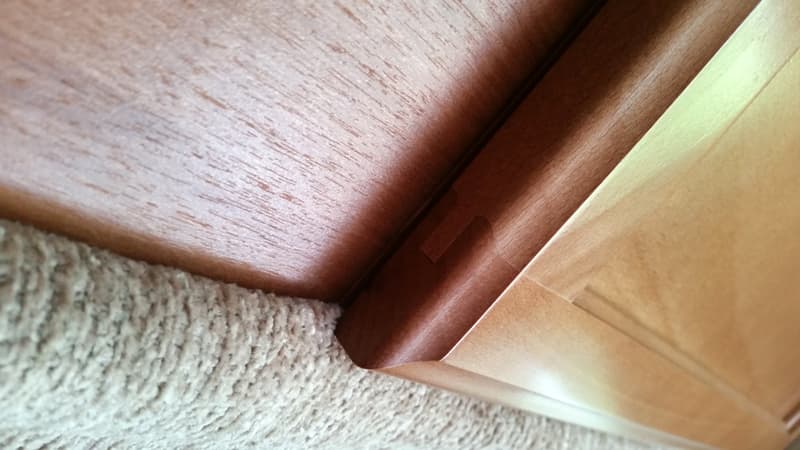
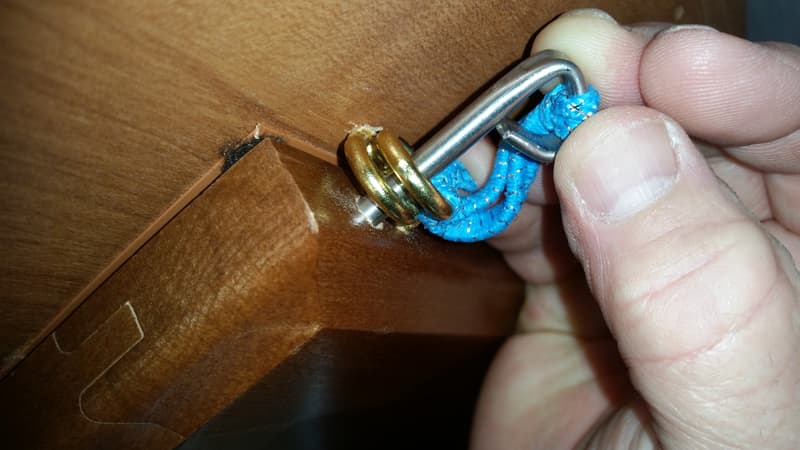
The original door catches may not latch correctly if the fabric at the bottom of the door gets pinched. The door can swing open and hit your wife on the noggin. Yup, it happened! There was an easy fix to keep doors from swinging into someone’s face (see photo below).
I really like the additional storage for longer items.
It took me about five hours to complete this modification and cost about $20. In my opinion, the skill level of this modification is fairly easy if you are handy with tools.
8. Charles Coushaine, Punta Gorda, Florida
Extra LED Tail Lights
2001 Ford F350
2012 Chalet DS116RB
I just completed another modification to my 2012 Chalet truck camper. This one is designed around safety on the road.
It becomes apparent to anyone that has traveled with an RV that being visible to other drivers is paramount to being safe, especially at night. I wanted to increase and improve my visibility, especially from the rear and sides, such that other drivers knew when I was braking or turning.
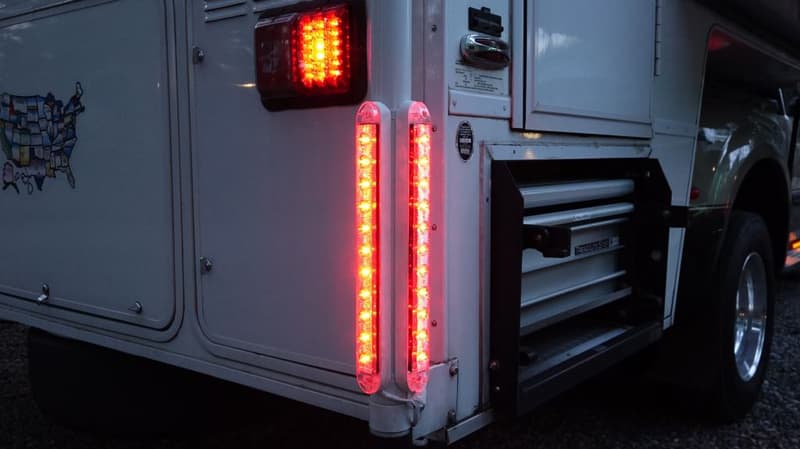
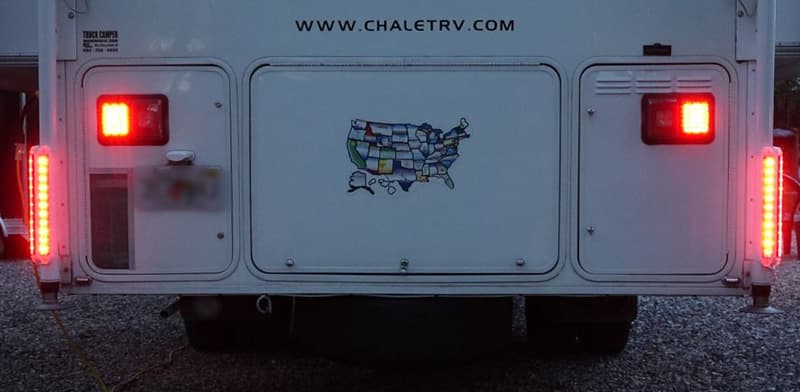
To that end, I installed four 15-inch LED tail/stop lights on the two rear round jacking posts of my camper. One faces toward the back and the other faces 90-degrees to the side so that my brake lights and directionals, can be seen from all directions.
This required making some custom post mounting brackets out of vinyl and wiring the assemblies to my camper’s additional seven-pin connector.
To see how this was constructed and installed, watch the video below:
I love these lights! They are securely mounted, distinct in appearance, and provide unmistakable visibility to other drivers as to my location, braking, and turning.
It took me about eight hours to complete this modification and cost me about $50. In my opinion, the skill level of this modification is medium to hard.
9. Kim Ragoza, Granby, Massachusetts
Dinette to Thomas Payne Sofa
2009 Chevy Silverado 2500
2012 Lance 1050
The dinette in our 2012 Lance 1050 was not user friendly. It was uncomfortable and too low for us to get out of comfortably.
We took out the dinette and replaced it with a 72-inch Thomas Payne sofa. Thomas Payne is made by Lippert Components as RV furniture. We got the sofa at Camping World.
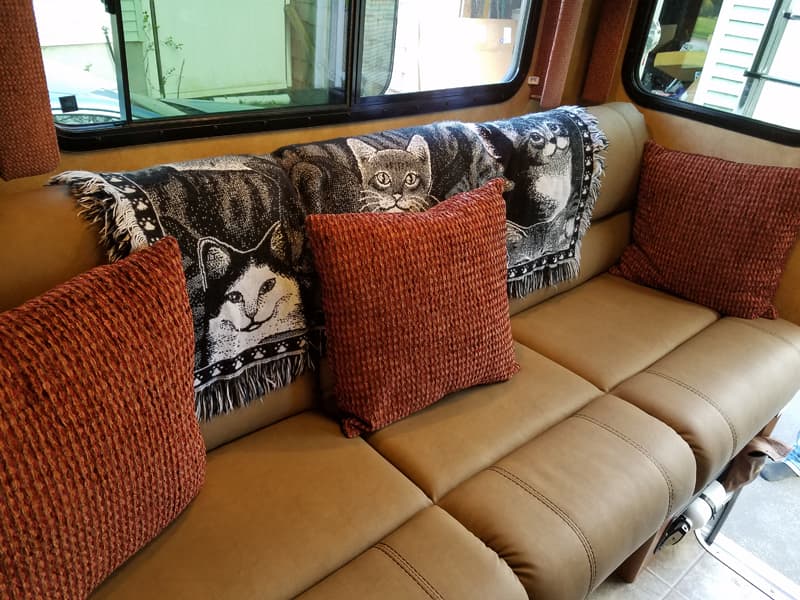
First, we removed the cushions from the original dinette. Then we attached the sofa to the wing with lag bolts. No modifications were needed for it to fit properly.
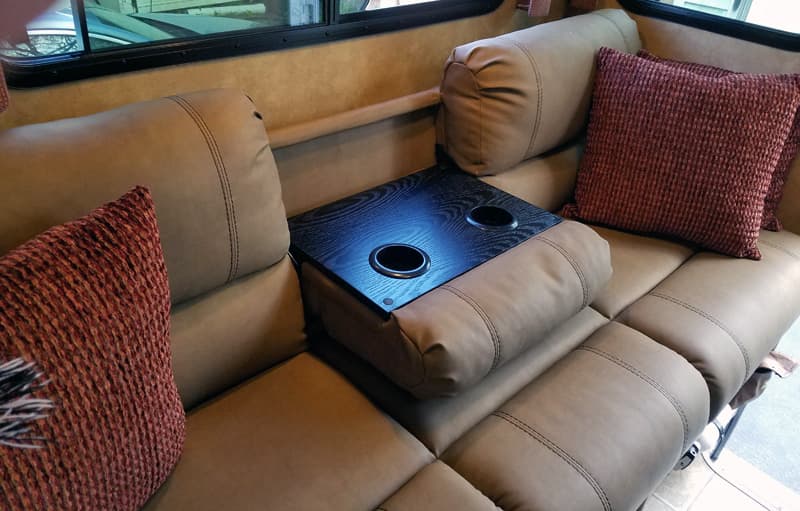
We left the original floor plan of the dinette alone just in case we sell the camper. This modification is wonderful! We love it.
It took me four hours to complete this modification and cost me $730. In my opinion, the skill level of this modification is medium.
10. Marcel Emond, Sorel, Quebec
Create An Awning
2013 Ford F150
CampLite 6.8
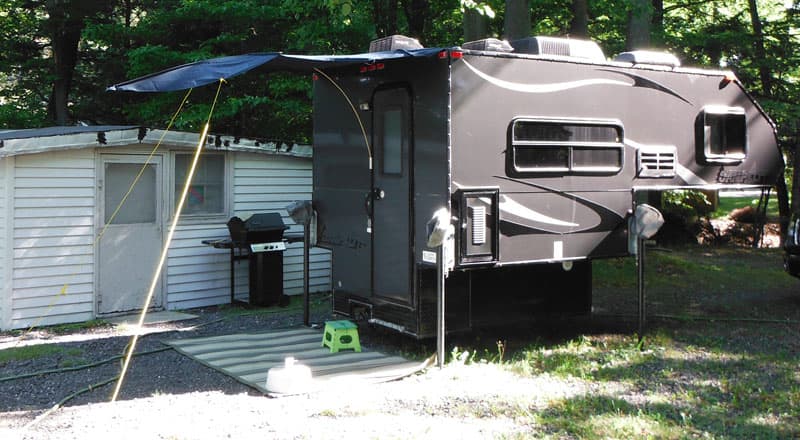
I wanted an awning that was light and did not have a post. With my awning there is a fiberglass center post that I used from an old tent. The fiberglass post starts from the bracket on the camper and goes to the end of awning.
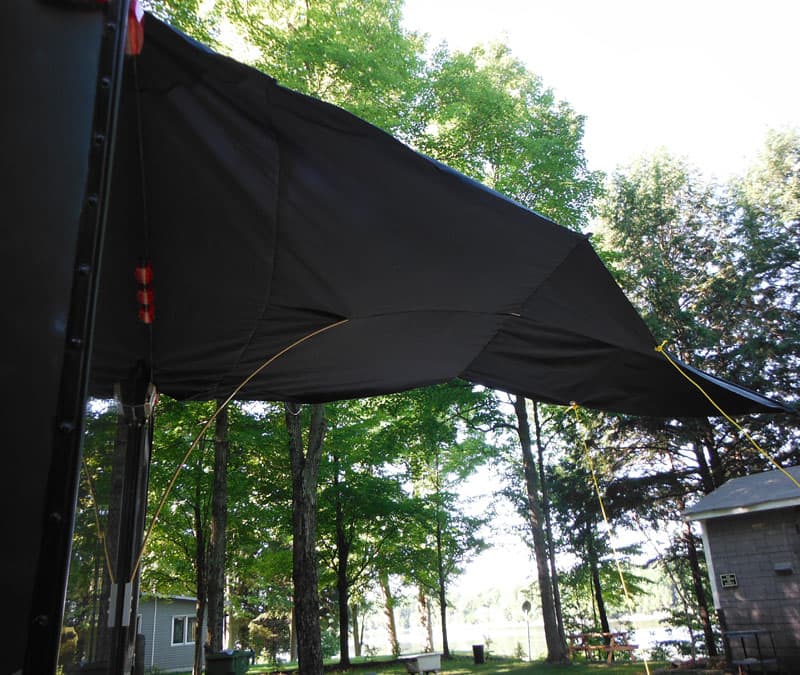
There are also two small posts that cross from one side to the other so that the awning can keep its form. The awning is also attached on the roof with two brackets.

It has worked out pretty well. The only problems have been in very high wind.
It took me some trial and error, so it might have taken a day to complete this modification. It cost me $40. In my opinion, the skill level of this modification is medium.
Click here to vote for your favorite 3 mods from this month’s contest.
Disclaimer: The modifications above are submitted by Truck Camper Magazine readers. It is your responsibility to make sure that any do-it-yourself modification project you undertake is safe, effective, and legal for your situation.
Enter Your Mods Now!
If you’d like to enter mods into TCM’s Monthly Mod Contest, click here. You can enter as many mods as you want, at any time. Good luck mod makers!