Welcome to the third entry in April’s Mega Mod-Ster Contest. One captivating Mega Mod will be published in every Email Alert in April. At the end of the month we’ll hold a reader vote to determine April’s winner. For information about the Mod-Ster Contest, including how to enter, click here.
Dave Riddle, Burbank, Washington
Stable Steps and Banister For Side Entry Camper
2015 Chevrolet Silverado 3500
2017 Host Mammoth
My wife and I have very much enjoyed truck camping for a number of years. We’re on our fourth camper and, as much as we enjoy it, we are also getting older and looking for ways to use the camper safely for years to come.
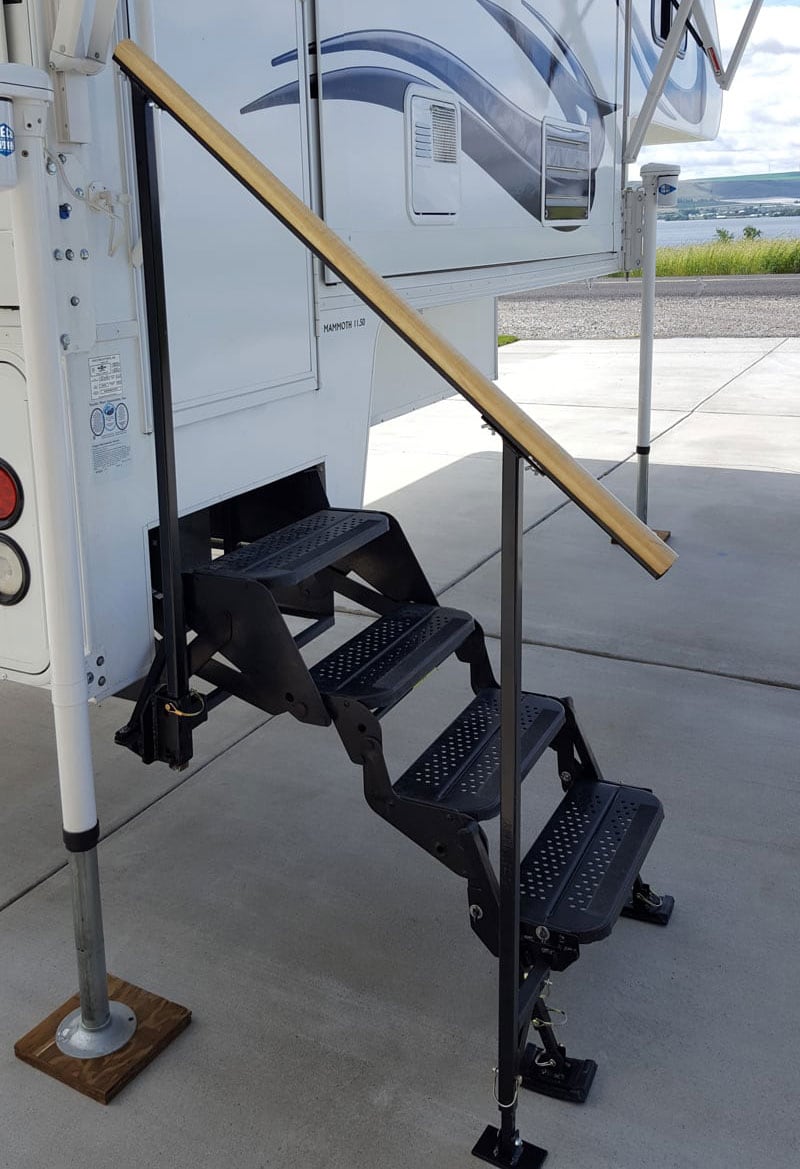
The biggest challenge for us was entry and exit of the camper. After discussing the possibilities of making the entry and exit safer, the decision was made to add extendable legs to the existing steps and a handrail along the side.
Looking online, we didn’t find anything that we could purchase that would work with our existing steps or a handrail that didn’t require modification. As a result, we decided to custom build our own extendable step support legs and integrated handrail system.
Our camper has four steps that fold out on the side. Like most folding steps, they are kind of springy. This is okay for a quick stop. However, when we stay parked for a longer period of time, we want a solid feel to the steps and an easily accessible and solid handrail.
Having spent the first part of my career as a certified welder and fabricator, I was comfortable with creating the extendable legs and integrated handrail system for the camper. Aside from the obvious aspects of utility and aesthetics, the new system would also have to be easily assembled and disassembled without the use of tools.
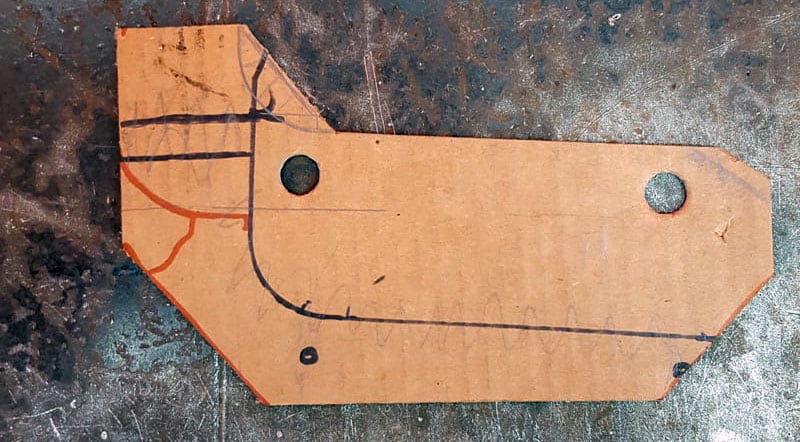
The modification started with a sketch and then a cardboard pattern of the side plates and the legs for the steps. The pattern allowed me to make changes in the design as needed before starting metal fabrication.
Once I had determined that the pattern was correct, I cut the pieces for the mounting plates and the leg extension tubes. The pieces were fit, then tacked together and then mounted to determine if any changes were needed.
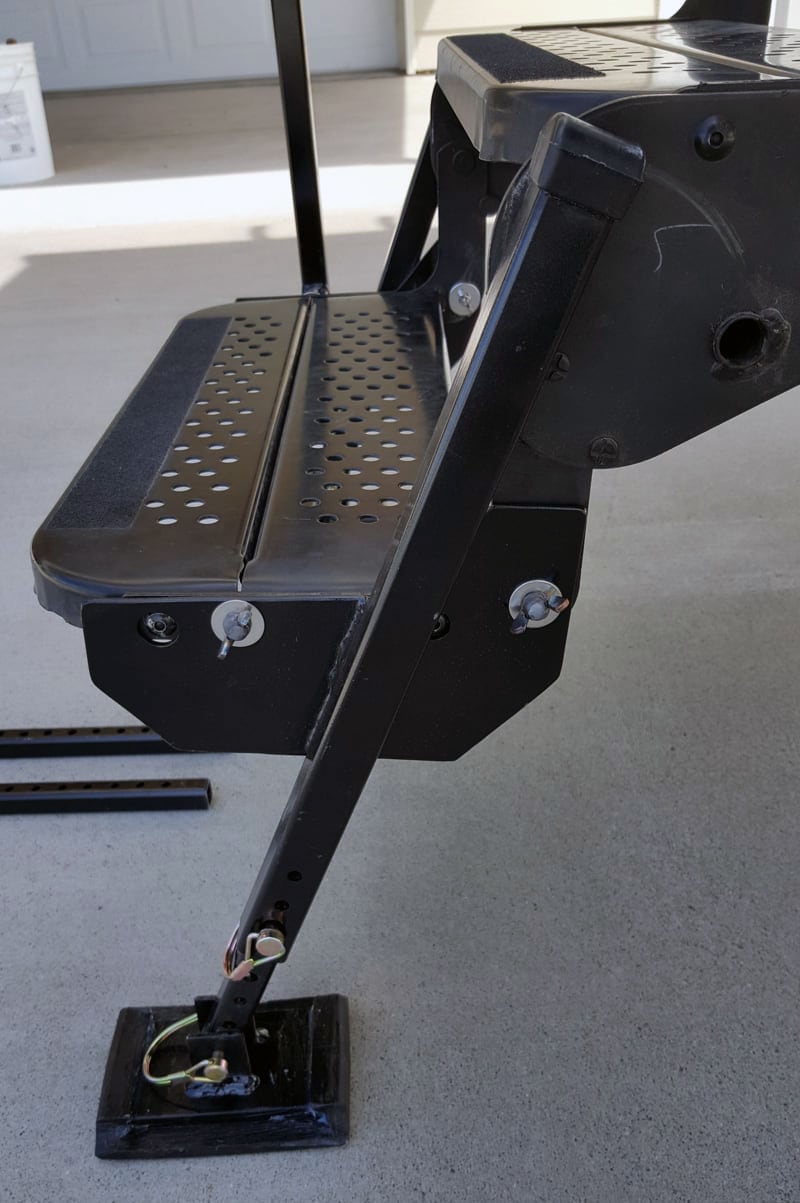
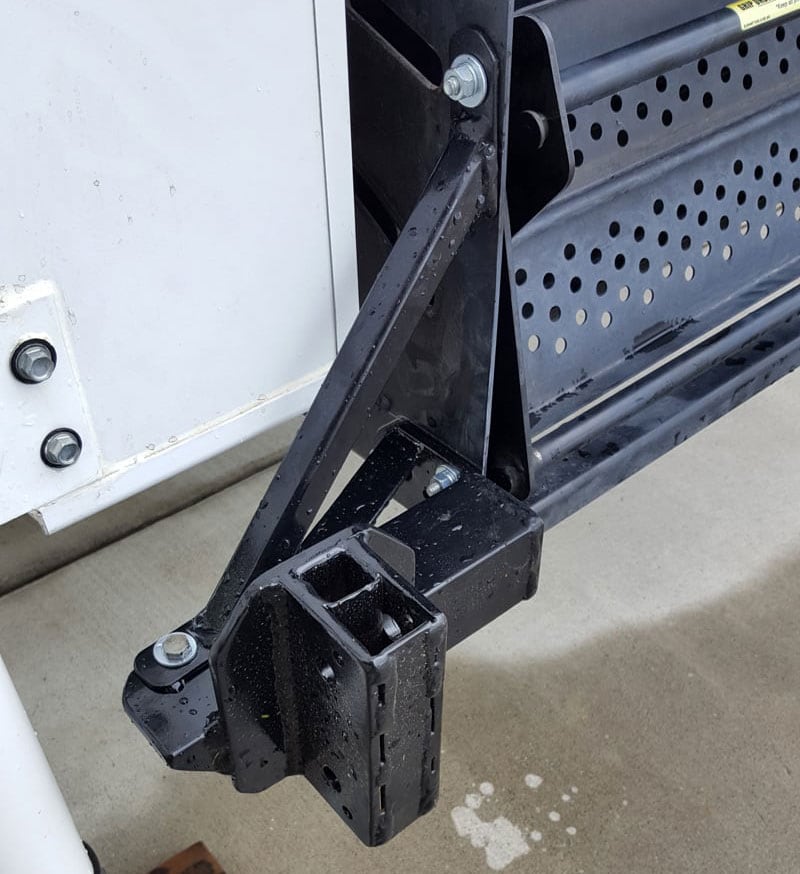
One modification that was added at this point was a quarter-inch thick steel strip to the inside of the side plates. The modification allows the bottom step to rest on the metal strip which then transfers that weight to the legs. Attachment bolts made from #10 stainless steel machine bolts. These were fabricated to hold the side plates in place.
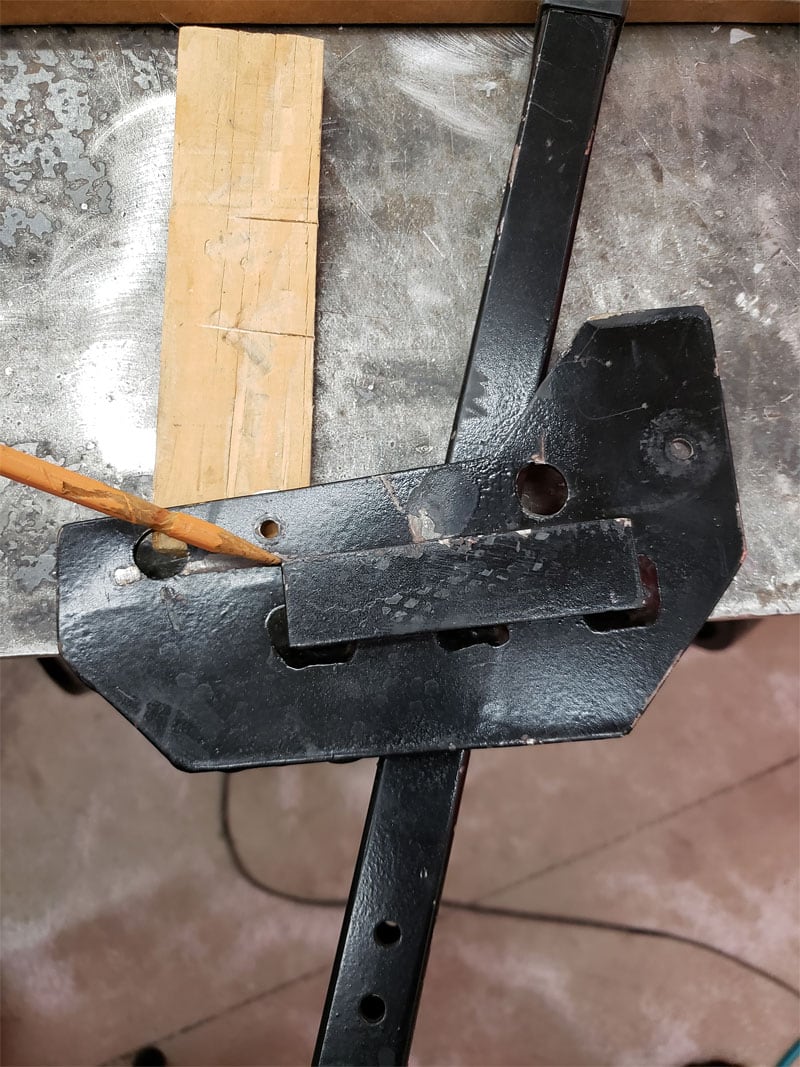
Above: The pencil is pointing to the quarter inch thick steel strip that’s mentioned above.
The attachment bolts use a quarter-inch diameter wing nut, which is TIG welded to the machine bolt, a #10 wing nut, and washers. The use of the smaller stainless steel bolts provide strength and adequate force to hold the plates in position without having to drill larger holes in the steps.
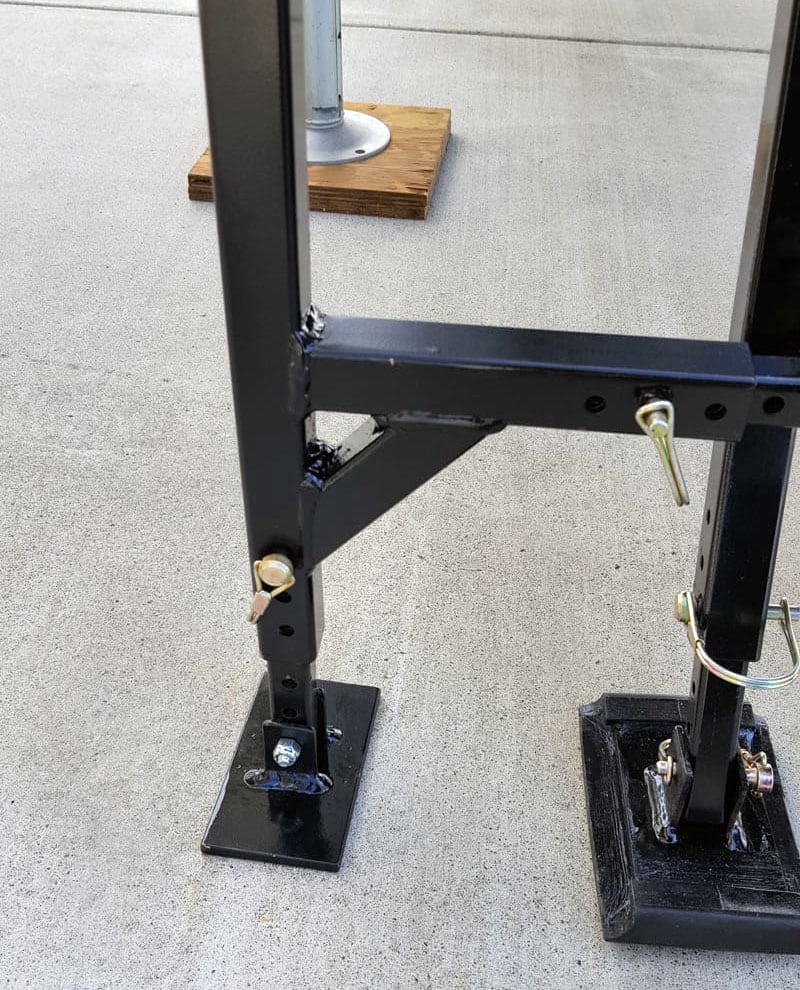
With the final pieces fabricated and fit, the entire leg and side plate components were MIG welded. Although designed to be used together, the leg assemblies can be used independently without the use of the handrail.
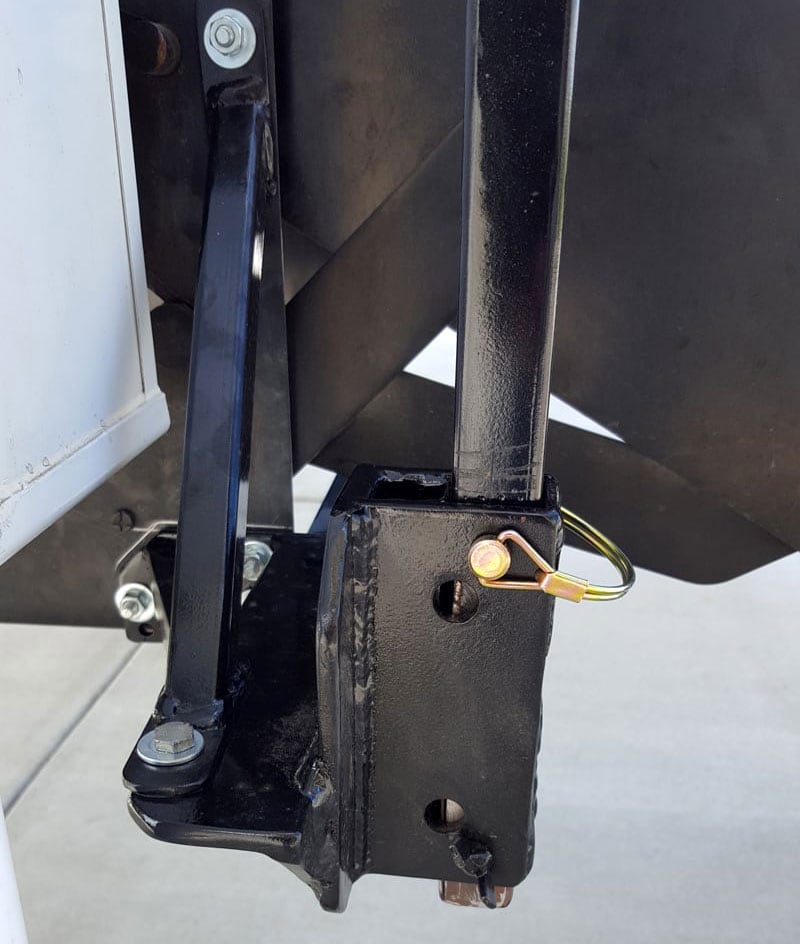
The handrail system is attached to the step’s side plate, then to a custom mount located at the base of the camper’s steps near the door. The mount furthest from the camper has an extendable leg to provide support to the ground.
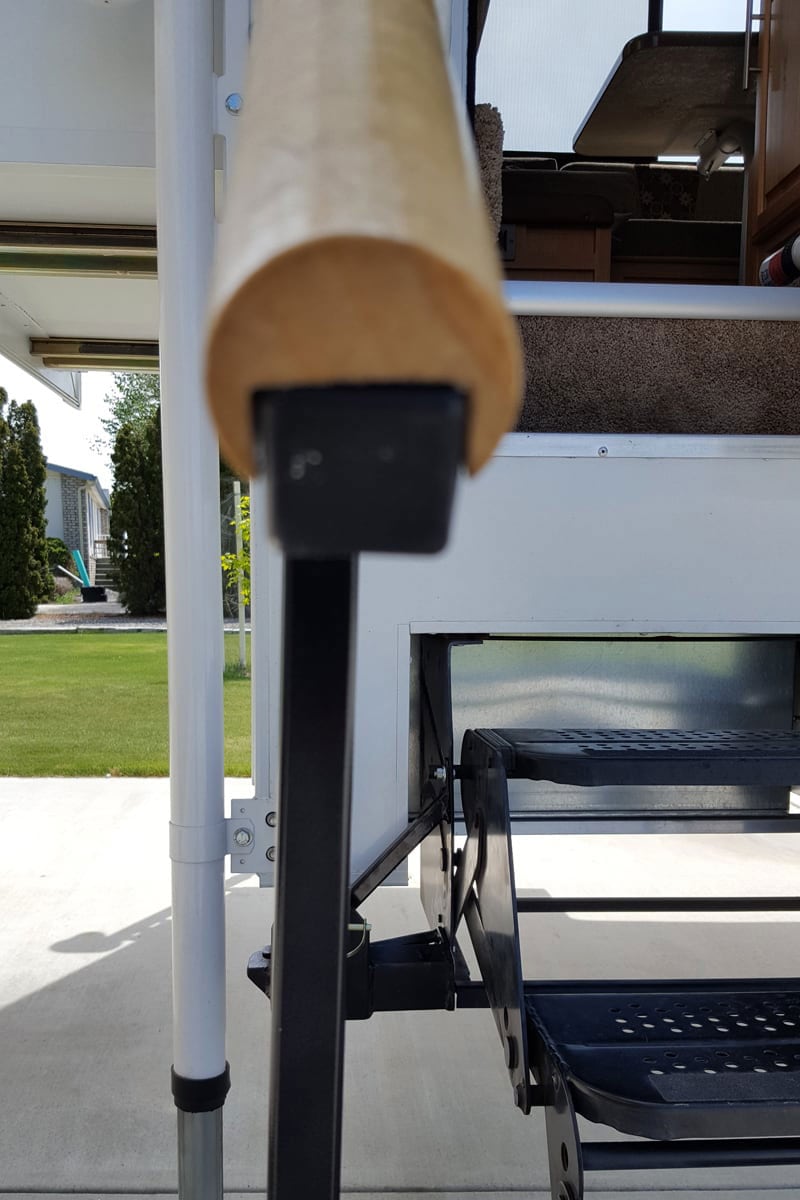
The design allows the handrail to be just far enough away from the steps to provide additional room for carrying items in or out of the camper while also not impeding the deployment of the awning.
At just over 36-inches from the top of each step to the handrail, the height feels natural, is cool to the touch, and is easy to grip, providing more than adequate support. The wooden top rail is made from 1.5-inch wood doweling that has been cut out with a dado blade and sized to fit the one-inch, .095 wall steel tubing. It is attached to the metal handrail with wood screws.
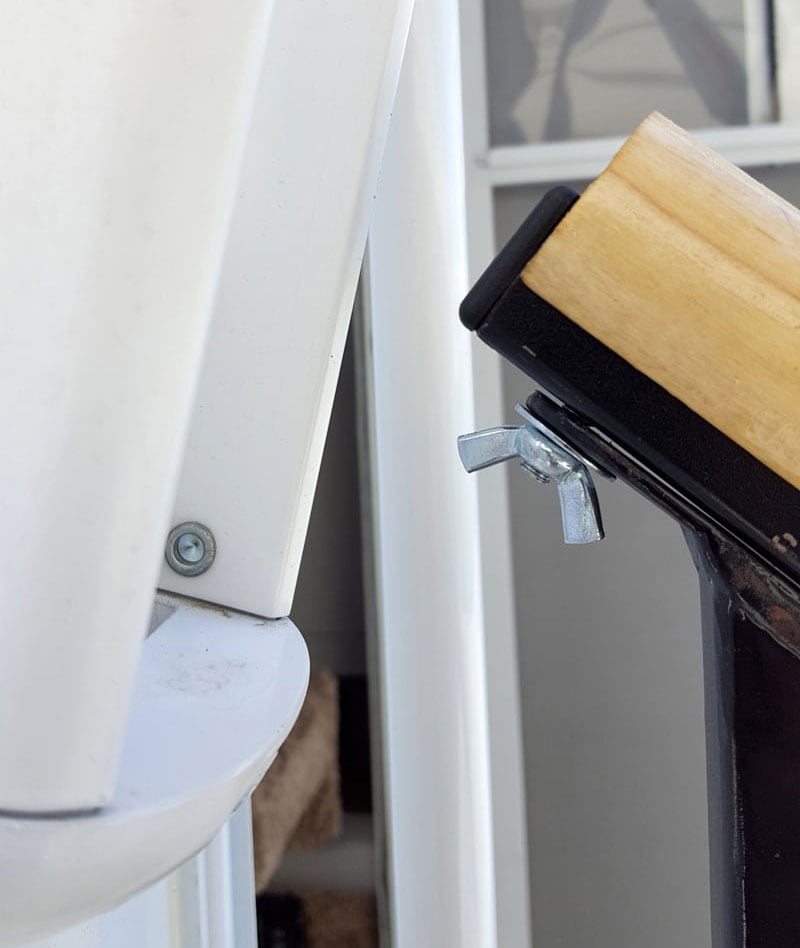
The handrail is attached to the vertical handrail posts with ¼-inch carriage bolts and wing nuts. The carriage bolts are hidden underneath the wooden handrail and epoxied into place.
After everything was welded, all of the metal parts were painted with a red rust preventative paint and then finished in glossy black. The wood was finished with a light stain and then covered with three coats of polyurethane.
This modification has exceeded my expectations. The springiness is completely gone and the legs give a very stable feel to the steps. The whole system assembles easily and quickly. Deploying and adjusting the legs or handrail ground brace, or changing the leg extensions for use when the camper is on the truck is simply a matter of moving the 1/4-inch pins from one hole to another.
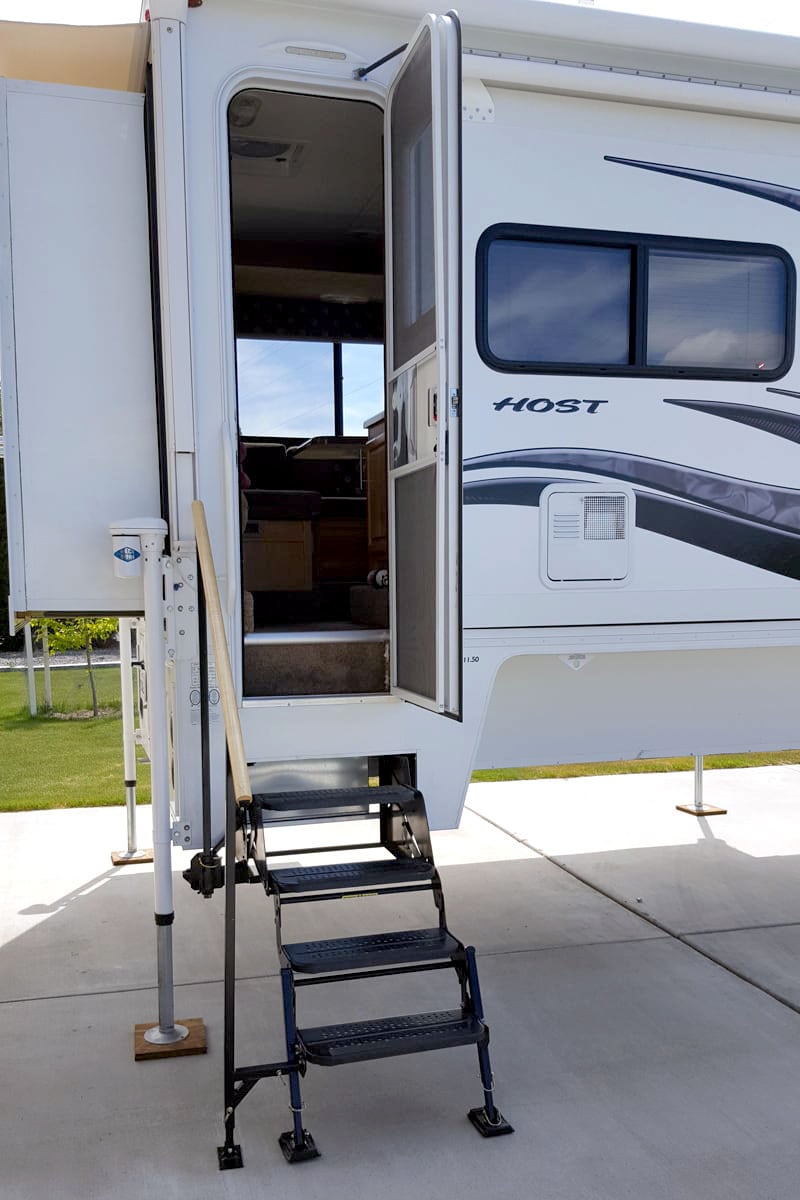
The handrail is very convenient and easy for both of us to use and it definitely increases the feeling of safety entering and exiting the camper. When the camper is on the truck, I can change out the shorter leg extensions for longer ones and the entire system can be used with the camper still on the truck. Additionally, the entire handrail and leg system can be taken apart with no tools and packed neatly away into the storage area of the camper.
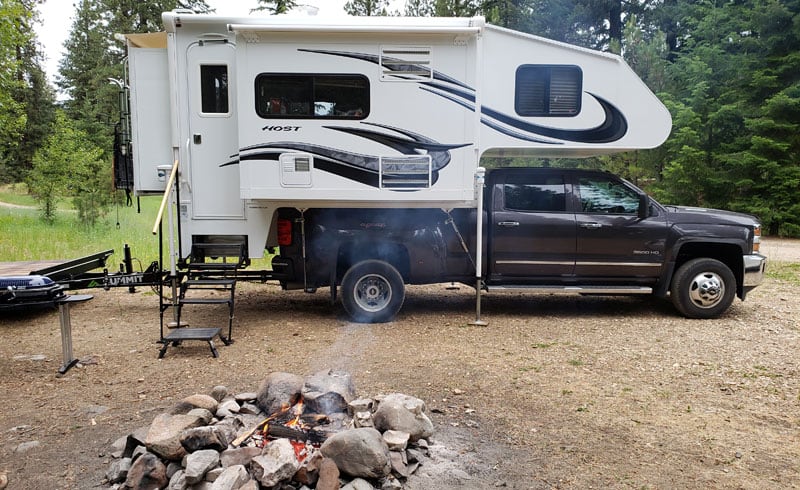
It took me 30 to 35 hours to complete this modification and cost me approximately $50. In my opinion, the skill level of this modification is extremely hard.
Disclaimer: The modifications above are submitted by Truck Camper Magazine readers. It is your responsibility to make sure that any do-it-yourself modification project you undertake is safe, effective, and legal for your situation.
Enter Your Mods Now!
Click here to enter a modification on your truck camper. You can enter as many mods as you want, at any time. Good luck mod makers!
