Welcome to the ninth entry in May’s Medium Mod-Ster Contest. One engaging Medium Mod will be published in every Email Alert in May. At the end of the month we’ll hold a reader vote to determine May’s winner. For information about the Mod-Ster Contest, including how to enter, click here.
David Romero, Shreveport, Louisiana
Shark Fin Sirius Antenna Relocation For Ram Trucks
2017 Ram 3500
2017 Cirrus 820
I have a 2017 Cirrus 820 that, like most campers, blocks the shark fin Sirius satellite radio antenna on the roof of the truck cab. I wanted to relocate the shark fin antenna when we travel with the camper. It needed the solution to be very quick, easy and easily reversible when not needed.
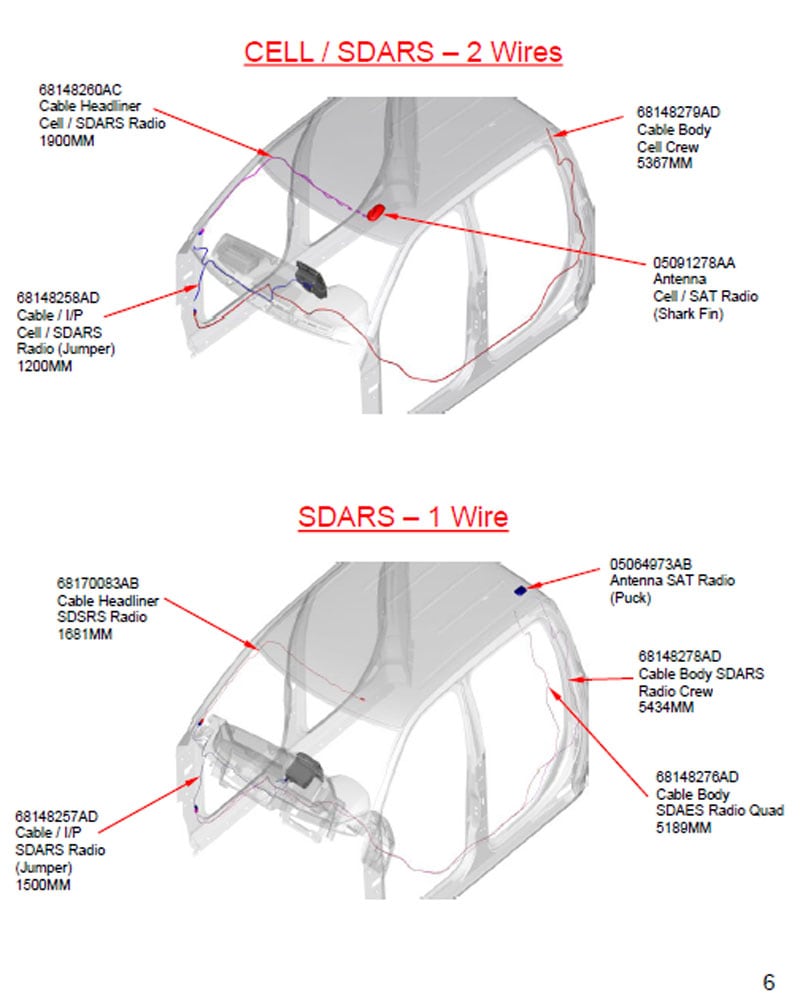
I purchased another roof top shark fin satellite radio antenna; a direct fit for my truck. I also purchased a 1900mm Cell/SDARS radio dual-cable from Mopar. In addition, I got a 12-inch by 12-inch by 5/8-inch white polycarbonate sheet from Amazon. I selected white because it matches my truck.
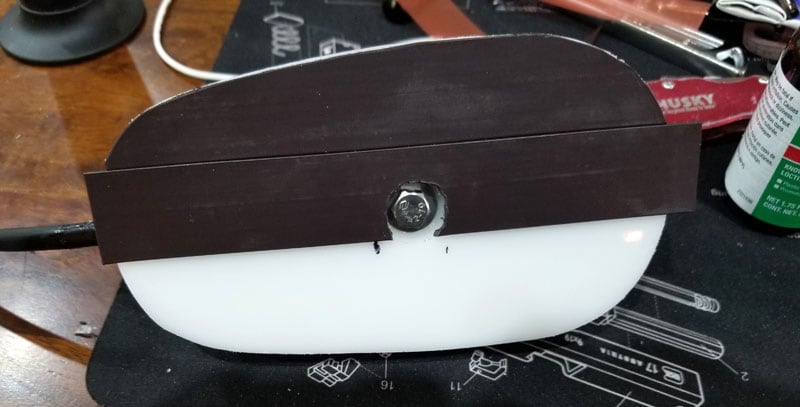
I went about cutting an oversized piece of the polycarbonate plate and centered a 3/4-inch hole with a Foster bit. I recessed the top side about 5/16-inch. With that completed, I could set the antenna on top of the plate and have the protruding bottom attachment point sit inside the hole.
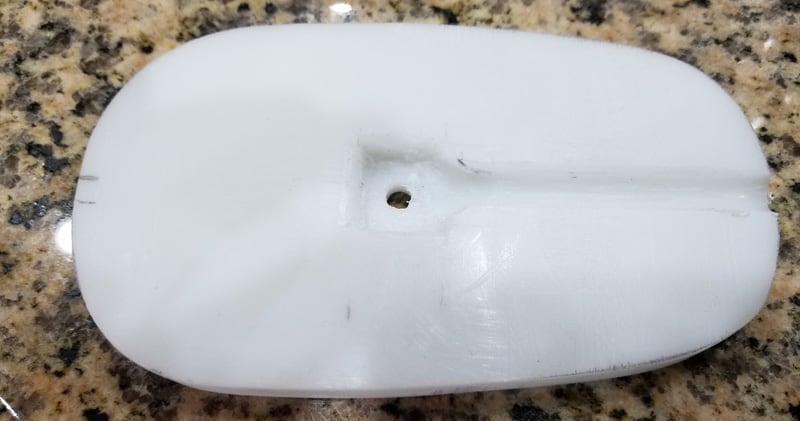
I used a sharp 1/4″ chisel to square the hole and let the mount part sit in the polycarbonate plate. I proceeded to run a groove from that square hole to the tail of the antenna that accommodates the antenna’s wiring under the antenna. That lets the wire lie flat.
Then I used a counter top belt sander on the top of the polycarbonate plate and added a slight curve from front to back to match the curve of the antenna. The goal was to have it lie completely flat.
On the underside of the polycarbonate plate I used the same Foster bit to recess into the bottom of the plate and accommodate the bolt head. That attaches the antenna to the plate about 1/8-inch, give or take a fraction. With the top and bottom of this plate recessed it left about 3/16-inch of plate to bolt the antenna down.
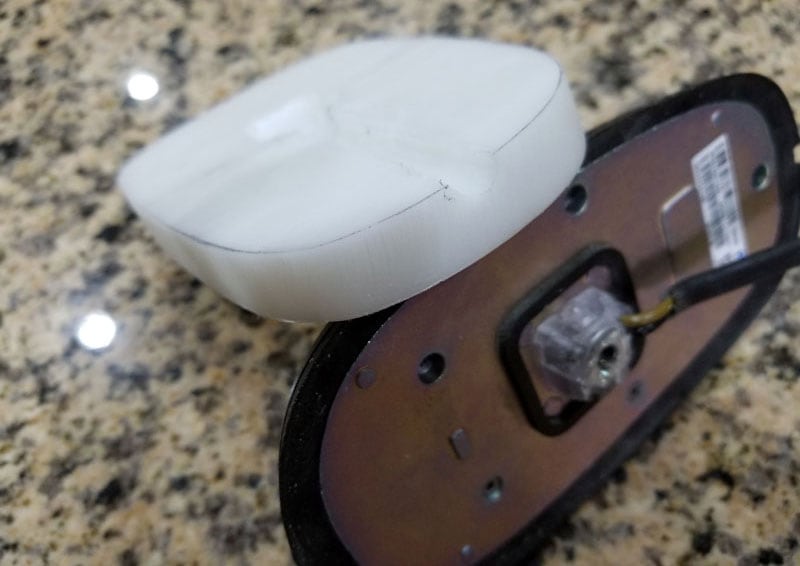
I attached the antenna to the polycarbonate plate using the supplied bolt to firmly attach the antenna. I then scribed around the antenna to mirror the shape to the plate.
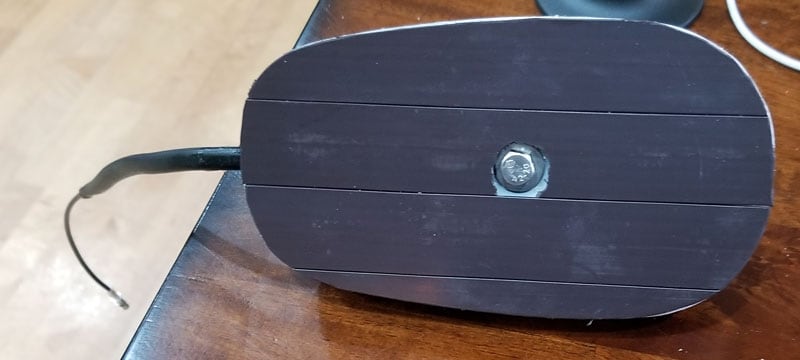
I removed the antenna from plate and used a band saw to trim the shape close to the antenna’s shape. Once that was close I was back to the belt sander cleaning up and smoothing out the shape.
Then I removed the connector ends of the wiring from the antenna and slid on a piece of marine-grade heat shrink. That will ensure no water penetration. The marine-grade heat shrink has a glue inside that actually filled the void in the area between the two wires.

I proceeded to attach the antenna to the plate with a bead of clear pure silicone. That was adhered to the outside edge and to the wire groove to block out any water or moister intrusion. I cleaned off access of silicone and let the items cure overnight to firmly attach and seal it.
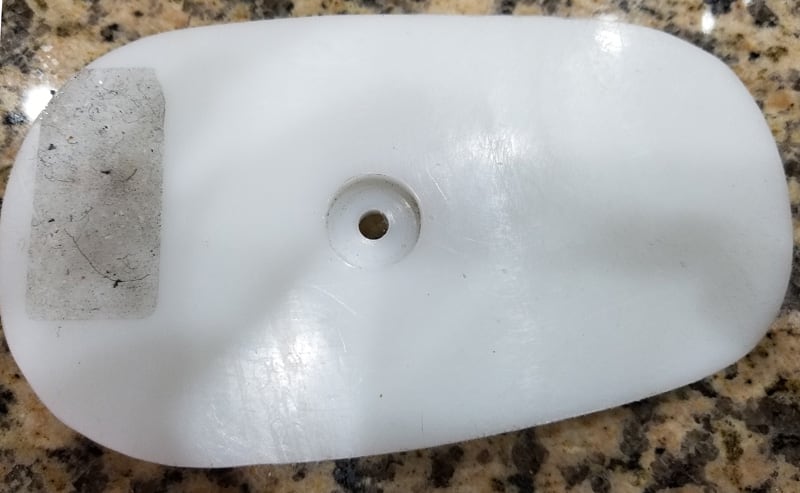
I proceeded to clean the bottom of the polycarbonate plate and prime it with a Loctite/Scotch plastic glue etch primer. 3M has one as well. I used single sided 3M self-adhesive magnetic tape to cover the bottom of the plate in 1-inch strips.
With a small wood roller I adhered the 3M magnetic tape to the plate. The primer let the tape adhere and almost fuse. It has a very strong bond after three or four hours. It’s trimmed to shape and it looks and feels great.
The extension cable was also an issue of how to keep together. I again removed the connectors off the 2-wire cable. Using another long piece of marine-grade heat shrink, I covered the cable.
This was a bit of a chore. The cable is over six-feet long. Pulling the wire cable through this six-foot long heat shrink with the glue on the inside was a challenge. I used a long steel TIG rod and ran it through the shrink wrap, taped the cable to it and worked the wire through the heat shrink. It worked with a little finessing.
In my Ram, the cable is behind the windshield’s pillar. It was close enough that I was able to pull the connection ends down to the inside of the dash just inside the passenger’s door.
The end plate of the dash pops off, so I am able to connect the antenna back and forth by just popping of the passenger’s side end plate. I ran the cable through under the hood and had plenty of cable. I removed the single ends of the extension cable.
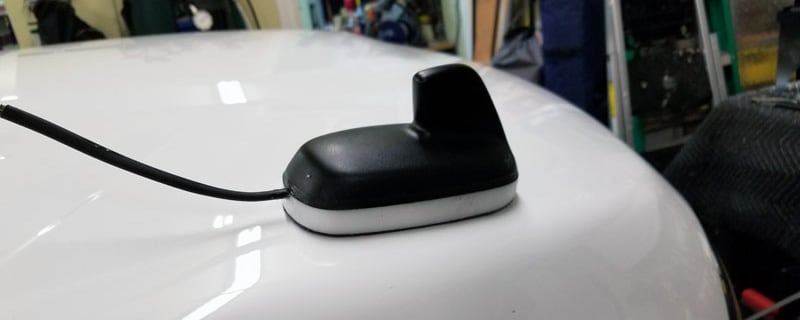
The antenna mount is very strong as long as you find a completely level flat spot on the hood. If there is any curve it tends to not adhere tightly and will move. My hood still has a metal skin, so it works well.
The antenna works great! I can now drive in any direction and still receive my XM Satellite Radio. It took me six hours to complete this modification and cost me about $100. In my opinion, the skill level of this modification is moderate.
Disclaimer: The modifications above are submitted by Truck Camper Magazine readers. It is your responsibility to make sure that any do-it-yourself modification project you undertake is safe, effective, and legal for your situation.
Enter Your Mods Now!
If you’d like to enter a modification you’ve done on your truck camper, click here. You can enter as many mods as you want, at any time. Good luck mod makers!


