Welcome to the sixth entry in August’s Medium Mod Contest. One Medium Mod will be published in every Email Alert in August. At the end of the month, we’ll hold a reader vote to determine August’s winner. Click here for information about the 2023 Mod Contest, including how to enter.
Steve Osburn, Poulsbo, Washington
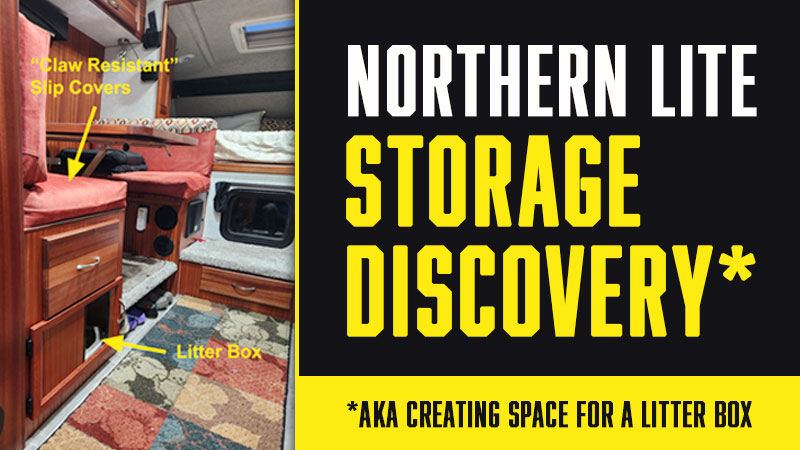
Northern Lite Storage Discovery
2019 Ford F-350
2023 Northern Lite 10-2 EX LE
This year we replaced our double-slide Lance 1172 camper with a new, non-slide Northern Lite 10-2 EX Limited Edition. As with any downsizing, figuring out where to put things is a challenge. One of the biggest challenges for those who take cats camping is finding a location for the litter box.
For those readers who don’t have cats, this mod might still be of interest because we’re essentially making space where there was none.
Litter box placement in our previous camper was easy. The shower floor was perfect. It was just the right size, and not in our way until we wanted to take showers. The only mod we needed to make in that camper was to cut a small door into the bottom of the bathroom door so that our cats, Mattie and Heidi, had access to the litter box even when the slide-outs were in. No such free space was available in our new camper.
Even before we bought the Northern Lite, we were looking for litter box options. If you travel with cats or want to travel with cats, you know how important this issue is.
If you put the litter box in the main aisle, you’ll be kicking it and having to step around it. Putting it under the table is a bit better, but you’ll still be kicking it, and you can only sit two people at the table. Plus, you lose storage space.
Even though we chose the dry bath model in the Northern Lite, the bathroom sink is in the shower, so putting the litter box in the shower would block access to the sink. That was not going to work for us.
The solution, we decided, was to make space. Before buying the camper, we went to an RV show and pulled out all the drawers in a Northern Lite, 10-2 EX and looked behind them to determine if there were any voids or large, unused areas.
Fortunately, we found not one, but two candidate spaces in the Northern Lite 10-2. One was under a dinette bench seat. The other under the closet, by the door.
We had other plans for the area under the closet, so focused on the dinette option. It was not ideal, but we could make it work. The area shares the furnace, so it has furnace ducting (including the main room furnace register outlet), and a generator transfer switch, all of which looked movable.
We took loads of photos of the cabinets, drawers and areas behind so I could get working on ideas. Then we bought the camper and waited two months to take delivery. By the time the camper arrived, I had a fairly solid plan for the mods I wanted to do.
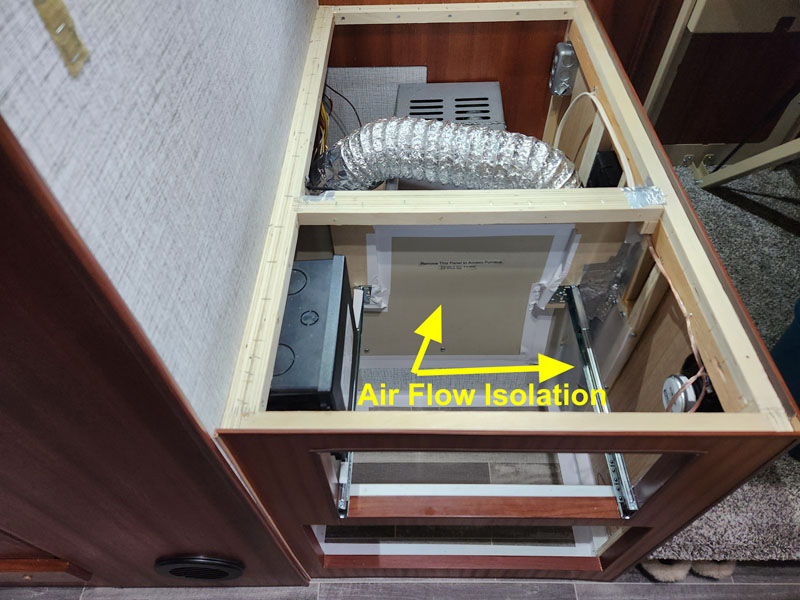
The area had about the right floor space, but the headroom was bit tight (okay for kittens and cats with short legs, but not normal cats). Another consideration (and this applies to dog owners too) is that pet fur and furnace sail switches do not get along well. And the furnace air intake is under the same seat, so we needed to isolate the cat litter box area from the furnace area. Another reason to isolate the two spaces, of course, is that after Heidi or Mattie have done their business, do you really want the furnace to distribute “that smell” throughout the camper? I think not…
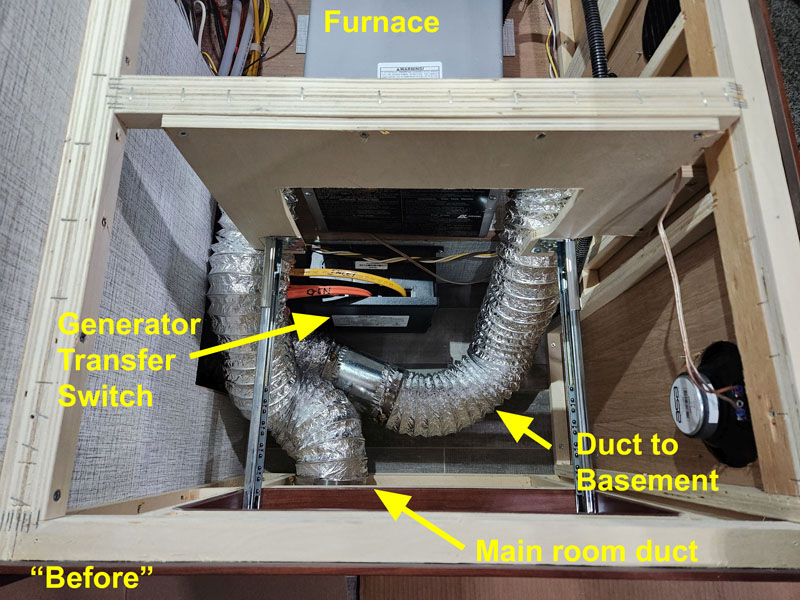
The first task was to move the furnace ducting. The main room register came out from under the seat, but there was available wall space just a foot away; under part of the shower.
Tip: It can be hard to see around corners and behind things, but if you put your phone in selfie mode, you can often hold the phone in such a way to get a good look around corners and into tight spaces. I did this to find out where to run the ducting and cut the new furnace air outlet.
The second (of two) ducts goes into the heated basement. I was able to reroute that over the top of the furnace, and away from the new space I was making. Consulting the furnace installation manual, I made sure to elevate the “over the top” ducting by an inch to keep it away from the furnace cabinet. I used 1-inch diameter aluminum tubes and screwed them into the top of the furnace case. Moving the generator transfer switch was fairly easy. I didn’t have to undo any wiring.
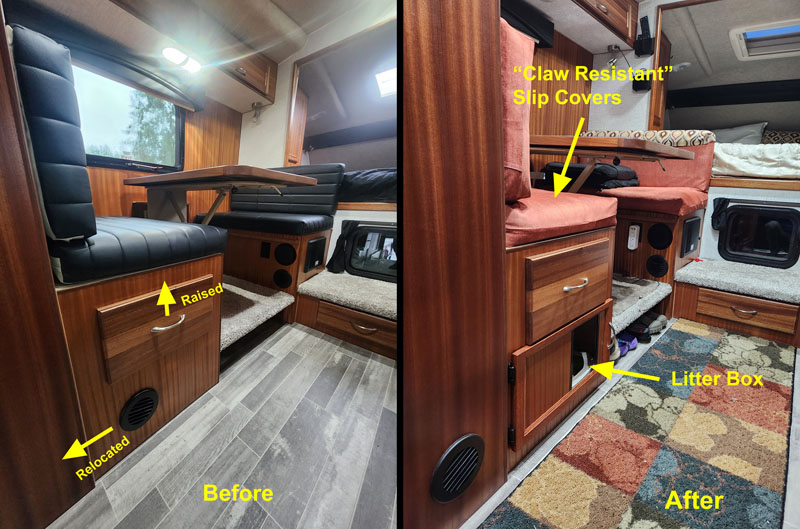
The big challenge, however, was headroom. The seat had a drawer in it, and I could have sacrificed the drawer to make plenty of headroom, but who wants to sacrifice a drawer? I realized that if I could move the drawer up by a couple of inches, I could save the drawer and create more headroom.
I used an oscillating saw to do most of my cuts. It makes a clean edge, and I was able to use the dinette bench framing as a guide (I cut the main access hole from the inside out, rather than from the outside in, allowing me to run the saw along the frame member). The oscillating saw is not good for corners, so I transitioned to a hand saw for the final few inches of each cut.
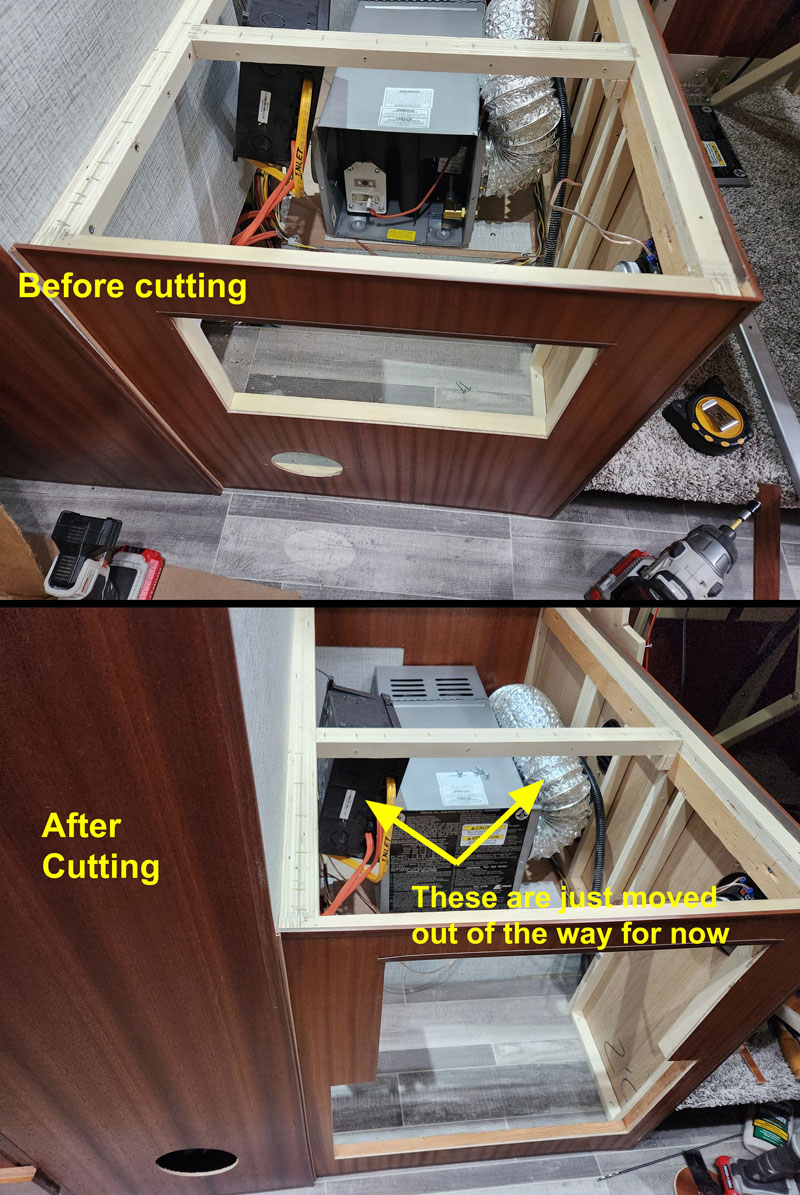
Now for the drawer. The drawer has a framing member both above and below it. The one above was not structurally significant, but the one below was. By carefully removing the lower framing member, I could reuse the same framing and the same exterior paneling and slide them up by about 2 inches. Then, to regain the structural strength of the original bench framing, I used copious amounts of wood glue to better adhere the paneling to the original framing, and screwed an aluminum bracket to the back of the framing member that I moved.
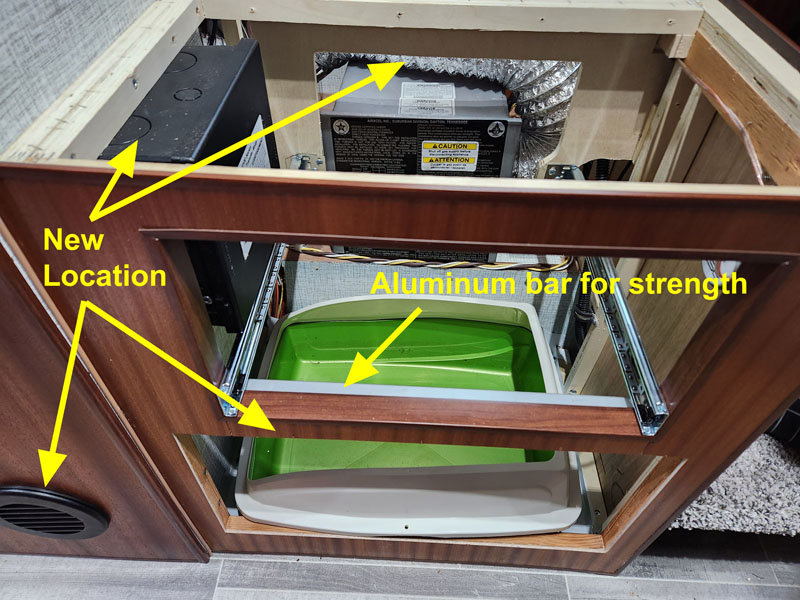
The extra two inches I gained gives the cats enough headroom, and I could just re-mount the same drawer 2-inches higher in the same cabinet. That drawer is now where the cat food and other cat supplies are stored.
Now for the furnace. I didn’t want to build something without considering how the furnace will be accessed in case of problems (e.g., the sail switch). Much to my disappointment, Suburban furnaces are not designed well for easy maintenance, and you can only access the sail switch by removing the furnace. Clearly, whoever designed the furnace doesn’t own an RV.
I needed to ensure any modifications were easy to remove for furnace access or removal. Moving the drawer was not a problem, but blocking off the furnace compartment had to be done with removable panels. For the main panel in front of the furnace, I chose a sheet of aluminum, especially since that area (about an inch from the furnace) might get warm.
For most of the rest of the panels, I used thin, disposable, plastic cutting boards (I found a multi-pack on Amazon), and thought – what better way to keep air movement isolated from the furnace than thin, bendable plastic sheets? All panels are secured with half-inch-long screws, making them simple to remove. To further seal the gaps, I used duct tape.
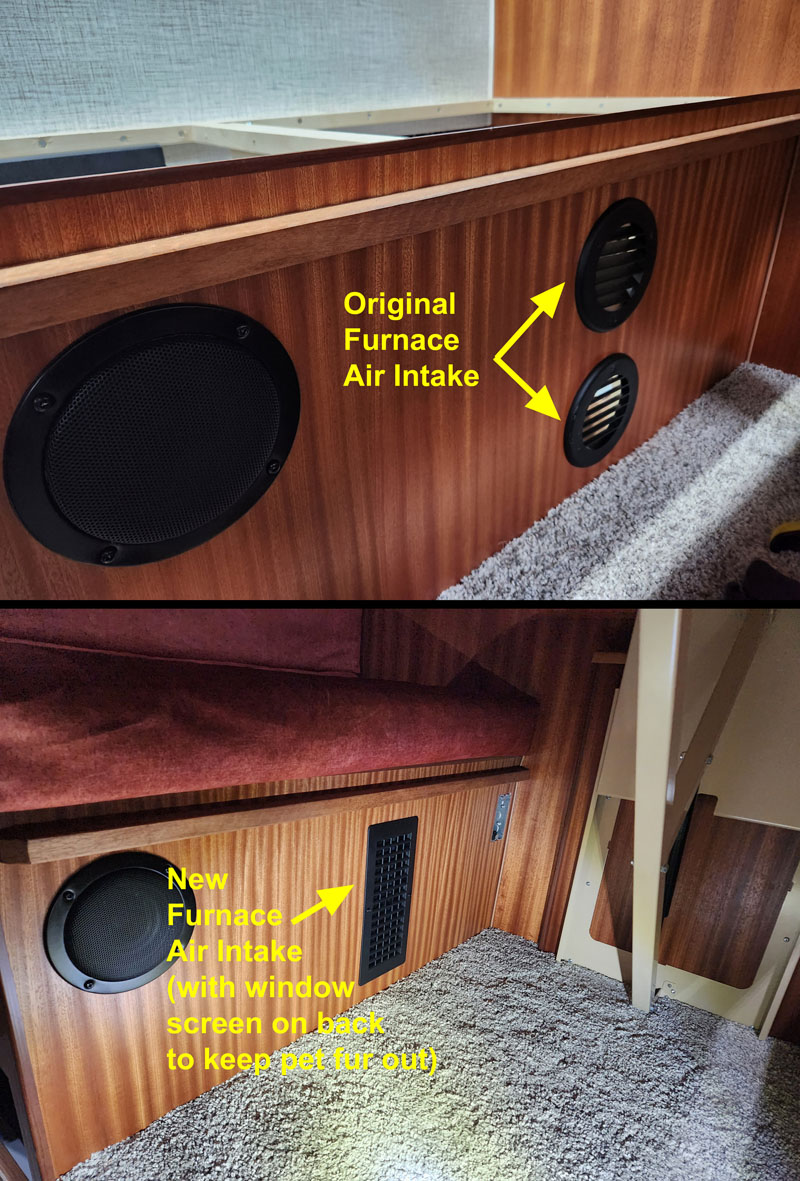
One other furnace thought, and this applies to dog owners too, is that the furnace air intake is under the same seat. So, even though it isn’t in the new cat box area, it needs to be protected from pet fur. The original design was two, round, 4-inch pass-through vents but, to protect the vents from sucking in pet hair, they need something like a window screen behind them. Adding a window screen by itself will reduce airflow, which could cause the furnace to work harder. When adding a screen, it’s also wise to increase the size of the opening. I replaced the 4-inch round vents with a rectangular 4-inch by 10-inch furnace register and then put a window screen on the back of that.
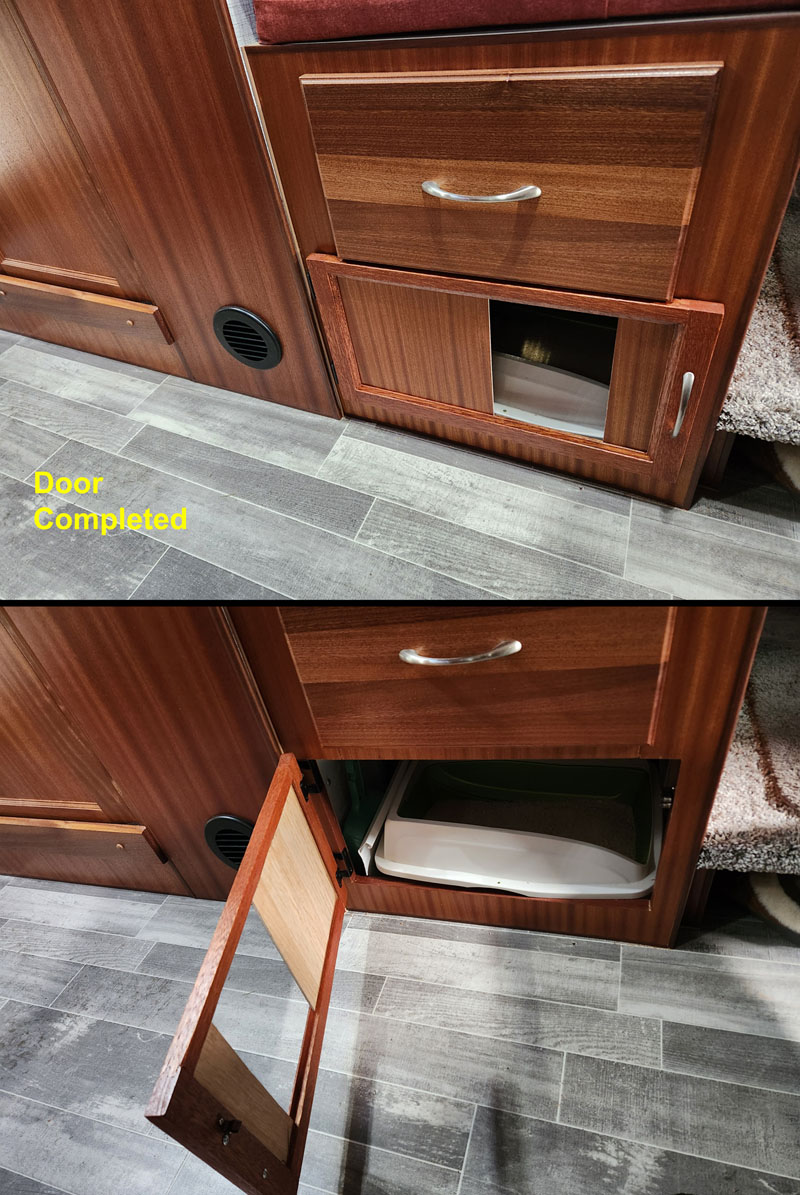
Lastly, cosmetics. I have a usable cat litter box area, but I’ve got a brand-new camper with a hole under the seat. I found some decorative plastic edge molding to put around the door frame. It’s not an exact match to other molding the Northern Lite came with, but it’s close.
As mentioned earlier, I cut out the paneling main entry with an oscillating saw. That piece I cut out is the foundation for a new cabinet door. Because that piece of paneling originally had a furnace duct in it, that’s where the cat door ended up. This is also why the door isn’t centered on the cat box.
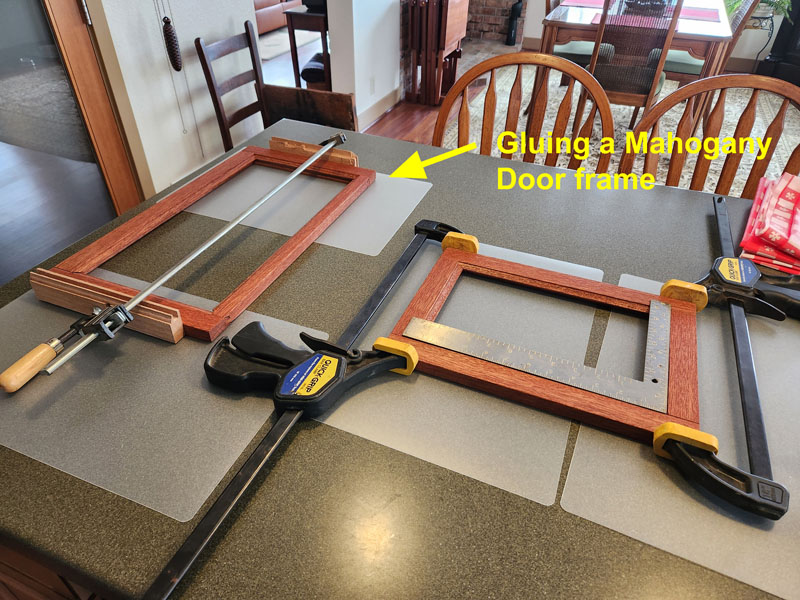
To make a cabinet door frame, I used a piece of mahogany board, ripped it to the size I needed, and routed it into a door frame. It looks almost like it belongs there now!
Note: The cabinetry in the Northern Lite campers is Sapele wood. which is beautiful, but not easy to find. I did some research and found that “Mahogany is the poor man’s Sapele”, and Mahogany is not hard to find. I actually had some in my shop.

While I was doing the woodworking and constructing, Nancy (my better half) was sewing together slipcovers for the dinette seats. Vinyl-covered cushions look great, but they seem to be great scratching posts as well. After Heidi “customized” the vinyl on our previous camper, Nancy came up with upholstery fabric that was less likely to be punctured or torn. Then she created slip covers that fit over the original seat cushions. Nothing appears to be Heidi-proof, but these seem to fare a whole lot better than the vinyl in our Lance. So far, so good!
In the end, this project took some time (about a week), but it was the first, and arguably, the most important mod to our new camper. Even the Lithium battery conversion was secondary to this. We now have a dedicated cat litter box area that seems to work really well and is completely out of the people space.
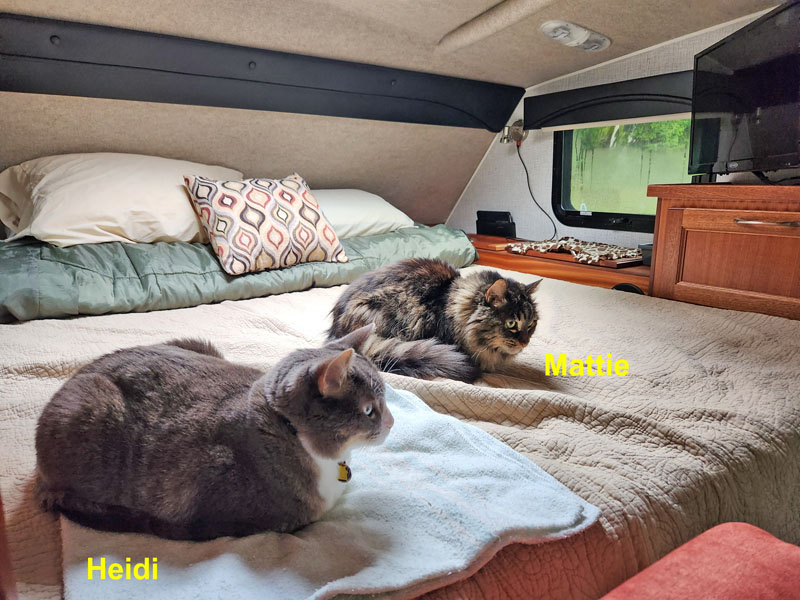
The cats – well, they’re cats – so it’s hard to tell if they really care, but they seem to use the new litter box just fine. Even without the cat aspect, we created space where there was none, so that would have been a win for anyone trying to solve a space constraint.
I used fewer parts than you would think. I was able to reuse all of the furnace ducting without having to add any more. I re-used all the paneling that I cut out but had to add a Mahogany board for the door framing (which I already had).
I bought some PVC edge banding trim (Amazon, $20 for a roll of 25-feet, of which I used about 4-feet). A 20-pack of plastic cutting boards or table mats was purchased on Amazon for $14. Plastic 4×10-inch floor register (for furnace air inlet) was also on Amazon for $8.
Cabinet door hinges were at Home Depot for about $6 for the pair, plus another $2 for the door catch. The door handle was bought at Home Depot for about $4. I did buy some router bits for making the door frame, but those are tools versus supplies, so I won’t count that. We already had the cat litter box, and I already had the various supplies including duct tape and screws. All in all, it was less than $80.
It took me about one week to complete this modification and cost me less than $80. In my opinion, the skill level of this modification is medium.
Disclaimer: The modifications above are submitted by Truck Camper Magazine readers. It is your responsibility to make sure that any do-it-yourself modification project you undertake is safe, effective, and legal for your situation.
Enter Your Mods Now!
If you’d like to enter a modification you’ve done on your truck camper, click here. You can enter as many mods as you want, at any time. Good luck mod makers!


