Welcome to the eighth entry in October’s Medium Mod Contest. One Medium Mod will be published in every Email Alert in October. At the end of the month, we’ll hold a reader vote to determine October’s winner. Click here for information about the 2023 Mod Contest, including how to enter.
Rick Tyler, Bellingham, Washington
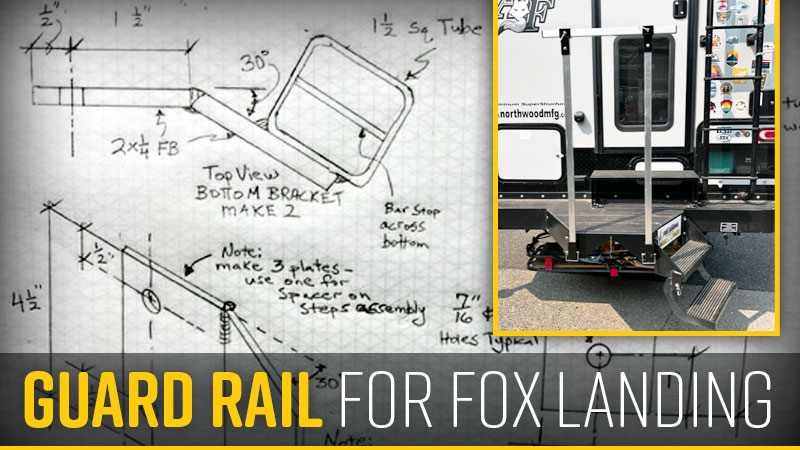
Guard Rail For Fox Landing
2019 GMC 3500
2019 Arctic Fox
My Arctic Fox truck camper features a Fox Landing. To give us something else to hold on to when getting in and out of the camper, we wanted a guard rail.
The guard rail needed to be something that could be quick and easy to install or take down for travel. I settled on permanently mounted bottom brackets and removable 1-1/4-inch square aluminum pieces.
There were existing holes with threaded 5/16-inch inserts on both sides of the Fox Landing, so no drilling of the original equipment is needed.
The top and bottom brackets are made from steel 1-1/2-inch square tubing and act like receivers, with the 1-1/4-inch aluminum tubes sliding through.
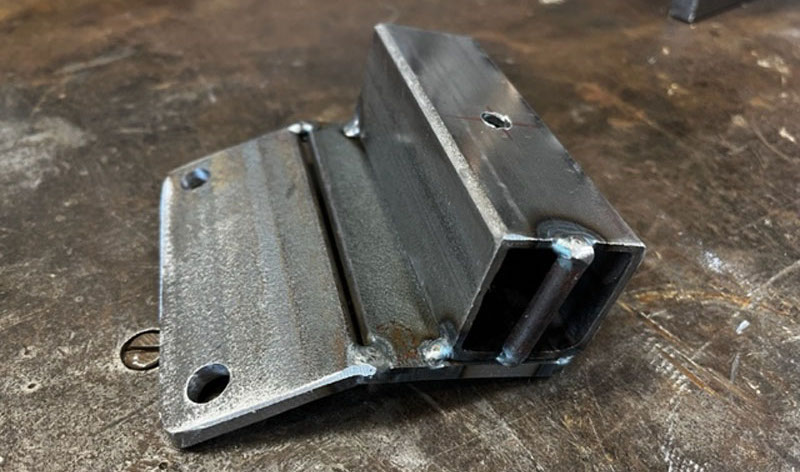
I made the bottom brackets from two pieces of 2 x 1/4-inch steel flat bar welded together at a 30-degree angle. It was just easier for me to do it this way instead of bending a single plate. The tubing is 1-1/2-inch square .120 wall.
Be sure to get the material that has square corners. Some tubing has rounded corners and the aluminum 1-1/4-inch tube won’t fit correctly.
Shown in the photo is a piece of 1/4-inch round bar welded to the bottom as a stop. I had to grind the internal weld out of the 1-1/2-inch steel tube so the aluminum would slide through.
I tack-welded the parts and tried them out for fit and alignment before final welding and painting. The only difference between the two bottom brackets is the stop weld on the bottom is different between left and right.
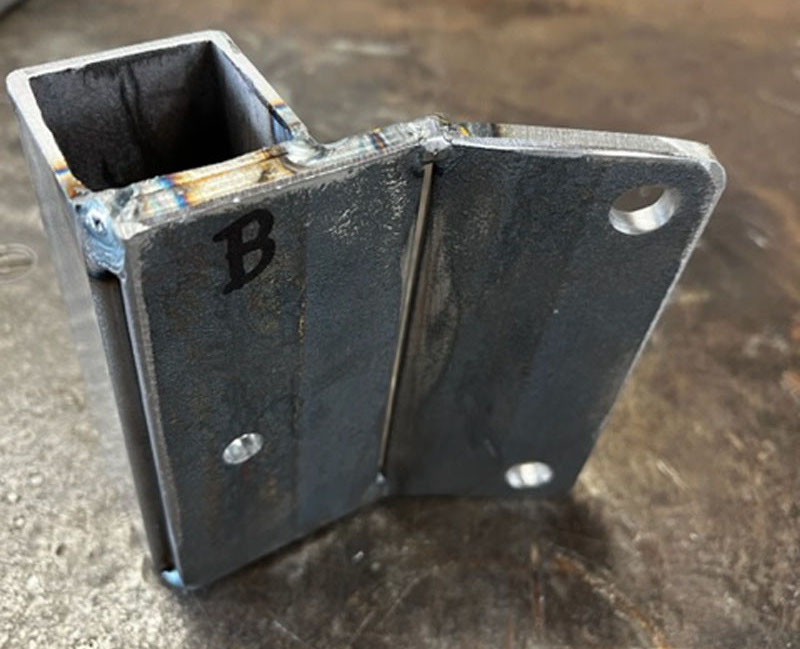
The mounting holes are 7/16-inch and the PTO pin holes are 5/16-inch for a 1/4-inch pin.
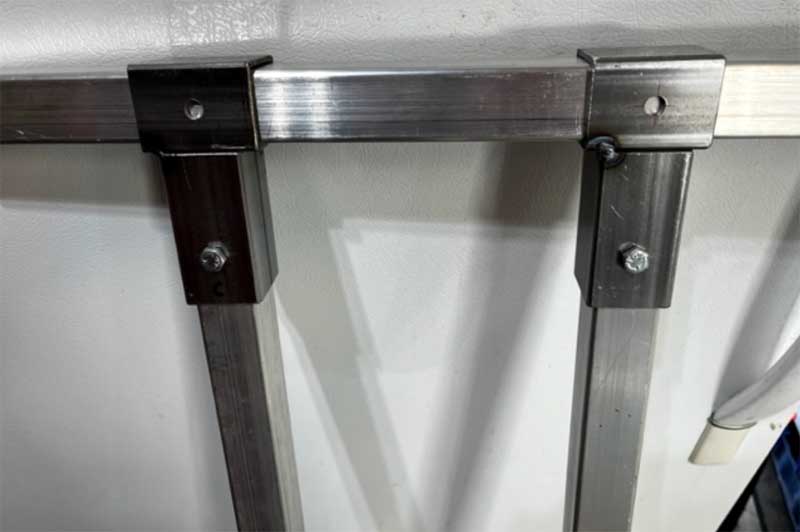
The top brackets are made from the same 1-1/2-inch square tubing. The bolts and lock nuts shown are permanent and stay with the posts when the system is broken down for travel. The other holes are for the PTO pins. Final welding and paint are not complete in the photo above.
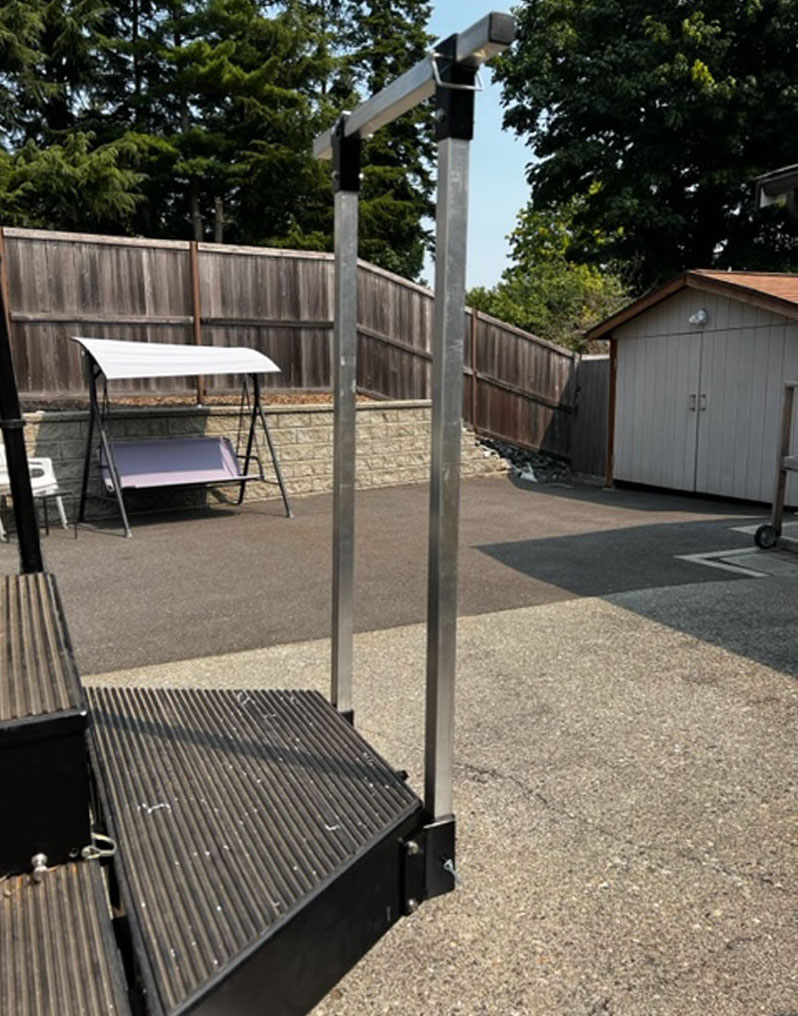
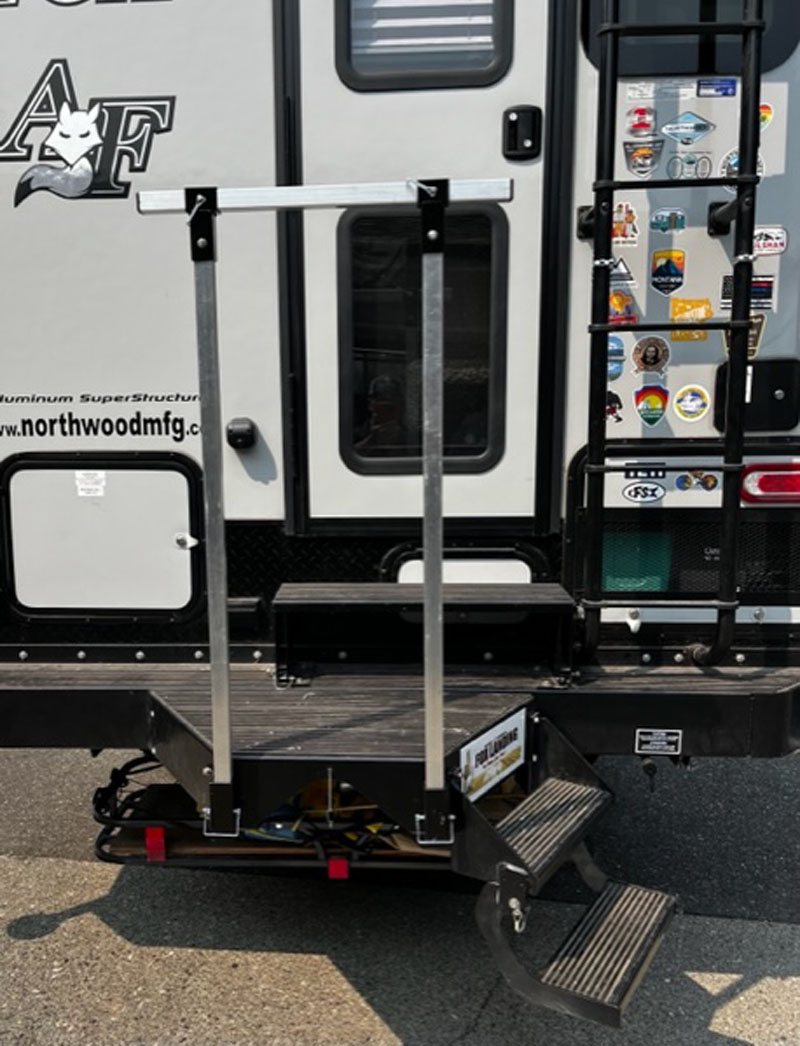
The aluminum tubing is 1-1/4-inch square tube that’s .120 wall. You have to get the kind with rounded corners so it will fit inside the brackets. I put plastic end caps on the top rail as a nice touch. The posts were cut to 44-inches and the top rail is 24-inches long.
The bottom brackets and posts were installed and left loose. Then the top rail was slipped into the top brackets. Everything was adjusted until the top rail slid in smoothly and everything looked good. Then the 5/16-inch bolts at the bottom brackets were tightened.
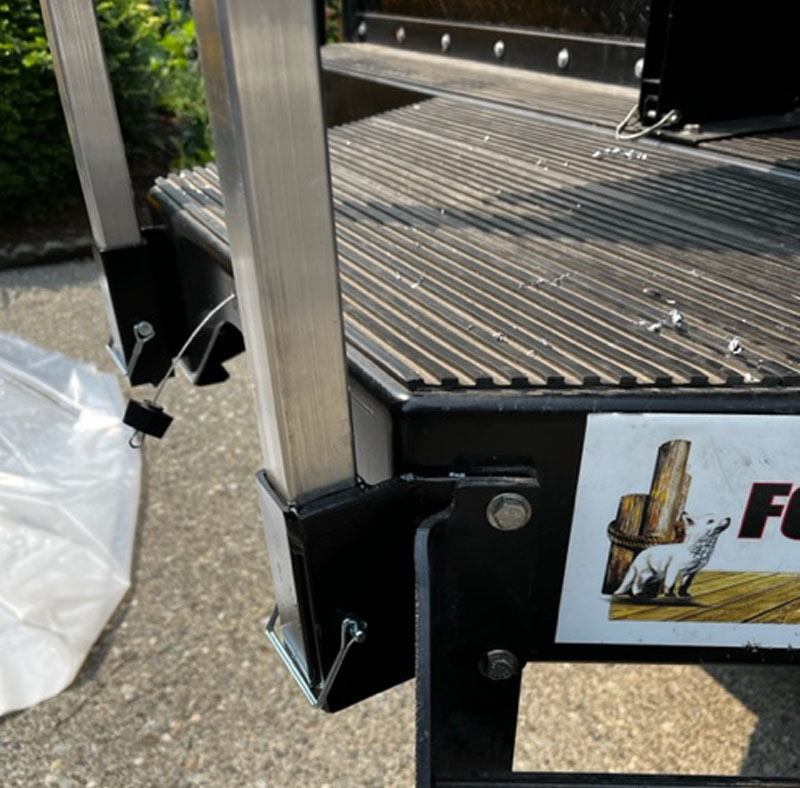
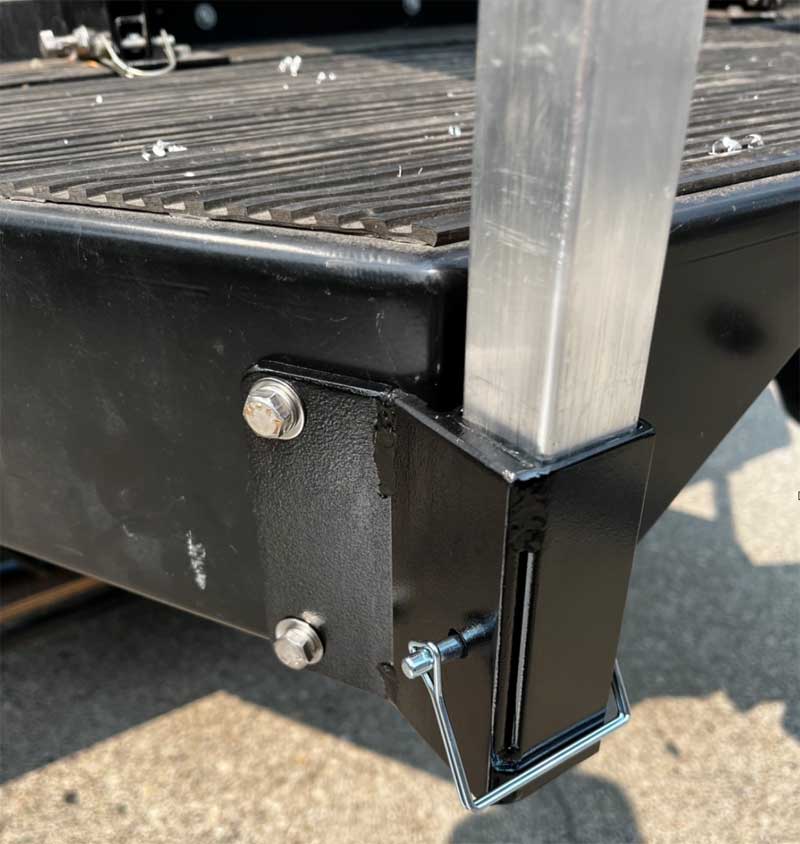
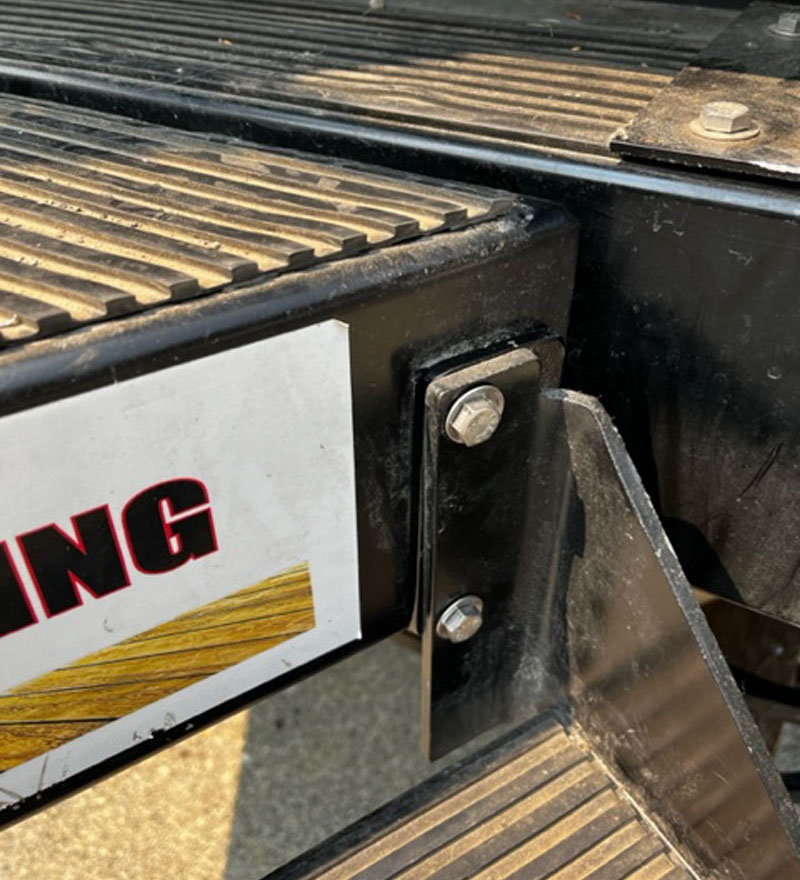
The bottom bracket is installed between the step assembly and the landing with the original 5/16-inch bolts. The post is fastened with PTO pins at the top and bottom when in use. This way the guardrail can be disassembled into three pieces for easy storage. The bottom brackets are permanently attached.
A spacer is installed on the other side of the step assembly.
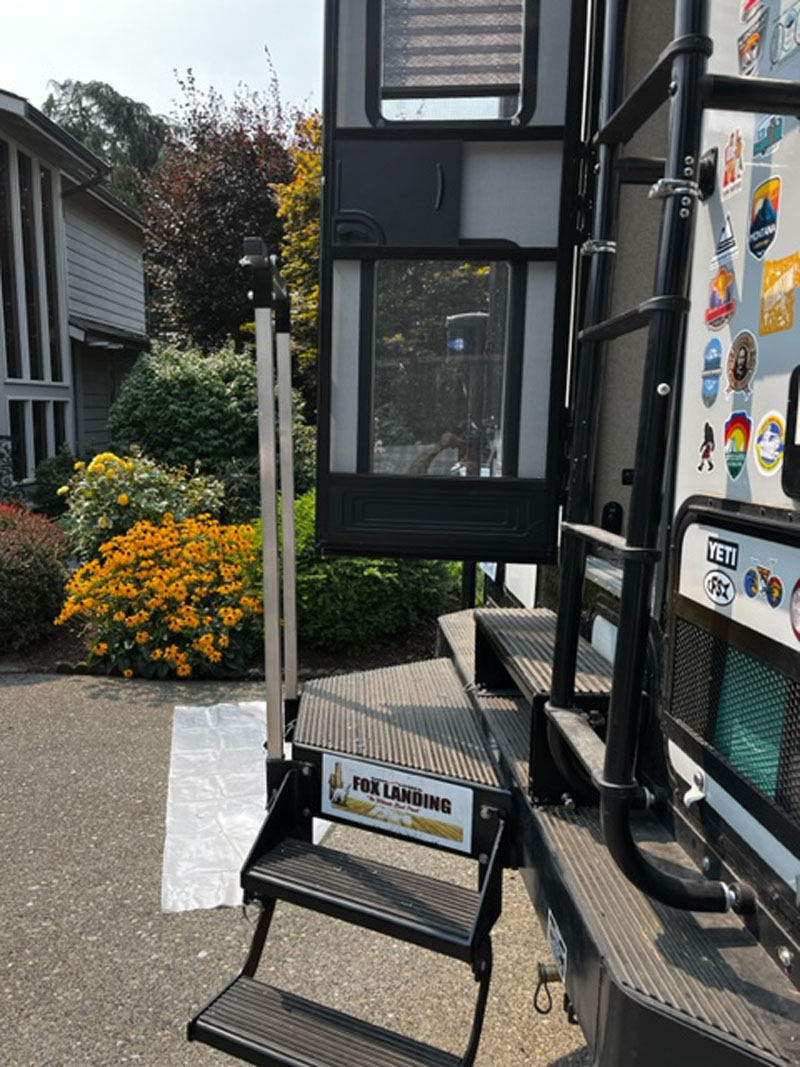
There is enough room for the door to open. Usually, there is a small portable step stool below the bottom step because it is so high.
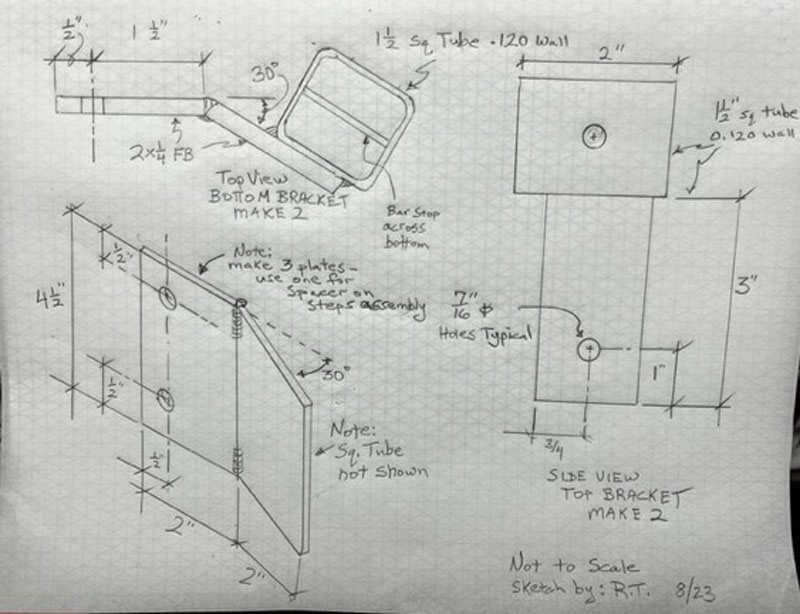
Above is a picture of my fabrication sketch. It may be helpful if you decide to make your own. The finished product works very well. The added security is very much needed in my opinion.
It works great! The parts when disassembled stow easily. It is very sturdy.
Materials Used:
2″ x 1/4″ steel flat bar 4-1/2″ long. 5 pieces
1-1/2′ steel square tube, .120′ wall thickness. See the drawing above for lengths.
1-1/4′ aluminum square tube, .120 ” wall, (rounded corners) 2 pieces 44″ long, 1 piece 24″ long
Four ¼” PTO pins
Two 5/16” x 1-1/4” SS bolts and washers
Two plastic 1-1/4” square plastic caps
It took me 10 hours to complete this modification and cost me $75. In my opinion, the skill level of this modification is medium if you have access to welding equipment.
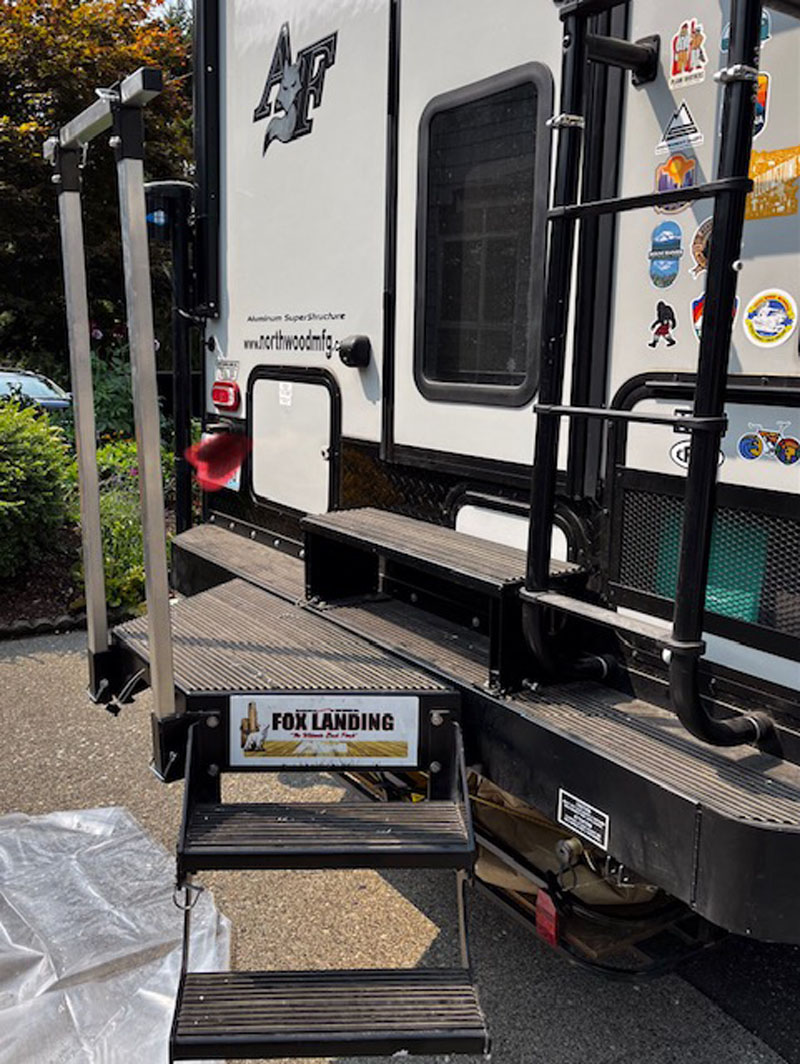
We hope that this will help out people like us who like a little extra security getting in and out of our camper. We searched the internet and didn’t find anything useful to use for the Fox Landing, so we came up with this. Safe travels!
Disclaimer: The modifications above are submitted by Truck Camper Magazine readers. It is your responsibility to make sure that any do-it-yourself modification project you undertake is safe, effective, and legal for your situation.
Enter Your Mods Now!
If you’d like to enter a modification you’ve done on your truck camper, click here. You can enter as many mods as you want, at any time. Good luck mod makers!


