Welcome to the second entry in June’s Mini Mod-Ster Contest. One marvelous Mini-Mod will be published in every Email Alert in June. At the end of the month we’ll hold a reader vote to determine June’s winner. For information about the Mod-Ster Contest, including how to enter, click here.
Eric Beatty, Peyton, Colorado
Frustration Free Fuse Block
1996 Ford F350
2005 Lance 1181
After a dark cold evening trying to figure out why my Dad’s camper batteries wouldn’t charge, I found the issue to be a blown fuse. No big deal, right? Just pop in a new one and everything should be fine.
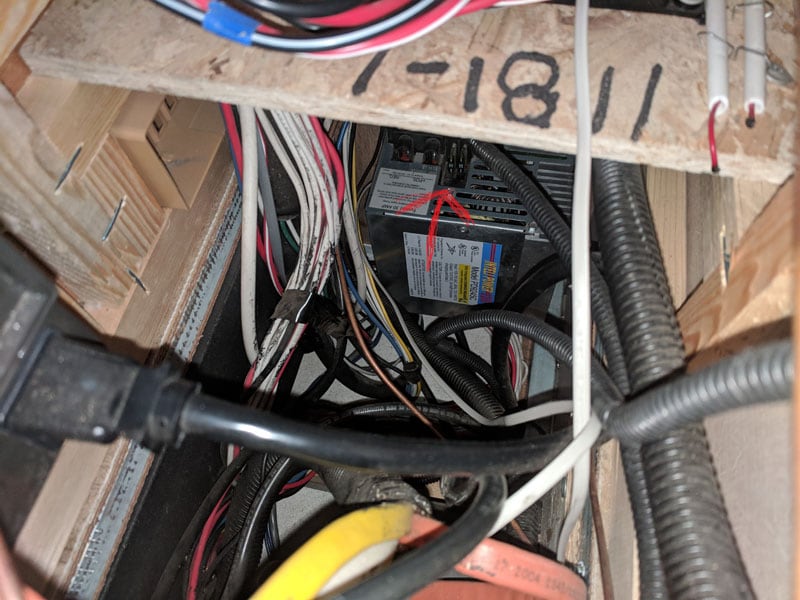
The fuse in question was on the power converter that was conveniently located deep in a hole under a step. It was in a location that you can see, but not reach.

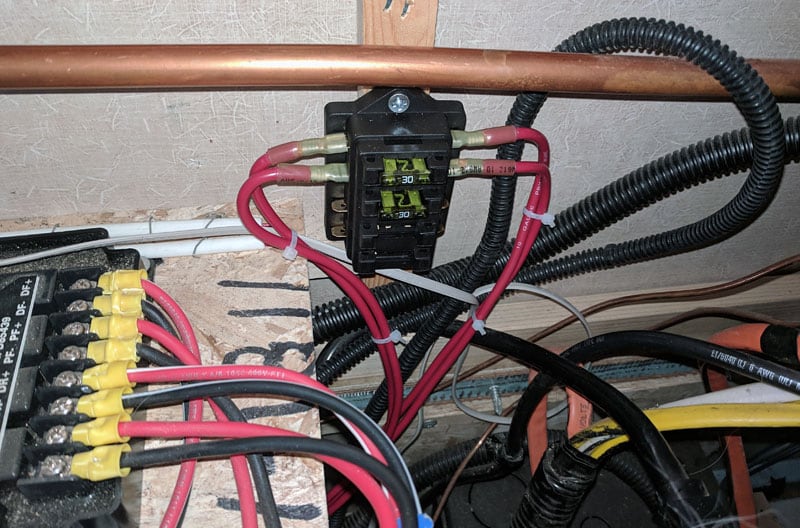
After struggling for an hour to blindly replace the fuse I decided that there must be a better way. With a simple fuse extension block, I can relocate hidden or hard to get to fuses to an easy to see and replace location. By mayhem’s rules I will never blow one of those fuses ever again.

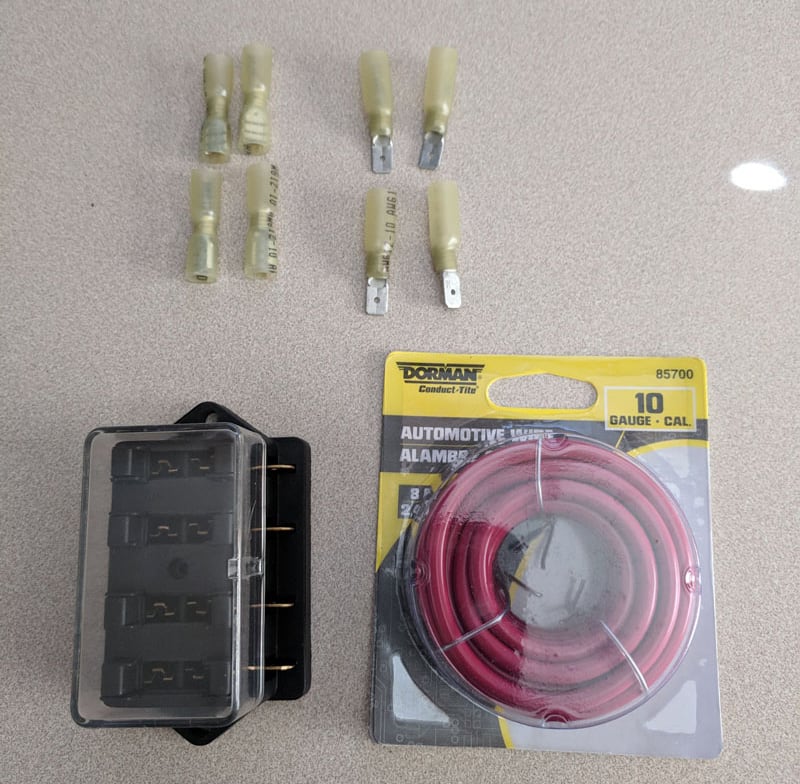
The parts needed (to change the two 30-amp fuses in question) include four heat shrink male spade connectors, four heat shrink female spade connectors, 10-gauge wire, and one straight-through fuse block. For a fuse block, the Artgear 4-way is easily sourced from Amazon.
Step 1: Disconnect the camper from shore power. Remove the positive battery connections to make sure that there is no power in the camper before starting work.
Step 2: Locate the new fuse block in an easy to reach location. Then measure for the length of wire you will need to get from the original fuse location to the new fuse block.
Step 3: Place a male connector on one end and a female on the other. Shrink the heat shrink and repeat for however many fuses you are relocating. There will be two wires for each fuse.
Plug a male end into each side of the original fuse posts in the original location. Then place the female end to one side of the new fuse block. There will be one for the left side of the fuse and one for the right side.
Make sure that you do not mix up wires from different fuse locations. I suggest that you do one fuse at a time to avoid mixing up the wires. Repeat with the next line so that both sides of the original fuse location have a terminal.
Step 4: Once you have completed all of the wiring, place the fuses in the new fuse block and label appropriately. Use zip ties or other wire management devices to make sure that your work looks superior to the basketful of snakes done at the factory.
Reconnect the batteries and test your work. Then enjoy the peace of mind that if one of the fuses goes out it will really be a quick and easy replacement.

This has been a great mod that I have now installed into several friends’ campers. It seems that Lance isn’t the only manufacturer to hide fuses.
It took me one hour to complete this modification and cost me less then $20. In my opinion, the skill level of this modification is easy. If you can change a fuse then you can do this mod.
Disclaimer: The modifications above are submitted by Truck Camper Magazine readers. It is your responsibility to make sure that any do-it-yourself modification project you undertake is safe, effective, and legal for your situation.
Enter Your Mods Now!
If you’d like to enter a modification you’ve done on your truck camper, click here. You can enter as many mods as you want, at any time. Good luck mod makers!
