Welcome to the fourth entry in November’s Medium Mod Contest. One Medium Mod will be published in every Email Alert in November. At the end of the month, we’ll hold a reader vote to determine November’s winner. Click here for information about the 2023 Mod Contest, including how to enter.
Donald Fox, Chesapeake, Virginia
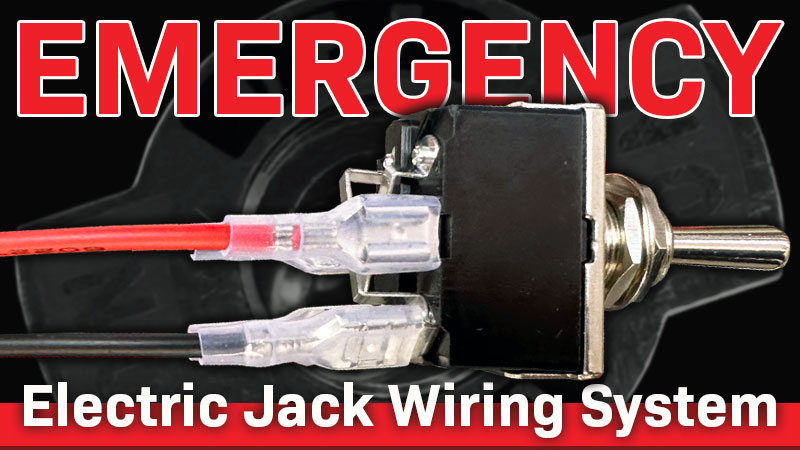
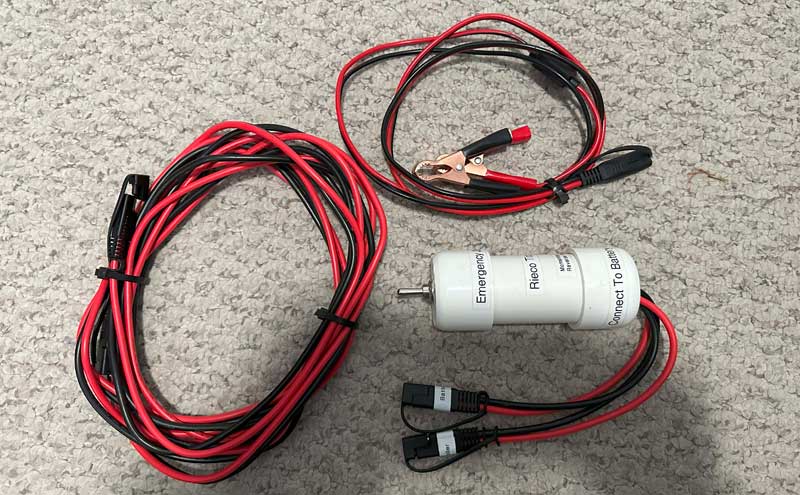
Emergency Electric Jack Wiring System
2015 Ford F-450
2018 Arctic Fox 990
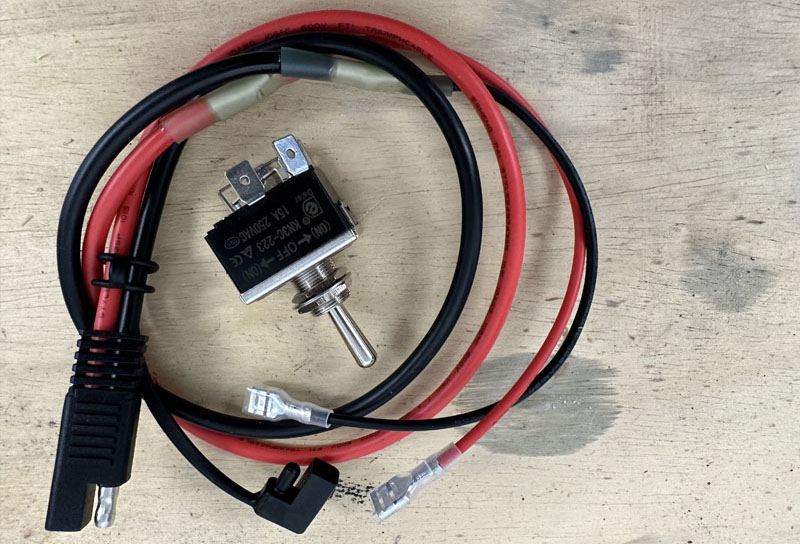
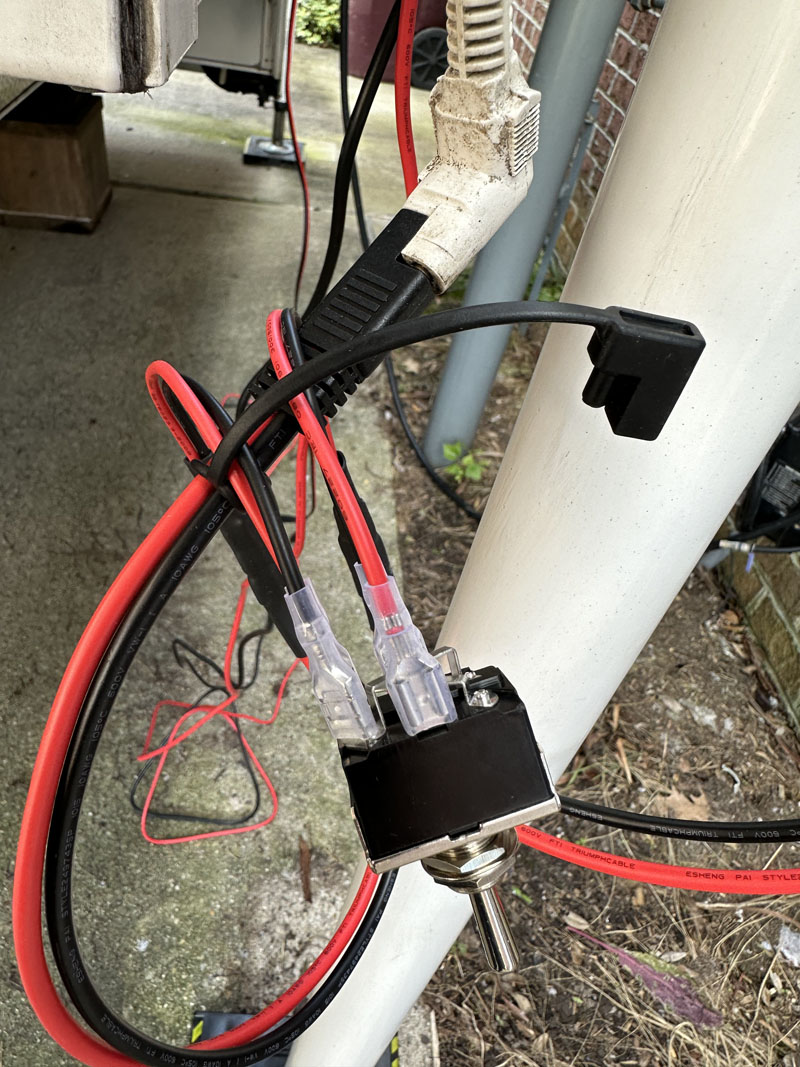
If you blow a fuse and your camper jacks will not function, this emergency jack four-pin switch will allow you to operate your jacks up and down; one at a time.
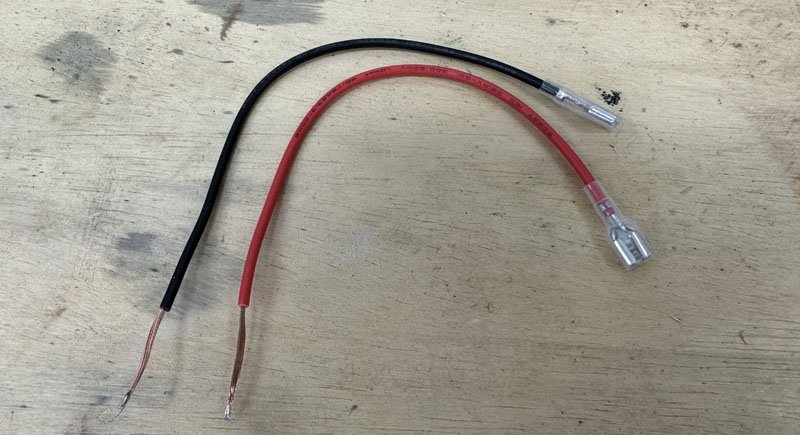
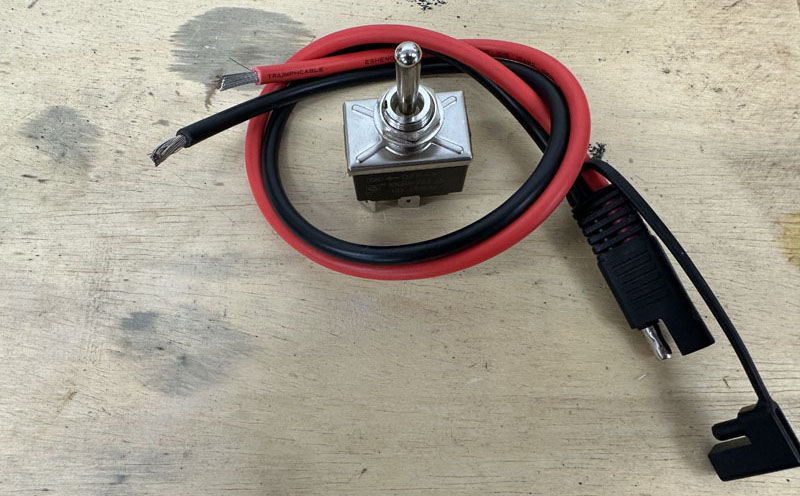
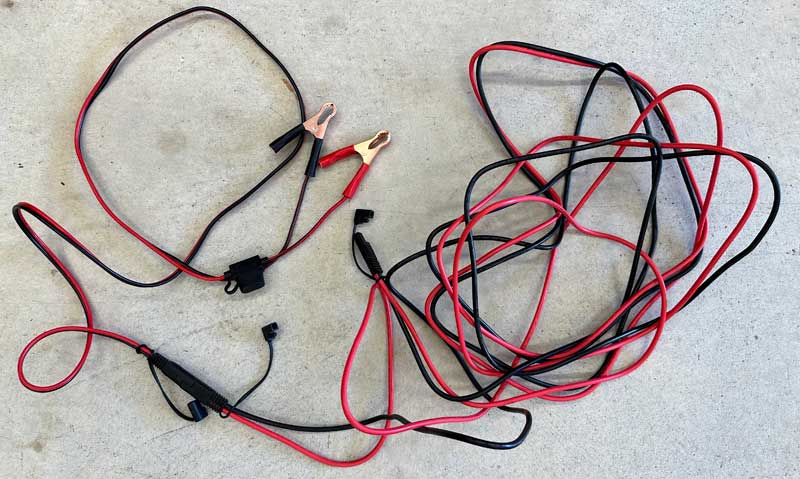
The Mankk 4 Pin switch comes with short wire and connectors. I did not use these provided connectors. I took one three foot SAE Disconnect wire and cut it in half. This provided me with the four end wires needed to connect to the female disconnects.
I connected the red to red and black to black using the watertight heat-shrink butt connectors. Because the provided wire was thinner than the SAE wire, I cut the thin wire sheathing twice as long as needed. Then I bent the wire to help make it thicker and thus able to be compressed within the butt connectors.
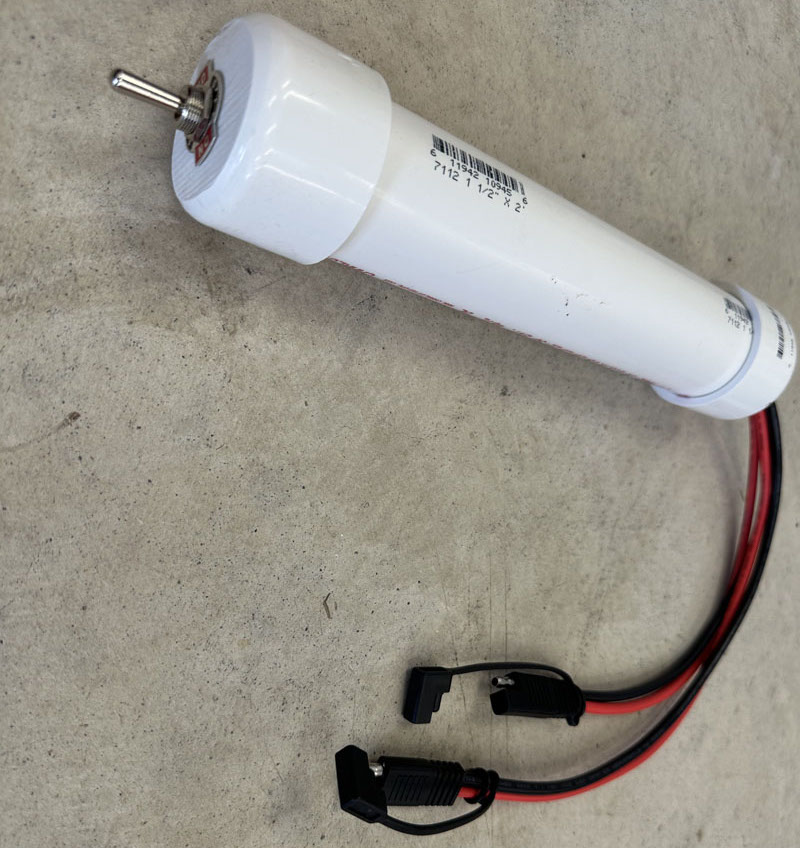
The PVC tube needs to be about 4-inches long because I wanted all of the female connectors to be housed within the PVC as added protection.
I drilled a half-inch hole into each of the PVC end connectors (centered). Before inserting the wire through the end connector, I added a rubber grommet to protect the wire. I took the bottom drilled end connector and fed the wire through the grommet and then through the end connector.
I cut off half of the thickness of the end connectors allowing the threaded 4-pin switch to have room to add the on-off-on cover, washer, and nut to go over the 4-pin switch and tighten.
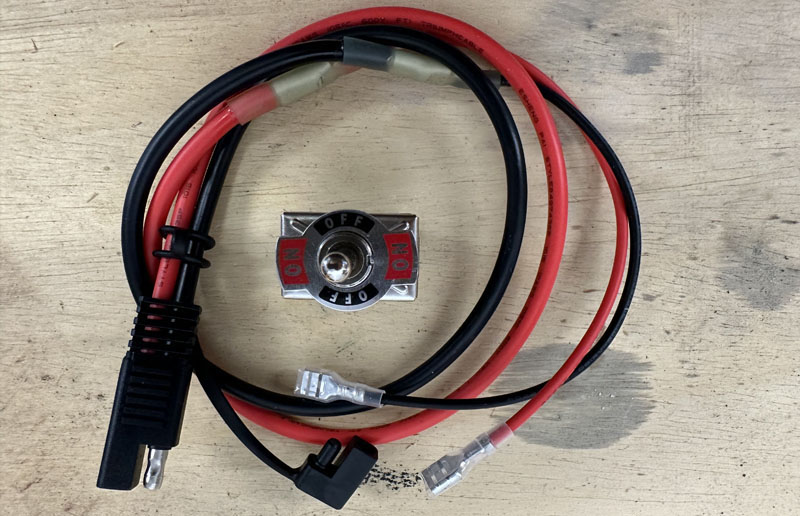
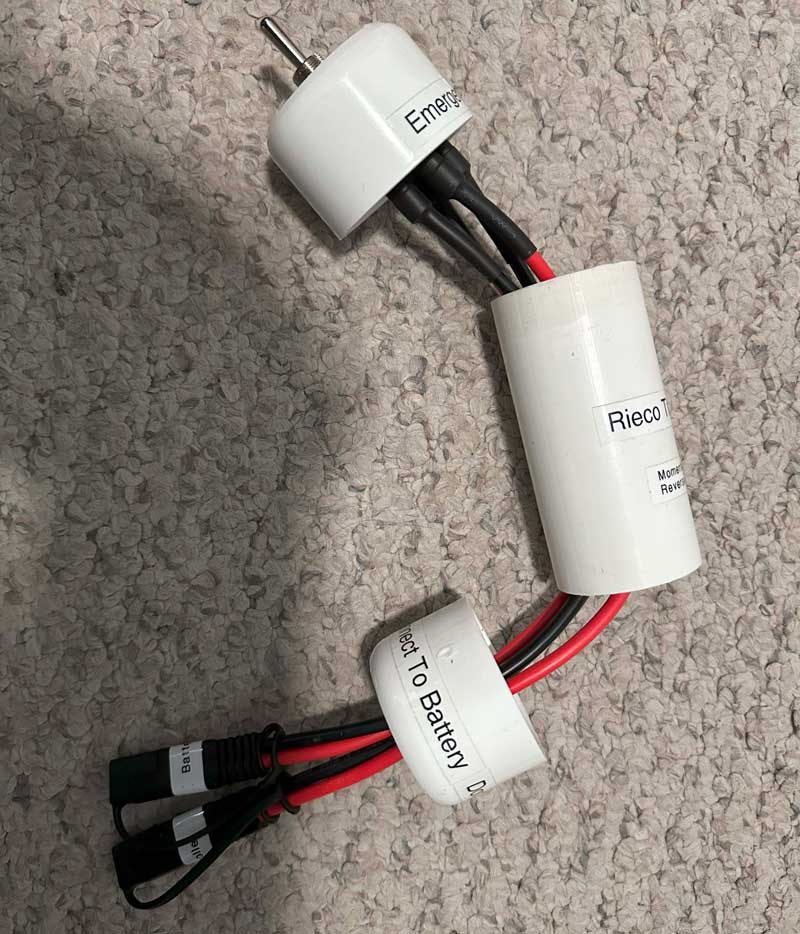
I marked the switch positions for “Lift” and “Lower” when I tested the wire harness. I also marked the wire harness ends as “Battery” and “Switch” so that I could attach all of the other wires the same way each time. If you don’t do this, each time you connect all of your wires together you could have your Lift and Lower for your 4-pin switch work differently. It may only matter if you can’t afford to have your jack go up or go down even a slight amount when placed in use.
I did not glue the PVC end caps. In the future, this will allow me to disconnect the entire system should I have a problem later that requires me to take the wire harness apart.
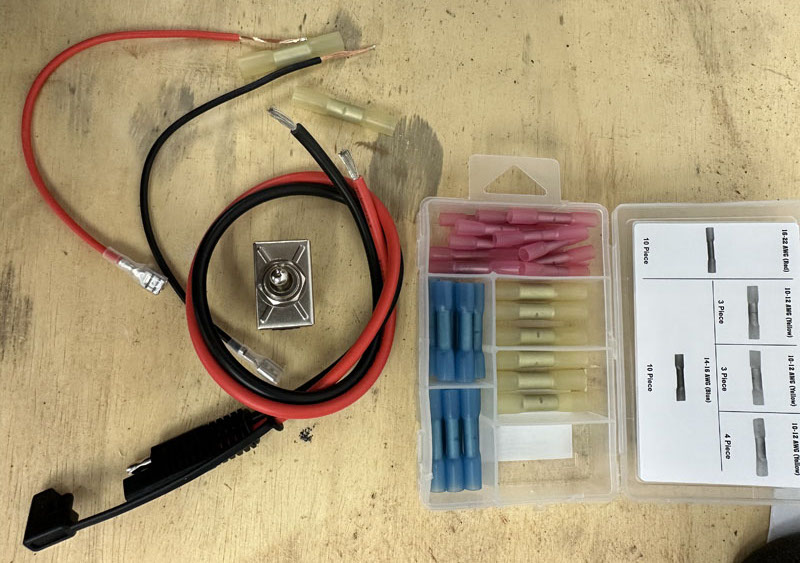
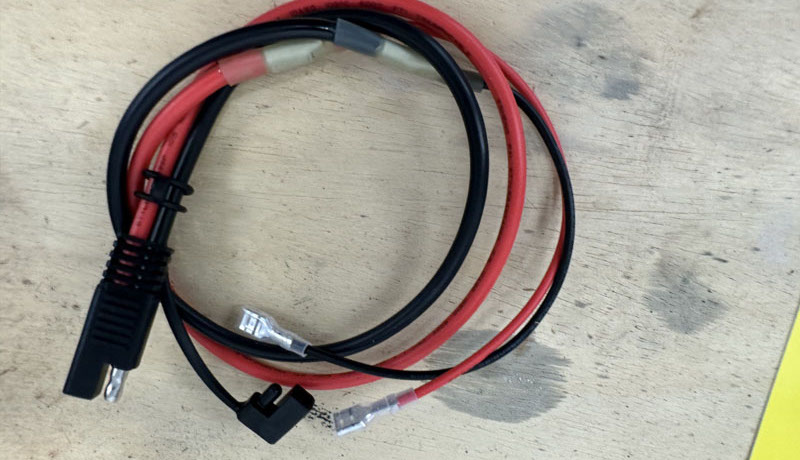
I also made a 12V cigarette plug that can be used in place of the alligator clips. It was made using the same SAE wires.
To test the system, I attached the battery alligator clips to the battery. For this purpose, I could use an RV battery, a car battery, or some other battery. Second, I attached the 15-foot SAE wire to the alligator clip ends and then I attached the 4-pin switch wire harness.
As I stated prior, once the 4-pin switch is used for the first time, I needed to mark the wires of the harness as “Battery” and the other set of wires as “Switch”. The total length of wire available was 22 feet. That was enough to attach my RV battery and to be able to reach all four Rieco-Titan electric jacks.
Note: The end connectors appear to be universal in size and makeup, so this wiring harness should work with any electric jack.
If you do not use the SAE wires that have quick-release adapter connectors, you should be able to build this for about half the price I did.
If you have a problem with your electric jack system and your jacks no longer work, or if you blow out a fuse and your jacks will not function, this emergency jack 4-pin switch will allow you to jack up or down, one jack at a time.
I originally saw a version of this on YouTube, but can’t find the original to give credit. My wiring system is a bit more involved, but works very well.
Items Needed:
15-foot SAE extension cable, 10 AWG, with polarity reverse capability – $29.99
3-foot SAE disconnect wire battery charger extension (2 pack) – $16.99
Mankk 4 pin reverse polarity momentary 12V DPDT on-off-on switch – $12.99
10 AWG battery alligator clips to SAE quick-release adapter with 15 AMP inline fuse – $14.99
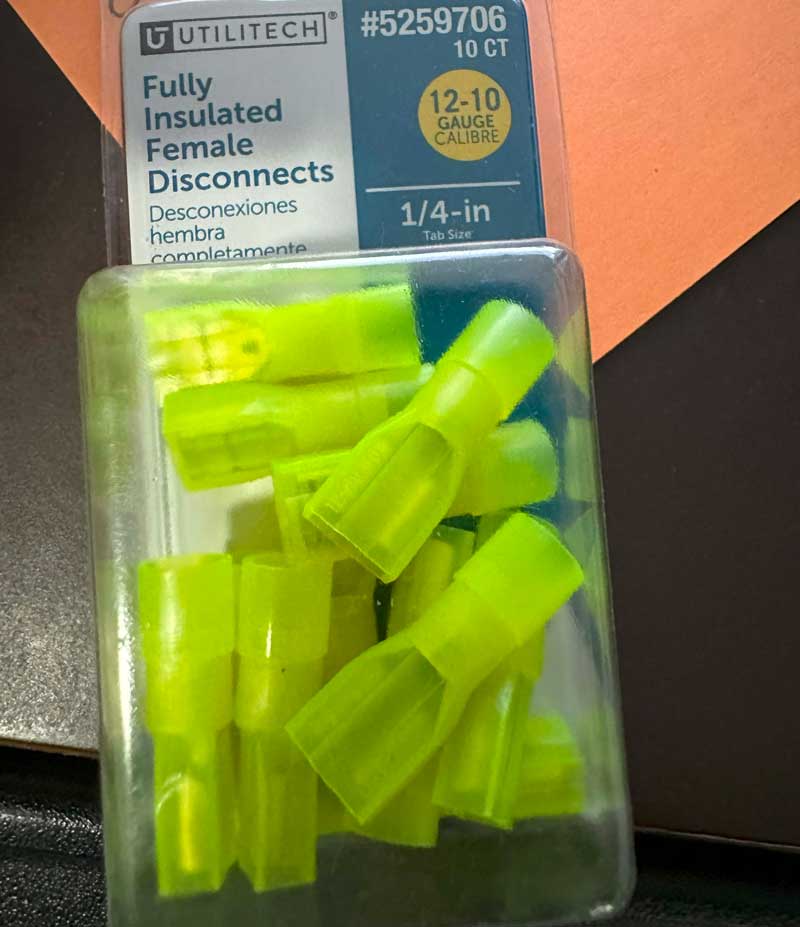
Fully insulated female disconnects ¼ inch connector (pack of 10) 10-12 AWG $3.00
1-1/2-inch PVC tube 4-inches long with two End Caps $9.00
Rubber grommet $0.00 (I had one in stock)
All of these items have adapter connectors that add to the overall expense. I went with the selected adapter connectors because I already have an electric macerator that uses the same wires. This makes the use of this adaptor connector dual-purpose for me.
This mod took me two hours and cost $86.96. In my opinion, the skill level of this modification is medium.
Disclaimer: The modifications above are submitted by Truck Camper Magazine readers. It is your responsibility to make sure that any do-it-yourself modification project you undertake is safe, effective, and legal for your situation.
Enter Your Mods Now!
If you’d like to enter a modification you’ve done on your truck camper, click here. You can enter as many mods as you want, at any time. Good luck mod makers!


