Welcome to the third entry in May’s Mega Mod Contest. One Mega Mod will be published in every Email Alert in May. At the end of the month, we’ll hold a reader vote to determine May’s winner. Click here for information about the 2023 Mod Contest, including how to enter.
David Anderson, Benson, Arizona
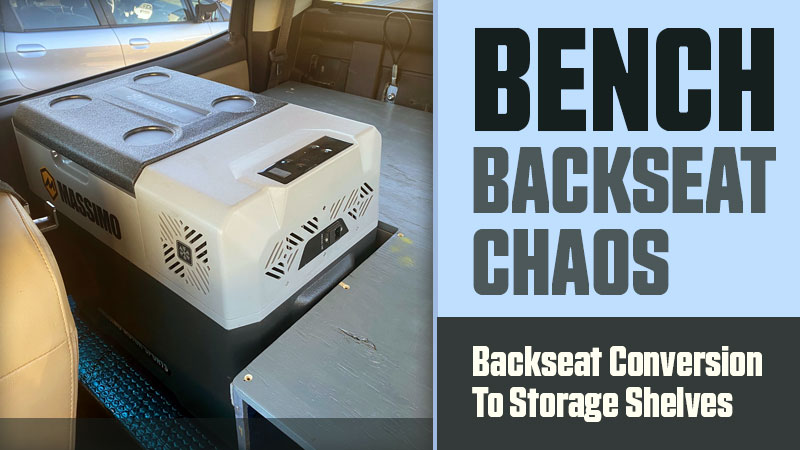
Backseat Conversion To Storage Shelves
2018 GMC Sierra 3500HD
2020 Adventurer 89RB
My wife and I were planning an eight-month trip in our Adventurer truck camper through the Western United States, Canada, and Alaska. We have taken many one, two, and three-month trips.
I have found that things tend to get piled one on top of another in the backseat of our crew cab truck. For lengthy trips, it would be great to have things better organized and more easily accessible. So I removed the rear crew cab seats in our 2018 GMC Sierra 3500HD and replaced them with two shelves that have a cut out area for a 12-volt cooler to sit in a level and in a secure place.

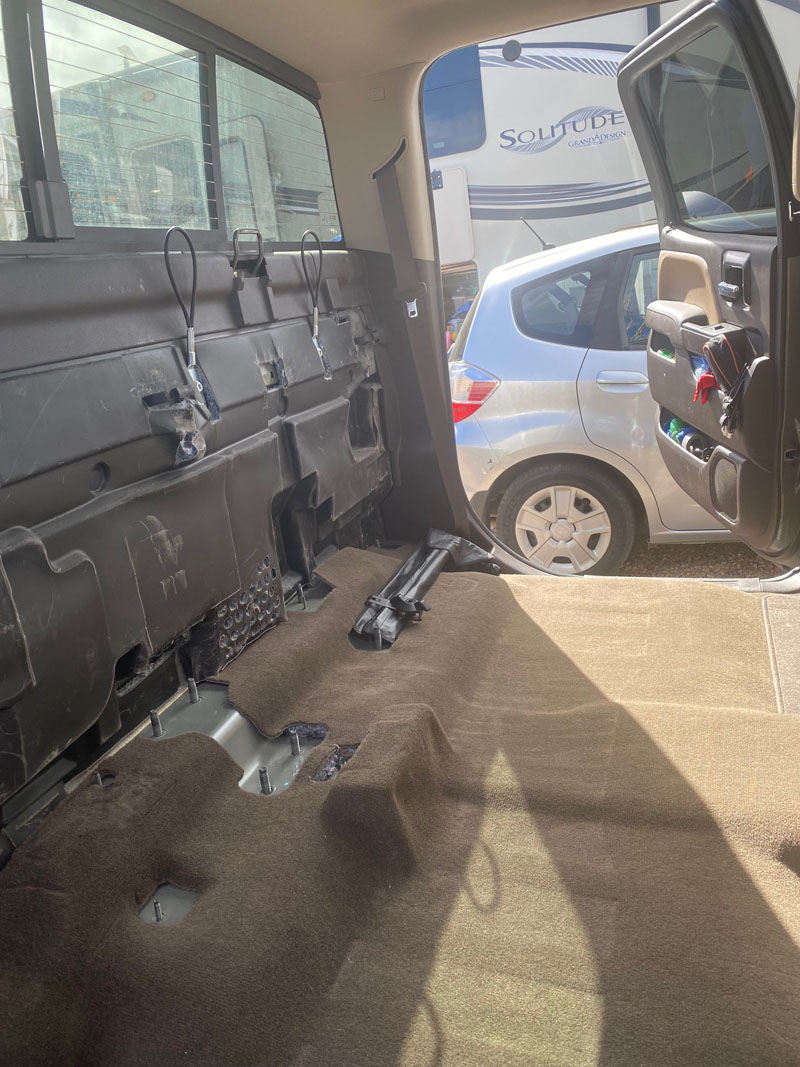
To get started, it was necessary to remove the rear seats which are split into two parts. There was a smaller single seat on the passenger’s side and a larger, and much heavier, seat on the driver’s side. It was necessary to get an extra person to help lift the driver’s side rear seat up and out because of the way it was slid into place when assembled.
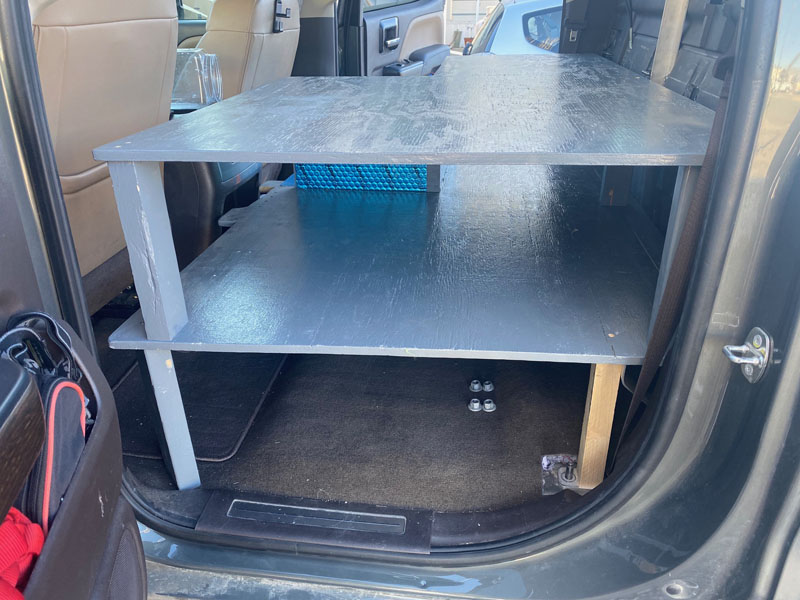
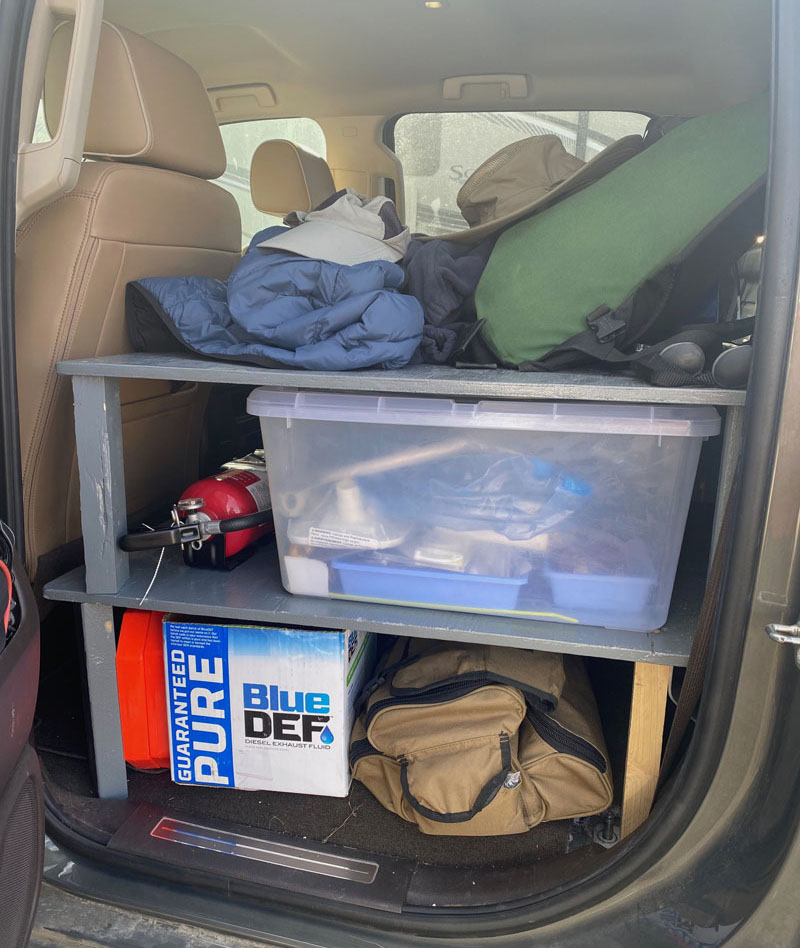
Next, I used a line to establish the height of the first shelf. It needed to be tall enough to be able to store DEF, a toolbox, an air pump, tire chains, a jack, recovery gear, etc.

Once this height was determined, I made four 2 x 2 inch rear vertical supports and two 2 x 4 inch front supports with one 2 x 8 inch front center support.
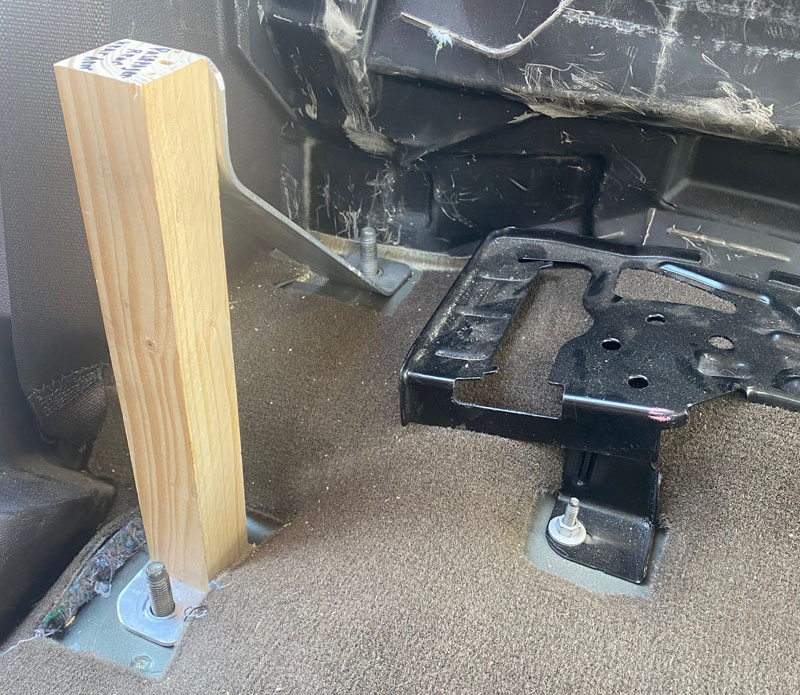
All of these supports needed to be a custom length due to the uneven rear floor. The wood rear supports were triangulated with 2 inch aluminum stock and bolted down to the seat anchors.
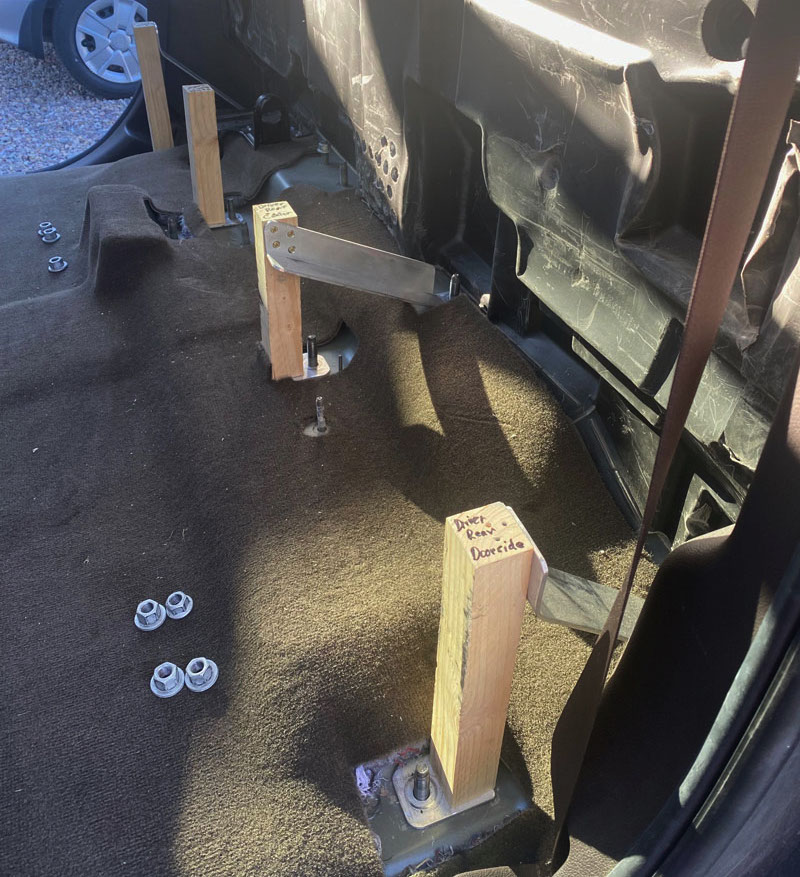
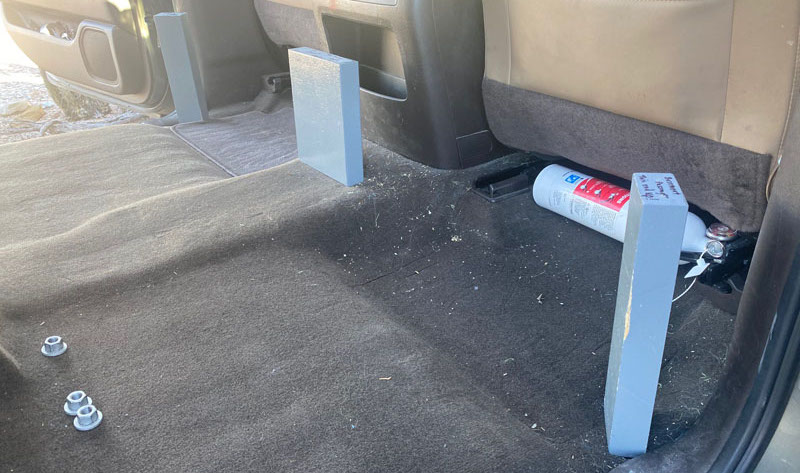
These triangulated rear supports ensure that shelves don’t rock back and forth providing a stable platform for the second and third levels. A half-inch 4 x 8 foot sheet of plywood was measured and cut for a shelf to be screwed down the above vertical supports. There was some trial and error when fitting this first shelf in place. It’s important to take into consideration the front seats being able to move forward and back and how much they will be able to recline. This first shelf is about 59 inches wide and 37 inches long.
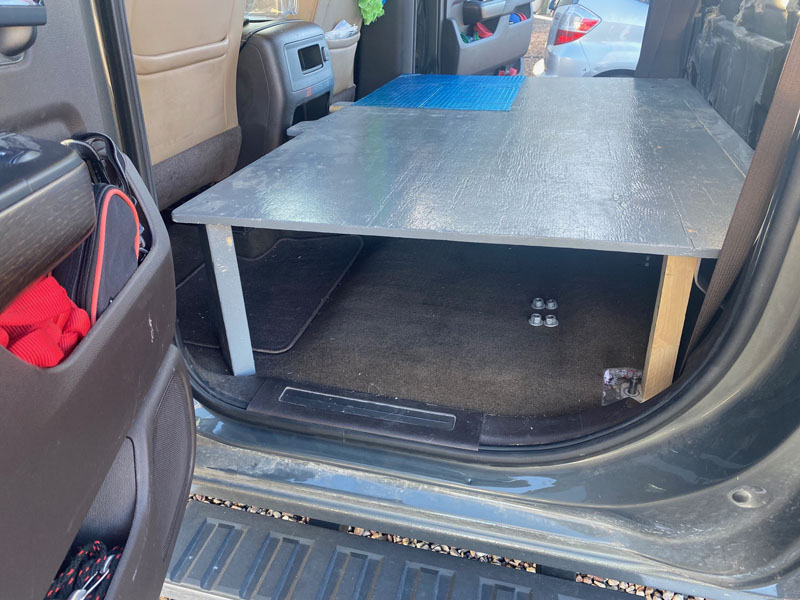
Since we now have a level surface, four 11 inch 2x4s were screwed into the first shelf from below in the rear corners, rear center, and driver’s side front corner. Behind the passenger’s seat half-inch plywood was cut to form an L-shaped wall 11 inches tall, 16 inches wide, and 25 inches long. This L-shaped wall was screwed into the first shelf from below.
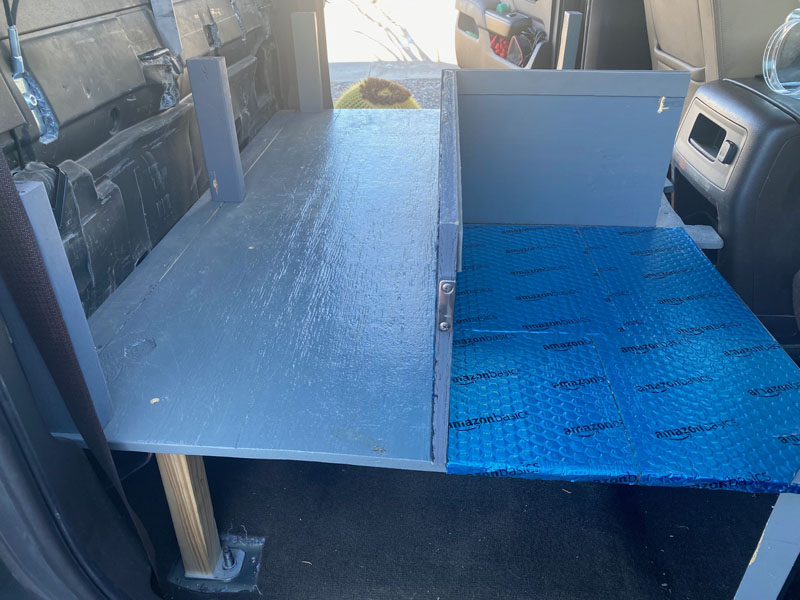
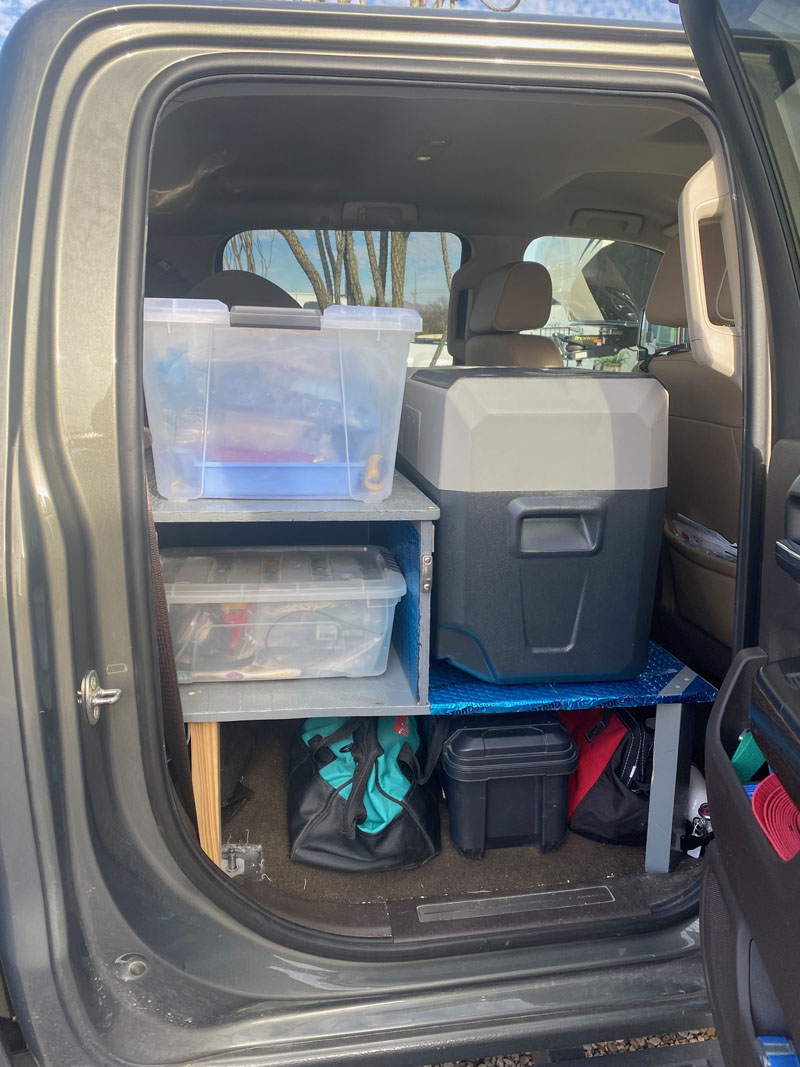
Taking into consideration that the front seats will slope backward slightly, the second shelf will be the same width (59 inches) as the first shelf below it but it must be shorter at about 35 inches.
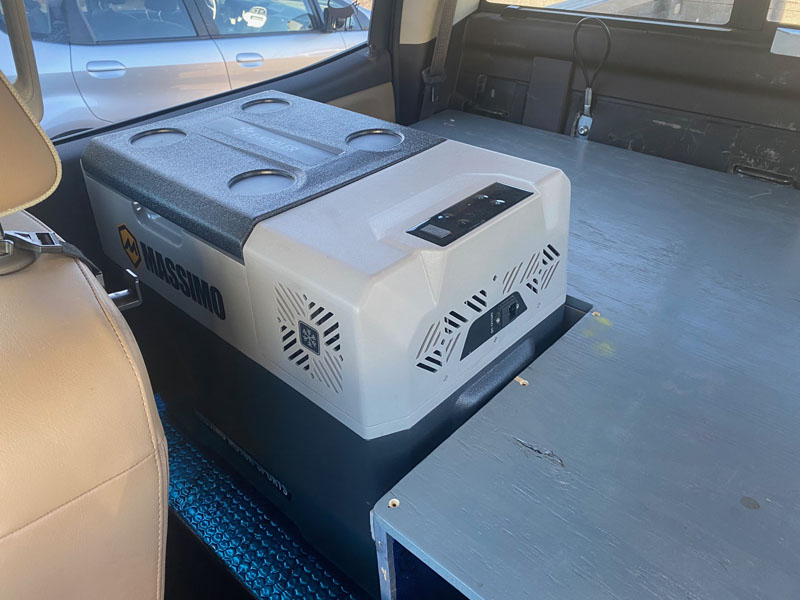
A long opening that is 15.5 inches wide by 24.5 inches is cut out from the second shelf behind the passenger’s seat to allow space for our cooler. This second shelf is then screwed down to the vertical supports and the 11 inch high wall.
A footman’s loop is screwed in place and an elongated hole has been cut to allow 1 inch webbing to be wrapped around the cooler to secure it in place. I used some self-adhesive sound-absorbing material that I had leftover from another project under and around the area where the cooler is to help keep it quiet.
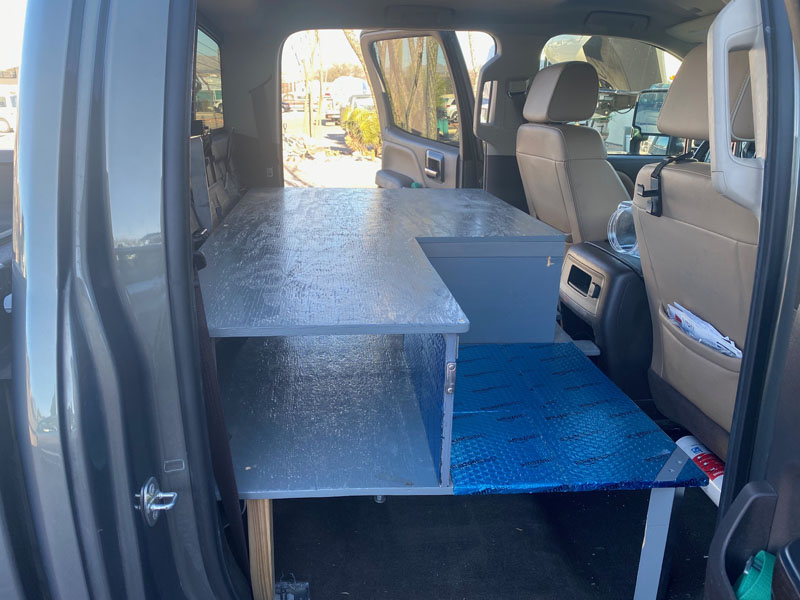
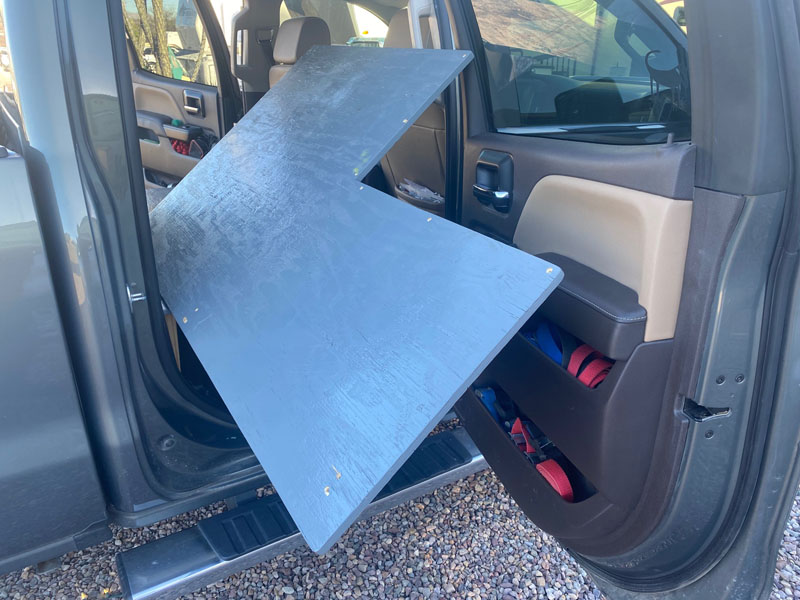
It worked but a towel or carpet would probably work just as well and cost less. I disassembled and painted everything with an oil-based paint. It took two weeks for the paint to fully dry and not smell.
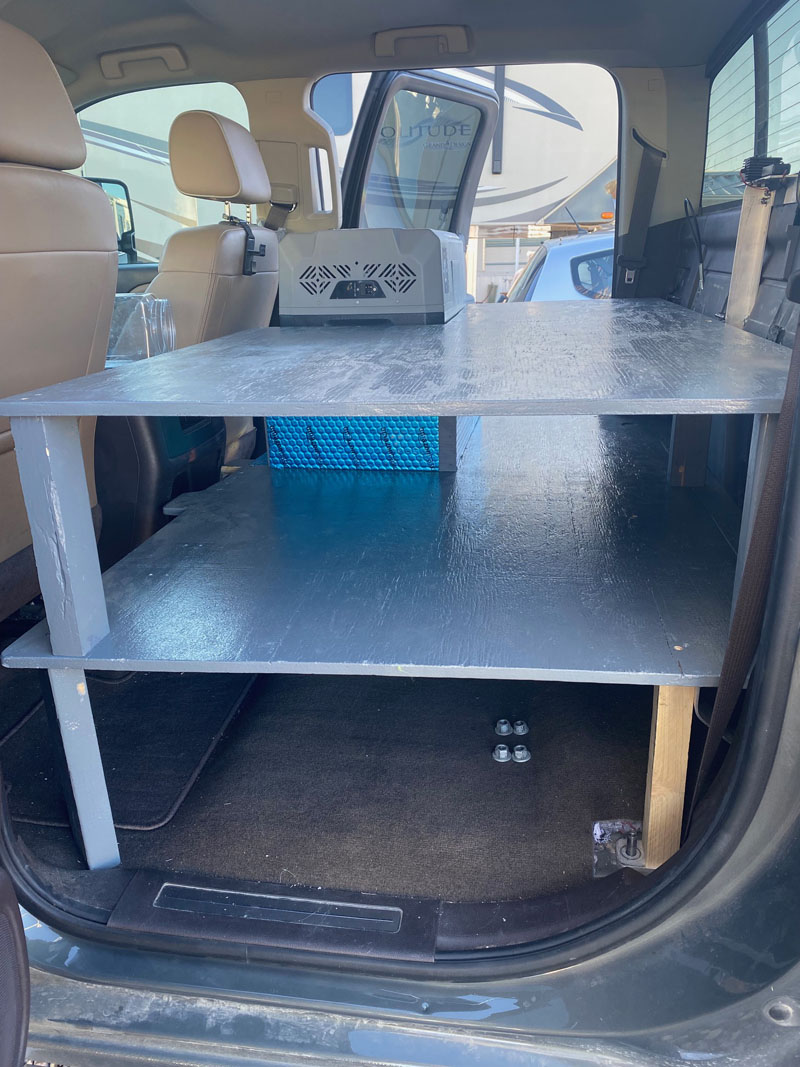
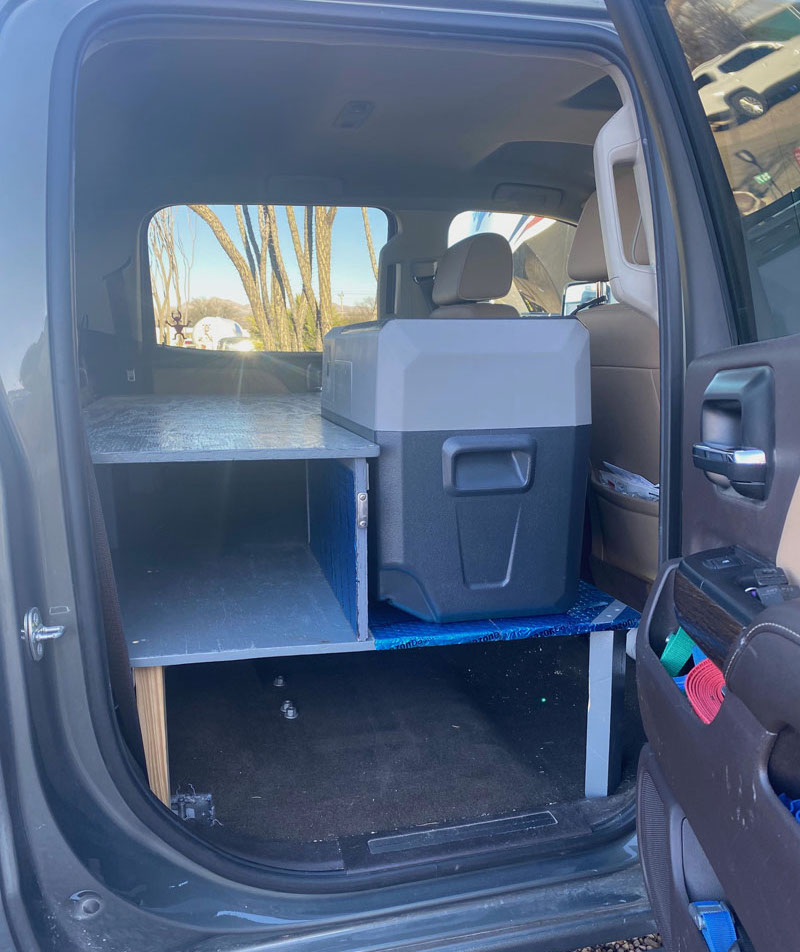
The back seats that I converted to shelves work great. It has kept everything from turning into one giant pile of stuff bouncing around in the back seat trying its best to climb into the front seat, and the cooler trying to migrate in any direction it can.
On our trip, the tools in the bottom space were always handy to make the never-ending minor repairs to the truck camper easy.
The things that I hoped we would never need were easily accessible when we needed them; two flat tires on the Dempster Highway. Best of all, the shelves stayed put and didn’t move at all.
Now that we’re back home in Arizona. The shelves were easy to remove and I converted them back to rear seats.
Materials Needed:
Two 1/2 inch 4 x 8 foot plywood sheets from the local hardware store – $50 each
One box of #8 2 inch construction screws from the local hardware store – $10
Oil-based paint one quart from the local hardware store – $15
Scrap 2×2, 2×4, 2×8 lumber from workshop
It took me about 8 hours to complete this mod, not including painting, and cost me about $125. In my opinion, the skill level of this modification is hard.
Disclaimer: The modifications above are submitted by Truck Camper Magazine readers. It is your responsibility to make sure that any do-it-yourself modification project you undertake is safe, effective, and legal for your situation.
Enter Your Mods Now!
If you’d like to enter a modification you’ve done on your truck camper, click here. You can enter as many mods as you want, at any time. Good luck mod makers!


