Ten unbelievable Mega Mods including a scooter mount, shower installation, interior build, skeleton support, cabinetry remodel, rolling dolly, swinging bike carrier, and a rear aluminum deck. Don’t miss the mod entry from South Africa!

Welcome to the August 2017 Super Cup Monthly Mod Contest. Please review the following ten Mega Mods and vote for your favorite. We will announce the winner next week. If you’d like to enter mods into TCM’s Monthly Mod Contest, click here.
1. John Hobson, Rodanthe, North Carolina
Adding Two Showers and Plumbing The Camper
2013 Toyota Tacoma
2014 CampLite 5.7
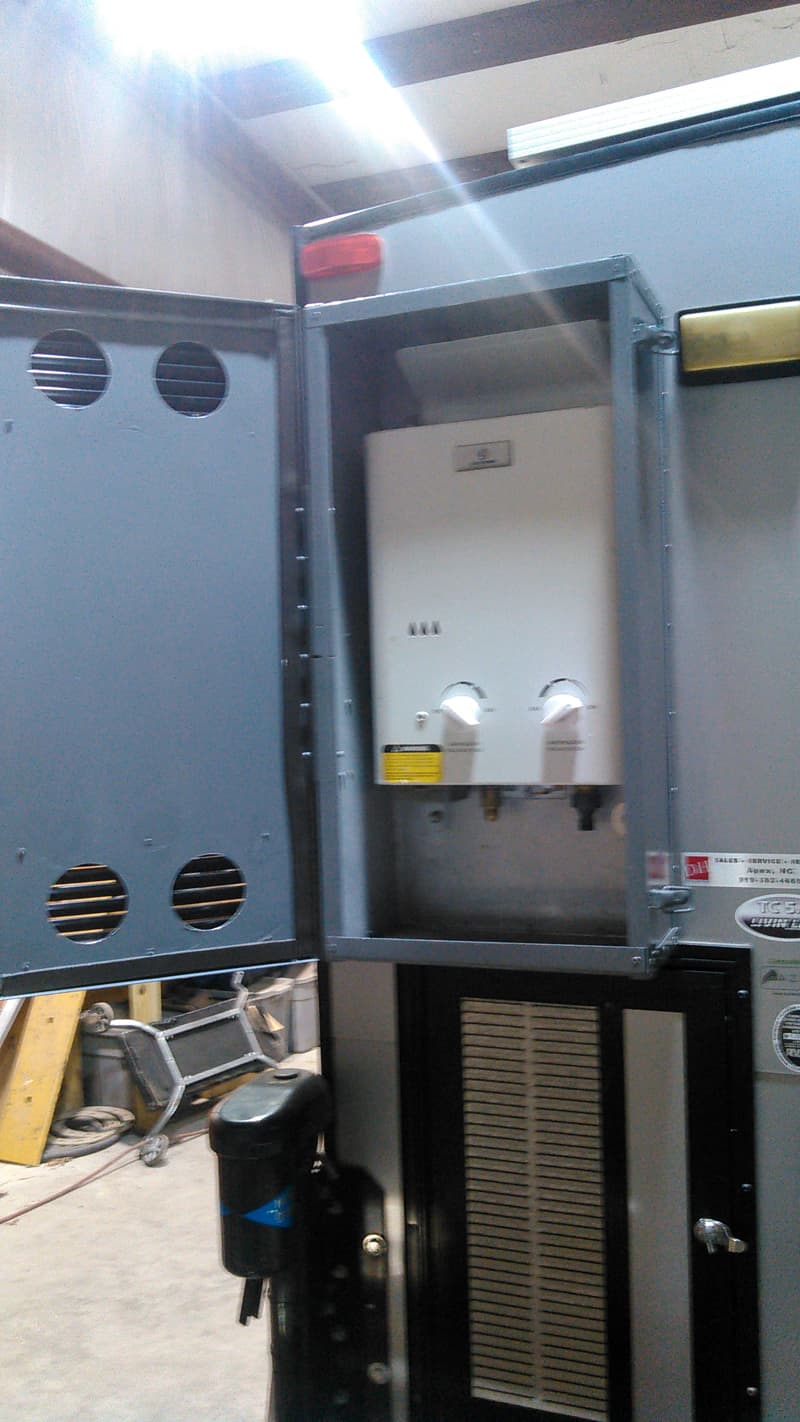
The little hand pump system for our sink broke and that was the perfect excuse to do some upgrading. Also, after my wife realized how much she enjoyed boondocking, she didn’t want to have to come back to a regular campground for a good shower. So I accepted the challenge of installing a shower in our camper and having hot water.
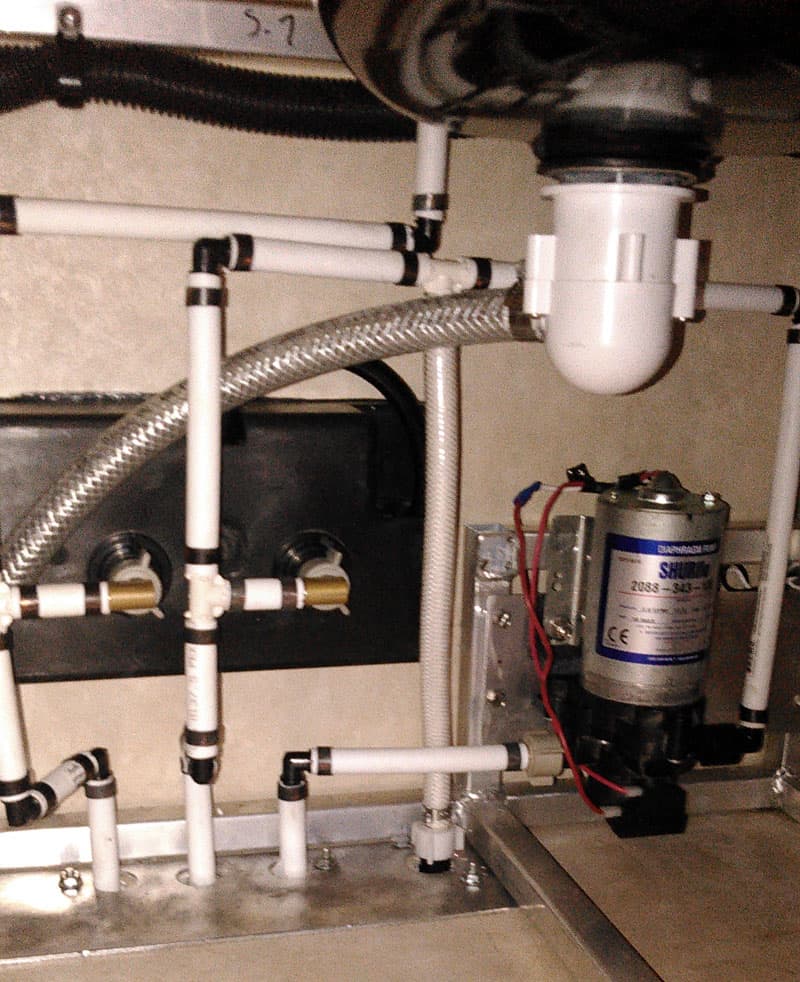
The project started with adding a water pump and the plumbing to accept water from the campground. We also needed to be able to siphon water from a portable tank.
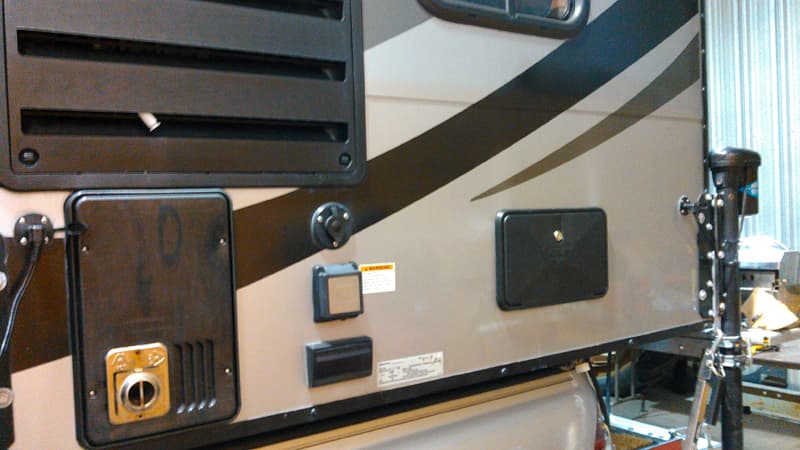
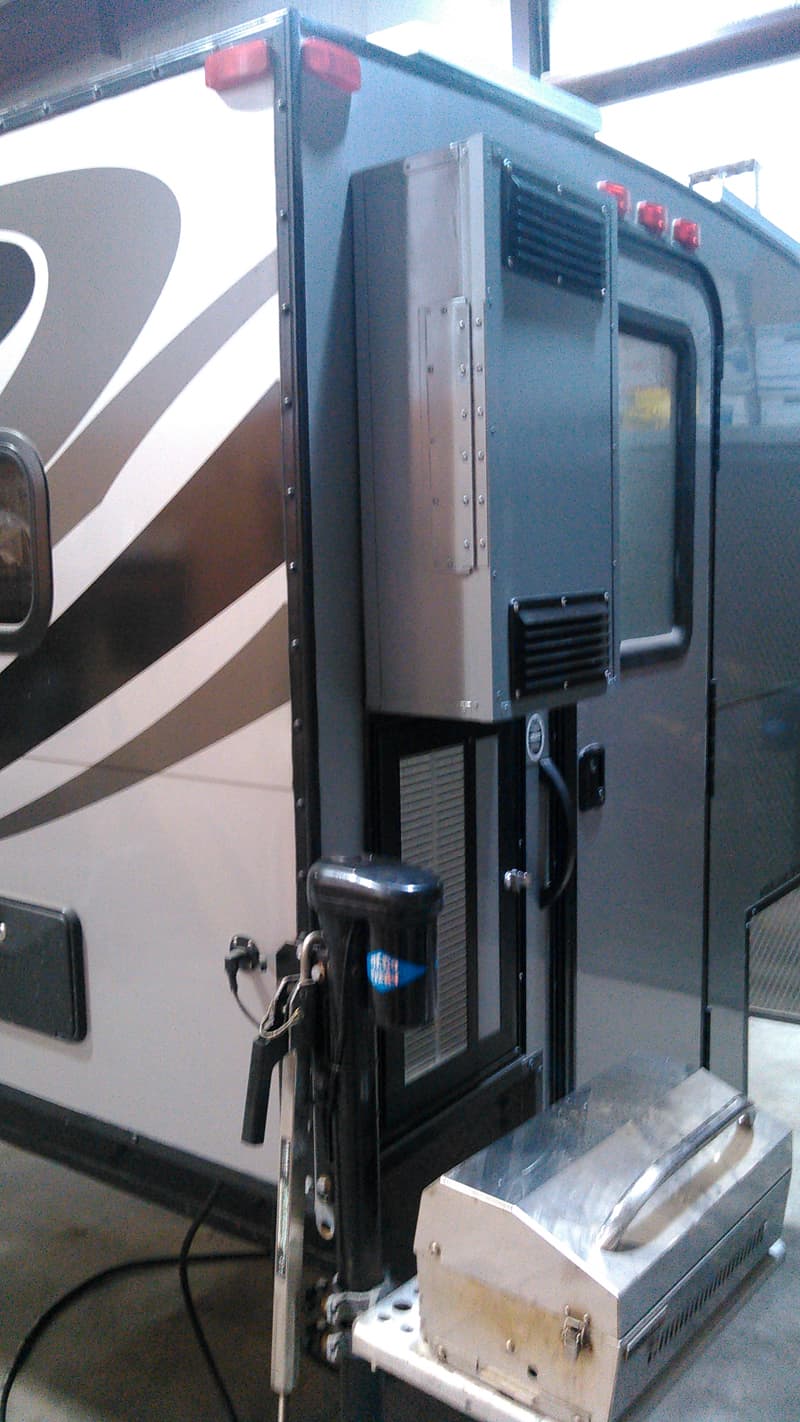
Then we added an outside shower. This required cutting the first hole in the side of our camper. Scary! At this time, we also upgraded the faucet at the sink and used the original hole in the counter for a soap dispenser.
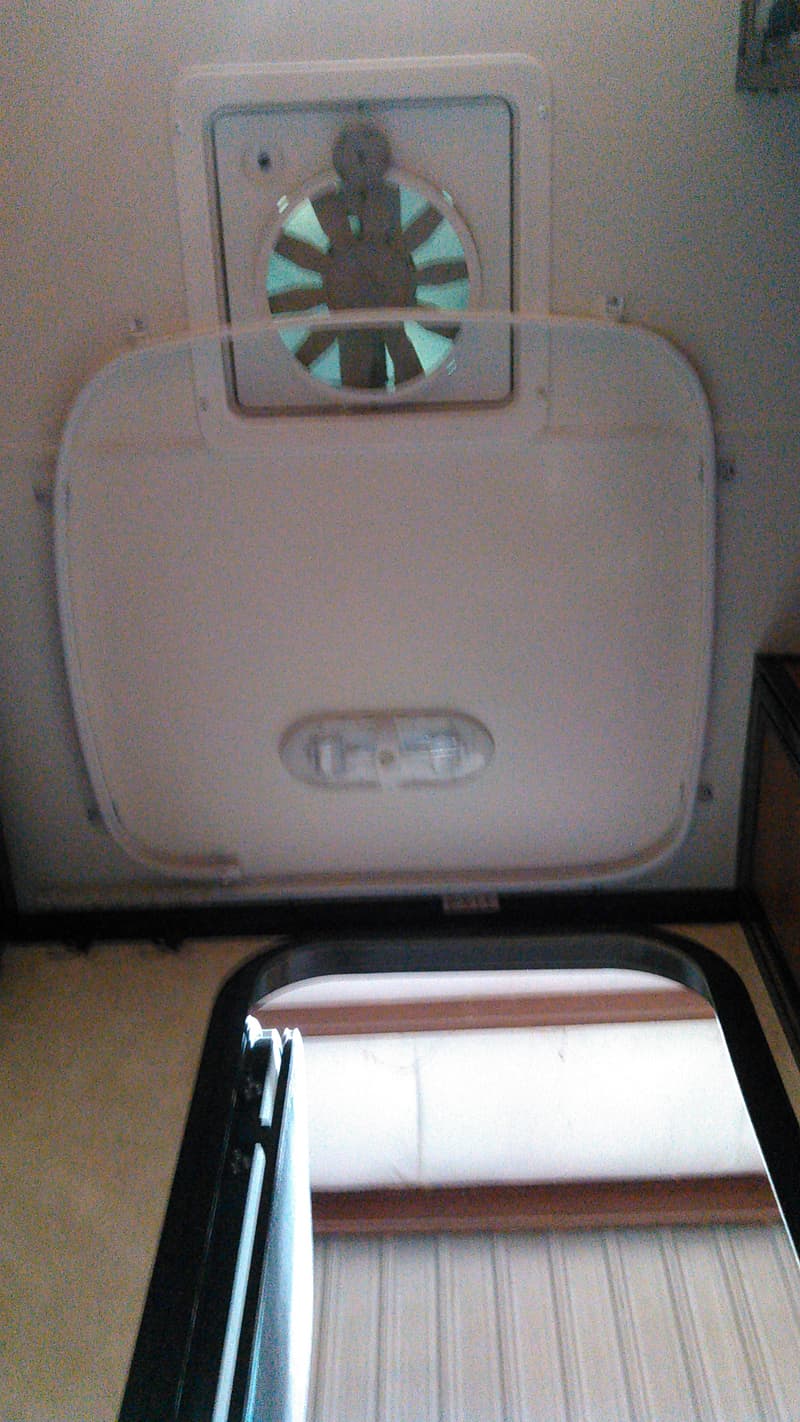
Outside showering is okay when you have privacy and the weather is good, but why stop there? I figured out how to put a shower inside the camper.
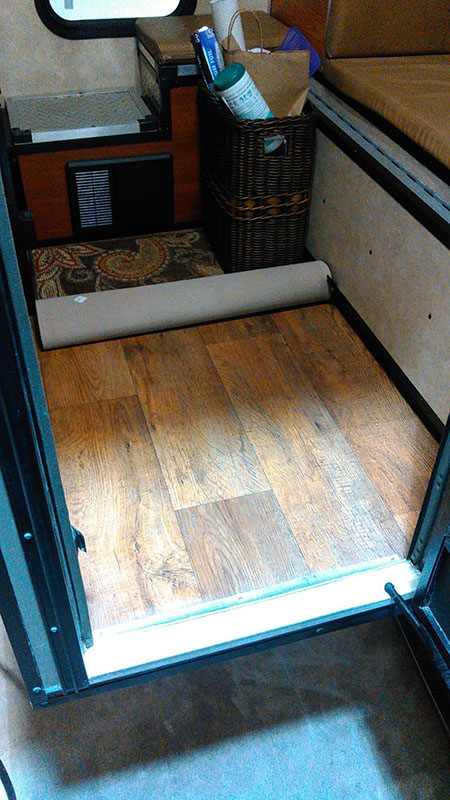
We cut the floor out and had an aluminum catch pan made to fit the hole.
 |
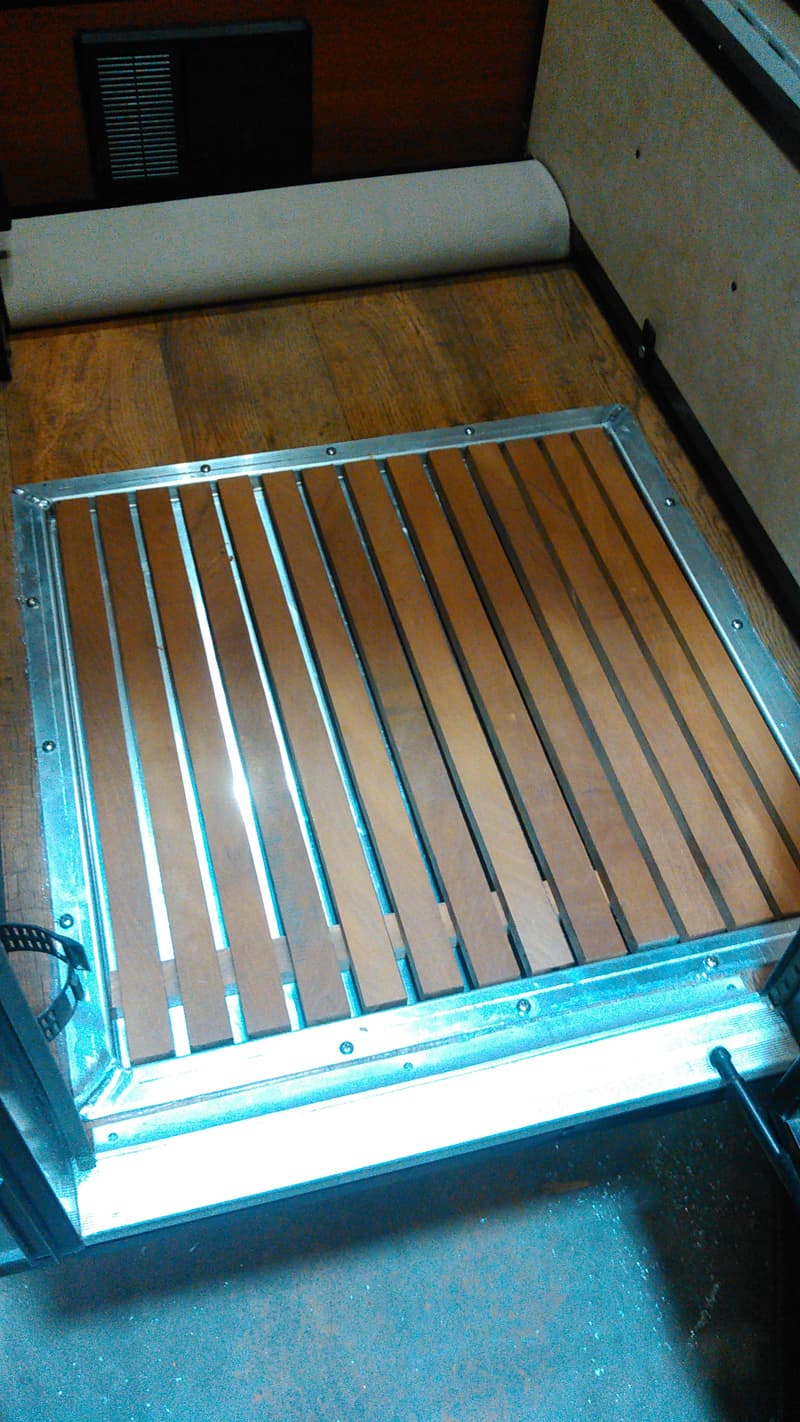 |
I added a Mahogany wood grate.
 |
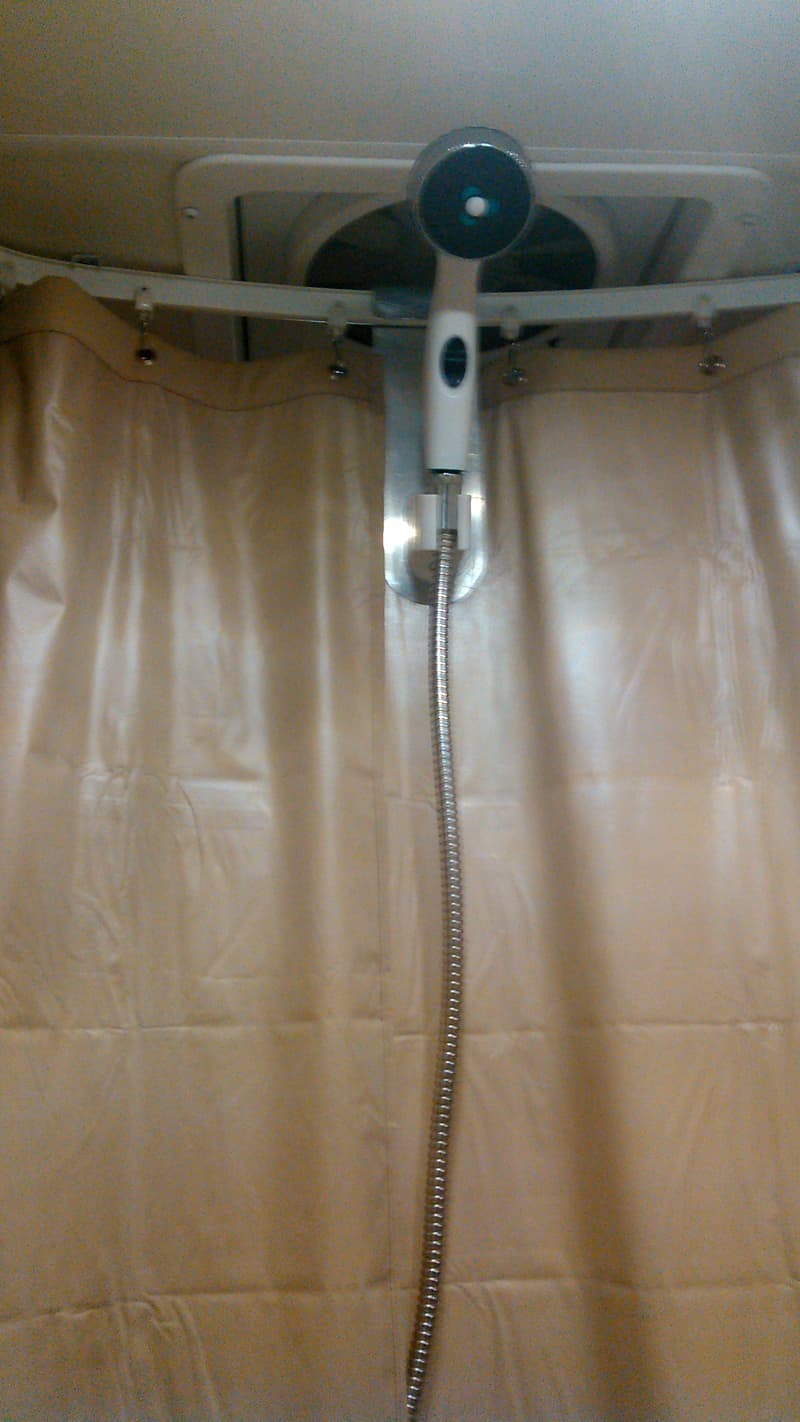 |
Then, I installed a shower curtain track in the ceiling and hooked up the shower to the sink’s faucet.
 |
 |
The only part of the labor that I didn’t do was the welding of the shower pan for the inside shower.
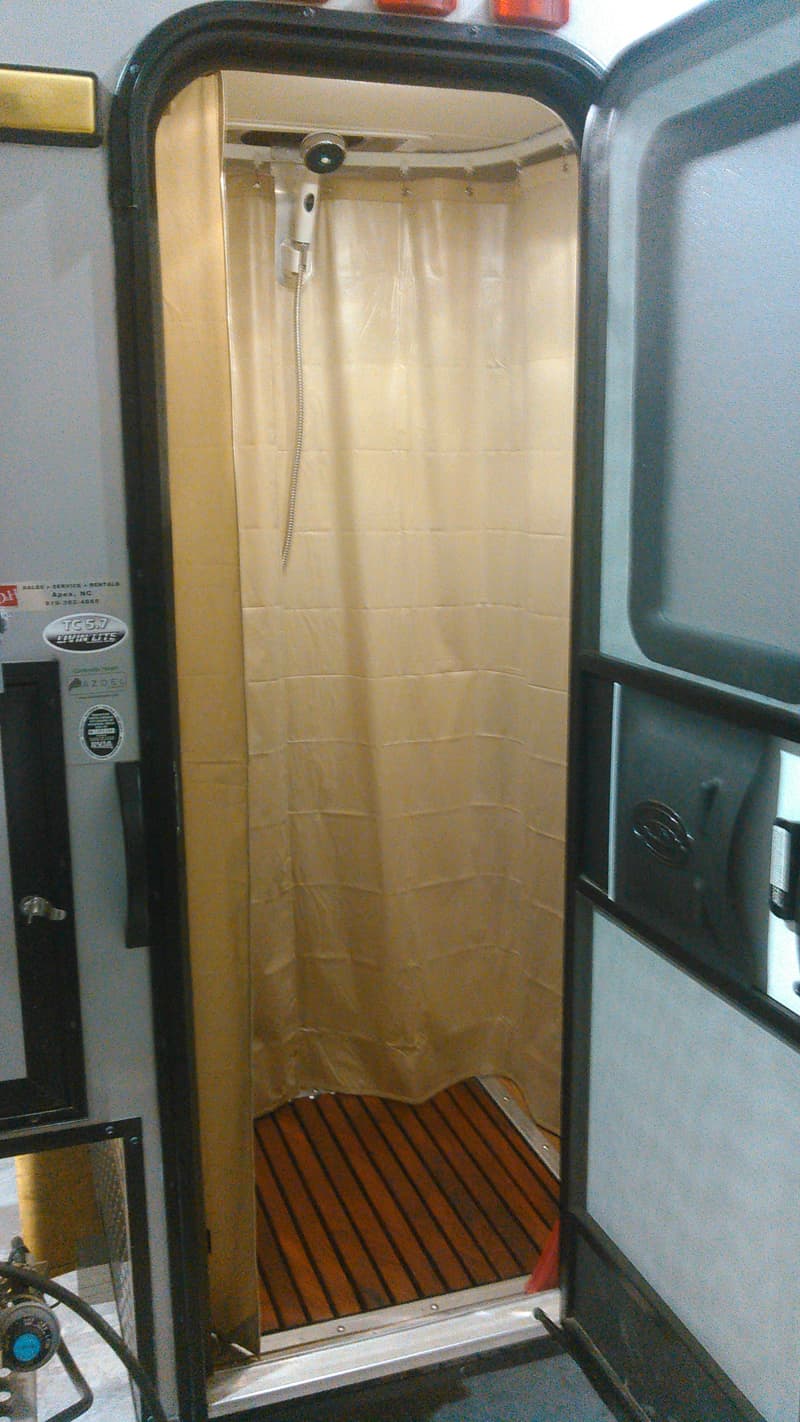
Above: Shower completed inside CampLite 5.7
So far, so good! It took me 40 to 50 hours to complete this modification and cost me $400. We figure what we spent on materials we will save by not having to stay at regular campgrounds. In my opinion, the skill level of this modification is hard.
2. Charles Coushaine, Punta Gorda, Florida
Securing A Scooter For Long Term Travel
2001 Ford F350
2012 Chalet DS116RB
As we go truck camping around the USA, our destinations are usually chosen based on sightseeing. There are so many wonderful places to visit all with their own charm for us to explore. That is why we chose a truck camper – so we could decouple the truck from camper and go explore!
However, we also came to realize that bringing along our scooter afforded us another level of fun during this sightseeing quest. We became more nimble with the scooter and all of its inherent benefits – like ease of parking, 100 miles per gallon fuel economy, and it’s fun to drive.
Note: In this video I attempted to answer many questions I get about my scooter mount including (1) why a front mount versus a rear mount, (2) what about visibility while driving the truck, and (3) doesn’t your truck overheat from blocked airflow?
After years of traveling with a scooter, I determined that several mods were required to stabilize the scooter for long term travel.
These mods were:
1. Solid linkage rods between the handle bars and the hold down point to stabilize the up/down motion of the scooter.
2. Additional stabilizing bars to better control the side-to-side motion of the hitch.
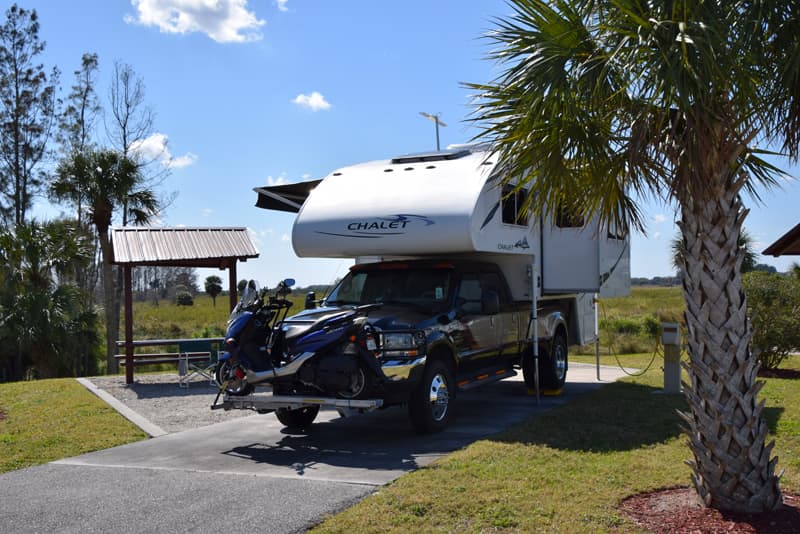
3. 8-inch drop down receiver with anti-rattle clamps to lower the scooter so it was not in my field of vision while driving.
4. Auxiliary driving lights on each side (attached to my brush guard) to supplement the lost headlight beams blocked by the width of the scooter.
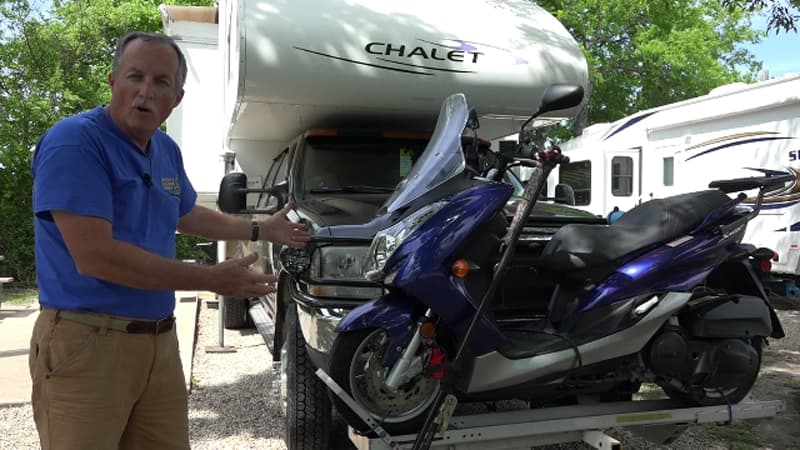
The video is a compilation of multiple mods required to safely and securely attach our 2015 Yamaha SMAX 155cc scooter to the front hitch of our truck.
Each mod shown was designed and built out of need based on extensive road testing as we traveled around the country on vastly different road conditions. With the front hitch now complete, our scooter goes along on our quest safely and securely.
It took me over 40 hours to complete this modification and cost me over $200. In my opinion, the skill level of this modification is medium to hard.
3. Laurel Wilson, Harrisburg, Missouri
Customizing A Four Wheel Camper
2013 Ford F350
2016 Four Wheel Grandby Shell
We sold our old Four Wheel Camper, mainly because we wanted the new window design that could be fully opened from the inside. We bought the Four Wheel Grandby Shell model because we knew how we wanted to customize it to suit our needs.
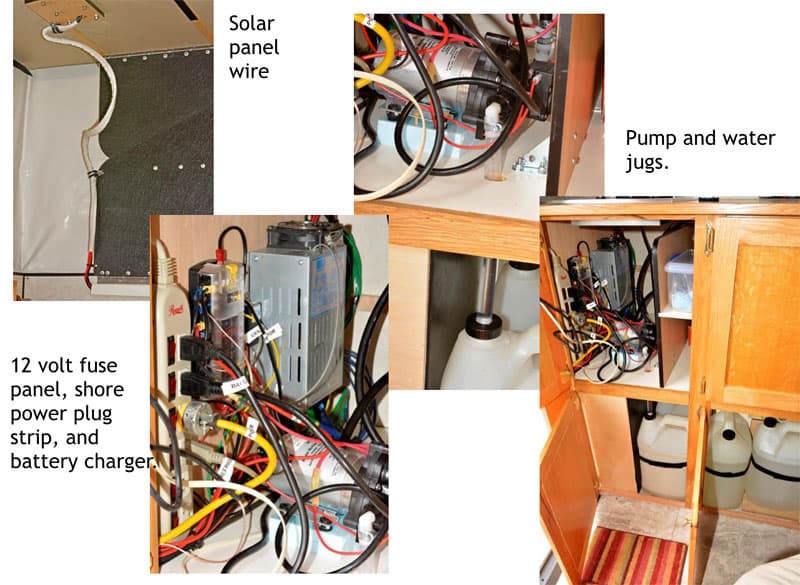
We began from the walls in. First, we replaced the solar electrical wiring system with larger wires that run a shorter distance to reduce voltage drop. Then we installed two solar panels on Yakima racks.
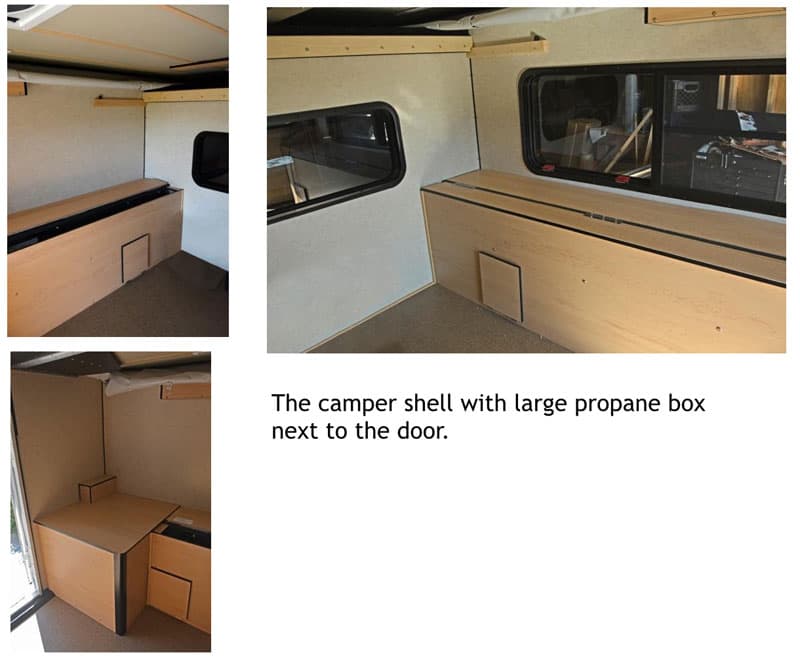
We reduced the size of the propane box for one five pound tank (we use propane for cooking and an occasional heat source) so we could accommodate four 2.5 gallon water jugs.

We also installed a cabinet with a cook top and water spigot since we use a basin and no sink.
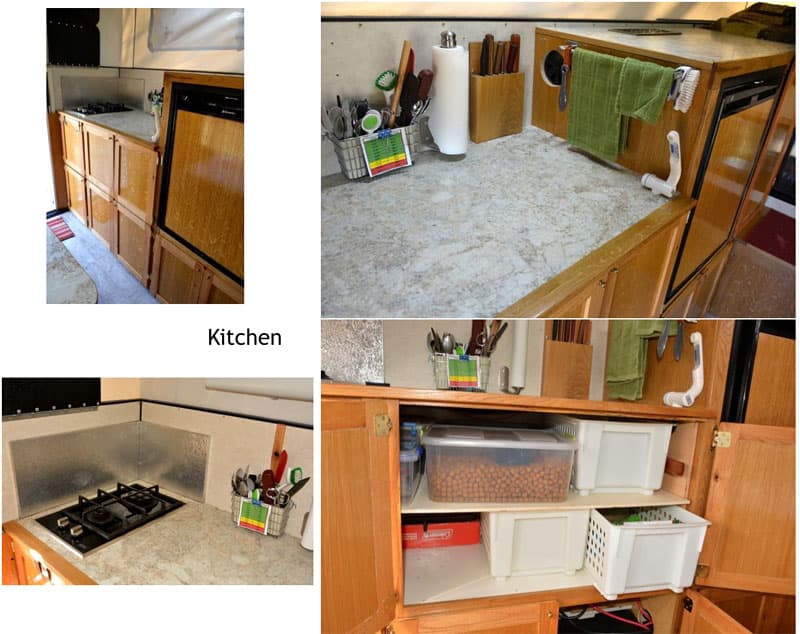
The cabinet is fitted with bins for dishes and food. Then, we installed a 3.3-cubic foot refrigerator.
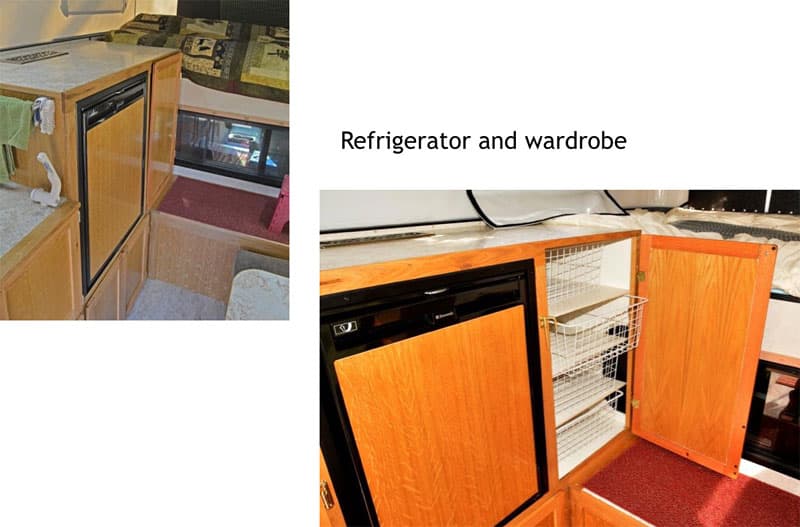
The wardrobe has four wire bins and there’s a trunk with a lift lid. Both have space for clothing and bedding.
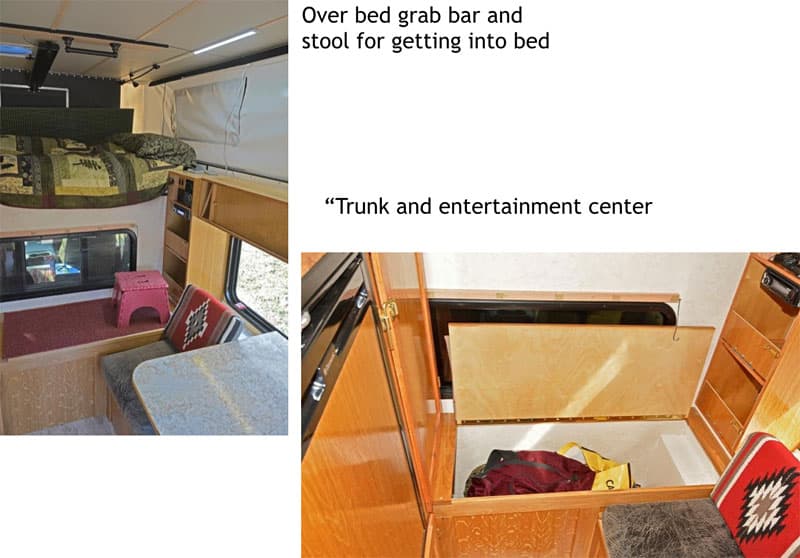
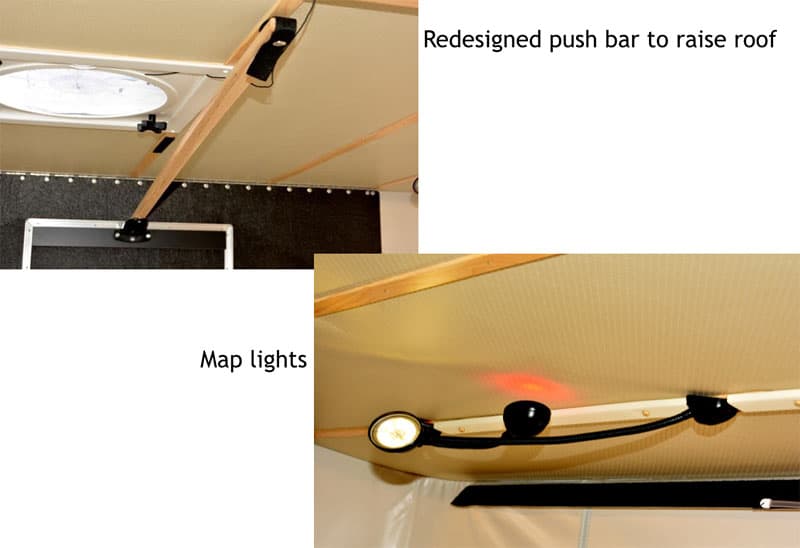
Map lights for reading are mounted over the bed. We have installed a grab bar for extra safety because I broke my collar bone slipping off the bed.
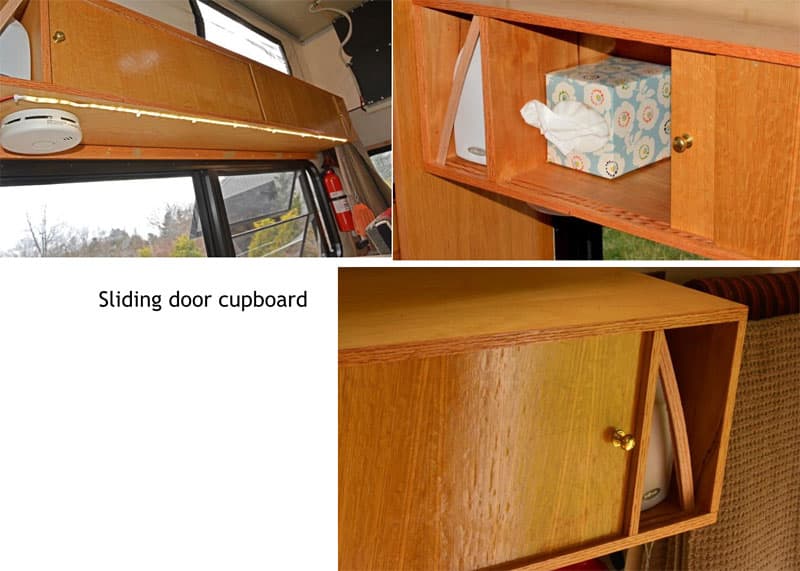
The entertainment center stores books and a receiver for CDs, AM, FM, and satellite radio. There’s a cupboard over the window cabinet with a LED strip light mounted to its under side. That stores smaller items.
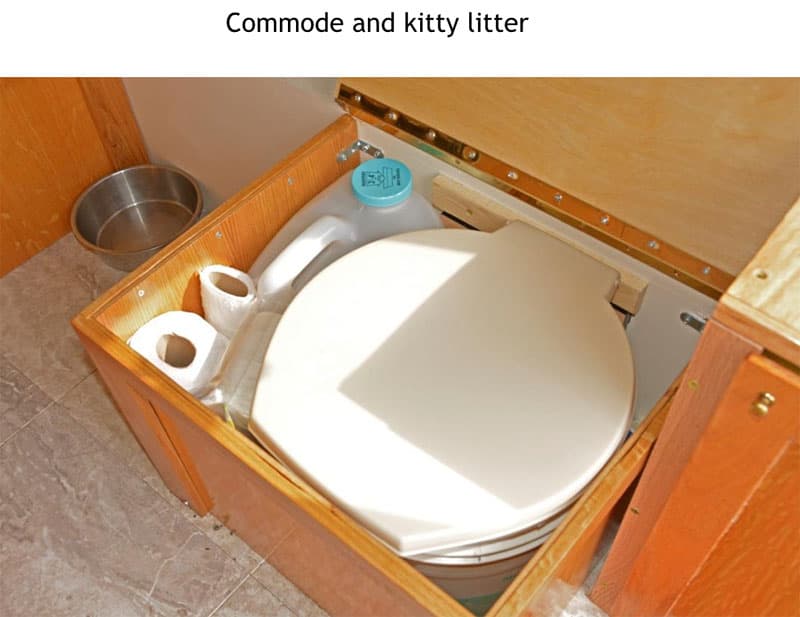
One lift lid seat holds craft supplies and the other is fitted with a commode that is fitted with a compactor bag and kitty litter.
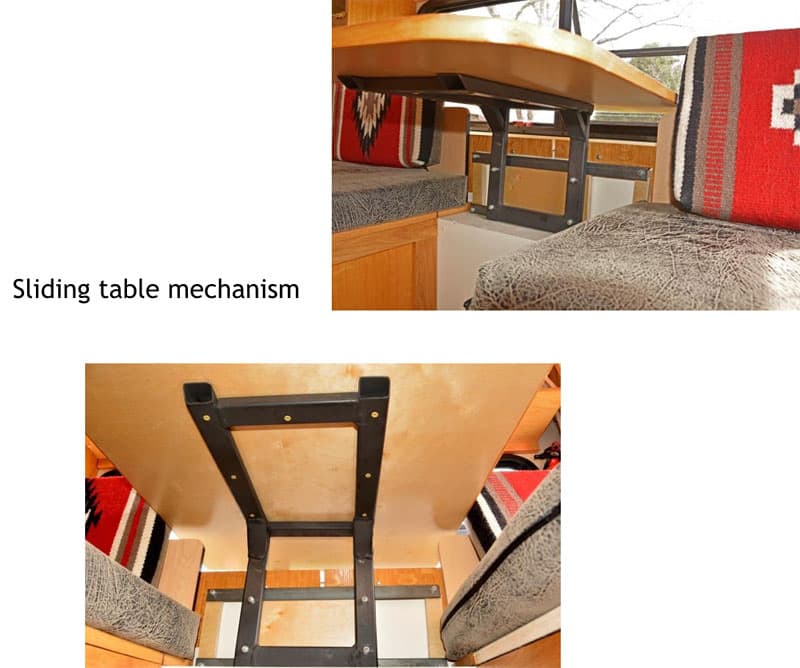
The oversized table slides on a wall mount so the seat lids open easily.
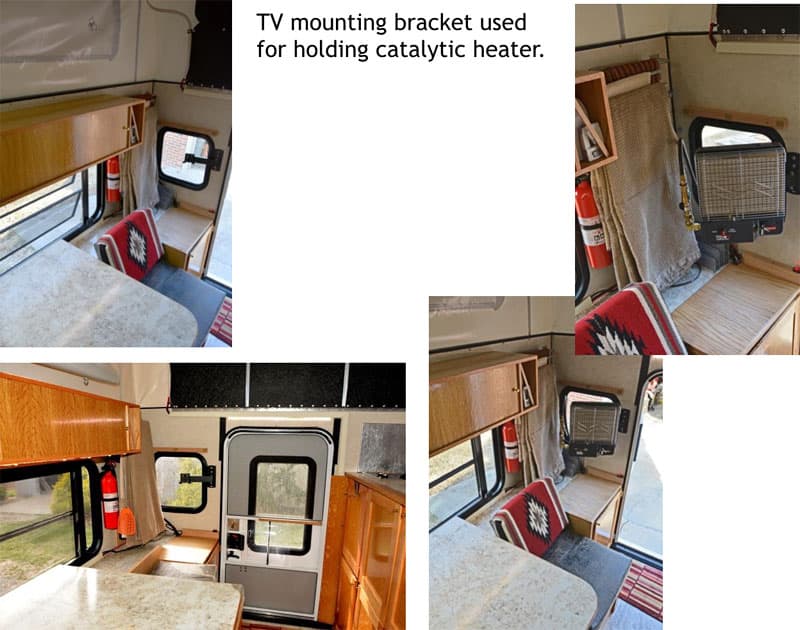
We use a television mount to hold the catalytic heater when needed.
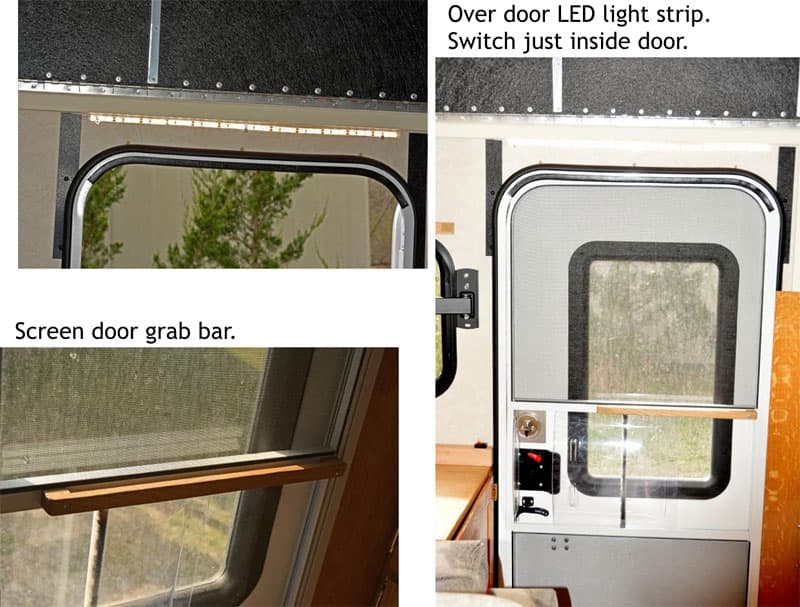
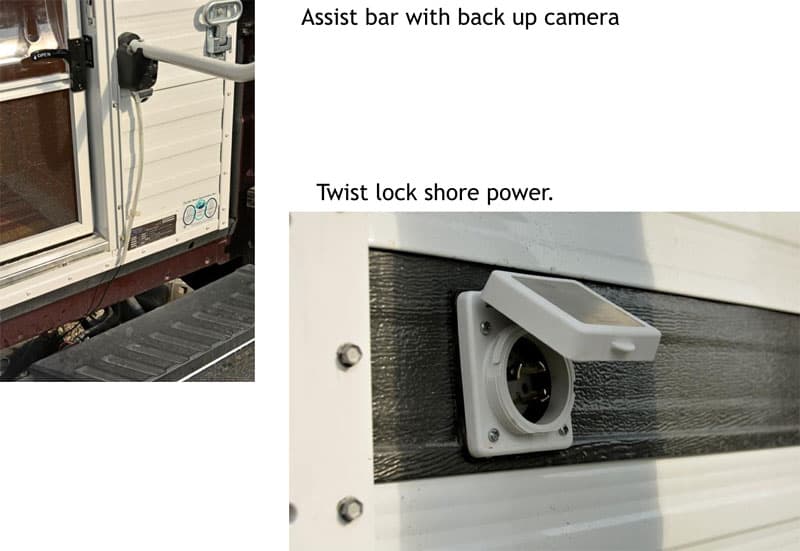
We mounted an LED strip over the door and a switch just inside the door so we have light as soon as we enter. We installed a screen door grab-bar and outside safety handle that also serves as a mount for the back-up camera.
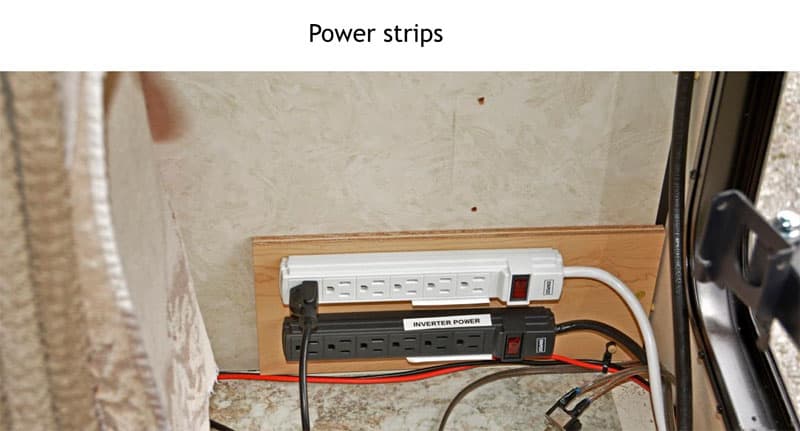
Our inverter and shore power 110-volt plug strips are mounted to the wall. That is where we have our charging station. The cupboard below stores a Vornado heater and cleaning supplies.
Because this is our second custom-made camper we knew what we wanted. We had modified the previous camper several times over the 15 years that we owned it. We are very pleased with the results. The one thing I might change is the cook top that has a grill is not fastened down. We store the grill in the cupboard when traveling since we like rough back roads.
It took me 200-300 hours to complete this modification and cost me $4,000. In my opinion, the skill level of this modification is extremely hard.
4. Bob Ogilvie, New Richmond, Wisconsin
Skeleton Frame For Camper In Truck
2008 Ford F350
2016 Ford 8.4S
We failed to ask the correct questions when we purchased our Ford 8.4S truck camper. The dealer as well as the brochure stated that it would work great in any three-quarter or one ton short bed pick-up. Since our truck is a 2008 Ford F350 short box, we assumed there would be no problem. However, after just a few trips we noticed the camper was bouncing more than normal.
After thinking through the problem we realized that the camper was sitting back about five inches from the front bed support. The weight of the camper had caved in the truck bed about an inch causing the bouncing. It was not a good situation.
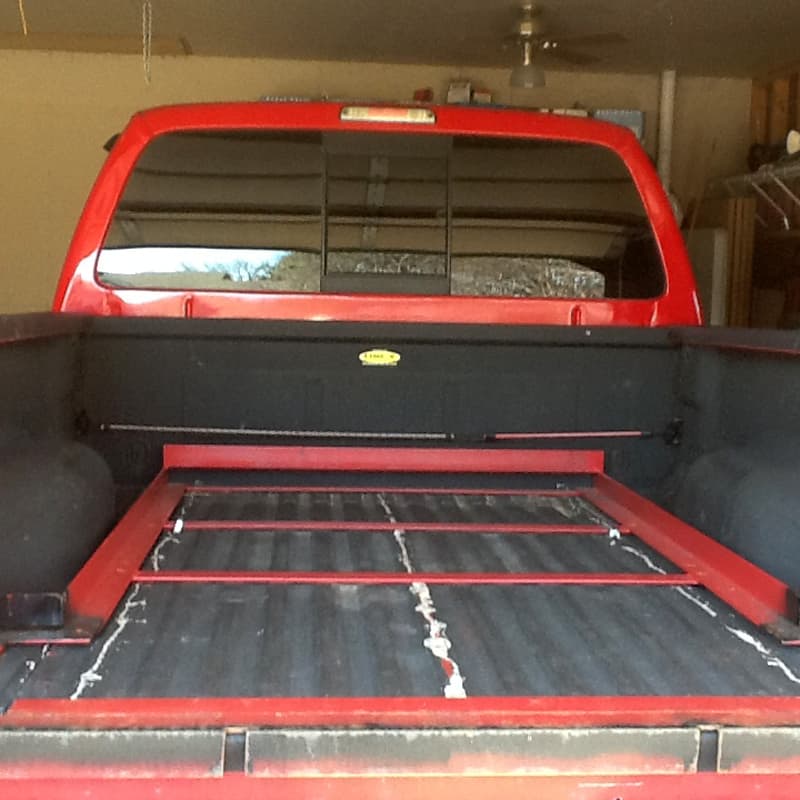
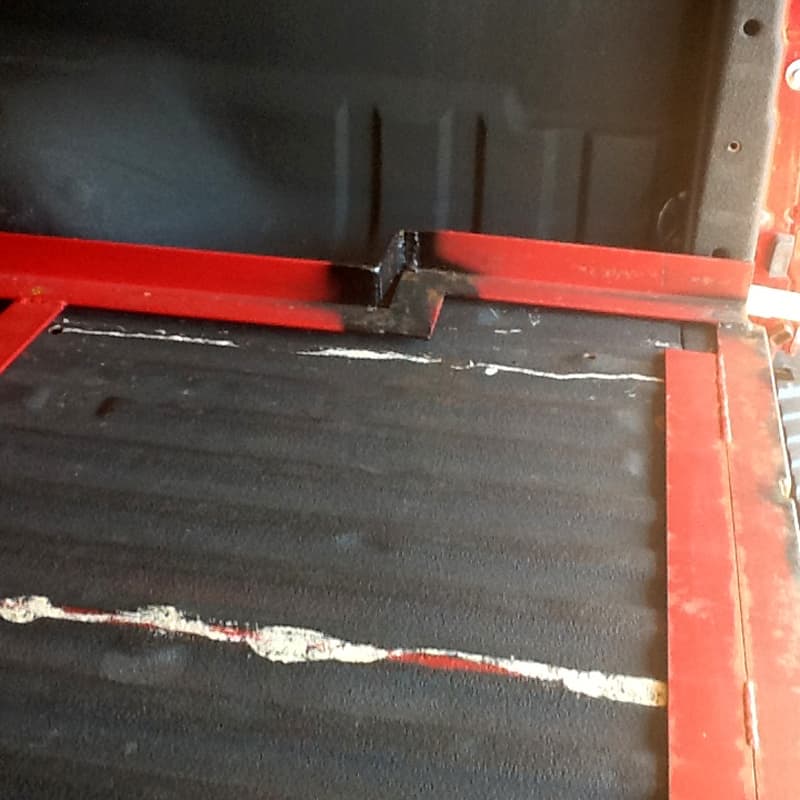
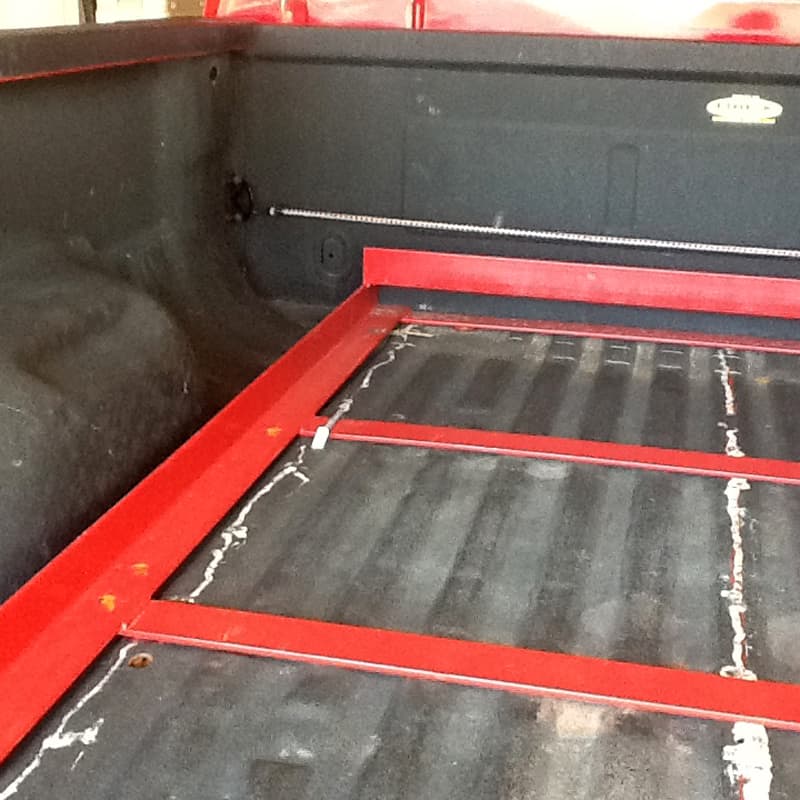
To correct this, I made a separate frame skeleton to spread the camper’s weight evenly over the entire length of the truck’s bed crossing each of the truck bed cross member supports. Problem solved!

A skeleton frame was welded with 1/4-inch L-stock. L-stock is L-shaped steel that is 1 1/2-inches tall by 1 1/2-inches wide. It was cut for the full length of the truck bed with flat stock placed at cross member locations.
To make sure that it all wound up square L-stock was 1 1/2-inches with outside dimensions 1/2-inch wider than the camper’s width.
We have made many trips since doing this modification, including a 3,000 mile trip to Florida in February. There have not been any problems with camper bouncing except the occasional chuck holes at 70 miles per hour.
It took me four hours to complete this modification and cost me $300. In my opinion, the skill level of this modification is medium to hard.
5. Eddie Cano, Lehigh Acres, Florida
Cabinet Made In Bunk Space
2012 Chevy Silverado 2500
2013 Northstar Igloo 9.5
Simply stated, I needed more storage areas.
Using the existing bunk space, I cut out three 22-inch cabinet spaces and made three oak doors with hinges and door handles. When finished it looked factory installed or even better because we used genuine oak.
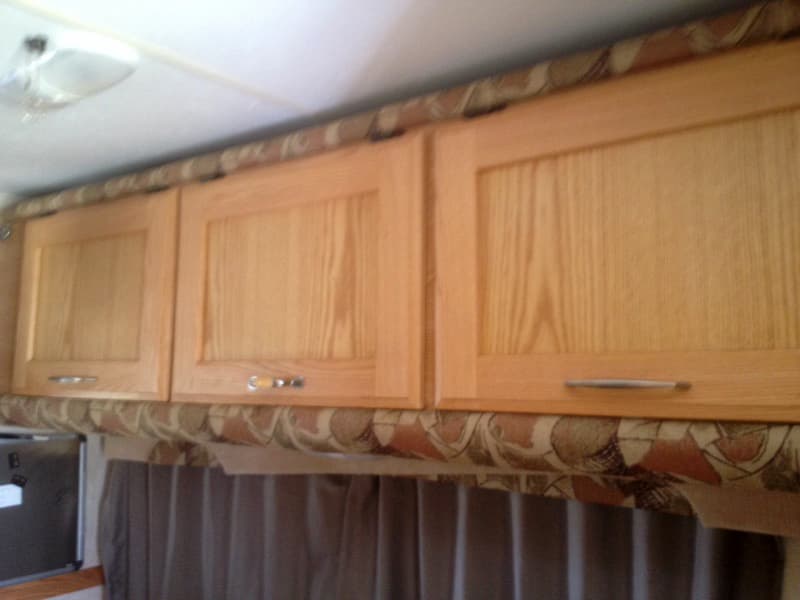
I installed small strip of hook and loop Velcro on the bottoms to keep the door closed tight while in transit. I also removed the rather heavy microwave and installed another oak door with handle. That provides an additional huge storage space.
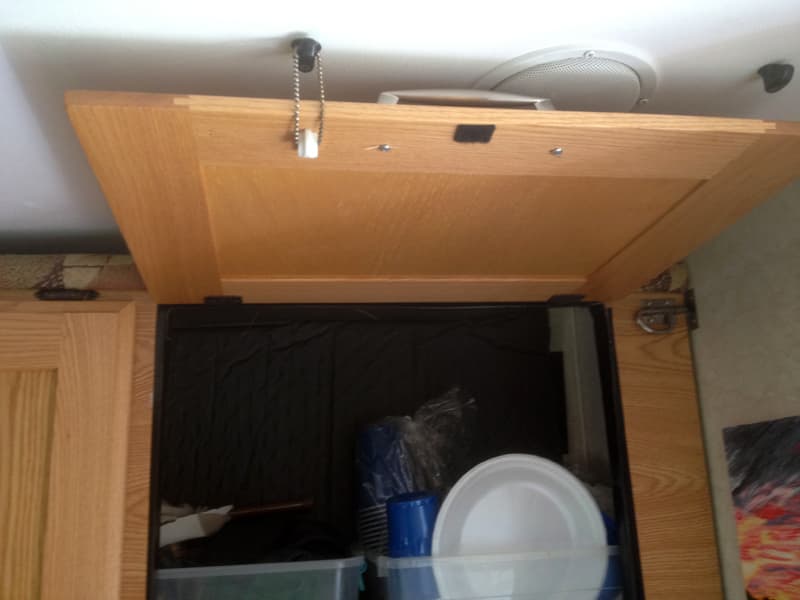
It’s fabulous storage for paper towels, plates, cups, blankets, etc. I used the microwave space for an additional pantry for lighter packaged foods.
The project took approximately nine hours, including the time to make and finish the cabinet doors. The materials cost about $250. In my opinion, the skill level of this modification is hard.
6. Wade and Becky Johnson, Powhatan, Virginia
Camper Dolly For Inside Garage
2004 Ford F350
2004 Lance 1130
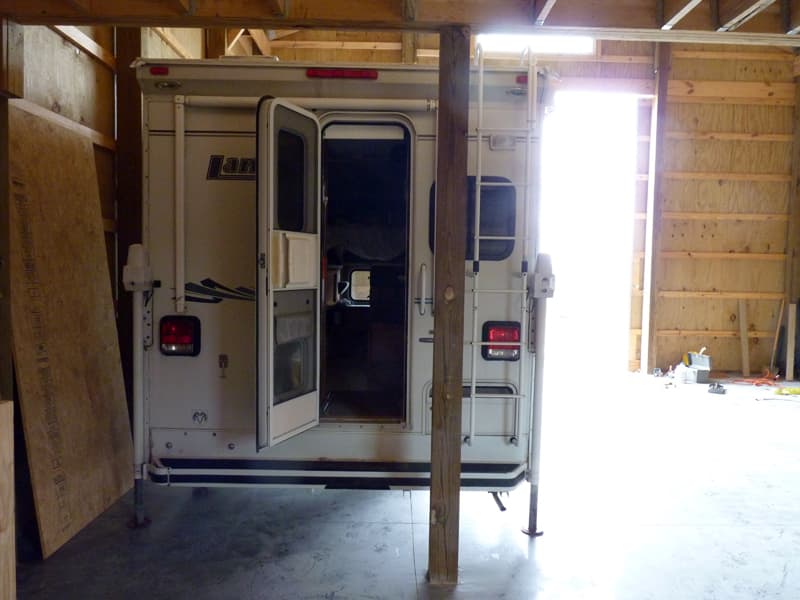
We have a new barn that we wanted to store our camper in but the barn isn’t big enough to maneuver the truck and camper around. We need the camper out of the way. To solve this, I wanted to create a rolling camper rest that would allow us to push the camper to the side once it was off the truck.
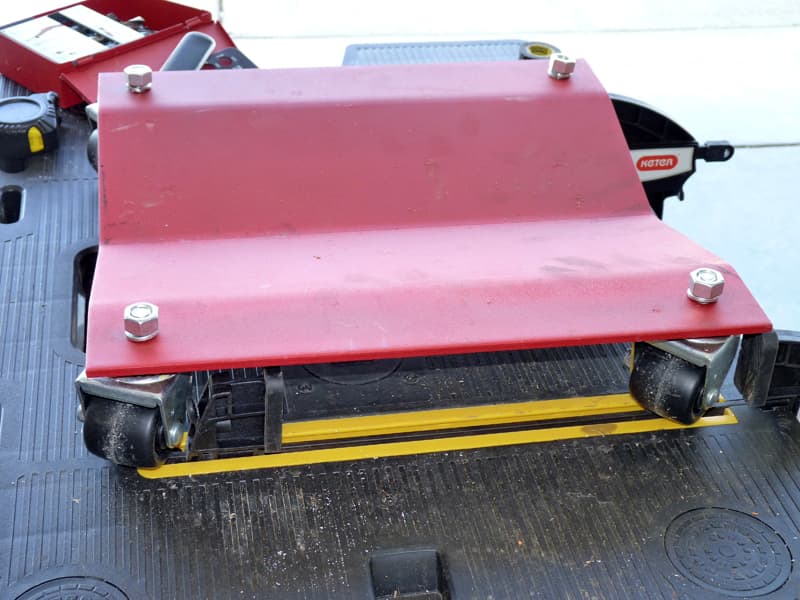
I used car skates that are designed to go under a car’s tires. They allow you to push the car around a garage, and they will go under a framework that would hold the camper.
 |
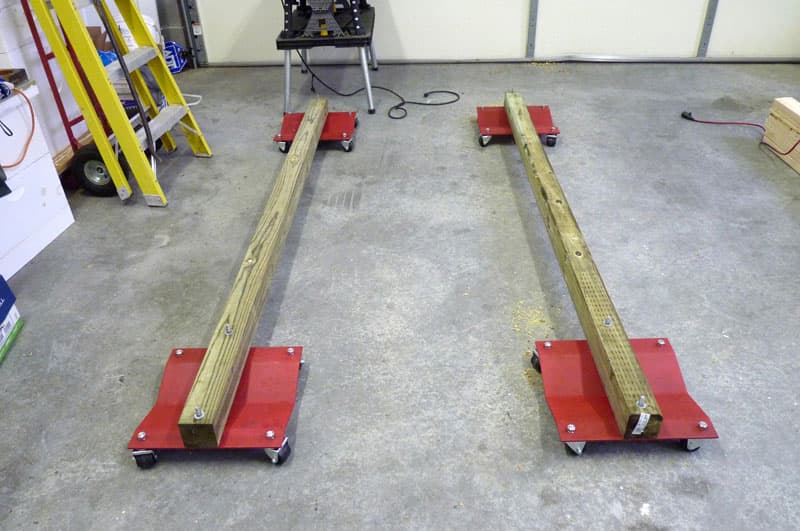 |
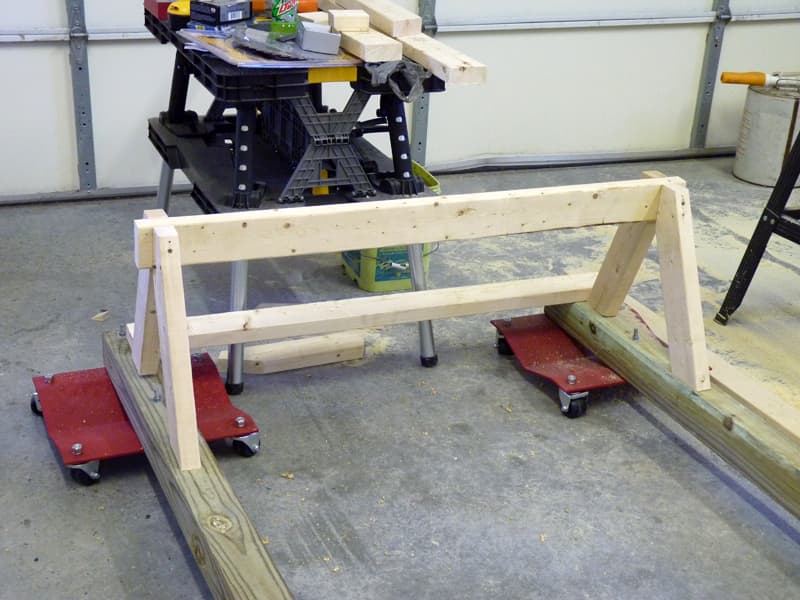
Basically, I used 4x4x8 lumber to connect the four skates and built reinforced sawhorse-like frames on top of those.
 |
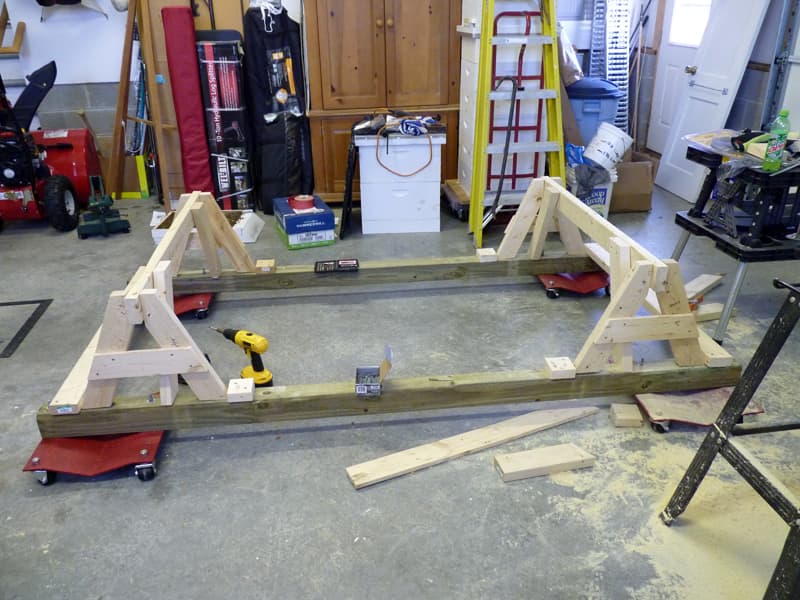 |
The hard part was figuring the angles to make a strong framework. That took some trial and error.
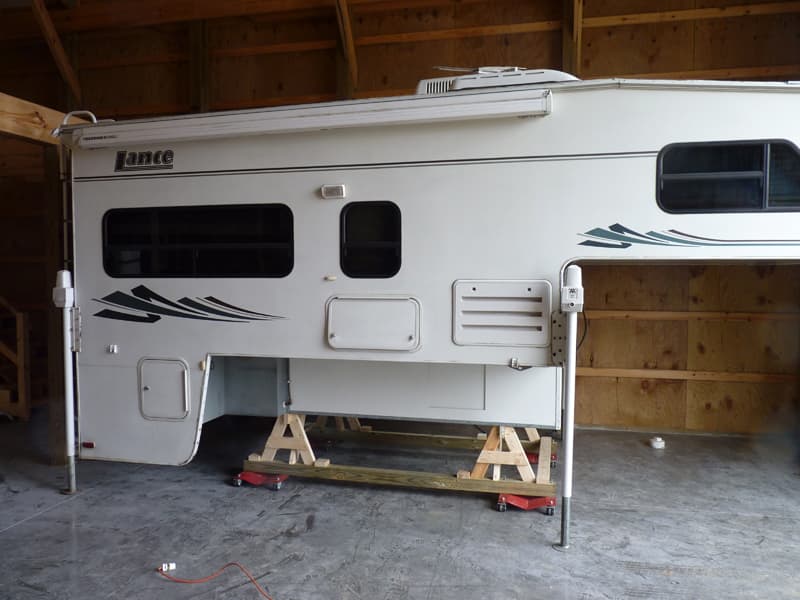
We backed the camper into the barn, jacked it up, pulled the truck out, and lowered the camper slowly onto the rest. To my delight, the rest took the 4,000 pound camper and didn’t even groan.
However, it was just too heavy to roll by hand, so we used a couple of 2×4’s as levers and moved the camper a few inches at a time by prying on the sides of the 4×4’s. It was slow, but the camper rolled slowly into place with no problem. Once in position, we lowered the legs to provide additional load bearing and stability. We were very pleased.
It took me eight hours to complete this modification and cost me $140. In my opinion, the skill level of this modification is hard.
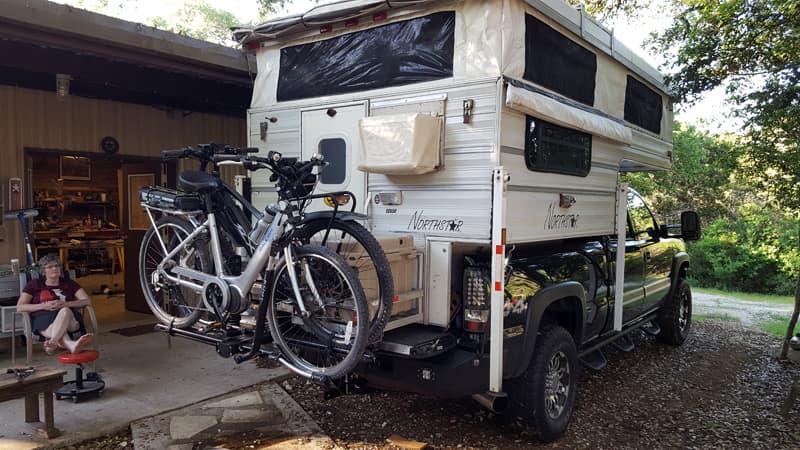
7. Tim Ray-Tahtinen, New Braunfels, Texas
Cargo Rack and Rear Carrier For Two Bikes
2007 Chevy Silverado 2500 HD
2003 Northstar TC650

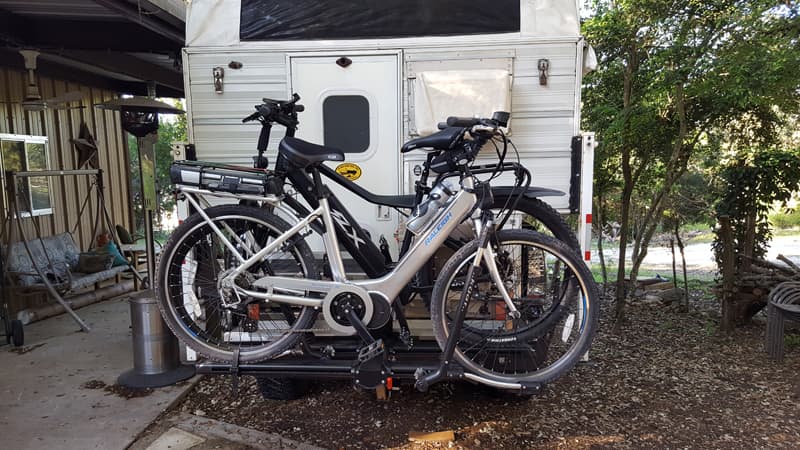
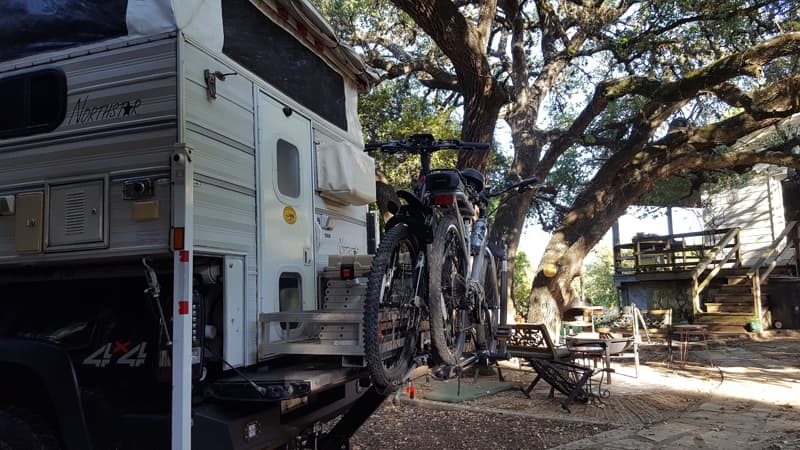
I needed a rear carrier for gear and two bikes. It also needed to maintain my entry and departure angles because the lion share of camping we do is off road. I also needed to be able to access our camper with ease while on the road. A swing out system was needed. I wanted my cake so we could eat it too.
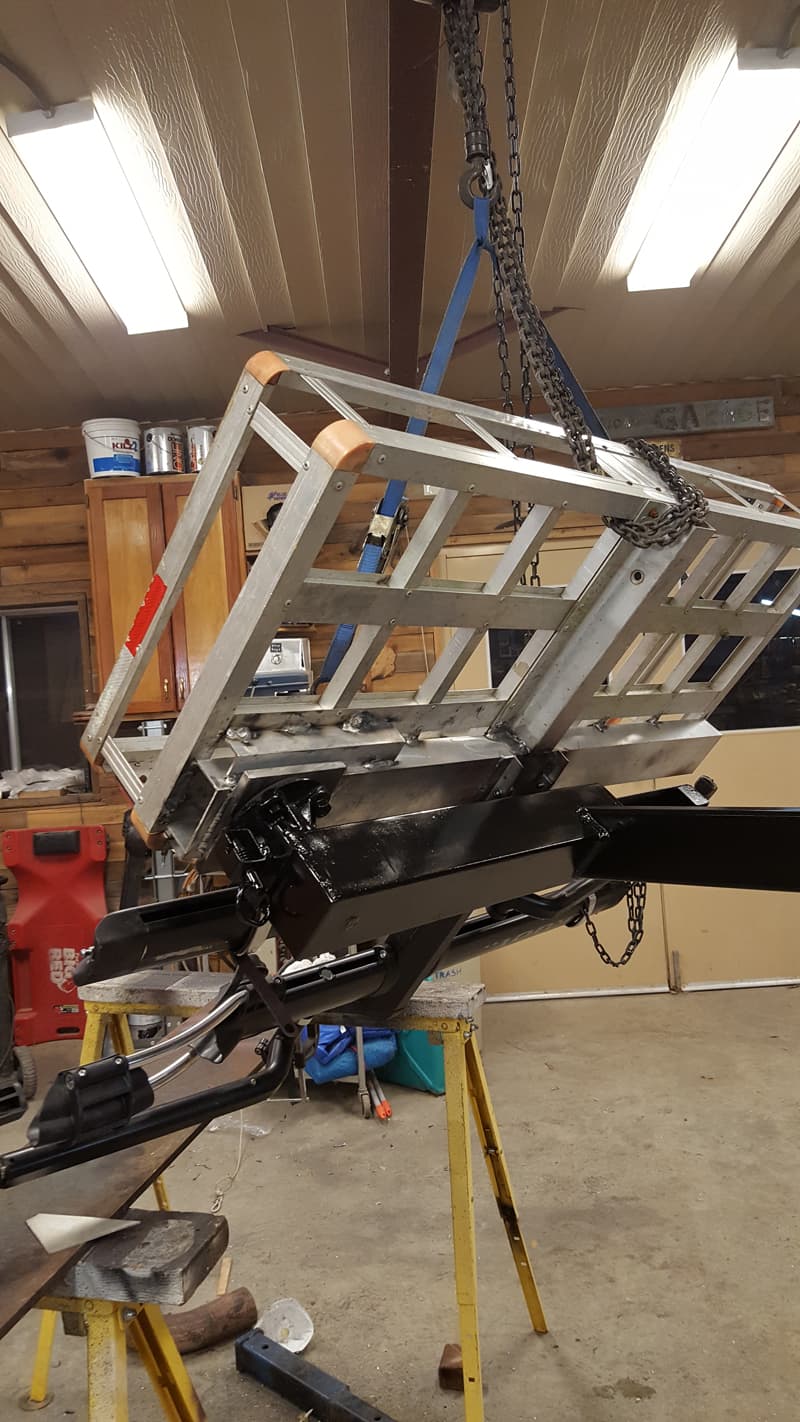
Very few suppliers had what I was looking for. Those that did were not affordable. So I took an aluminum Northern Tool rear receiver carrier, a trailer axle hub, some scrap steel tubing, aluminum tubing, and a rear section of a dual bike carrier and put them together.

I started by butchering the aluminum carrier and adding a strong back 2×4 aluminum rectangle tube. Then I fabricated a steel receiver unit that lifted the whole assembly over the top of my rear tailgate. We use our tailgate as a rear deck when our TC650 Northstar is installed.
 |
 |
I welded a bike carrier rear add-on section in place on the back of the aluminum carrier.
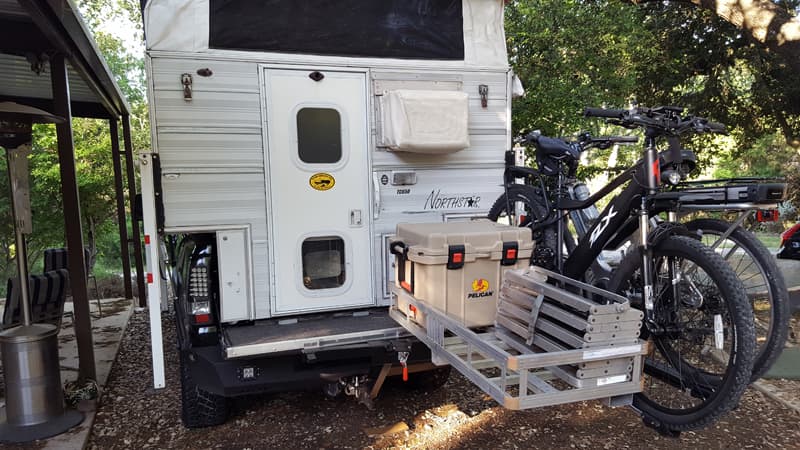
And presto, I have a finished swing out cargo/bike rack. I will be taking it into the backcountry of the North Rim this year.
It took me about 30 hours to complete this modification and cost me $100 for the carrier, $175 for the bike section, $85 in materials, and $40 for the spindle. About $300 in total. In my opinion, the skill level of this modification is extremely hard. You need to know aluminum and MIG welding.
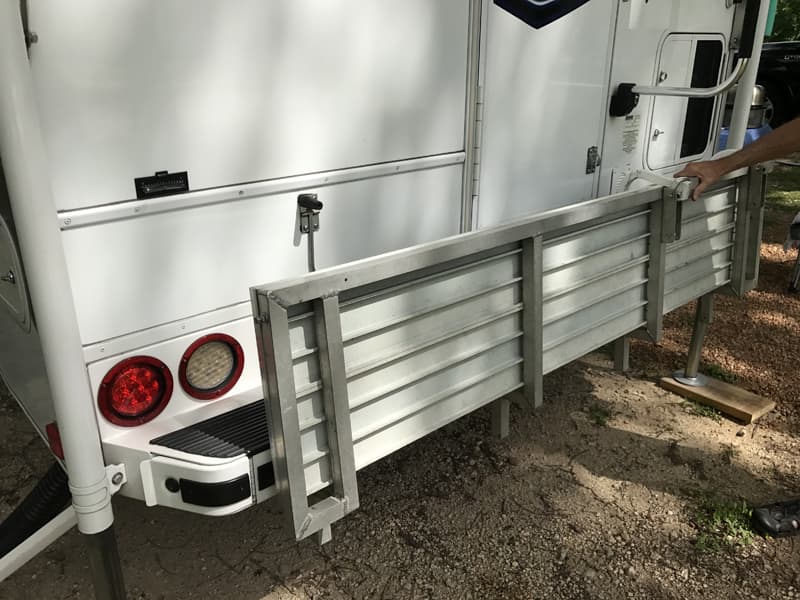
8. Bruce Jones, KwaZuluNatal, South Africa
Fold Up Entrance Steps With Storage That Locks
2004 Toyota Hilux
Week-n-der Camper
I have visited many of the major places of interest in our beautiful country, but usually at 35,000 feet or 120 kilometers per hour (74 mph). I would now, at 76, like to take time to smell the roses and explore all the places in between.
I am no longer interested in pitching tents or sleeping in sleeping bags and stretchers. I know better than to try and persuade Liz to do so. We love camping but, at our age, we need a comfortable bed to sleep in.
I have a 2004 Toyota four-wheel drive truck with low mileage. I recently bought an old Week-N-Der camper in order to travel South Africa and surrounding countries in Africa. While it is in relatively good condition for its age, it overlaps the bin by about five centimeters (about 2 inches) and does not allow the tailgate to close. This is not a problem because it acts as a veranda at the entrance.

I needed entrance steps and, after much research, could not find what I was looking for. I also need somewhere to store camping equipment such as ground sheets, tent pegs, tarpaulins, and other light but bulky items. These items would otherwise have to be stored inside the camper while traveling and could be wet and muddy on occasion.
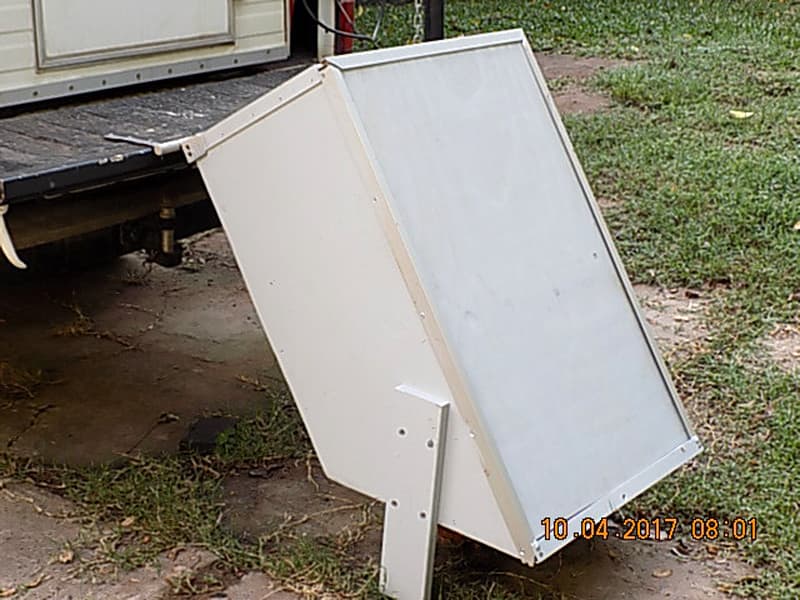
After much trial and error, I came up with the idea of putting the steps in a box which could be raised or lowered or removed entirely. It also is extra security as it locks over the entrance.
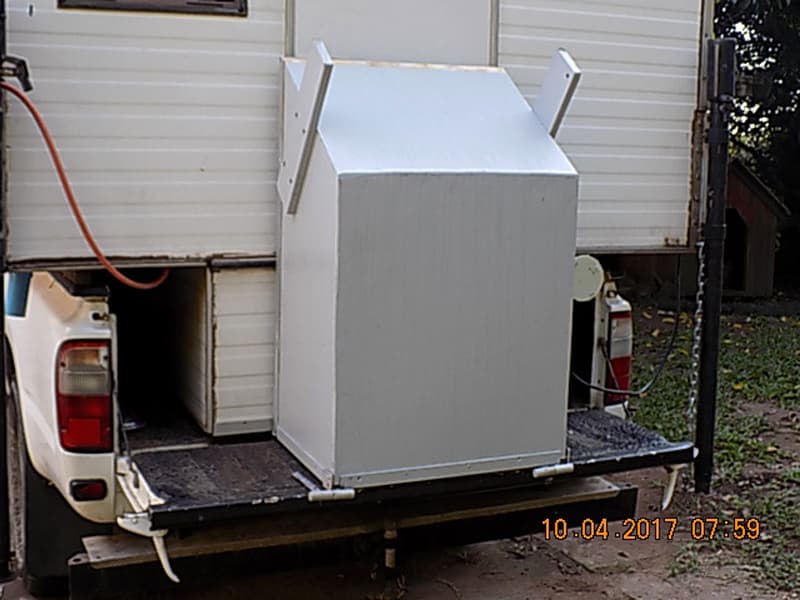
I did not want anything heavy, so the outer box is constructed of plywood. The sides which need strength are 10mm and the rest is 6mm. The steps are made from tongue and groove pine floor boards. The slide sections are aluminum angle.
Bullet hinges facing the same way allow the box to tilt up onto the tailgate and the whole contraption can be removed.
There is a lot of space in the box and the steps act as shelves. Once the bulky items have been packed away, the front and top covers are slid into place and the box can be tilted up onto the tailgate.
I have not traveled with it yet, but I am sure that it will suit my purpose as steps with the added bonus of storage.
I did the project over a few days; cutting out the parts, gluing and screwing the framework, constructing the slides, sandpapering, painting and allowing it to dry. I estimate the total time to be about six hours.
The cost to me was minimal as I had most of the wood, screws, and aluminum on the farm and purchased only the 6mm ply. In my opinion, the skill level of this modification – according to the TCM definitions – is hard.
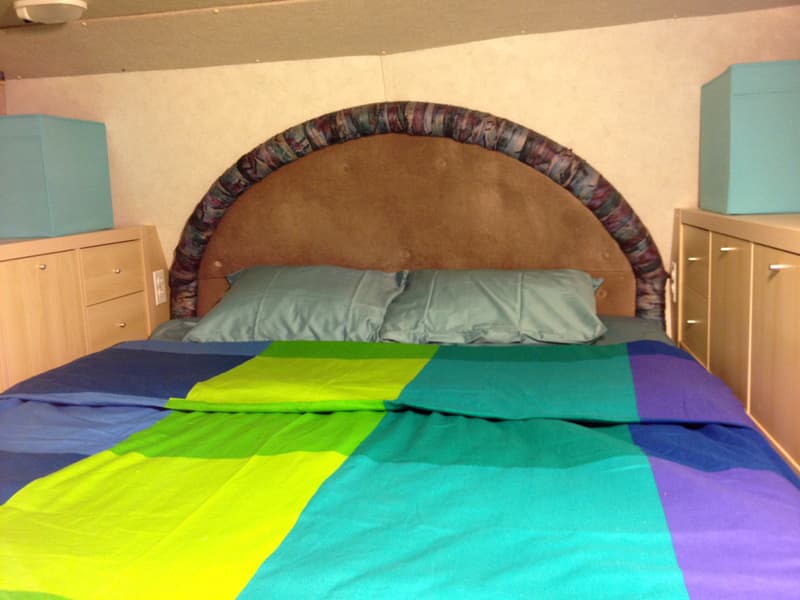
9. Thomas Bowes, Warren, Michigan
IKEA Storage Cabinets For Overcab Storage
2010 Chevy Silverado
1998 Bigfoot 30C10.11F
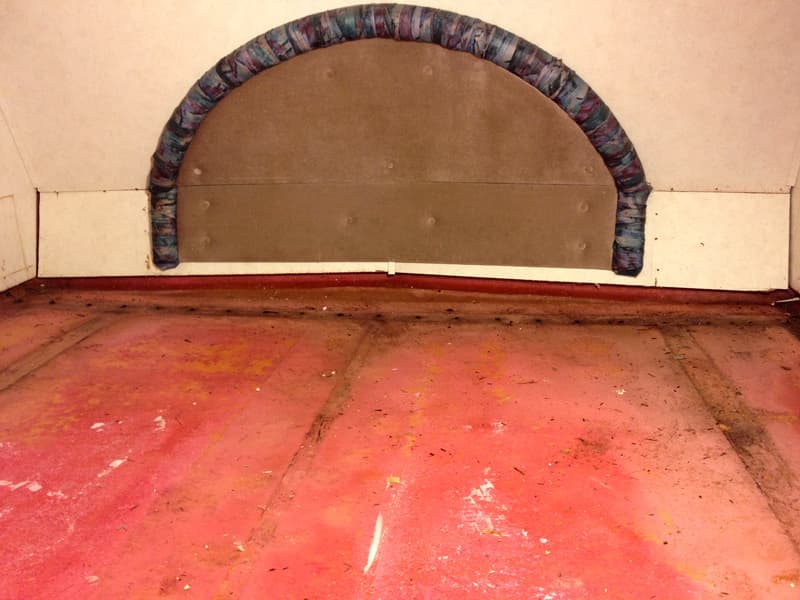
The bedroom area in my camper was water damaged and needed to be torn out. I also disliked the hamper cabinets that were part of the original design.
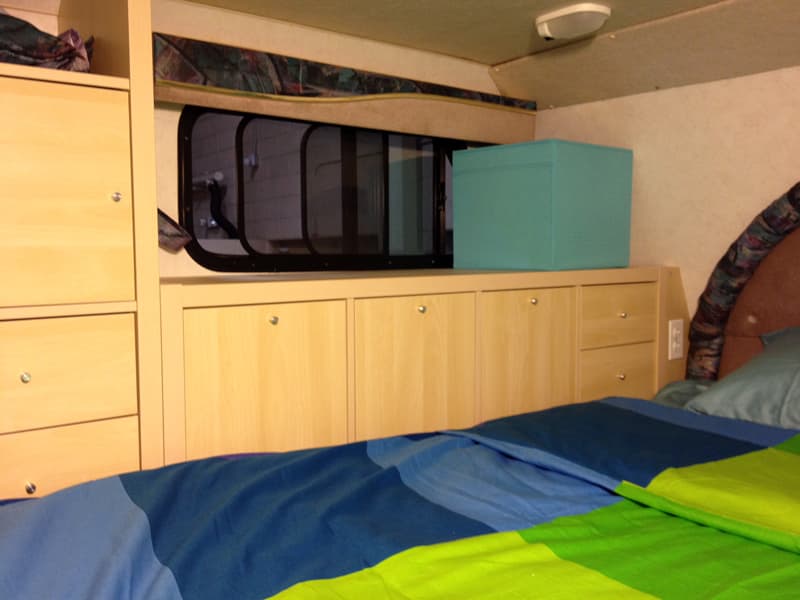
I tore out the cabinets and the flooring and replaced the cabinets with IKEA Kallax shelving units with drawer and door inserts. By raising the units to just below the windows, I now have additional storage under them for extra pillows, blankets, and clothing.
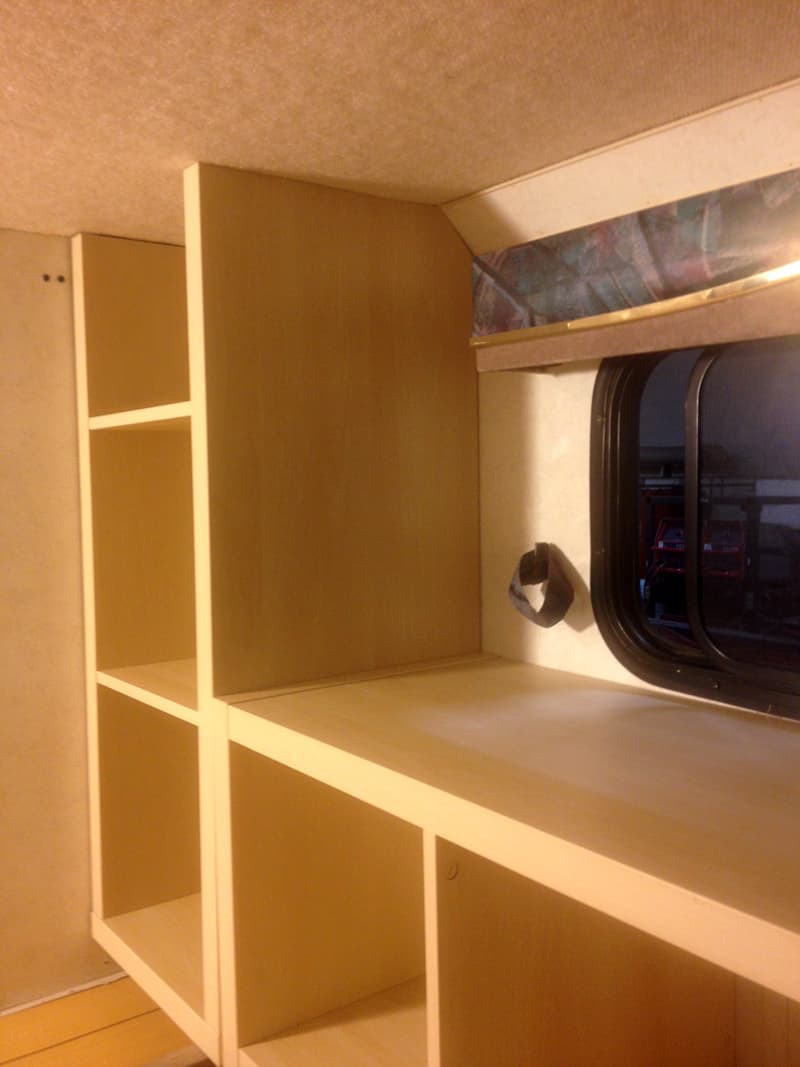
I used three units to construct the new cabinets, custom fitting them into the angled space at the front of the bunk. I also added two 120-volt receptacles on each side of the head of the bed.
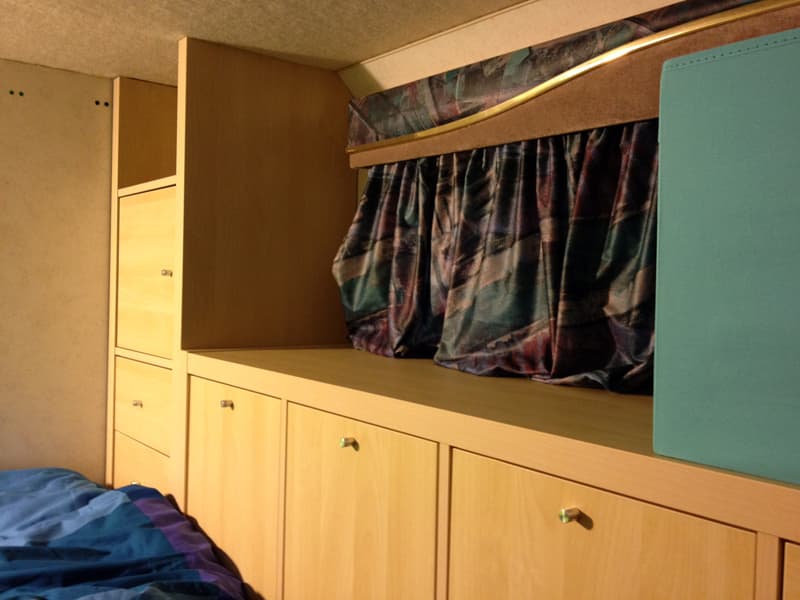
So far the mod has worked out fine. The forward facing doors and drawers allow items to be stacked and accessed more easily than the old vertical hampers. The top of the new cabinets can also be used for sundry items such as boxes of tissues, a clothes basket, and my CPAP machine.
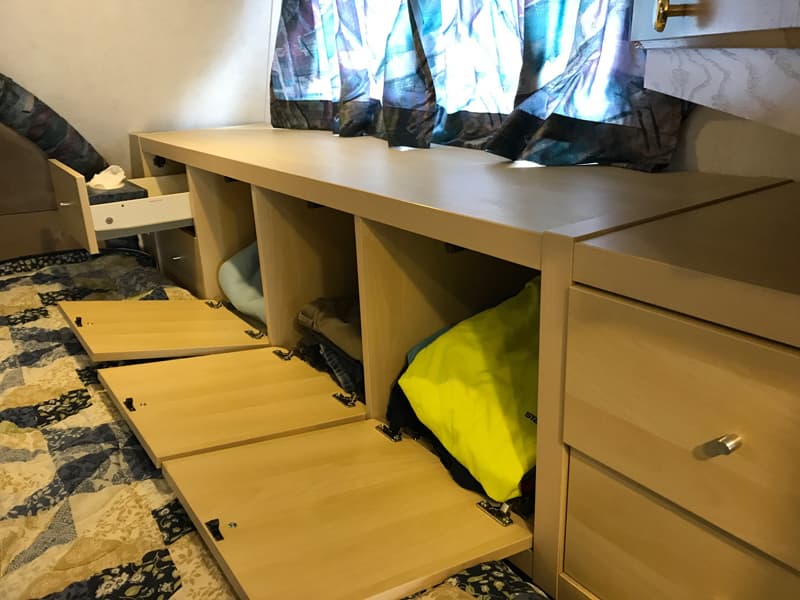
It’s a little tricky getting into the bottom drawers as the mattress is somewhat in the way. The bottom drawers are good for small items that can be reached without having to pull the drawers all the way out.
The tilt forward bottom hinge arrangement on the doors has worked out well, allowing them to be tilted out about 45-degrees for access to the inside.
It took me 40 hours to complete this modification and cost me $500. In my opinion, the skill level of this modification is hard.
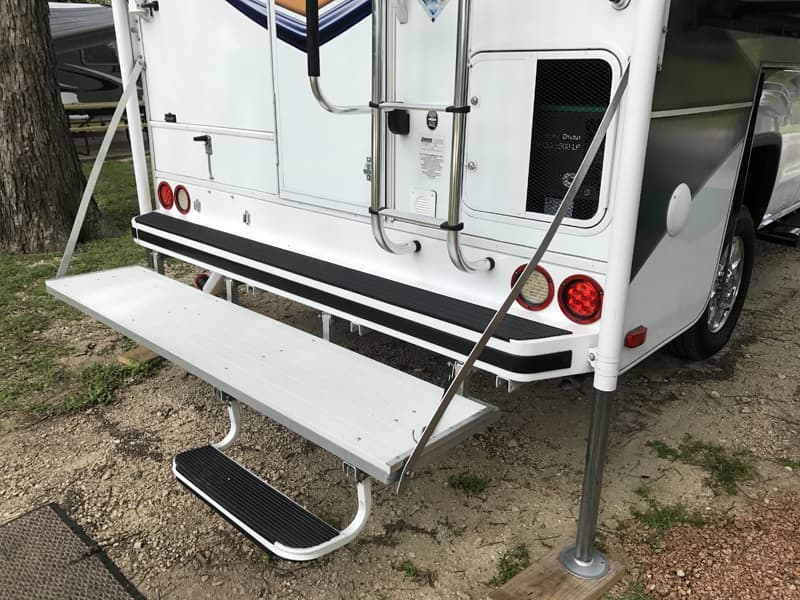
10. Les Sage, Joplin, Missouri
Aluminum Tip Up Rear Deck
2015 GMC 3500
2015 Lance 855S
The main issue for us was safely entering and exiting our camper with the stock eight-inch rear bumper. We generally had to exit the camper backwards to be safe.
I wanted the deck to look professional and clean. My first thought was to use the aluminum panels often utilized for picnic tables. As I researched where to purchase aluminum panels, I discovered a company that made boat docks.
The boat dock company offered all kinds of decking material. When I contacted them, they and told about their deck material with white powder coat. I had them cut it to the exact length I needed and ship it with pieces of trim for the end caps.
Before designing our rear deck, I studied how others installed various decks on the back of their truck campers. I pull a boat, so I designed our deck to tip up. The boat I pull only works with the deck secured in the up position. The deck is also a place to sit when we are boondocking.
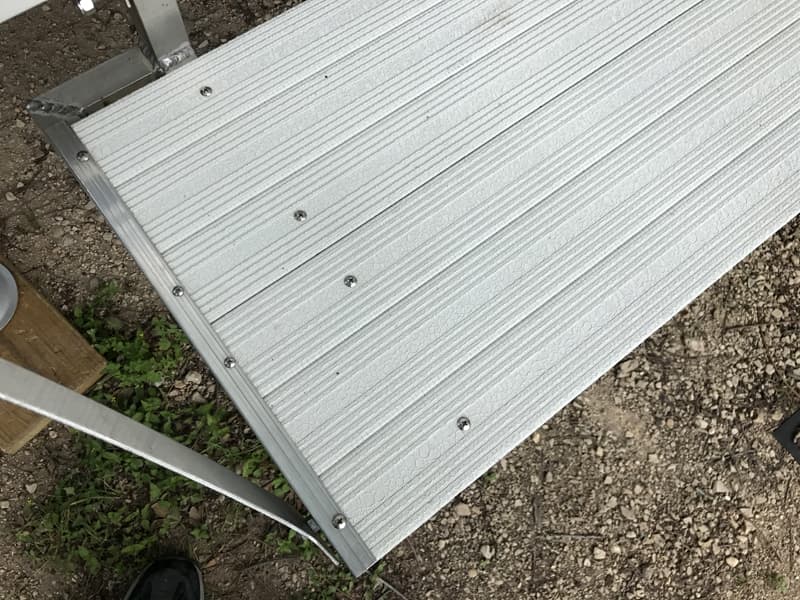
The deck framing is made out of 1½-inch square aluminum tubing. 1½-inch square aluminum tubing is the perfect diameter to fit inside the receivers on the bottom of the Lance Camper.
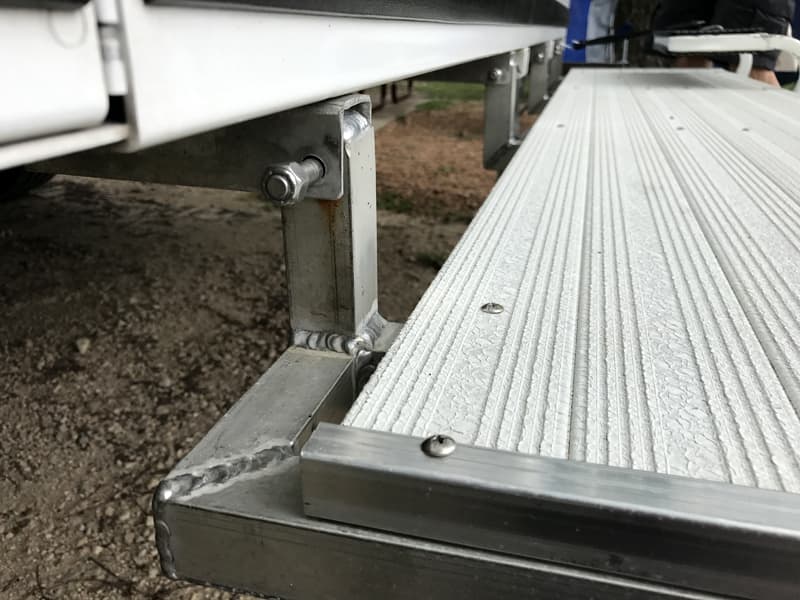
I used aluminum tubing to reduce weight.
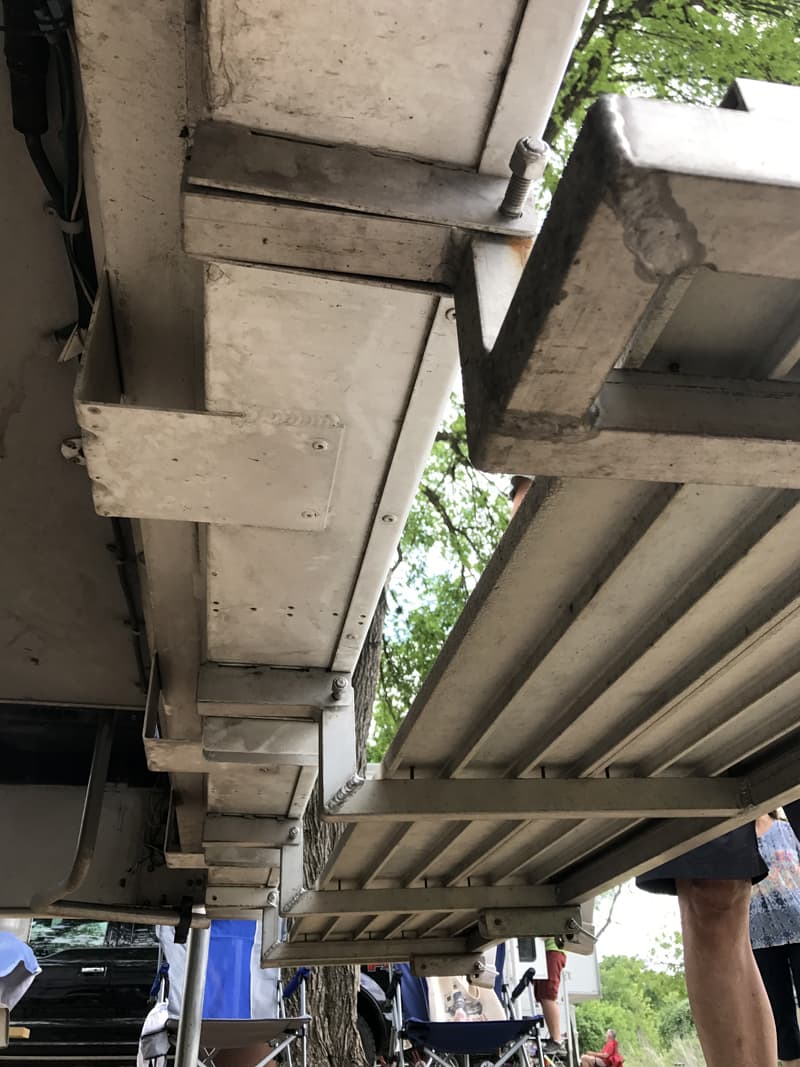
When lowered, the deck stops when it is perpendicular to the vertical portion of the rear bumper and parallel to the ground. This design does not need chains or supports. It can support itself. I added the aluminum straps for more rigidity. I started with chains and they were too flexible.
The deck is very easy to remove. I drilled holes into the tubing so it can slide in and bolt into the channeled receivers the same way the camper step attaches. The deck can fold up when I drive, but I usually keep it in the down position.

At first, I was going to use a plastic step stool with the deck. Then I realized that the existing Lance swing step would attach to the outer edge. That eliminated the need for a plastic step stool. The Lance swing step folds up onto the deck in the same manor it did on the original Lance bumper.
I originally wanted deck mounted at same level as bumper. I opted not to do that because we would need more steps to get into the camper. Using the Lance swing step eliminated that problem. The deck and step are pretty low to the ground.
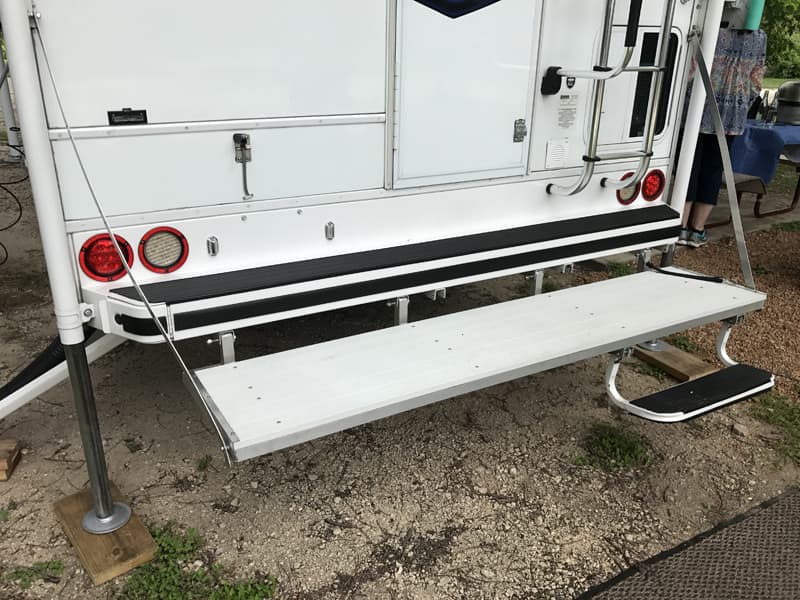
I also added a big assist handle to the camper. I’m thinking of adding a box underneath the overhang for hoses and other exterior items.
I’ve done over a hundred modifications, and over everything, we have the most enjoyment from the rear deck mod. We put our shoes on it, we sit on it, and we have a carpet to wipe shoes on.
The rear deck took me an entire day, plus months of design considerations. I took the design to a professional metal fabrication shop for the welding part of the bottom of the deck.
The deck materials cost $150, plus the welding labor of $150. In my opinion, the skill level of this modification is hard due to the required aluminum welding.
Click here to vote for your favorite 3 mods from this month’s contest.
Disclaimer: The modifications above are submitted by Truck Camper Magazine readers. It is your responsibility to make sure that any do-it-yourself modification project you undertake is safe, effective, and legal for your situation.
Enter Your Mods Now!
If you’d like to enter mods into TCM’s Monthly Mod Contest, click here. You can enter as many mods as you want, at any time. Good luck mod makers!