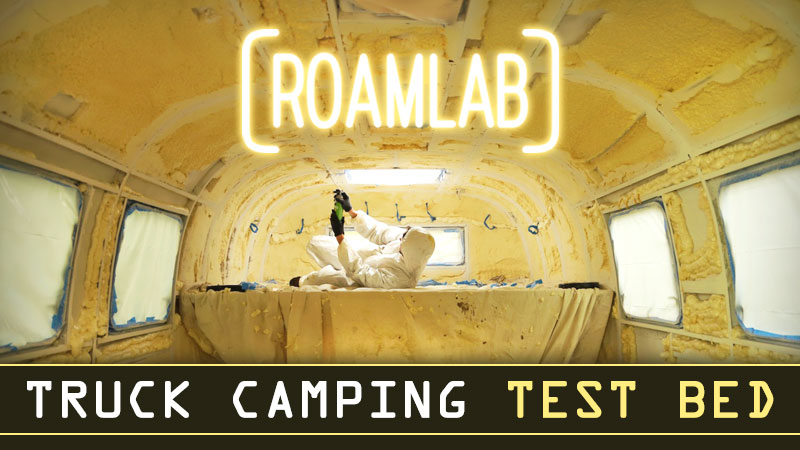
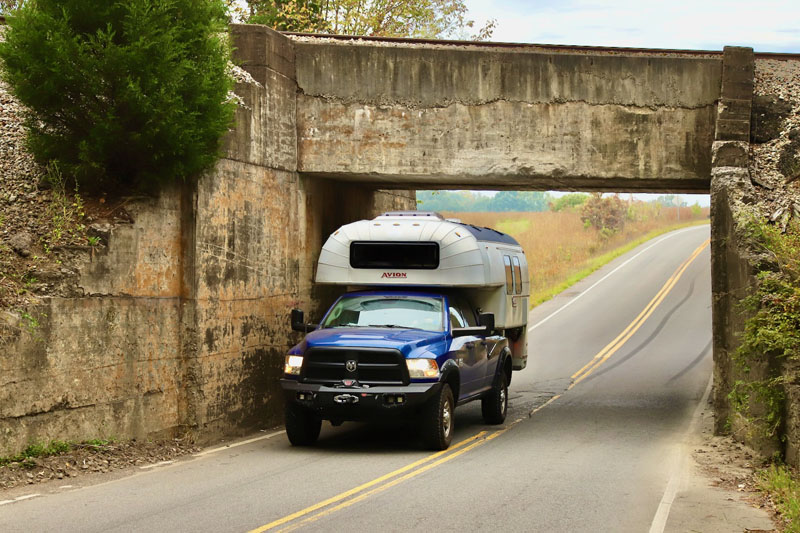
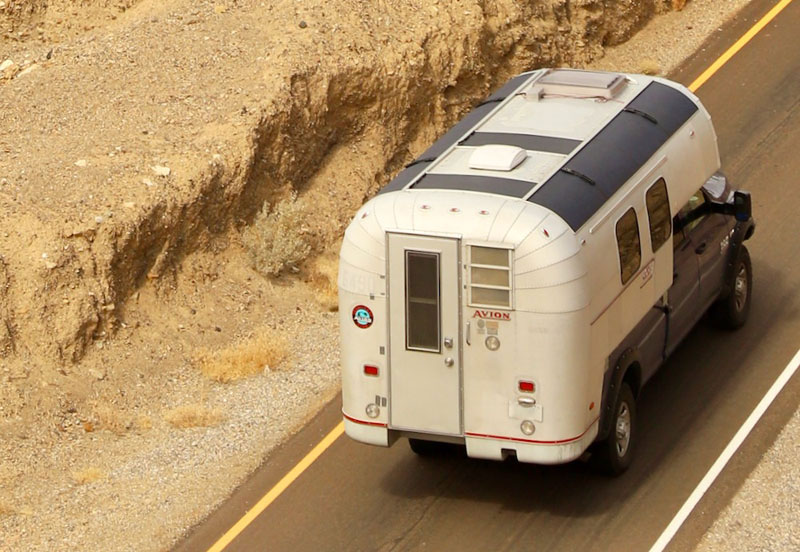
Lexi and Chris of Roam Lab are scientifically transforming a vintage camper into a platform for innovative ideas. For starters, their 1,100-watt solar panel system is attached with industrial strength velcro. It worked for Apollo 11. Why not an Avion C11?
With little to no experience working with campers, aluminum or fiberglass, Lexi and Chris purchased a four-decade-old riveted aluminum Avion C11 in desperate need of repairs. And when we say desperate, the floor and wing walls were rotted to the point where the two didn’t feel safe using the camper. What were these two thinking?
Well, it turns out it’s exactly what they wanted; a 1970s vintage camper they could gut, rebuild and remodel. They loved the vintage 70s camper aesthetic and were full of daring ideas to push the camper’s comfort and off-road capabilities forward. We have never encountered a couple who approached truck camper upgrades and modifications with more of a scientific mindset than Lexi and Chris.
With that mindset comes a bit of madness, as in an eager willingness to think up, research, and deploy cutting-edge experiments no camper manufacturer would dare consider. How about solar panels attached with industrial velcro? Or building custom lithium batteries? Or extending a camper to create a north-south cabover?
Some of Lexi and Chris’s experiments are firmly in the ‘that’s brave and interesting’ and others are dangerously close to that, ‘mad scientist’, bubbling beakers and buzzing Van de Graaff territory. It’s alive!
In all seriousness, Lexi and Chris’s creativity and willingness to experiment is refreshing and could yield huge breakthroughs for our community. Should the truck camper industry experiment with velcro for solar panels? Absolutely! And while they’re at it, they should take a look at the other ‘crazy’ projects these two have tackled.
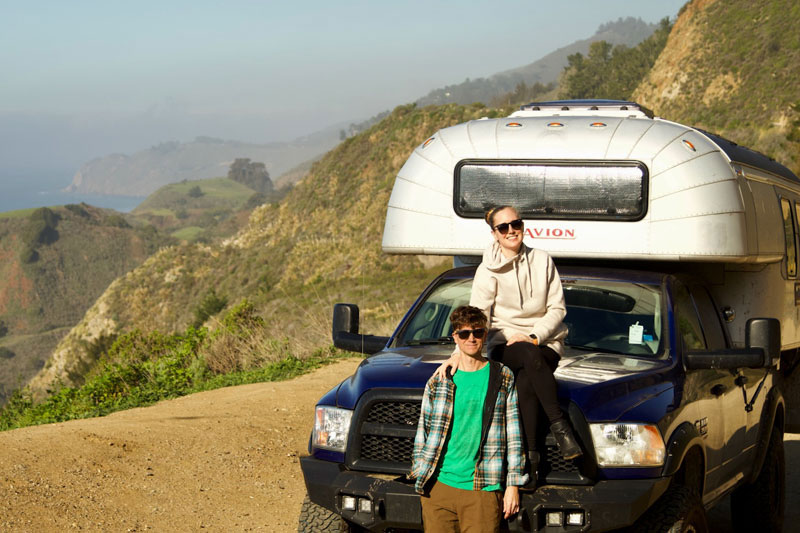
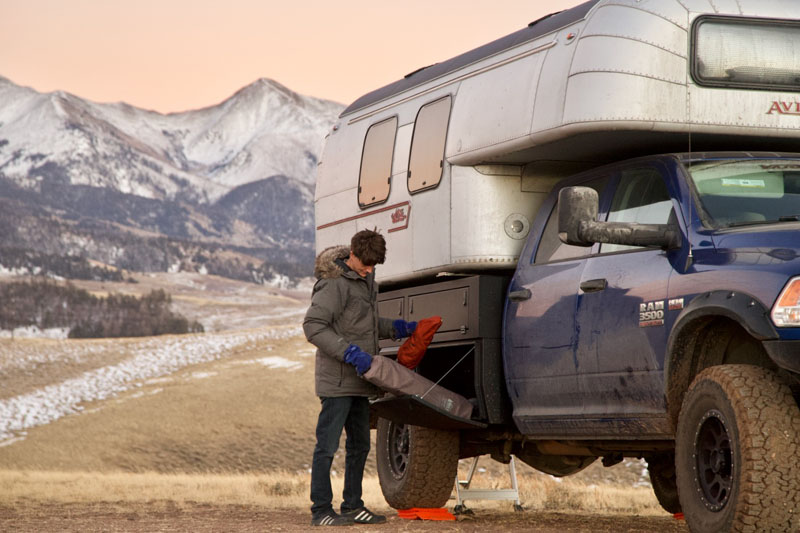
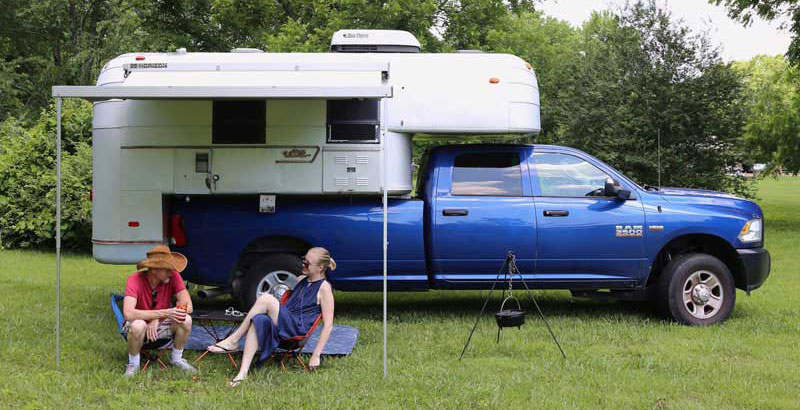
Above: Lexi and Chris parked along the California coast
What led to truck camping in a vintage camper?
We actually came to truck camping in a roundabout manner. In 2014, we sold all our furniture, moved out of our apartment, and lived full-time in a cream and brown Ram converted camper van. After traveling in the van for a year, we knew we loved the nomadic life and the vintage aesthetics of the old van. However, finding a mechanic that was eager to work on the van’s old engine was next to impossible. We also realized that the best and cheapest places to camp were easier to reach with four-wheel drive.
In our search for a better alternative, we came across truck campers. With a truck and camper, we could have the vintage aesthetic of a 70’s camper, the mobility and compact size of a pickup truck, four-wheel drive, and a truck that mechanics could work on wherever we might be.
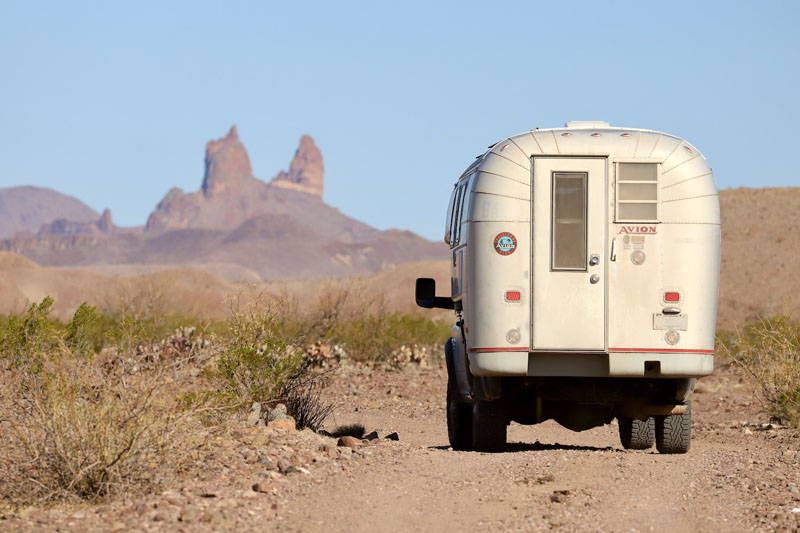
Above: Driving through Big Bend National Park, Texas
Why a vintage camper and not something modern or new?
We both like the vintage aesthetic and wanted to renovate a camper. With that in mind, practical considerations like the floor plan and appliances didn’t matter because we intended to completely remodel the interior. We wanted an iconic vintage exterior with enough interior space to accomplish our renovation goals.
We almost bought an early 70s Cobra truck camper that was for sale locally, but it was in terrible shape and the owner was asking too much. The Cobra had a two-story bunk and seating area in the cabover. It was very roomy but, in retrospect, it would have been way too big and heavy for the off-road trails we like to drive.
After some research, we narrowed our camper search down to three brands; Amerigo, Alaskan and Avion. In the end, we found a 1970 Avion C11 with very few dents and scratches in Florida. It checked all the boxes.
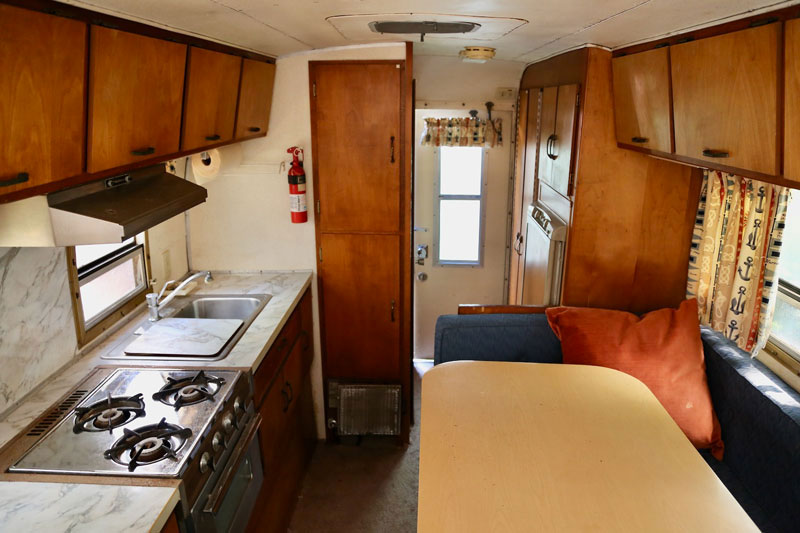
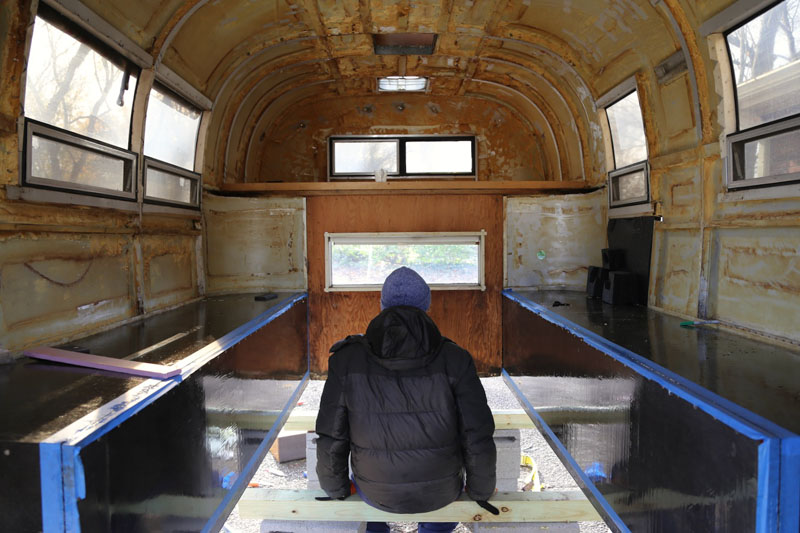
Above: Interior shot of the Avion in the Condition that Lexi and Chris received it
Your photographs show the Avion needed a lot of work. Did you have the background to tackle the scope of this renovation?
When we started, we weren’t really thinking the renovation was going to take years. We thought it would be a fast turnaround. We didn’t know what we were getting into. Fortunately, we love challenges.
We have taken the renovation project in small bites. That’s been the key for us. First, we replaced the main floor and the wings. When we had the floor and wings solid, we drove to California for the winter. It was a half-finished set-up because the cabover still had rotted wood. We couldn’t sleep in the cabover for that trip, but it was a good start.
Since then our lifestyle has alternated between renovation and travel, renovation and travel. Traveling makes our slower progress palatable and gives us time to identify, research, and respond to renovation challenges along the way. Renovating the Avion has been an exciting opportunity to learn.
We bought a 10 year old truck camper in 2014 and have been learning ever since. When you have a renovation task you don’t know, what do you do?
There are so many great resources. Of course, we look to see what fellow RVers are doing on YouTube and other social media. The online boating and airplane communities have also been invaluable. Once we have a general overview from these communities, we dive deep into industry educational publications and reach out to vendors. A handy tip when researching tasks is to learn the industry terms and use them when searching for resources.
It helps that we’re both naturally curious. As software developers, we have an engineer’s mindset and break things down logically. That said, we have been surprised that we haven’t seriously hurt ourselves, yet.
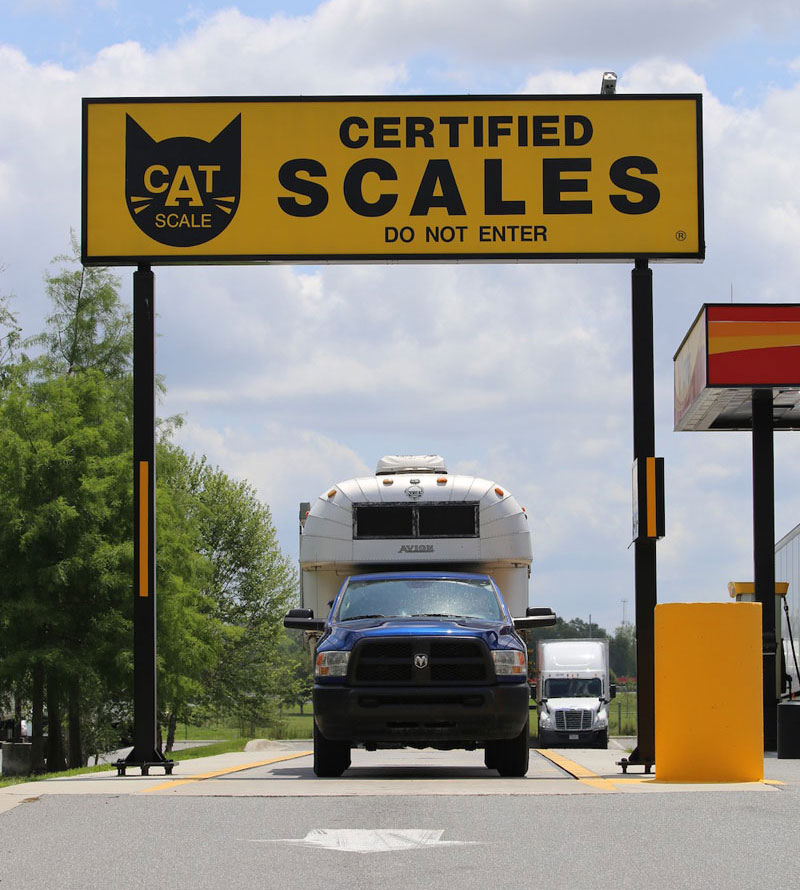
Above: They frequent the CAT Scales to keep track of the camper’s weight
Every camper requires a little blood and sweat to keep going. Why did you weigh your camper right after you took ownership?
We wanted to get a sense of the camper’s weight before we gutted it. That weight is our baseline to compare against as we renovate. We also keep an eye on our rig’s weight because of the rougher trails we travel on. We have heard horror stories of heavy or mismatched campers getting stuck. That’s why we went with a one-ton truck. It is better to have more capacity.
Initially, the Avion C11 weighed 2,837 pounds. The weight of our rig has shifted as we have changed things up like adding a bumper, the new truck bed, and various additions to the camper. On our website, I track the weights and what has changed each time we CAT scale our rig.
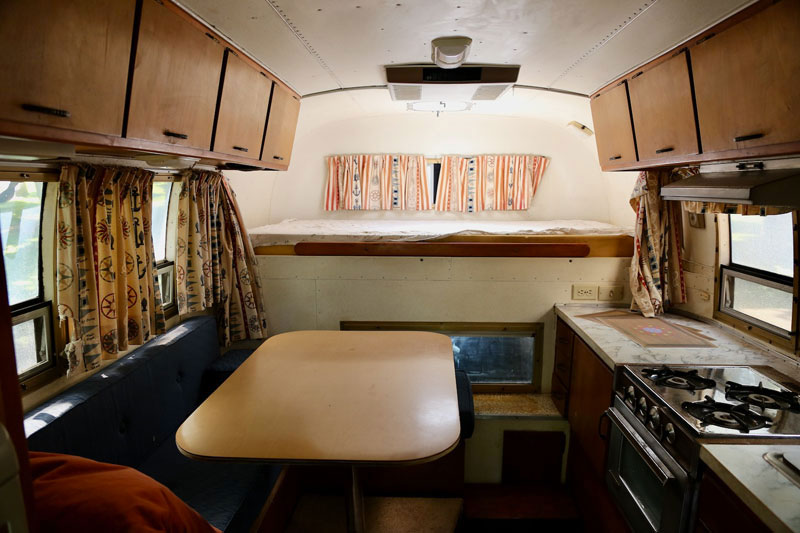
Above: Interior shot of the Avion with the original East-West full sized bed
The running camper weight tally is a great idea to learn how much difference changes make. Avion has been out of business for at least 25 years and is constructed more like an Airstream trailer than any camper currently on the market. How did you know where to start?
First, we had to get rid of the cockroaches. But aside from creepy crawlies, our renovation work started by documenting everything so that we had points of comparison. I also have the pictures from the original Craigslist listing where we found the camper.
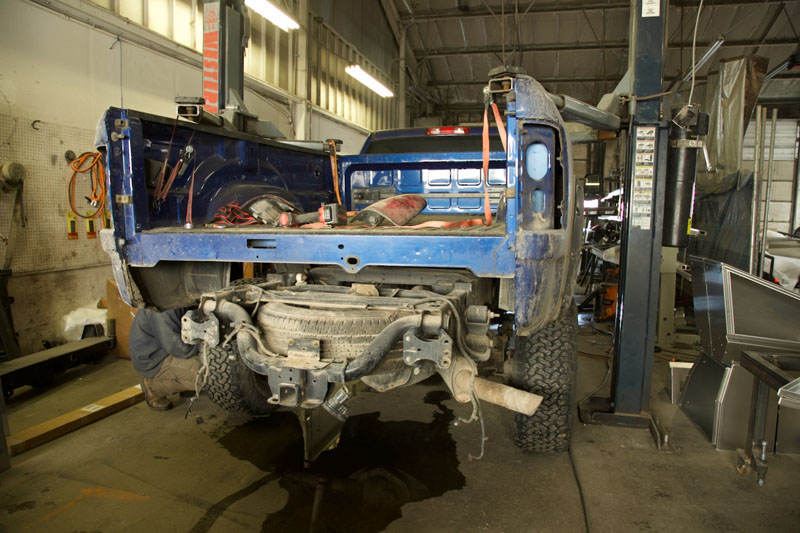
Above: Replacing the main floor and wings; negative space between the camper wings
After that, knowing where to start was obvious. We could see how rotten the floor and wings were when we picked up the camper. As a safety issue, the floor and wings needed to be taken out and replaced right away. It was an intimidating first step. We didn’t know what was going to happen when we took the floor out.
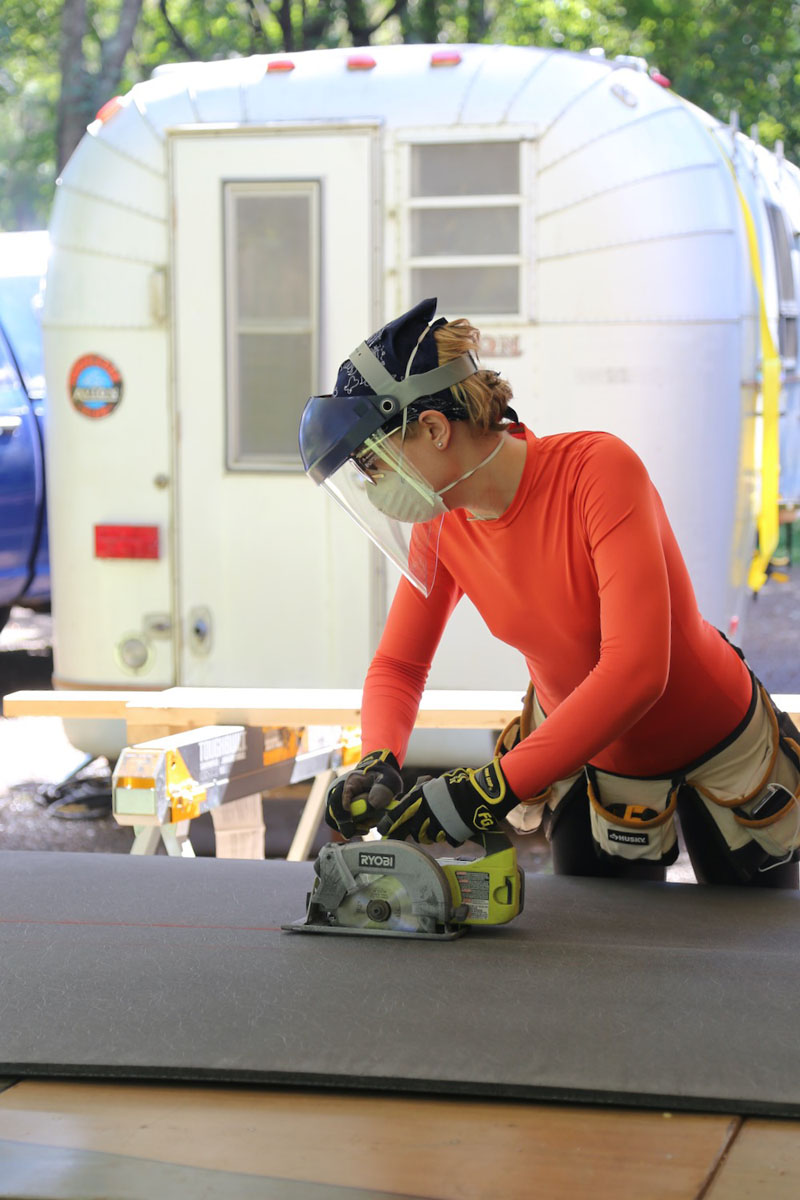
Above: Cutting Coosa board for the wings
There is an extensive Avion truck camper thread on RV.net. From that thread, we could see what others had done, but it was mostly just pictures. I kept thinking, “When we take out the floor, is the camper going to collapse like a house of cards?” Of course, if we didn’t have a solid floor and wings, it wouldn’t matter. The camper would not be roadworthy or safe.
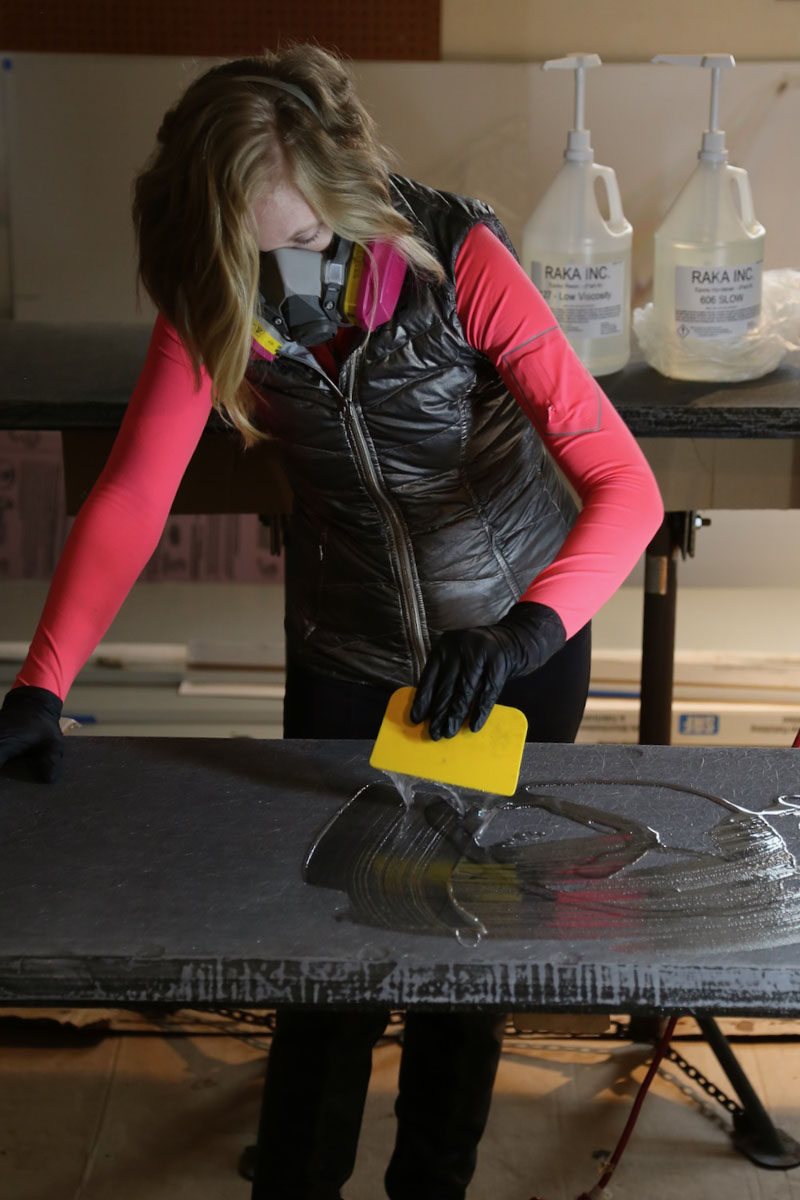
Above: Spreading epoxy on the Coosa replacement wings
With all this work to replace the old floor and wings, we wanted to be sure that our new floor would be resistant to the elements. Instead of wood, we used Coosa, a lightweight fiberglass composite that is resistant to rot. That choice required a major learning experience about fiberglass and epoxies.
Did you have any challenges with the exterior aluminum skin?
Most of the exterior aluminum was in place, but there were large sections under the wings and the base of the camper that had galvanic corrosion. We replaced these sections with anodized aluminum identical to the original camper. Anodizing large aluminum sheets calls for specialized equipment. Fortunately, we found SAF (Southern Aluminum Finishing Company) with a wide range of anodized finishes for us to choose from.
We also have the original Avion manuals and diagrams that the previous owners had. With this information, we know where the wires run. As a camper from the 70s, it seems things were more simple and straightforward.
Above: The cabover was extended for a north-south bed
In 2019 you submitted an audacious north-south extended cabover to our mod contest. Why did you decide to cut open your camper for this change?
Our Avion originally had enough space in the cabover for a full-sized bed sleeping east-west. That was fine for short trips but, as light sleepers who occasionally wake up in the middle of the night, we wanted a solution that would allow us to get in and out of bed without crawling over each other.
For that, we needed a north-south bed. While we were at it, might as well make it a queen-sized bed with storage on each side. That required adding 28-additional inches to the sleeping area; 10-inches inside the interior body and 18-inches on the exterior. That approach would mitigate adding too much pressure and avoid a potential cabover collapse.

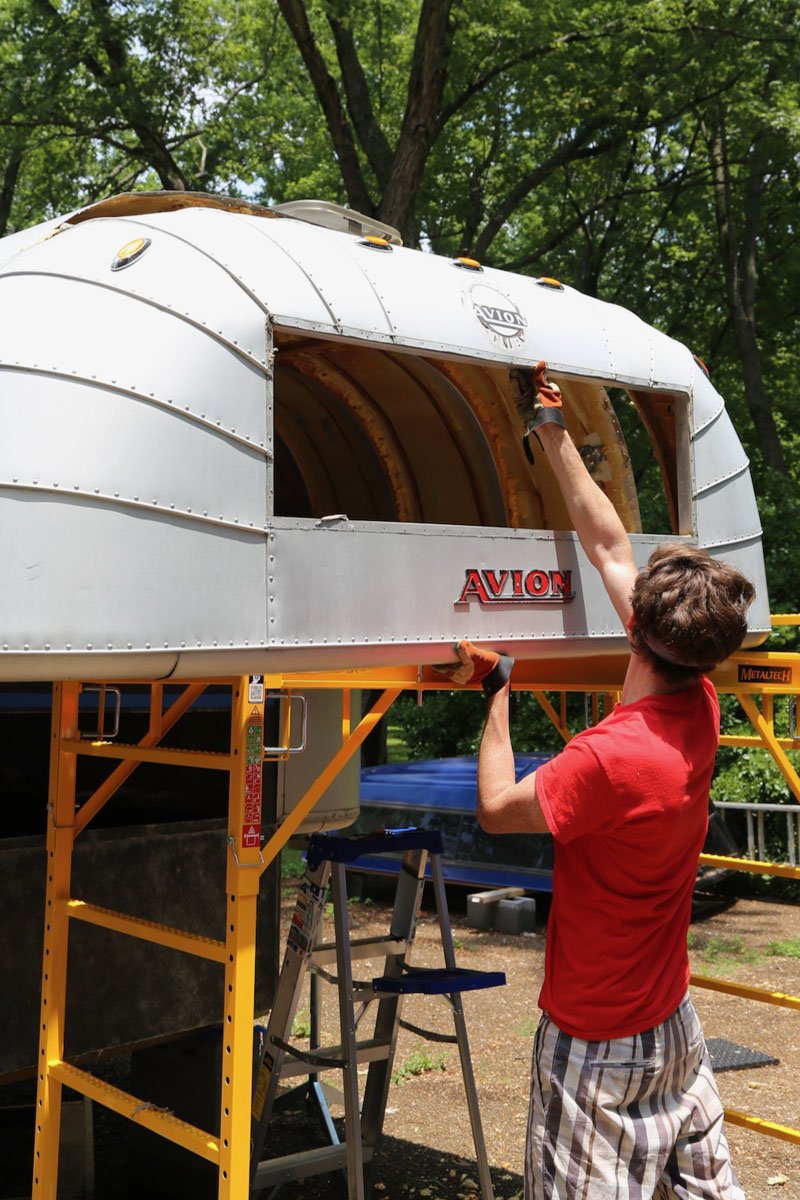
Above: Removing the last piece of aluminum connecting the Bulwark
To add the 18-inches in the cabover, we removed the curved endcap. The base of the cabover was already rotted out, so we replaced the wood floor with more Coosa board while also adding the 28-inches needed to support a queen-size bed. We then riveted in an 18-inch wide strip of aluminum sheet to extend the cabover walls before reattaching the curved end cap.
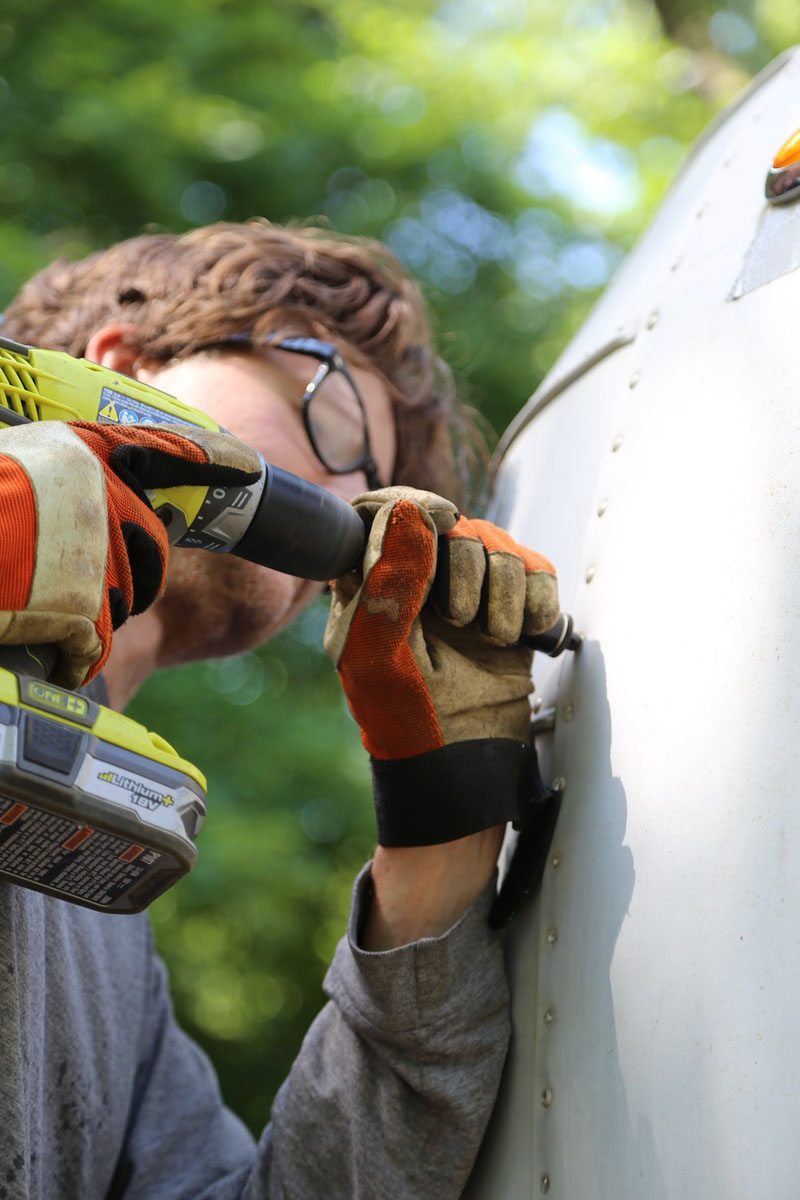
Above: Drilling out rivets for the cabover
Putting 10-inches inside the main part of the camper has worked well. It overlaps with where we have our battery box, freshwater tank, and wire runs, so it doesn’t take up much interior space. Now that it’s completed, we don’t have to climb over each other to get out of the cabover.
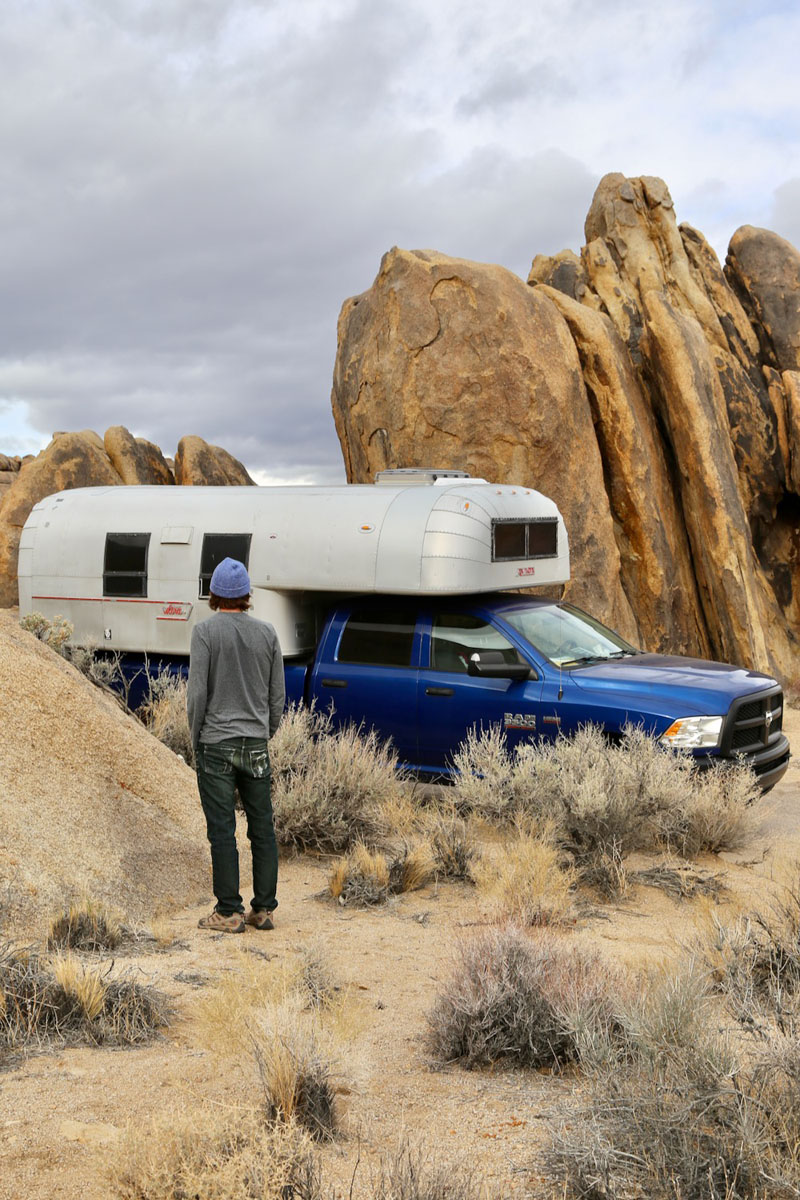
Above: The north-south cabover completed; Alabama Hills, California
Our camper is still a work in progress. We are looking forward to redesigning the interior space over the summer. A lot of our beginning focus has been on the structure. We can travel in a barebones camper, but not an unsafe rig.
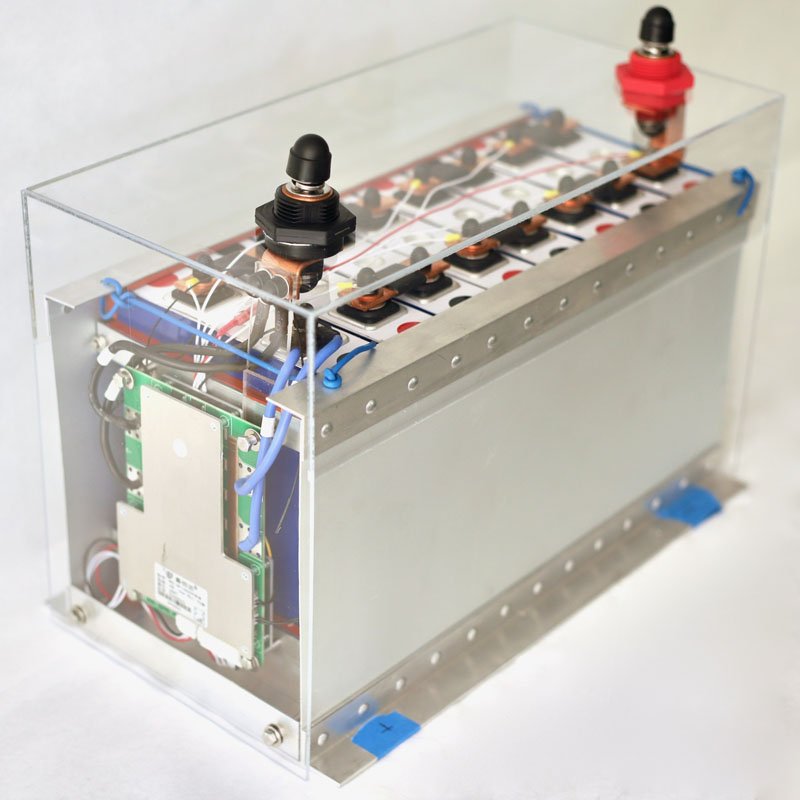
Lithium battery systems are a huge trend in the truck camper marketplace, but most owners opt for an off-the-shelf lithium battery solution. Why did you choose to build your own battery bank?
Our goal is to be all-electric. That meant we needed a huge battery bank. At that scale, an off-the-shelf lithium battery would be prohibitively expensive. Buying lithium cells and assembling our own battery would only be a small fraction of the cost.
Building our own LiFePO4 battery bank was a lot of time and work. But, this way, we currently have just under 9-kilowatts of storage (360-amp hours at 24-volts).
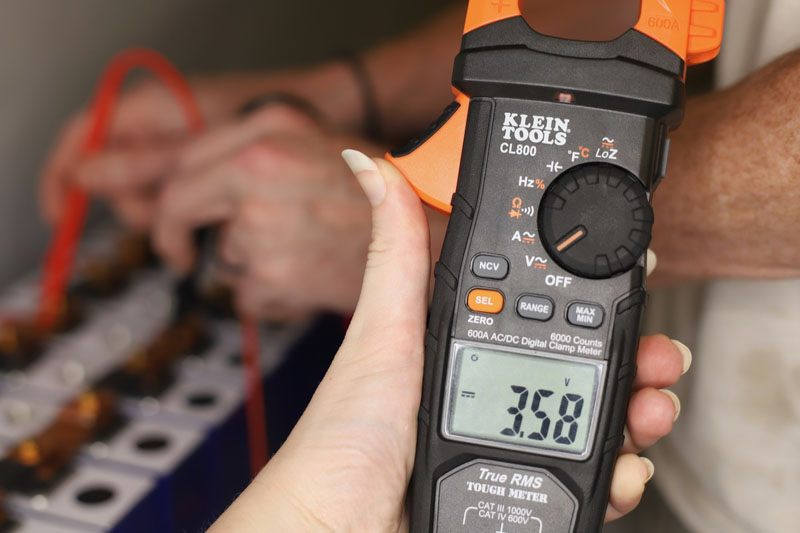
Above: Testing the voltage of the battery cells in parallel
By building the battery bank ourselves, we are able to share our experience with the community. Detailed information about that project can be found on our website.
Above: Overhead view of solar panels arranged on roof
Of all the mods you have done, your choice to velcro down your solar panels might be the most interesting, and controversial.
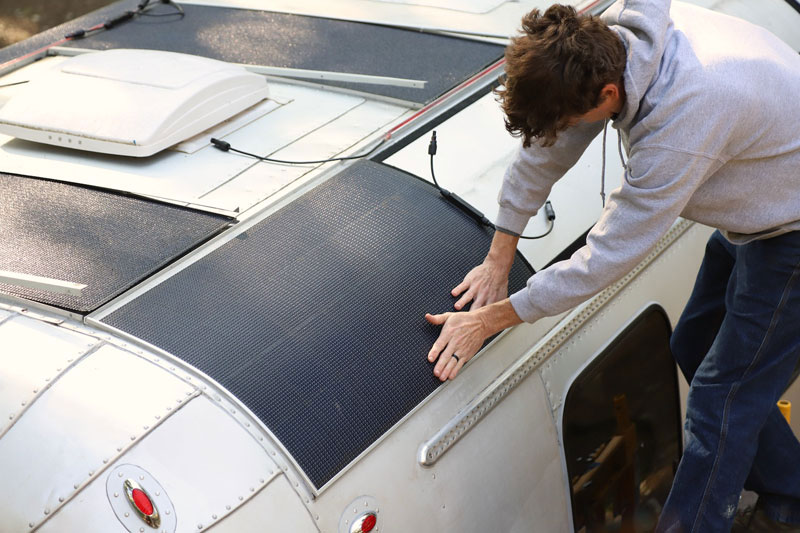
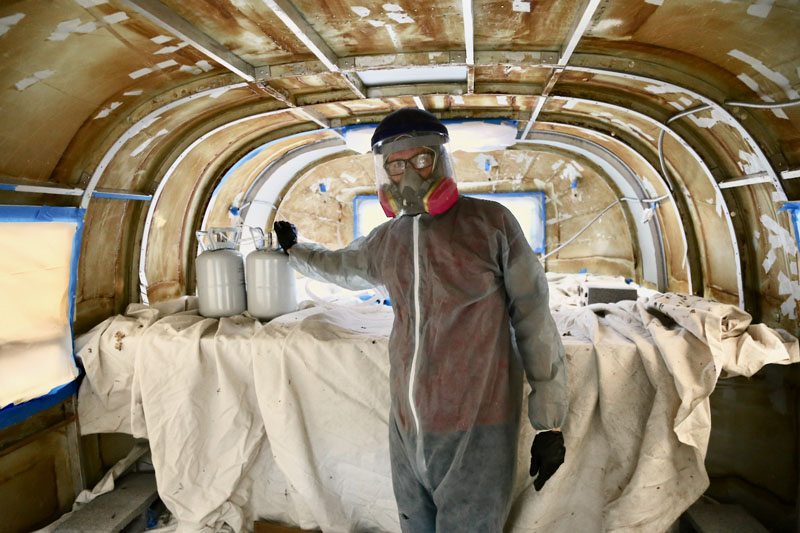
Chris loves to point out the velcro when people ask about the camper. The solar panels were a tricky project given the curvature of the Avion. We used flat, walkable panels along the center of the roof and flexible panels along the curved sides that are secured using industrial strength velcro. In total, we have 1,100-watts of solar.
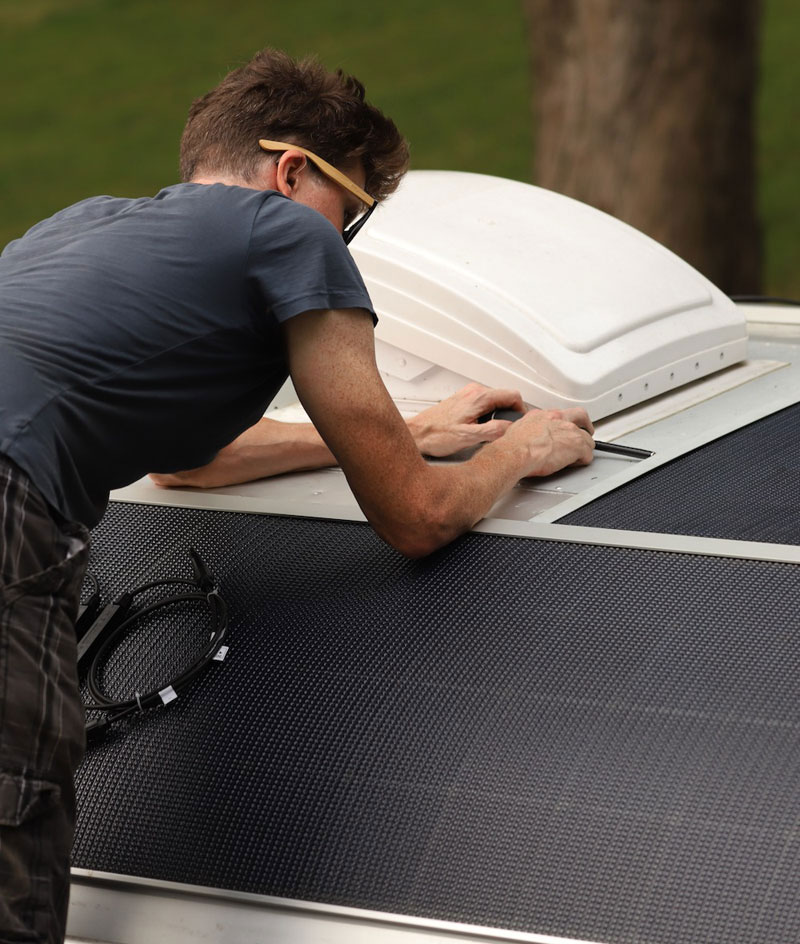
Above: Bolting down the aluminum frame around the solar panels
Industrial strength velcro is incredibly strong. It’s not your common run-of-the-mill velcro. We can only take the panels off a few times (cycles) before we have to replace the velcro. At different points, we will have to remove the panels for maintenance and potential upgrades. Solar is one of our most important resources.
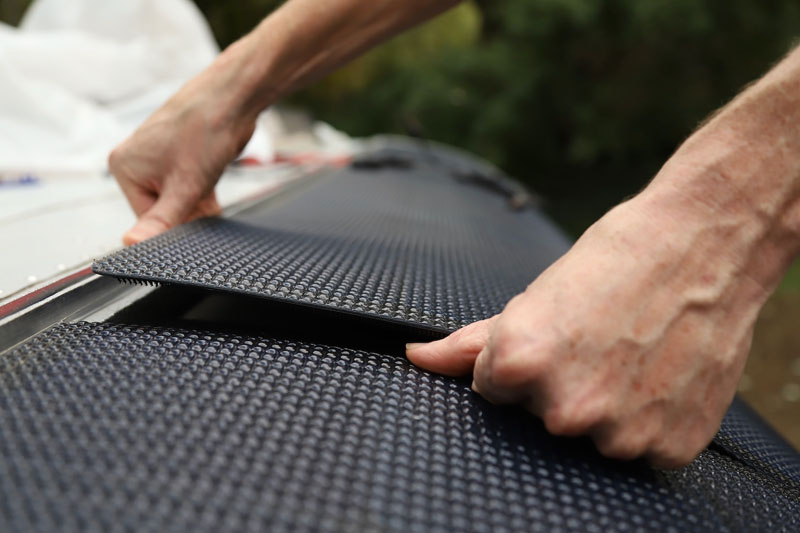
Above: Removing solar panels is a tedious process of disengaging the velcro inch by inch
So far the velcro has held up well. We installed the panels in early 2020, so it’s almost been two years. They have remained solidly attached through all sorts of weather and many thousands of miles of driving. If you want more information, I wrote an article on our website about how we mounted the solar panels.
Above: Chris applying pressure along the edges of each solar panel to securely engage the velcro
Where did you get the idea for velcro and the aluminum frames?
We knew we were going to need a lot of solar panels. Unfortunately, our curved Avion roof has limited space for flat panels. So, in order to add more solar power, we needed to use flexible panels along the curved part of the roof. We had heard that flexible solar panels don’t last as long as rigid panels, so we wanted to make it easier to swap them out if they fail. We thought it would also be nice to be able to pull them up if we needed to patch up a leaking rivet or perform other roof maintenance.
Velcro strikes a balance with strong bonds that are also detachable. And given that only the borders of the panels have velcro, we actually have a small air gap between the roof of the camper and the panels. The small air gap might help the panels with overheating. The aluminum framing also helps lock the panels in place and most importantly prevents the wind from getting under the panels and peeling them off
On your website, you put together an estimated electrical consumption chart for your truck camping lifestyle. Has that been accurate?
We have found that the power we use depends on seasonality and extremes. The weather makes a huge difference. We try to stay in temperate regions, but there are times when we can’t avoid extremes and the power needed to heat or cool. We have just gone through winter and found that we need more power. More solar is a possibility or better insulation. I thought that we had gone over the top with insulation, but when it’s 9-degrees Fahrenheit at night and you have an electric heater, it gets cold.
Given the short days in the winter (for solar charging) and some of the places we camp, we need to figure out more efficient heating methods. We are still kicking around ideas. For now, we have a Mr. Heater Portable Buddy for backup.
Above: All prepared for spray foam
Nine degrees is a few degrees colder than we have ever camped. How did you improve the insulation in your Avion’s walls?
An important feature of Avions in the 1970s was their use of spray foam insulation. The use of spray foam was popularized by NASA. Avion marketing material often featured spray foam as contributing to the structural integrity of the camper shell and a distinctive difference between the competing trailers by Airstream.
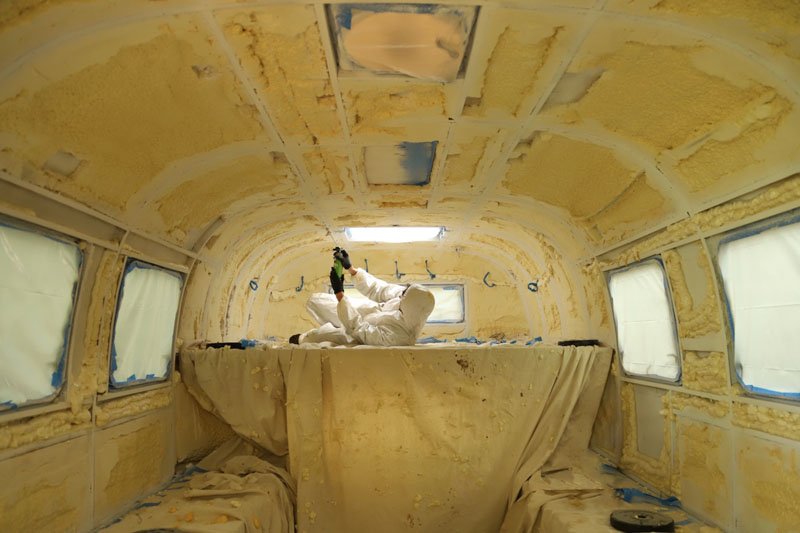
In keeping with the tradition, we re-foamed the entire interior ourselves. It was a fun but extremely messy project.
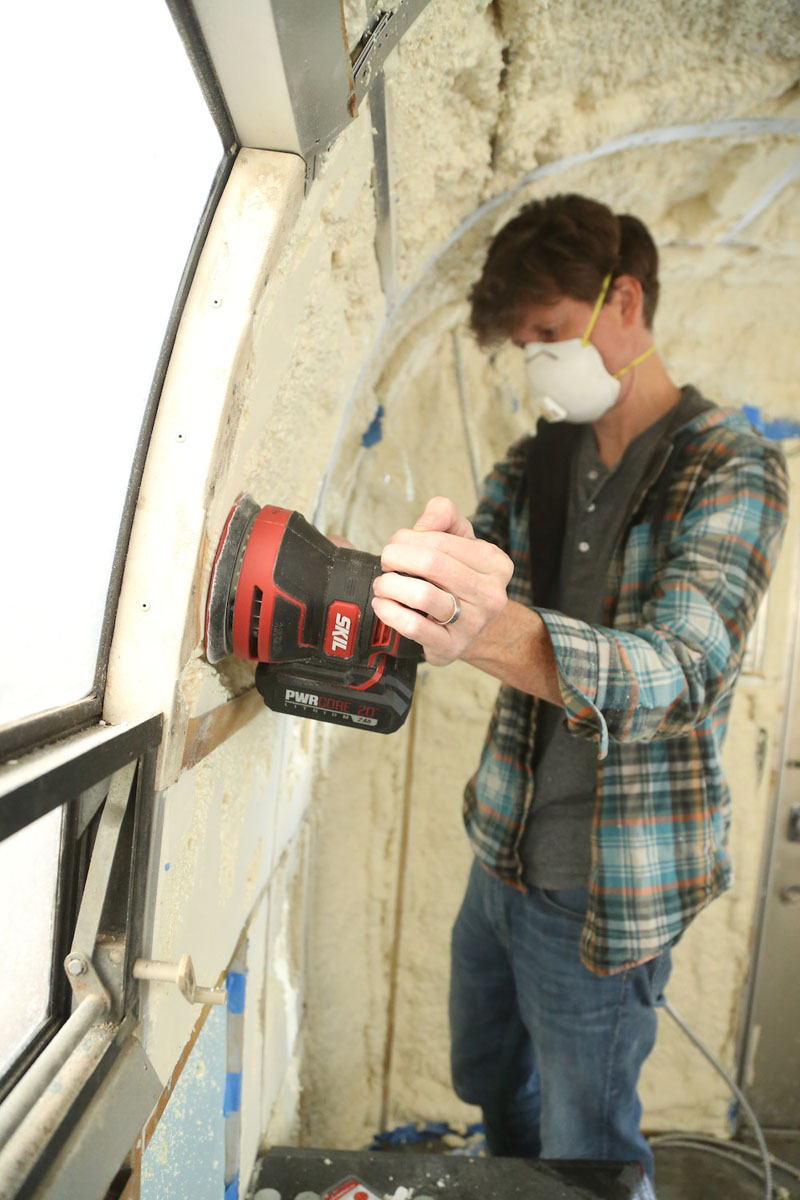
Above: Leveling excess spray with an orbital sander
At the same time, we added aluminum extrusions to strengthen the roof, wall, and window frames. Unfortunately, the additional aluminum extrusions increase the thermal transfer between the outside and inside walls. We tried to minimize the thermal transfer with ceramic paint on all the extrusions, but we’re not convinced it has made much of a difference.
Why did you decide not to have propane in your camper?
The propane tanks took up a significant amount of interior space in the original camper layout. They were also uniquely shaped and would have been hard to replace. And just to be safe, we would have had to replace the entire propane system given that it was more than 50 years old. We like to go overlanding and travel on rough trails. Things in the camper knock around a lot. Propane connections and lines can be damaged in off-road conditions. By going all-electric, we avoid that risk.
We understand that our electrical connections are potential fire hazards. We make sure to use the right gauge of wire to avoid creating too much heat. Safety is also why we have LiFePO4 batteries as opposed to other lithium battery types. LiFePO4 has a more stable chemistry.
Tell us about your new custom truck bed.
We have a Bowen Customs truck bed for external storage. The bed was custom-made for our Avion C11 in order to maximize storage and maintain the low center of gravity of the original truck bed. It features a custom mounting system, removable jack points, and interior tie-downs that are hidden from the outside.
We came across Bowen Customs at Overland Expo Mountain West. We had been looking at truck beds for a good amount of time. Even when we were redoing the camper’s wings, we were thinking about how we could get more space. We decided against making changes since it was our first big project, but we were aware of potential space we weren’t making use of.
At the time there weren’t a lot of options for a custom bed solution. We wanted aluminum because we were able to work with the material. At first, we were looking at doing it ourselves and putting on our own storage boxes. We had false starts. Eventually, we came to accept that it was too big of a project to do on our own.
Then we went to Overland Expo and saw what Brent was doing. He makes utility-style flatbeds for industrial and commercial applications. We liked the aesthetic and he was eager to work on the project. We have the first Bowen Custom bed of this style.
Above: Lifting the factory bed off the truck
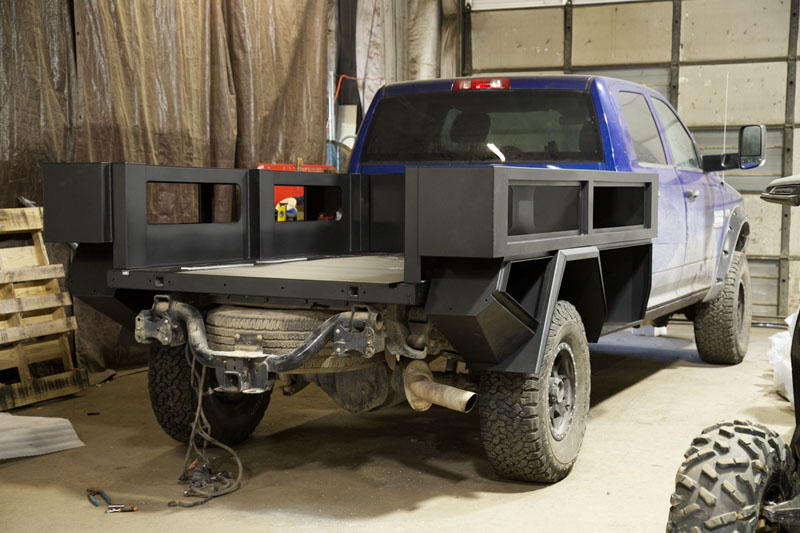
Above: Bowen Customs Truck Bed Boxes partially installed
During the process, we had to take a lot of measurements. A challenge with an older camper is that it’s not exactly the same on both sides. Another limitation was that the back extends an extra three-feet beyond the truck bed and wraps around the side. We couldn’t have the bed extend too far and contact the rear of the camper. With these complexities, it made a difference to work with someone who was inspired by the product and willing to work with our vintage camper.
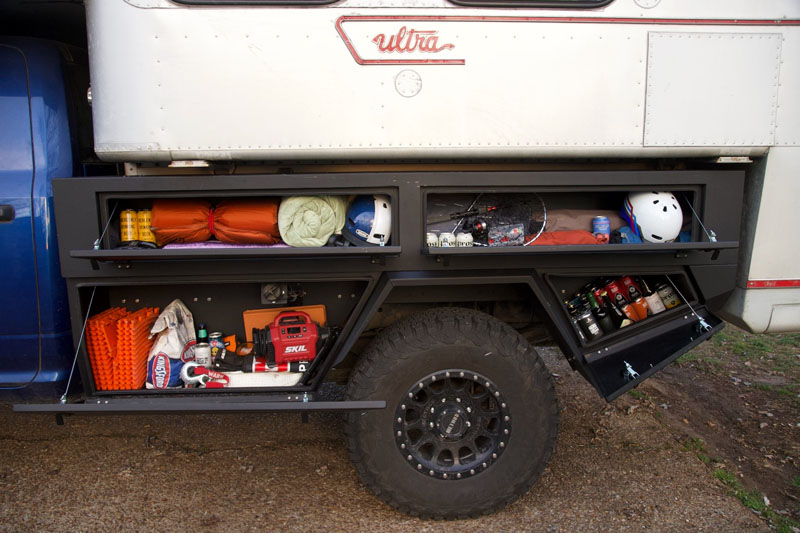
Above: The truck bed storage boxes open
Other challenges were the jacks and the tie-downs. External turnbuckles would cut off access to the storage doors on the bed. Being able to design something that would allow us to securely mount the camper to the truck bed without taking away from storage boxes was an important focus of the project.
Above: Reaching through interior box hatches to secure a turnbuckle to the truck bed
Brent wound up making custom tie-down jack points. They’re a combination of both. One side is for the turnbuckle and the other is an easy quick release for the jack points.
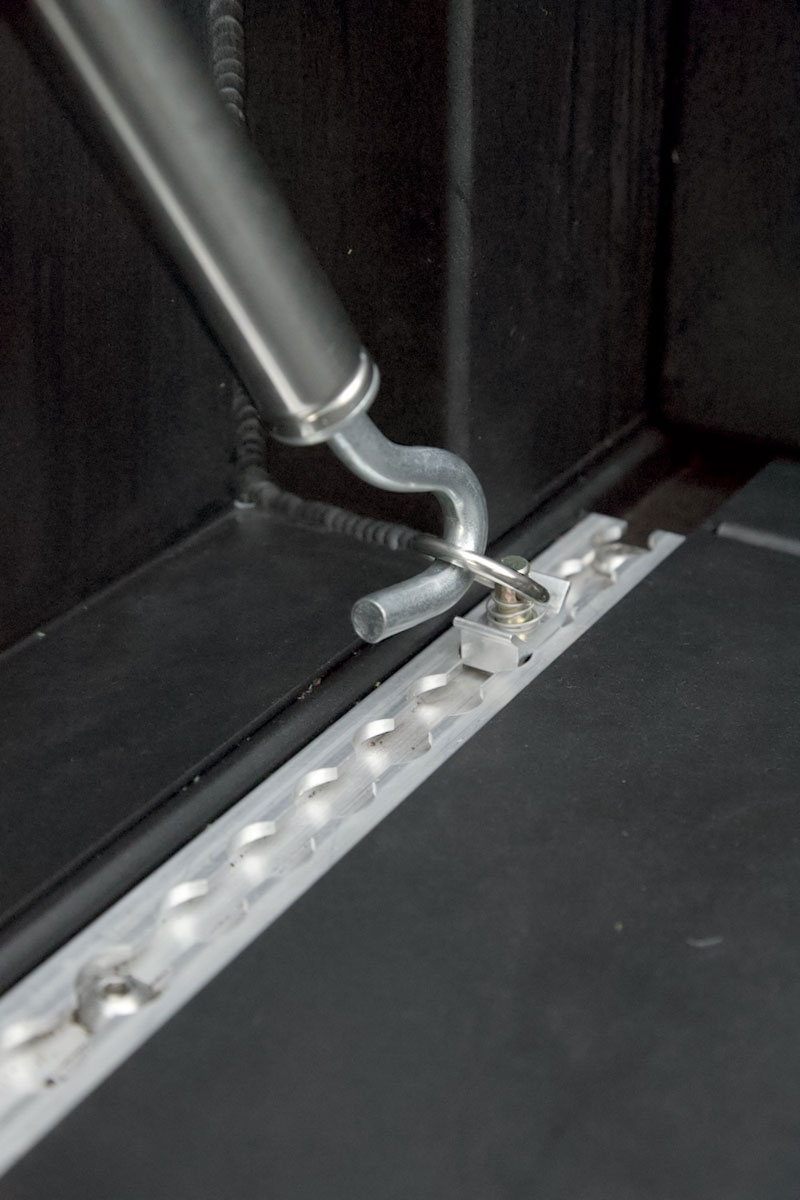
Above: Turnbuckle hooked into an L-track bolted to the truck frame
With there being only two inches of wiggle room in the bed, is your camper difficult to load?
Unfortunately, it is even less than two inches. There are technically two inches between the truck bed walls and the camper, but it’s really closer to a 3/4-inch from the tie-downs. We are doing some tweaks to get more space which will make loading better. It is more challenging to load than it was before we had the custom bed but, so far, having the new bed has been worth it.
Above: In this photo, you can see the single jack point hanging over the truck bed in this shot. This Avion C11 originally only had three jack points total; two on the driver’s side and one on the passenger’s side.
How about your camper jacks. Where do they attach and where are they stored?
We have quick-release jack points along the wings. That does mean that we have to store them when we are on the road. It used to be hard to find the space which meant that we would leave our jacks behind. Now that we have the truck storage bed, it’s easier to bring the jacks.
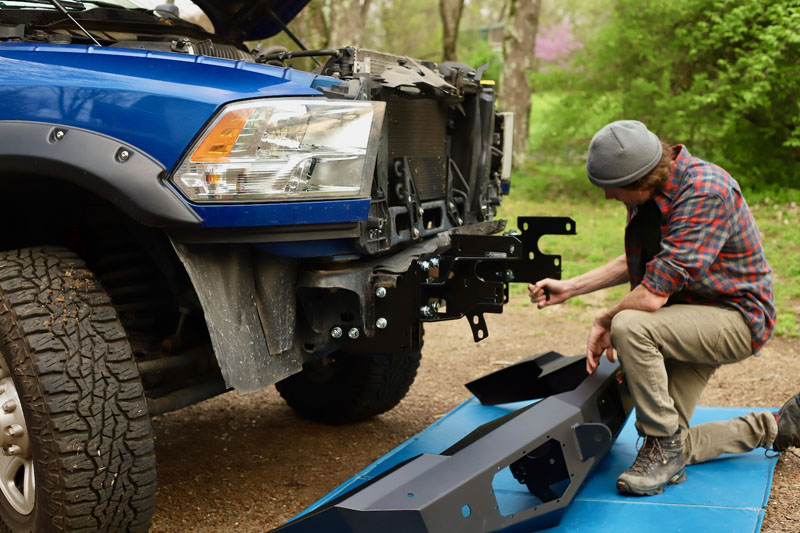
Above: New front bumper installation
You’ve installed a Warn Winch and Ascent bumper and have wonderful installation articles on your website. Have you used your winch yet?
Since installing the winch, we are lucky that we haven’t needed to use it. We like going on rough trails, so it’s peace of mind to have a winch. The winch still comes in handy, though. We visited friends and used the winch to pull up a tree root. That helps to justify our presence when moochdocking.
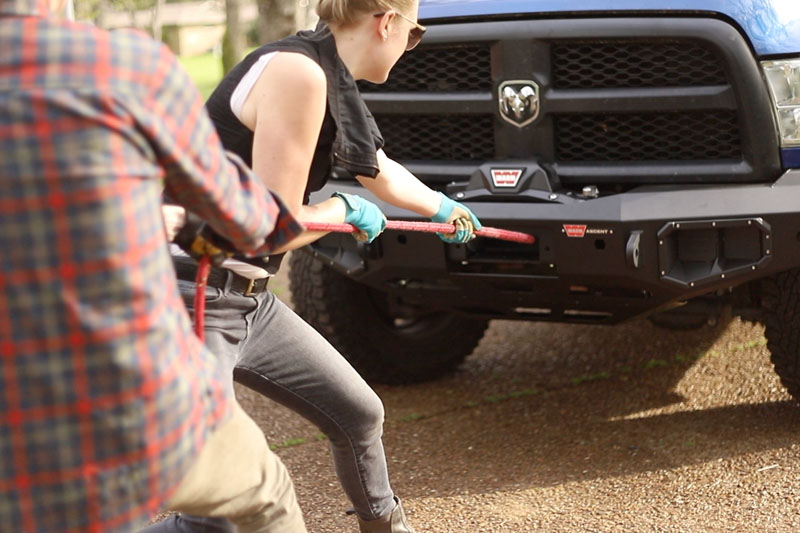
Above: Pulling the Warn Winch rope into place
Do you work from the road?
Yes. We are both software developers and we can work wherever we are, as long as we have an internet connection. So, our Avion is our home and office on the road. We have fun exploring backcountry trails and then hunkering down to get work done.
Where did you get the name Roam Lab from?
The meaning of “Roam Lab” has changed for us over time. Originally, the name expressed the experimental nature of our digital nomad lifestyle. We are a traveling laboratory or a laboratory of travel. The first test was living in a van; the lifestyle worked but the rig wasn’t ideal.
Nowadays, “Roam Lab” also encompasses our approach to building our truck camper. Each time we do a new renovation it’s another test. Then we ask ourselves, how well did this work? Is there a better way? And we document and share our findings on our website.
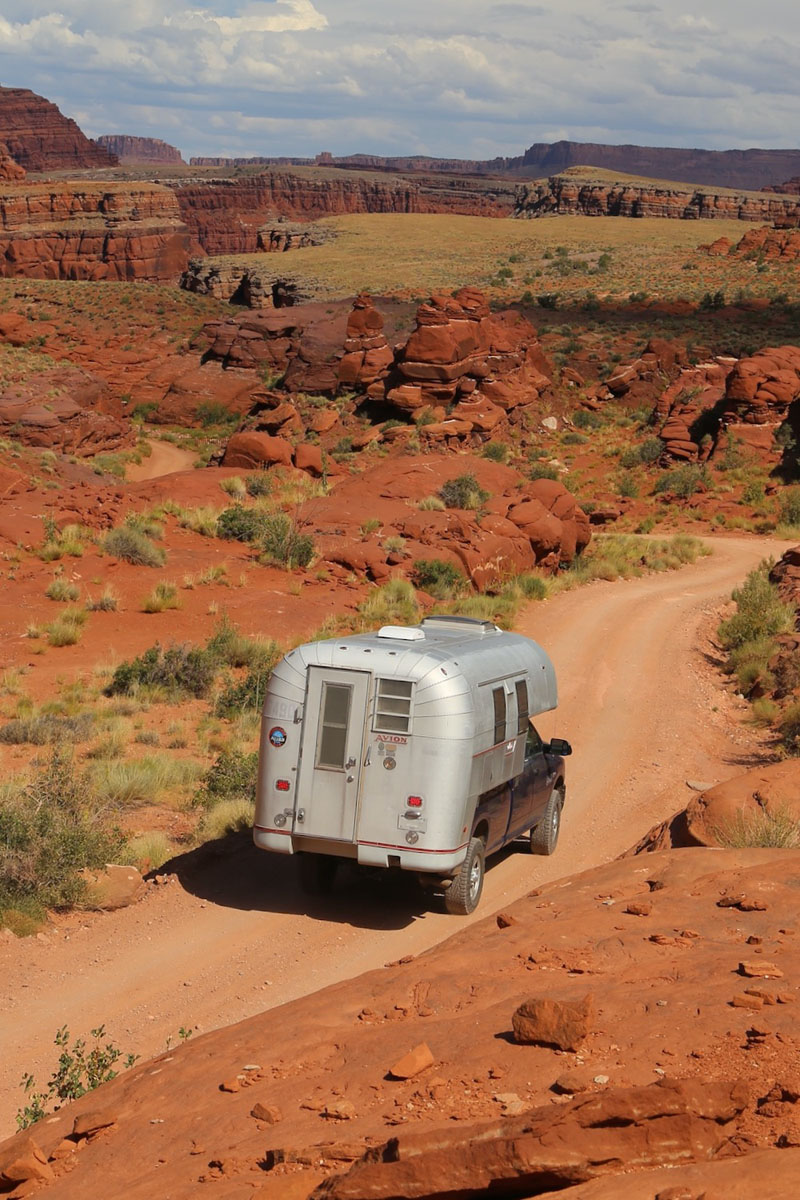
Above: Dirt road in Moab, Utah exploring
Your blog also includes a lot of your travels and adventures. Where have you been that you would recommend to other truck campers?
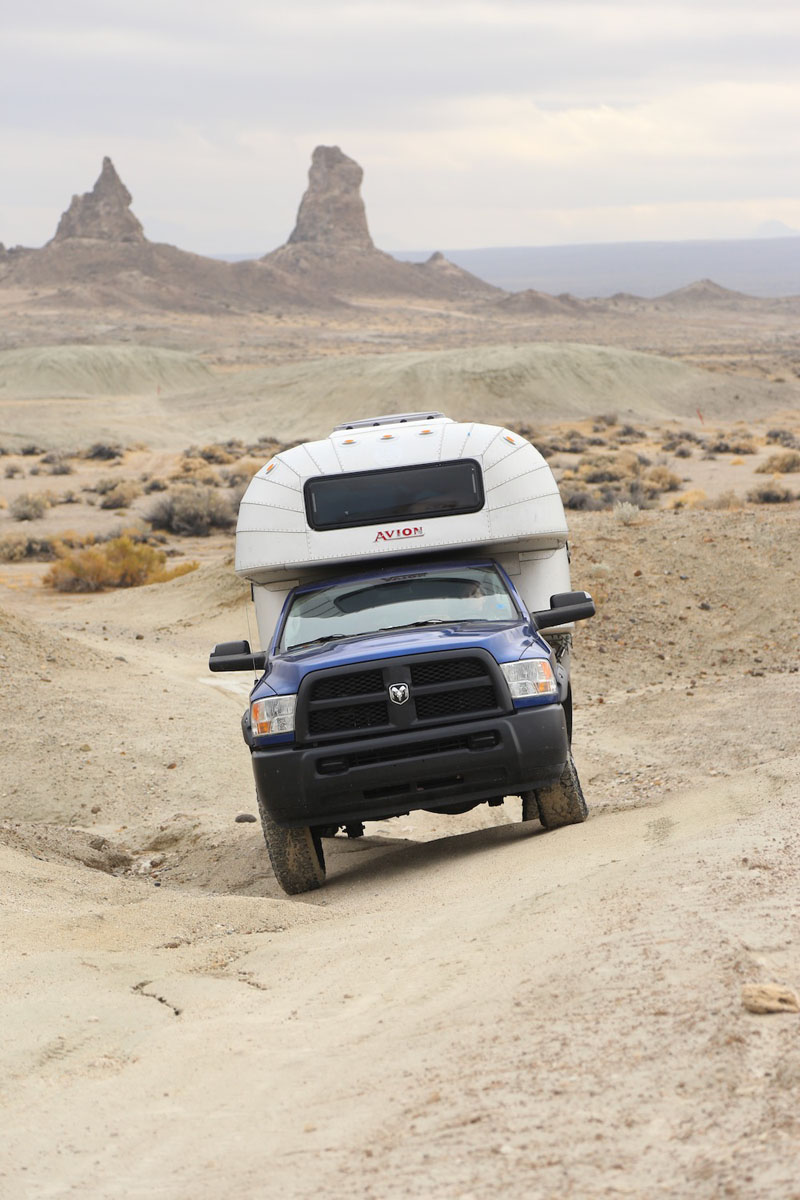
We have covered most of the lower 48 in our truck camper. Most winters we head for warmer weather in the Southwest and explore high elevations in the summer. With a truck camper, we have so much flexibility.
We really recommend doing some research but keeping plans open. We are constantly taking advantage of opportunities and avoiding bad weather or disappointing camping arrangements.
We like to recommend iconic highways and parkways such as the Natchez Trace, the Blue Ridge Parkway, Route 66, and Highway 1. We are huge fans of dry camping, particularly in the Southwest. The desert terrain is fantastic for exploring and finding remote destinations such as BLM land around Quartzsite, Anza Borrego, and Moab.
Is there anything else that you’d like to share about your Avion truck camper or lifestyle?
There’s definitely more to come with our projects. We have exciting things planned for the future. We’ll be doing a lot of interior work over the summer. For the last two months, we’ve been researching plumbing and have some creative ideas for that. We’ll also be working on the interior walls and the floors.
Of course, we also love talking about DIY work and being open to learning new things. When we started this project, we had no experience buck riveting, fiberglassing, or working with a lot of the tools we use today. We have persevered by taking our time and doing a lot of research. It’s also nice to know that we should be able to fix most anything that goes wrong.
Lexi and Chris Goforth’s Rig
Truck: 2015 Ram 3500, extended cab, 4×4, single rear wheel, 6.4 Hemi, with a Bowen Customs bed
Camper: 1970 Avion C11
Tie-Downs and Turnbuckles: Custom tie-down points and Happijac spring-loaded turnbuckles
Suspension: A 2.5-inch leveling kit to accommodate the 35-inch tires