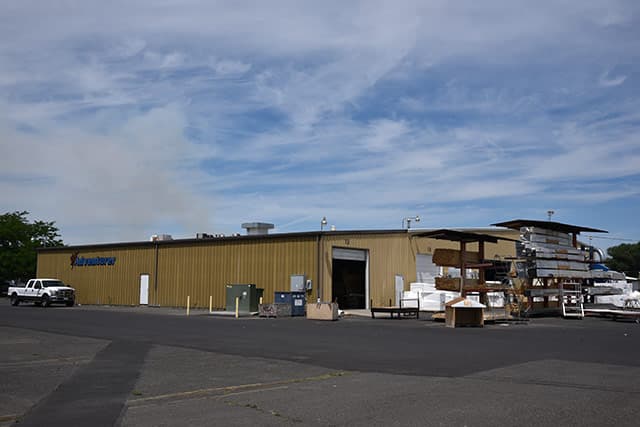
Continuing on the 2015 “Never Seen That” tour, TCM lands at Adventurer Manufacturing in Yakima, Washington and gets a bird’s eye view of the new Eagle Cap Camper production line.

Welcome to the next installment of Truck Camper Magazine’s “Never Seen That” tour. On this tour we are visiting camper and gear factories we have never seen, and bringing you our exclusive reports.
Wait a minute! How is it possible that TCM never visited Eagle Cap, a major truck camper manufacturer? Haven’t we visited every truck camper company from the Atlantic to the Pacific, at least twice, over the past eight years?
Yes, we have. And no, we have not.
In 2007 and 2010, we visited Eagle Cap in La Grande, Oregon. Less than three months after our visit in 2010, Adventurer Manufacturing purchased Eagle Cap and brought the company to Yakima, Washington.
This wasn’t a big deal initially as Adventurer Manufacturing faithfully re-created every aspect of Eagle Cap’s original design and manufacturing process – material for material, floor plan for floor plan – with a few exceptions they openly detailed in various articles here in Truck Camper Magazine.
Then something dramatic happened in July of 2014. Adventurer Manufacturing announced that Eagle Cap would become a bird of a very different feather. Every aspect of Eagle Cap campers had been re-examined, challenged, and pushed forward by the Adventurer Manufacturing team. The next generation of Eagle Cap would be rolling off the line for 2015.
With this announcement, we needed to see the new production line, and get in tune with how Adventurer Manufacturing is building Eagle Cap. You can’t do that from the East Coast. You have to get into the factory, talk to the team, and experience the production line in person.
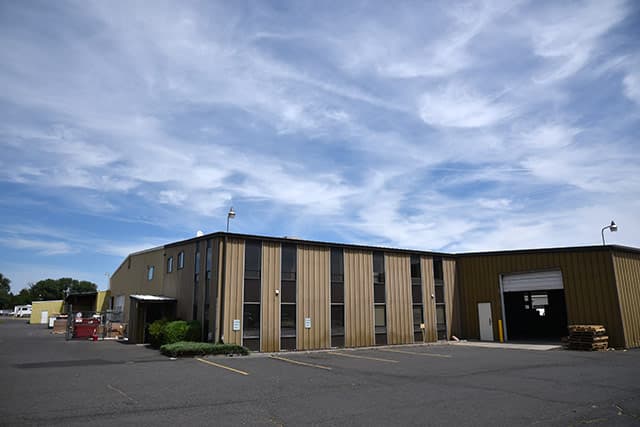
In July we pulled into Adventurer Manufacturing in Yakima. From the outside nothing looked all that different. That would soon change.
 |
 |
 |
Click on the photo thumbnails throughout this article to enlarge.
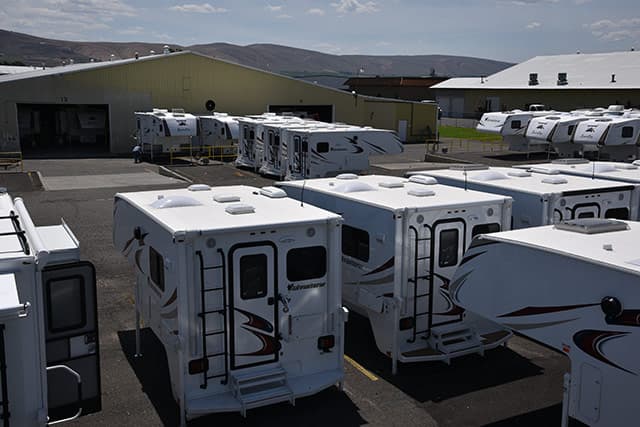
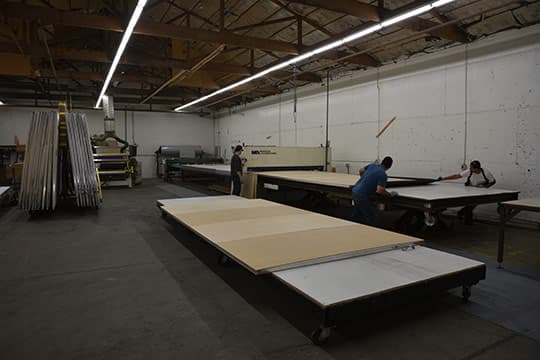
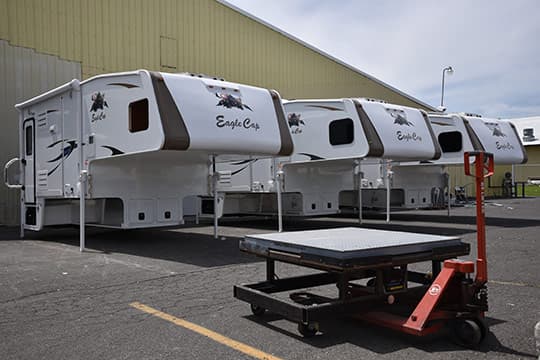
Walking around the Adventurer Manufacturing plant, we would have been hard pressed to say anything new was going on inside. That is until we saw the rows of 2016 Eagle Cap truck campers out back.
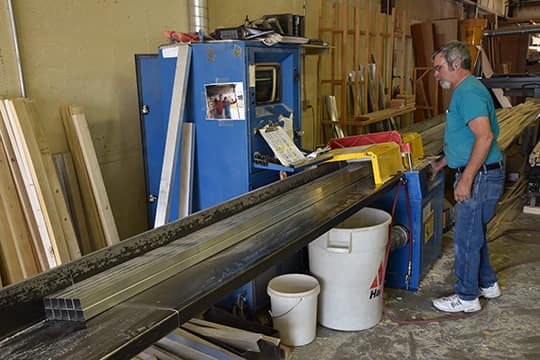
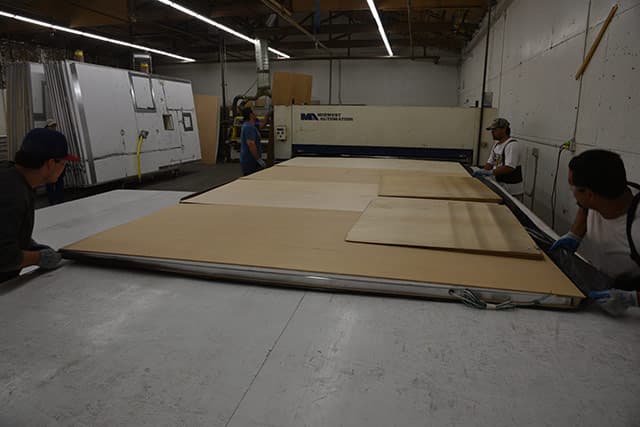
We started our factory walkthrough where wood and aluminum are brought into the plant. There we found Marvin Kern right we we left him in 2010. Marvin manned this same computer controlled cutting table at Western RV, and probably cut the aluminum and wood for our 2004 Alpenlite 1100.
Have I mentioned how much I enjoy the intense squeal of aluminum being cut? Let’s just say the florescent green ear plugs Marvin is wearing aren’t a fashion statement. At least not entirely.
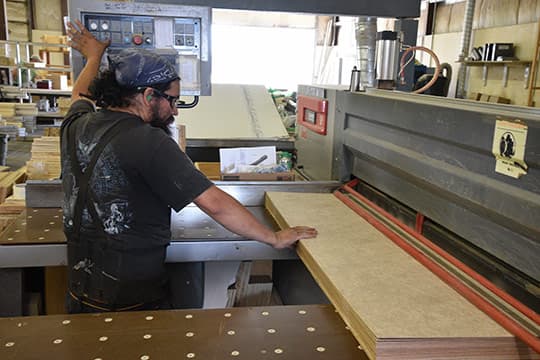
About fifteen feet from where Marvin is waking the dead, Omar Jimenez was using a computer controlled system to precision cut wall board.

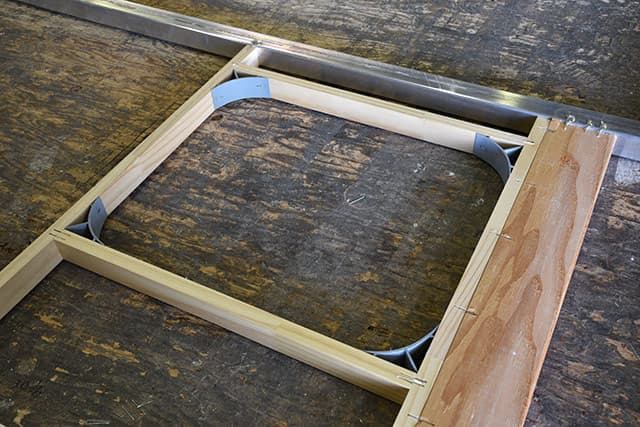
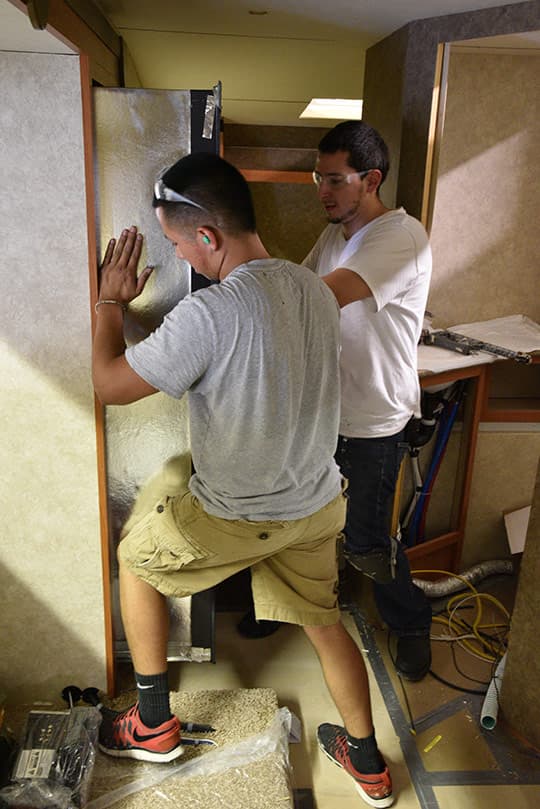
To give screws a solid and secure bite inside the Eagle Cap aluminum frames, Adventurer Manufacturing stuffs their aluminum frames with wood. We see this conservative structural approach at almost every hard side truck camper manufacturer that frames with aluminum.
 |
 |
 |
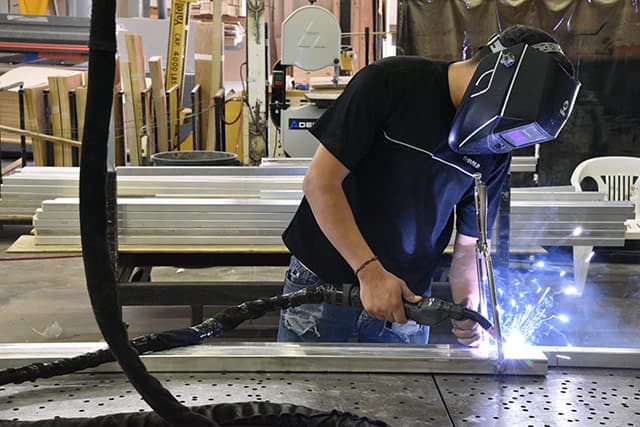
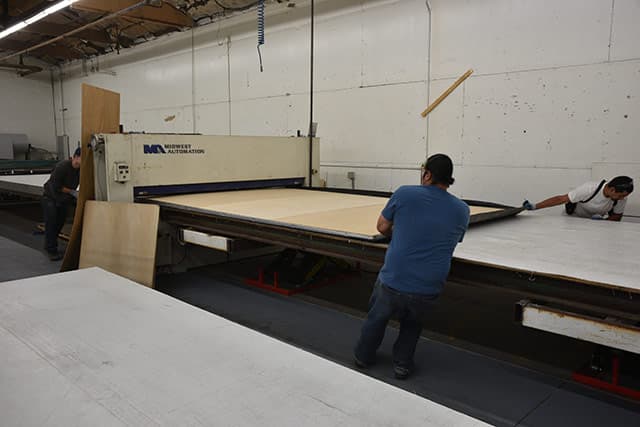
Eagle Cap campers are aluminum framed and TIG welded. Here you see the Adventurer Manufacturing welding team, Miguel Silva and Derek Polley, TIG welding the full length of the adjoining aluminum. Adventurer’s management later explained that TIG welding takes longer than tack welding, but produces a significantly stronger weld.
 |
 |
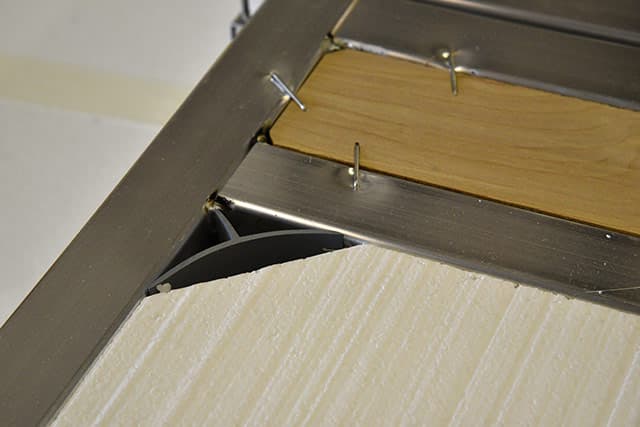 |
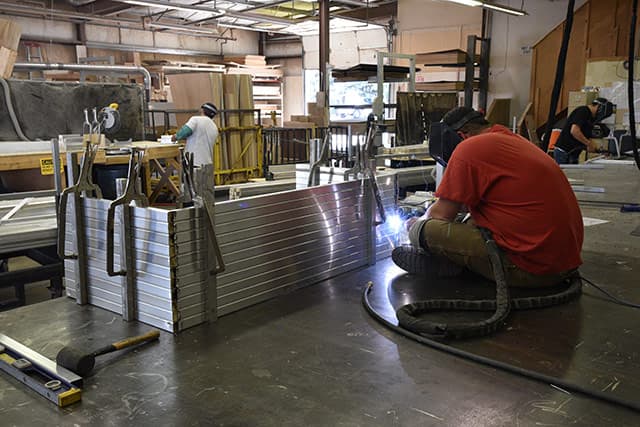
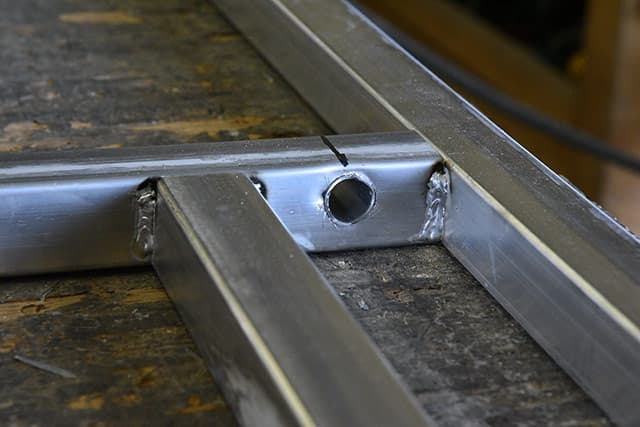
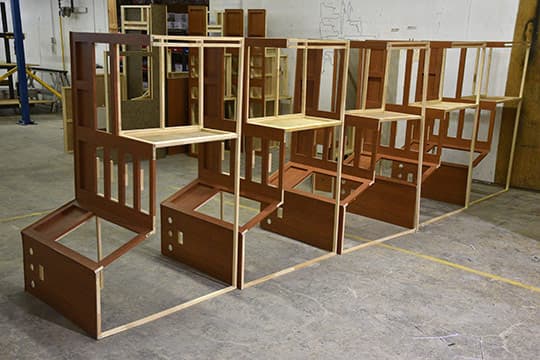
Another part of the manufacturing approach at Adventurer Manufacturing is that all windows and compartments should be fully framed. In these photographs you can see the results of this approach including another important element used at Adventurer Manufacturing; structural gussets.
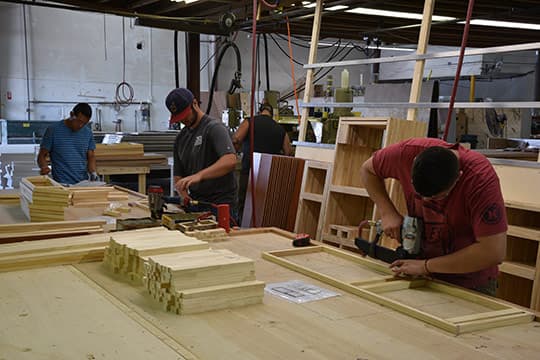
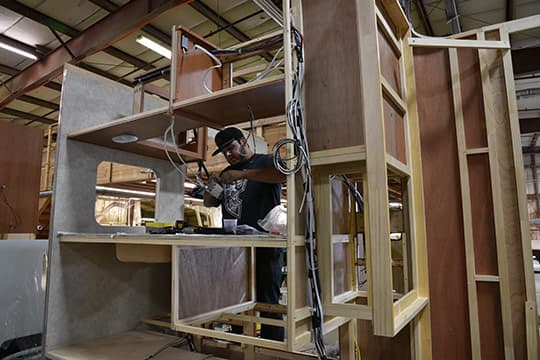
The cabinetry team of Edgar Gudino, Nathan Giles, and Marcos Aguirre use a series of jigs to build the cabinetry frames. Behind the team you can see the results of their work. Also note the CAD (computer aided design) plans on the work space guiding the build process.
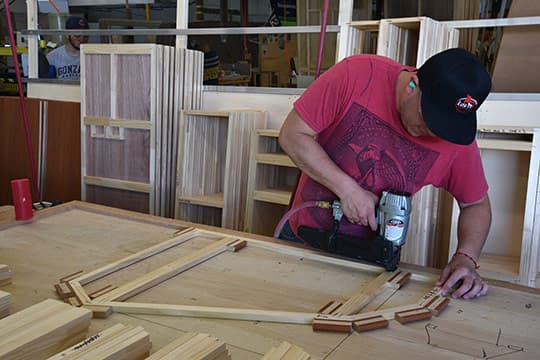
Here Marcos builds a front nose cabinet, often called a penguin by the industry because these cabinets resemble penguins when set out on their own.
 |
 |
 |
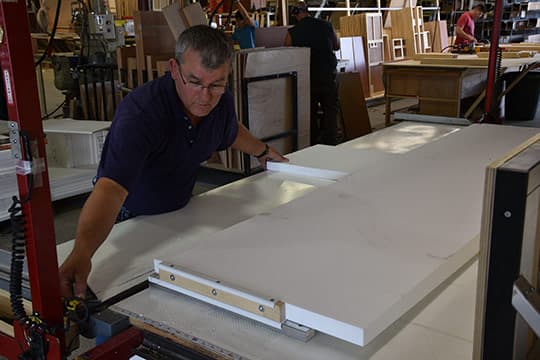
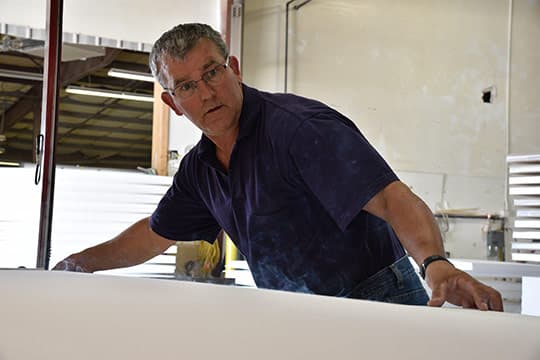
Adventurer Manufacturing laminates cabinetry elements in a manner similar to how it laminates its sidewalls and roofs. In the above progression, you see Manny Anguiano apply a heated adhesive to the frame, lay the cabinetry panel on top, and staple the panel.
Once this process is complete, he passes the cabinetry panels through the yellow pinch roller to his right. According to Adventurer, they are the only truck camper manufacturer that pinch roll laminates their cabinetry.
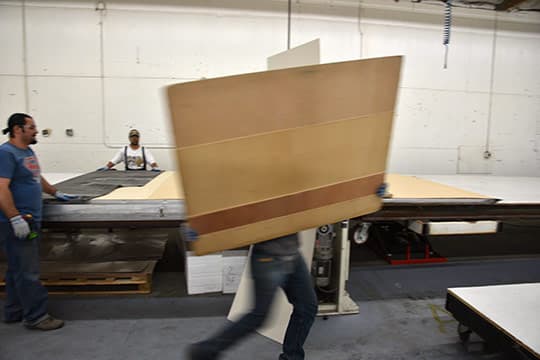
Completed cabinetry sections are stacked to the sides of the cabinetry shop ready for pickup by the Eagle Cap production line team.
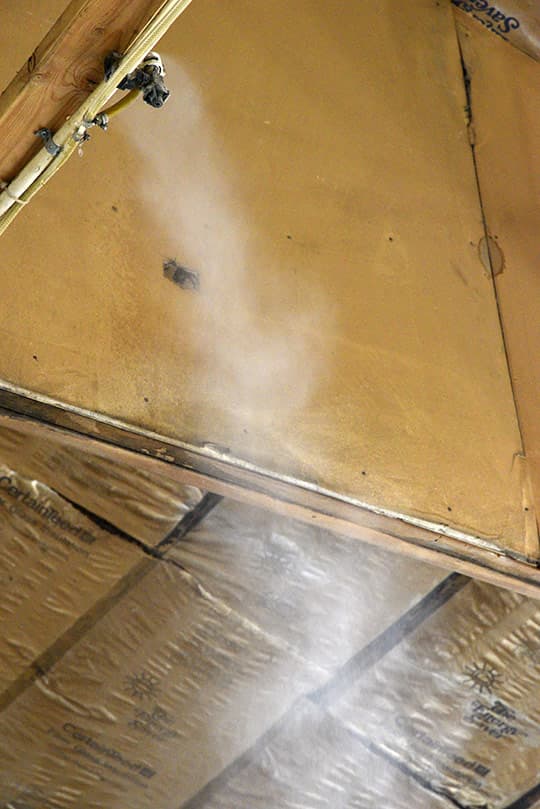
A few feet from the cabinet building team, Miles Allen uses a hot wire and an adjustable jig to cut closed cell foam insulation material.
When the hot wire passes through the closed cell foam, it literally burns (or melts) through the material resulting in a wisp of white smoke.
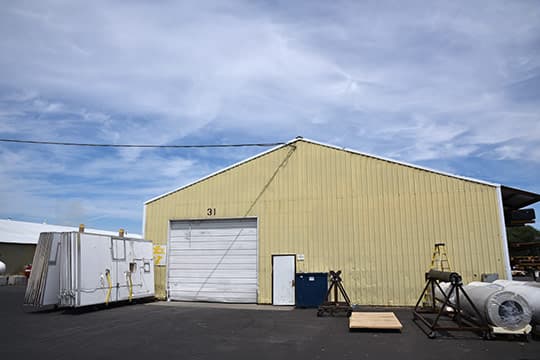
When we visited Adventurer Manufacturing in 2010, lamination was done inside the main building. Today, lamination is done in a separate facility located about 100 feet from the main factory.
Moving lamination into its own building offered two important benefits; improved climate control (which is critical for proper lamination bonds), and opening up much needed production space in the main building.
This photograph was taken from the entry door to the lamination building. As you can see, it’s a 100% dedicated lamination facility.
To that point, Adventurer Manufacturing has added misters which allow the lamination team to better control the humidity in the building. Pascual Mendoza, Adventurer Manufacturing’s lamination team leader, explained to us that his team – Alberto Lopez, Jesse Lane, and Rafa Maciel – will change work hours if the temperatures inside the lamination building are too high during the day.
 |
 |
 |
Proper temperature and humidity aren’t the only important variables for lamination. The lamination team must also ensure that the adhesive itself is the right temperature, the adhesive is applied evenly throughout the material surface, and the lamination process is completed before the adhesive sets.
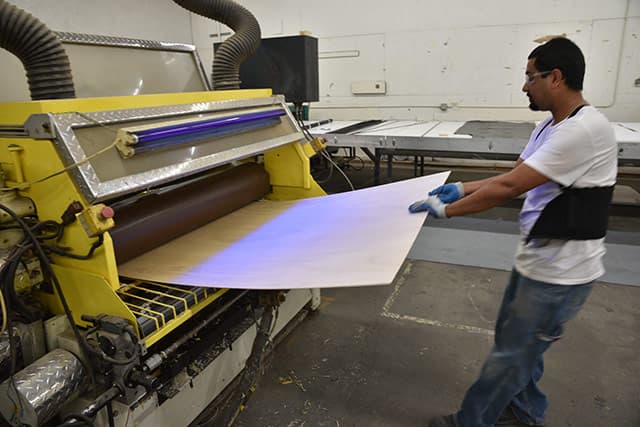
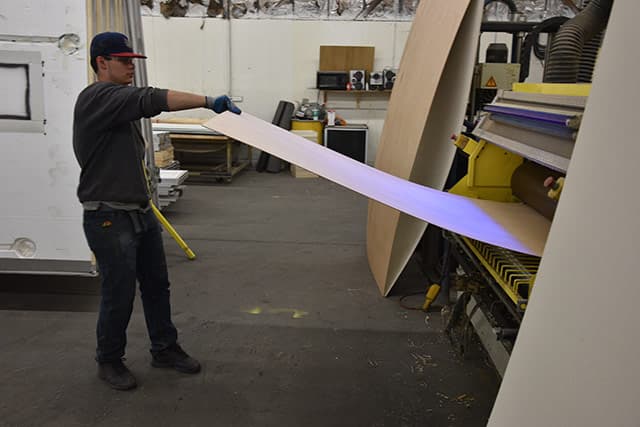
After checking the facility temperature and humidity, Pascual checks the adhesive temperature on the hot melt lamination applicator and starts the countdown clock. Within seconds he feeds luan plywood through the applicator. Time to get focused, and move fast.
On the other side, the lamination team receives the luan and inspects the adhesive application under a black light. The black light makes the applied adhesive visible as purple light.
 |
 |
 |
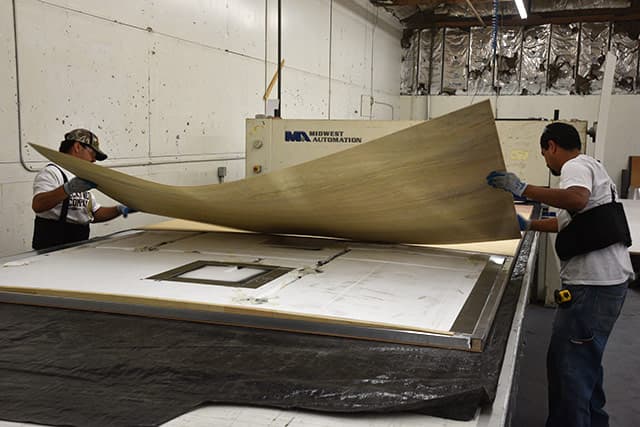
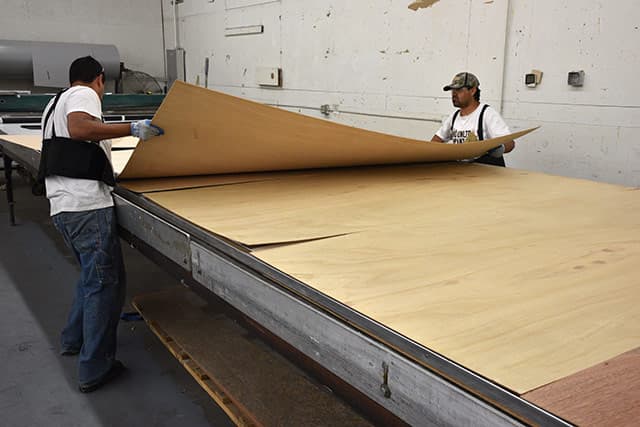
As the adhesive applied luan emerges sheet after sheet from the hot melt applicator, the lamination team builds the roof layers on a fifty-foot pinch rolling table. The luan is passed to the team member on the opposite side of the table and placed into position. The sense of urgency against the clock is palpable. No one is talking. Everyone is eyes on task.
 |
 |
 |
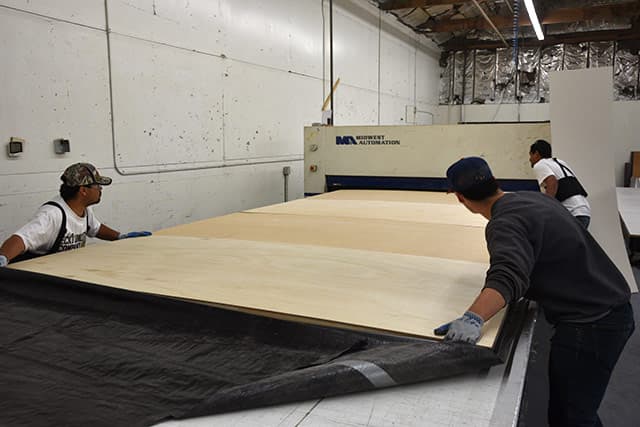
Once the roof elements are assembled on the table, the lamination team pushes, and then pulls the roof through the pinch roller. As the name implies, the pinch roller features a heavy cylinder that spans the width of the table and is carefully adjusted to a pre-determined pinch height. As the roof runs under the roller, the roof lamination is pinched together.
The roof is run through the pinch roller three times; forward, back, and forward again. For the second and third pass through, tapered panels are placed on both sides of the roof to give the final roof a specified pitch.
The team doesn’t have enough tapered panels to run the full length of the roof, so they have to place them forward into the roller, and then run them back to the still-running roof. I asked Pascual why they just didn’t have more tapered panels and he said, “It keeps the guys in shape”.
A few moments after the third and final pinch roll, the adhesive in the roof begins to set. A few hours later, depending on outside temperature and humidity, the adhesive sets and the roof is ready to be moved to the main building for routing.
 |
 |
 |
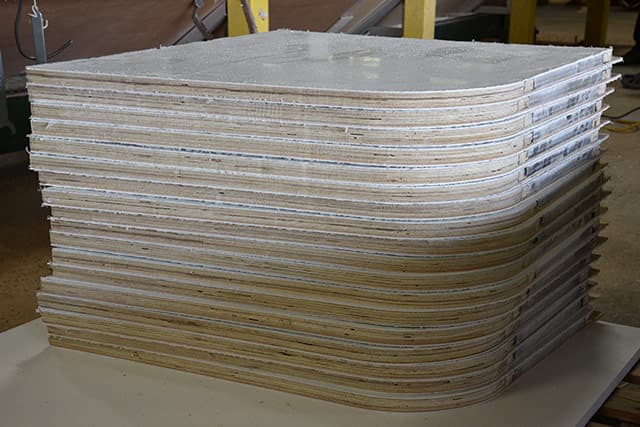
Inside the main building laminations are routed by hand on a V-shaped open table designed to capture the resulting routed-out sections, sawdust, and other debris. In these photos you can see laminated sections being routed, and the resulting routed components; big and small.
The larger laminated components include sidewalls and roofs. In this photograph you can see one of the roof laminations from above being hand routed by Marcelino Dela Torne with a series of jigs on a V-shape routing table.
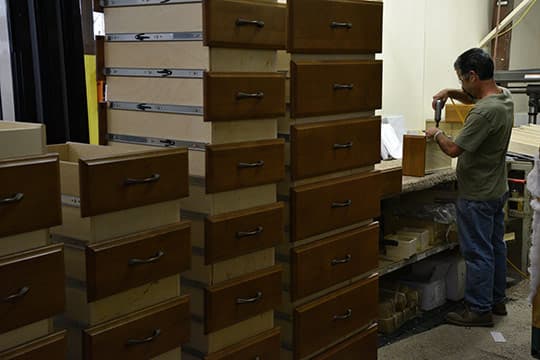
Almost in the dead center of the main production building, we found Valentine Sanchez tucked away and hard at work building a mountain of drawers.
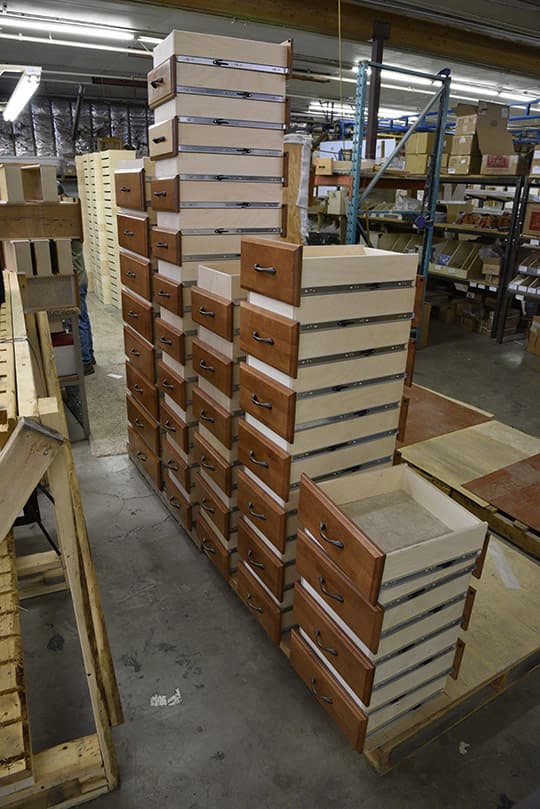
He was very excited when we asked if we could take his picture. I think the rest of the plant forgets he’s back there, hidden behind his rather impressive output. If anyone from Adventurer Manufacturing is reading this, please check on Valentine now and then.
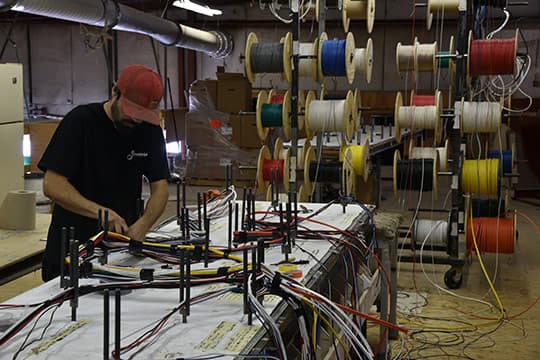
Above the production floor we discovered Bobby Cantrel creating the wire harnesses. With what looks like up-ended tuning forks, he was weaving a complex network of wire, each color-coded to identify the specific gauge and application.
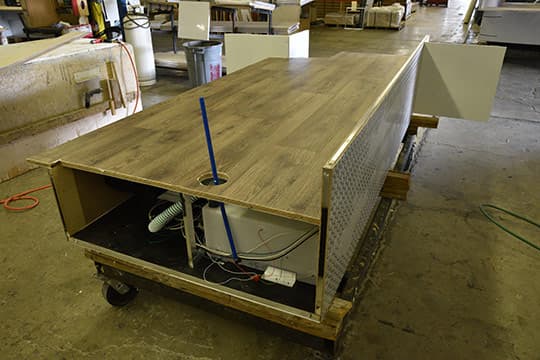
The materials and elements that go into a finished truck camper are manufactured simultaneously to supply the production line as they are needed. As we have already seen, this process includes everything from the preparation of raw materials to larger components like cabinetry and laminated roofs and sidewalls.
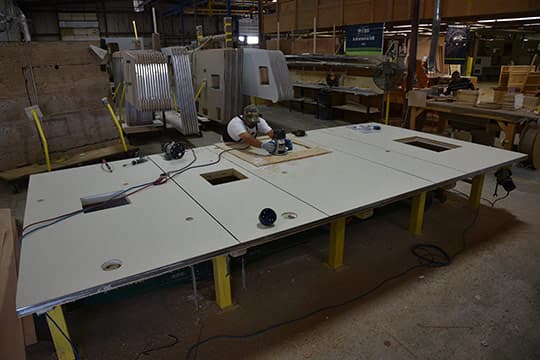
These materials and elements begin to come together on the line at station one; basement production. In this photograph, a 2016 Eagle Cap 960 is starting its journey down the production line.
Once the basements are completed, the rear walls are installed. The rear wall installation is followed immediately by the first sections of interior cabinetry.
With the beginning of the interior cabinetry installed, the wiring team gets to work. It’s much easier to add wiring and plumbing when the camper and cabinetry is still wide open (minimal sidewalls, no cabinetry doors, no furniture, etc). Here Oscar Gutierrez is installing a 110-volt outlet for a microwave to be installed further down the production line.
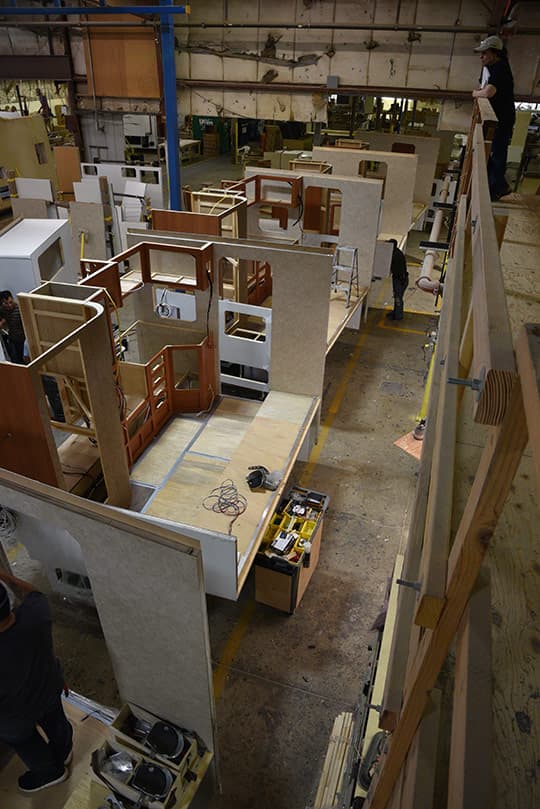
This photograph was taken from the wiring harness area looking back to the beginning of the production line. Again, notice the back wall installed, kitchen and bathroom cabinetry installed, and wiring beginning to be installed. Also notice Angela, top right, taking it all in.
Standing in the same position and turning the camera to the next leg of the production line, we see more cabinetry and wiring has been installed. The camper is still wide-open for the production team to access from the inside and outside. Also note the production line makes a U-shape with the bottom of the U at this point.
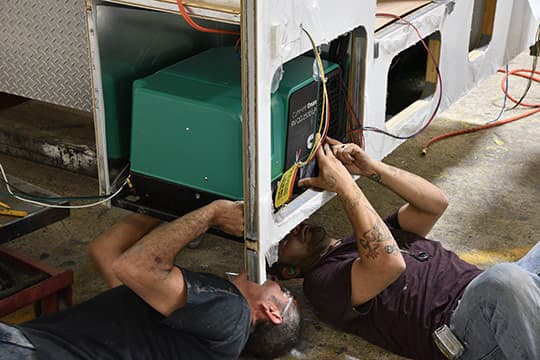
Not everything is routine on a production line. For example, features are introduced, floor plans are updated and tweaked, and appliances are discontinued and replaced with newer models. As they installed an Onan generator, Angel Padilla and Jeff Radabaugh were talking about minor adjustments they needed to fit the generator around some recent production tweaks.
While we have seen tremendous strides in computer aided design and precision cut CNC materials over the past decade, truck campers are still hand made products. This means people, not robots, are assembling our truck campers. The ability to adapt on the production line – as this team is demonstrating – is a vital element for every manufacturer.

Eagle Cap floors are installed at the very first production station. From that point forward, there’s a lot of foot traffic those floors have to endure. To protect the flooring from potential damage, cardboard is taped over the linoleum. This is later removed by final finishing at the end of the production line.
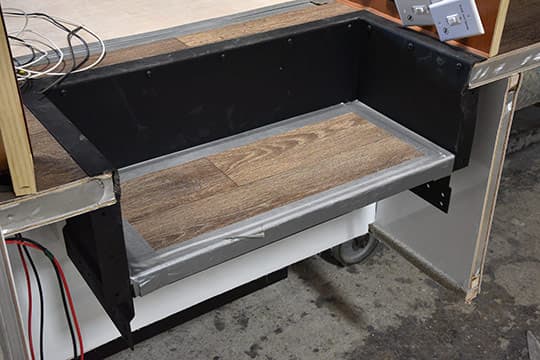
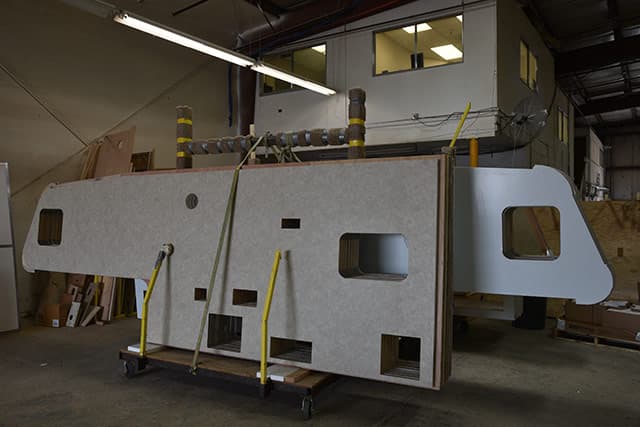
Protective material is also taped over the entry step. Here you can see the steel inside step and support Adventurer Manufacturing uses for its side-entry Eagle Cap models; the 1160 double-slide and 1165 triple-slide.
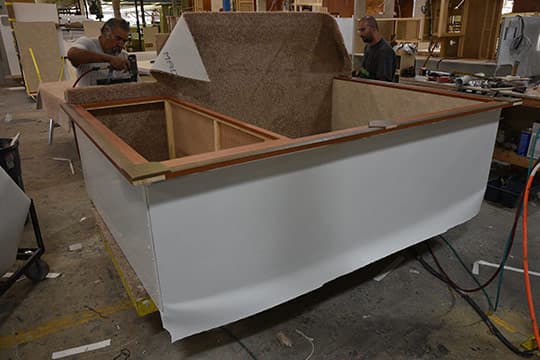
Inside the U-shape production line, a small team builds the Eagle Cap slide-out rooms. Walls, cabinetry, and furniture for the slide-outs are assembled and finished with carpeting before going to the production line as ready-to-install slide-out rooms.
The slide-out rooms are then hoisted into position by Nate Mitchell. Once placed, the production team installs and aligns the slide-out mechanisms. Eagle Cap uses Schwintek slide-out mechanisms exclusively for all of its slide-out rooms.
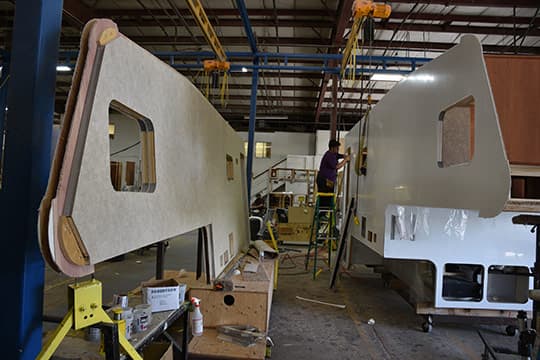
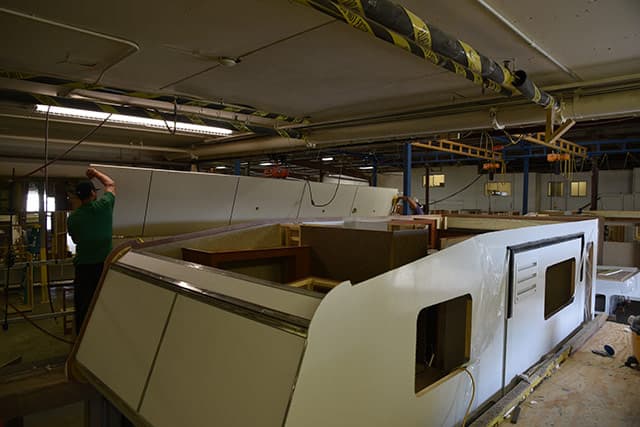
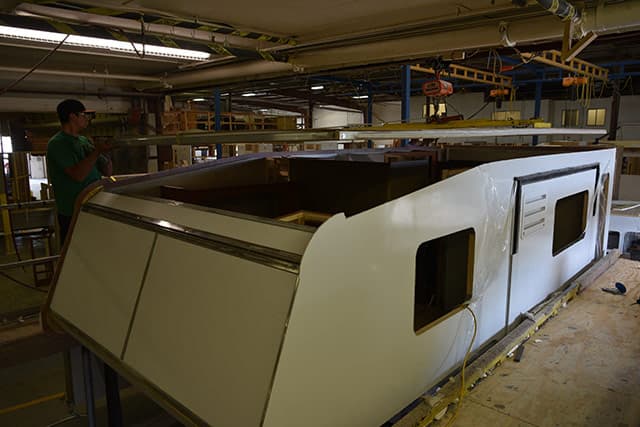
At the same station where the slide-out rooms are being installed, any remaining side walls that need to be installed are added. In this image you can see the laminated and routed side walls stacked and ready to be hoisted and installed.
 |
 |
 |
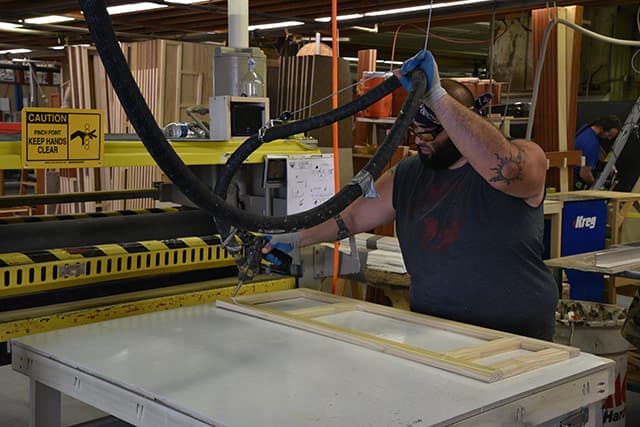
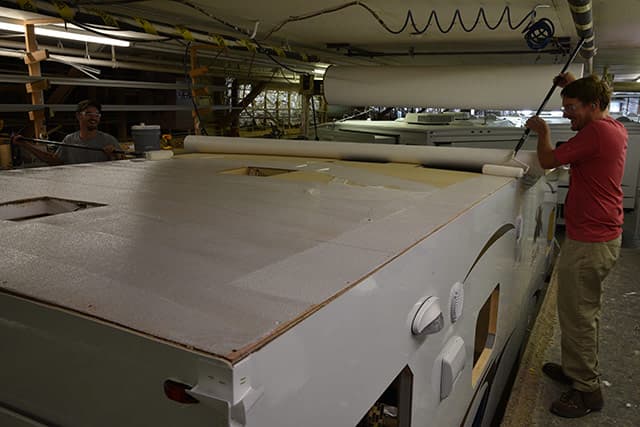
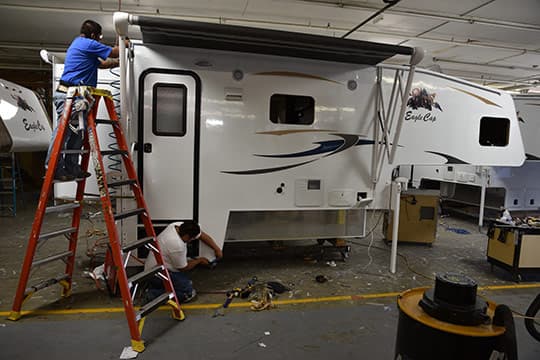
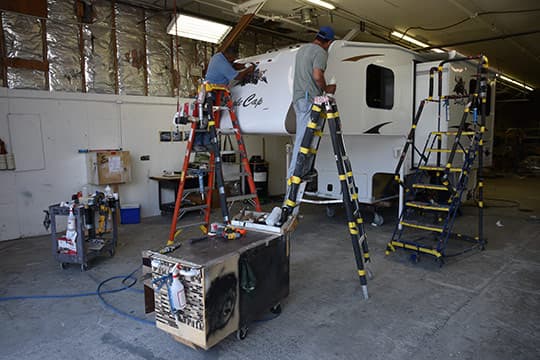
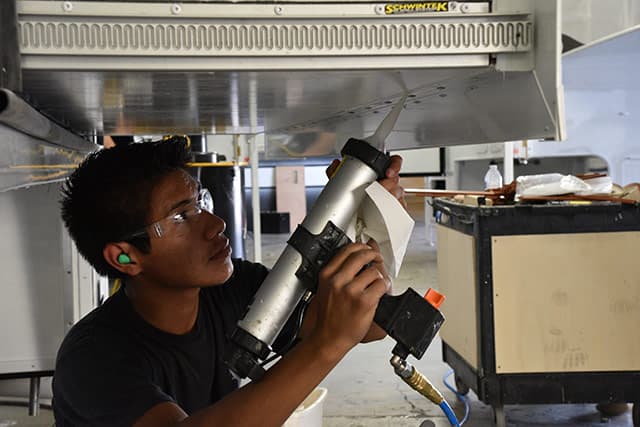
Hoists are also used for installing the roofs at Adventurer Manufacturing. In these photographs you see the roof installation team hoisting a laminated roof off the factory floor, turning it horizontal, and lowering it onto an Eagle Cap 1160.
Once in position, the roof is screwed into the camper sidewalls.
 |
 |
 |
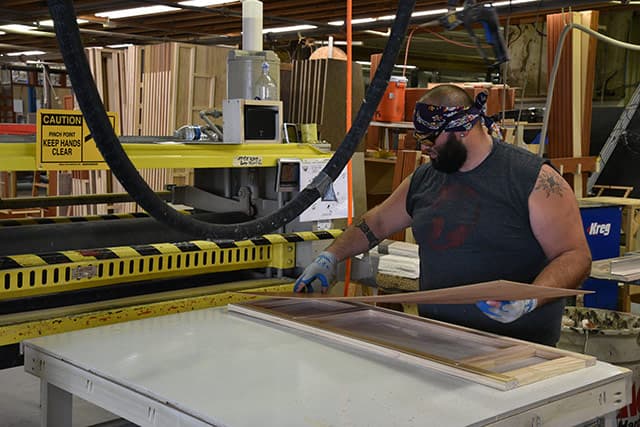
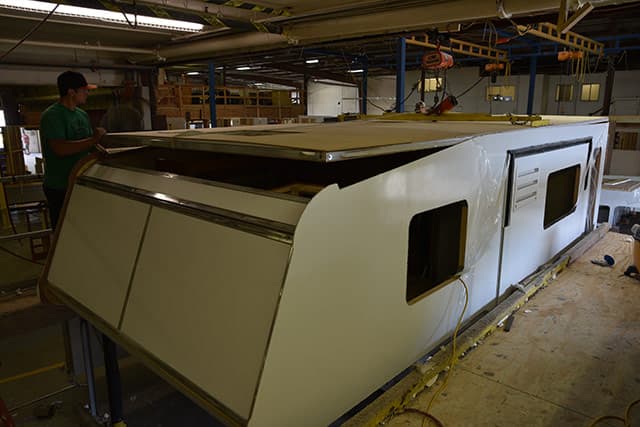
To achieve the sloped cabover nose shape, the top layer of the roof is cut allowing the roof to be pulled down, clamped, and screwed into position.
 |
 |
 |
 |
 |
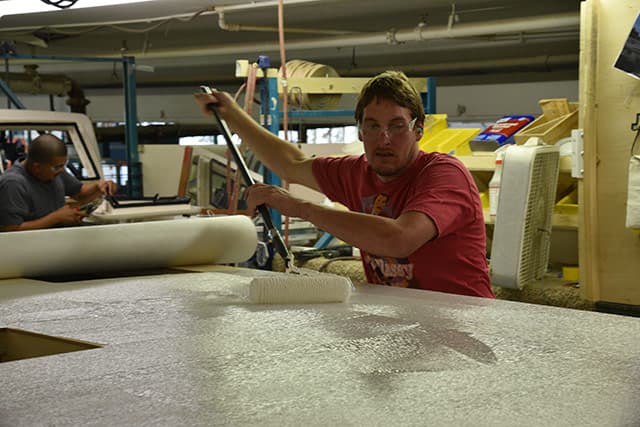 |
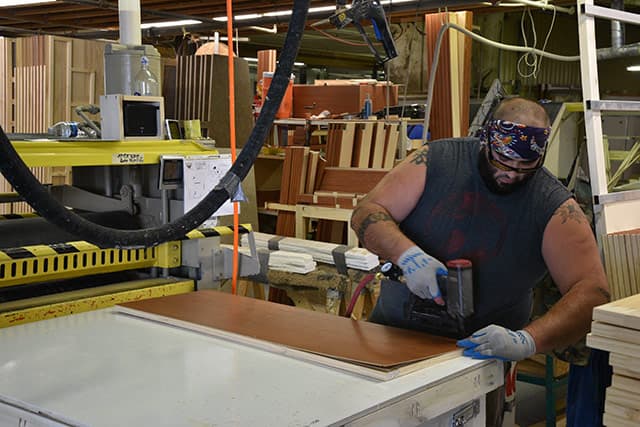
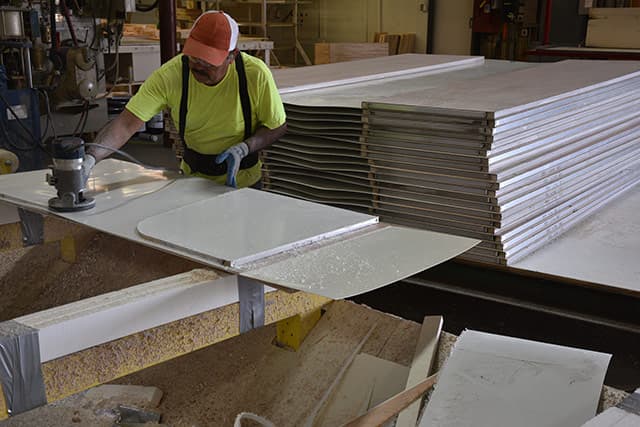
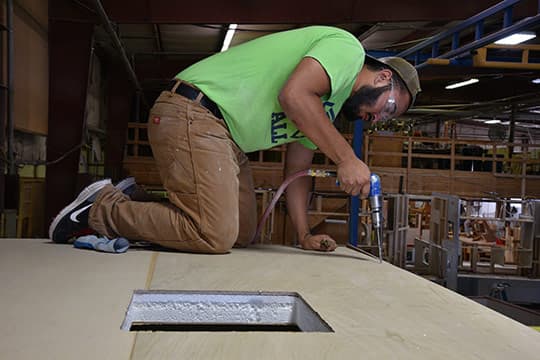
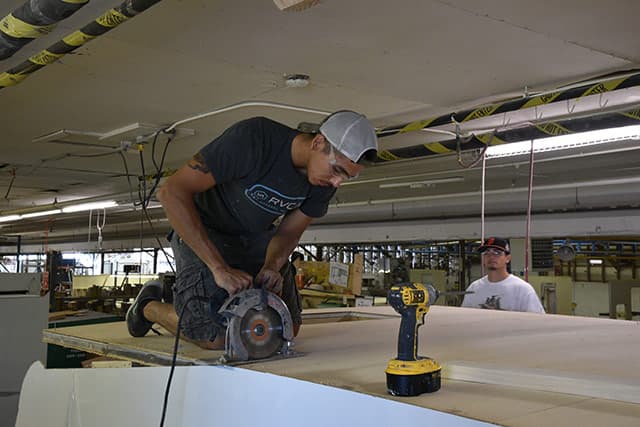
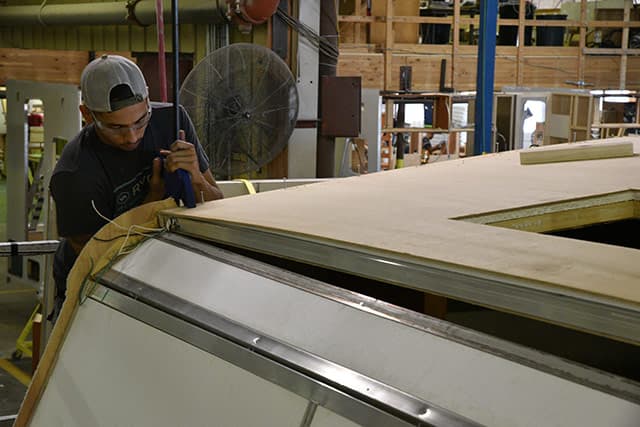
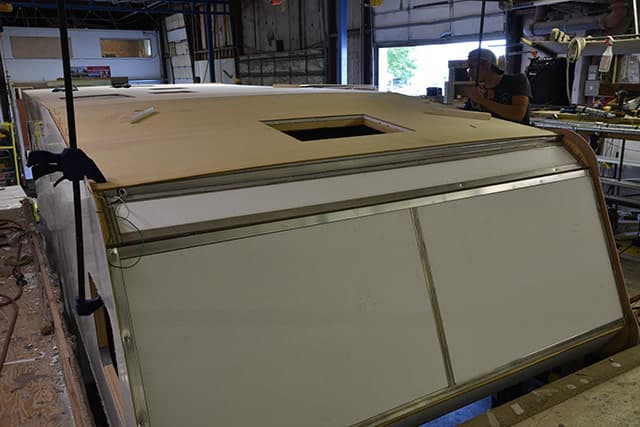
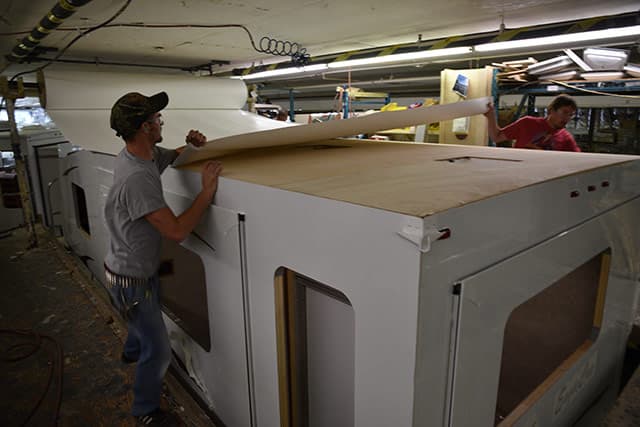
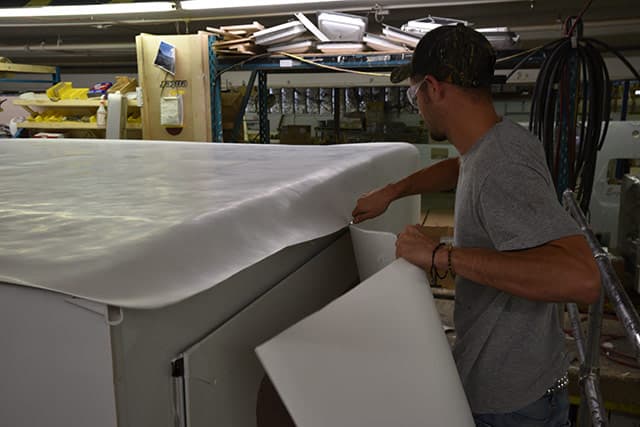
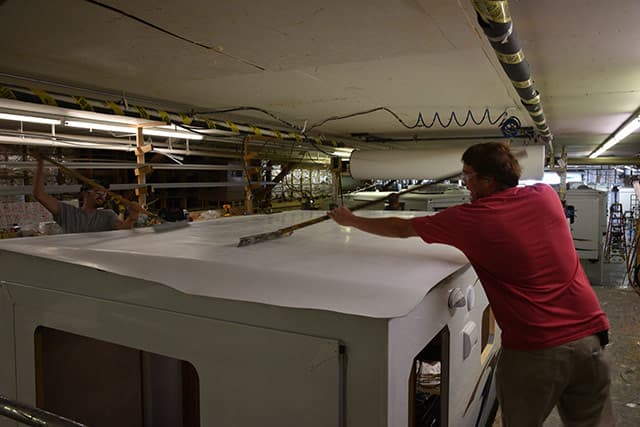
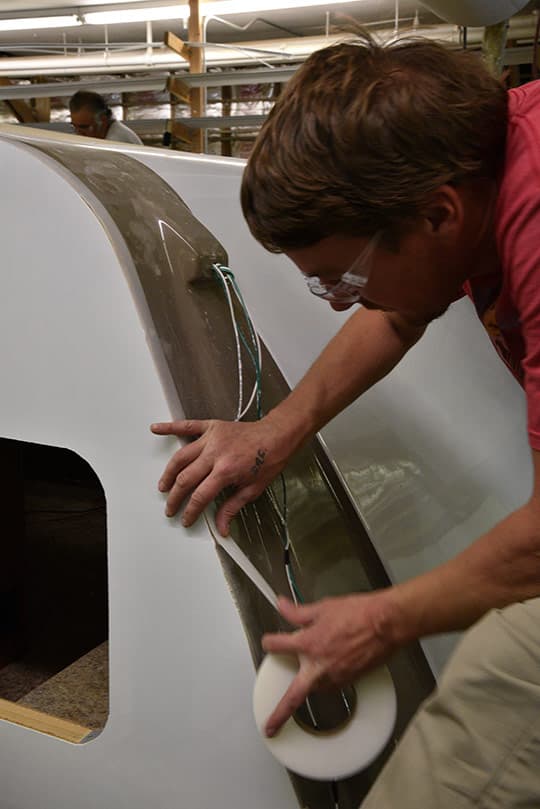
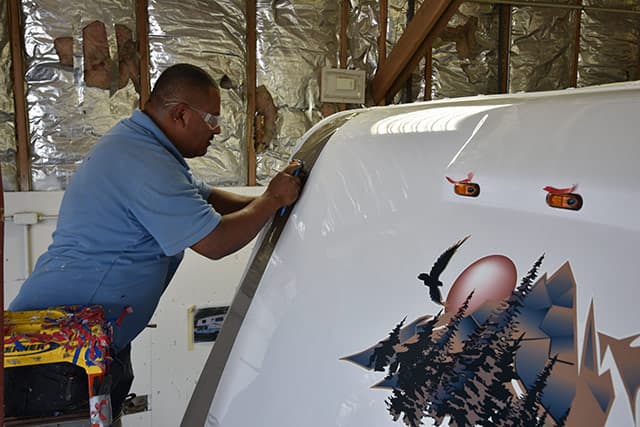
Eagle Cap roofs are finished with a layer of TPO, or thermoplastic polyolefin. This material is found on most RV roofs and has proven to be an incredibly durable product. Short of running into a sharp tree branch, or cutting it with a hand tool, there’s not much this material can’t take.
The TPO roof team at Adventurer Manufacturing is Garrett Birkedahl and David Cutten. Once a unit is brought into their station, they pull TPO over the length of the roof and cut the material to shape.
Then they fold the TPO over the front cabover and pour adhesive onto the rear roof. This adhesive is then spread with paint rollers across the exposed roof surface. Once the surface is covered, they roll the TPO over the adhesive and then fold the front of the TPO over the back.
Once again, they pour adhesive on the exposed roof, spread it with rollers, and then pull the folded TPO onto the cabover. This all happens within about five minutes.
 |
 |
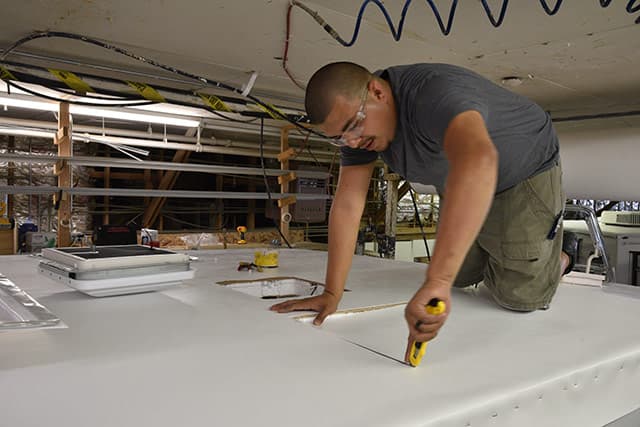 |
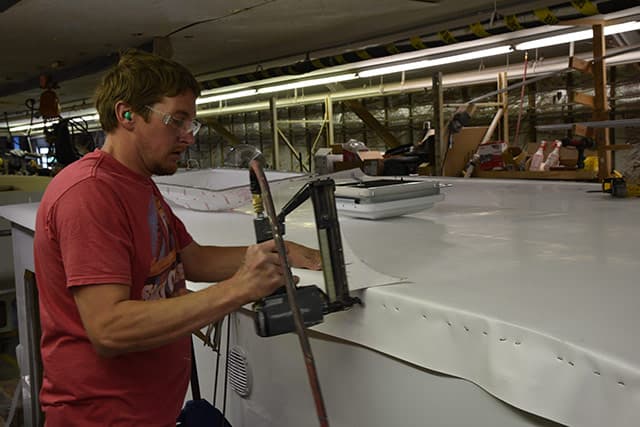
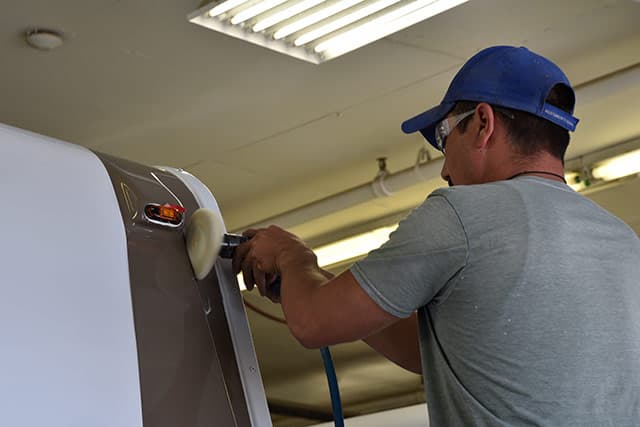
Then Garrett and David use large squeegees to apply pressure and pull the TPO material tight to the edges of the roof. Once that is completed, they use industrial staples to fasten the TPO to the roof edges. At the same time, Rafael Maciel gets on the roof and begins to cut out and install the roof features including the standard Heki skylight and vents.
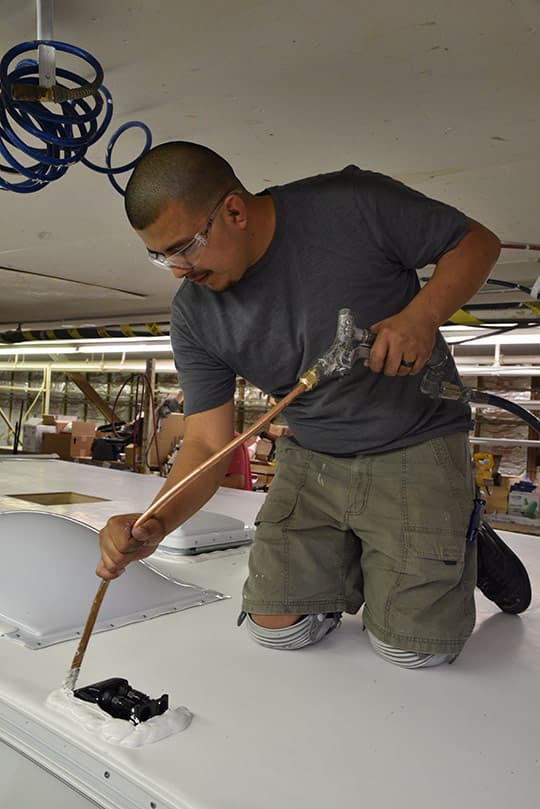
Man do I wish we had one of these when we resealed our roof last October. Once Rafael installed all of the roof features, he used a specially designed applicator to apply Dicor self-leveling sealant. With the endless supply of Dicor and an ergonomically designed applicator, the process was incredibly fast and accurate. What took us a few hours took him less than a half hour. I want one!
“Don’t screw that up.”
Garrett is laughing in this photograph because I just told him how important sealing the front clearance lights are. We would like to see traditional RV clearance lights go by way of the Dodo birds, but evidently they’re legally required.
Perhaps someday there will be self-contained, solar-powered LED light strips that simply adhere across the front eliminating the need to cut into our precious camper noses. In the mean time, check and re-check those clearance lights no matter what type of RV you have.
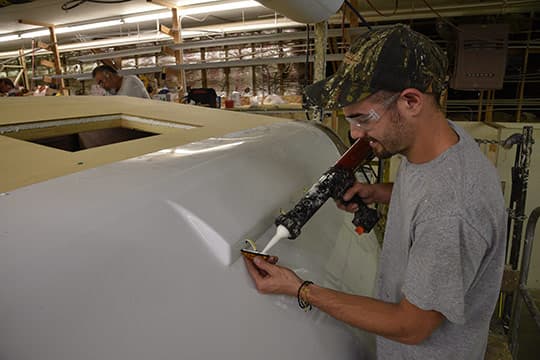
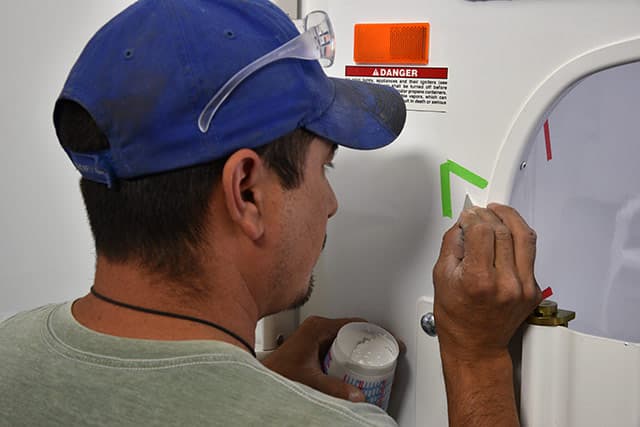
When Eagle Cap went to their new fiberglass front nose cap for 2015, they also started using 3M Extreme Seal on the front nose screws.
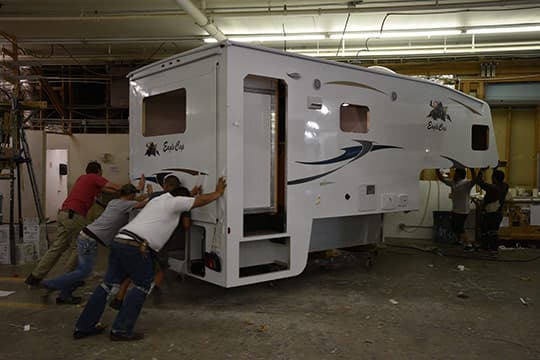
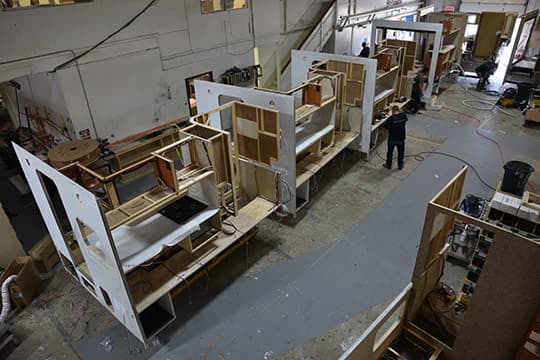
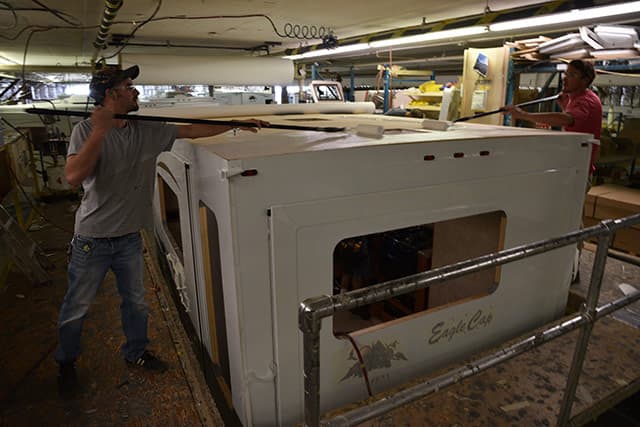
How many guys does it take to push an eleven-foot double-side 2016 Eagle Cap 1160? Evidently, at least five. Now only if I could talk these guys into pushing our camper around. “Take us to Alaska please!” Sure it would take a while to get there, but imagine the fuel savings.
So why are these fellas pushing a camper sideways on the production line?
Some production stations take longer with certain models. For example, the roof team needs about the same amount of time for every unit, but the slide-out install team needs more time for the Eagle Cap 1165 triple-slide than the Eagle Cap 850 single-slide. Final finishing also takes more time with the larger and more complex units than the smaller and more simple units.
In this photograph we see the team pushing a 2016 Eagle Cap 1160 sideways so they can bring a new unit down the line while the rest of the line catches up.
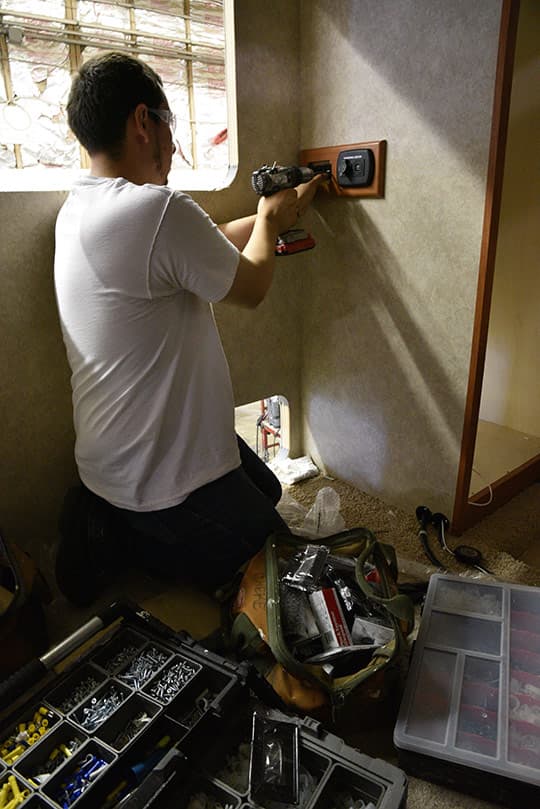
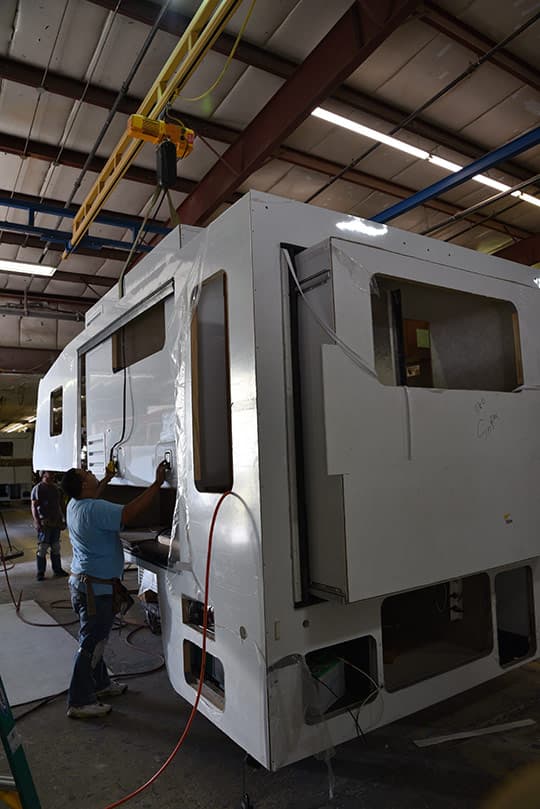
With the walls up, roof on, and cabinetry installed, team members get to work installing USB outlets, drawers, furniture, major appliances, plumbing fixtures, and other items.
I would have preferred more photographs at this point, but there’s barely enough room in the units for the workers, their tools, and hardware bins, never mind a 6’3” magazine dude.
Further down the line, awnings are being installed and tested. Exterior stripping is being screwed in and checked. Quality control and finial finishing begins at the next station.
 |
 |
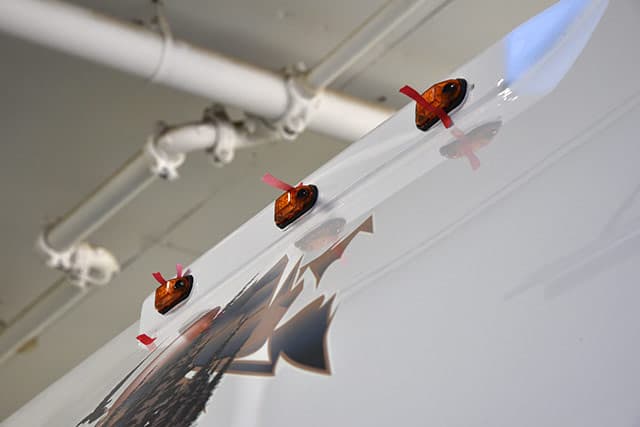 |
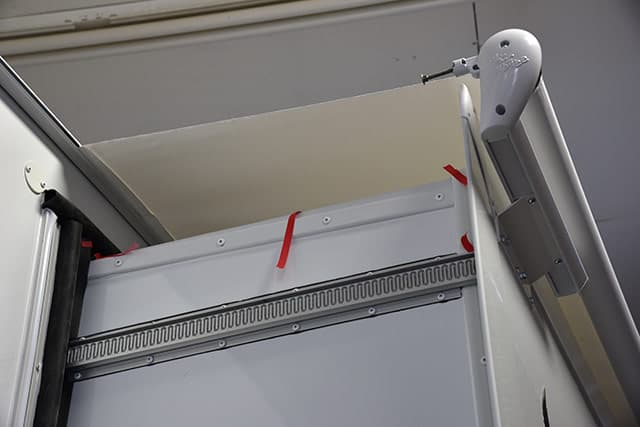
If anyone out there thinks the quality control folks at Adventurer Manufacturing don’t take their jobs seriously, have a look at the pictures above. Dedicated exterior and interior quality control inspectors on the line have placed red tape next to anything that needs be adjusted, fixed, or cleaned up. They look for screws that aren’t in straight, broken seals, scuffs, and scratches. Anything that doesn’t look right gets red tape.
This inspection process happens on the interior and exterior at roughly the same time. Here you see Tim Sanchez and Joel Aguilar from the interior quality control team going through a 2016 Eagle Cap 1165. Tim is using green tape to mark gel coat marks or scratches on the fiberglass bathroom shower stall.
After Tim and Joel have gone through the unit, the finial finishing team of Christian Mendoza, Abigail Watkins, and Ruben Martinez, get to work repairing everything marked with red tape. When they’re done, the unit gets inspected again, and again the final finishing team addresses anything found.
On the outside, the final finishing team is attacking anything marked with red and green tape. Note how their ladders and step rails are padded to avoid potentially damaging the units.
 |
 |
 |
 |
 |
 |
Gel coat gets filled and buffed, seals get repaired, and scuffs get cleaned up. As all of this is going on, the systems are also checked by the final finishing team.
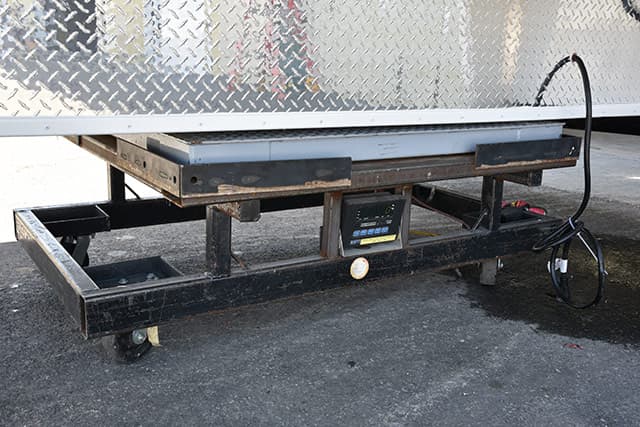
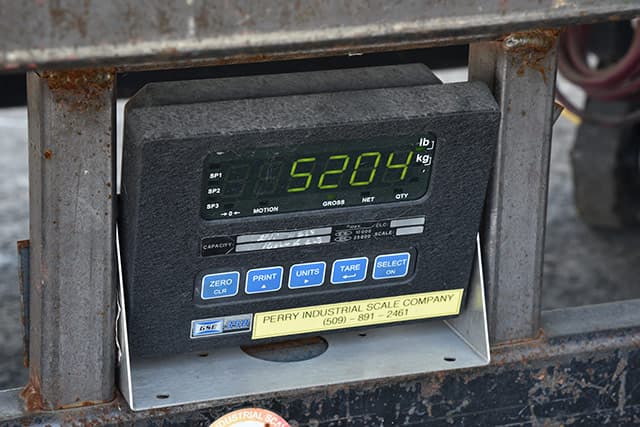
Once an Eagle Cap has been completed by final finishing, it heads out the factory door to be weighed. Adventurer Manufacturing weighs every Eagle Cap and Adventurer truck camper as it comes off the production line.
 |
 |
 |
The scale is placed directly under the center of gravity, which is also marked on the units with a red sticker. The camper jacks are then retracted until the full weight of the camper rests on the scale. Within a second, the scale gives a reading. On the particular 2016 Eagle Cap being weighed, the dry weight with options came to 5,204 pounds.
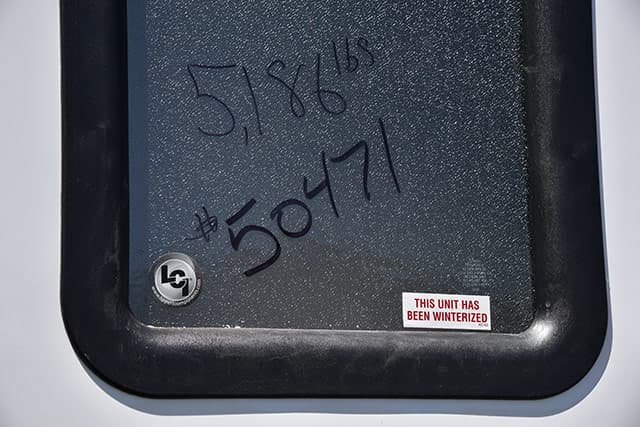
The 2016 Eagle Cap 1165 immediately next to the 1165 being weighed had a number written on its rear window that caught our attention. It read “5,186 lbs”. I asked the final finishing team what this identified and they said, “We write the dry weight of every truck camper on the rear window before it ships”.
After noticing that every truck camper in their storage lot did indeed have their specific weight written on the rear window, I practically threw my Chief of the Weight Police hat in the air and did a happy dance. In an ideal world, this same weight could be identified on the weight sticker on the back of the camper. Since that’s not going to happen any time soon, writing the real weight on the back window accomplishes the same goal. Adventurer Manufacturing also puts this real weight on a sticker inside the unit.
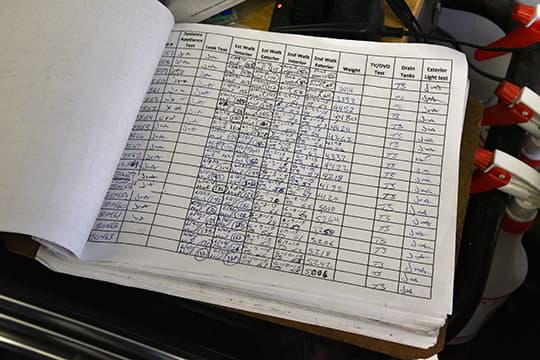
This is the actual book where the quality control checks (systems appliance test, leak test, interior inspections, and exterior inspections) and actual camper weights are hand written and initialed by the quality control and final finishing teams. This information is then submitted to management where it is entered into the records for each unit.
 |
 |
 |
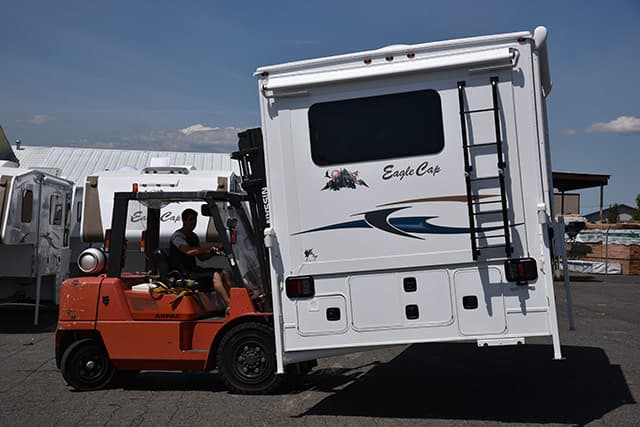
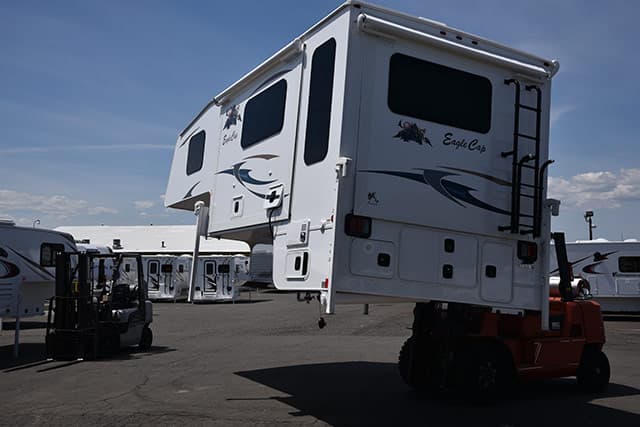
Finished, weighed, and documented, Eagle Cap campers are then picked up – literally – by Tony Olivera.
Watching Tony scoop up, lift, and move Eagle Cap campers was half fascinating and half terrifying. To see a 5,200 pound camper angled back, lifted way up into the air, and rolled around is an odd sight. Tony seems to be in his element lifting campers and putting them into neat rows without hesitation. I was told that he even lifts the campers above the other units sometimes. That’s talent, and a little insanity.
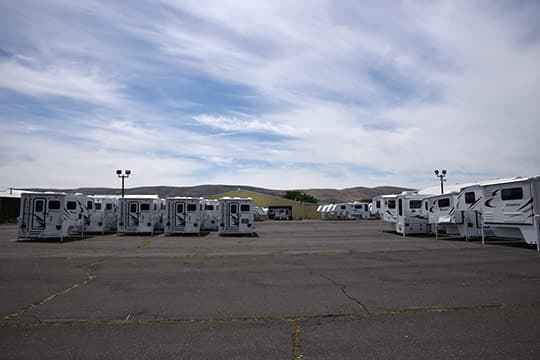
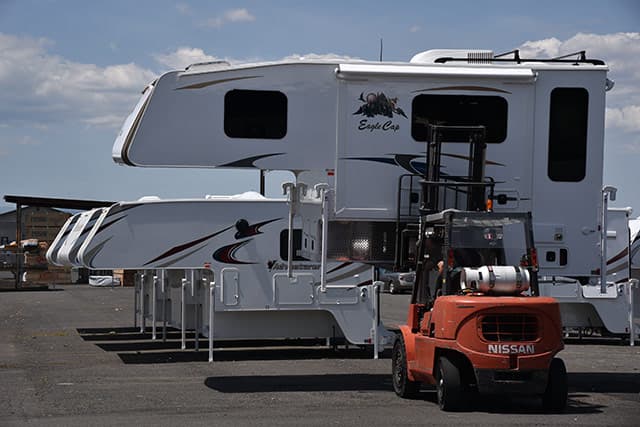
This photograph was taken from the far back of the camper storage yard looking towards the rear of the factory. According to the management team, most of these units are already sold to the dealers, and a good number of those are already sold to customers.
Wrap It Up
One thing you may have noticed is that Adventurer Manufacturing does not have a separate production line for Eagle Cap campers. In fact, they build Adventurer and Eagle Cap truck campers on the same production line, usually in runs of ten to twenty (or more) of a particular model.
When we asked about this, we were told that consolidating the two production lines increased efficiency, and allowed the best people to be used for both brands. For example, they had two teams applying TPO roofs before, one TPO roof team for the Adventurer line, another TPO roof for the Eagle Cap line. Now they have their best TPO roof team putting roofs on for both.
Another interesting facet of Adventurer Manufacturing’s production line was how they had multiple campers at each station. For example, where they had only one camper at each station before, now they had multiple campers at each station. This too, as it was explained to us, helps to increase efficiency.
Adventurer Manufacturing isn’t done pushing Eagle Cap forward. During our visit, we were teased about at least one new multi-slide model on the way, and some other advancements in the early stages of consideration.
As a brand, Eagle Cap has always been associated with the high-end luxury market. This is not an entry level truck camper, by any stretch of the imagination. As of 2015, Adventurer Manufacturing started to re-define exactly what high-end luxury was for Eagle Cap truck campers. Based on what we saw in the factory, and the progressive attitude from the management and design teams, that bar will continue to move forward.
For more information on Eagle Cap Campers, visit their website at eaglecapcampers.com.


