Crack open a cool one and brush your boots. Here are seven unique mods to make your camper exterior even more fun and functional. The best part is they’re almost all mini-mods! Easy peasy and done.
Submitted by: Richard Mount, Ford F150, Four Wheel Campers Grandby
I enjoy craft beer. Often craft beers do not have screw-top bottles, and I can never remember where I left the bottle opener.
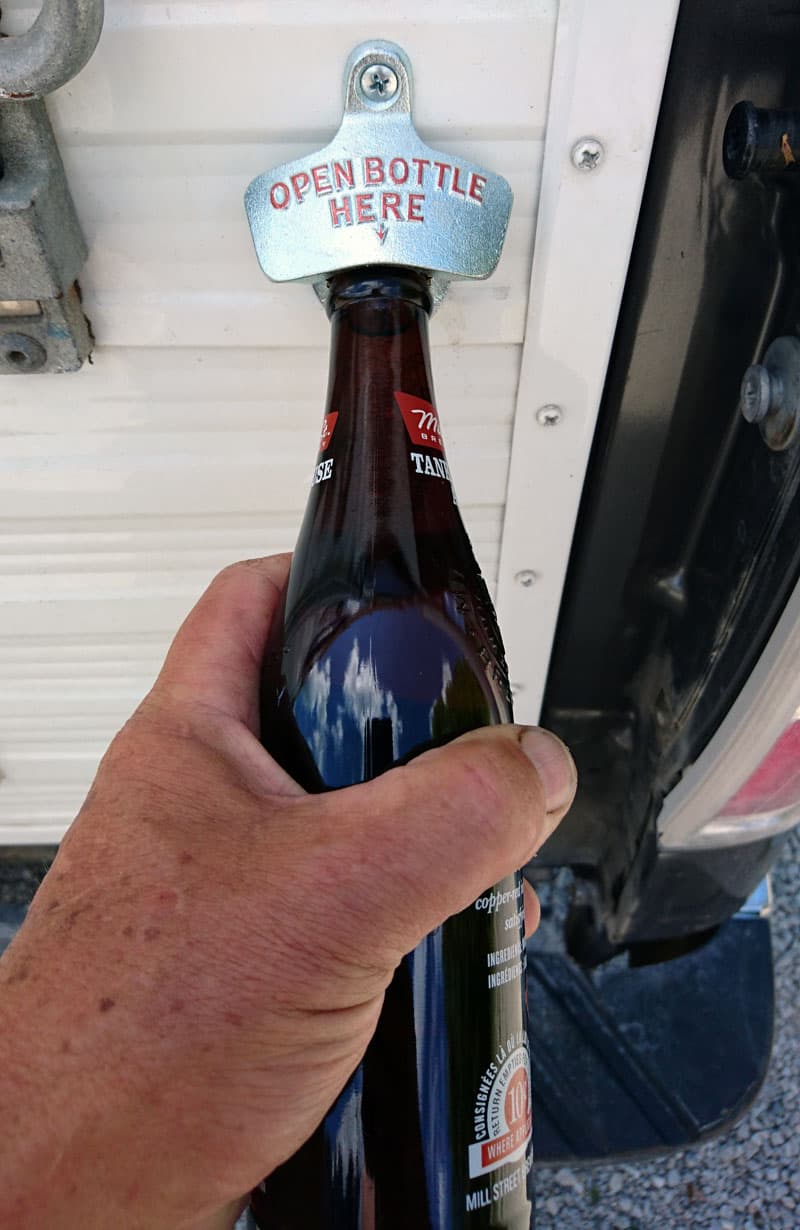
We stopped at a small brewery in Maine and they had a basket of these old-style wall openers by the checkout.
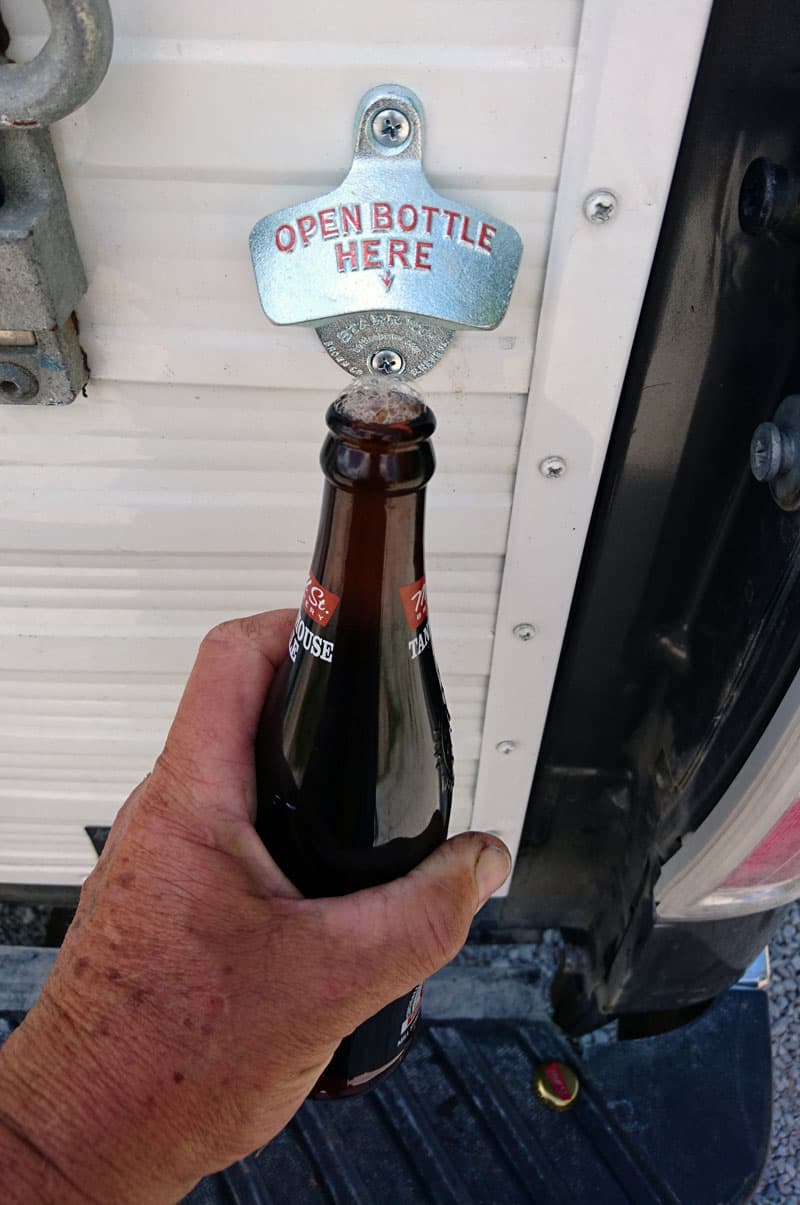
So, I bought one and screwed the opener onto the back wall of the camper.
It works perfectly! If I can find the camper, I know exactly where the bottle opener is located.

It took me two minutes to complete this modification and cost me under $10. In my opinion, the skill level of this modification is easy.
Submitted by: Ray and Brenda Fair, Silverado 3500, 2015 Eagle Cap 850
A day walking on a beach or walking up a mountain trail is great until you return to the truck camper with all the sand, dirt, leaves, and/or grass on the bottom of your footwear. Just sitting around the campsite is great until you start to go into the camper and hear a voice say, “Take off your sneakers”.
But we will only be a minute going in for a brew or cookie!
To address this problem I purchased a boot brush at Bass Pro for $20. With a cup of coffee in hand, I had to figure out where to install the brush.
Possible location 1: Under the back porch. That would be hard to use and one would have to stand on the ground in order to clean the other foot
Possible location 2: On a hinge under the step that could be lower for cleaning and raised when the steps are raised and made ready for travel. This would interfere with the door to the basement that is behind the removable steps.
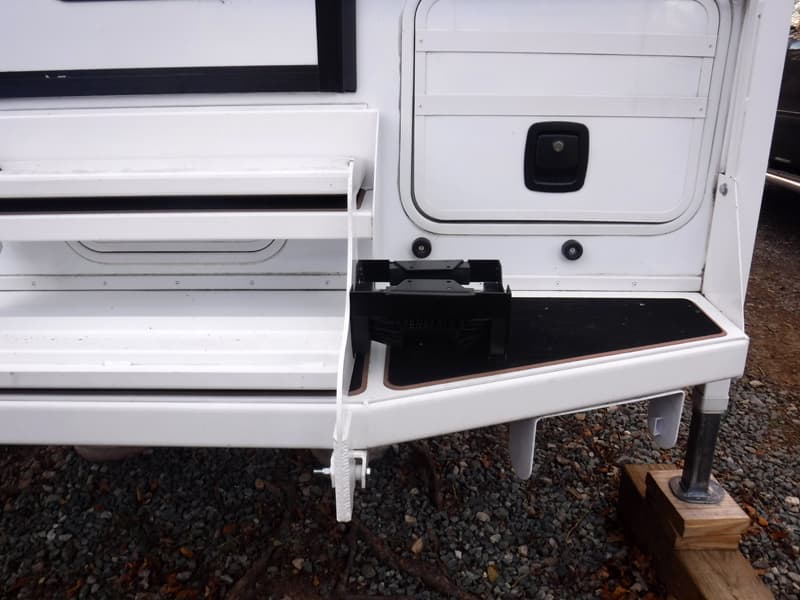
At this point, my coffee was getting cold, and I had to make an executive decision. I would mount the brush on the side of the steps. But which side? The right side was the best option.
I drilled two holes into the stair frame and used #10 stainless screws to attach the brush to the frame.
The sequence to clean the footwear is (1) clean the left foot first and then (2) step onto the first stair step and then (3) clean the right foot. Should someone have a balancing problem when standing on the left foot while cleaning the right foot, the assist entry handle is just above the brush.
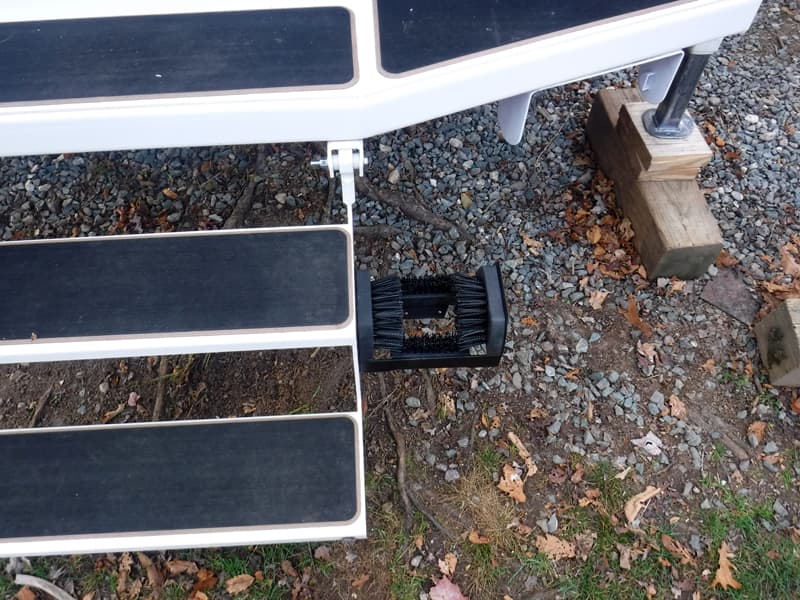
The first picture shows the stairs in the down position with the brush mounted on the right side.
The second picture shows the stairs raised into the stored position for travel.
It took me 20 minutes hours to complete this modification and cost me $20, plus a cup of coffee. In my opinion, the skill level of this modification is easy.
Submitted by: Roger Odahl, 2008 Dodge Ram 3500, 2004 Eagle Cap 950
When we travel I like to keep our truck and camper clean, if possible. There are actually a few RV parks that allow the washing of vehicles. When we find one, I will clean off the bugs, dirt, and debris from the vehicle and my wife will do the laundry. Time-wise, we both finish at about the same time.
 |
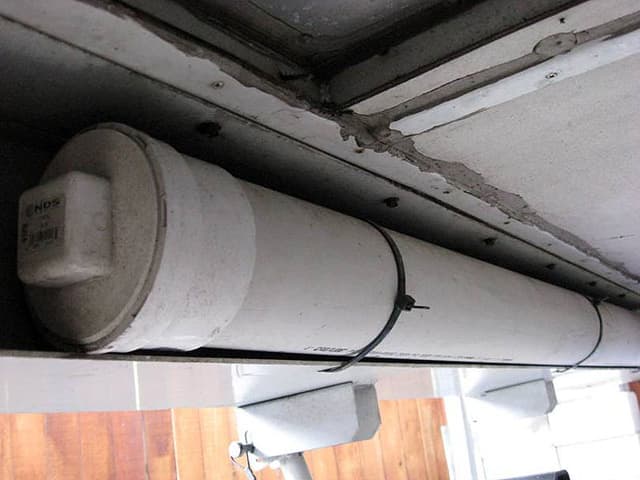 |
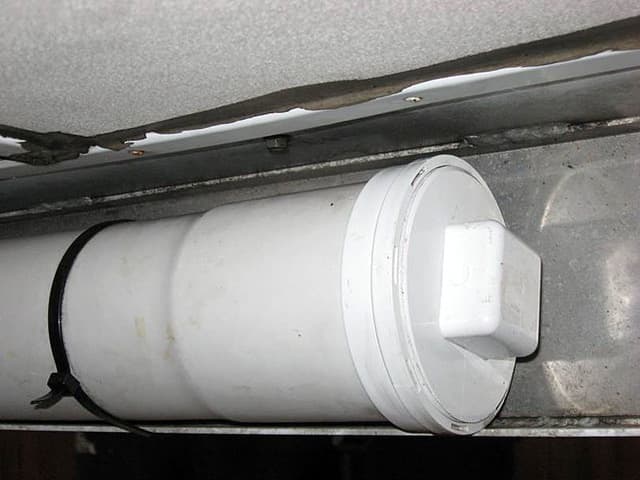
I needed a place to store the long handle wash brush and a long handle towel holder. I purchased a 5-foot, 4-inch diameter sewer pipe that is threaded on both ends for screw-on caps. This pipe fits under my rear bumper, which holds the sewer hose on the Eagle Cap 950.
The Orange Grove RV Park near Bakersfield has a great wash area. Also, the Oasis RV Park in Quartzsite, Arizona has a high-pressure wash system and it’s right next to the laundry facilities.
To make it stay in place, I drilled 3-3/8-inch holes on the lip that the sewer tube sits on. I used a small square file to notch a flat section in the round hole. I had 18-inch, 3/8-inch zip ties available. I always carry various sizes in my tool bag. The tube stays quite secure.

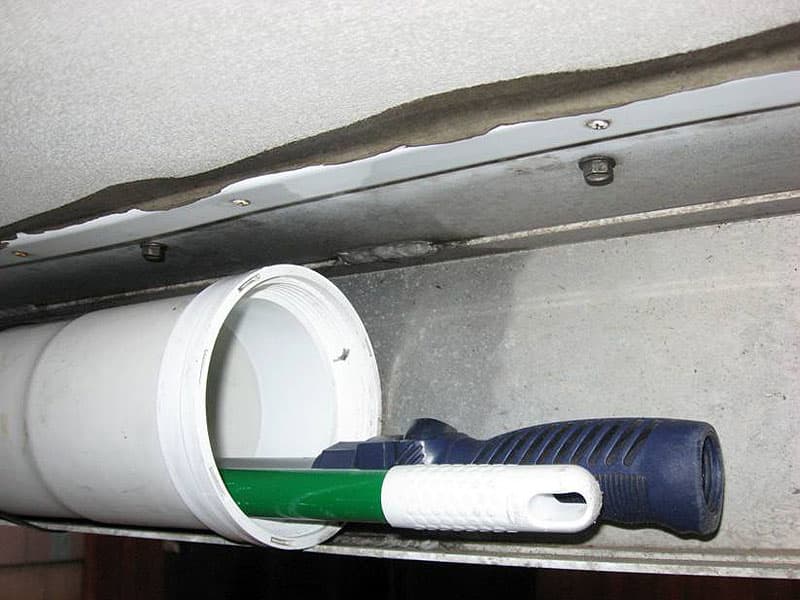
I use the driver’s side of the tube to retrieve the brush and handles. So, when placing the tube, be sure to allow enough room after removing the cap for the handles to slide out.
On the passenger’s side of the tube, I keep a tightly rolled 5×7 plastic tarp just in case I have to be under the vehicle.
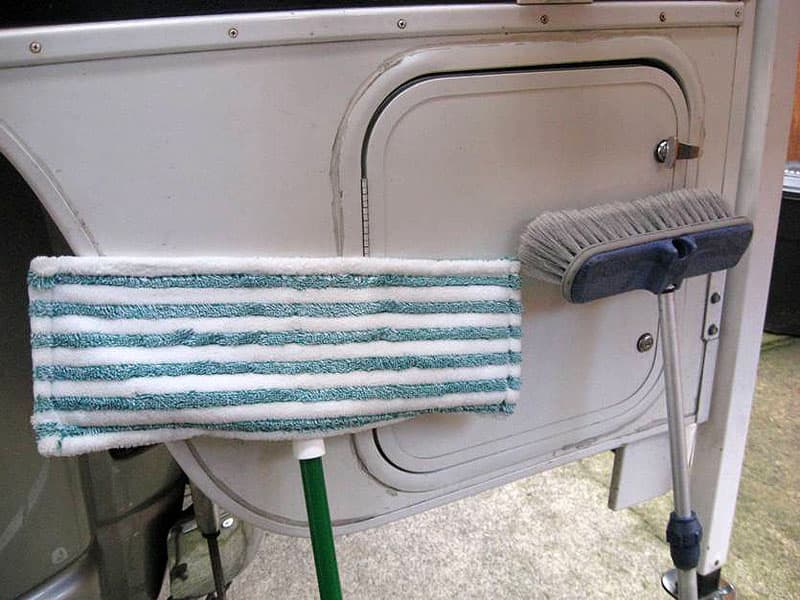
The wash handle is a 3-foot extension model and the brush is soft bristle. I got it from Camping World. For drying off the water, I wrap towels around the flat swivel head mop that one can find at Walmart or your local grocery store. The flat head snaps off the handle and I store that in my propane cabinet along with two towels for the drying off duty.
This is a very convenient way to carry cleaning tools while on the road.
It took me less than two hours to complete this modification and cost me around $20 or less. In my opinion, the skill level of this modification is easy.
Submitted by: Ray and Brenda Fair, Chevy Silverado 3500, 2015 Eagle Cap 850
It never fails. When the family is sitting at a picnic table, someone needs an extra napkin or paper towel. The task of retrieving the needed paper falls upon the person closest to the truck camper door. To make the task easier, I installed a paper towel rack outside.
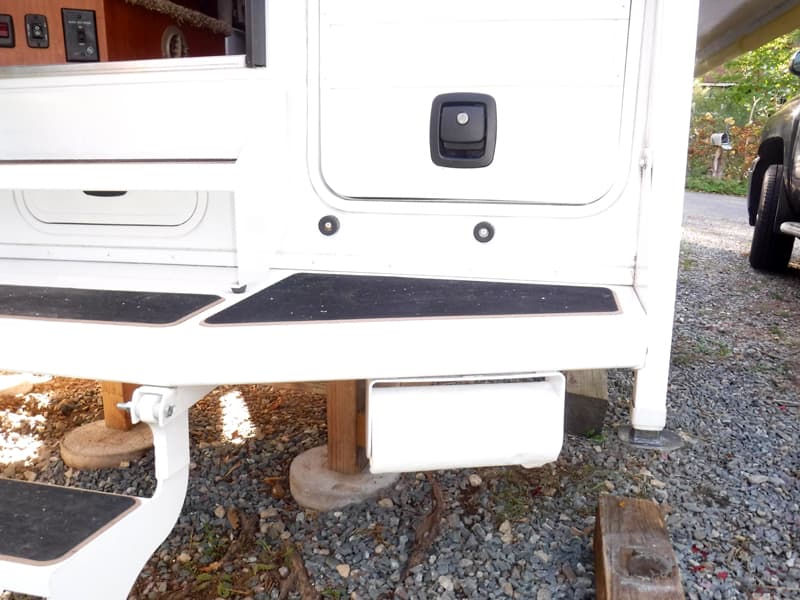
I purchased a paper towel holder that had two-sided tape and mounting screws. The location chosen was below the bumper and to the right of the stairs. The tape on the rack held it in place so no hardware was needed.
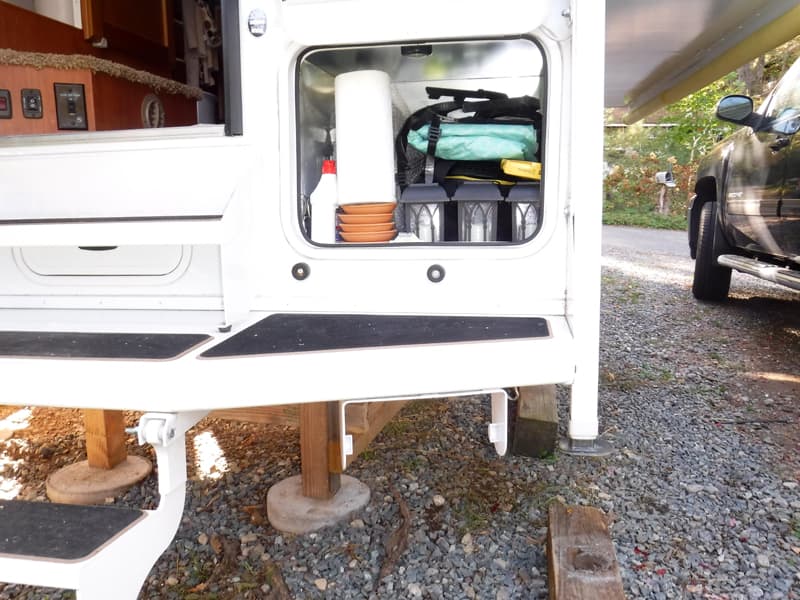
A roll of towels is kept in the storage area just above the rack. When we park and set up the truck camper, the roll of towels is mounted and restored when we are packing up. The towels are also removed when there is a chance of rain, and before we travel.
After traveling for many years, we have not lost the paper towel holder yet (knock on wood). What you see in the photos is the original towel holder.
It took me fifteen minutes hours to complete this modification and cost me the price of the holder, which was under $5. In my opinion, the skill level of this modification is easy.
Submitted by: Bruce Allison, California, 2017 Ram 3500, 2012 Adventurer 910FBS
When we get to a campsite, we release our Torklift Fastgun turnbuckles and level the truck camper with the jacks. We also disconnect the 12-volt seven-pin power cord connecting our truck camper to our truck.
The 12-volt seven-pin power cord would hang down from the truck camper and very often end up under the camper when we loaded the camper back into the truck. While loading, we would have to pay careful attention to the cord. One of us would have to pull it to the side and out of the way while the other worked the jacks. Inconvenient!
If we ever forgot, we would run the risk of cutting or chaffing the small gauge wires in the power cord, ruining our holiday and causing an expensive repair. 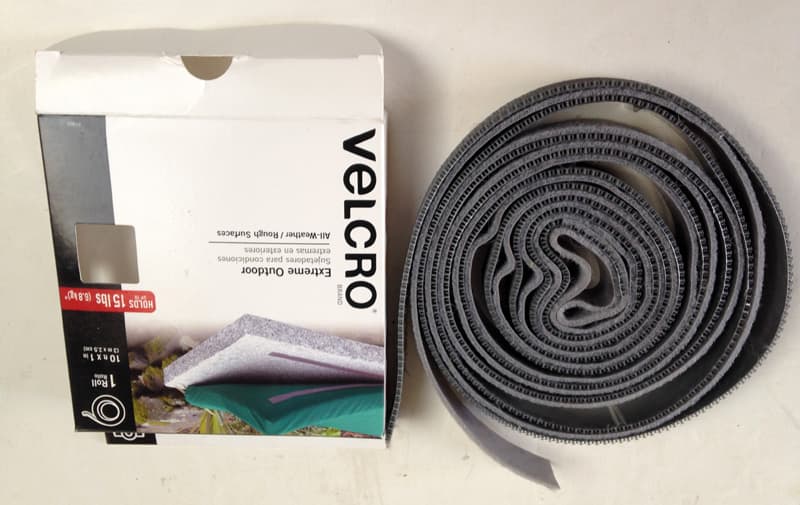
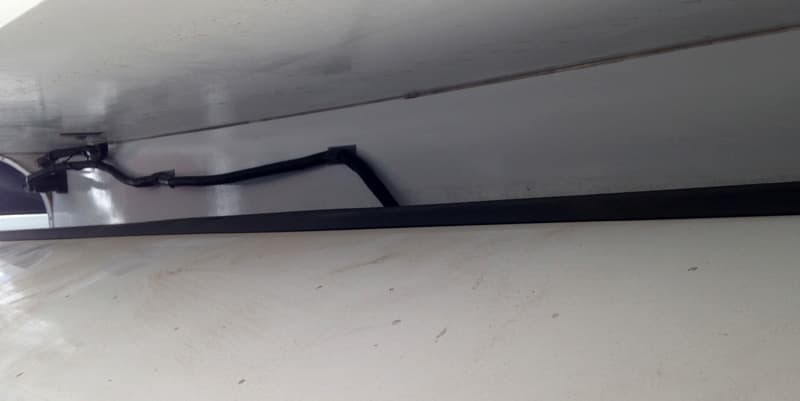
To fix this problem, I purchased some heavy-duty velcro and stuck the cord to the side of the camper in the truck bed.
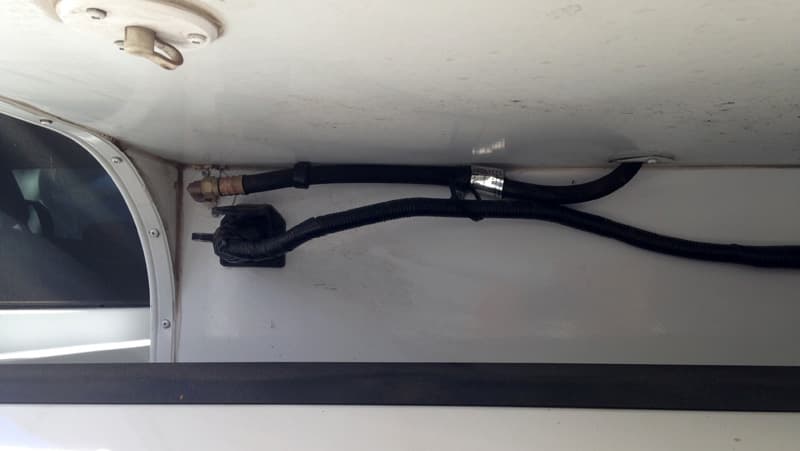
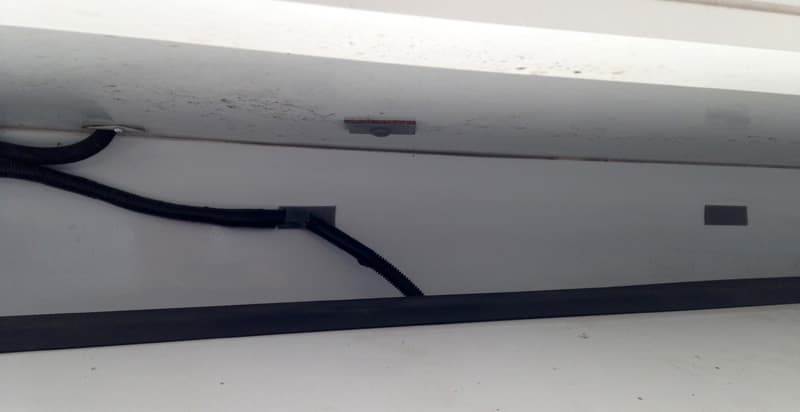
It is high enough to clear the inner wheel housings and it’s off the truck bed. Now we don’t have to pay attention to the cord, and it’s safe from possible damage.
Submitted by: Jean Landau-Vogt, 2015 Ford F350, 2016 Northstar 12STC
We got our first truck camper after downsizing from a 35-foot fifth wheel. One issue was shoes. We often have wet, muddy shoes from dog walking and there was always a pile of shoes inside the door.
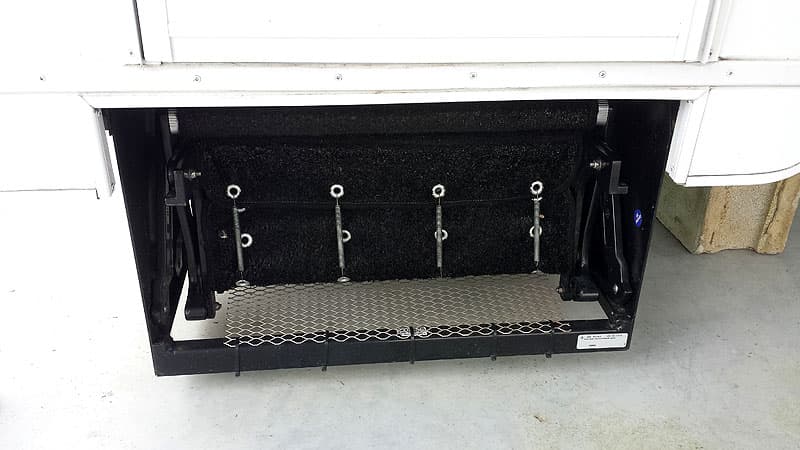
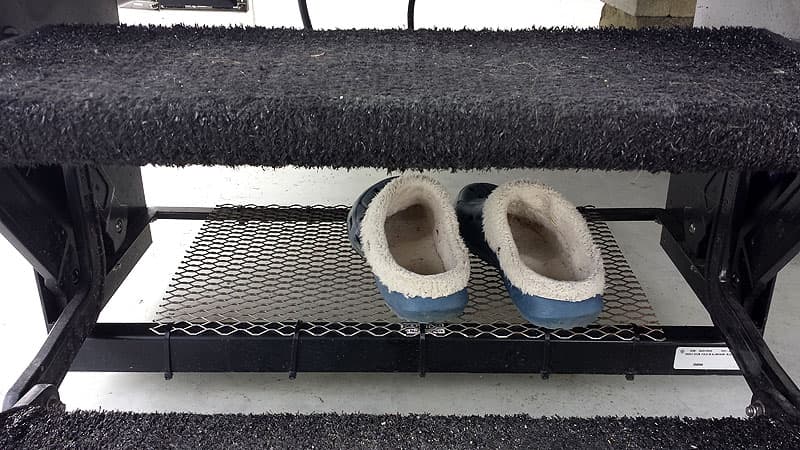
First, my husband cut a piece of expanded metal to fit the bottom of the folding step box and attached it with tie wraps.

It doesn’t interfere with the operation of the steps.
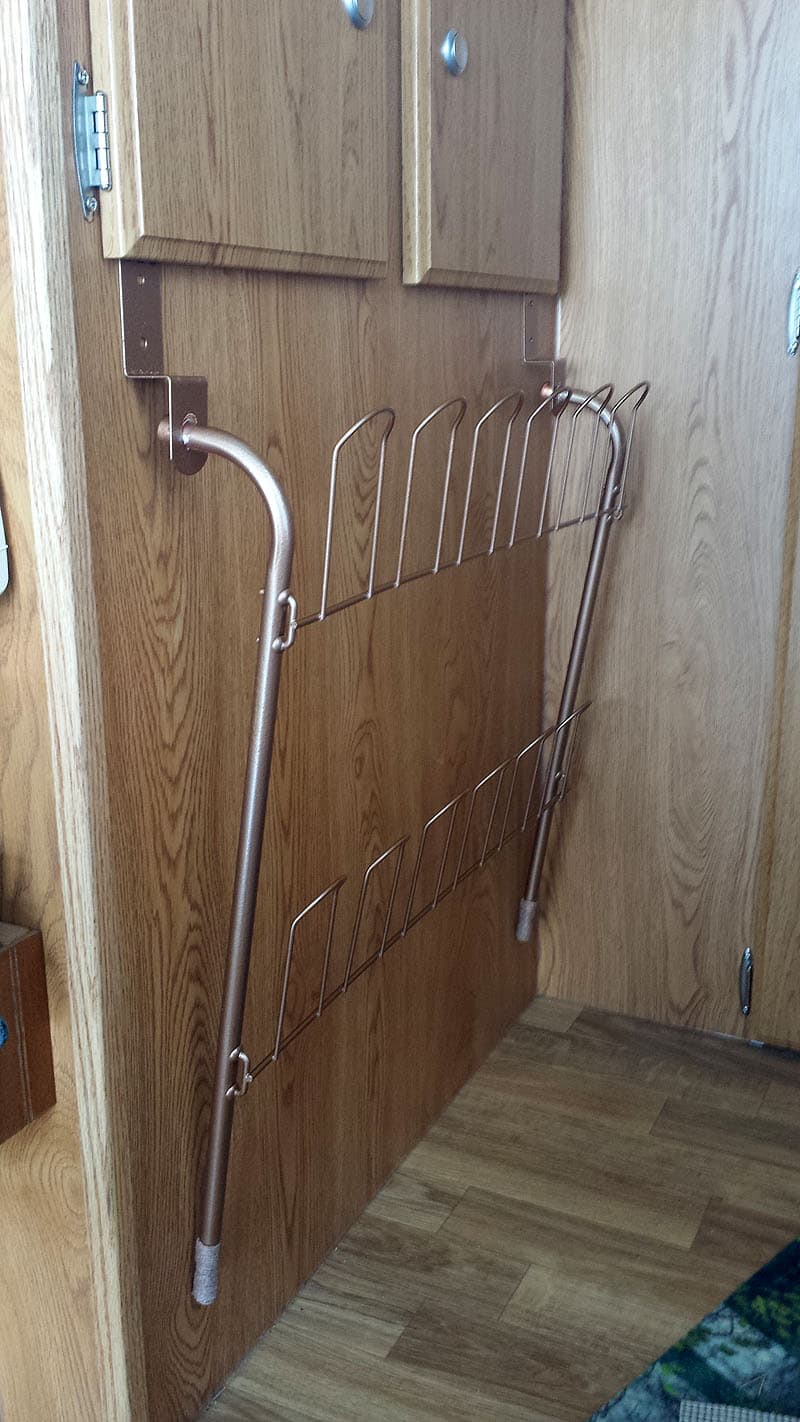
I found an over-the-door shoe rack at Walmart on sale for $5. Using just the top section, spray-painted to make it more attractive, it holds six pairs of shoes out of the way. The over the door hangers fit right in the cabinet doors making it a non-permanent installation.
Wet and muddy shoes can dry outside out of the weather and we no longer trip over a pile of shoes inside the door.
It took me three hours to complete this modification and cost me about five dollars. In my opinion, the skill level of this modification is easy to medium.
Submitted by: Russell Berquam, Ford F350, Arctic Fox 1140
Our new camper has a front window behind the cab of the truck. The window is a standard Hehr window with weep holes at the bottom of the frame.
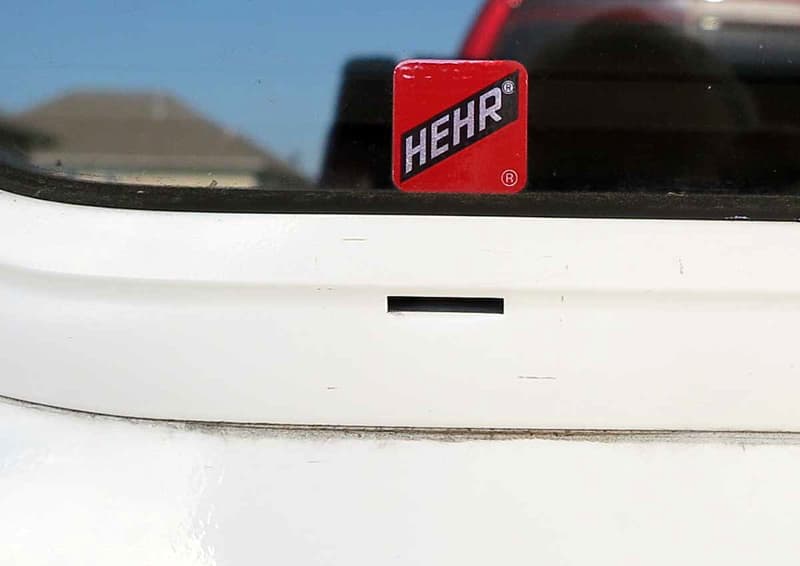
When we drive down the highway in heavy rain, the weep holes let the rainwater into the camper. The RV stores have a plastic cover that will keep out some of the water, but a simple piece of tape over the holes will (a) let the condensation water drip out and (b) keep the driving rain out.
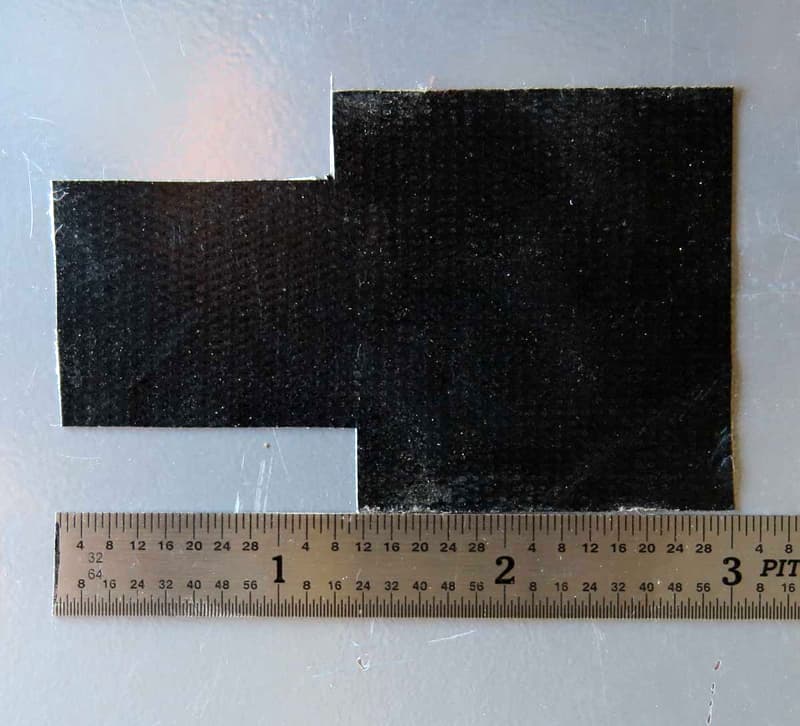
I used Gorilla tape, but duct tape should also work. I cut a piece of tape three inches long and cut notches out of tape 1¼-inch long by ⅜-inch wide as shown in the picture.
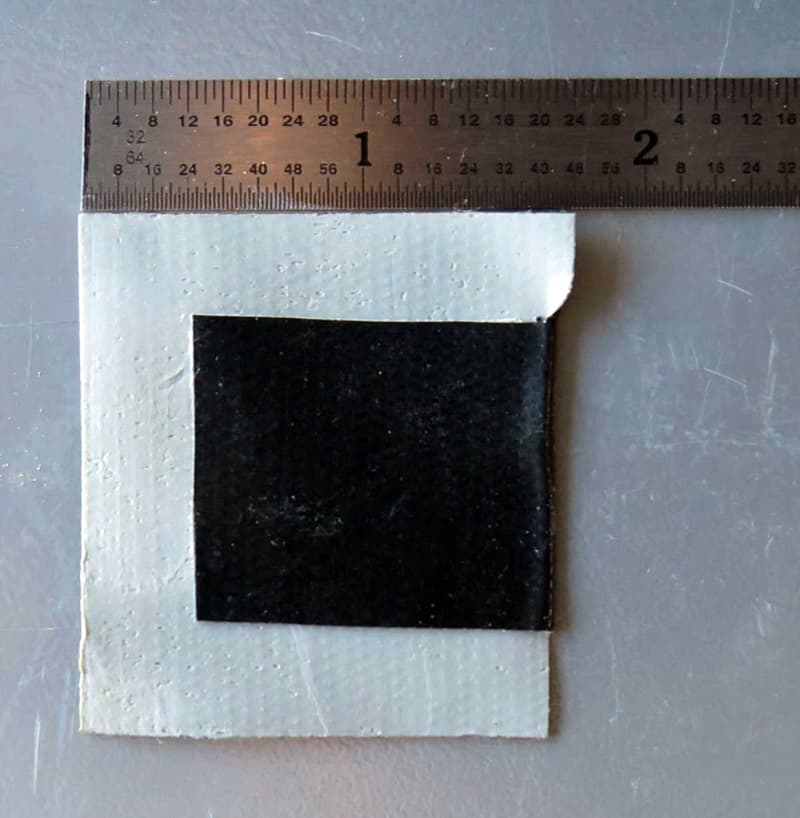
I folded the small end where it will keep the tape from sticking to the frame of the window. When I applied the tape to the window frame I kept the center away from the frame to form a channel for the water to drip out.
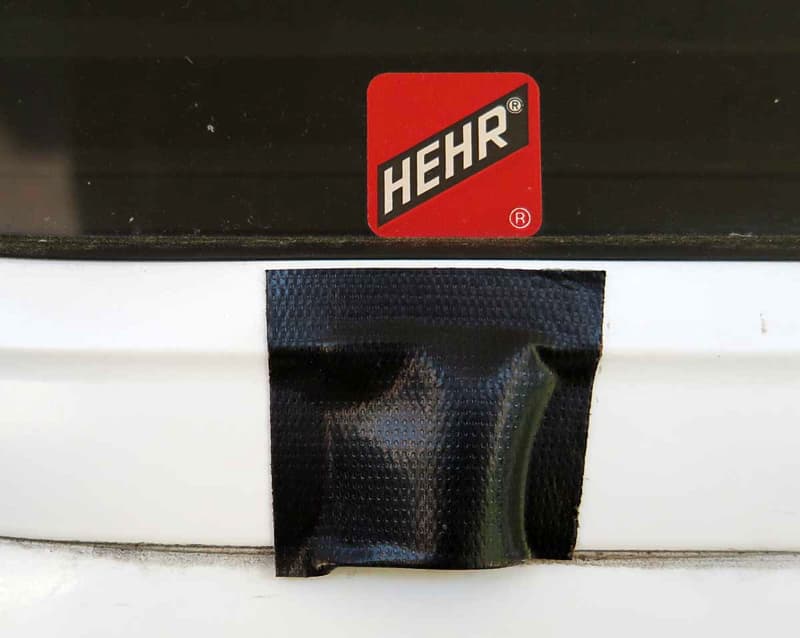
Make sure that the sticky part is applied above the weep hole so the hole is not sealed. The tape channel is long enough to keep the driving rain out of the camper.
After the mod, there are no rain leaks. It works great!
It took me half an hour to complete this modification and cost me a few cents. In my opinion, the skill level of this modification is easy.
Disclaimer: The modifications above are submitted by Truck Camper Magazine readers. It is your responsibility to make sure that any do-it-yourself modification project you undertake is safe, effective, and legal for your situation.


